

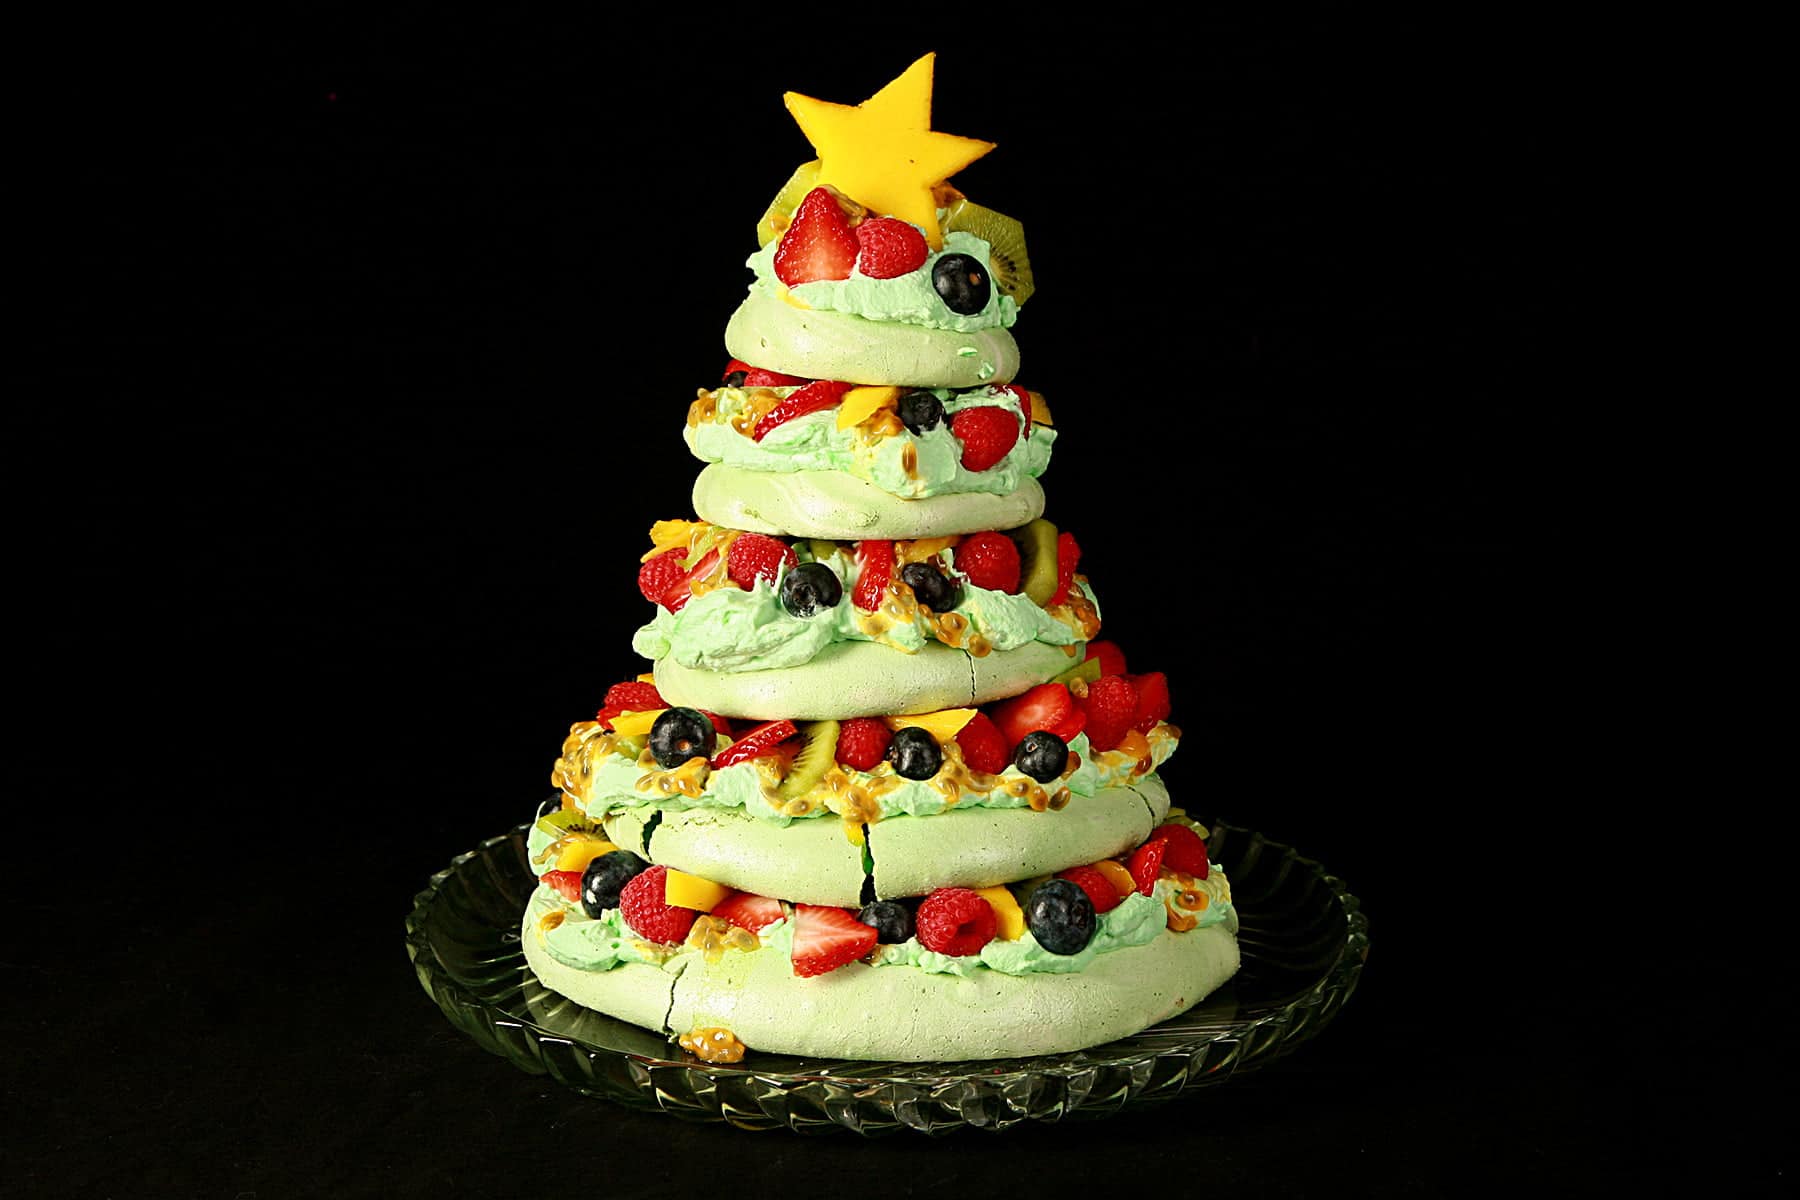
Looking for something different to serve this holiday season? This Christmas Pavlova is fun to make, tasty, and visually impressive - a 3D Christmas Tree!
Originally published November 27, 2020. Updated 11/16/2022.

... and how I thought that was that, and I’d be done with making Pavlovas for a while? That we’d had WAY more Pavlova (5 in 3 days!) than is at all healthy, and that would satiate us for a while?
... and how before I’d even posted all 5 of those recipes, I had an idea (EYEdea?) for a gross “Bloody Eyeball” Halloween themed Pavlova, and posted THAT?
For real, I think we’re good until at least the end of the year at this point, but don’t be surprised if I end up posting one / a few Valentine’s Day Pavlovas in the new year!
(Update: Not only have I posted a Heart Shaped Valentine Pavlova, I also have an Easter Egg Pavlova now! Woo!)
Anyway!
Pavlovas are named after the Russian ballerina Anna Pavlova, and are a great dessert any time of year.
It’s my absolute favorite dessert to whip up for special occasions in general, but I thought it would be fun to make a wild, holiday Pavlova.
Christmas Tree Pavlova
You may have seen a Christmas Pavlova wreath recipe before - a beautiful dessert, not all that different from traditional Pavlovas - where the Pavlova base is formed into a wreath shape before baking.
It’s a popular dessert during the festive season in Australia and New Zealand, a great thing to serve on Christmas Day... but I wanted to have some fun with the idea of a holiday themed Pavlova dessert.
Like my other Pavlova recipes, this starts out as a meringue dessert with a crisp crust and marshmallow-like center.
It’s piled with good stuff - whipped cream and fresh fruit, and is a delicious dessert.
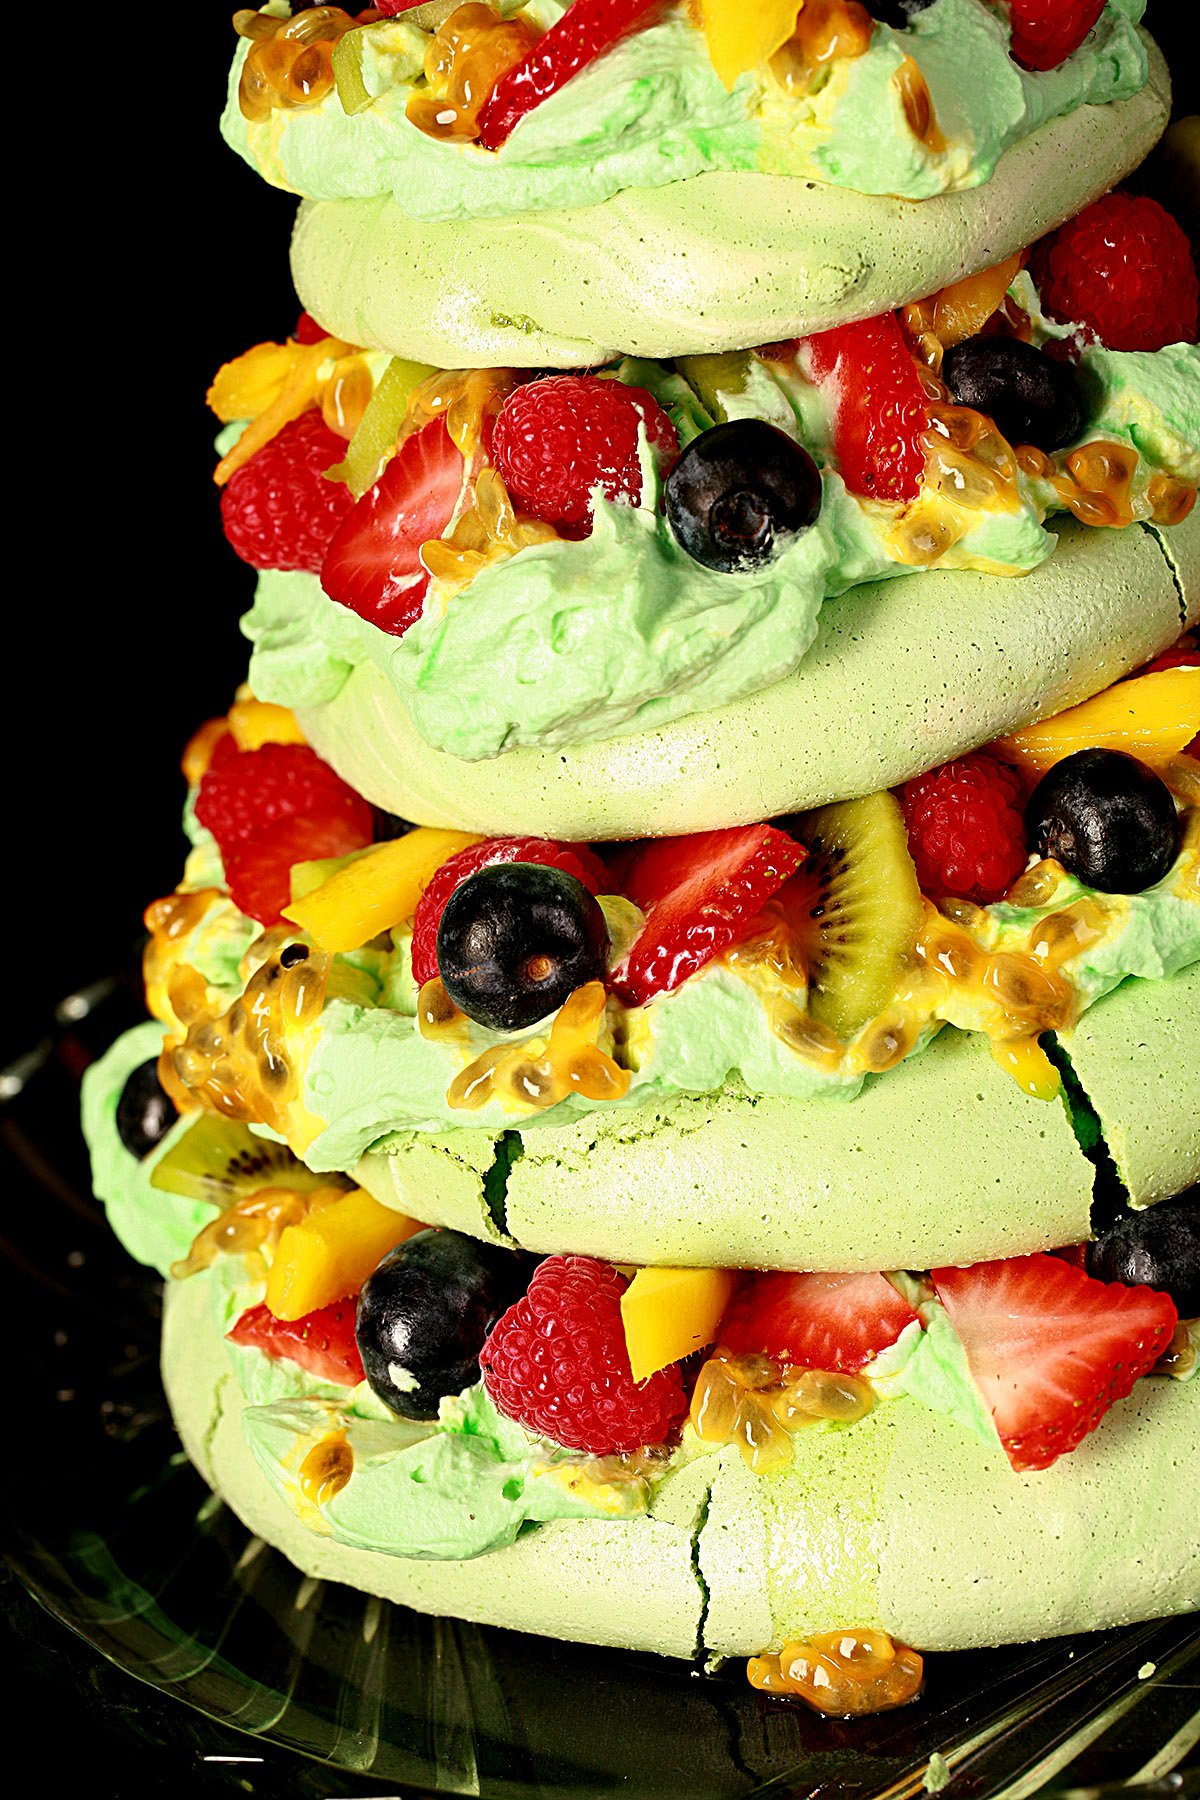
While Pavlovas are generally white desserts - both as the meringue and whipped cream - I decided to go seasonal with this, and dye mine green.
... and make it in multiple parts, stacked up to form a Christmas tree!
While my other Pavlovas could technically serve 2 very ambitious Pavlova fans, this one... you’re probably going to actually want at least a few more people for.
Trust me, we tried. First time a Pav has ever gotten the better of us!
Still, this delicious dessert is probably going to become a Christmas tradition for us, moving forward!
Ingredients
Pavlovas are - at the heart of it - a super simple recipe base, with basic ingredients that you should be able to find at any grocery store.
A few notes for you on what you’ll need:
Castor Sugar
Caster Sugar - or superfine sugar - is a finer grind of white sugar, than regular sugar is.
It is NOT icing sugar / powdered sugar, though, and icing sugar is NOT a suitable substitute, as it usually contains other ingredients, like corn flour.
That said, I never buy castor sugar anymore, as I’m not big on paying the markup.
Just run some regular sugar through a food processor for a minute or so, and you’ve got super fine sugar!
Fresh Cream
You’ll be whipping this, so you need a fat content cream - 32-35% milk fat.
Depending on where you live, this can be called whipping cream, heavy cream, heavy whipping cream, or double cream.
Acid
I tend to use plain white wine vinegar for this, but you can use apple cider vinegar or lemon juice, if you prefer.
Flavouring
I generally use Pure Vanilla Extract when making this Pavlova, as it’s a nice neutral base flavour.
That said, you can use whatever extract you like - Rum Extract, Lemon Extract, or Almond Extract are great options.
... just make sure it’s not an oil-based flavoring, as that can break down the protein structure of the meringue.
Green Food Coloring
I recommend using gel food colouring, rather than paste or liquid colour.
It’s super concentrated, available in a ton of colours, and doesn’t screw with the meringue viscosity too much.
Several brands make gel colour, you can get it on Amazon or at your local cake decorating supply store.
In particular, I recommend Americolor (what I used when I was in the USA), or ChefMaster (Which is the option more readily available here!)
You can use the grocery store liquid food coloring if you like - it’ll just take a bit more of it!
Fresh Fruit
The crowning glory of any Pavlova, you’ll want one or more kinds of seasonal fruits and/or fresh berries to top your whipped cream layers with.
I’ve always been one for lots of different colours on any Christmas tree I’ve ever decorated, so I went wild with a variety of sliced fruit and pretty berries.
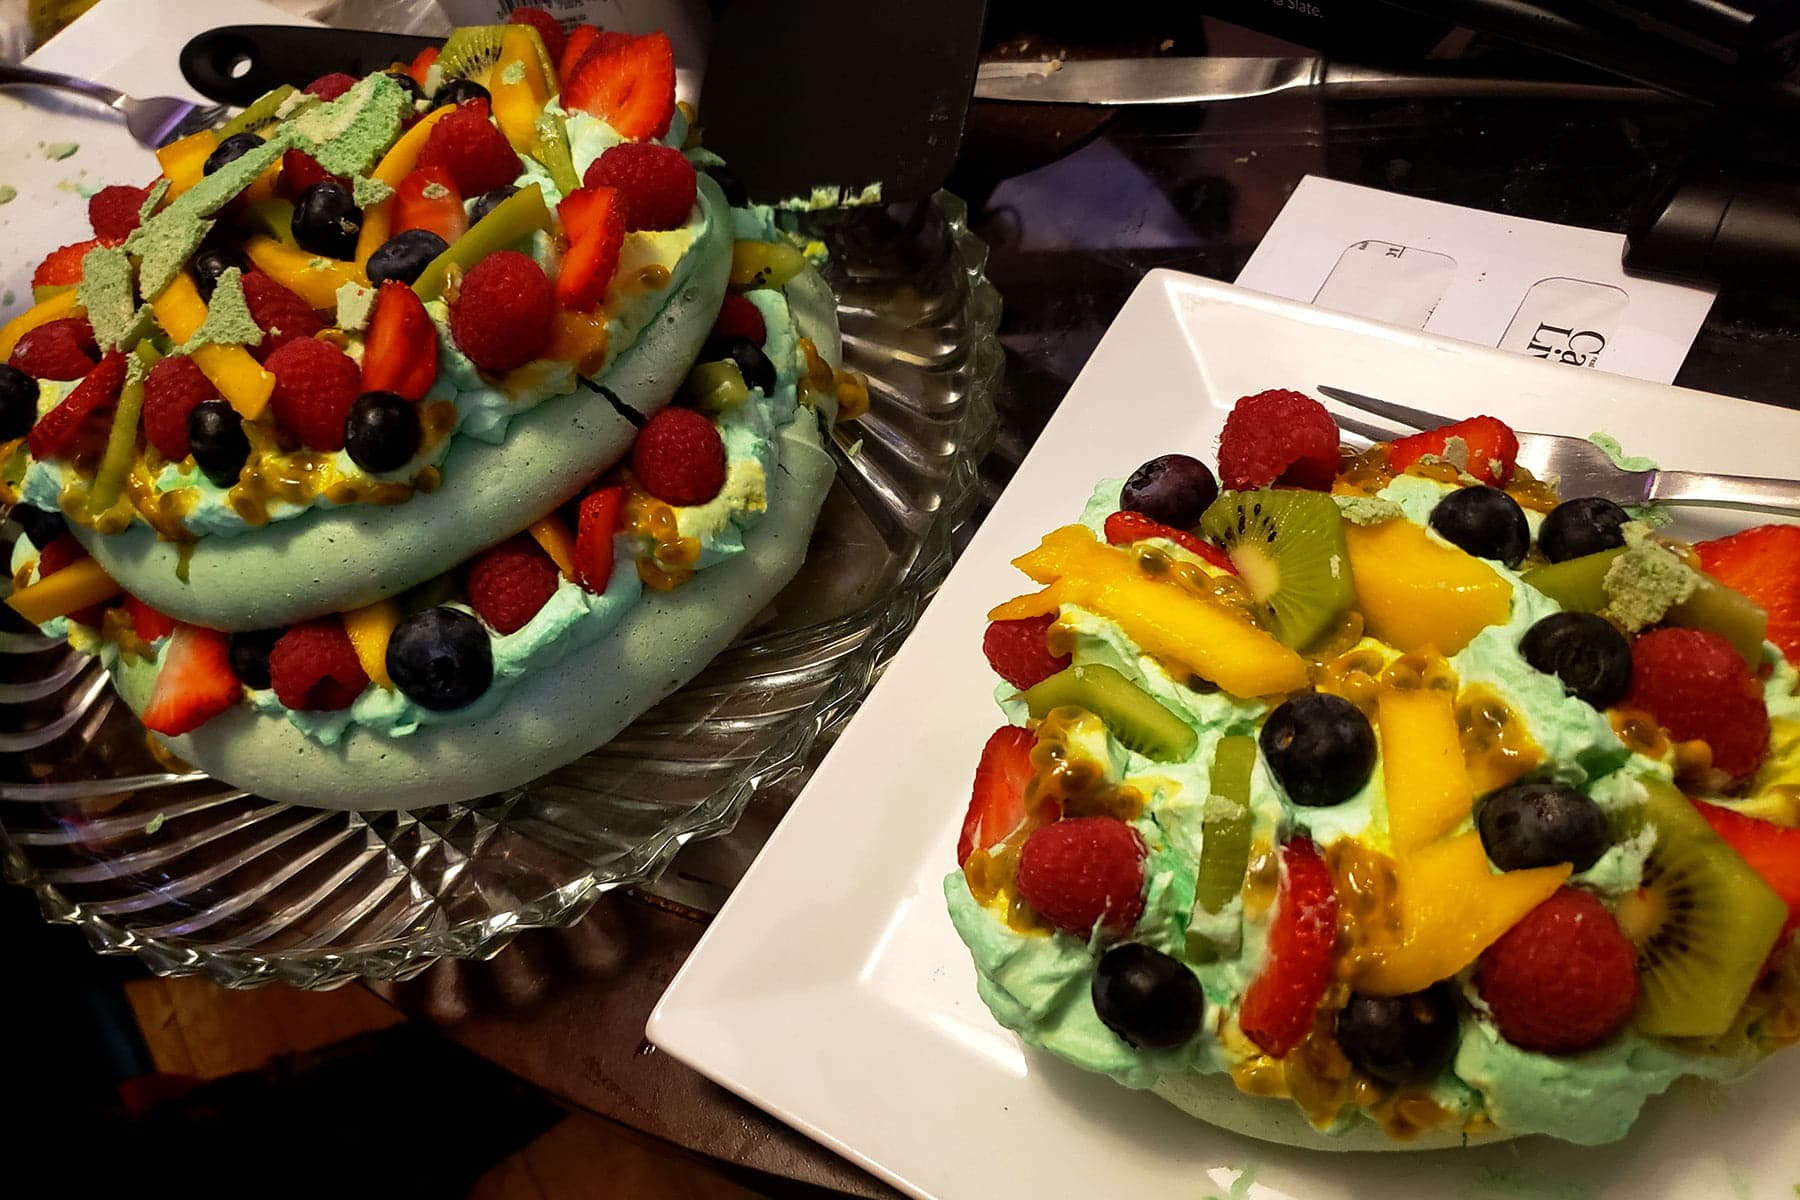
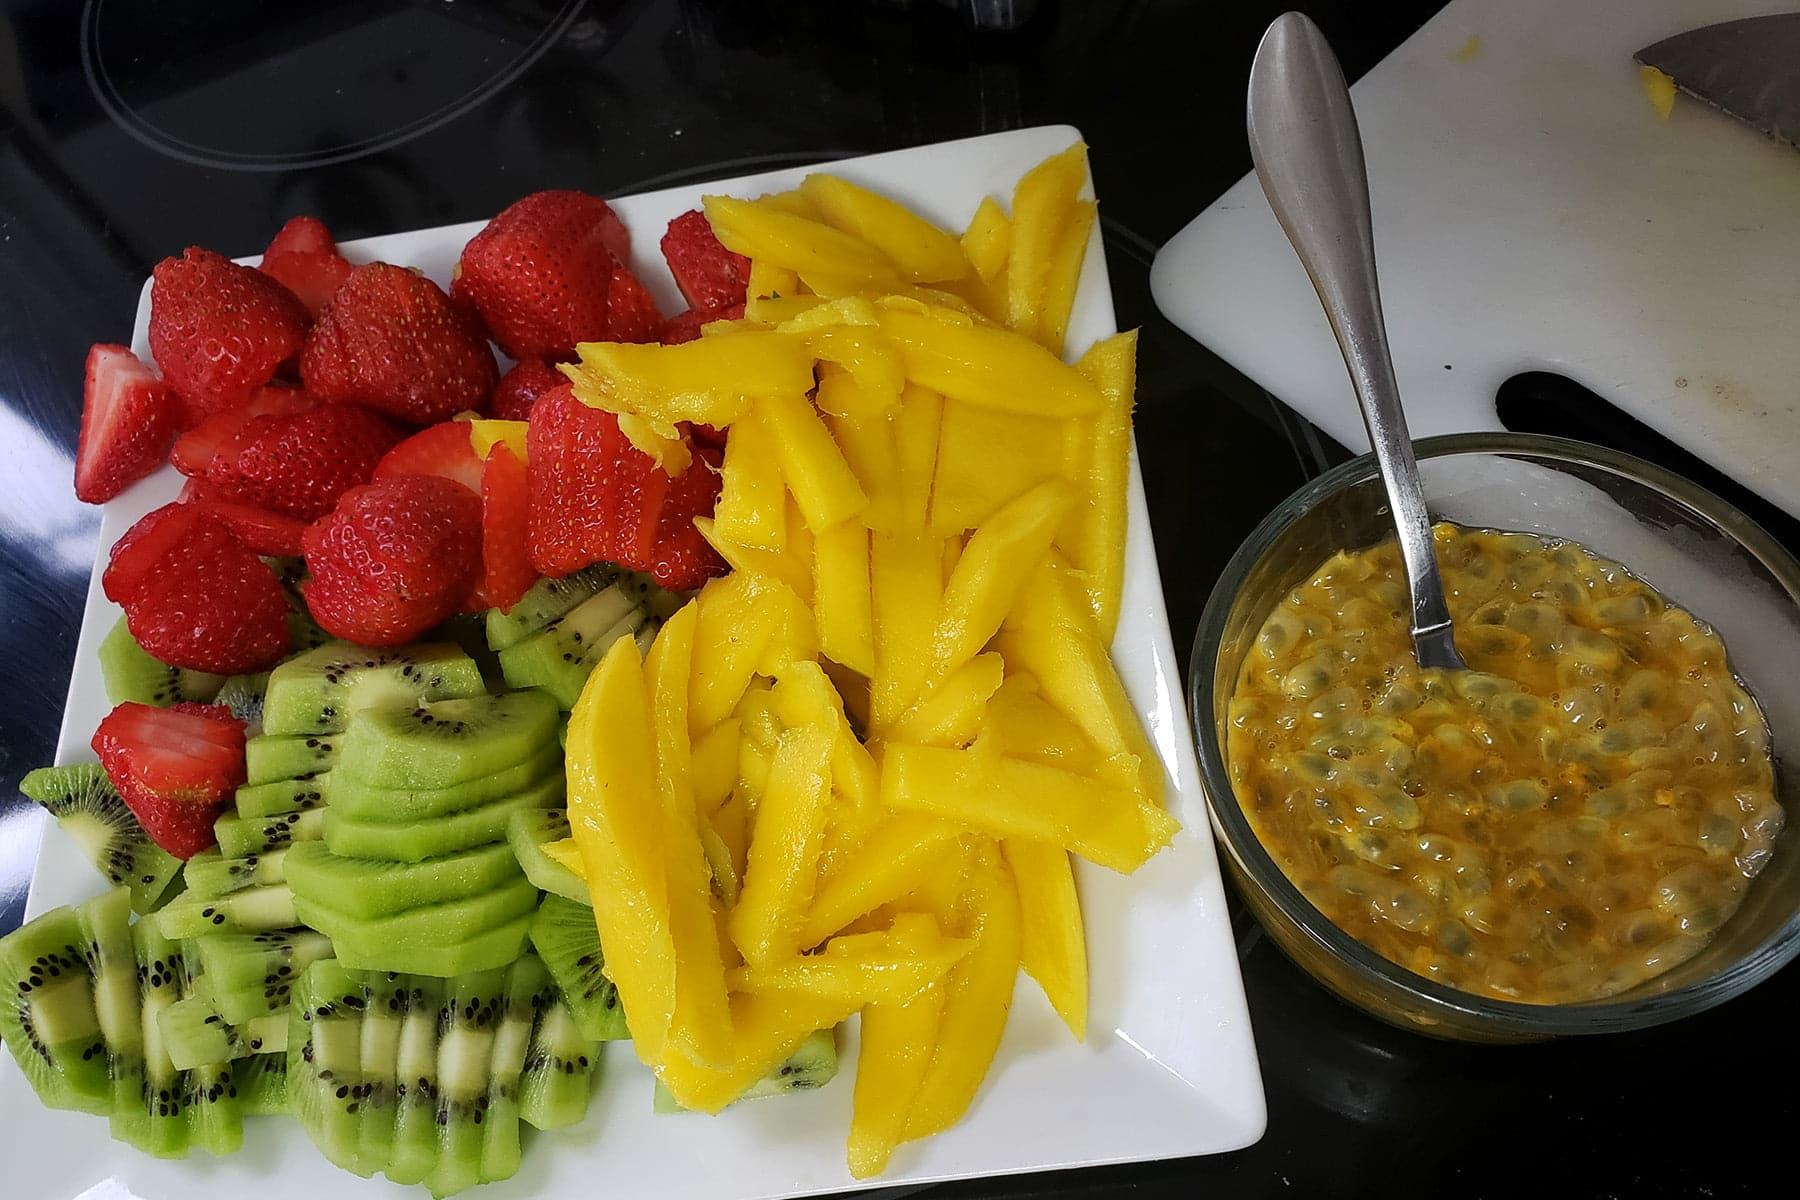
As pictured, I used mango, kiwi, strawberries, raspberries, blueberries, and passion fruit
The best thing about Pavlovas is that you can really do whatever you want. Use the same ones I did, swap some out, or just go completely on your own.
Maybe you want everything green and red (pomegranate arils and mint leaves are great options), whatever!
Everything Else
Rounding out this recipe, you will need:
Large Egg Whites
Corn starch
Salt
... I just really don’t have anything else to say about these ingredients!

Tips for Pavlova Success
Pavlovas are super easy to make, if you keep a few basic things in mind. Here are a few tips to help you successfully make a Pavlova:
For best results, crack and separate them right away when you take them out of the fridge, then cover the bowl and let it sit for a bit to warm to room temp.
10-15 minutes should be plenty of time, you don’t want to leave them out all day, as salmonella is a THING.
Honestly, if you have a good stand mixer - I LOVE my Kitchenaid! - you should be good to go, right out of the fridge. If you’re using a hand mixer... I’d let them warm up.
Any yolk at all - even a speck - will prevent your whites from whipping up as they’re supposed to.
If you do get any bits of egg yolks in the whites, and can’t get it out... start from scratch.
Seriously. You can make a nice omelette from those whites, but you won’t be able to get a Pavlova out of them.
For the same reason yolks will mess you up, you also have to be careful to not let fat, oil, grease, etc touch your meringue.
Make sure your mixer is clean, and you use a very clean bowl. Also, use a parchment lined baking sheet - do NOT grease it!
Also, when flavouring the meringue, be sure you’re not using an oil based flavour.

Over beating the egg whites can lead to a weeping meringue, and/or affect the texture. Get them to stiff peaks and that’s it!
Once the pavlovas are in the oven, shut the door *and leave it shut* until you’re ready to use it. At the very least leave it in there for a few hours, for the sake of structural integrity.
I’ll usually leave it in there right up until I’m ready to assemble and serve it, as it’s nice and protected in there.
Pavlovas are delicate and fragile and really, Murphy’s Law is a thing.
Pavlovas crack - especially when you mound them up with whipped cream and fruit - and that’s just a fact of life. Embrace it.
Don’t mourn “perfection” lost, realize that it’s literally collapsing under the weight of its own awesomeness.
This is doubly true when you’ve got FIVE LAYERS of Pavlova awesomeness on the go!
Once you start whipping the cream for your Pavlova, the timer is started. Before even make the whipped cream, have your fruit good and ready to go, and be ready to serve it right away.
Whipped cream breaks down over time - unless you stabilize it with some gelatin. That’s neither here nor there, in this case, as Pavlovas need to be eaten pretty soon after assembling.
So, have everything ready to go when you make the whipped cream, serve it right away, and don’t leave anything behind - it really doesn’t hold up as leftovers.
That said, you can make the pavlovas a day or two ahead of time - just keep them in an airtight container in a cool place (NOT the fridge).
Can this Pavlova serve 10 people (some say 12!)? Sure, when you’re listening to the same people who think that a serving size of dip is 2 Tbsp.
TWO TABLESPOONS!!!
Personally, I think this makes 6 good sized servings... 4 if you’re ambitious.
How to Make a Christmas Tree Pavlova
The full recipe is in the recipe card at the end of this post, here is a pictorial walk through for visual learners.
Get Ready
- Preheat your oven to 250 degrees. Fit your electric mixer with the whisk attachment.
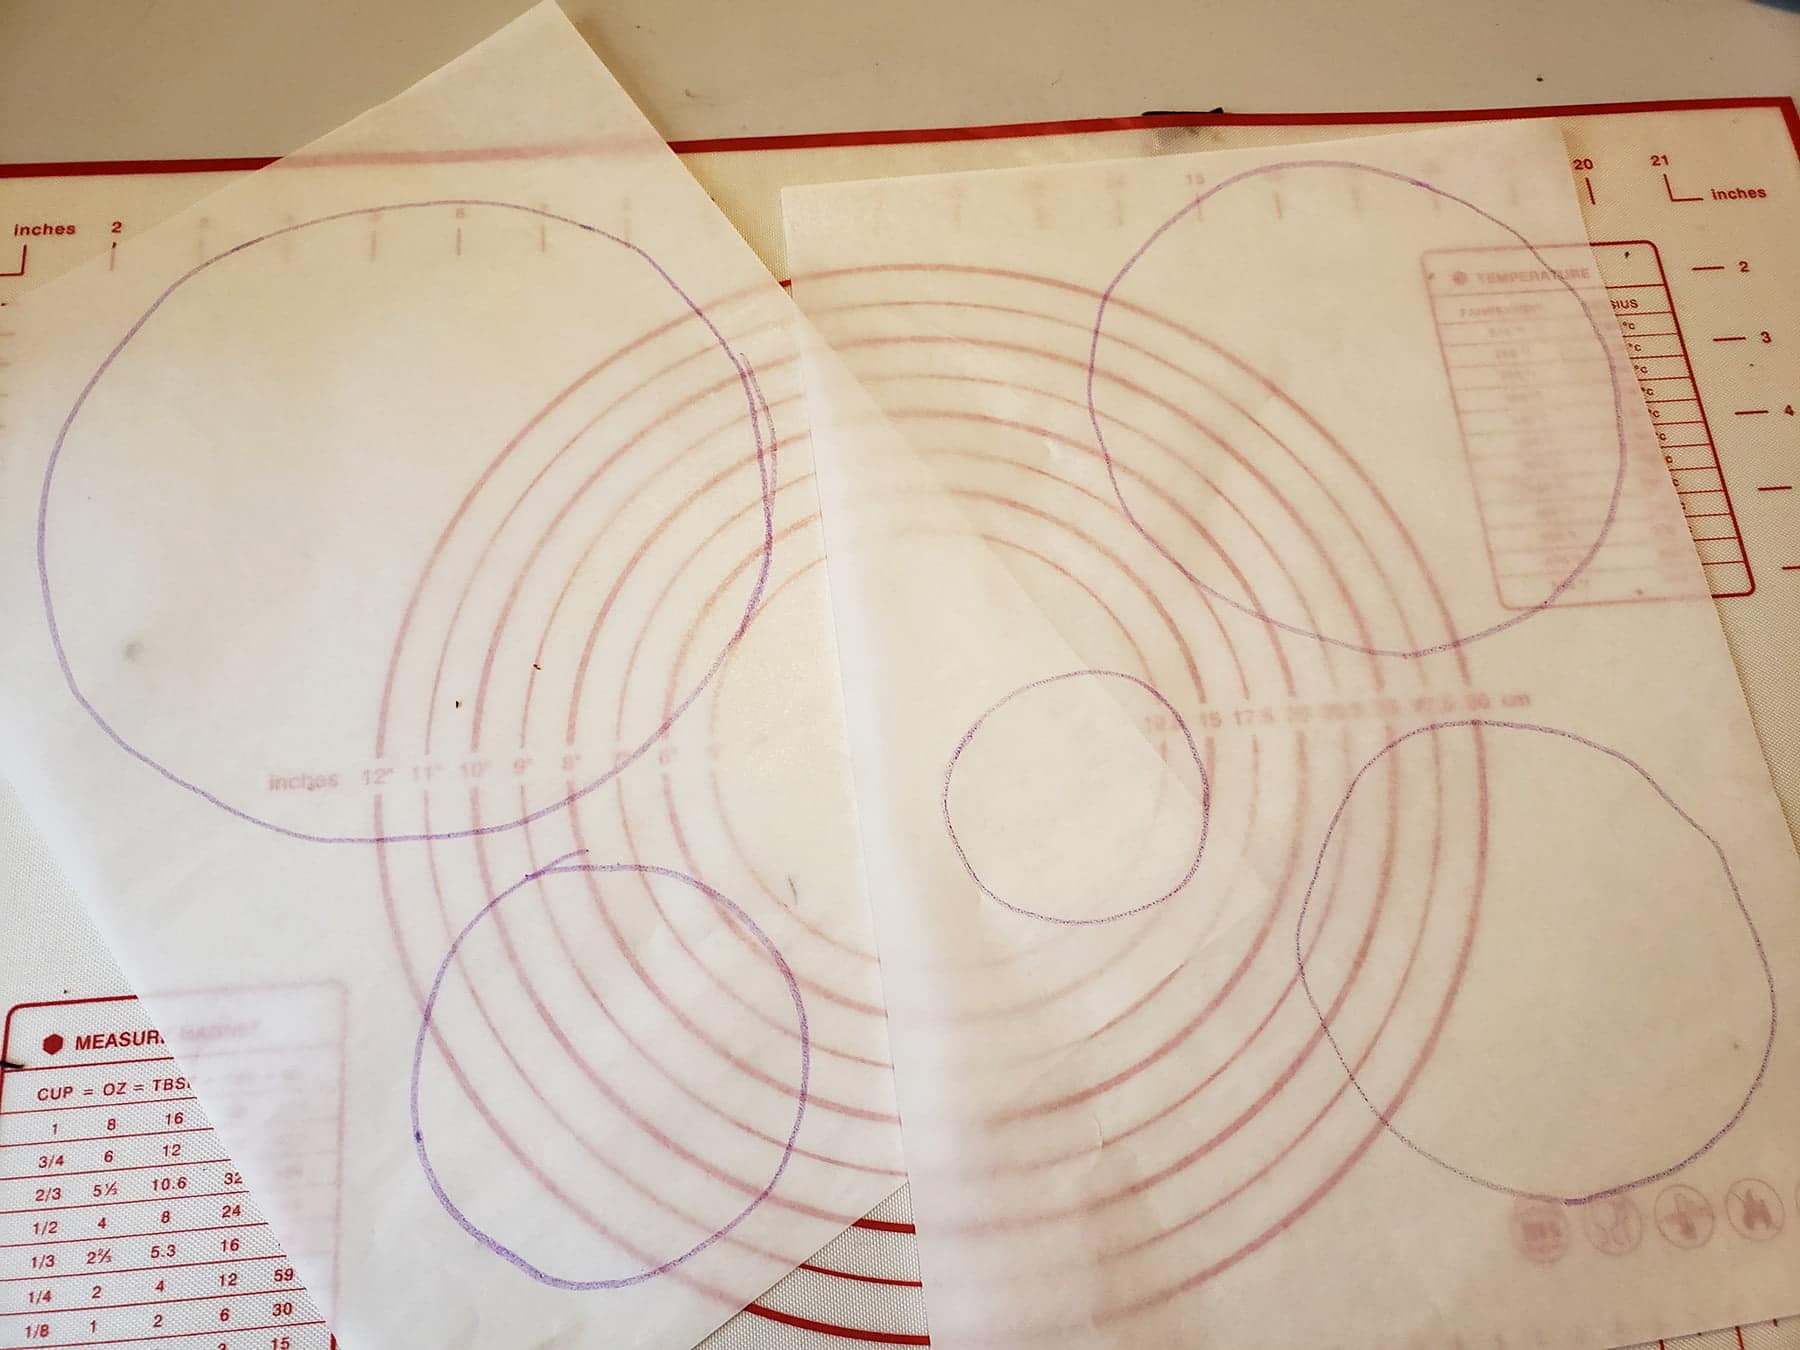
- Cut 2 sheets of baking parchment to fit your each baking sheet. Draw circles of the following sizes on sheet of parchment paper (1 of each circle size):
Pan 1: 8"/20 cm, 5" / 12.5 cm, 2"/ 5 cm circle.
Pan 2: 6.5" / 16.5 cm, 3.5" / 9 cm
I like to use the nonstick mat that came with my adjustable rolling pin set.
While it doesn’t have all of these specific measurements, it served as a guide, and I was able to guesstimate by drawing between lines.
Remove eggs from fridge, separate out the whites (place egg whites in a large mixing bowl), and allow to warm to room temp (about 5 minutes).
Make Your Meringue
In the large bowl - or the bowl of a stand mixer with a whisk attachment - use an electric whisk on high speed to beat egg whites together with salt until glossy, soft peaks form.
Slowly add in the sugar, and continue whipping until stiff peaks form. Turn off mixer, remove bowl.
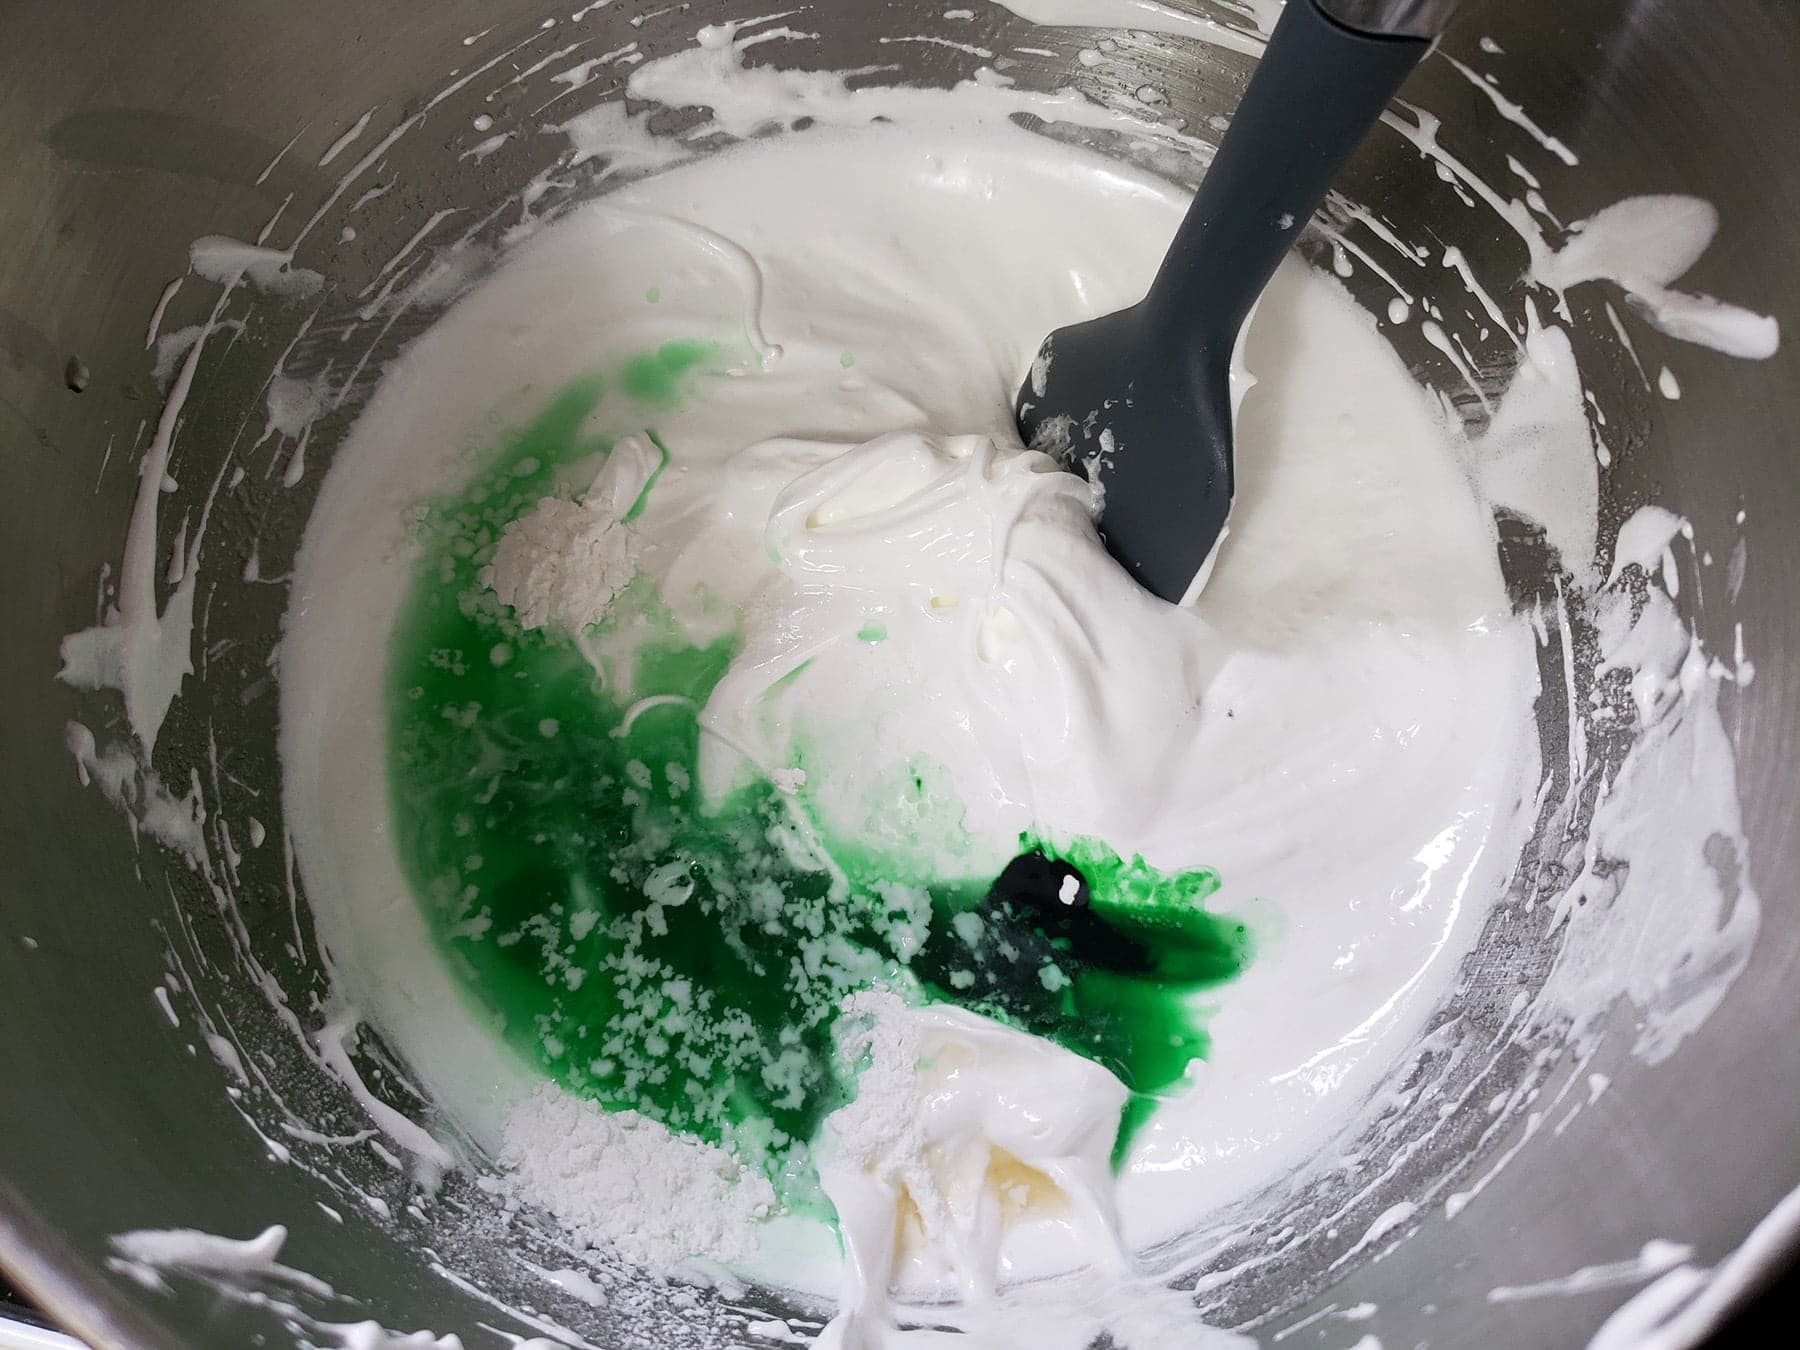
Sprinkle vinegar, cornstarch, vanilla, and food colouring over meringue, gently fold in till combined.
Note: I like to use a rubber spatula for this, but a wooden spoon works as well. Just be gentle!
Aim to have each round about the same height. If they're not perfectly even or all the way out to the circle, don't worry!
Note: You can use a large piping bag set with a large tip to pipe a fancier meringue, if you like.

Once your timer goes off, turn the oven off and let the meringue cool in the oven for several hours.
The baking of the meringue can be done the day before, if needed!
Prepare Your Fruit
Wash, peel, slice, and scoop as your choices of fruit dictate.
I’ll usually scoop passionfruit pulp into a small bowl and stir it a bit to break up the structure a bit.
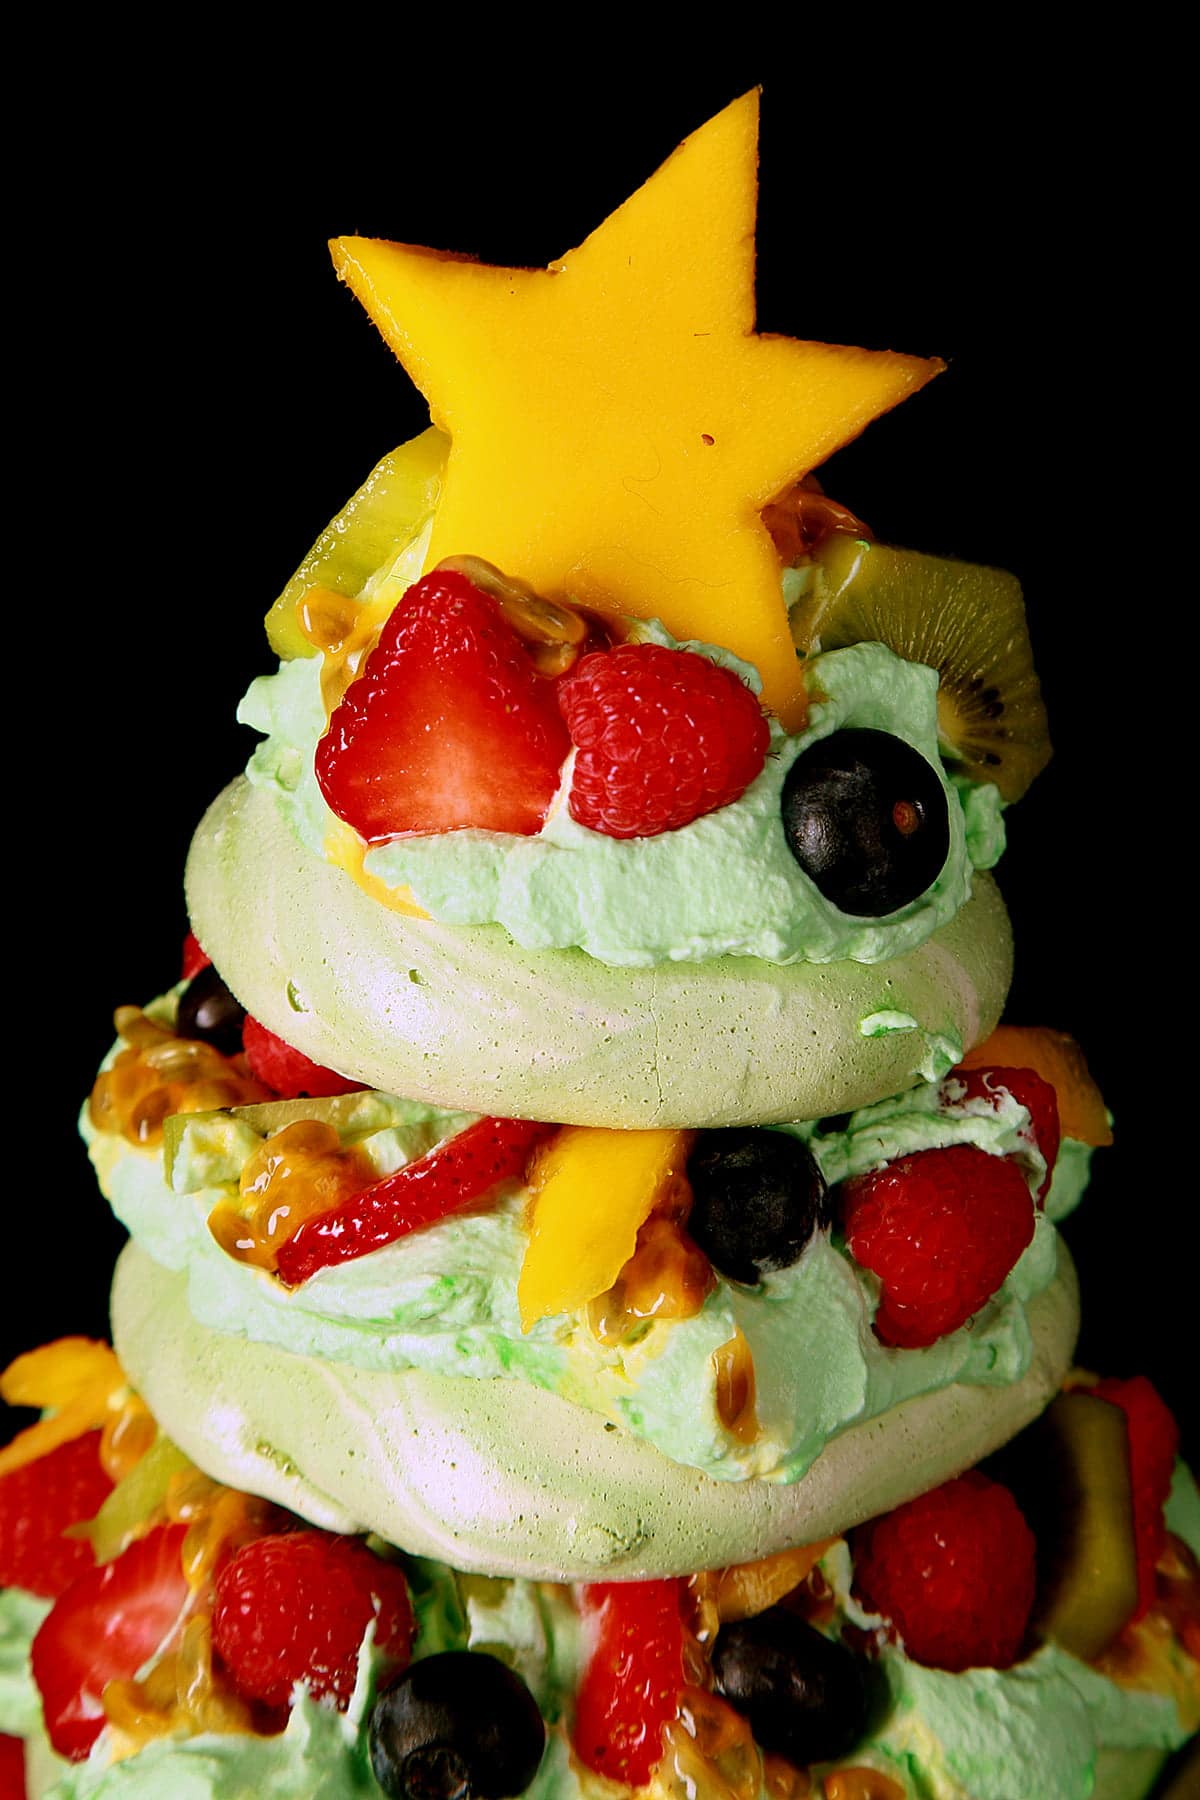
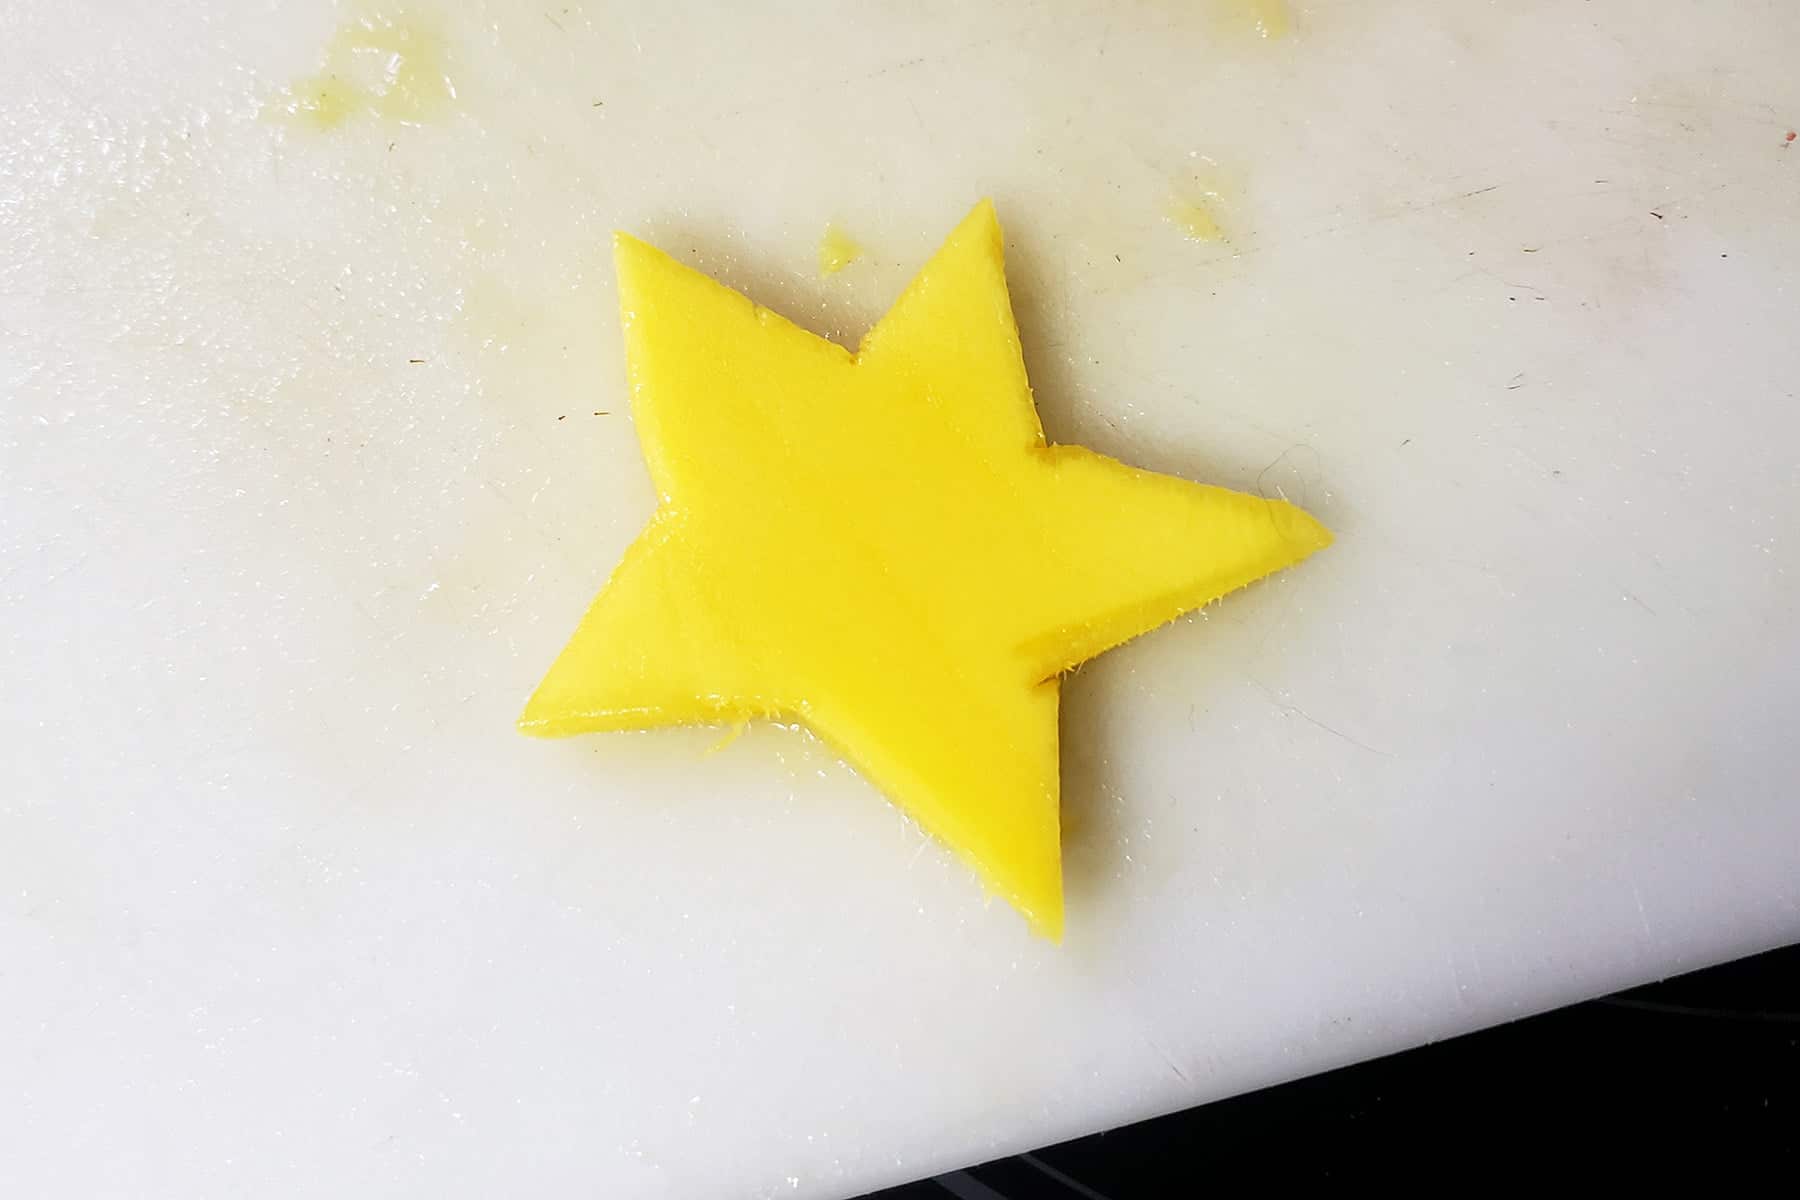
So, I sliced up a mango, and cut one of the slices in the shape of a star.
I went freestyle with it, as I didn’t happen to have any star shaped cookie cutters... and was feeling too lazy to print off a template to go from.
If you’re looking for a more perfect star, you could definitely use a cookie cutter or template.
To Serve
Just before serving, whip the heavy cream. I like my pavlovas a little sweeter, so I add about 2 tablespoon of sugar – add as much or as little as you want.
Purists may not want to sweeten the cream at all!
Once heavy cream is whipped to the desired thickness, add any desired flavourings, if applicable, as well as the green food colouring. Mix until well combined.
Place largest meringue on serving plate, top with some whipped cream, and then fruit.
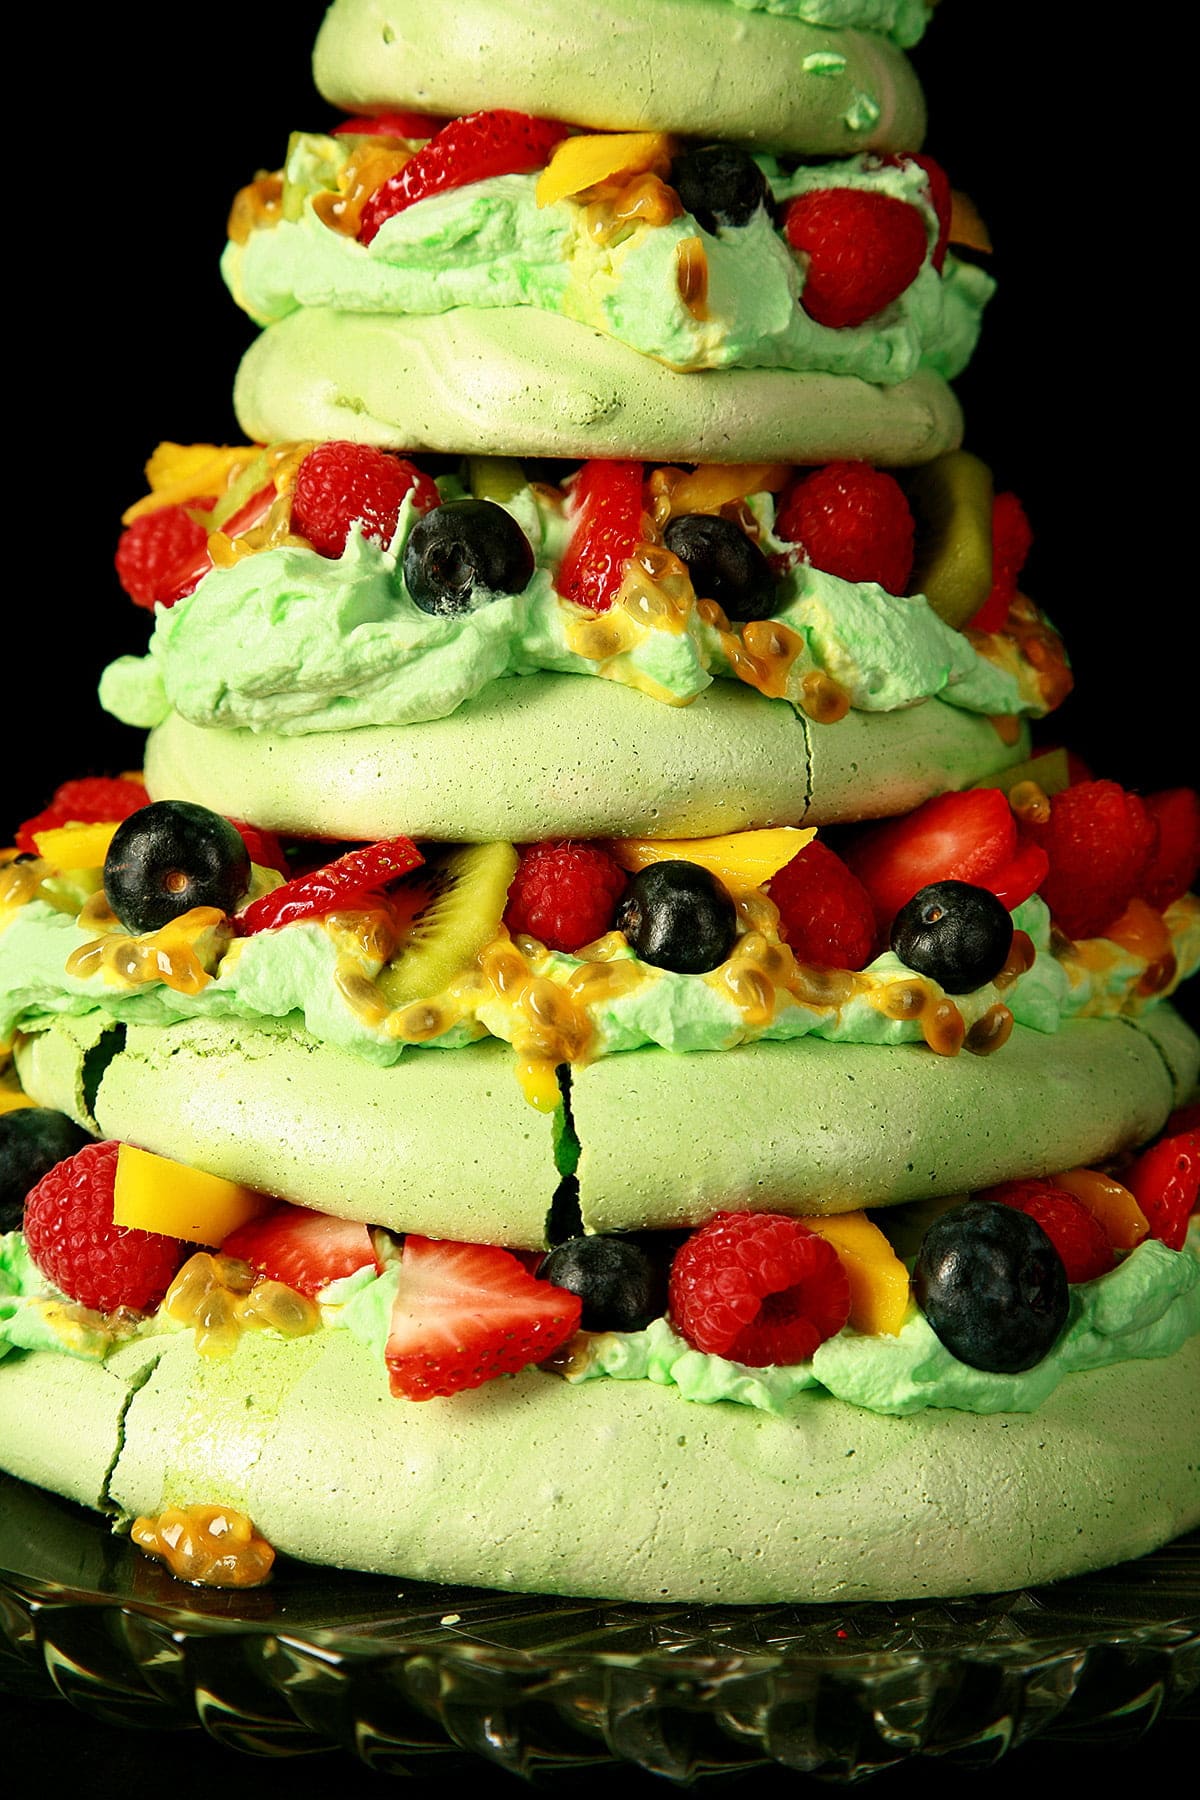
- Repeat with the remaining meringues and whipped cream, ending with a little bit of whipped cream, to form a peak.
Add your "Christmas tree topper" - a slice of starfruit, a star cut from a piece of mango, or whatever else you'd like.
Place some extra fruit as final touches, if needed, and serve immediately!

Also, if you're interested in gluten-free cooking and baking, you should definitely check out my gluten-free cookbooks: Beyond Flour: A Fresh Approach to Gluten Free Cooking & Baking, and the sequel... Beyond Flour 2. You can order them right here on my website, through Amazon, or through any major bookseller.
More Pavlova Recipes
Do you love Pavlovas like we do? Awesome! I have several more super tasty Pavlova recipes for you...
Bananas Foster Pavlova
Basic Pavlova Recipe
Blueberry Pavlova
Cardamom Fig Pavlova
Chocolate Raspberry Pavlova
Matcha Green Tea Pavlova
Pavlova Grazing Board
Tropical Dragonfruit Pavlova
Seasonal Pavlovas
Easter Egg Pavlova
Halloween Pavlova with Bloody Eyeballs
Heart Shaped Valentine's Pavlova

Share the Love!
Before you chow down, be sure to take some pics of your handiwork! If you post it to Bluesky, be sure to tag us - @CelebrationGen. We're also on Pinterest, so you can save all your favourite recipes to a board!
Also, be sure to subscribe to my free monthly email newsletter, so you never miss out on any of my nonsense. Well, the published nonsense, anyway!
Finally, if you love this recipe, please consider leaving a star rating and/or a comment below, and maybe even sharing this post on social media!
Anyway, on to that recipe!
Christmas Pavlova [Christmas Tree Pavlova]
Equipment
- Parchment Paper
- Baking Sheet
Ingredients
Mini Pavlovas
- 6 Large Egg Whites
- Pinch Salt
- 1 ½ cup Super Fine / Castor Sugar *
- 3 teaspoon Vinegar
- 1 ½ teaspoon Cornstarch
- 1 ½ teaspoon Vanilla Extract Or other non-oil flavouring
- Green Food colouring
Whipped Cream
- 2 ½ cup Heavy Cream
- 2 tablespoon Granulated Sugar optional
- 1 teaspoon Vanilla Extract Or other flavouring
- Green food colouring
Serving
- Fruit of choice.
Instructions
- Get ready: Preheat your oven to 250 degrees. Fit your electric mixer with the whisk attachment.
- Cut 2 sheets of parchment paper to fit your baking sheets. Draw circles of the following sizes on them (1 of each):Pan 1: 8"/20 cm, 5" / 12.5 cm, 2"/ 5 cm.Pan 2: 6.5" / 16.5 cm, 3.5" / 9 cmPlace parchment paper in your pans, marked side down. You should be able to see the markings through the paper.Set aside.
- Remove eggs from fridge, separate out the whites, and allow to warm to room temp (about 5 minutes).
- In your mixer bowl, beat egg whites together with salt until glossy peaks form.
- Slowly add in the sugar, and continue whipping until stiff peaks form. Turn off mixer, remove bowl.
- Sprinkle vinegar, cornstarch, vanilla, and food colouring over meringue, gently fold in till combined.
- Divide meringue amount your drawn circles - smoothing meringue out to the edges of the guides.Aim to have each round about the same height. If they're not perfectly even or all the way out to the circle, don't worry!
- Put the baking sheets into your oven, bake for 55 minutes.
- Once your timer goes off, turn the oven off and let the meringue cool in the oven for several hours. The baking of the meringue can be done the day before, if needed!
- Just before serving, whip the heavy cream.I like my pavlovas a little sweeter, so I add about 2 tablespoon of sugar – add as much or as little as you want. Purists may not want to sweeten the cream at all! I also like to add a little flavoring, again – optional
- Once heavy cream is whipped to the desired thickness, add any desired flavourings, if applicable, as well as the green food colouring. Mix until well combined.
- Place largest meringue on serving plate, top with some whipped cream, and then fruit.Add the next largest meringue, and gently top with whipped cream and fruit.Repeat with the remaining meringues and whipped cream, ending with a peak of whipped cream.
- Add your "Christmas tree topper" - a slice of starfruit, a star cut from a piece of mango, or whatever else you'd like - and serve immediately!


Ana
FANTASTIC!