

This homemade raspberry curd is thick, luxurious, easy to make, and tastes like raspberry sorbet. Try some with your breakfast this weekend!
Originally published October 13, 2021, updated on 4/19/2023

Raspberries need different handling, and they also have a lower acid level than lemon juice does.
You need enough acid to react with the proteins in the egg yolks, to ensure a nice, thick product. Without that, you end up with a runny curd.
Generally speaking, raspberry curd means either accepting a runnier curd, or supplementing the raspberries with some lemon juice.
Two problems:
1. The bright berry flavor of our raspberry curd is diluted with the flavour from the lemon.
2. The acid that the lemon juice brings is diluted with the raspberry pulp ... so it still doesn't set up quite as thick as lemon curd.
... and it worked perfectly, even that first time!
The bright flavors of the raspberries took center stage from the very first batch, with a thick, velvety smooth texture.
I went through LOTS of eggs, immediately following that epiphany, LOL.
Anyway, this is still a super easy recipe to make - much like traditional lemon curd.
Like lemon curd, this raspberry curd recipe also requires some specifics with regards to ingredients, equipment, and technique... so let's get to it!

Uses for Raspberry Curd
Beyond a “just eat it with a spoon, straight from the jar”, there are many, many different uses for raspberry curd!
Here are a few ideas for you:
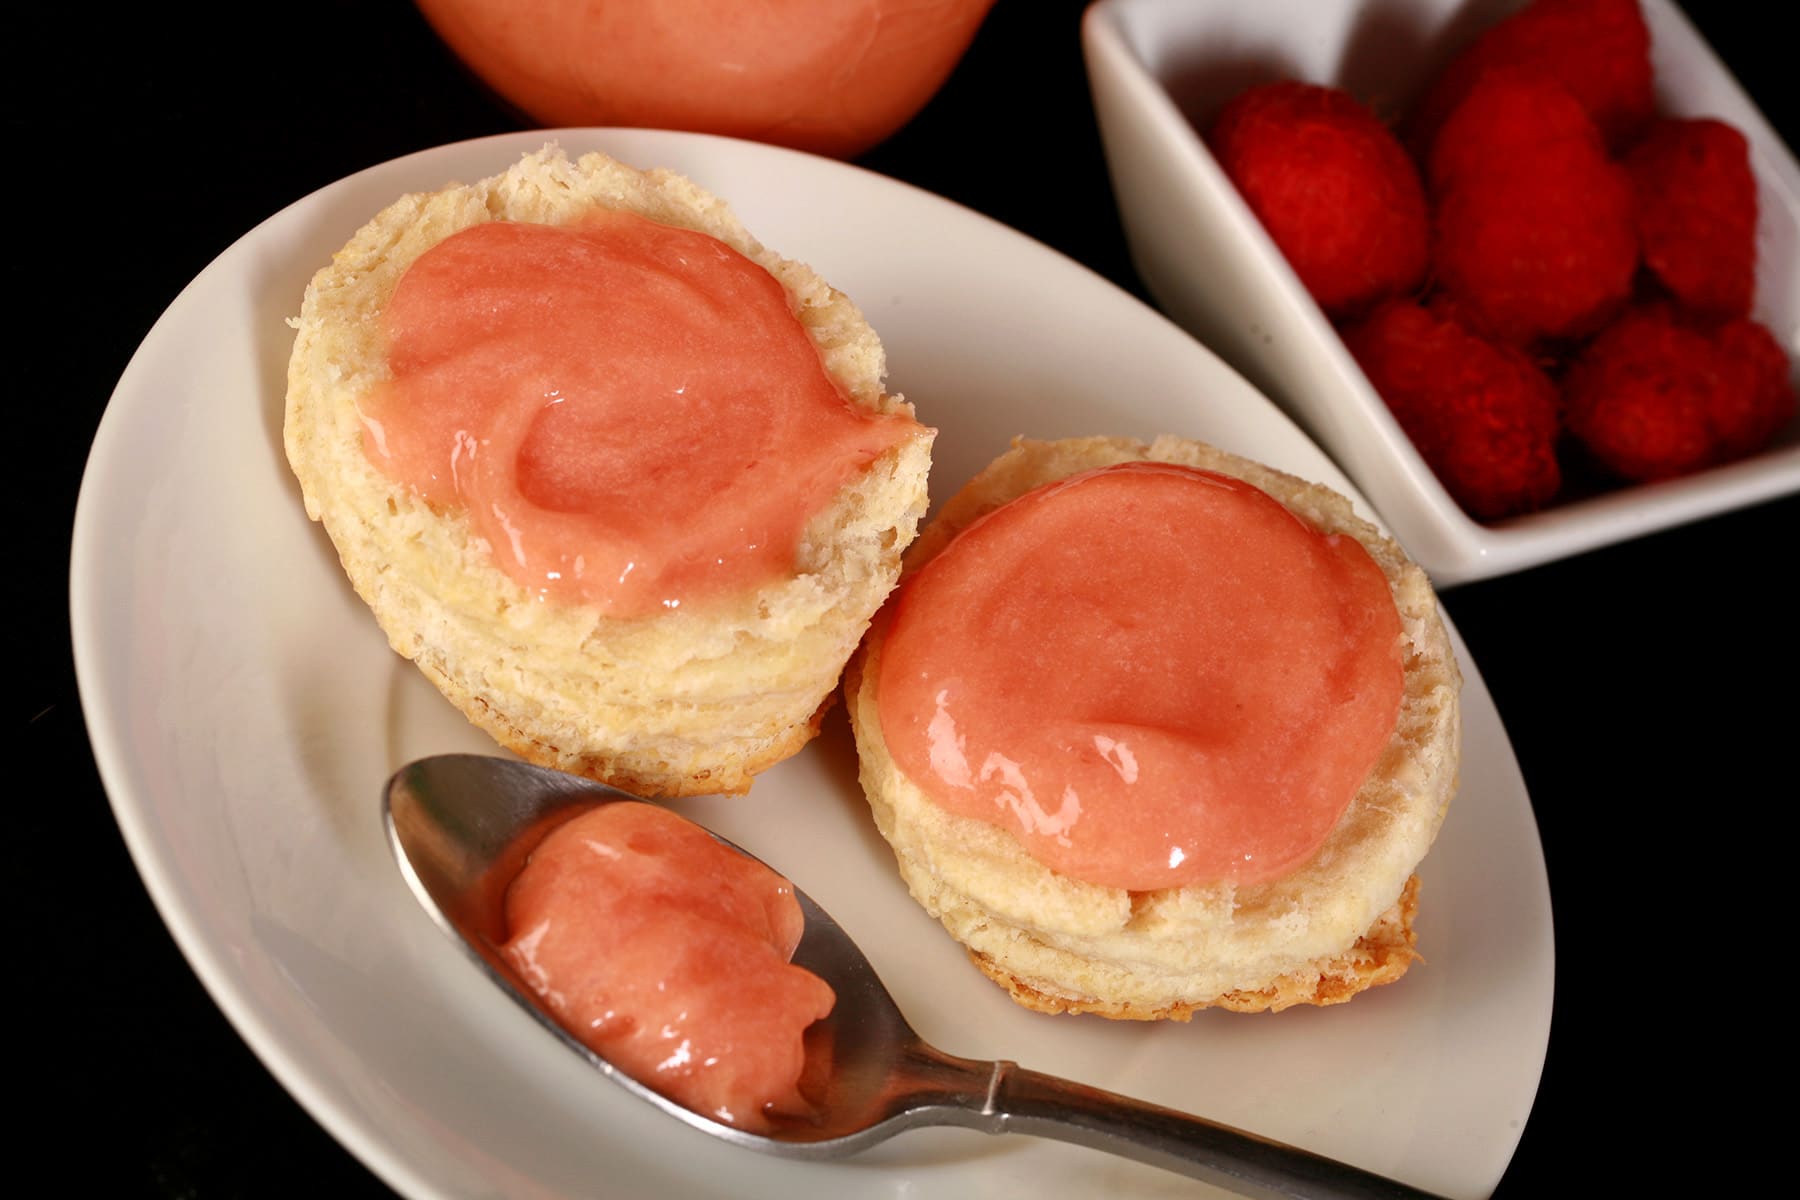
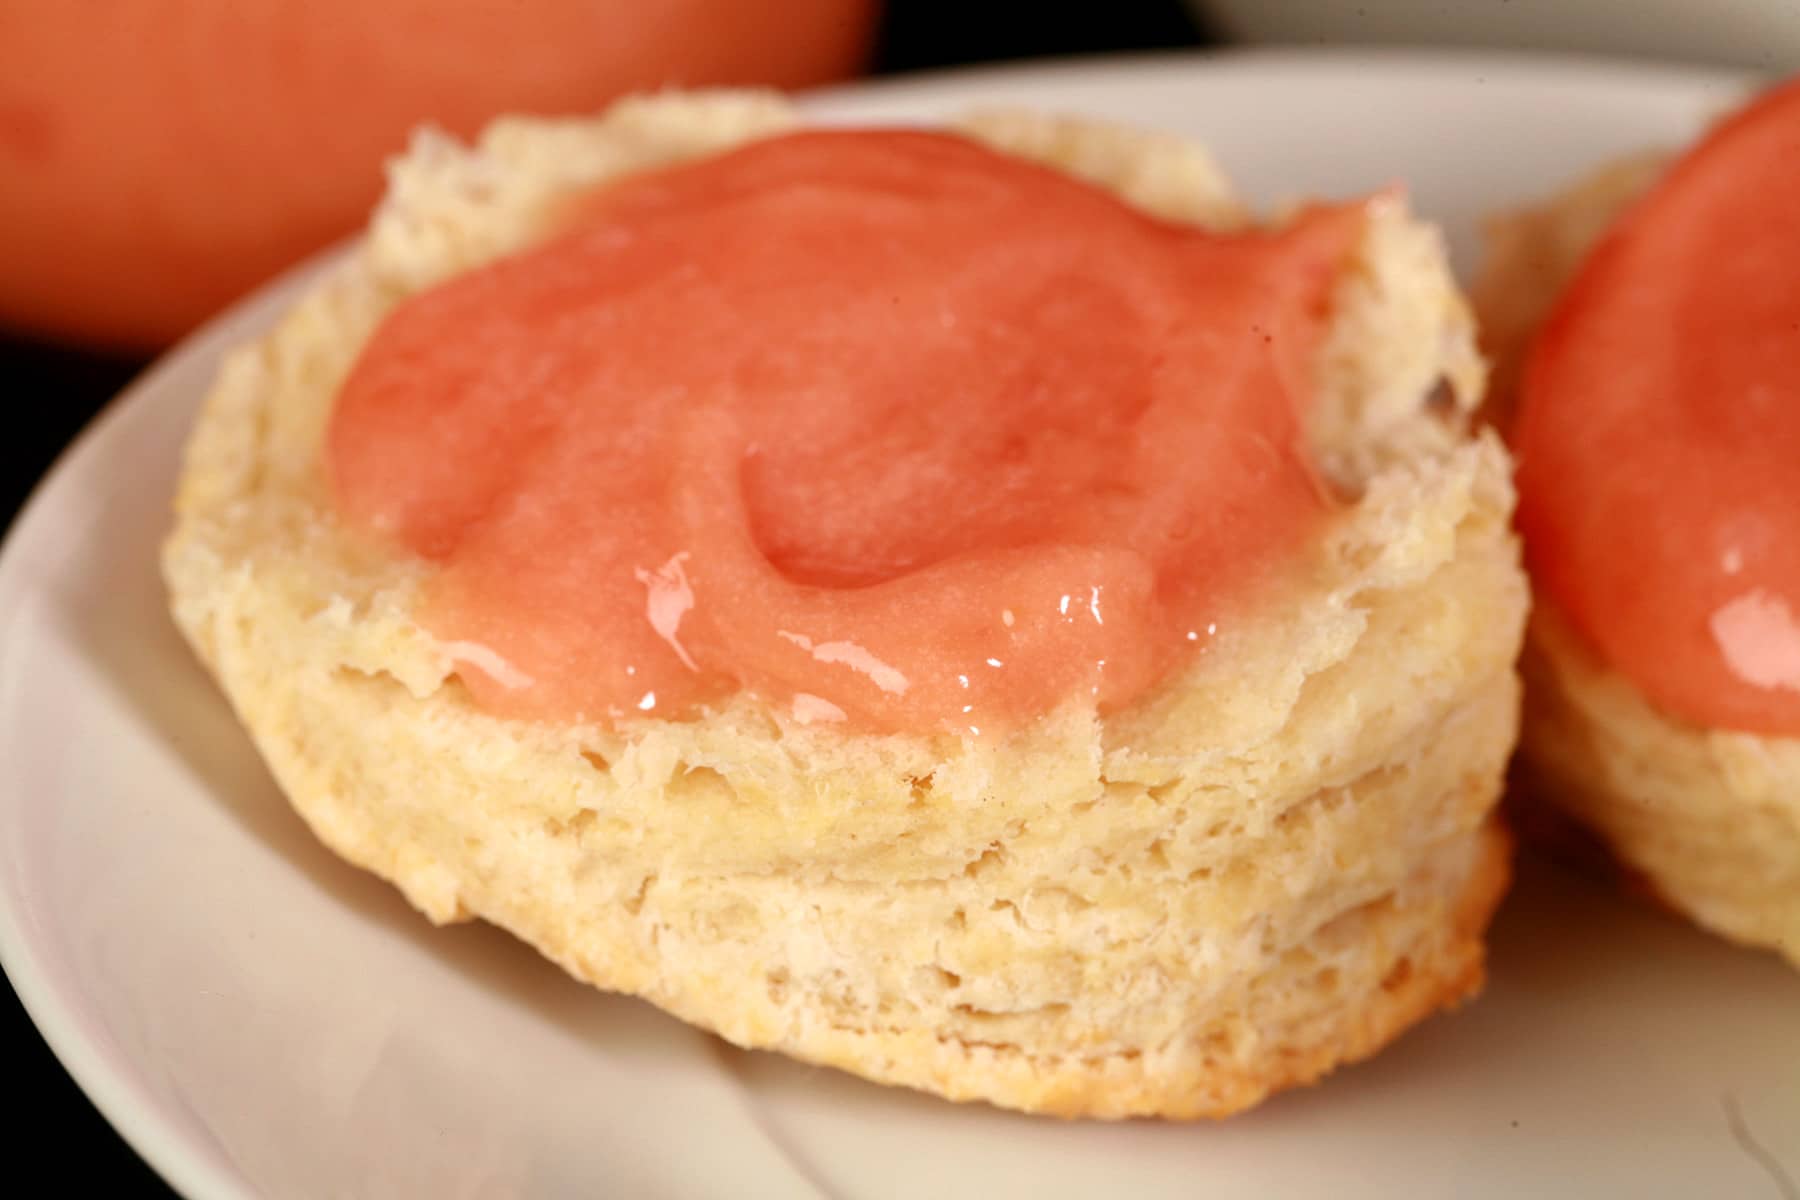
- Delicious curds are an absolute must for the breakfast table, or as part of an English tea. Spread it on toast, Biscuits, English muffins, scones, pound cake, etc. Spoon it over waffles or pancakes (especially good when topped with berries!)
- As a filling for baked goods. Fill Macarons, Cream Puffs or Profiteroles, pre-baked tart shells, or layered cakes* with raspberry curd. It also makes a great macaron filling.
- Raspberry curd is also a delicious filling for Butterfly Cupcakes, either instead of or in addition to frosting. When “in addition to”, I’ll spoon some curd in the cavity, then pipe frosting over it.
- One of my favorite ways to serve raspberry curd is as a topping for Pavlova. I like to do the layer of whipped cream, then the curd, and finally the fruit topping. You can even mix some into the whipped cream to flavour it. Alternately, it’s great as an offering on a Pavlova Dessert Board.
- We like to drizzle it over yogurt that’s been topped with my Porter’s Yogurt and Ice Cream Topping.
- You can also make layered parfaits with curd and yogurt, or curd and cottage cheese.
* When using raspberry curd as a cake filling, it’s best to pipe a ring of frosting around the outer perimeter of the layer being filled, then fill the inside of that border with the curd.
This gives some stability to the filling layer, and will prevent the curd from oozing out.

Tips for Making Raspberry Curd
Raspberry Curd Ingredients
Most of the ingredients are super simple: Raspberries, sugar, eggs, and unsalted butter.
You can use fresh raspberries or frozen raspberries for this. When using fresh berries... the riper, the better - riper berries are sweeter, with a wonderful flavor.
Use basic white granulated sugar for the best taste.
Also, for the best shelf life, use nice fresh eggs.
I use egg yolks, rather than whole eggs. As far as the extra egg whites go, I like to use them for making Swiss Meringue Buttercream, Meringue Cookies or Pavlova.
And - conversely - I use the extra egg yolks from making any of those, to make curd.
Citric acid.
We initially started buying citric acid for use with our Homebrewed Ciders and Wines (along with Acid Blend), but over the years, we've been using it a lot more in our kitchen.
You can find it used in such things like my replica Beep Drink, as part of the fun rim on my Fuzzy Peach Candy Cocktail, and as part of my Wine Slush Mix - always a favourite for gifting!
Citric acid is the “secret” ingredient to providing enough acid for the curd to set up, without diluting the flavour of the curd.
Finally - as an optional ingredient - I like to use a little food coloring. This curd can turn out pretty pale, sometimes I like giving it a little bit more “oomph” in the colour department!
Note: I didn't add colour this time, as I wanted to differentiate it from a few other curds I was making at the time!

Raspberry Curd Equipment
You don’t need a ton of equipment to make curd, but each piece you do need is important. Here’s the rundown:
Mini Food Processor
I run the berries through my Mini Food Processor before getting started.
Before cooking the raspberry curd, you’ll want to press them through a Fine Mesh Strainer.
Using a fine-mesh strainer gets all the bits of seeds out of the raspberry pulp, allowing for a nice smooth final product.
I tend to stir/scrape the mixture against the fine-mesh sieve, with a silicone spatula.
Heavy Bottomed Pot OR Double Boiler
Personally, I prefer using a heavy bottomed pot and cook this over direct heat, but a double boiler is the traditional way to do this... more on that in a bit!
A Silicone Whisk
Yes, wire whisks are great in general... but they can react with the acid in your raspberry curd, and make it taste metallic.
I like to avoid that whole thing, and just use a silicone whisk. (For that matter, it’s also best to use a non-reactive saucepan, for the same reason!)
When making curd, I use the smallest whisk in my Set of 3 Silicone Whisks.
I just find that the smaller one is best to keep everything moving, prevent clumps, and ensure a .smooth silky feel to the finished curd.
That said, any brand of silicone whisk should do just fine.
A Thermometer
For both proper thickening AND food safety reasons, I like to use a thermometer when making fruit curds.
You can use any thermometer that will accurate read a temperature of 165 F.
Personally, I like to use a Infrared Cooking Thermometer. It's quick, easy, and no-mess!

Cooking Technique
While you’re “supposed” to cook this over a double boiler - and I did in the photos - I’ll be honest... I never do.
I like to cook my raspberry curd over low, direct heat. I whisk it constantly, and it’s ready in just minutes - so much less fussy.
If you’re not cooking it over higher heat and you keep an eye on it / keep whisking, you’re going to end up with a smooth curd, no clumps of egg bits.
I like to use a heavy bottomed pot, for the best heat distribution.
You’ll find that when you start out, there will be a lot of foaming. As you approach the right temperature, that foaming will subside - that’s when you should really start keeping an eye on the temperature, to avoid overcooking it.
Finally, just know that the curd will thicken more as it cools, so don’t be so worried if it’s not as thick as you’d like.
If you followed the recipe, did the spoon trick (more on that later), and your curd reached 165F, it’ll thicken!
How Long Does Raspberry Curd Last?
Depending on who you ask, homemade raspberry curd will last up to a month or two in the fridge. (ALWAYS refrigerate your curd!)
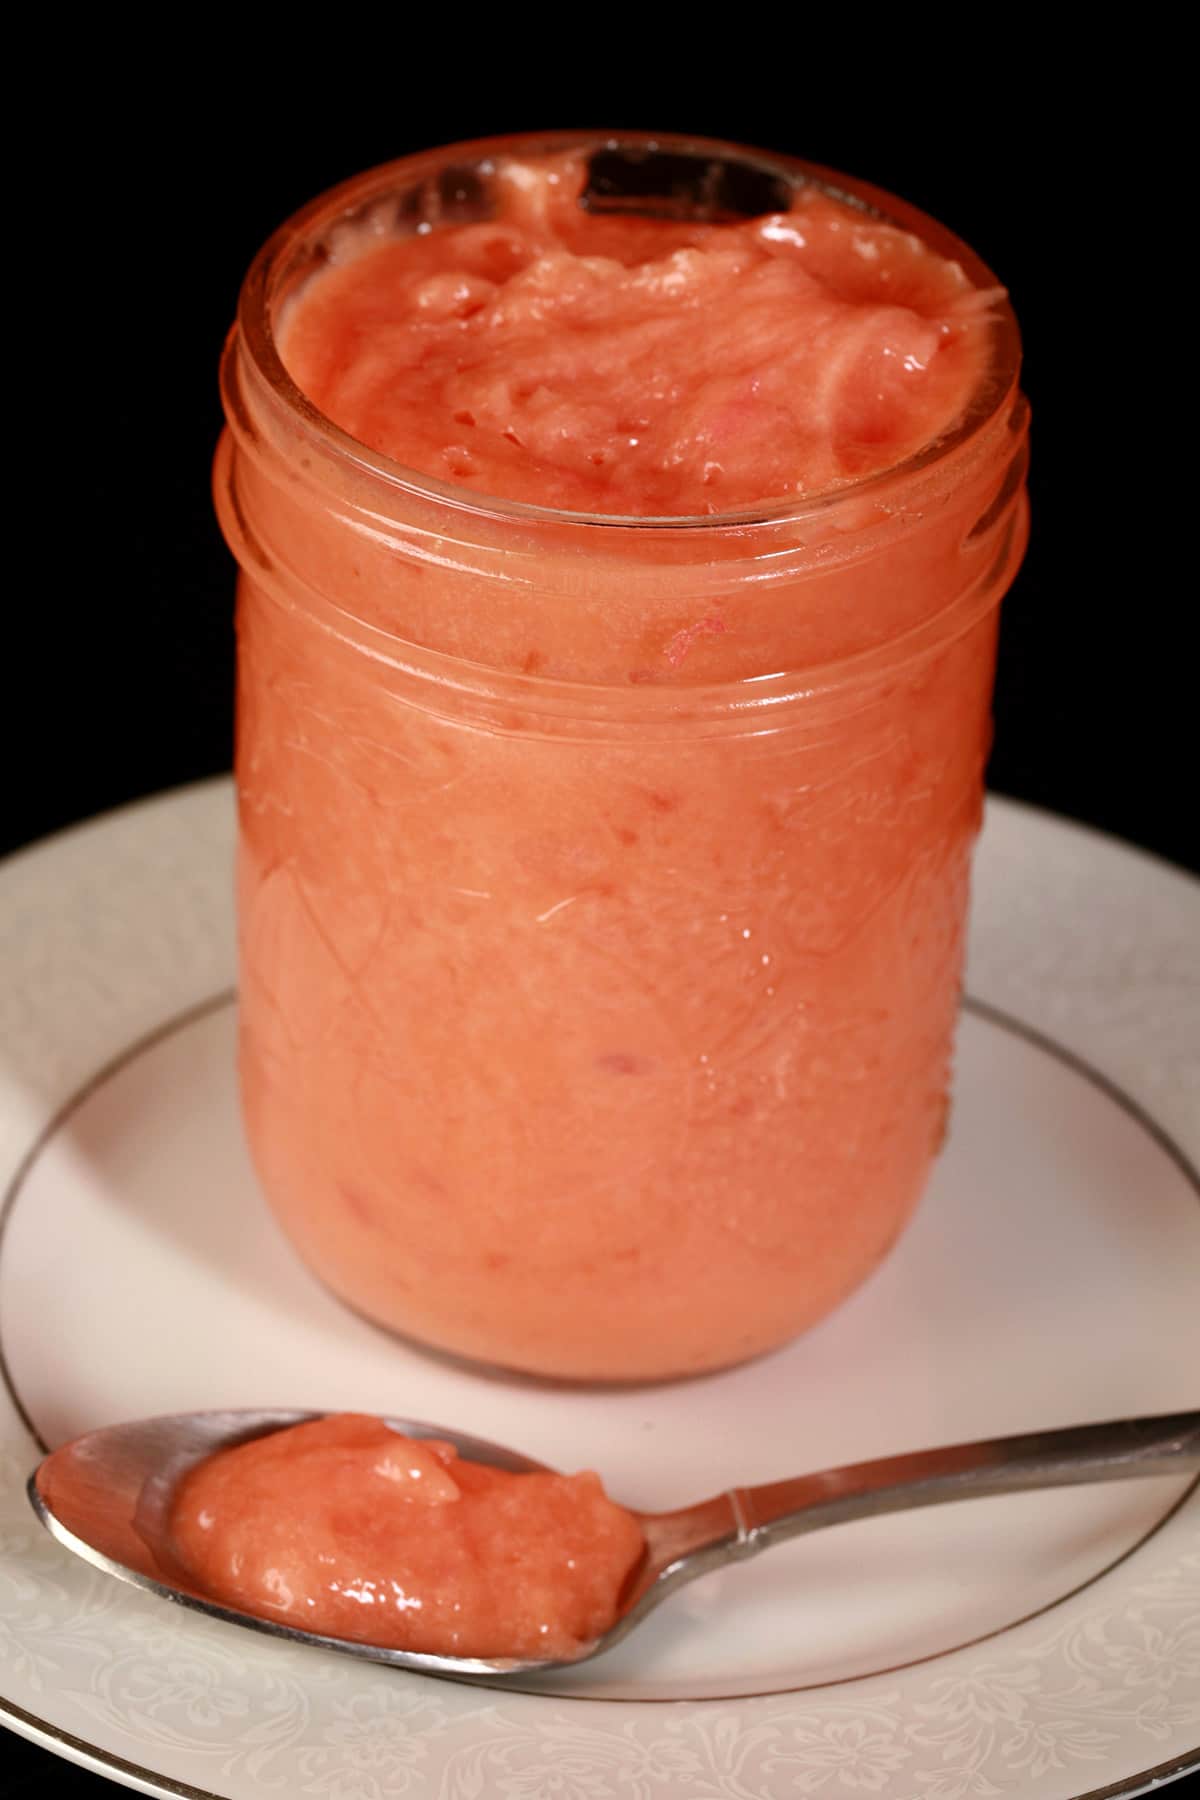
Personally, I find it’s best to use it up within 2 weeks, for the best flavour. Just keep it in an airtight container - I’ll usually use a mason jar.
If the container has a lot of head space after putting the curd in, I like to press a piece of plastic wrap against the surface of the curd. This helps prevent a skin from forming on it.
Can I Freeze Raspberry Curd?
Yes! It’ll keep for about 6 months in the freezer, and you can freeze it right in a canning jar.
Freeze your curd as fresh as possible - ie, don’t wait til it’s about to go bad.
When you want to use it, let it defrost in the fridge for a day or two before use.
Once the raspberry curd is thawed, you’ll want to use it within a week or two.
How to Make Raspberry Curd
The full recipe follows - in the recipe card at the end of this post - but let's start with a pictorial overview:
In a small food processor, blitz together raspberries and water.

In a small pot, whisk together egg yolks, large egg, and sugar until well combined.

Add the raspberry puree and the citric acid to the egg mixture, whisk until well combined.

It should be able to coat the back of a spoon and retain a clear trail when a finger is dragged across the back of the spoon.

Once the raspberry mixture is thick / hot enough, transfer to a small bowl - you’ll want a heatproof bowl for this. Add the pieces of room temperature butter, whisking until well incorporated.

Transfer raspberry curd to your storage container and chill for at least 1 hour before use.

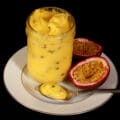
Look how thick it is!

More Fruit Curd Recipes
Looking for more fun fruit curd recipes to dress up your breakfasts, brunches, or desserts? I've got you covered!
Blackcurrant Curd
Blueberry Curd
Cranberry Curd
Grape Curd
Grapefruit Curd
Kiwi Curd
Lemon Curd
Lime Curd
Mango Curd
Orange Curd
Passionfruit Curd
Sugar Free Lemon Curd
Share the Love!
Before you chow down, be sure to take some pics of your handiwork! If you post it to Bluesky, be sure to tag us - @CelebrationGen. We're also on Pinterest, so you can save all your favourite recipes to a board!
Also, be sure to subscribe to my free monthly email newsletter, so you never miss out on any of my nonsense. Well, the published nonsense, anyway!
Finally, if you love this recipe, please consider leaving a star rating and/or a comment below, and maybe even sharing this post on social media!


Easy, No-Fail Raspberry Curd Recipe
Equipment
- Mini Food Processor
- Wire Mesh Strainer
- Silicone Whisk
- Infrared Surface Thermometer
Ingredients
- 1 cup Raspberries Fresh or frozen & thawed
- 2 tablespoon Water
- ¾ cup Granulated Sugar
- 3 Large Egg Yolks
- 1 Large Egg
- 1 teaspoon Citric Acid
- 6 tablespoon Salted Butter Chilled and cut into pieces.
- Red food colouring Optional
Instructions
- In a small food processor, blitz together raspberries and water.
- Press raspberry pulp through a wire strainer, discarding the solids (seeds) left behind. Set pulp aside.
- In a small pot, whisk together egg yolks, large egg, and sugar until well combined. Add the raspberry pulp and the citric acid, whisk until well combined.
- Cook over medium heat, whisking constantly, until mixture thickens. It should be able to coat the back of a spoon and retain a clear trail when a finger is dragged across the back of the spoon. Ideally, you want the mixture to reach 165F - I use a surface thermometer for this.
- Once mixture is thick / hot enough, transfer to a bowl. Add the pieces of butter, whisking until well incorporated.
- Once all of the butter has melted in and been fully incorporated into the curd, tint red with food colouring, if desired (We didn't, hence the pale colour!)
- Transfer raspberry curd to your storage container and chill for at least 1 hour before use.


Erin
I love your posts on making curds with citric acid. It's a great alternative to using lemon juice, which I haven't liked that much due to the lemon flavor. I do have a question...How are you figuring out how much citric acid to use with the different fruits? Are you measuring the ph, or just adding little bits to taste? I'm looking to try out some other fruits and want to make sure that I do it correctly. Thanks 🙂
Marie Porter
It was just ballparking to start, then experimenting to see how much you'd need without going TOO far with it.
Barbara
Raspberry curds... can I use raspberry jelly that have no seeds I it???
Marie Porter
I wouldn't - it's going to have sugars, pectin, etc that could throw things off.
Christy
If using strawberries, should I follow the raspberry recipe?
Marie Porter
I would!
Nikki
If I were to use blackberries, would it be the same as the raspberry recipe? I'm totally gonna make this and will let you know how it turns out.
Marie Porter
You might want to use a little more sugar, but other than that, yeah, it'll work great!
Vanessa Stroh
I have used this recipe before and it turned out really well, I love it! I'm experimenting with strawberry now, but I already have the puree so I'm looking to find out how much puree is used, guessing about 1/2 a cup?
Marie Porter
What's what I'd go with!