Looking for a small cheesecake to serve 2-4 people? This Creamy Vanilla 6 inch Cheesecake is perfect! Super smooth, flavourful, and easy to make!

I’d actually done recipes for each of the items that were served at our wedding a long time ago - maybe a decade? - but just used them for anniversary dinners.
Anyway, more on that on a later day!
Part of coming up with a “for 2” version of that wedding dinner involved making a very small cheesecake.
It’s just the 2 of us, and - as good as my classic cheesecake recipe is - we definitely don’t need 12+ servings of it in a go.
So, I bought a little 6" springform pan, played around a bit, and came up with the *perfect* 6-inch cheesecake recipe.
From there, I worked up the alterations needed to approximate the caramel tuxedo truffle cheesecake that was served at our wedding.

No, because sometimes life gets in the way. I promise it’s coming, though!
See, when I was attempting to make and photograph THAT 6-inch cheesecake recipe last week, I got distracted and missed a very important step.
Didn’t realize it until the cheesecake was in the oven, so the “tuxedo truffle” didn’t happen.
So, here we are with my basic recipe for small batch cheesecakes.
This is the best vanilla cheesecake we’ve ever had, and can be customized a TON of ways - more on that in a minute!
It’s rich - but not overly so - and extremely smooth and creamy. Basically the perfect cheesecake!
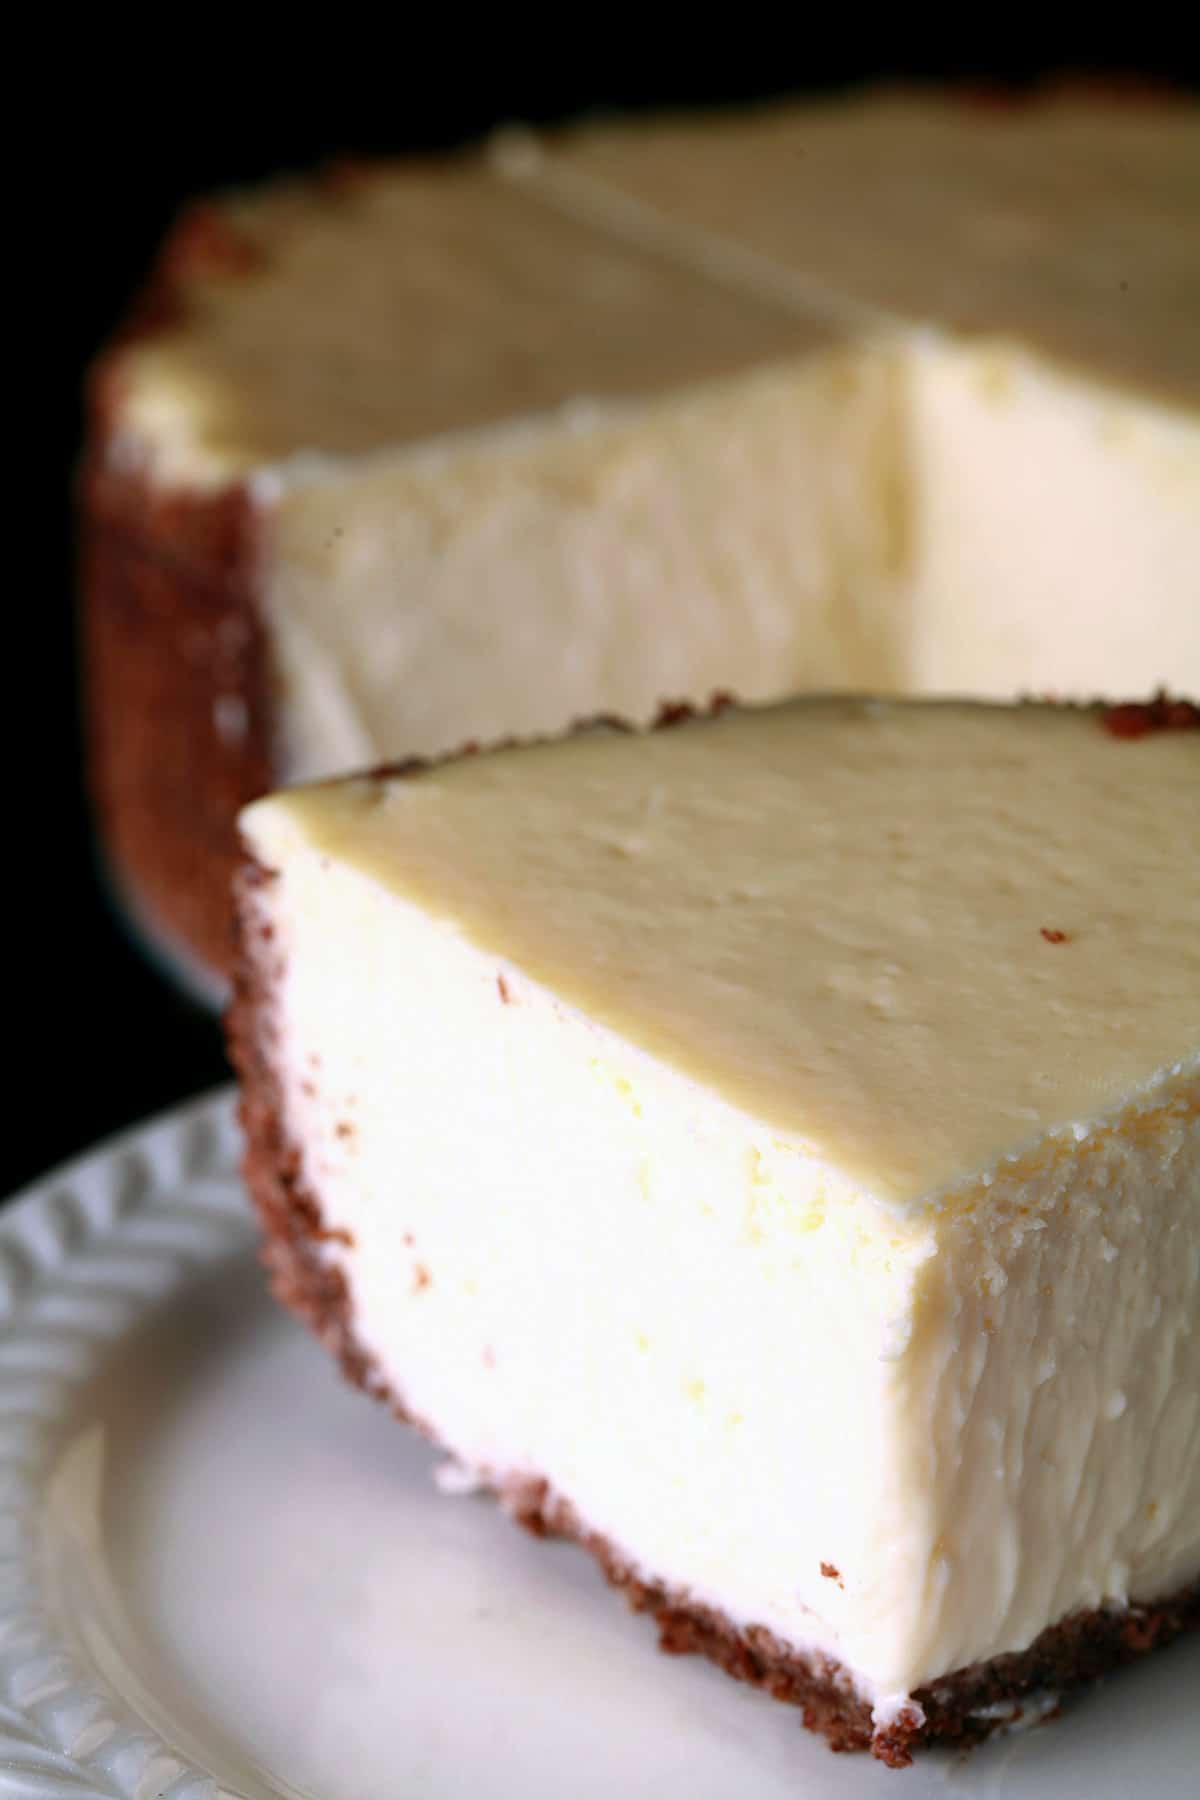
The Glories of 6" Cheesecakes
Why make a 6 inch cheesecake, you may ask?
So many reasons. Here are a few:
6" Cheesecake Servings
If you’re a 2-4 person household, this is the PERFECT size.
It makes 4-6 servings for dessert, 8 if you’re just looking for a small snack or are serving multiple desserts.
We tend to cut it into 4ths right off the bat, have a serving each, then split the remaining 2 slices in half for snack-size servings.
However you do it, it takes up far less space in the fridge, requires a LOT less in the way of ingredients than regular cheesecake.
Also? It won’t come with the “we ate 12 servings of cheesecake in the past few days” guilt!

Just one of the many ways to serve this cheesecake!
6 inch Cheesecakes are EASY!
Cheesecakes can be fussy, in general. If you under beat it, the texture won’t be great.
If you overbeat the batter - or beat it on high speed - that’s when you get air bubbles, cracking, etc.
6" cheesecakes are an easy way to miss out on all of that, because the amount of batter involved is small enough that you can easily mix it by hand.
Seriously, not only is it not worth the effort of using/washing a stand mixer or electric hand mixer, you just get a much better product when mixing by hand.
... and that’s not something I’d ever do for a normal-sized cheesecake. If I want that rough of a workout, I’ve got a home gym upstairs!
Note: If you do want to use a mixer, I recommend using a stand mixer, paddle attachment, and low speed. You want to avoid introducing too much air into the batter.
Foolproof 6" Cheesecake
Related to “Easy recipe” - due to the scale, it’s much easier to get a 6" cheesecake to turn out perfect, than a bigger one.
Not only is there the issue of mixing, but there’s also the cooking.
Larger cheesecakes take longer to cook all the way through, and that longer baking time can mean overcooking to the outside of the cheesecake, etc.
6" cooks up relatively quickly, so it’s a lot easier to get even cooking.
As long as you seal up the pan properly and follow the directions, you’ll end up with a perfectly cooked cheesecake from this. It really is the best cheesecake recipe!
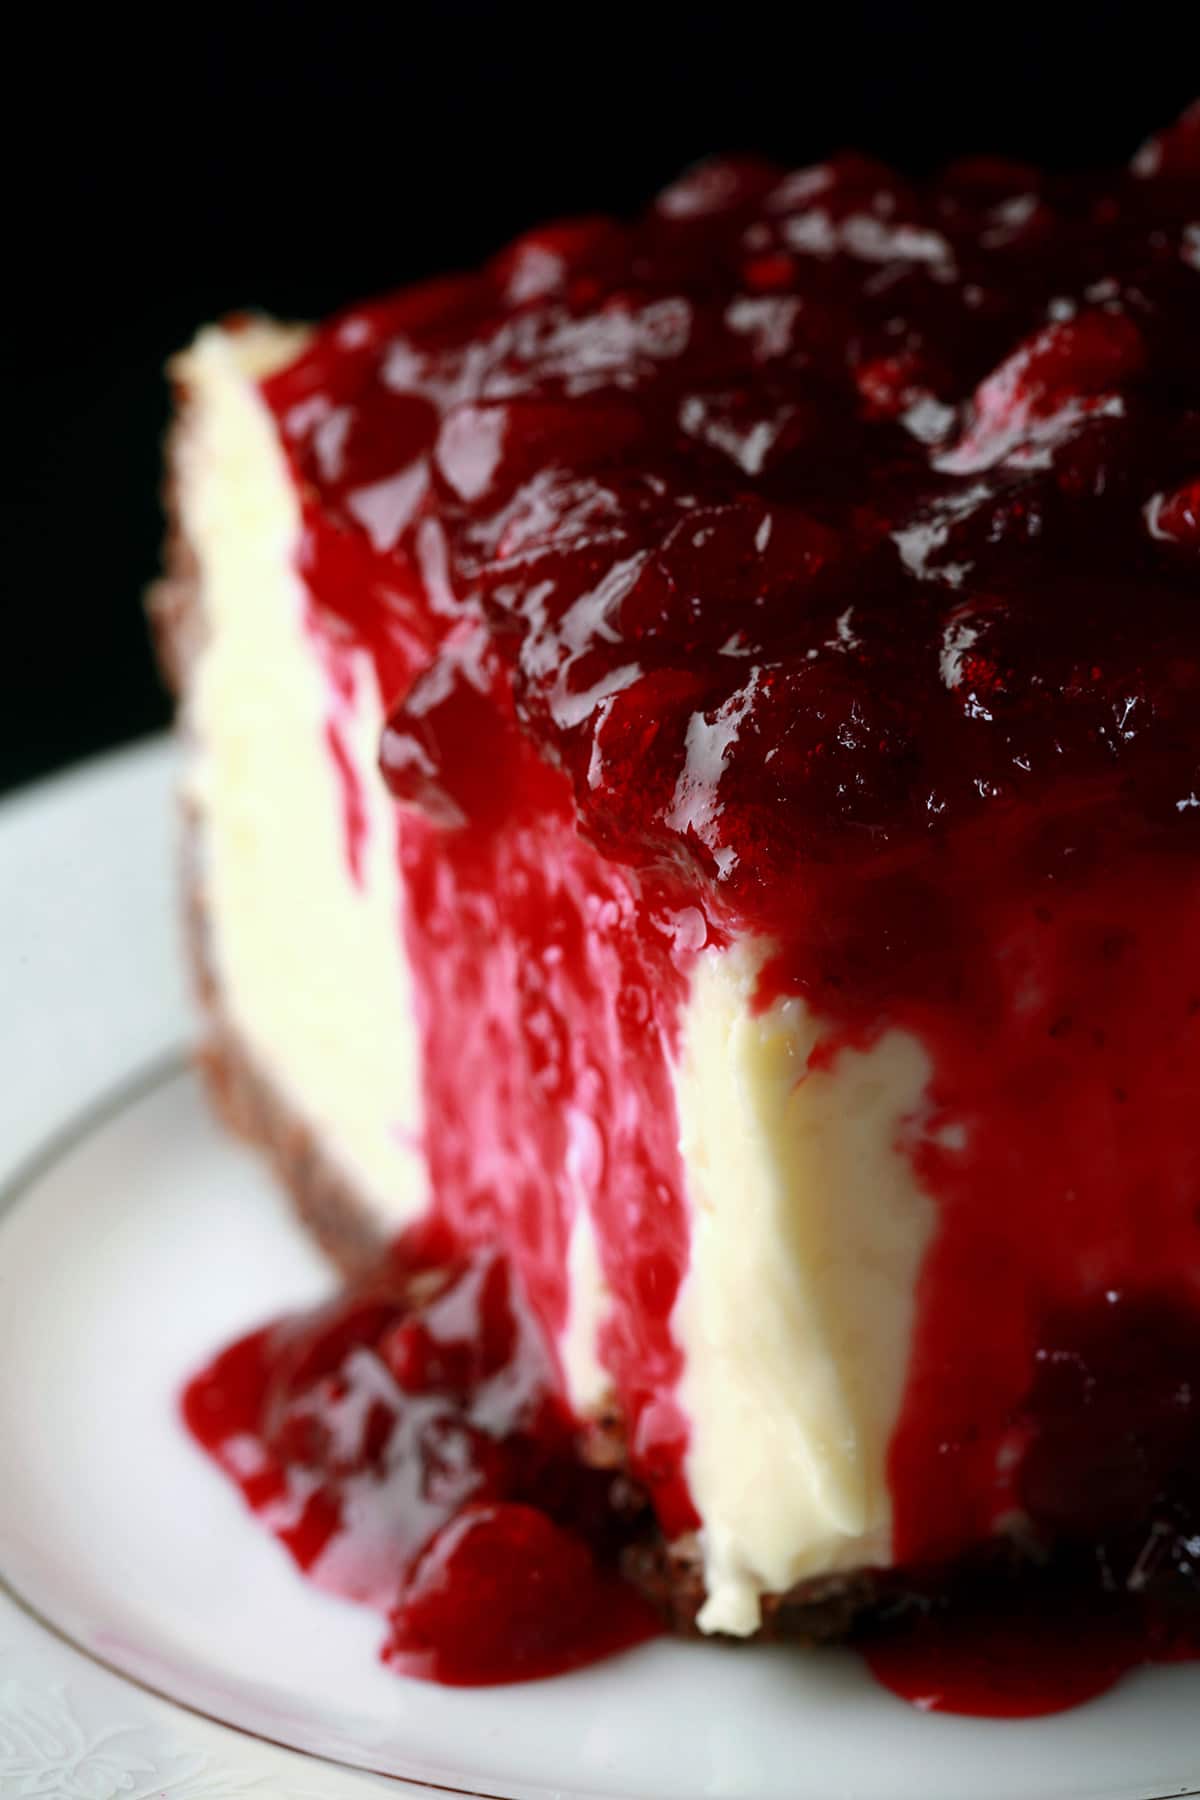
Forgetting to make the "tuxedo truffle aspect was a great excuse to make partridgeberry cheesecake - my favourite!
Using a 6" Cheesecake Pan
Much like with larger cheesecakes, one key point of failure is moisture getting into the pan, rendering your graham cracker crust soggy.
When making your cheesecake, you’ll want to tightly and securely wrap the pan in foil, before proceeding.
Using extra-wide aluminum foil is ideal, to avoid any seams. If you give the water any opportunity to get in, it WILL.
Otherwise, just cross a couple of pieces of foil, bunch it up tightly around the sides of the 6 -inch springform pan (you want to keep the bottom level!), and just do your best to keep the water out.
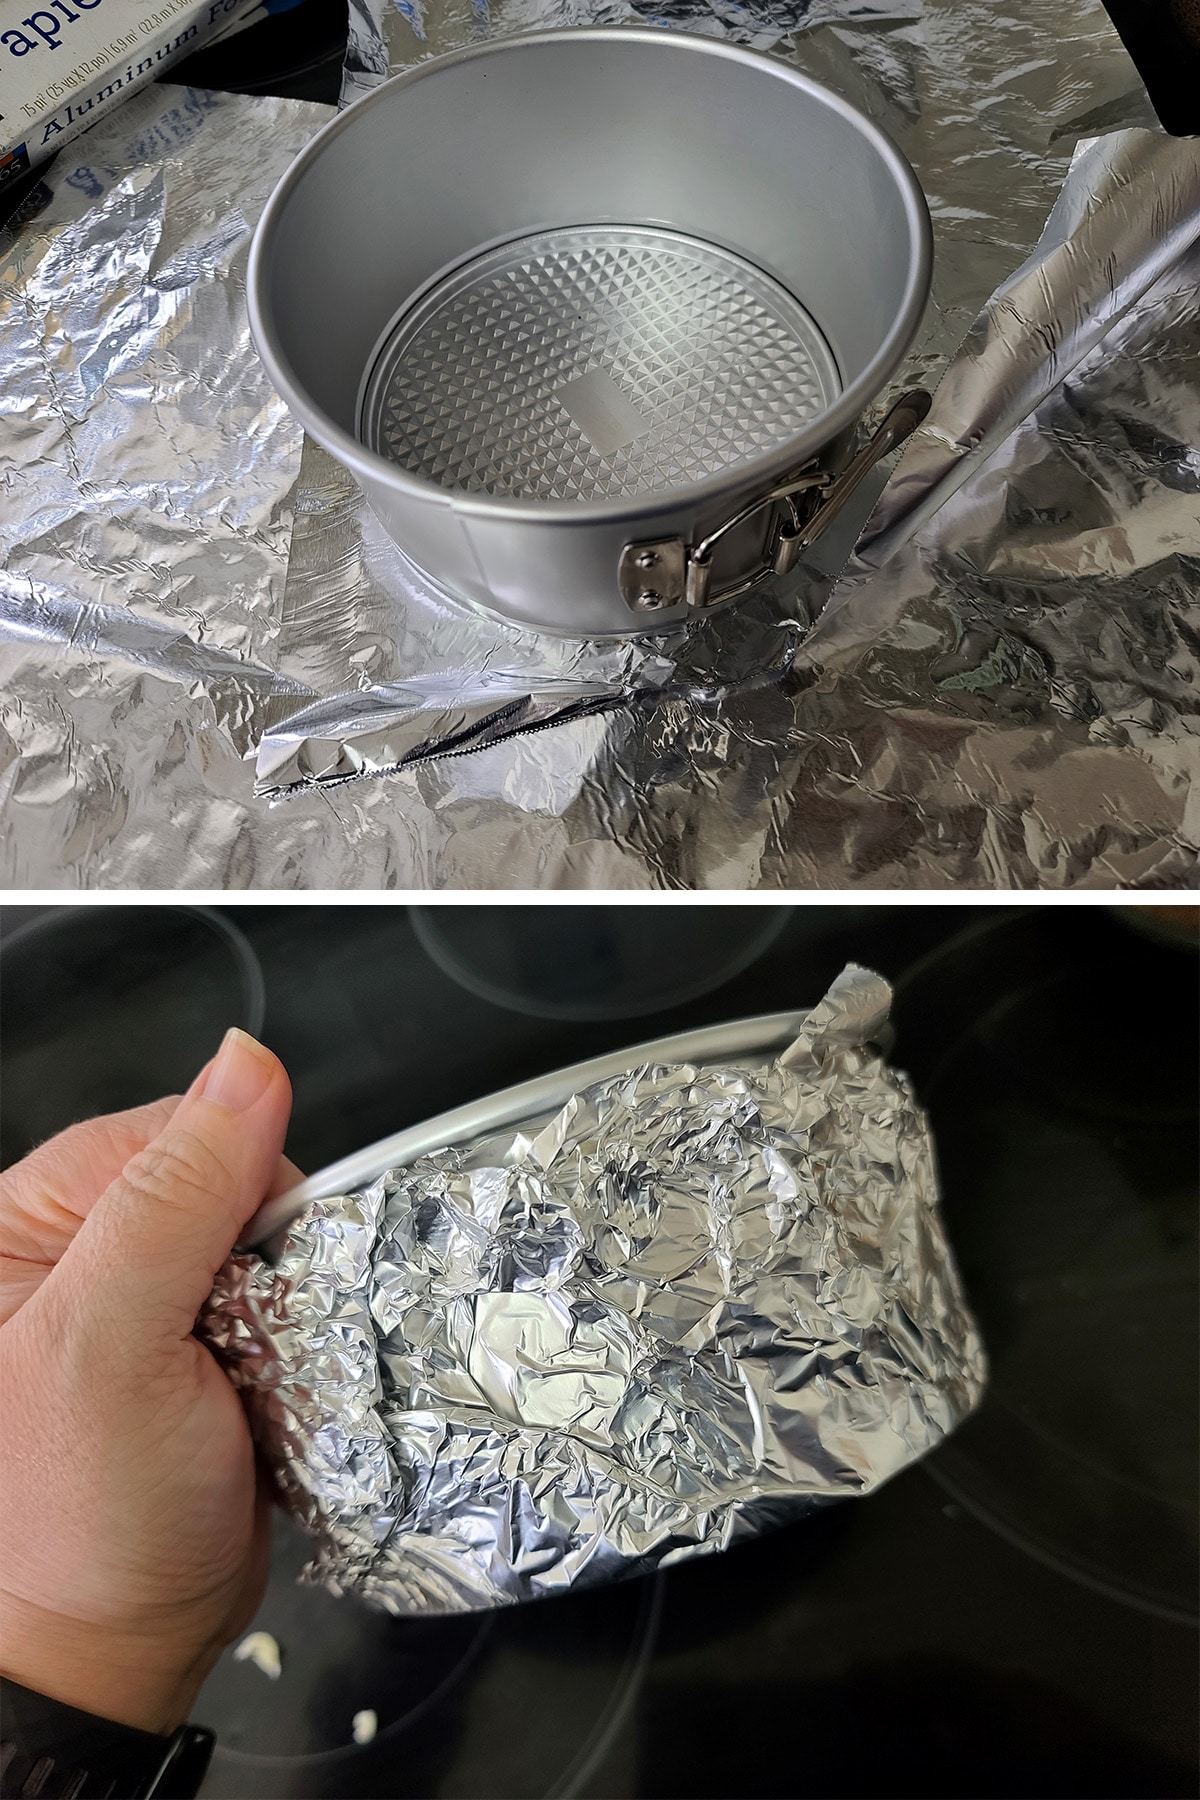
Well, the key to a perfectly baked cheesecake - 6" or otherwise - is a water bath.
You make up your cheesecake, put it in another pan - I like to use a roasting pan or a larger cake pan - and partially fill that pan with hot water.
It disperses the heat from the oven, and allows for slower, more even cooking.

Don't mind me, just sharing some more cheesecake |>0r|\| - Bananas Foster Cheesecake!
About that 6" Cheesecake Pan...
The reason that you need to protect the cake from water seeping in, is because cheesecakes require a special kind of pan - a springform pan.
This is a 2 piece pan: A removable bottom - that ends up doubling as a serving plate - and a wraparound side with a groove along the bottom edge.
The base part fits in the groove, then an external clip on the ring portion pulls it closed and holds it tight.
This recipe works well in either - it will basically fill a 2", and leave some headspace in a 3".
I don’t like buying more kitchen stuff than I need, though, so I use a 3" tall, 6" Springform Pan. I can get the functionality of both, in just one 6 inch pan!
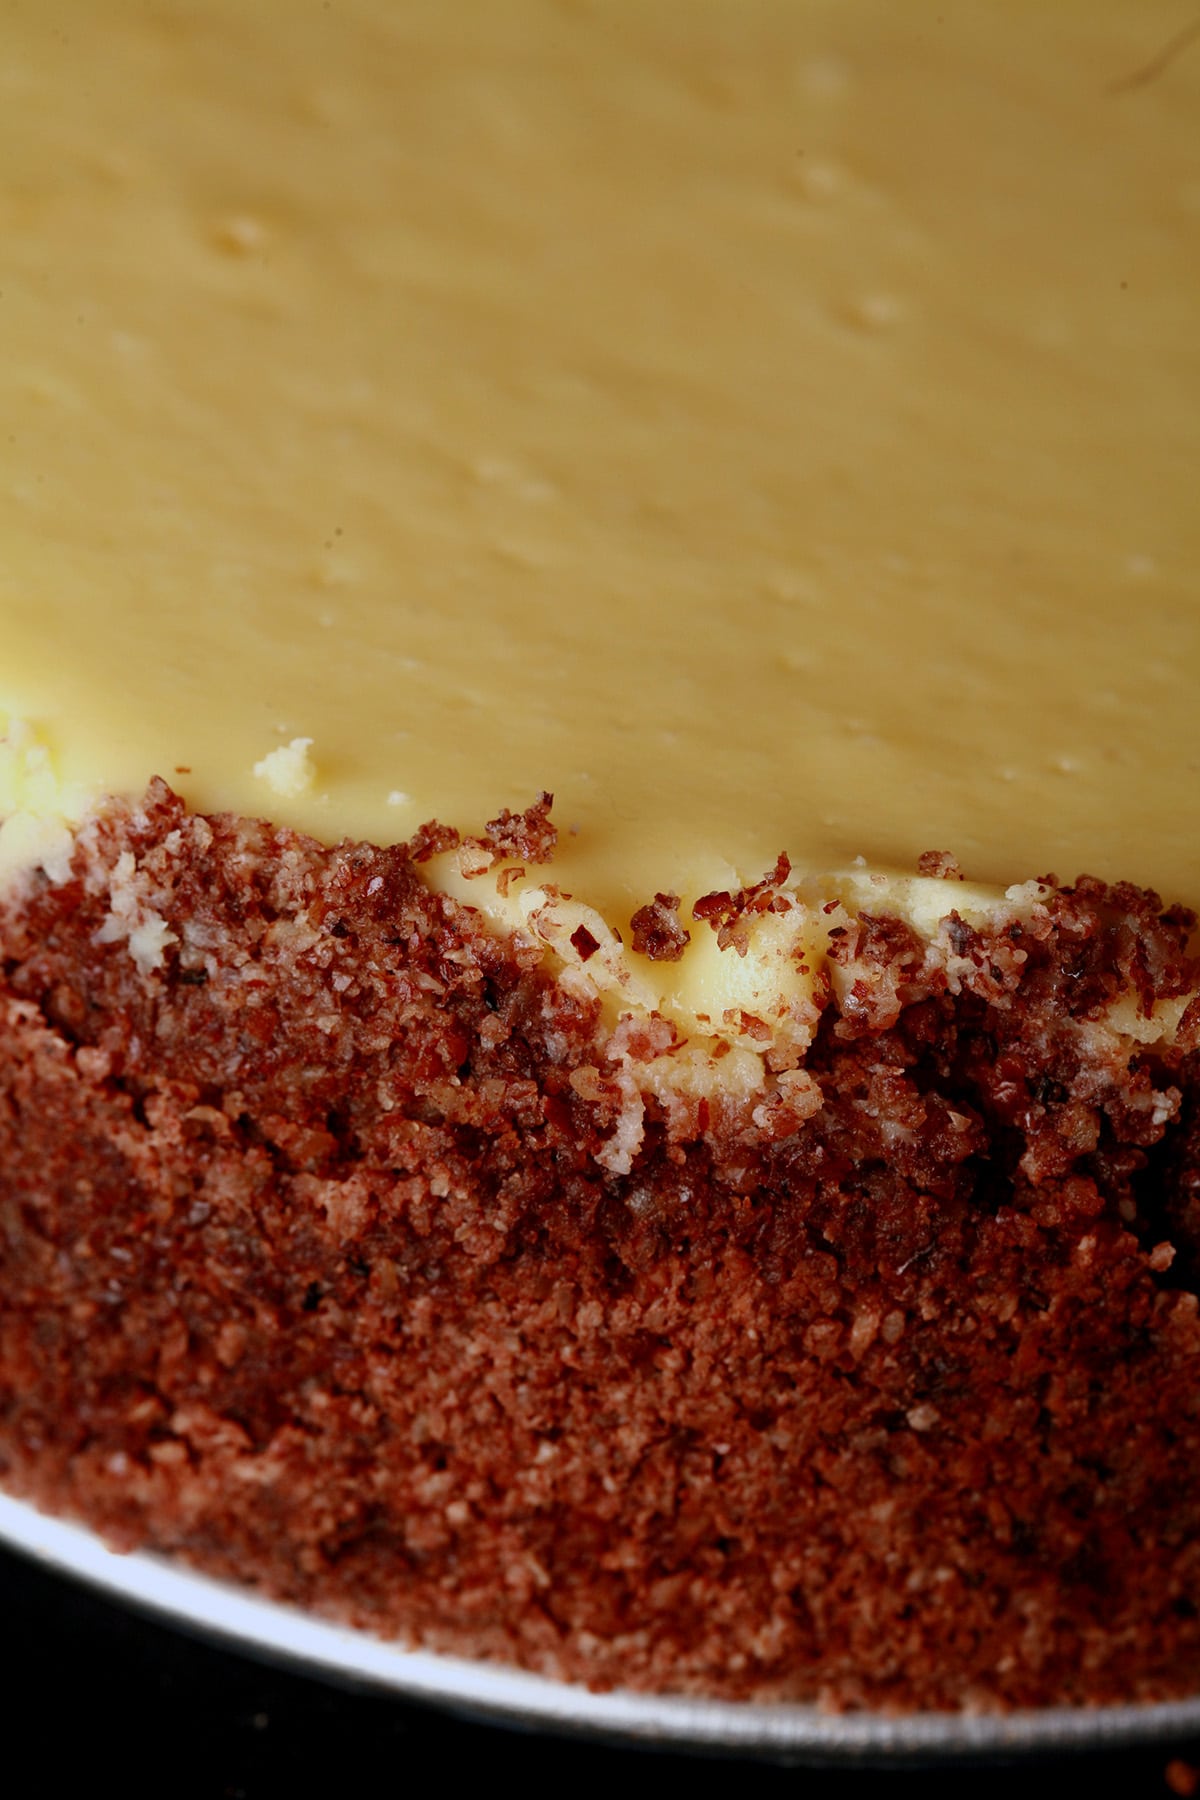
Pecan crust is fantastic, but definitely not the only way to make this!
6" Cheesecake Crust Variations
As is, this recipe is for a pecan-based crust that goes all the way up the sides of the cheesecake.
However, this is customizable, per your tastes. A few ideas:
- Use graham cracker crumbs for a basic, traditional cheesecake crust. (Increase melted butter to 3 Tbsp).
No crumbs? Use a mini food processor or rolling pin to break up graham crackers into a fine crumb.
- Oreo crumbs, Nilla wafers, gingersnap, or any other type of dry cookie can be used to customize crust flavor.
If you don't have it pre-crumbled, just break the cookies up and rum them through your food processor until they're fine crumbs. (Increase melted butter to 3 Tbsp)
- Substitute different nuts for the pecan meal / pecan flour (same thing!). Almond meal is a popular option, but cashew meal, walnut meal, hazelnut meal, and - my fav! - pistachio meal are all fantastic options!
- Go for a bottom-only crust. Just cut the crust recipe in half, and press evenly into the bottom of the pan only.

Mini Cheesecake FAQ
Can I Leave Cheesecake Out on the Counter?
The only time you should be leaving cheesecake out is when it cools down, for an hour or two.
Beyond that, it’s a dairy product and should be kept chilling in the fridge, in an airtight container.
How Long IS Cheesecake Good For?
Theoretically, you’ll want to eat it all within 5 days... I’ve never had one last more than 3 days, though! 🙂
How Should I Store Cheesecake
Until serving, I cover it tightly in plastic wrap, right in the pan. (I do loosen the side wall first, to ensure it’s not stuck to the cheesecake, though!)
Once it’s been cut into, I wrap any remaining cheesecake tightly in plastic, to prevent it from drying out.
I prefer to store it un-topped, but that’s a matter of personal preference.
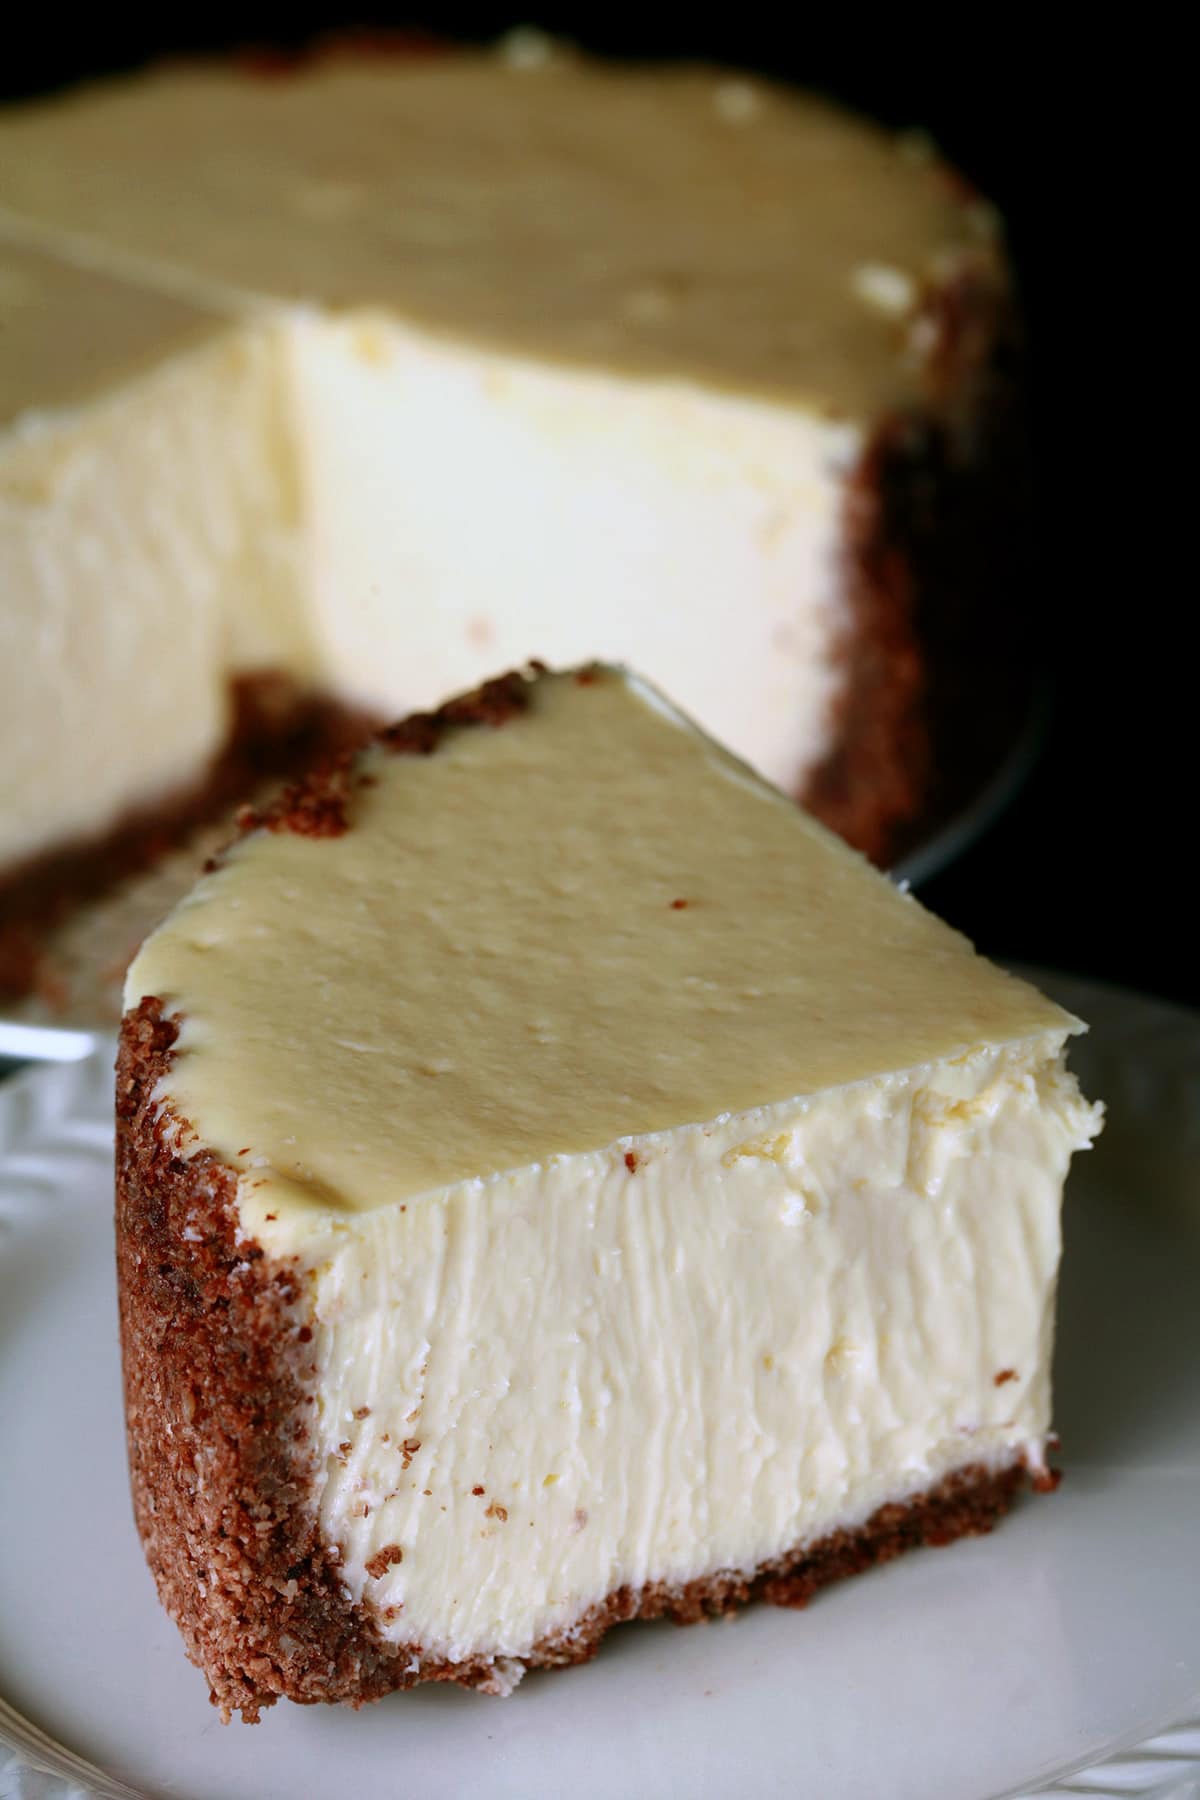
What Should I Top the Cheesecake With?
SO MANY OPTIONS. Let me address a few:
6" Cheesecake Toppings & Variations
There are so many ways you can top your cheesecake, here are a few of my favourites:
Berry Sauce for Mini Cheesecakes
This cheesecake sauce recipe uses simple ingredients, and works with any berry - blueberry, blackberry, raspberry, strawberry, cranberry, blackcurrant, partridgeberries/lingonberries, etc.
If using strawberries, hull and chop them.
1 cup Fresh or frozen berries
⅓ cup Granulated sugar
¼ cup Water
Zest of 1 orange or lemon (optional)
Pinch salt
Combine all ingredients in a small saucepan.
Bring to a boil, stirring frequently. Turn the temperature down and simmer until the berries have broken down into a thick sauce, about 10 minutes.
Remove from heat, and cool to room temperature before using.

Making my berry sauce with partridgeberries.
* For a more "adult" variation, substitute a non-creme liqueur for the water!

Bananas Foster 6" Cheesecake
This topping is great on the recipe as-is (with pecan crust!), but feel free to swap the vanilla out for rum or banana extract when making the cheesecake filling.
1 tablespoon Butter
½ cup Brown Sugar
1 tablespoon Amber Rum
½ teaspoon Cinnamon
1 Large or two small bananas, sliced
Pecan halves or pieces
In a medium saucepan, melt butter over medium heat.
Add brown sugar, cinnamon, and rum, stirring until well combined.
Add banana slices, turn the temp down, and cook on medium-low heat for about 5 minutes, or until desired texture.

Remove from heat, allow to cool slightly before serving over the cheesecake. Top with pecans.

Just LOOK at that. So good!
6" Cookies N Cream Cheesecake
This is a great one for your favourite chocolate lover.
Swap out the nuts in the crust for chocolate cookie crumbs.
If you’d like, add some chopped Oreos to the batter. (I personally prefer to keep the batter smooth!).
Top the finished cheesecake slices with chopped cookies and chocolate sauce or chocolate ganache.
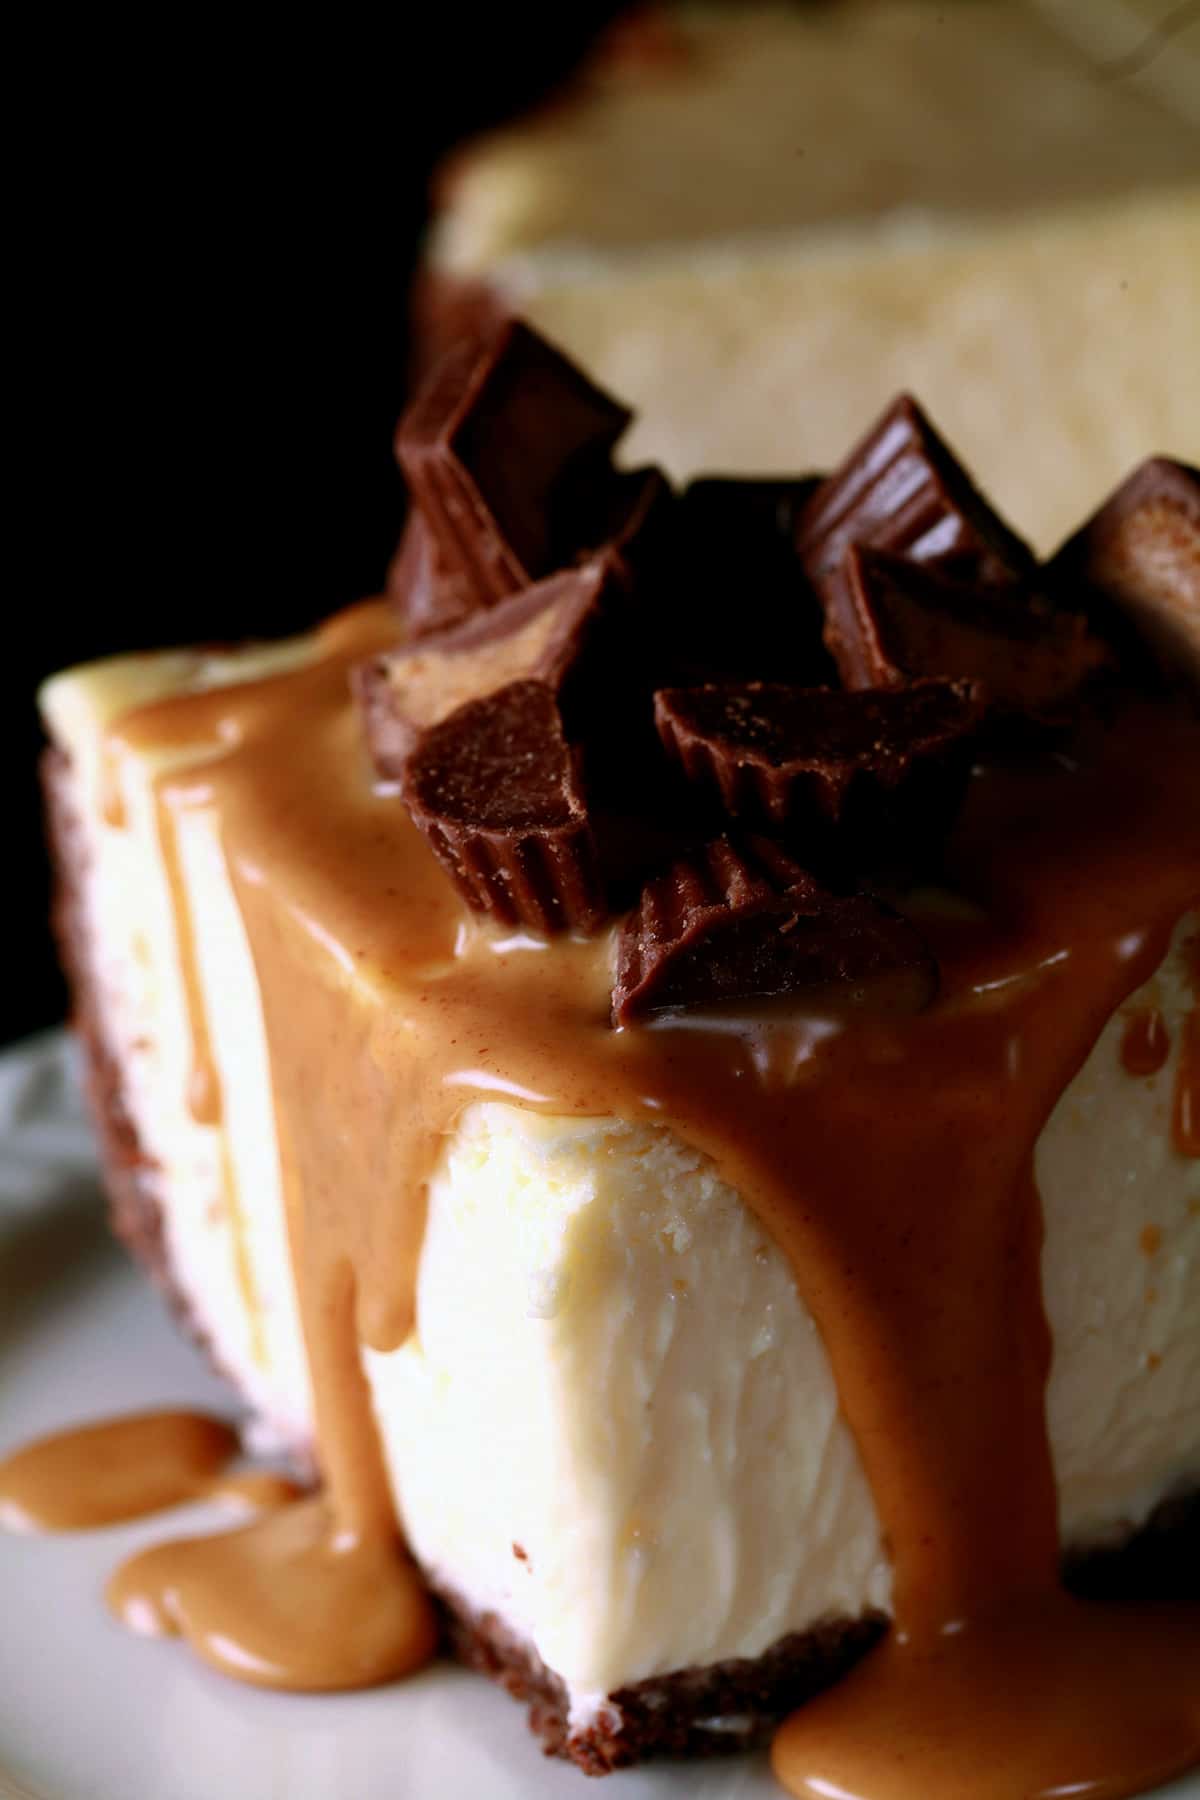
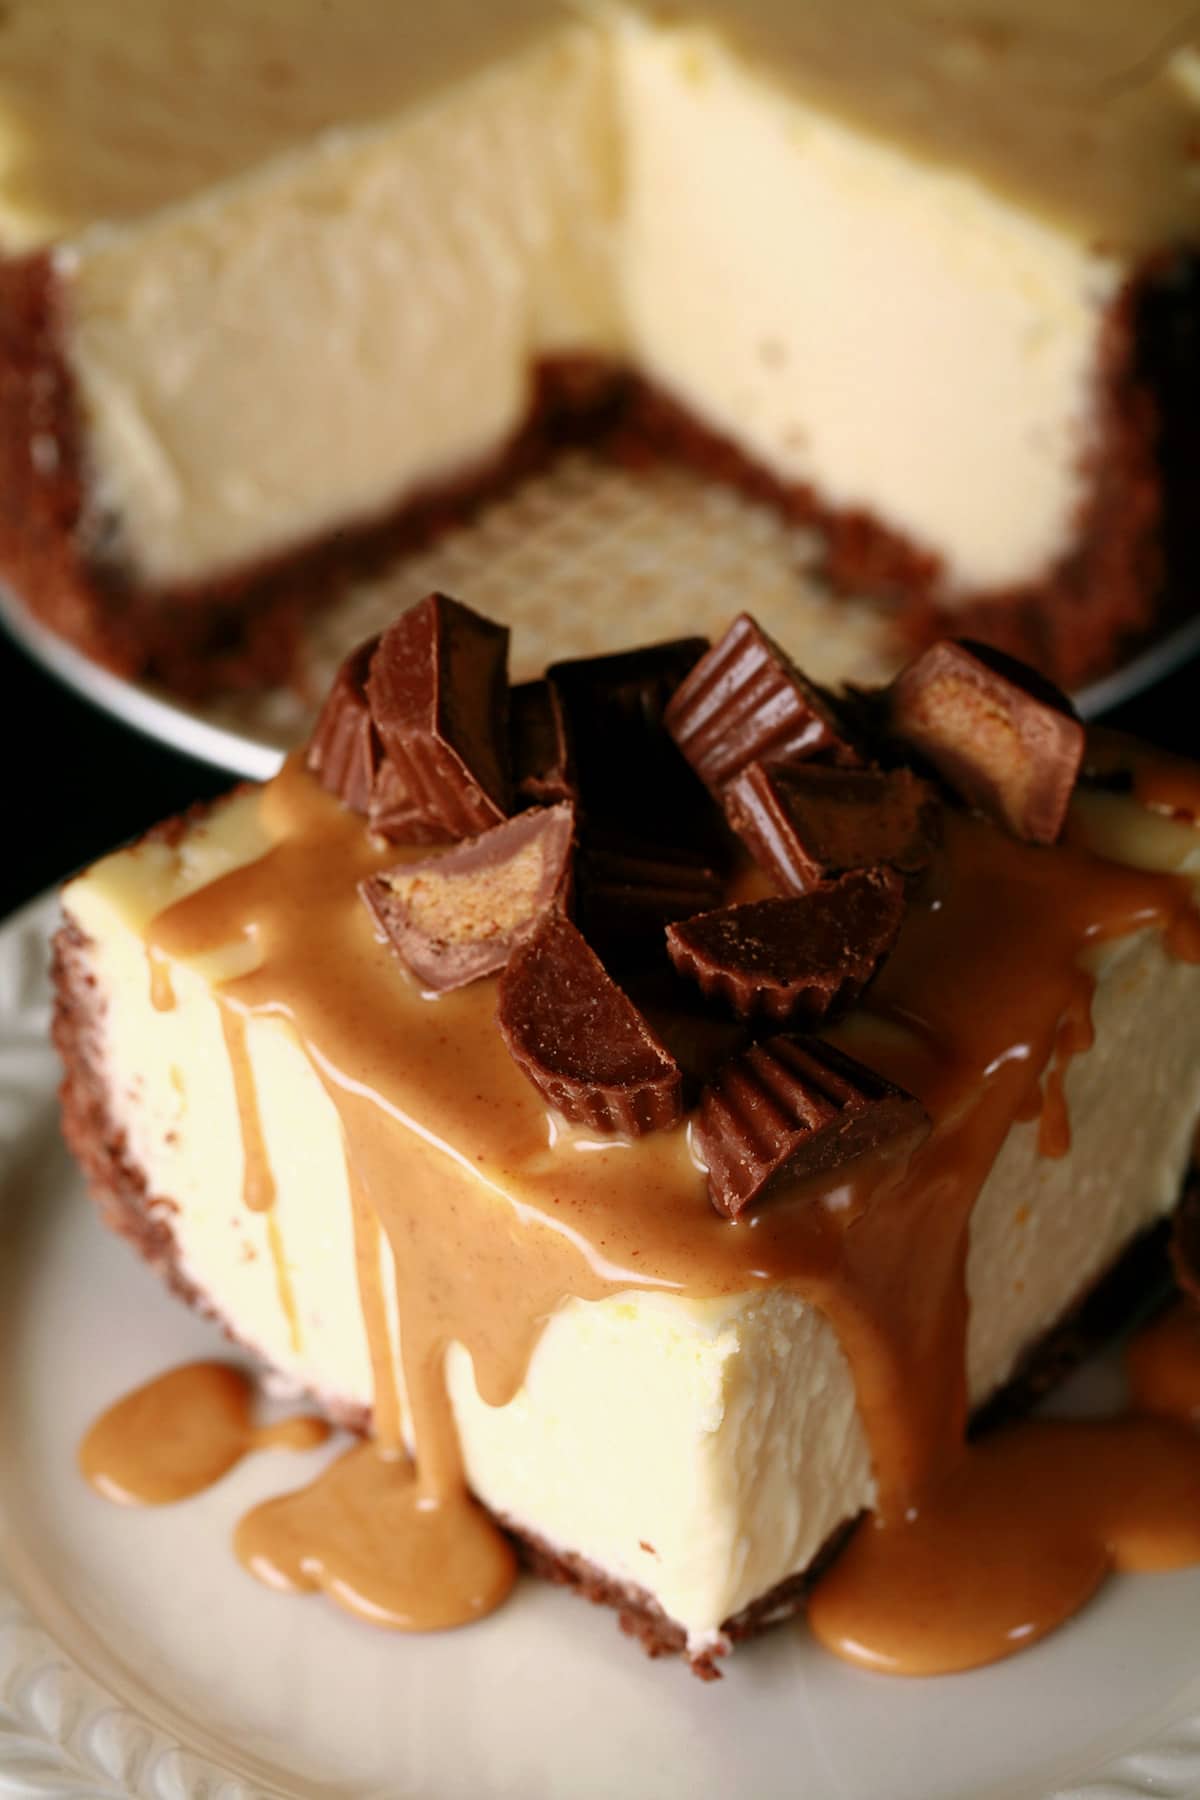
6" Peanut Butter Cup Cheesecake
Melt some smooth peanut butter.
Drizzle it over slices of cheesecake, top with chopped up peanut butter cups.
6" Banana Nutella Cheesecake
Melt some Nutella.
Top cheesecake slices with sliced fresh banana, drizzle with melted Nutella.
6" Turtle Cheesecake
Drizzle cheesecake with caramel sauce and chocolate sauce, top with toasted pecans.

Turtle Cheesecake
6" Candy Bar Cheesecake
Swap out the nuts in the crust for chocolate cookie crumbs.
Top cheesecake slices with chopped candy bars, drizzle with chocolate sauce, caramel sauce, and/or melted peanut butter.
Citrus Cheesecake
Add the zest of 1 orange, 1 lemon, or 2 limes (or a combination!) to the cheesecake batter.
You can swap the lemon juice for orange, lime, or calamansi juice, if desired.
Optionally: top with citrus curd of your choice.
Other Cheesecake Toppings
You can never go wrong with fresh fruit - I’ll usually arrange berries, kiwi slices, etc on top of the cheesecake, then brush with a little melted apricot preserves or apple jelly.
See my Sweet Corn Ice Cream post for some topping recipes that would also go well on cheesecake:
Glazed nuts
Candied Bacon
Salted Caramel Sauce

Just a few more ways you can top your cheesecake
How to Make a 6" Cheesecake
The full recipe follows in the recipe card at the end of the post, but here is a pictorial overview.
Preheat oven to 350F, carefully wrap the outside of a 6" Springform pan with aluminum foil, making sure it’s completely sealed off.
In a small bowl, mix crust ingredients: Pecan flour, butter, and sugar.
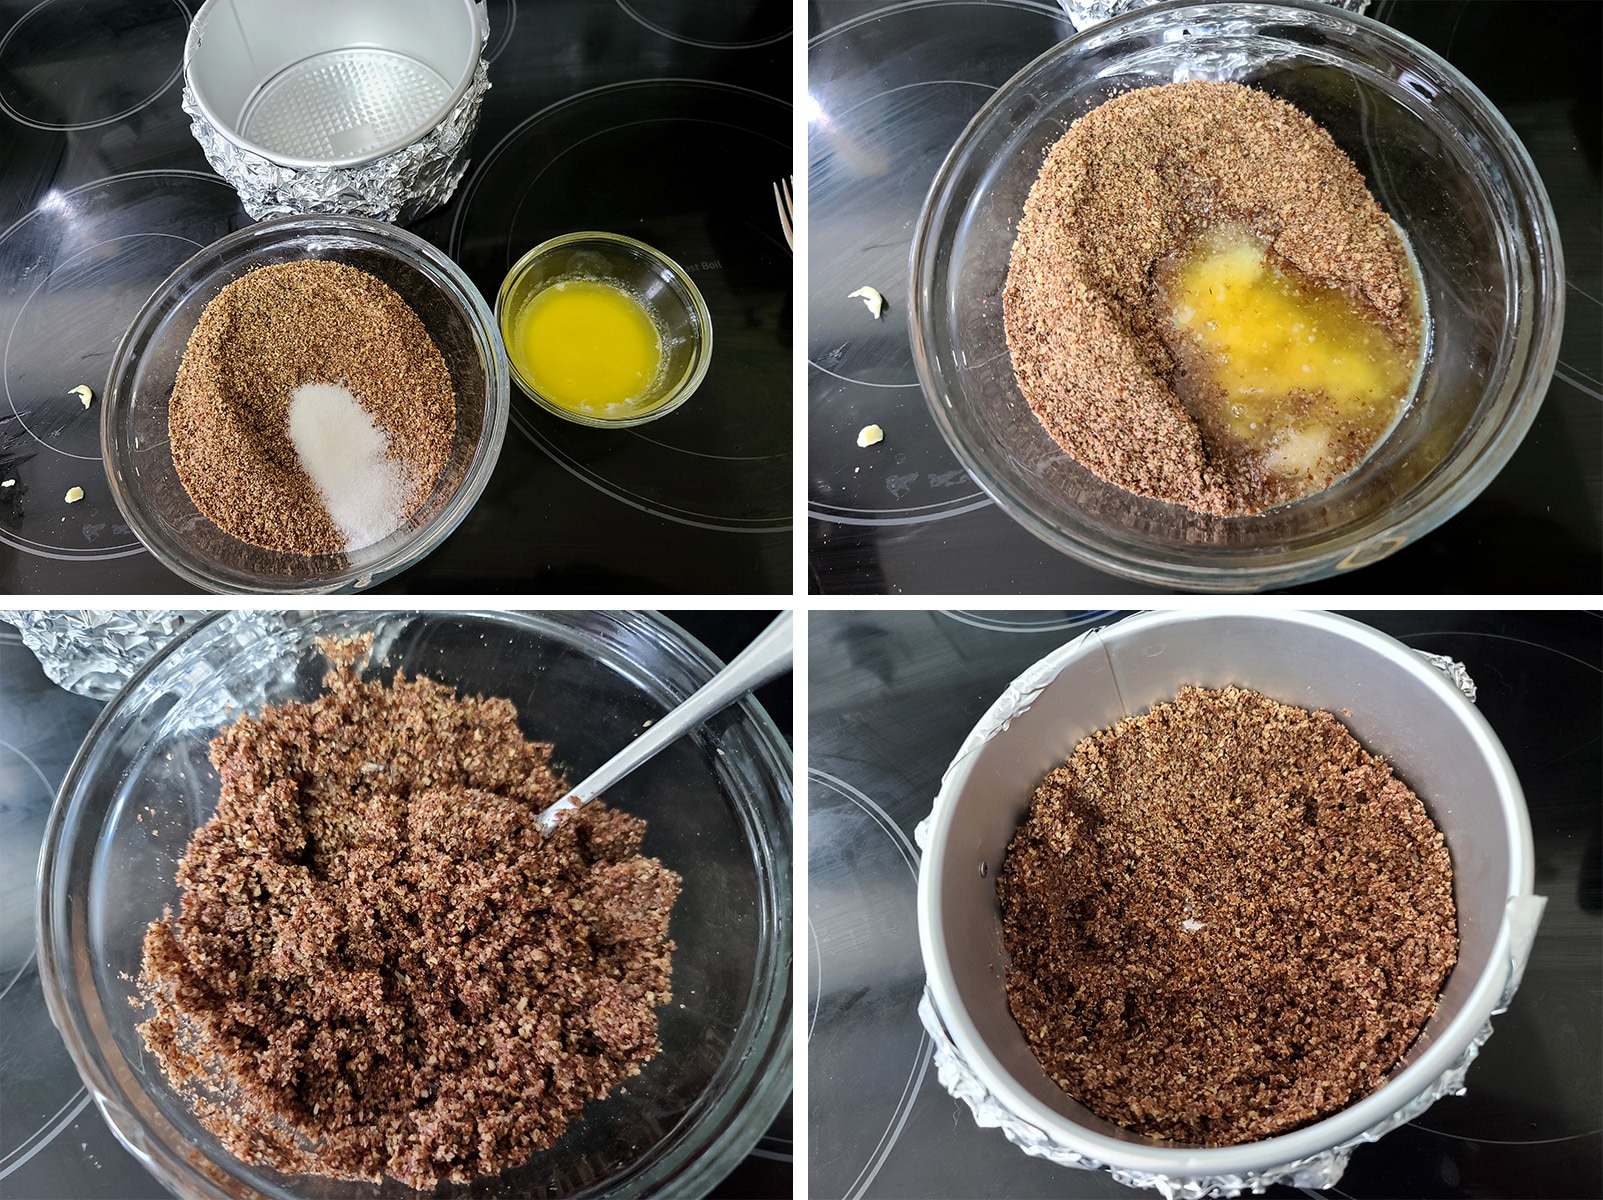
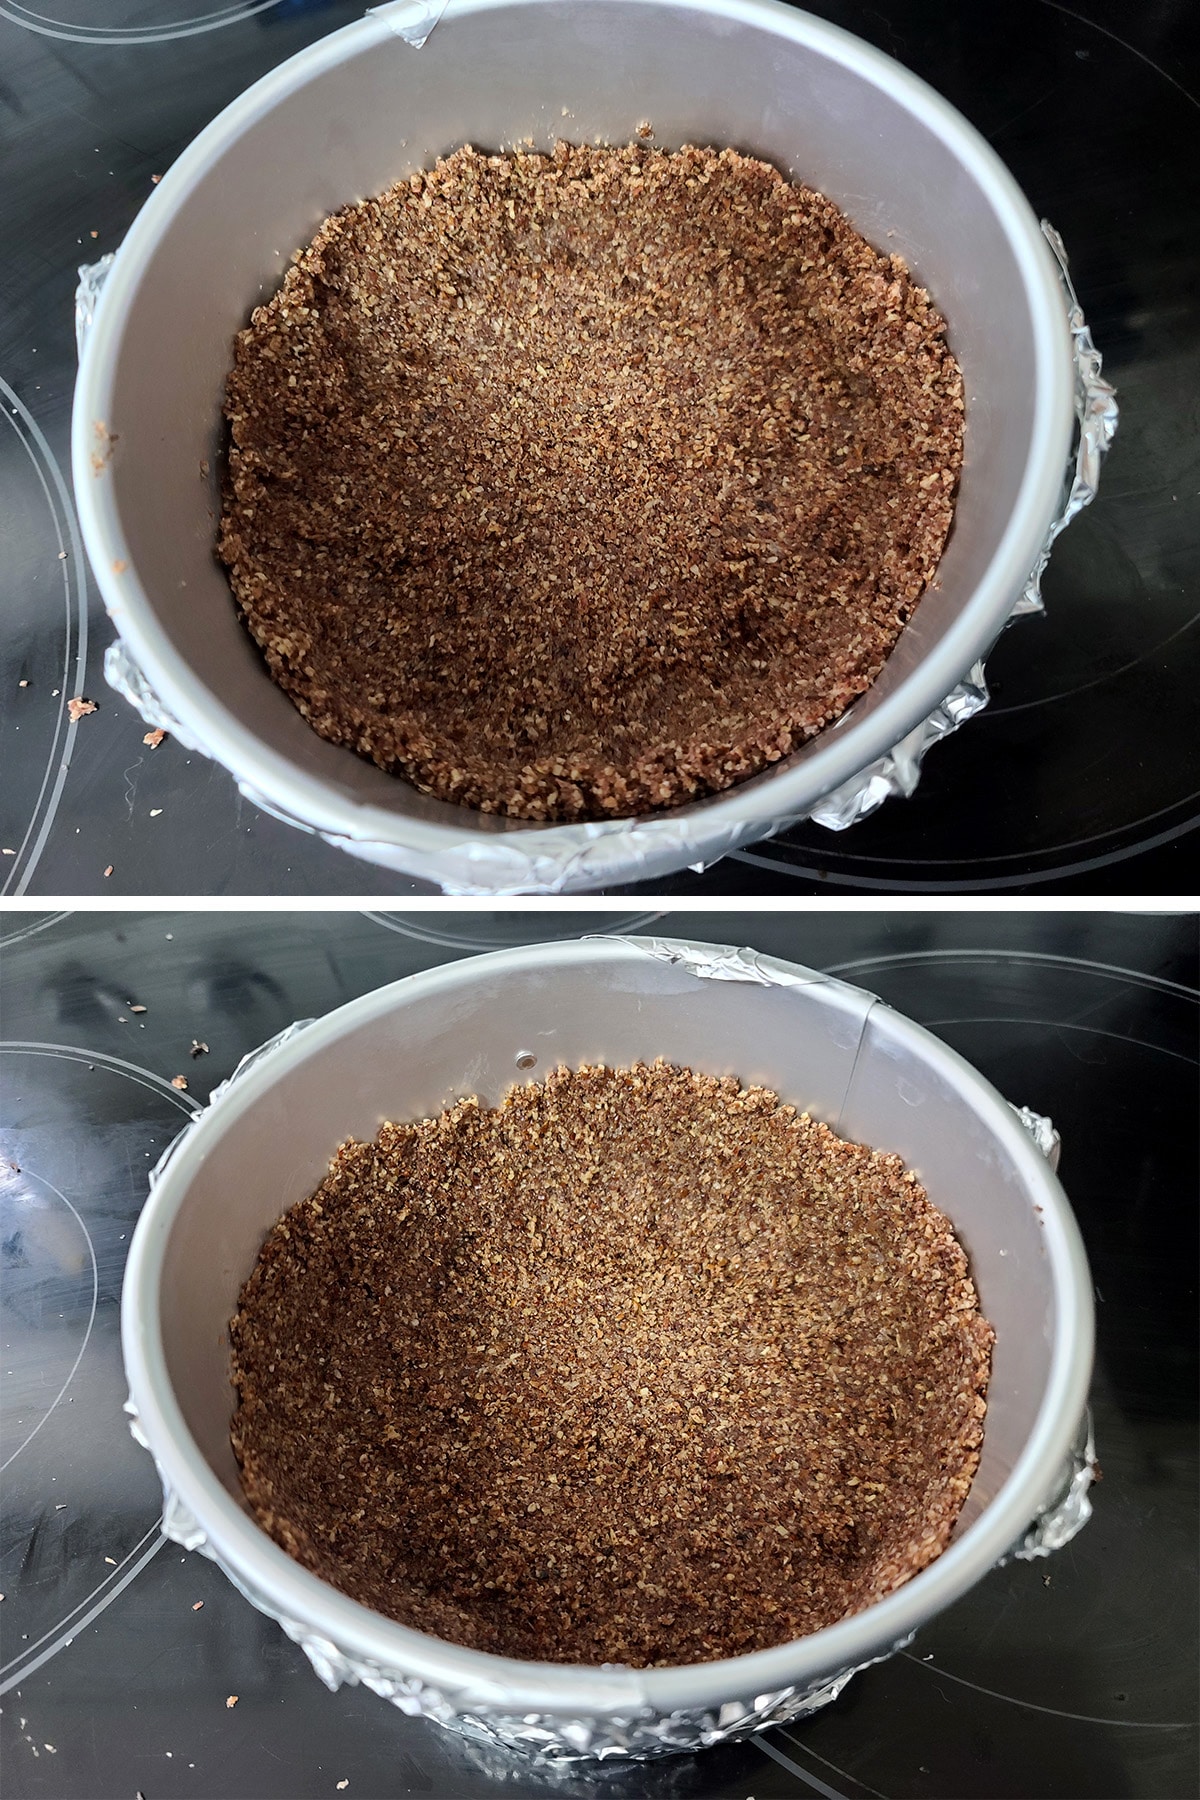
Press into the bottom and up the sides of the springform pan. If you’re using a 3" tall pan, aim to get the top of the crust ⅔ of the way up.
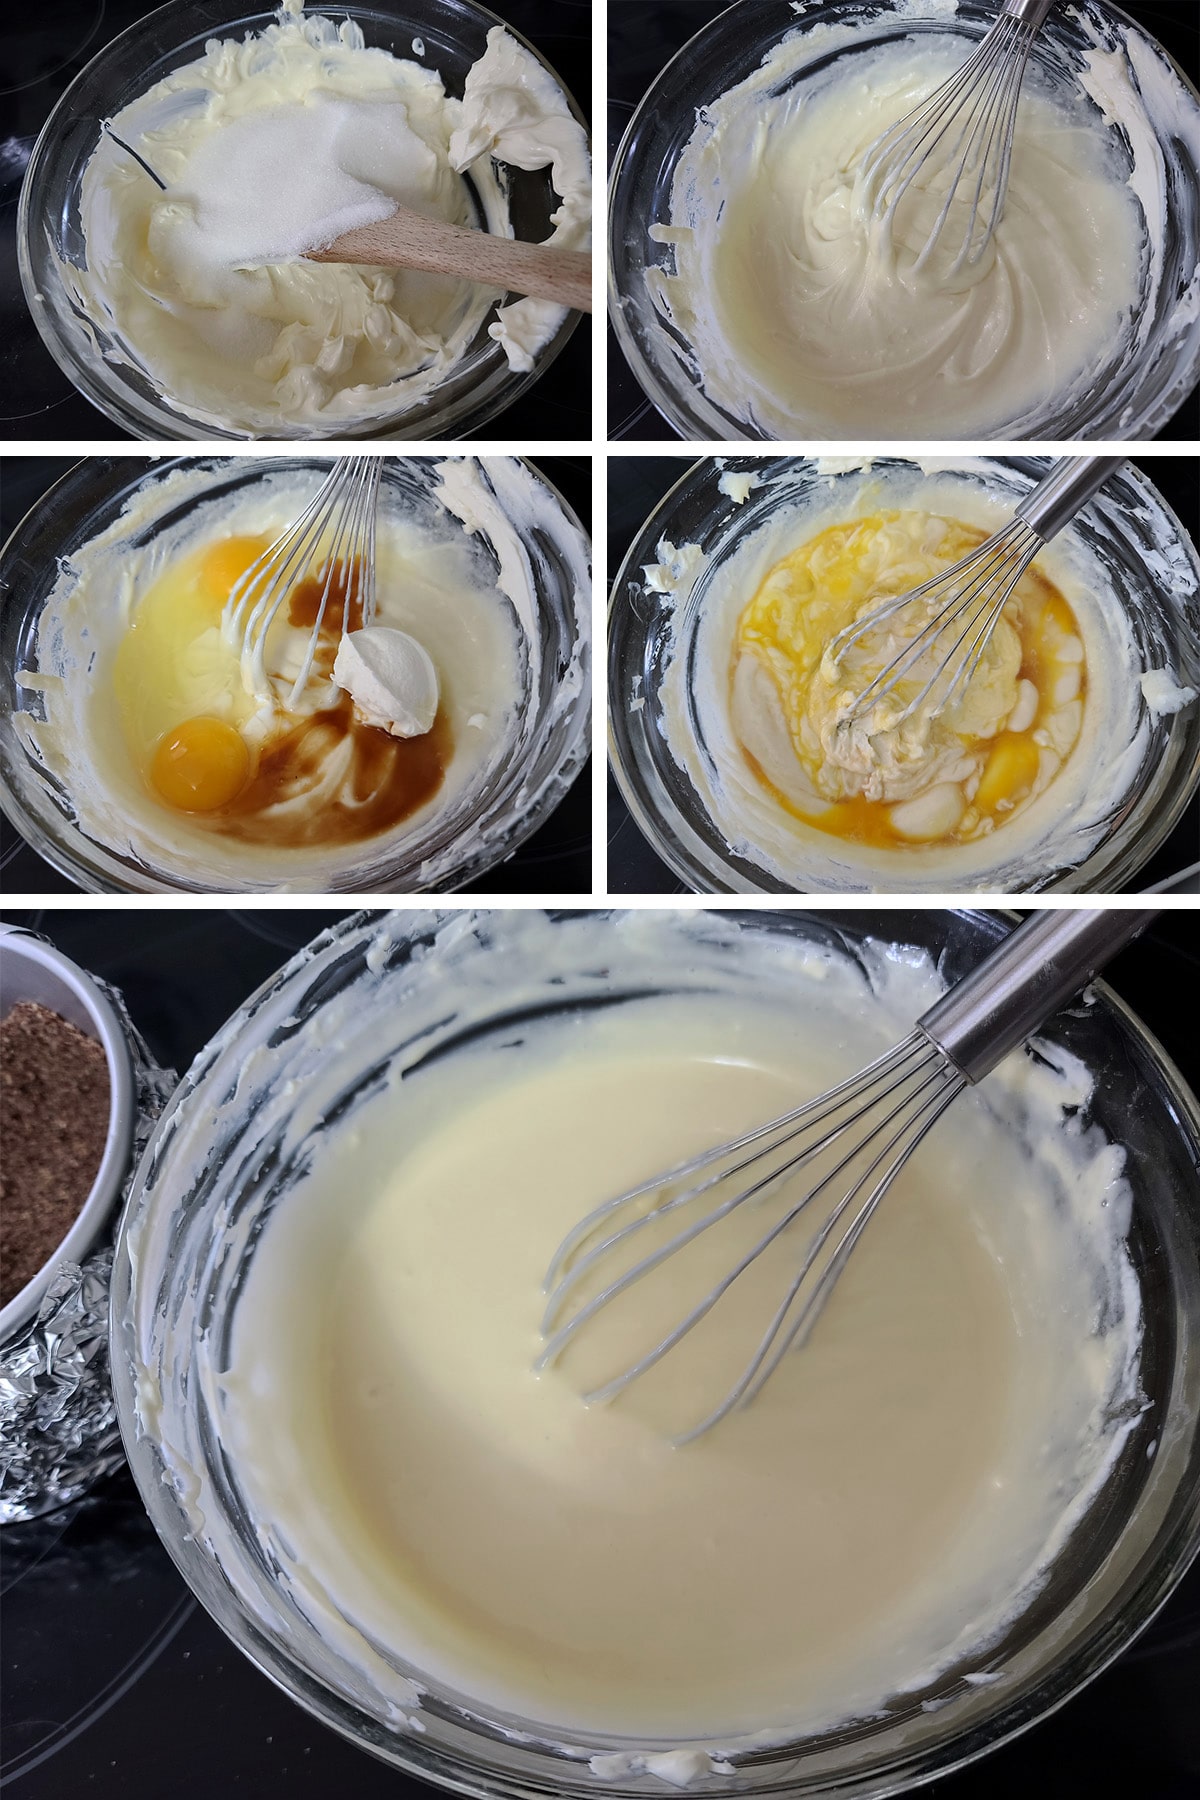
In a large bowl, cream the softened cream cheese and sugar together until smooth.
Add sour cream, eggs, vanilla extract and lemon juice, beat just until smooth. DO NOT overbeat.
Note: I like to use an offset spatula, and make sure to scrape down the sides of the bowl and bottom of the bowl.
Place prepared cheesecake in a larger pan - 8x8 or 9x13.

Carefully transfer the whole thing to the 325 F oven.
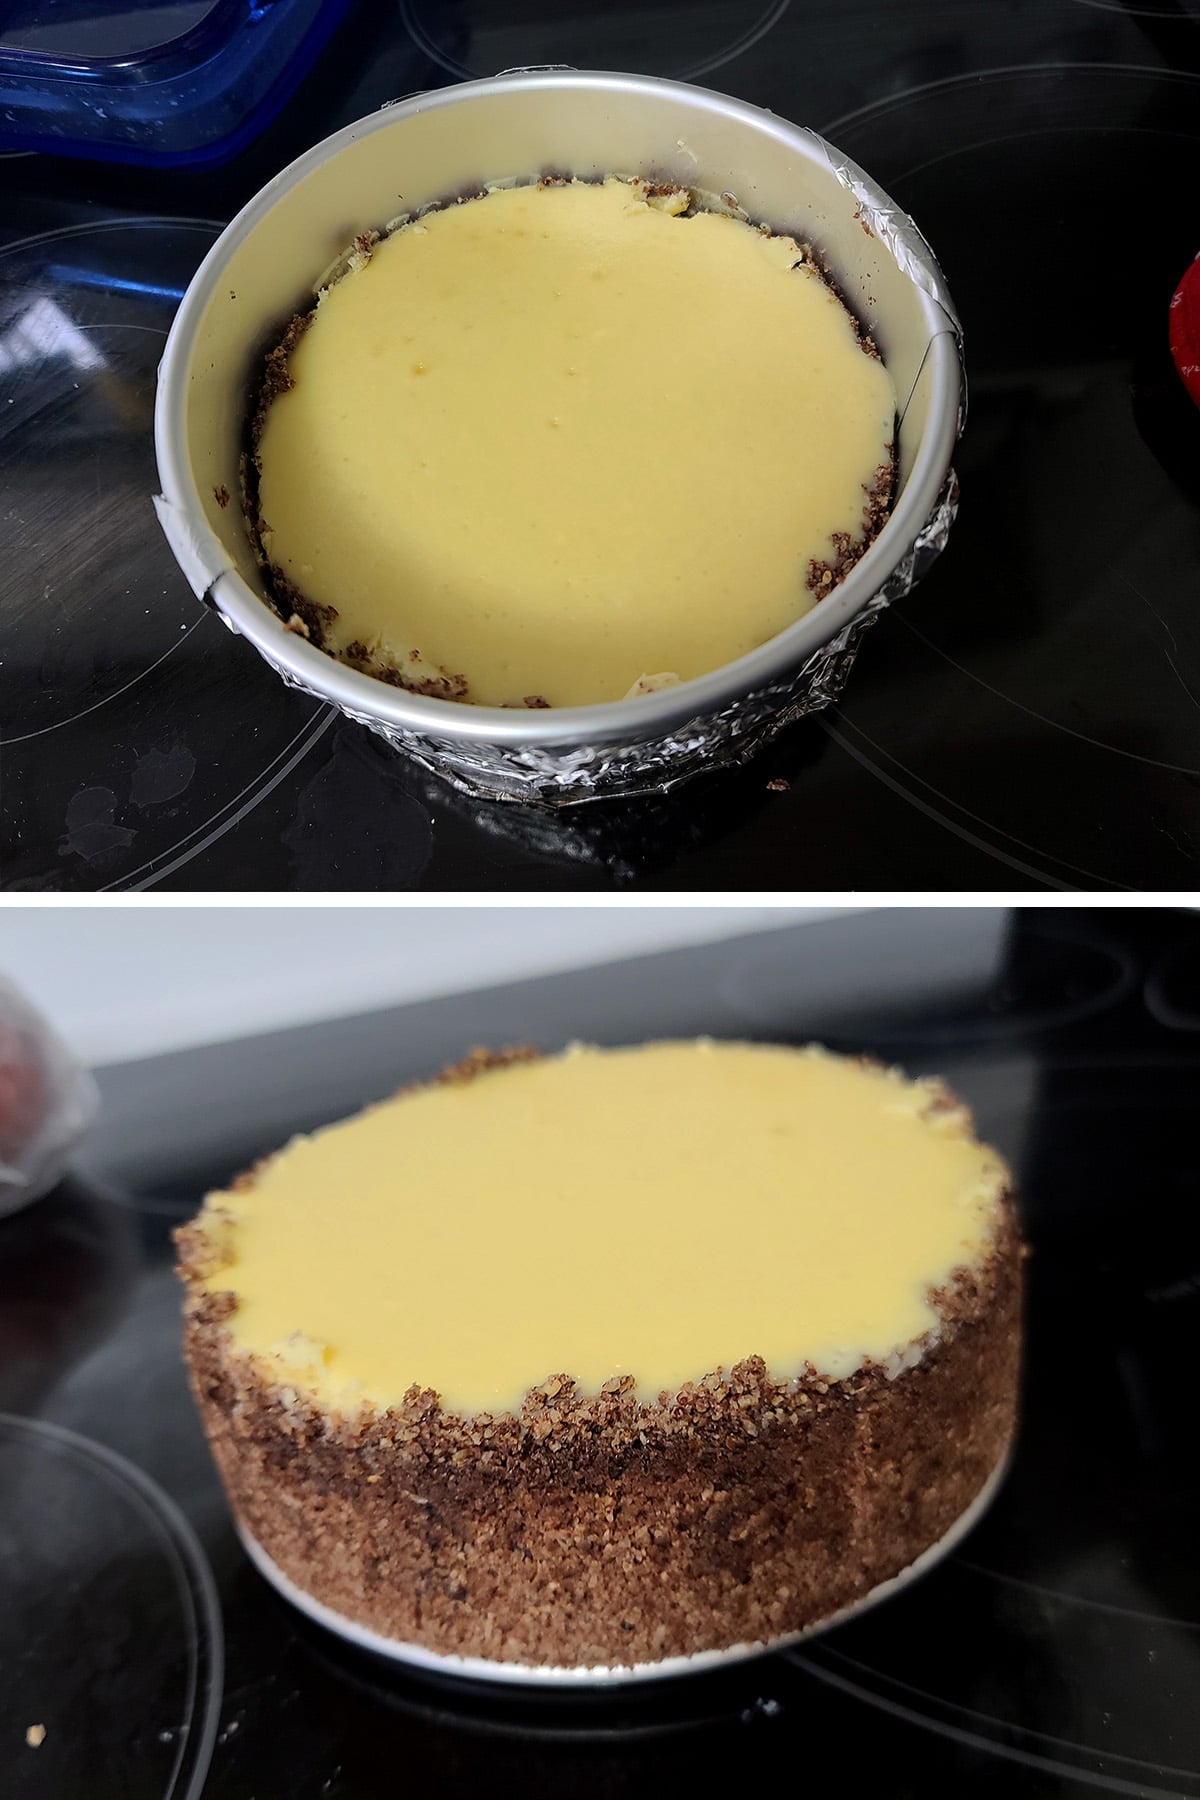
Bake cheesecake - on a lower over rack, and without opening the oven door - for 65 minutes, or until the center is mostly set. It’ll wiggle a little if shaken, but shouldn’t be liquid.
Once the cake is fully cooked, remove it from oven, and remove the springform pan from the water bath.
Run a butter knife along the inside of the pan to loosen the crust from the pan, then let the cheesecake cool to room temperature.
Slice your chilled cheesecake, top with whatever you'd like, and serve!

More Fancy Recipes
Planning for a special dinner, whether Valentine’s Day, a special date, or a fancy dinner party? Here are a few recipes to consider!
Balsamic Mushroom Baked Brie
Boozy Crème Brûlée
Chocolate Dessert Ravioli
Chocolate Fondue
Clementine Mousse with Champagne
Easy Kahlua Panna Cotta
Fancy Tea Sandwiches
How to Make Cream Puffs and Croquembouche
Mushroom Brie Turnovers
Mushroom & Goat Cheese Braid with Balsamic Glaze
Pepper Crusted Tuna with Wasabi Cream Sauce
Phyllo Crab Triangles
Savory Tomato Shortcake
Seafood Mousse
Shrimp & Artichoke Stuffed Mushrooms
Traditional Raspberry Mousse
White Chocolate Almond Amaretto Truffles
Wild Rice Stuffed Chicken Breast with Dijon Chive Cream Sauce

Share the Love!
Before you chow down, be sure to take some pics of your handiwork! If you post it to Bluesky, be sure to tag us - @CelebrationGen. We're also on Pinterest, so you can save all your favourite recipes to a board!
Also, be sure to subscribe to my free monthly email newsletter, so you never miss out on any of my nonsense. Well, the published nonsense, anyway!
Finally, if you love this recipe, please consider leaving a star rating and/or a comment below, and maybe even sharing this post on social media!

Creamy Vanilla 6" Cheesecake
Equipment
- 6" Springform pan
Ingredients
Crust:
- 1 cup Pecan flour / meal
- 2 tablespoon butter melted
- 1 tablespoon Granulated Sugar
Cheesecake Batter
- 1 lb Cream Cheese room temperature
- ⅔ cup Granulated sugar
- 2 tablespoon Sour cream
- 2 eggs room temperature & lightly beaten
- 1 teaspoon vanilla extract
- ½ teaspoon Lemon juice
Caramel sauce
Instructions
- Preheat oven to 350F.
- Carefully wrap the outside of a 6" Springform pan with aluminum foil, making sure it’s completely sealed off.
- In a small bowl, mix crust ingredients: Pecan flour, butter, and sugar.
- Press into the bottom and up the sides of the springform pan.
- Bake crust for 15 minutes. Remove from oven, turn over temp down to 325 F.
- Cream the cream cheese and sugar together until smooth.
- Add sour cream, eggs, vanilla extract and lemon juice, beat just until smooth. DO NOT overbeat!
- Pour cheesecake batter into the prepared crust.
- Place prepared cheesecake in a larger pan - 8x8 or 9x13.
- Carefully pour hot water into the larger pan, aiming for it to come halfway up the height of the springform pan.
- Carefully transfer the whole thing to the 325 F oven.
- Bake for 65 minute, or until the center is mostly set - it’ll wiggle a little if shaken, but shouldn’t be liquid.
- Once the cake is fully cooked, remove from the oven, and remove the springform pan from the water bath.
- Run a butter knife along the inside of the pan to loosen the crust from the pan, then allow to cool to room temperature.
- Transfer cheesecake to fridge, chill for at least 6 hours - ideally overnight.
Nutrition








Linda
Pecan crust?? Heck yes!
I made this to surprise my sister on her birthday. My first cheesecake. Topped simply with fresh berries, it was a real winner.
The pecan crust is inspired and will be repeated many times in my kitchen
Thank you for sharing your recipe.