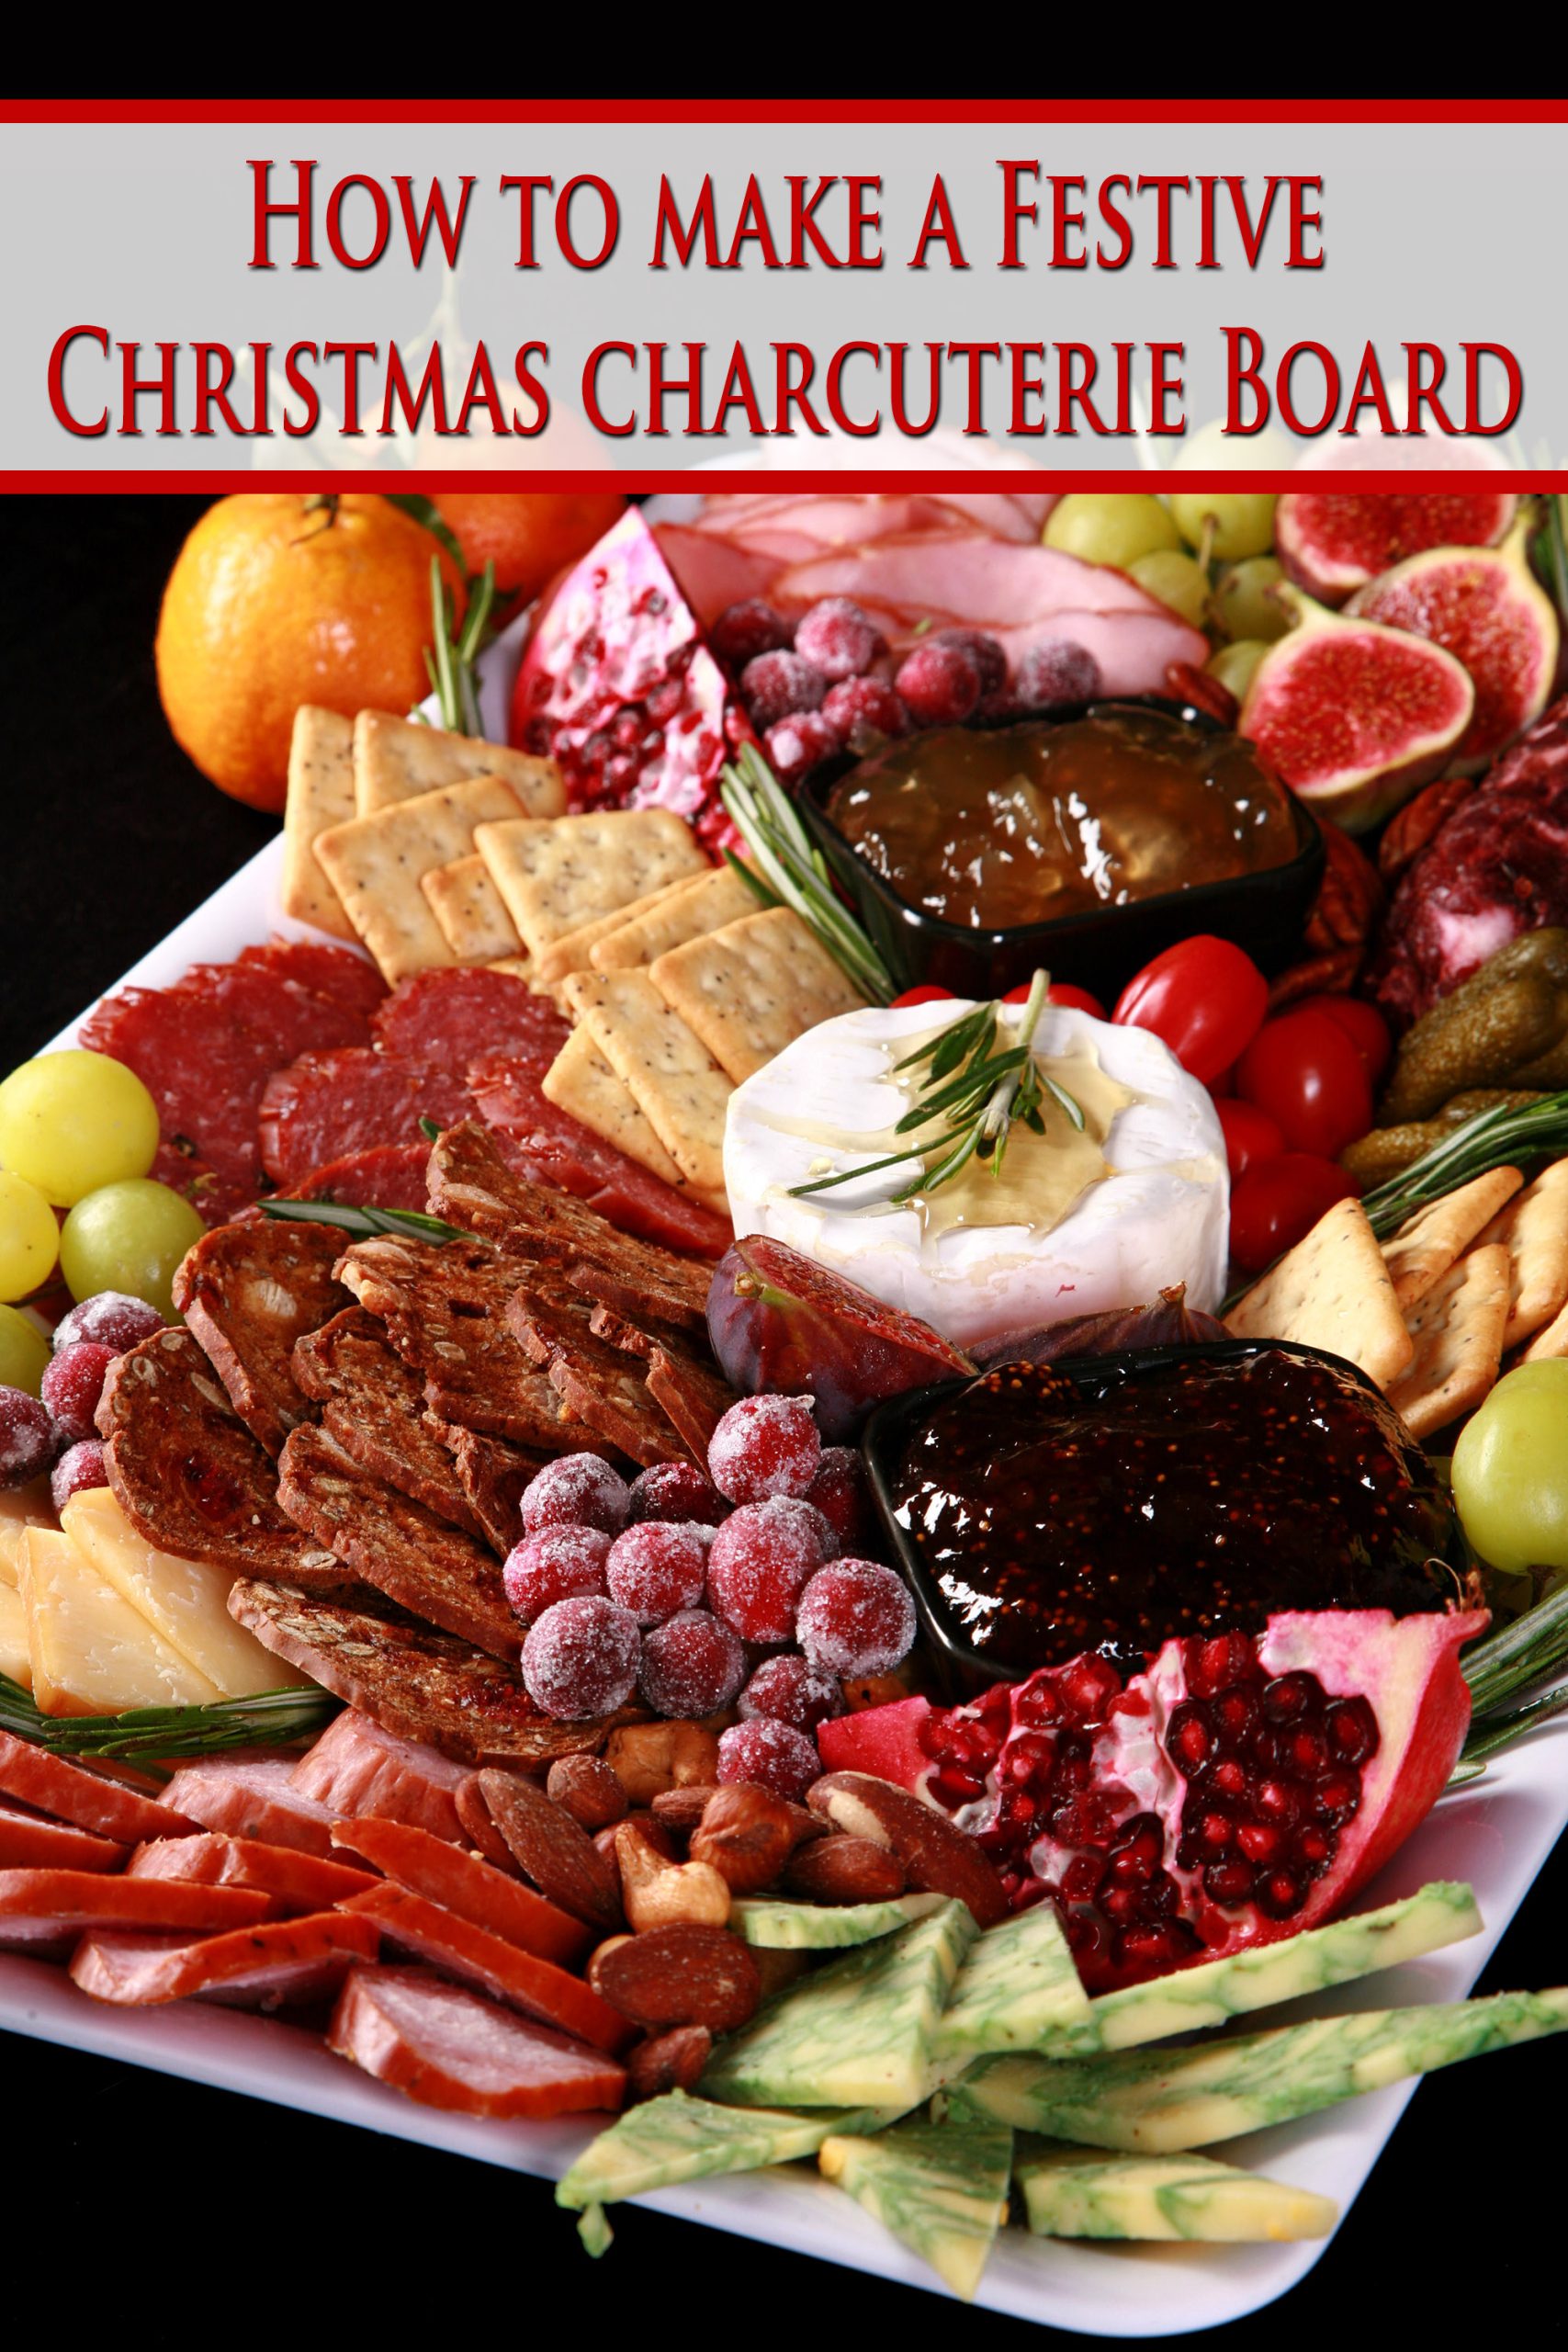
This festive Christmas charcuterie board is tasty, elegant, and super customizable. The best part? It’s so much fun to make, and fairly low effort!
I ended up taking the idea of a Christmas tree charcuterie board to new, uh. heights with my Charcuterie Tree.
Instead of a flat grazing board, it’s a tower of charcuterie, just done up in the shape of a Christmas tree! Sure to be a centerpiece at any holiday party it’s presented at!
I went a bit more traditional / 2 dimensional with my next holiday charcuterie board: my Christmas Charcuterie Wreath.
That one was a festive board made up of antipasto skewers. Also great for holiday gatherings, but we served it as a main course for two over a few days, LOL!
(Truthfully, I’m already considering making another one for this year’s Christmas dinner, so I guess I shouldn’t laugh!)
Anyway...
During my festive charcuterie board designing binge, I managed to come up with a gorgeous charcuterie board for every major holiday, and even one “game day” one!
Each is the perfect holiday appetizer for its time of year, and I’m looking forward to sharing them all, eventually.
Today though, it’s all about my Christmas charcuterie board recipe!
This easy Christmas charcuterie board doesn’t involve skewers or styrofoam, and is just an elegant, beautiful board that is realtively low effort - a perfect option for holiday parties and family gatherings.
It’s easily scaled up to serve at a large Christmas party, or scaled down as a fun Christmas eve dinner or snack.
Anyway, lots to talk about, so let’s get to it!
Charcuturie Ingredients
Unlike the vast majority of my recipes, charcuterie doesn’t require a set list of ingredients - and most should be available at pretty much any large grocery store!.
Think of it more like “choose your own adventure”, or “pick 3 from column A, and a few from column B”, than following an actual recipe.
Here are the major categories you’ll want represented, and some ideas of the kinds of ingredients I’ll use from each, to fit in with the Christmas theme:
Meats
“Charcuterie” is a French term that specifically refers to cooked meats, so having a variety of meats should be a bit of a focal point when designing your Christmas charcuterie.
Generally speaking, I like to aim for 3 different meats, trying to get a variety of textures in there.
I tend to think of 4 or so main different types - really hard dry cured meats, softer cured sausages, deli meats, and pates.
I suppose you could have an “other” category as well, depending on how far you want to stray from tradition. Think smoked oysters, shrimp, etc.
That peppercorn sausage has quickly become one of my favorite meats for charcuterie boards, btw. Great stuff!
While liver pate is can be a great addition, I skipped it just for aethetic reasons on this board. The pink colour just wasn’t working with my rich jewel tone holiday board.
Anyway, the final meat I used was a sliced ham, as a reference to how we often used to serve ham for Christmas. Smoked deli turkey would also have been a good option - but I used it on my Thanksgiving board!
A salami rose is always a fun option - and I used a few across my other boards - but didn’t for this one. If you’d like to, see my tutorial:
How to Make Salami Roses!
Cheeses
As with planning a cheese board, I like to have a nice assortment of cheese when it comes to planning the cheeses used on my holiday charcuterie boards.
I like to aim to have a mix of hard cheeses and soft cheeses, as well as a mixture of colours, flavors, and textures involved across the cheese platter offerings.
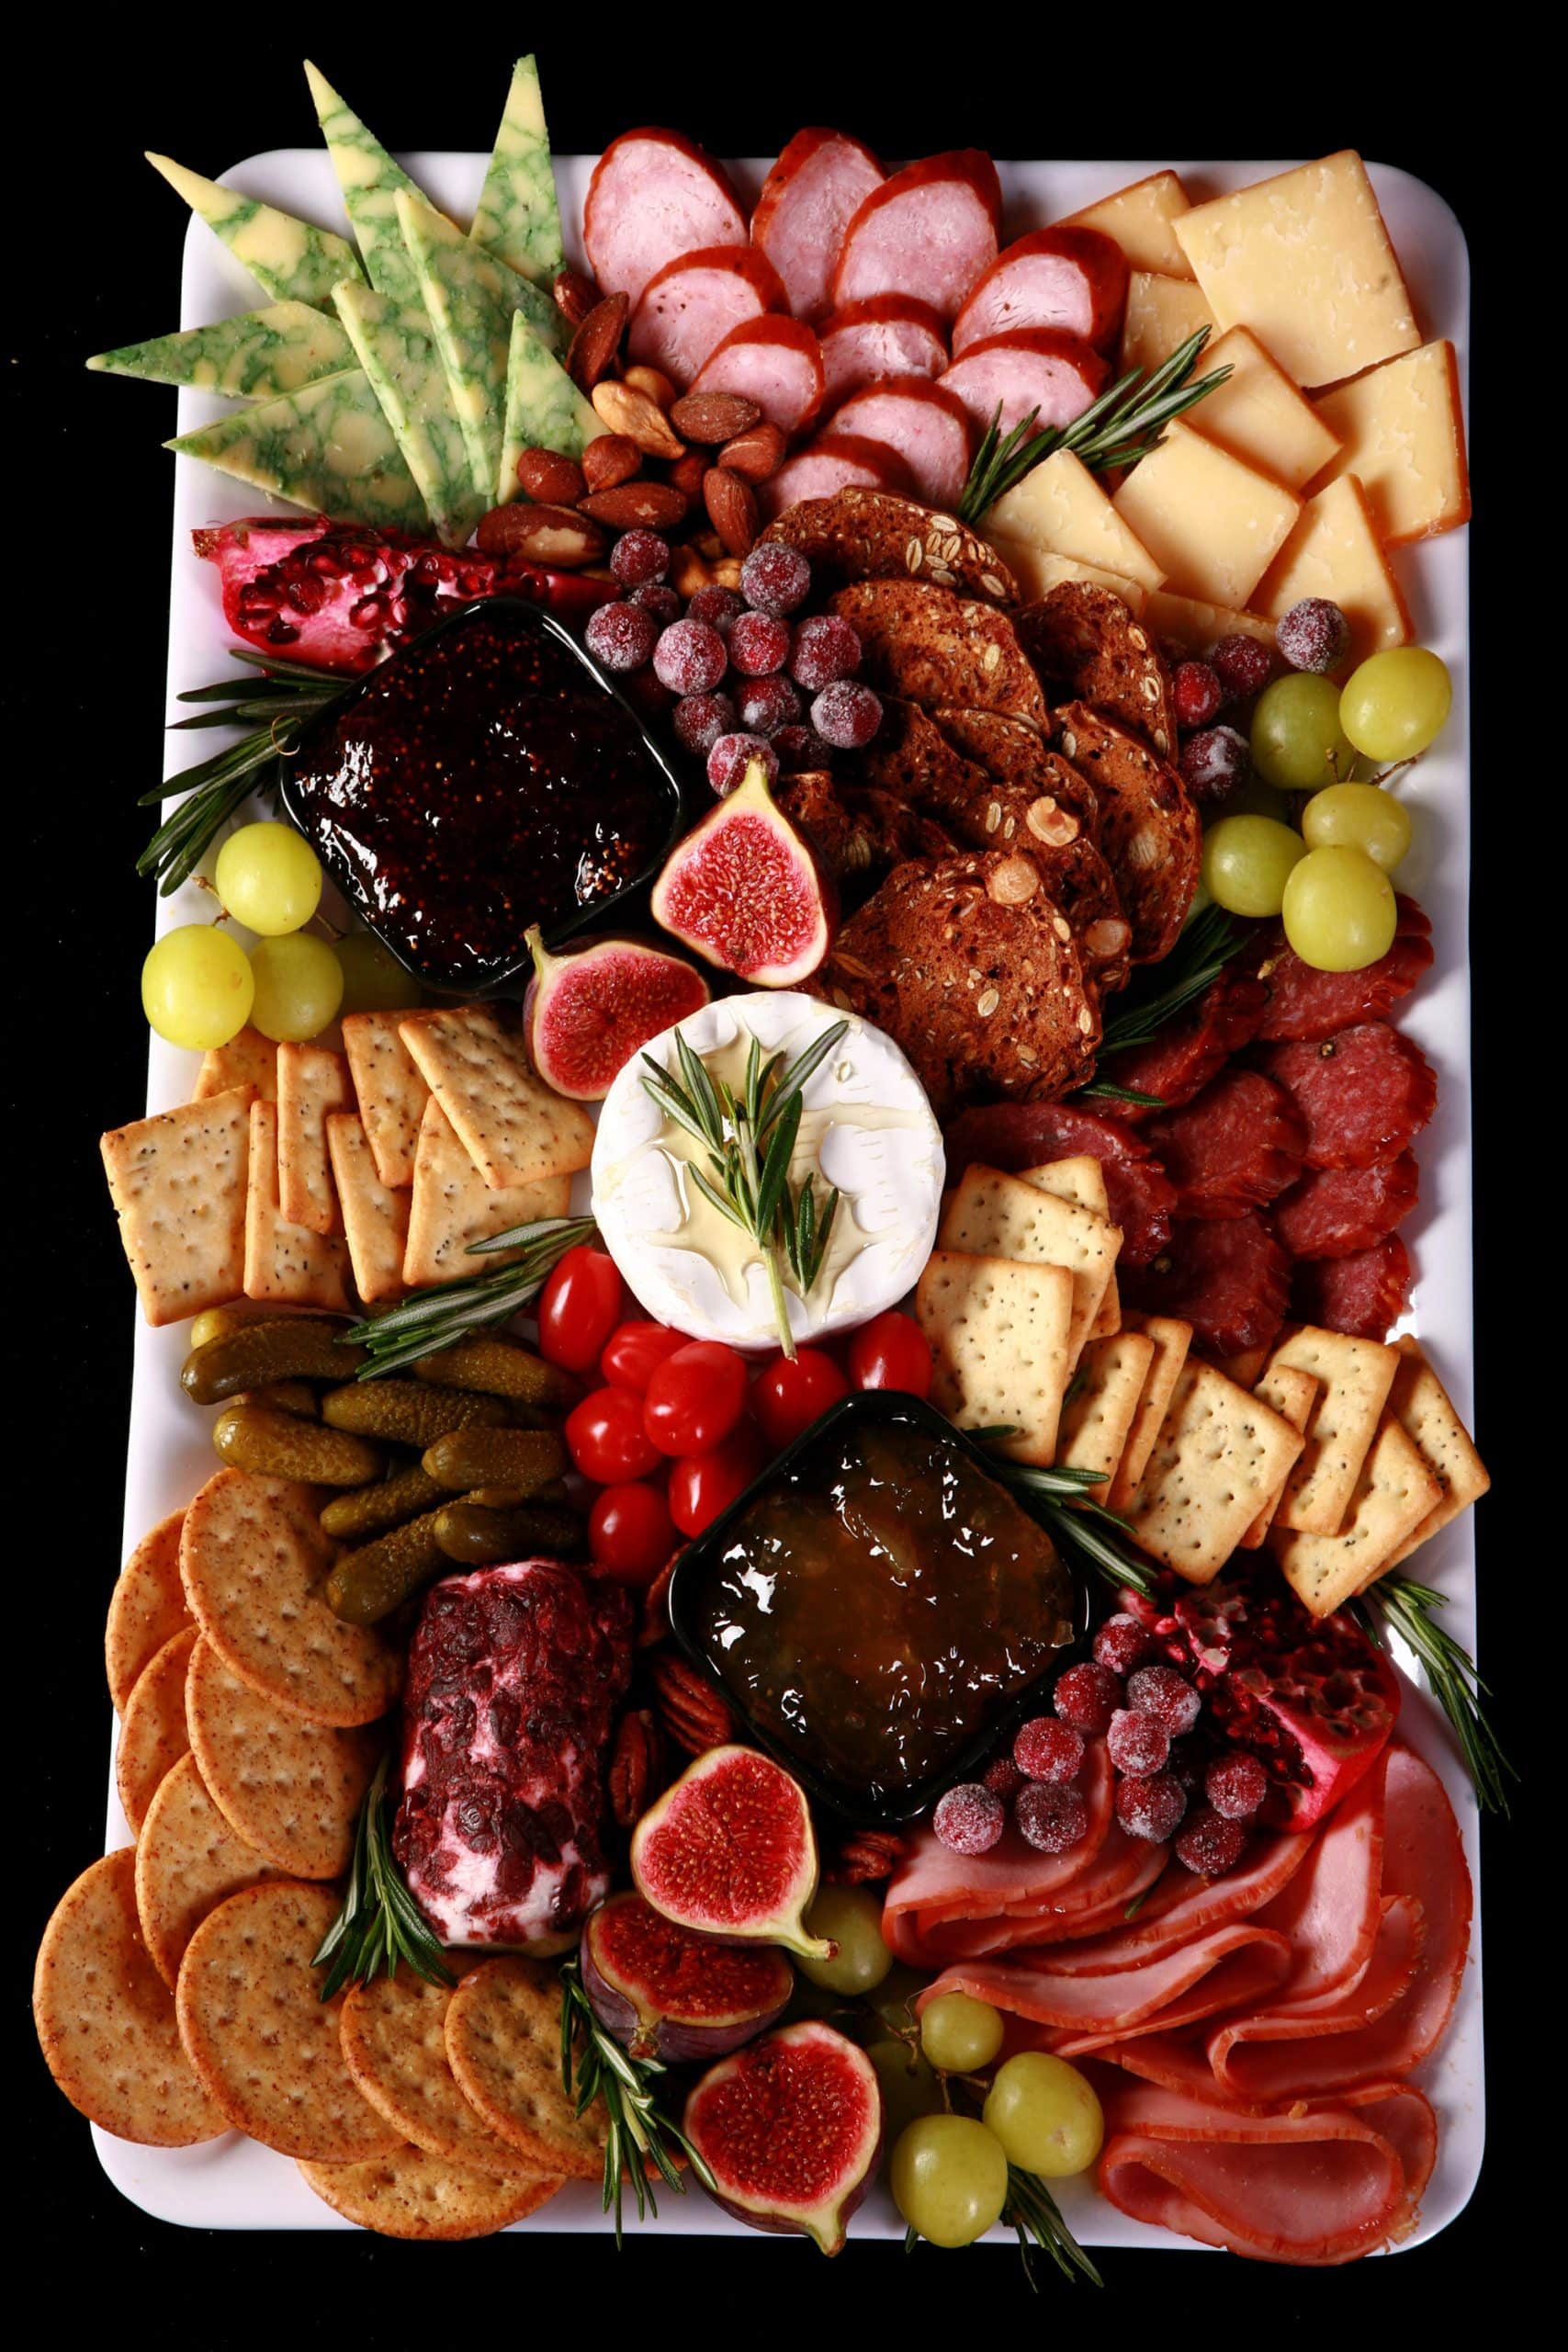
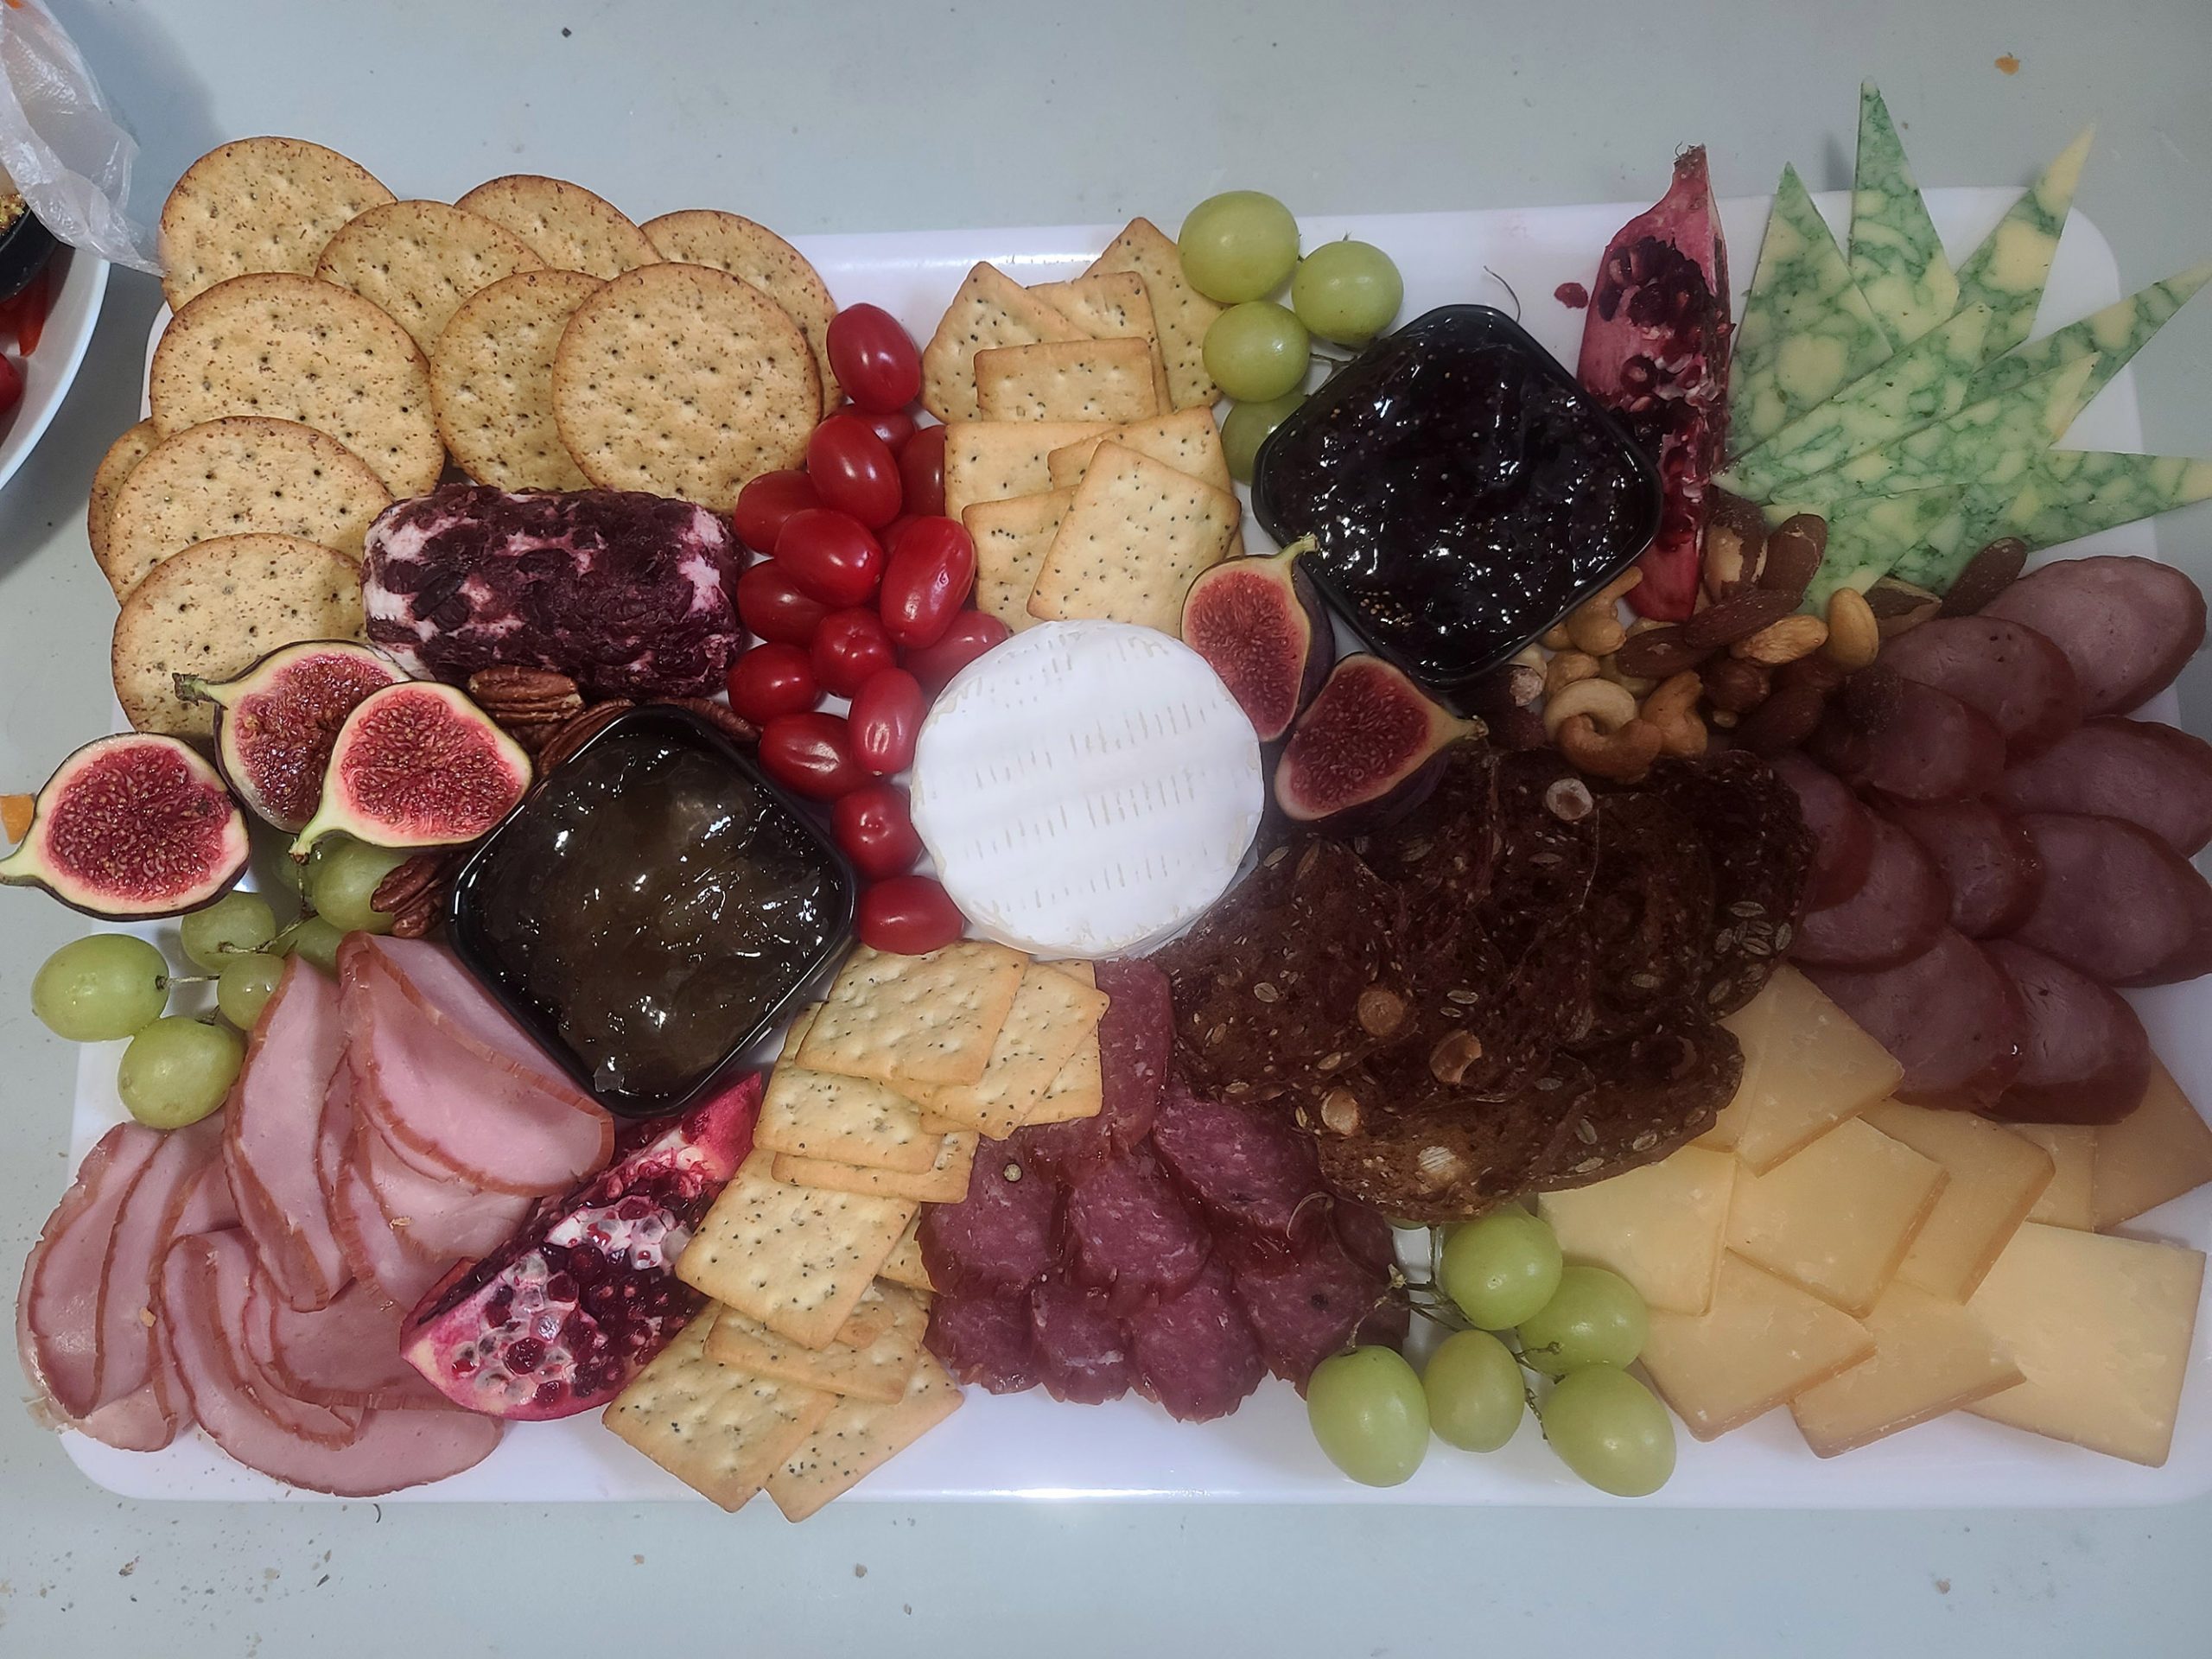
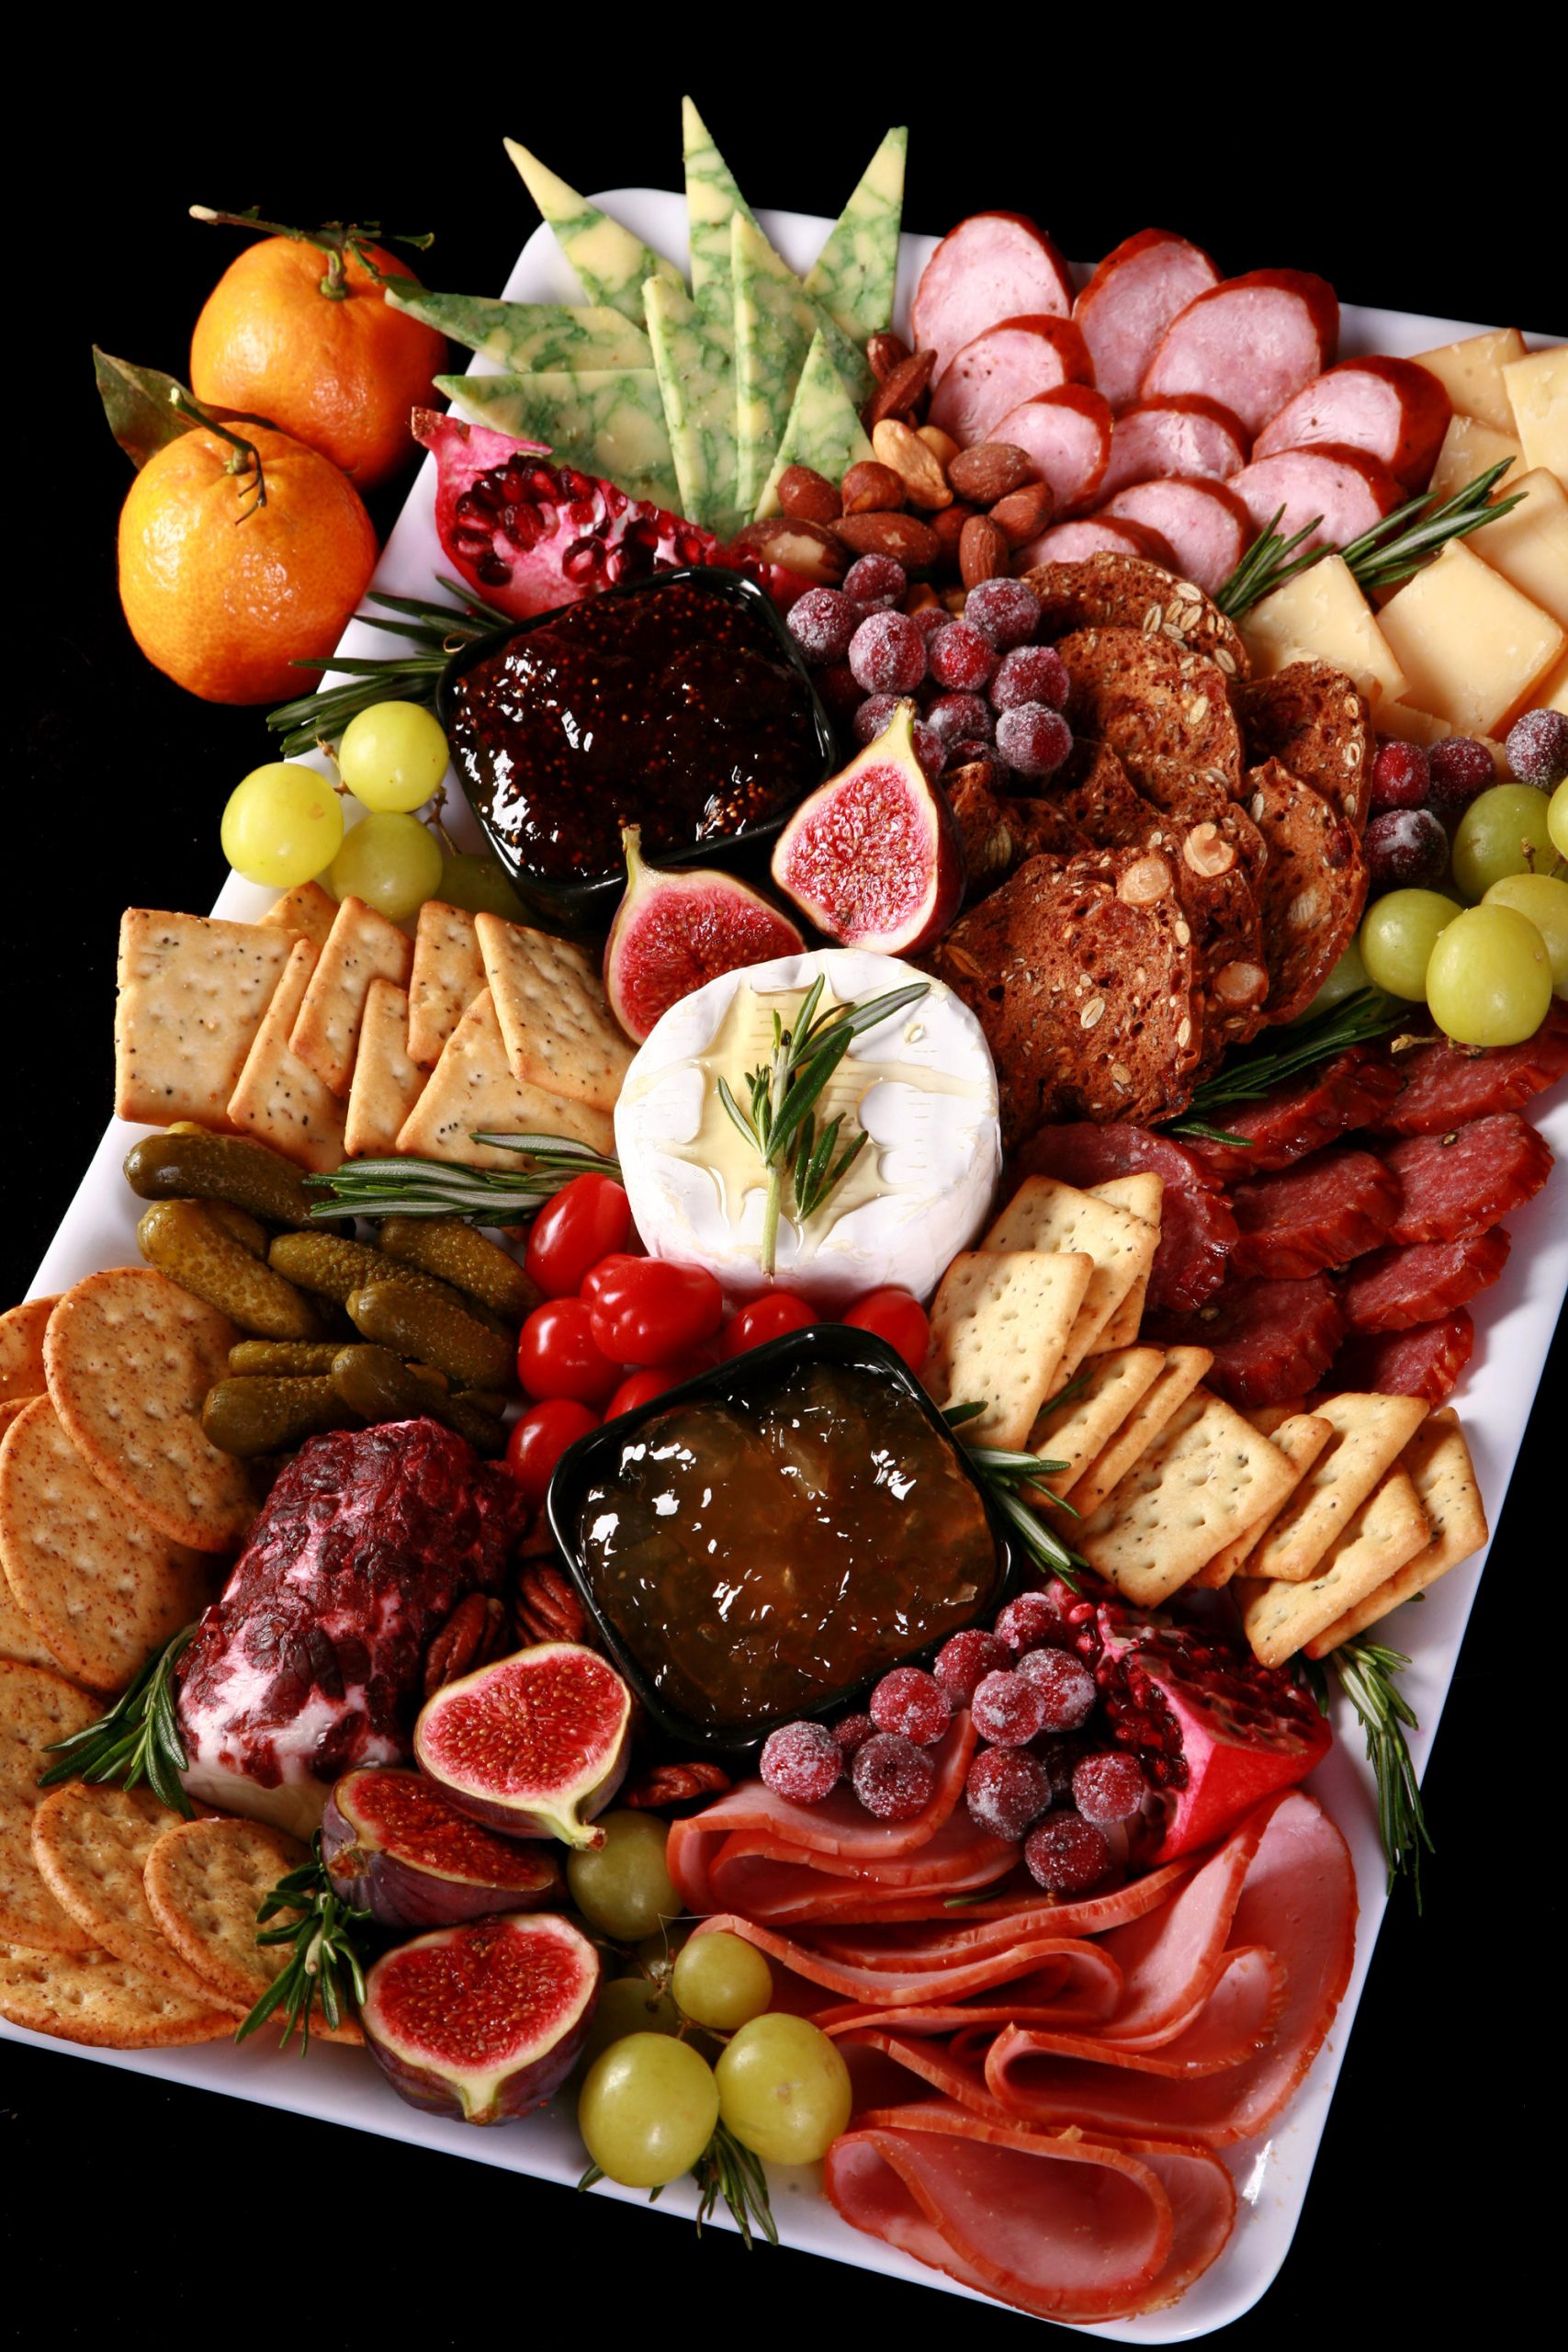
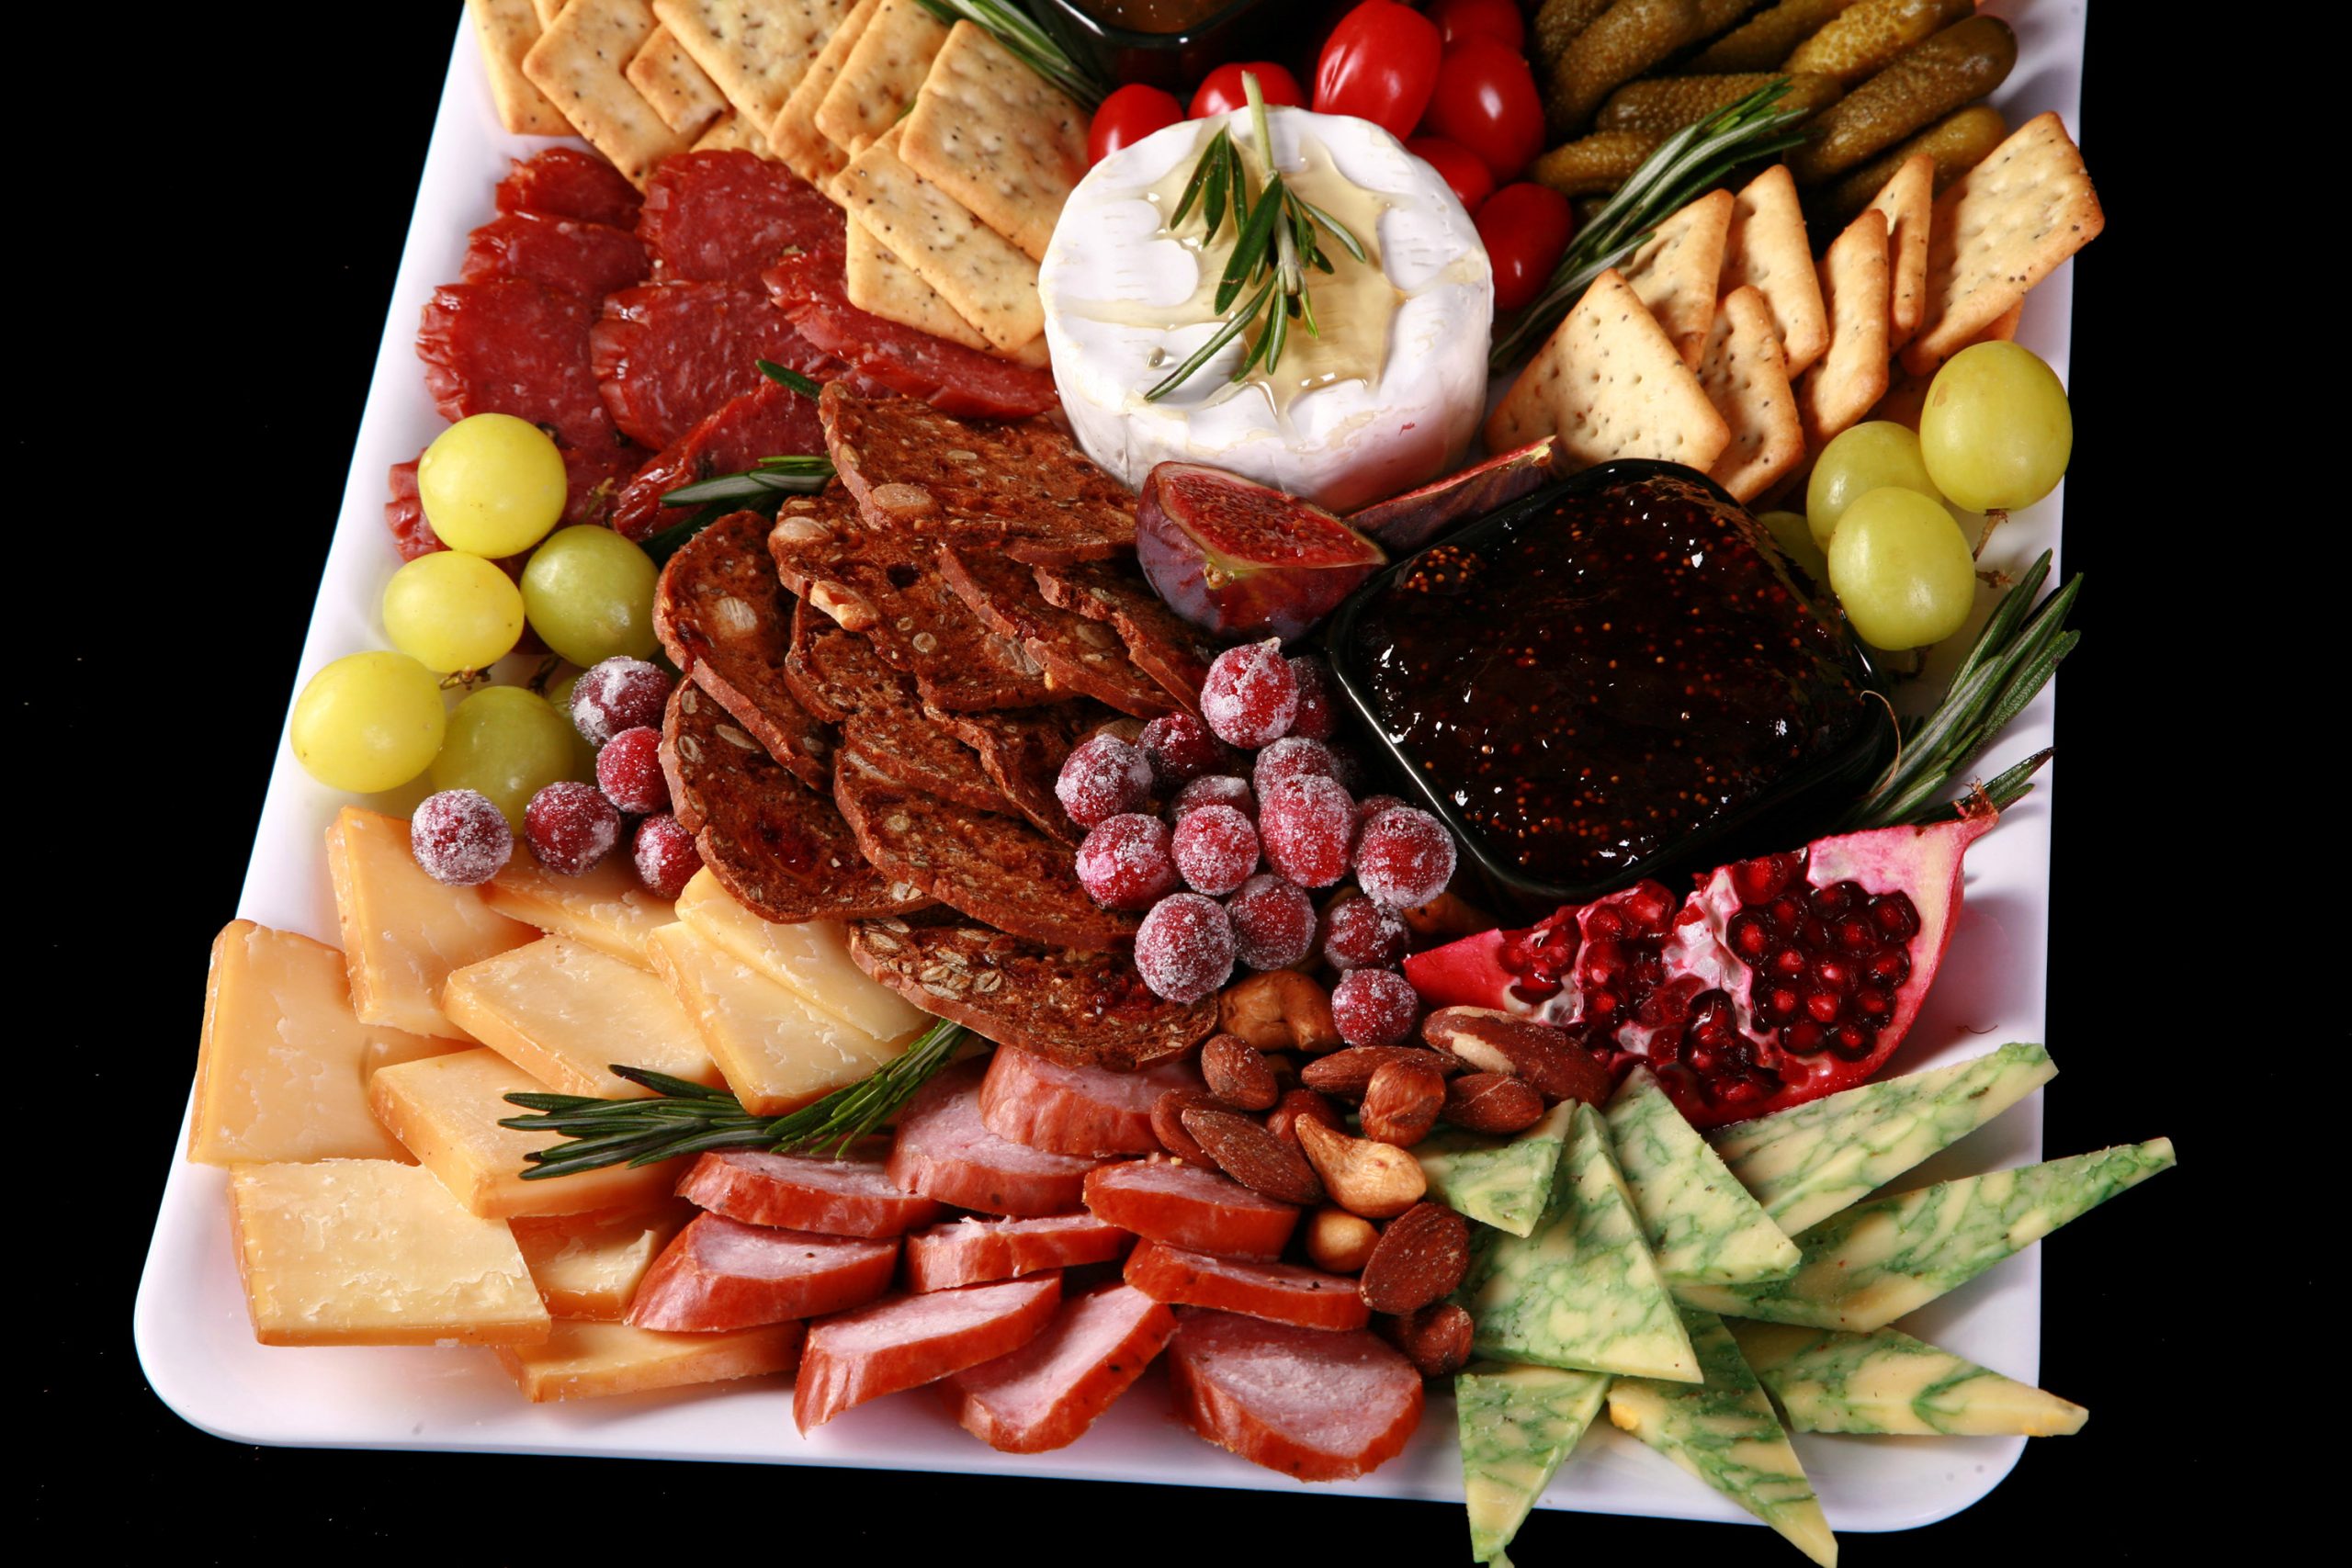
In this case, I used 4 different cheeses: A brie wheel topped with honey and rosemary (very soft), Sage Derby cheese (not super hard), a smoked cheddar (the hardest option here), and a log of cranberry goat cheese (soft).
Usually I aim to have at least one actual hard cheese - like a Parmesan, Asiago, or really aged Gouda - but it was already getting a bit out of hand with 4 choices.
Choosing the cheese is a fun part of designing a charcuterie board, but it can also be a DIFFICULT part - so many choices!
The smoked cheddar just worked so well with the ham and the other meats, I just had to include it.
I love a good brie, and dressing it up with a bit of honey (really, I should have used more, the way it pooled. Whoops!) and rosemary added a touch of class.
Finally, the cranberry goat cheese was a great way to bring some more color to the board, as well as another traditional holiday flavour.
As always, use whatever you like, and whatever makes sense for the board you’re designing.
Bocconcini - tiny mozzarella balls - are always a great option, and can be representative of snowballs, depending on what way you’re going with your holiday theme.
A Note on Presentation
If you’re not feeling inspired when figuring out how to present your cheeses, consider using a small cookie cutter to cut sliced cheese into different shapes.
I did this on my charcuterie tree - cutting a star shape for the top - and my upcoming Valentine’s Day board (heart shapes), but you can do whatever feels right for the aesthetic you’re going with.
For example, if you’re going with kind of a winter wonderland theme (Bocconici snowballs!), little snowflakes cut from a white cheese would be super cute, whether in a pile, or scattered around the board!
Just have fun with it!
Sauces, Spreads, and Dips
Having little bowls of condiments on your board is a great way to not only bring visual interest, but to add more flavor options for your meats and cheeses.
I like to pick sauces and such that not only look good, but are seasonally appropriate if possible, AND go well with meats and cheeses I’ve chosen.
While I’ll usually include a little pot of a flavorful mustard - usually one of Kozlik’s Canadian Mustard offerings - I wasn’t liking the look of it on this board.
Remember: You can always serve things on the side, if you’re being fussy about your holiday aesthetic *on* the board!
Mustard just goes so well with meats and cheeses, there’s a reason it’s pretty standard for charcuterie boards in general.
Two festive, flavorful choices that pair well with other things on the board!
I’d also considered using a Cranberry Relish, but decided that the cranberry goat cheese was enough, on that front.
Olive tapenade would be another good option.
Starches
Every charcuterie board should have a good selection of crackers for those meats and cheeses, though they don’t necessarily need to be on the board itself.
If it’s not working for your look - or the size of your platter - you can always serve a separate platter of artfully arranged crackers.
As with the meats and cheeses, I like to use around 3 types of crackers - also incorporating different colors, flavours, textures, and shapes across those offerings.
In this case, I started with Raincoast Crisps in the cranberry and hazelnut flavor.
It was actually kind of difficult to choose ONE flavor from that line, they’re all visually interesting, and many of the flavours are super holiday appropriate. “Gingerbread and Spiced Pear”, “Fig and Olive”, and “Rosemary Raisin Pecan” were the other flavours I was considering.
Bacon Dippers, Ritz Crackers, Rye Crispbread, Sociables, Stoned Wheat Thins and Water Crackers are other great options for charcuterie crackers.
If you’re serving your board to people who need to keep gluten free, Rice Crackers, Mary's Gone Crackers, and Schar Entertainment Crackers are great gluten free cracker options.
Cookies!
While “starches” generally refer to crackers - when talking about charcuterie - don’t be afraid to throw in a sweet option as well!
Cookies can be a fun way to bring a pop of color to your board, or help develop the theme.
Cut Out Sugar Cookies or gingerbread cookies can be either purchased or made ahead, and decorated to match your holiday and color scheme.
See my Sugar Cookie Decorating tutorial for everything you need to know, if you’d like to go the homemade route.
Of, and if you need gluten free? I’ve got you covered - here’s my fantastic Gluten-Free Sugar Cookies recipe, and my Gluten Free Gingerbread Cookies recipe!
Fresh Produce
I like to use a bit of fresh fruit - and vegetables - on my boards, both as a way to bring some more colour in, and as an accompaniment for whatever’s on my board.
When it comes to this Christmas Charcuterie board, I used some cherry tomatoes and green grapes for the bright “red and green” Christmas colours.
I also used sugared cranberries, fresh figs, and wedges of pomegranate to bring some holiday elegance and richness to the board, and to balance our the brightness of the grapes and tomatoes with more of the jewel tone colours I wanted.
Serving the pomegranate as wedges definitely ends up being more of a garnish thing, but pomegranate seeds can be served in little bowls as an actual accompaniment for the meats and cheeses.
See my tutorial on How to Cut and Serve Pomegranate, for the easy way to get the pomegranate arils out!
Anyway, red grapes, grape tomatoes, red bell pepper slices, and green veggies - peas in the pod (SNOW peas, LOL), blanched and chilled asparagus or green beans, cucumber slices, etc - are all good ways to bring a bit of freshness to your holiday charcuterie board.
Munchies
“Munchies” are the blanket name I give to the category of *other* stuff on the board -smaller items, finger foods, etc that you can use to round out your board.
Think “snacky” items - nuts, dried fruits, pickled items, etc.
In this case, I went with Cornichons (Tiny pickles), Mixed Nuts, and toasted Pecan Halves.
You can use the “munchies” category to bring more green foods in - Pepitas, Pickled Green Beans, green olives, etc .
In terms of red foods, Pickled Red Onions, Sweetened Dried Cranberries, and Roasted Red Peppers are good options.
All of those are some of my favorite things to include on charcuterie boards in general.
While most of those are savory items, consider adding some seasonal sweet treats to your board - mini candy canes, starlight mints, etc.
When using mint flavored candies, I recommend leaving them wrapped - I find that mint flavor can leech onto other items.
I don’t know about you, but a pepperminty smoked cheddar doesn’t sound amazing to me, LOL!
Garnish and “Other”
Finally, we’re looking at the garnish - almost done!
I like to use fresh herbs on most of my charcuterie boards, and in this case I went with fresh rosemary sprigs.
Not only does it add to the green theme, but I find the look of it to be a bit evocative of pine needles - so it goes with the holiday aesthetic.
Rosemary also works on the flavor front, both in terms of it being a seasonal flavor, AND working well with the meats and cheeses.
Italian parsley is another good option for garnish. Fresh basil leaves can also work, but I usually only use them if I’mgoing really Italian with the meats, cheeses, and munchies on a board.
The 3 3 3 3 Rule
You may have noticed that I tend to offer 3 options of each category - meats, cheeses, crackers, etc.
This is because charcuterie design as a concept called the 3 3 3 3 rule, which says you should offer 3 each of meats, cheeses, crackers, and accompaniments when designing a well balanced board.
Honestly, I mostly ignore the rule, and end up with “about 3", just due to space limitations, etc.
I like to think of it as a guideline more than a rule - you don’t want to have 6 cheeses, 1 meat, and 4 vegetables... that kind of thing.
If you want 4 cheeses, go for it. If only 2 meats are inspiring you, whatever - just serve a bit more of each, so there’s balance in terms of volume.
Try not to over think it, no one is going to be scandalized if you serve 3 meats, 3 cheeses, 2 crackers, and 4 accompaniments.
I can’t imagine many / any people noticing, really.
As always - go with what you like!

Charcuterie Supplies
Aside from the actual ingredients you’ll be serving to your guests, there are a few other supplies you’ll want for your Christmas charcuterie board.
A Charcuterie Tray
Charcuterie Boards can be almost anything, as long as it’s food safe.
The shape and size you get are pretty wide open, and will depend on how many people you’re serving, the amount of space you have to serve it on, etc.
I generally gravitate to a rectangular board, but you can use a round board if you prefer.
A Large Cutting Board will work for smaller displays, and most party supply and dollar stores have plastic platters that work really well for mid range charcuterie displays.
If you’re looking to do a really large display, you’re probably going to need to buy something specifically intended as a catering platter - or make a large wooden cutting board, if you feel so inclined!
In terms of color, I like using a very neutral colored tray. Sure, going with a seasonal color can be fun - but it can also distract from the food being served, and/or make it look weird.
Maybe I’m boring, but the vast majority of the time ... I’m serving my seasonal charcuterie boards on a plain white serving tray.
Ramekins, Dip Bowls
For smaller servings of spreads - mustard, jelly, etc - or to contain smaller items like nuts, I recommend using small ramekins. 2 oz Ceramic Ramekins work perfectly!
If you’re serving a dip, you’ll want some sort of Small Dip Bowl.
Be sure to check the size against your tray before actually using it - you’d be surprised how much real estate some “small bowls” can take up!
Serving Utensils
Depending on what items you’re serving, you may need certain utensils.
If you’re not slicing all of your cheese, have a few Cheese Knives on hand.
Have some tiny spoons on hand for things like sauces and dip - Espresso Spoons are perfectly sized for this..
If you’re serving to a crowd - rather than, say, a small board for 2 - I recommend having several Cocktail Picks, Cocktail Tongs, or even Bamboo Cocktail Forks on hand.
This will help fingers out of food that others will eventually be eating!
Completely optional, but Cheese Markers are little signs you can stick in your cheeses, to let people know what they are.
I generally skip them - just as a matter of aesthetics.
Finally, having small plates and napkins on hand is always a great idea!

How to Make a Christmas Charcuterie Board
Much like with the ingredients, putting together a Christmas charcuterie board is more of a free form thing, rather than a set of step-by-step instructions that *has* to be followed, and done in the right order.
Here’s how I do it:
Place the Main Items
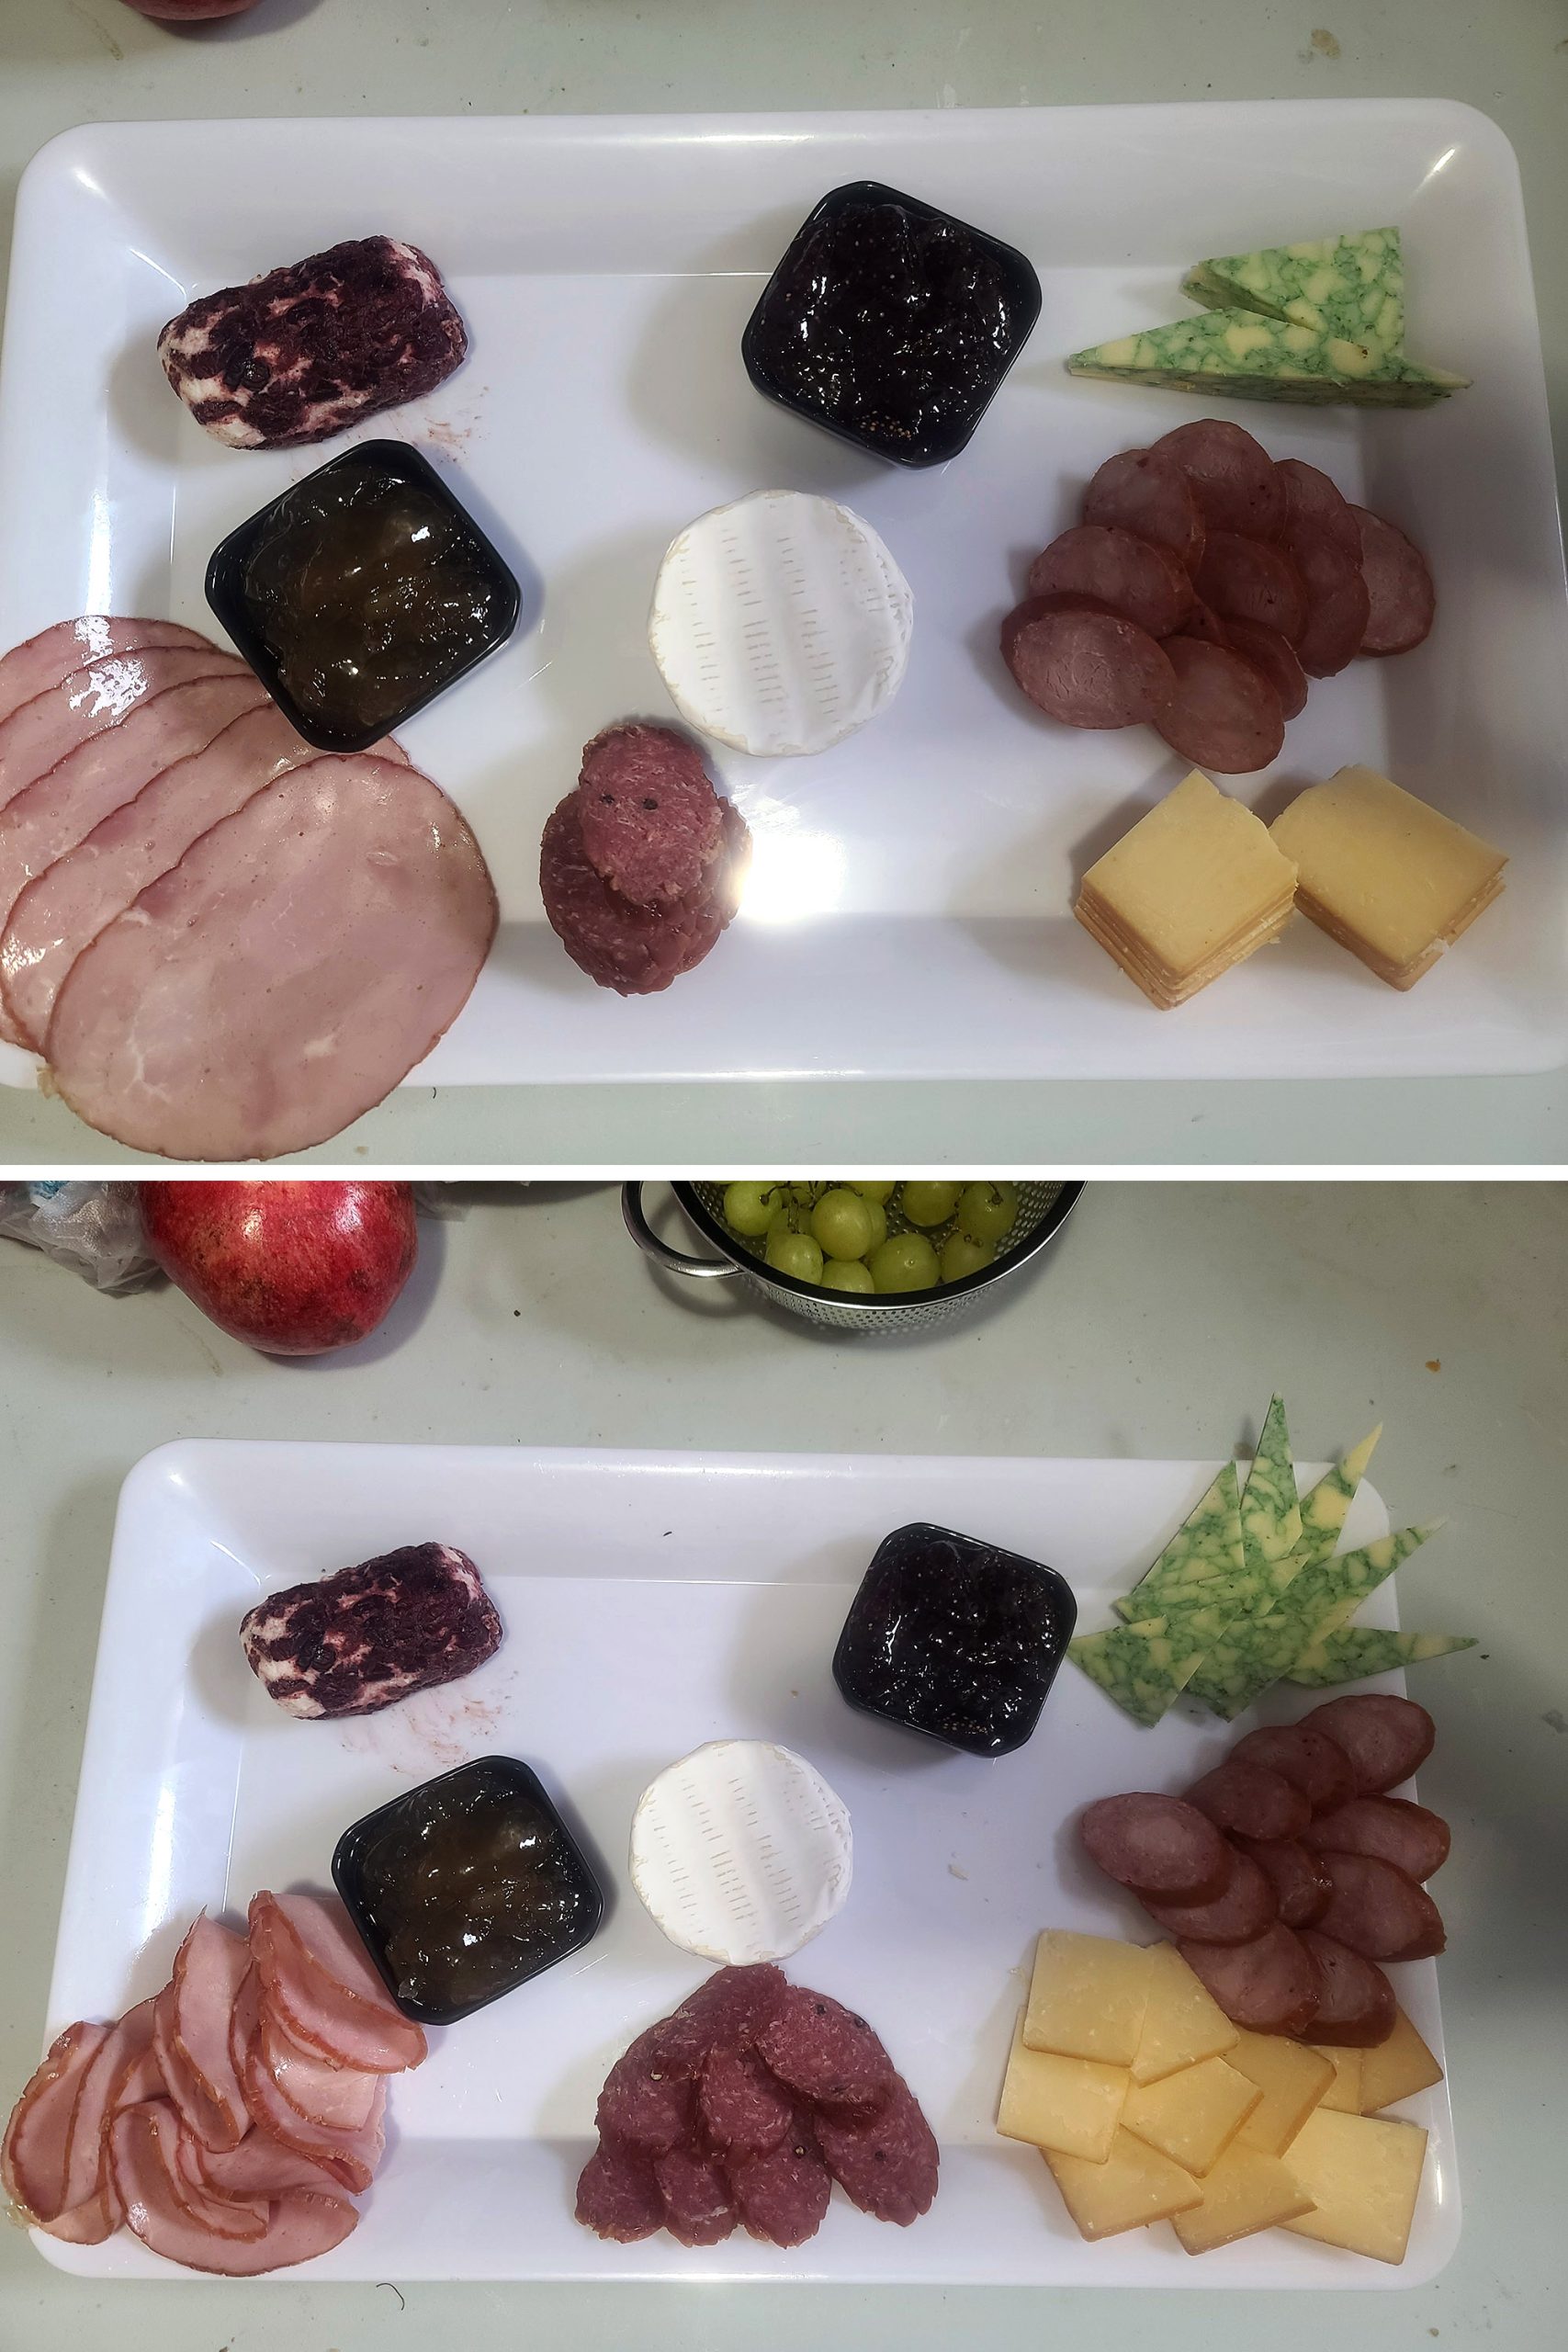
1. Figure out what your “solid” focal points are. This is generally larger items like sauce ramekins and dips, but could also be a cheese or meat - depending on the presentation.
If you are including a wheel of brie, log of goat cheese (I’m using a cranberry goat cheese), some kind of cheese ball, or a pate / terrine of some kind, that would count.
Place those focal points on your charcuterie board, leaving space between. I like to keep colour and texture in mind when placing, not placing things that are too similar next to each other.
Note: If any of your focal points is a bowl of dip, place the bowl - add the dip later!
2. Place your meats roughly where you’d like them to go. They don’t have to be “artfully” arranged at this point, but I do try to space them out, relative to each other.
3. Place your cheeses roughly where you’d like them, spacing them out relative to each other. I’ll usually use space between each meat and cheese.
Fill in the Secondary Items
4. Arrange sections of your starches. I like to keep the types of crackers separate from each other.
6. Place sections of your “Munchies” items, filling in any larger empty spaces - I used mixed nuts and cornichons on this holiday board.
Final Touches
7. If you haven’t arranged your meat slices and cheese slices the way you want to yet, do so now. I’ll usually use more meat / cheese / surrounding items to prop slices up, if needed.
8. Fill in any sparsely covered areas with more meat, cheese, produce, or munchies - whatever makes sense for that space on your specific board.
10. Do any last minute fussing you may need to.
11. If you were holding off on adding dips to the bowls, do so just before serving.
12. If you’re adding any fresh herbs as garnish, place them now - I used small sprigs of rosemary.
13. Serve and enjoy!
Tips for Charcuterie Success
Due to the different types of ingredients - and the different ways they need to be handled and stored - timing is very important when it comes to serving a Christmas charcuterie plate.
Here are some things to keep in mind:
Food Safety
1. Make sure your charcuterie tray itself is food safe. Some boards are meant more for display, using woods or finishes that aren’t food safe.
That’s not to say you CAN’T use them for charcuterie - just be sure to cover the whole board with parchment paper, so the food doesn’t directly touch the surface.
2. Observe good food handling hygiene: Wash your hands frequently and/or wear gloves while preparing your ingredients and assembling your charcuterie board.
Change gloves / wash hands after using your phone, going to the washroom, using your phone, etc.
Wash all produce, and work with clean equipment.
3. Meats and cheeses should be served at room temperature, but they shouldn’t be KEPT a room temperature for more than 2 hours. The same goes for dips, condiments, and cut produce.
This is a cumulative time - including the time you’re preparing the foods and working on your plate.
That being the case, you’ll want to minimize the amount of time your meats and cheeses are out of the fridge.
I recommend preparing each meat or cheese separately, when possible: Take one from the fridge, slice it up, cover and return it to the fridge.
Keep it all chilled until you start assembling your board, assemble it as close to serving time as possible.
If you expect the board to be out for more than a few hours, make it smaller than needed, and keep rounds of refill items in baggies - in the fridge. That way, you can cycle food out as its time expires.
Food Quality
1. Check expiration dates on things like packaged cheeses and meats, and use them well before the expiry date. Cut wedges of cheese should be used within 2 weeks of purchase - generally speaking.
2. Check all produce for blemishes, mold, etc before using. Use only ripe produce.
3. Don’t let cheeses be exposed to the air for too long before use. Bag everything - or wrap with plastic wrap - when not in use, whether in the fridge or not.
4. Keep cheeses separate when stored. Ideally you’ll be serving cheeses in a variety of flavors, after all. When stored together, those flavors can mingle - and not in a good way!
Keeping each in its own airtight container will keep everything tasting as it should!
Presentation
1. Plan to assemble your charcuterie board as close to the time you’ll serve it, as possible. This will prevent flavors from mingling, produce from bleeding, moisture from softening crackers, etc.
2. I like to leave the bowls empty until the last minute. Aside from unnecessary time at room temp, it’s really easy to accidentally get a hand in the dip, as you’re assembling your board. Get your charcuterie board all assembled - with empty bowls - THEN spoon the dips in.
3. If you’re traveling with your board, it’s best to travel with the ingredients prepared - and bagged - just not assembled. Not only will the flavors and textures stay good, you don’t have to risk an messing up an assembled board in transit.
4. Try to be inclusive, when serving a mixed crowd. If you know that some people are gluten free, leave the crackers off the board altogether, and provide some gluten free cracker options on the side. Minimize cross contamination wherever possible.
If you’ve got access to some fun plant-based cheeses, consider including one!
More Charcuterie Fun!
Looking for more cheese board, charcuterie board, and grazing board ideas? Sweet or savoury, I've got you covered with more holiday recipes:
Charcuterie Christmas Tree
Charcuterie Wreath Charcuterie Board
Colourful Squares Cutting Board
Cutting Boards 101
Log Cabin Cutting Board
How to Make Salami Roses
Pavlova Dessert Board
Thanksgiving Charcuterie Board
Share the Love!
Before you chow down, be sure to take some pics of your handiwork! If you post it to Bluesky, be sure to tag us - @CelebrationGen. We're also on Pinterest, so you can save all your favourite recipes to a board!
Also, be sure to subscribe to my free monthly email newsletter, so you never miss out on any of my nonsense. Well, the published nonsense, anyway!
Finally, if you love this recipe, please consider leaving a star rating and/or a comment below, and maybe even sharing this post on social media!
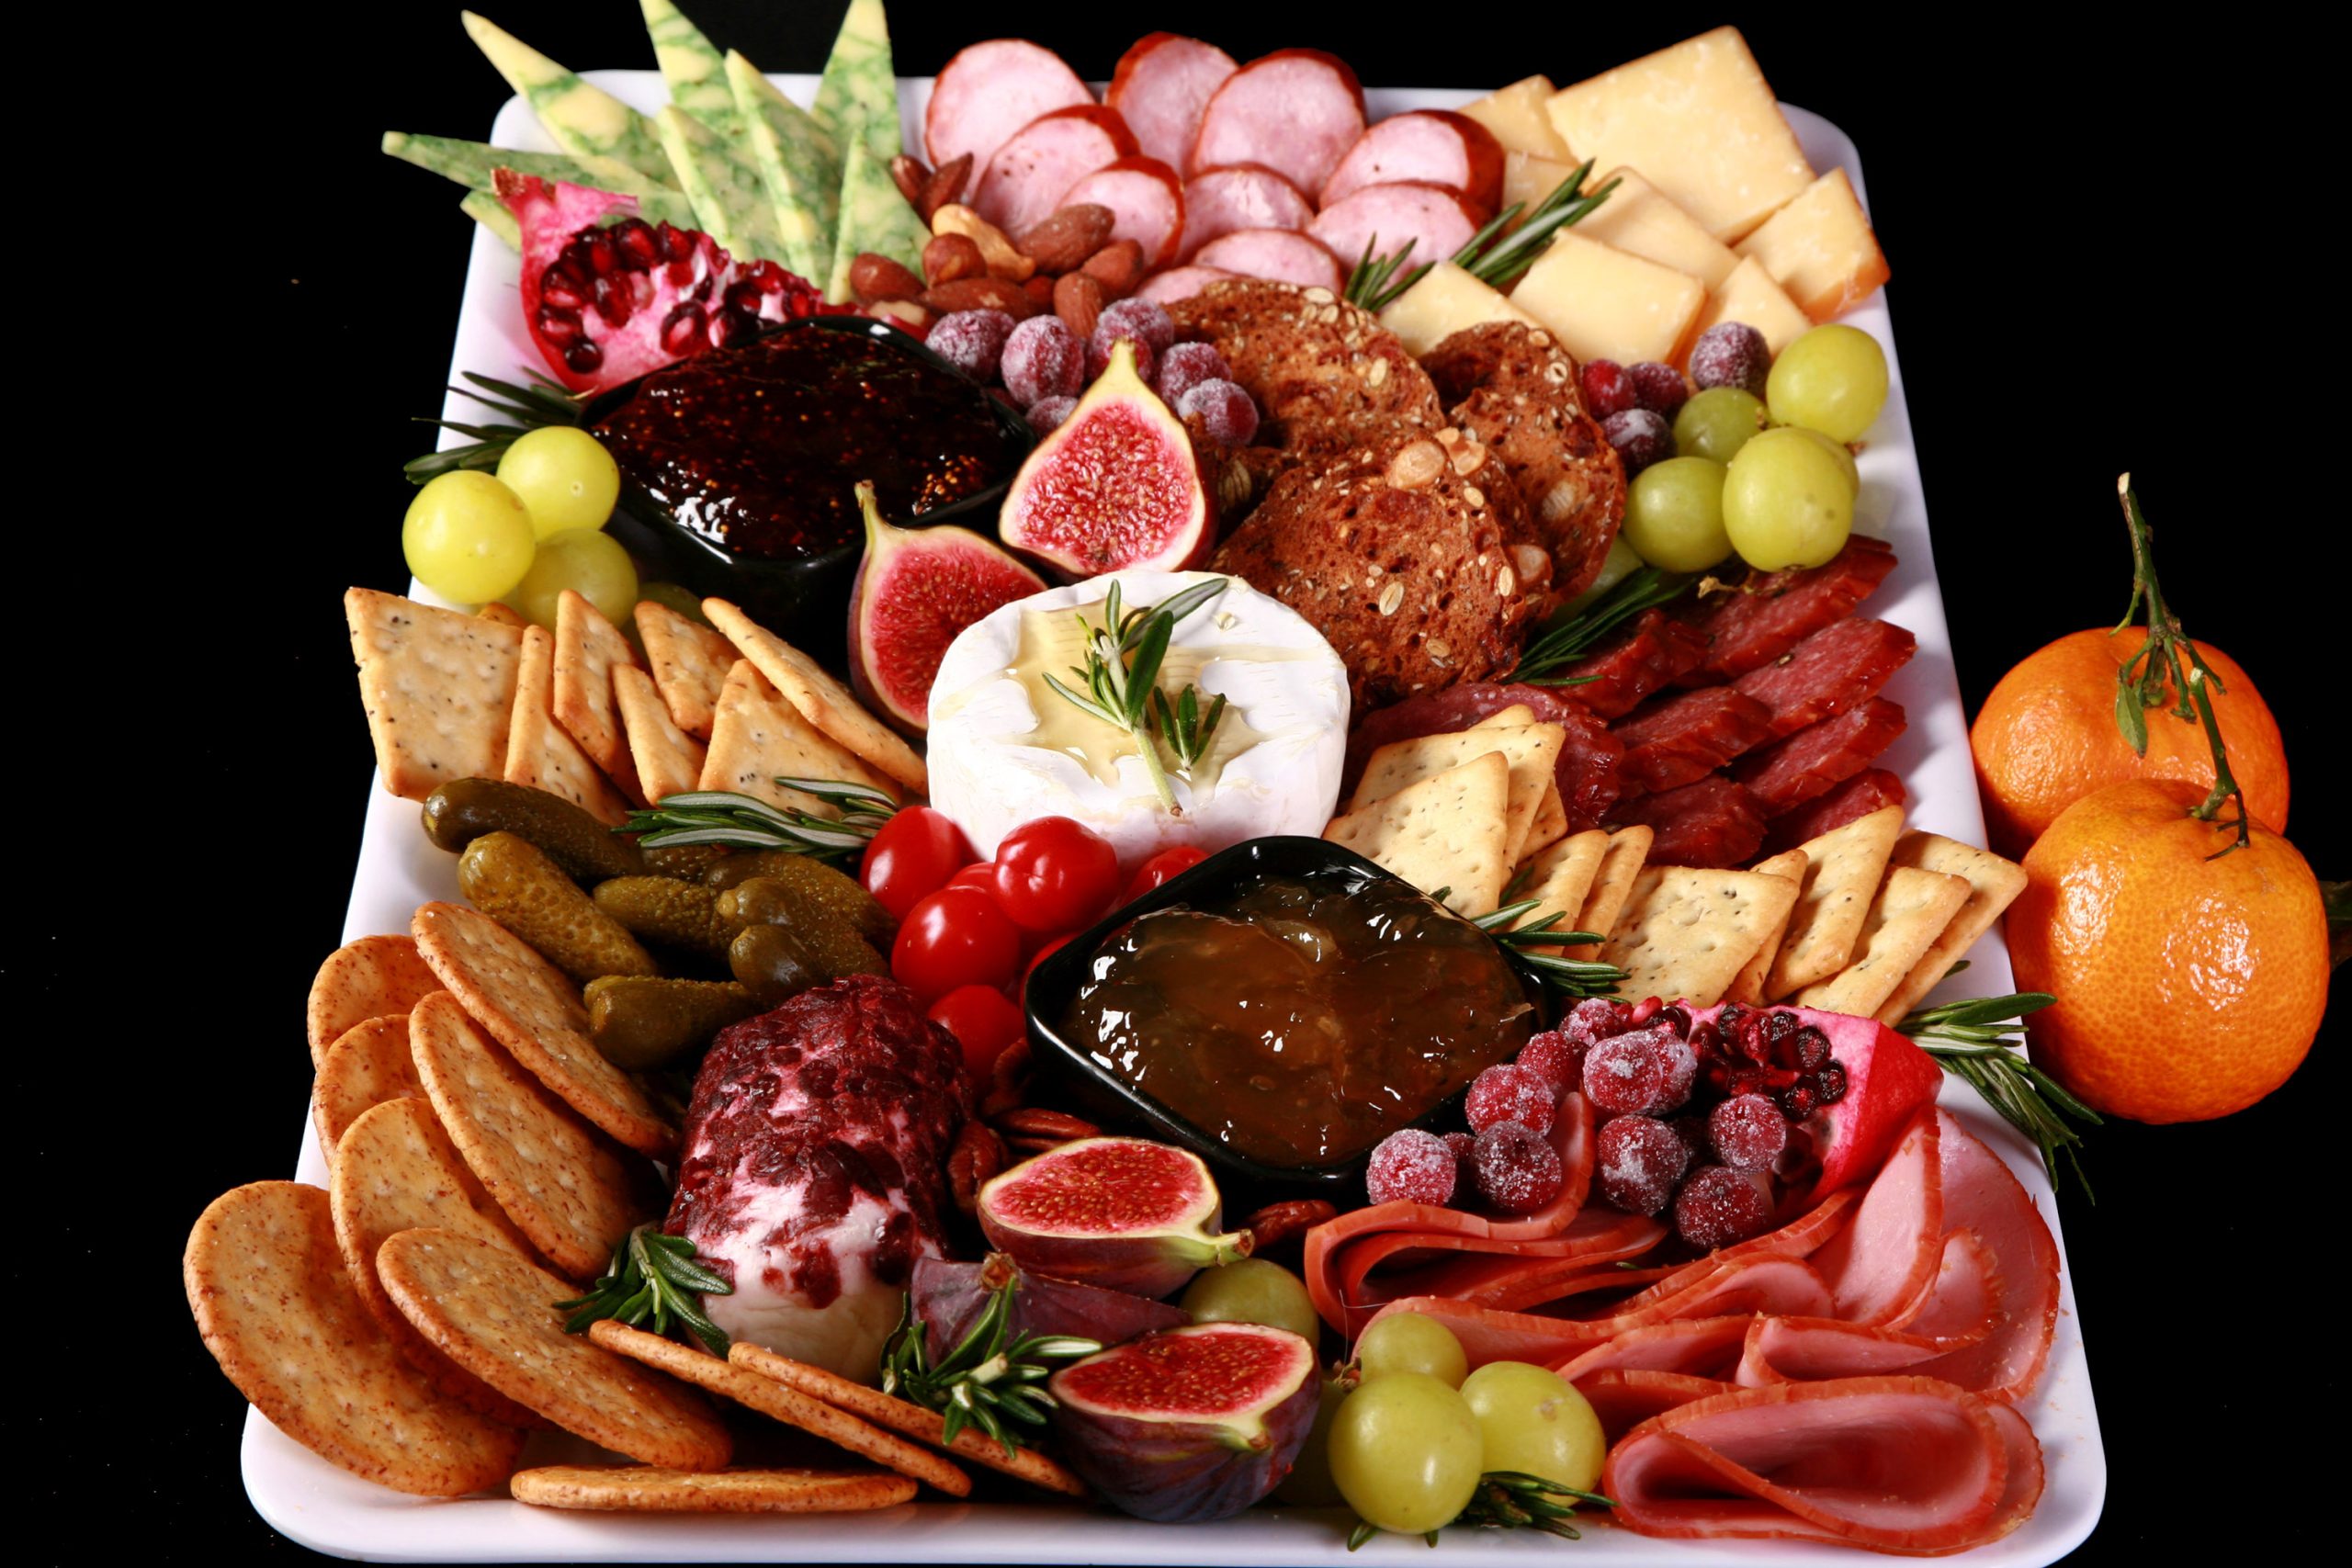
How to Make a Festive Christmas Charcuterie Board
Equipment
- Charcuterie Board
- Ramekins and Dip Bowls
- Cheese Knives, etc
Ingredients
- 3 oz Cured or smoked meats see post for suggestions
- 3 oz Cheese see post for suggestions
- Crackers see post for suggestions
- Produce Sauces, Snack Items, and Garnishes as desired - see post for suggestions.
Instructions
Place the Main Items
- Place your focal point items - wheels or chunks of cheese, sauce ramekins, dip bowls, etc - on the charcuterie tray.
- Situate your meats roughly where you’d like them to go, then place your cheeses.
Fill in the Secondary Items
- Arrange sections of your starches - crackers, cookies, bread.
- Fill in your sections of the more “snacky” produce, leaving more “garnish” produce for a later step. In this example, that means placing the grapes, figs, and cherry tomatoes now, and saving the sugared cranberries and rosemary for the finishing touches.
- Place sections of your “Munchies” items, filling in any larger empty spaces. This is the cornichons and mixed nuts, on the charcuterie board as pictured.
Final Touches
- Arrange your meat and cheese slices more artfully, if desired.
- Fill in any sparsely covered areas with more meat, cheese, produce, etc.
- Add dips to the bowls, if applicable, then garnish as desired - I used rosemarie springs and sugared cranberries.
- Serve and enjoy!












Leave a Reply