Chocolate Leaves Cake Decorating Tutorial
This Chocolate Leaves Cake Tutorial is a fun project for any level of cake decorating experience - even beginner! Great for Valentine's Day.
Cost: $10
Equipment
- Leaf Cutting Set, Optional
- Small Diameter Pizza Cutter
- Water and a Brush
Ingredients
- A Cake
- Fondant
Instructions
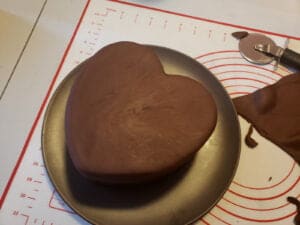
Cover the Cake
- Soften (if applicable) and knead your fondant to make it more pliable. Be sure your hands are VERY clean!
- Roll out your fondant and cover your chilled cake, taking care to smooth it all out from the centre out and down, eliminating any air bubbles as you go.
- Use your hands to carefully mold the fondant down around the sides, flaring out from the base.

- Use a small wheel pizza cutter to trim the excess fondant from the base of the cake.
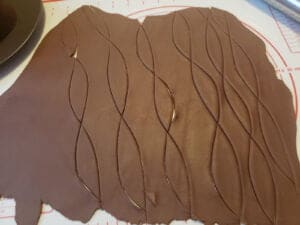
Cut your Leaves
- Re-knead your fondant and roll it out quite thin - about ⅛" inch thick. You want to strike a balance between being strong enough to stand up, and thin enough to not look clunky.
- Use your choice of cutter to cut out a bunch of leaf or petal shapes from the rolled fondant. Ball up the excess and wrap in plastic wrap - you’ll be re-rolling it and cutting more, as you run out!
Decorate the Cake
- Flip a couple of your leaves over, and brush the “lower” half of each with a little water.
- Press each against the cake, so that the dry part of the underside is sticking up over the edge of the cake, as pictured.
- Repeat all the way around the cake, varying the angles of the leaves.
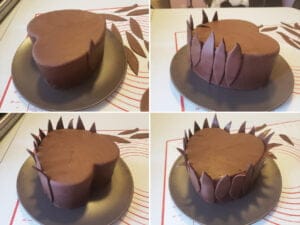
- Once you’ve made it the whole way around, repeat with another layer, down a bit from the first - as pictured.
- Again, vary the angles of the leaves, overlap them randomly, etc.

- For the final row of vertical leaves, use your pizza wheel or a knife to cut across the bottom of several leaves, before applying them. This straight edge will go along the bottom of the cake, touching the cake plate.
- Alternatively, you can position whole leaves overlapping onto the plate, and just trim the excess when you’re done.

- I like to go back with one final row of leaves to form a horizontal border, as shown.

- Shortly before serving, pile the top of the cake with fruit of your choice.