

Candy Apples are a fun activity for the family, are cheap and easy to make, inspire nostalgia, and are a tasty way to use some of the bountiful apples this season. What's not to love?

Originally published October 27, 2009, Updated on 8/4/22
While this is an easy homemade candy apples recipe, I recommend keeping little hands away from the cooking sugar, and ideally away from the dipping process as well.
Kids can have just as much fun picking out the apples, the flavors, etc... without the risk!
Anyway! Not to scare you right off the bat or anything, just figured I should put that our there!
When I first blogged this recipe back in 2009, it was a few years after I’d moved to the USA - and I was shocked that they weren’t as much of a THING, when fall season came around
Caramel apples, yes. Bright red candy apples? Not so much!
Not sure if that’s a Minnesota thing or a US thing.
I do remember seeing some kind of a kit with a wrap (??), but the best candy apples are made from a scratch recipe and eaten soon after making.
Anyway, lots to share with you on the subject, so let’s get to it!
Ingredients
As is, this is a pretty traditional candy apple recipe. It requires really simple ingredients that you can find at any grocery store.
Apples
The kind of apple you use is really up to you. Any apple that you like to eat raw (as opposed to one you’d only use for baking) is generally a good candidate for making candy apples with.
Some popular options include gala apples, fuji apples, and jazz apples.
Personally, I like to start with tart or semi tart apples.
Not only is it my favourite apple of all time, it also looks great in pretty much any candy colour!
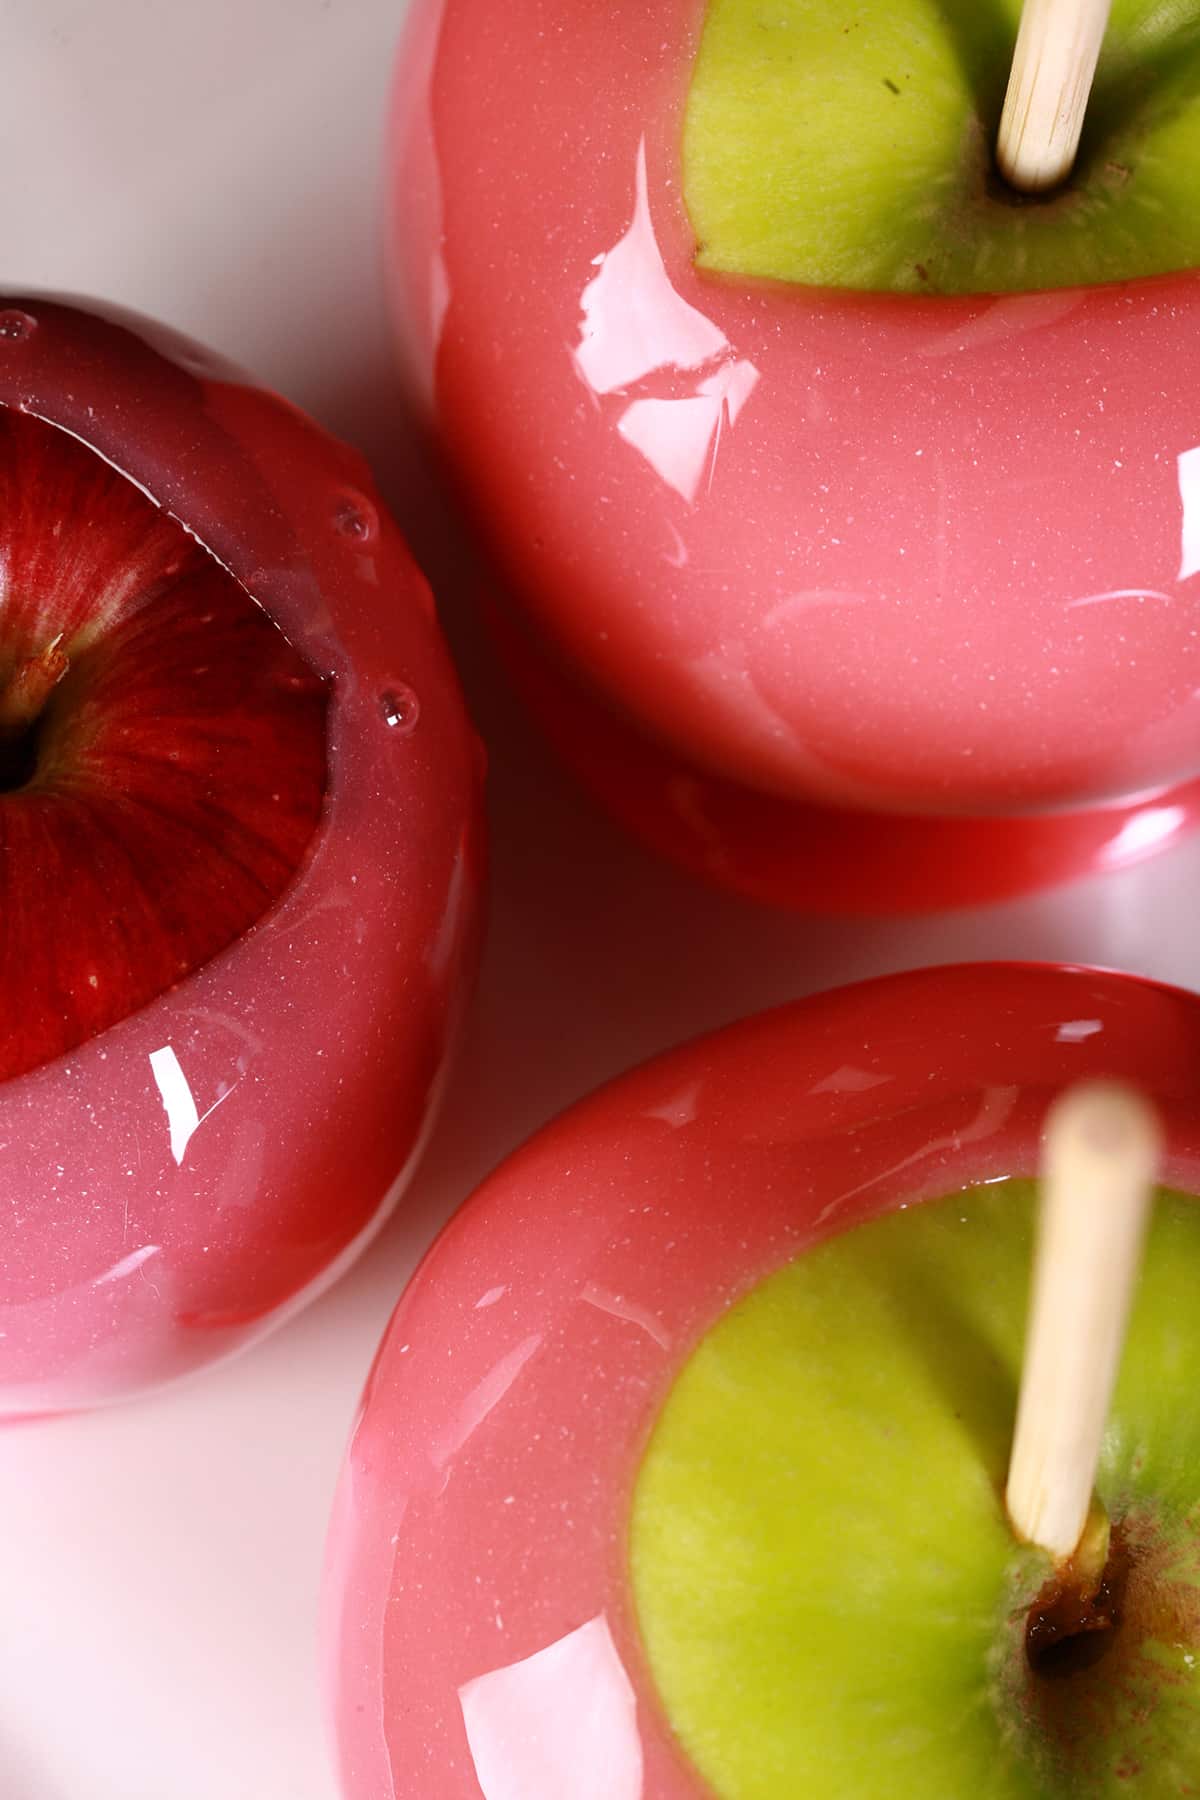
Tart Granny Smith apples are another common choice when making your own candy apples. Their coloring is generally pretty uniform (looks good under the candy!), and the tartness is a great contrast to the sweet candy coating.
Green apples in general look really nice when candied. Their light color provides a nice backdrop for the candy coating to shine!
Choosing Your Apples
Choose nice, big apples that don’t have any soft spots or blemishes.
I usually figure out what flavor/colour I’d like to do, and then choose the apple type based on that.
As an example, Grape and Banana candy look great on Red Delicious apples, Cherry and Grape look particularly nice on Granny Smith or Golden Delicious apples.
More on color and flavor in a minute, though!
If your apples have a wax coating, you’re going to want wash them in hot water to remove that and fully - FULLY! - dry the apples before coating them with candy.
Sugars
This recipe uses two different sugar sources - granulated white sugar, and light corn syrup.
While you COULD use brown sugar and/or dark corn syrup, I find that they impart too much molasses-type flavour, and can muddle the flavour of the candy.
Flavouring
There are two main types of flavouring you can use for to make the perfect candy apple:
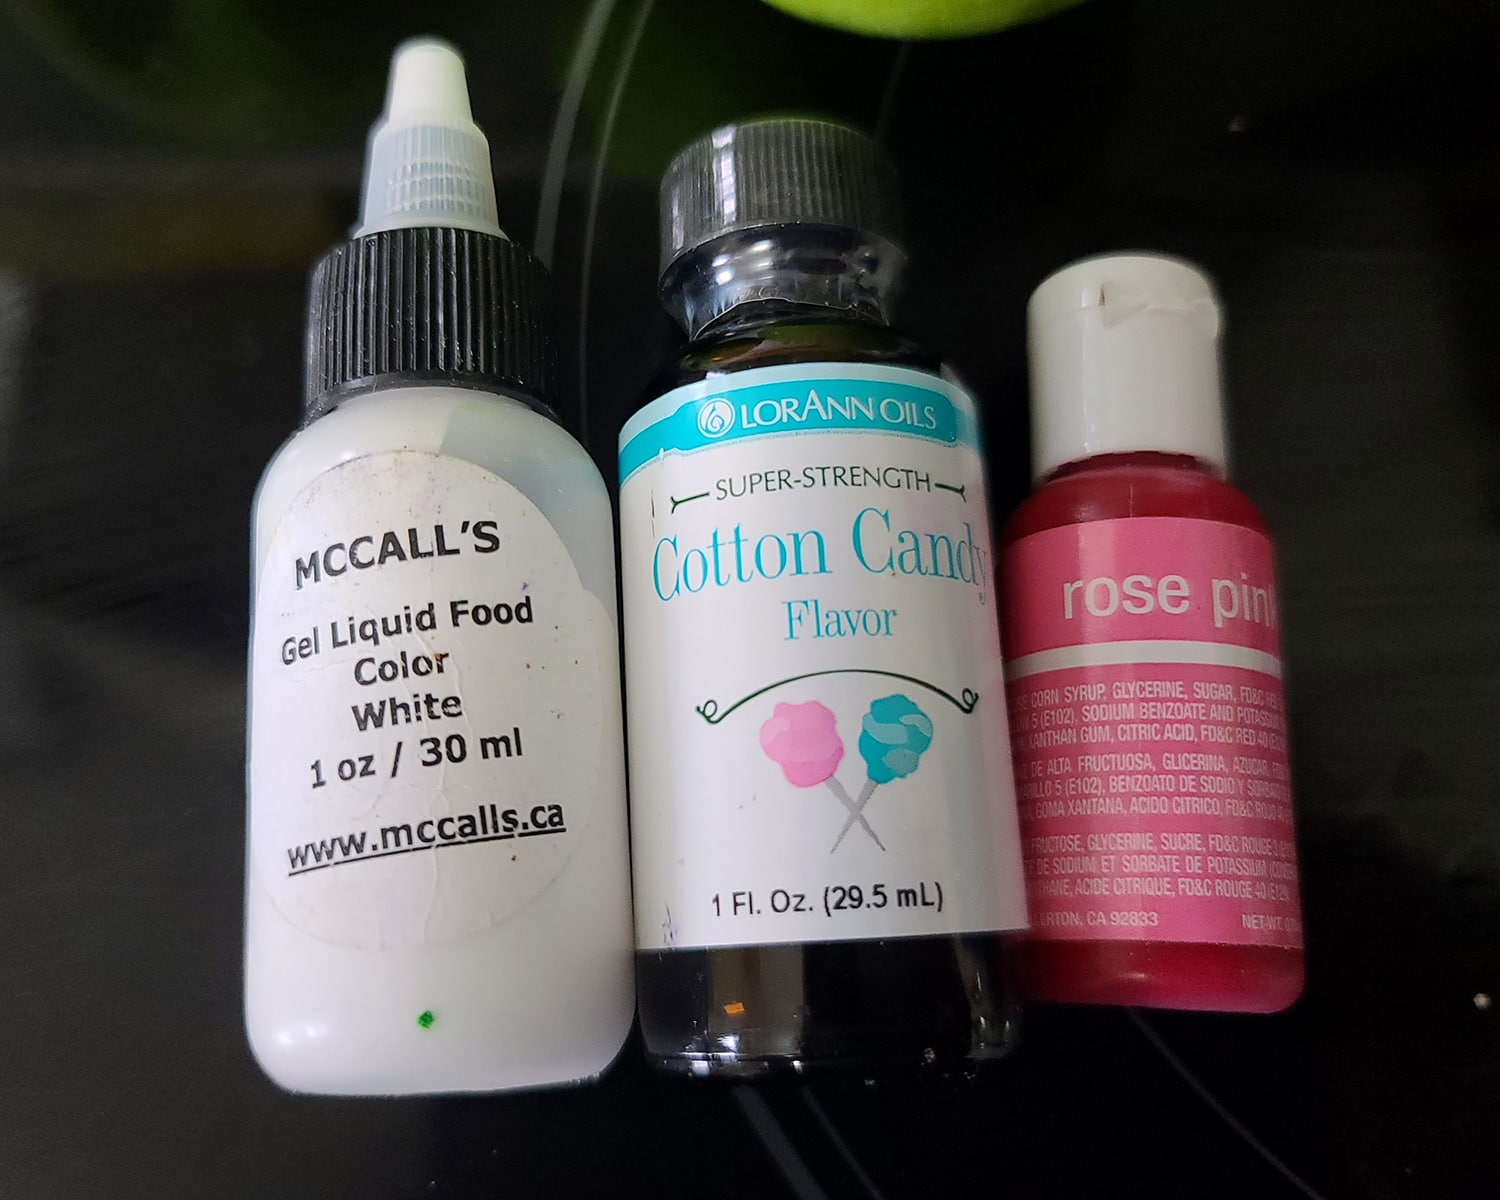
Flavour Extract - This is the stuff you can buy at the grocery store, usually McCormick brand.
You can usually find some good basic flavours that’ll work - Cherry, Orange Extract , Lemon Extract , Grape, Banana Extract, Strawberry Extract , etc.
Even Maple Extract works well - I just tend to stick to fruity flavors, leaving maple for caramel apples.
It comes in a LOT more flavours than grocery store extracts do, so you can really have fun with it!
Note: Flavour oils are MUCH more concentrated than extracts. You’ll need a tablespoon of extract in this recipe, but only a teaspoon of oil.
Food Coloring
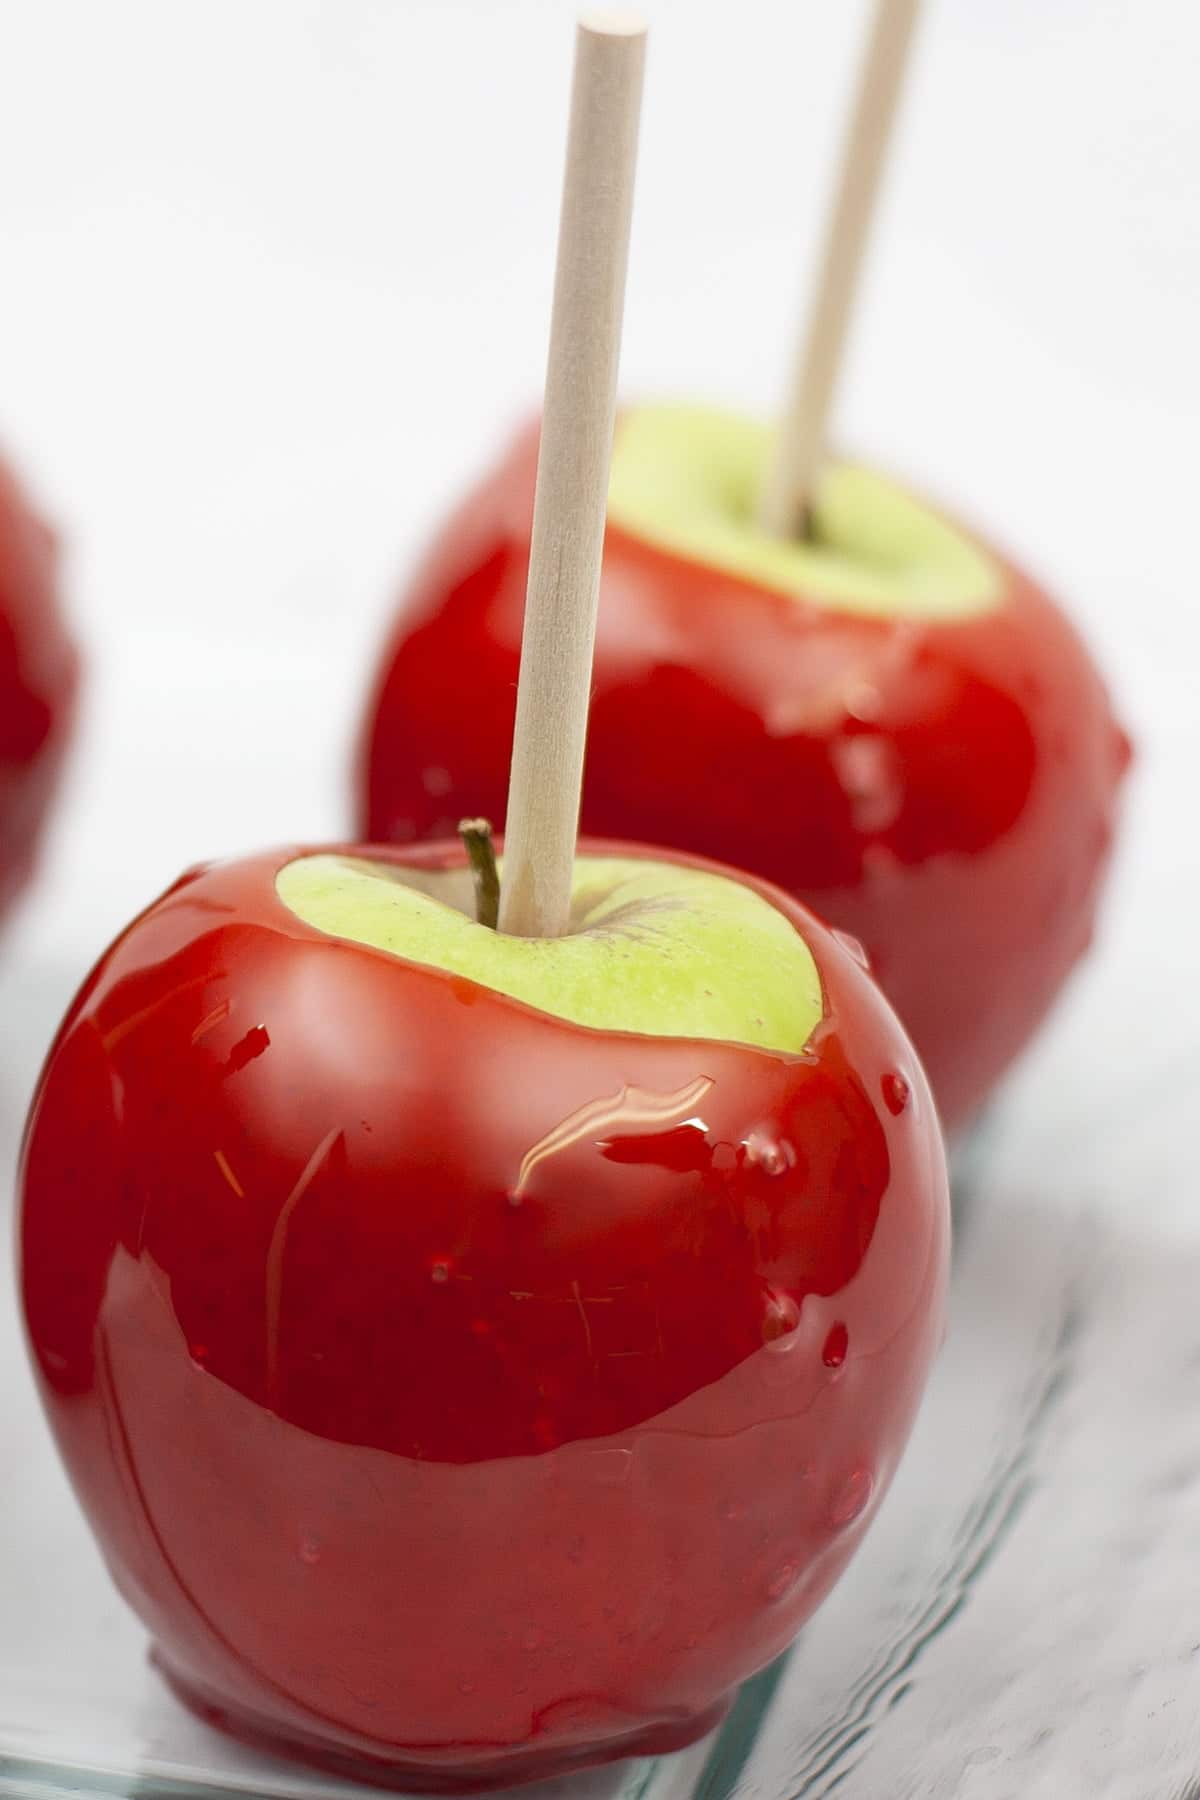
Red food coloring is traditional, but definitely don’t feel married to it.
What’s the fun of having access to a ton of colors, if you don’t get wild with them?
I like to choose my flavor first, then the candy colour... but sometimes I’ll be going for a certain look, and will pick the colour first and decide what flavour would be nice with it.
When using grocery store extracts, I like to flavor my candy apples with cherry, Banana Extract , or grape extract.
Usually, I like to color my candy to match: Purple for grape, yellow for banana, and so on.
Sometimes I’ll let my “Chaotic Good” side out, and make purple banana, yellow cherry, or whatever. They’re Candy Apples, have fun with different colors!
Black - regardless of flavor - looks GREAT for serving at a Halloween party!
Whichever colour(s) I go with, I prefer to use a nice quality gel based colour, such as Americolor (what I used when I was in the USA), or ChefMaster (Which is the option more readily available here!)
You can use the grocery store liquid food colouring if you like - it’ll just take a bit more of it!
Opaque Colours
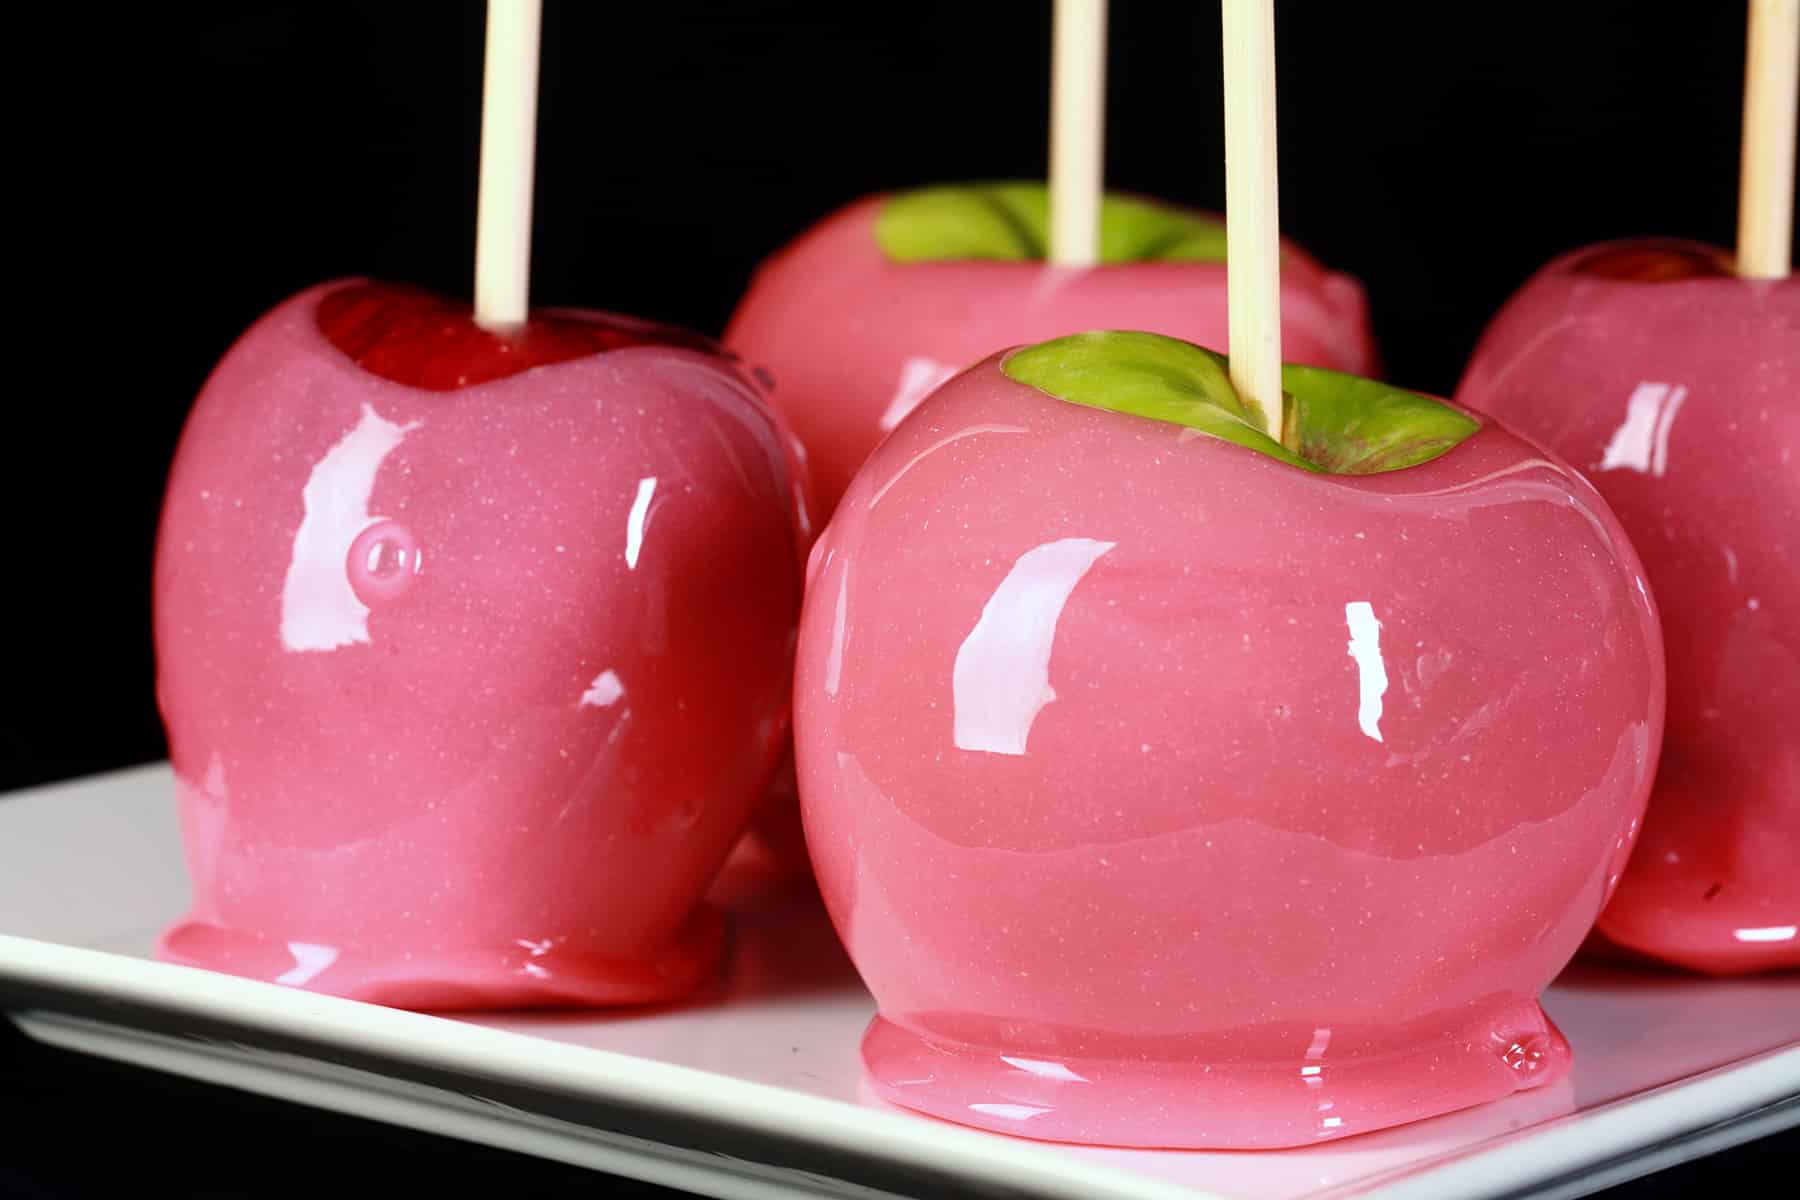
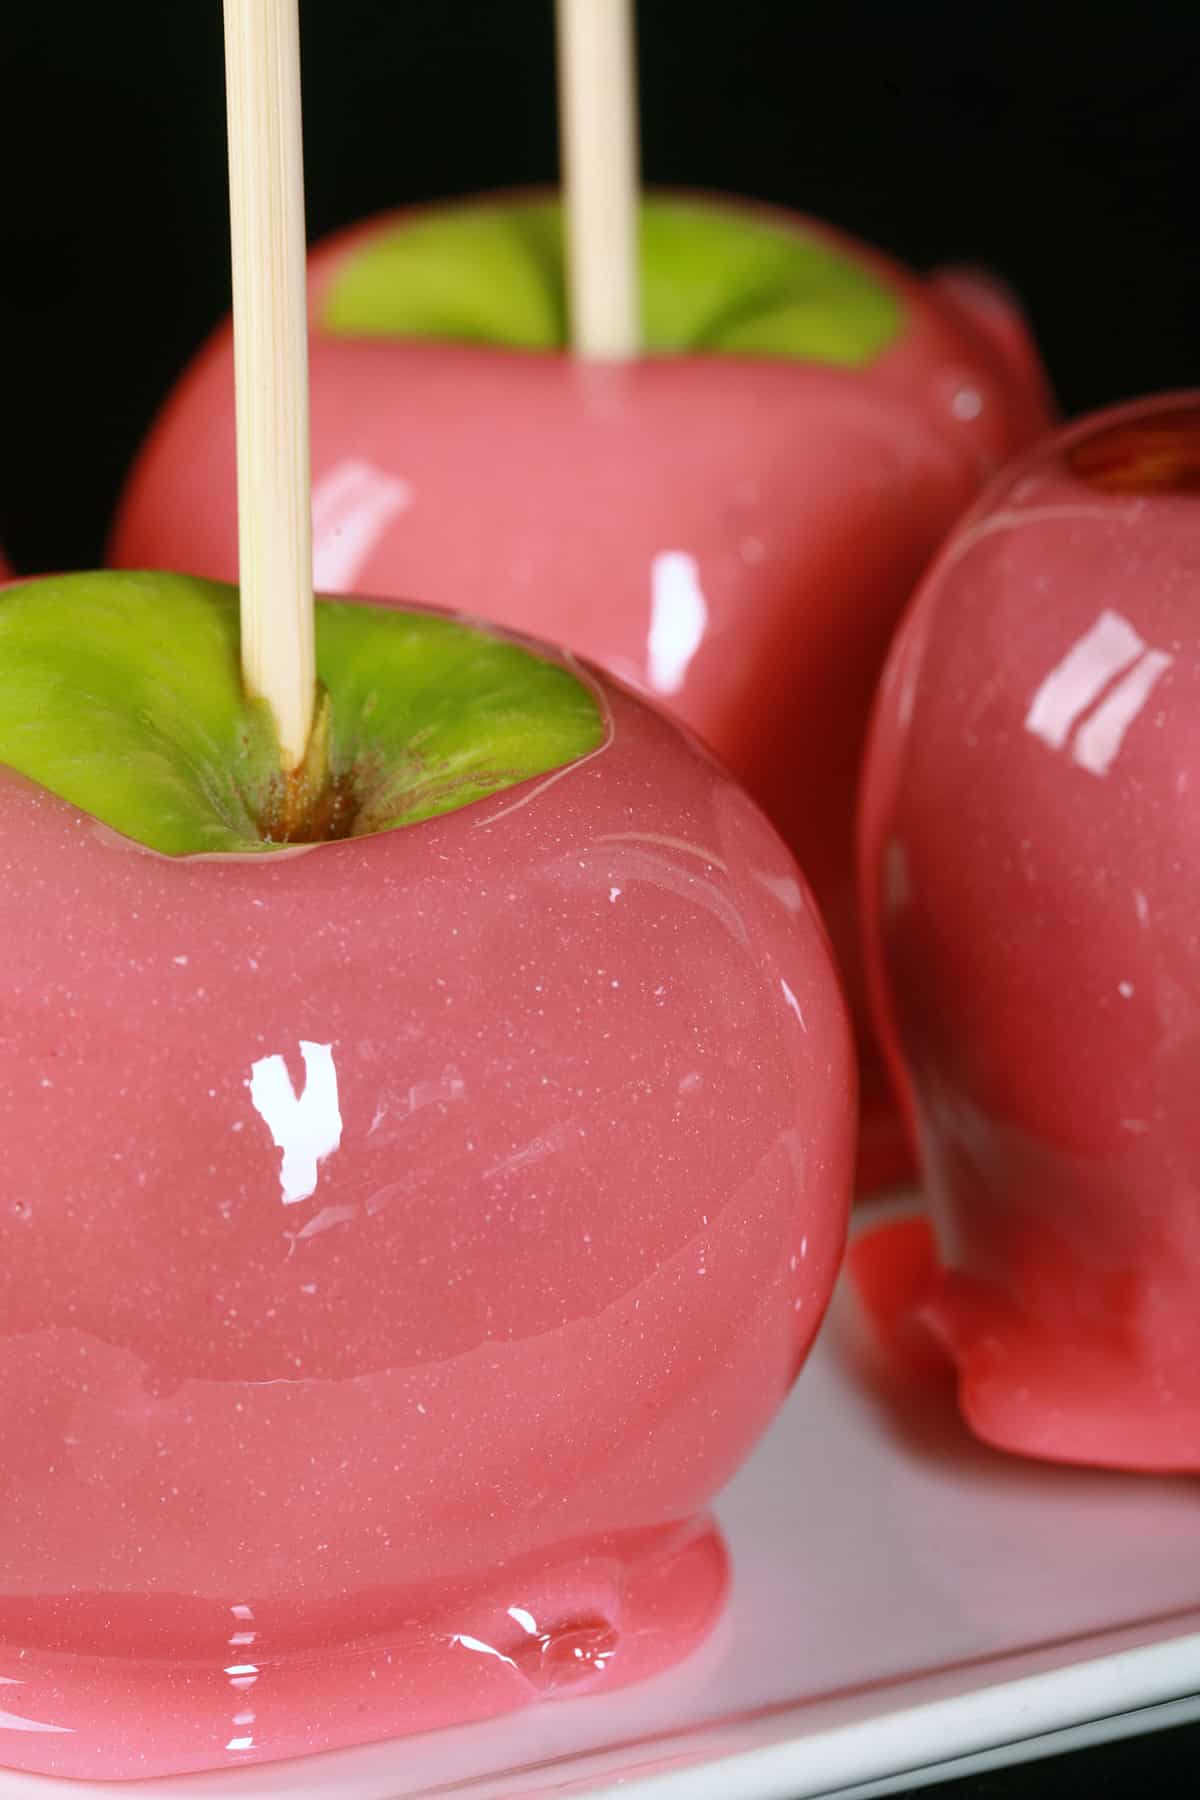
If you want your candy to be opaque - that is, not a sheer, see-through candy - use a few drops of WHITE gel food colouring - I recommend Americolor White Gel Paste - before mixing in your colour.
You can do all kinds of fun pastels, or just creamy medium-tone colours using this technique. The white food coloring provides a nice base to make the final colour stand out more from the apple.
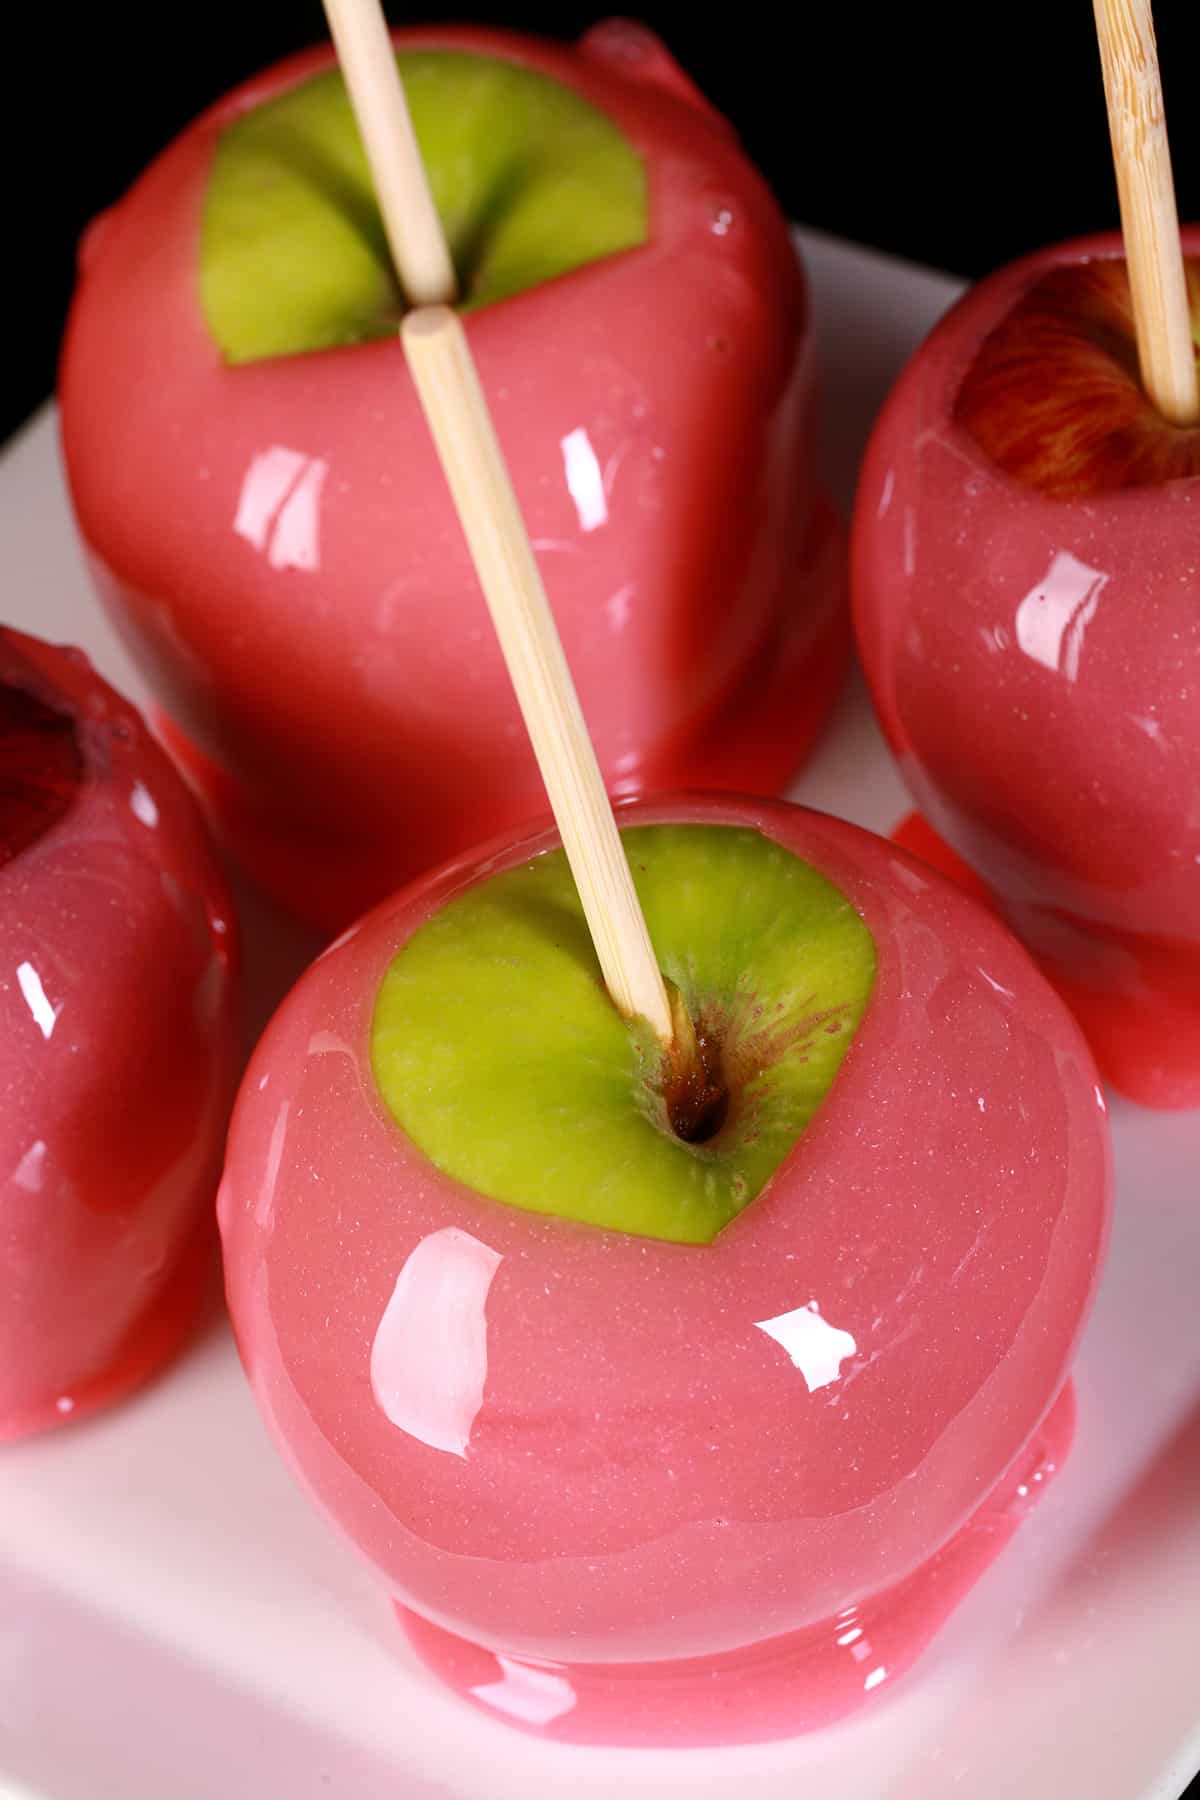
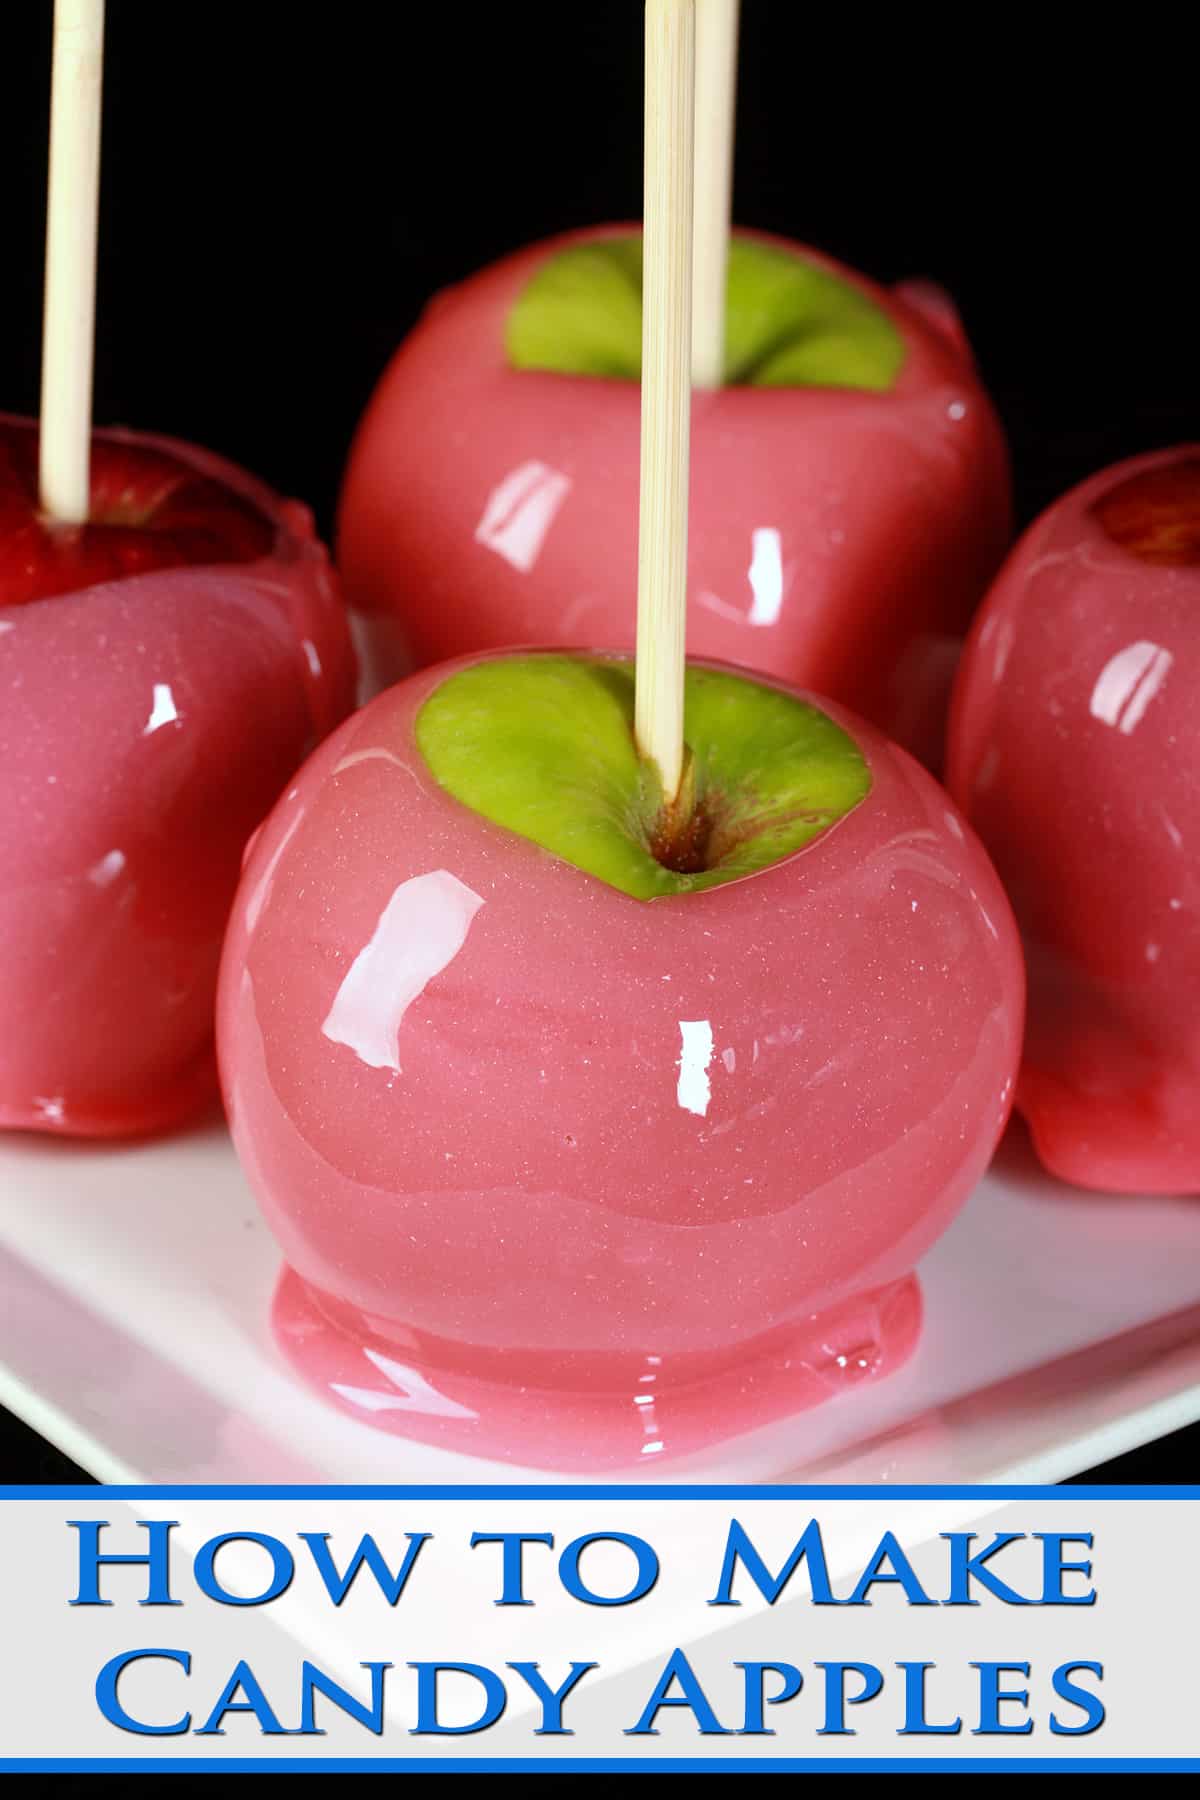
Example: You can start with white, tint it pink or baby blue, add some Cotton Candy Flavour Oil, and it’ll show up and look great on any colour of apple!
The pink candy apples throughout this post were done with that cotton candy flavor oil, which tastes SO good with a tart green apple base!
Equipment & Supplies
You’ll need a couple basic things to make this candy apples recipe.
Candy Thermometer
To make the perfect candy shell for your apples, getting the sugar syrup to the right temperature is THE most important thing.
So, you’ll want a Candy Thermometer on hand. They’re cheap to buy and come in really handy for all kinds of candy making recipes!
That said, you CAN make these without one - see the tips section a bit further down for info on how to make candy apples without a candy thermometer.
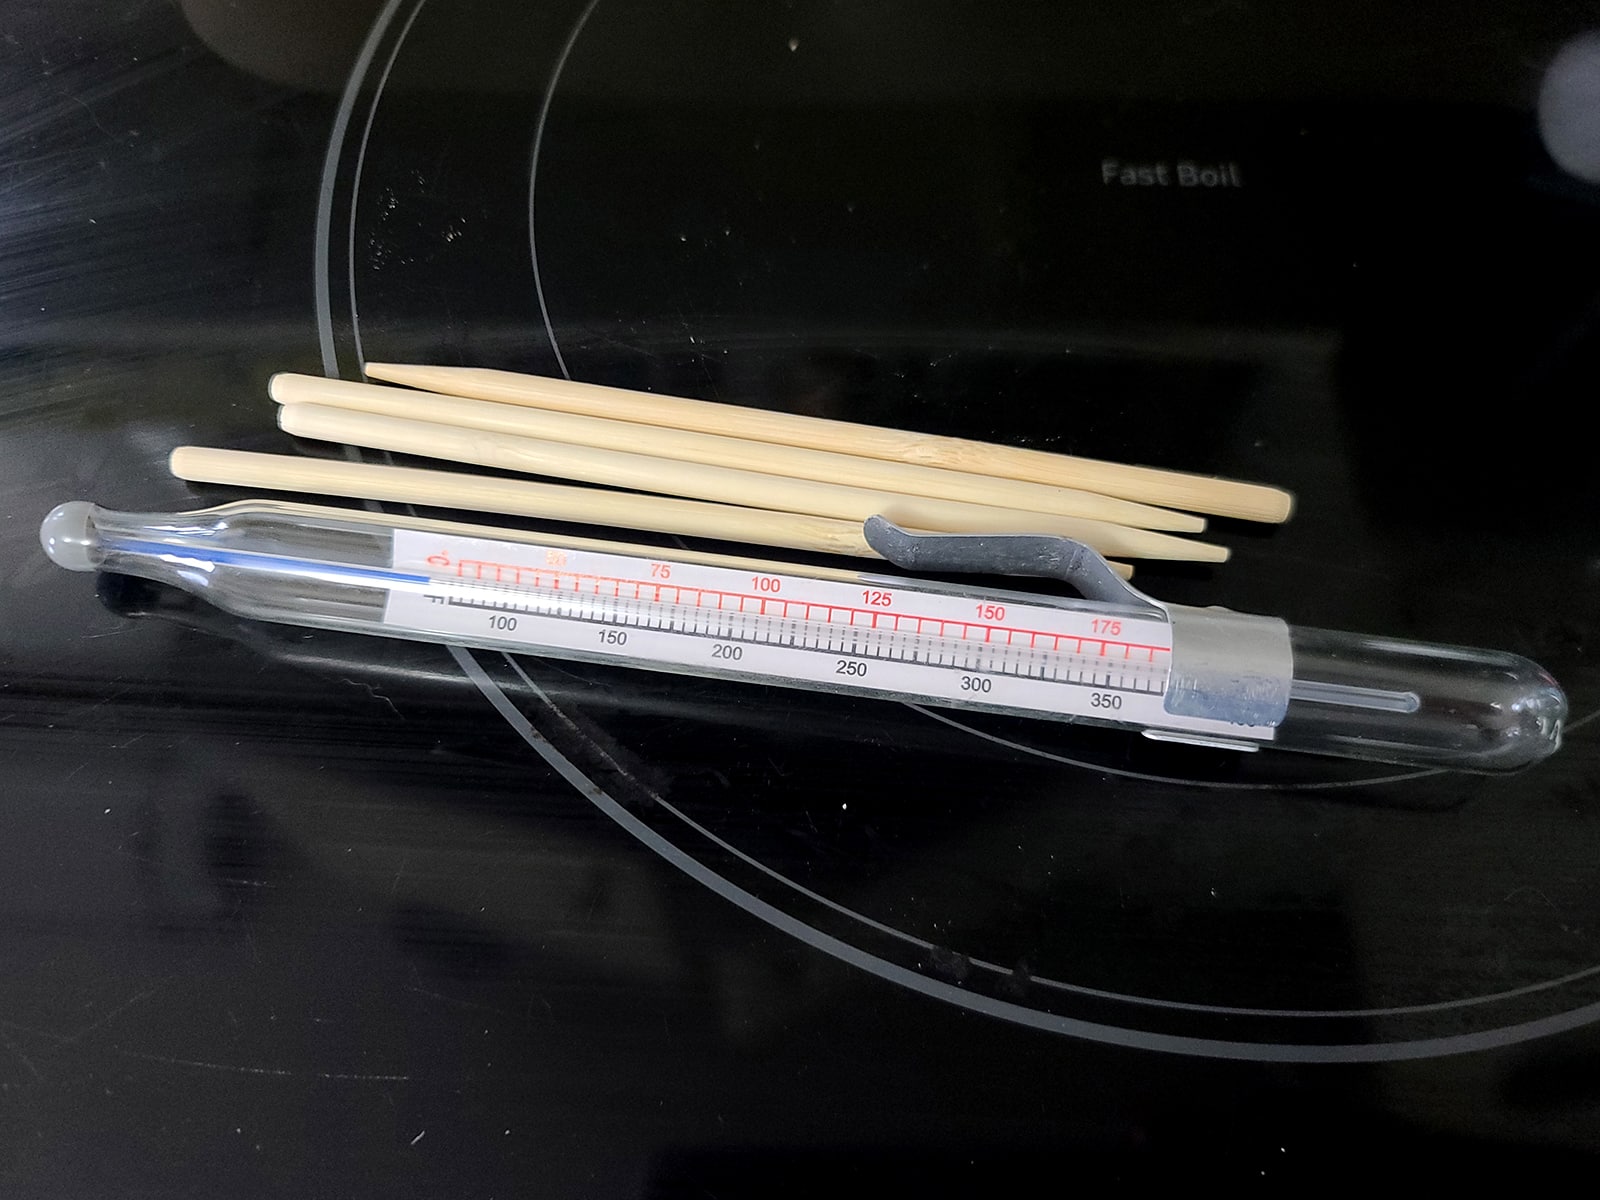
Wooden Candy Apple Sticks
I like to have wooden sticks that are specifically designated as being Candy Apple Sticks . They have one side honed to a point, which makes driving them down into the apple a lot easier.
That said, you can get creative with your choice of wooden stick style, if you can’t get a hold of the specialty ones.
The first time I ever made candy apples, I used popsicle sticks!
Whatever you choose, just make sure the apple stays on it securely, and it’s strong enough.
Something like a bamboo kebab skewer will snap when you dip the apple in the sugar syrup.
How to Make Candy Apples
The full recipe with ingredient amounts is in the recipe card at the end of this post. Here is the pictorial walk through, with additional information:
Prepare Your Apples
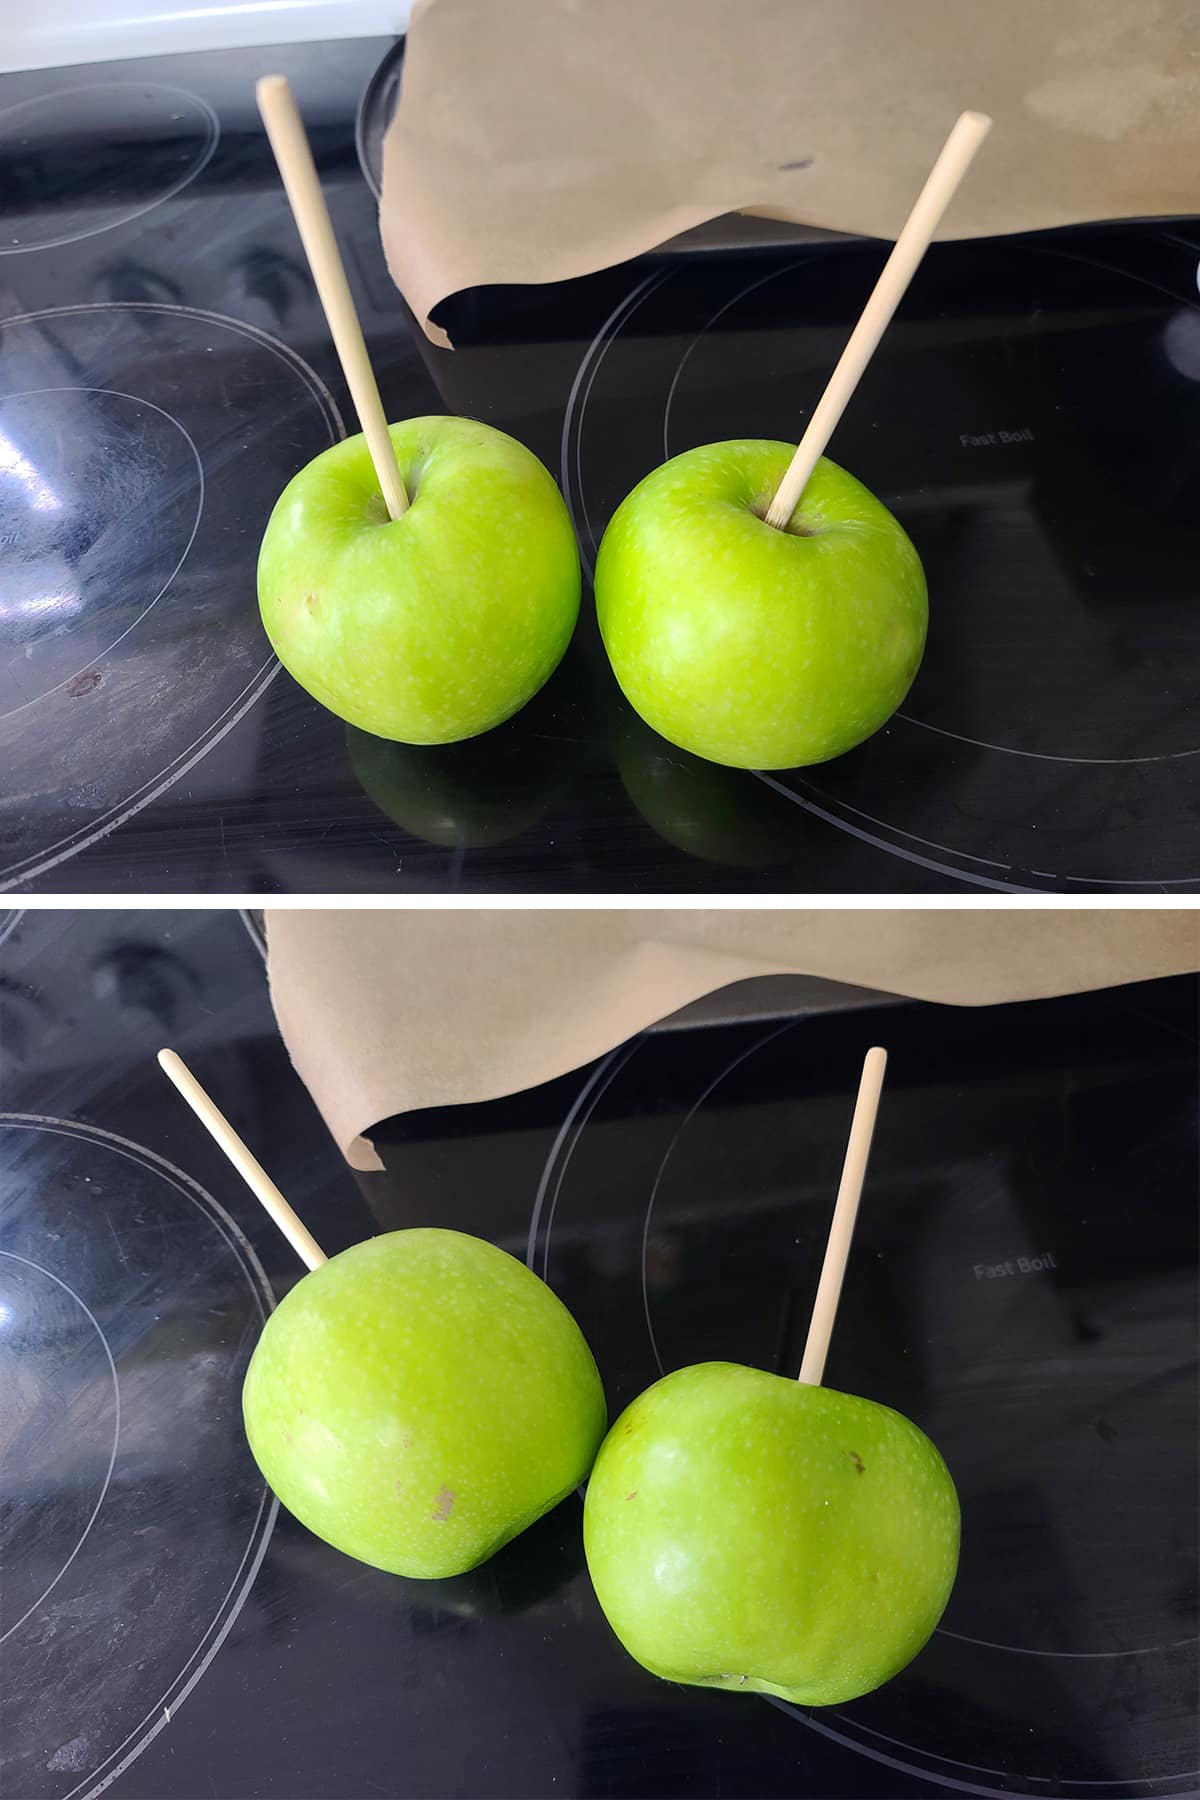
Grease a baking sheet with a bit of cooking spray, and/or line cookie sheet with parchment paper. Set aside.
Prepare the apples: Remove all stems and stickers (if applicable). Wash with warm water and fully dry apples. (Paper towels and then air dry a bit)
Insert a Candy Apple Stick into the stem end of each apple – They should go in far enough to reach the center of each apple. Set aside.
Make the Candy
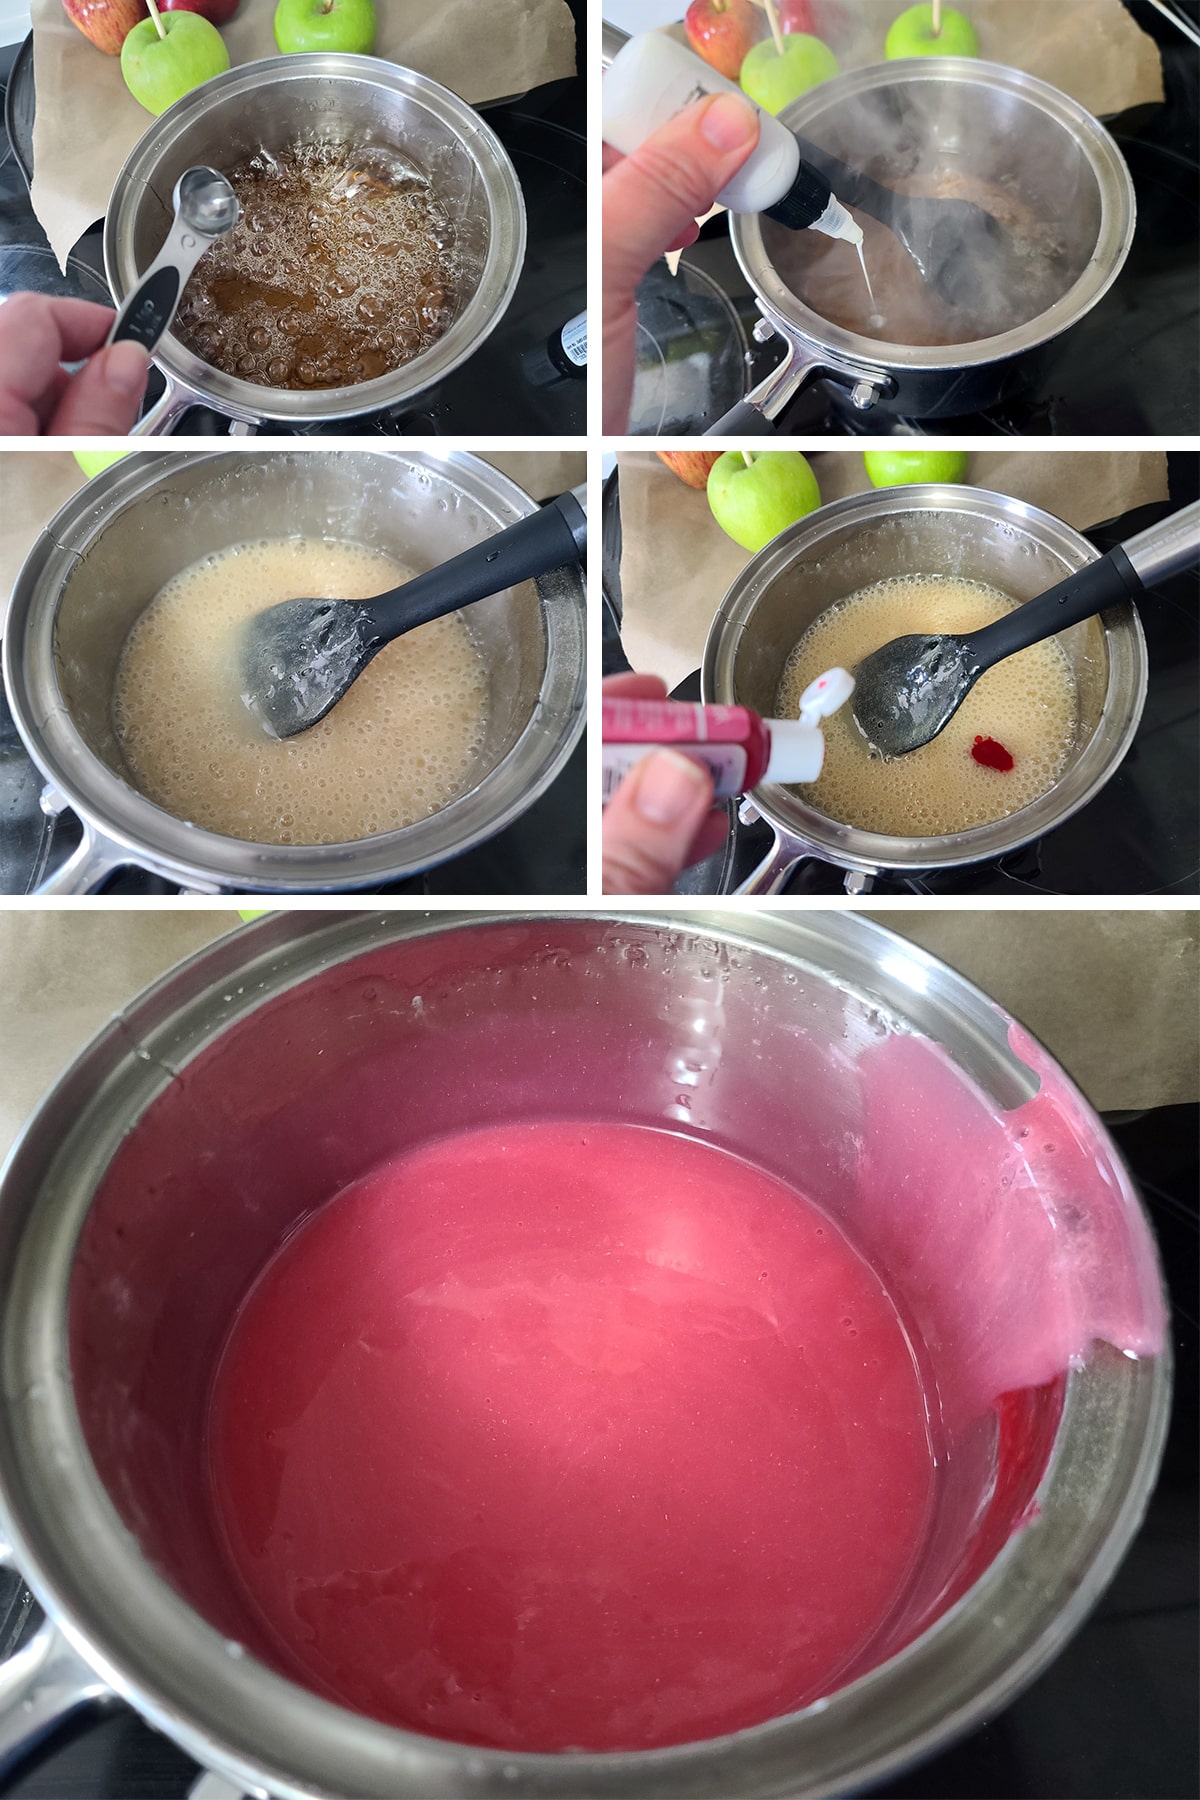
In a heavy saucepan, combine sugar, corn syrup, and water. Stir well, bring this sugar mixture to a boil on medium heat or medium-high heat. Affix candy thermometer to pan.
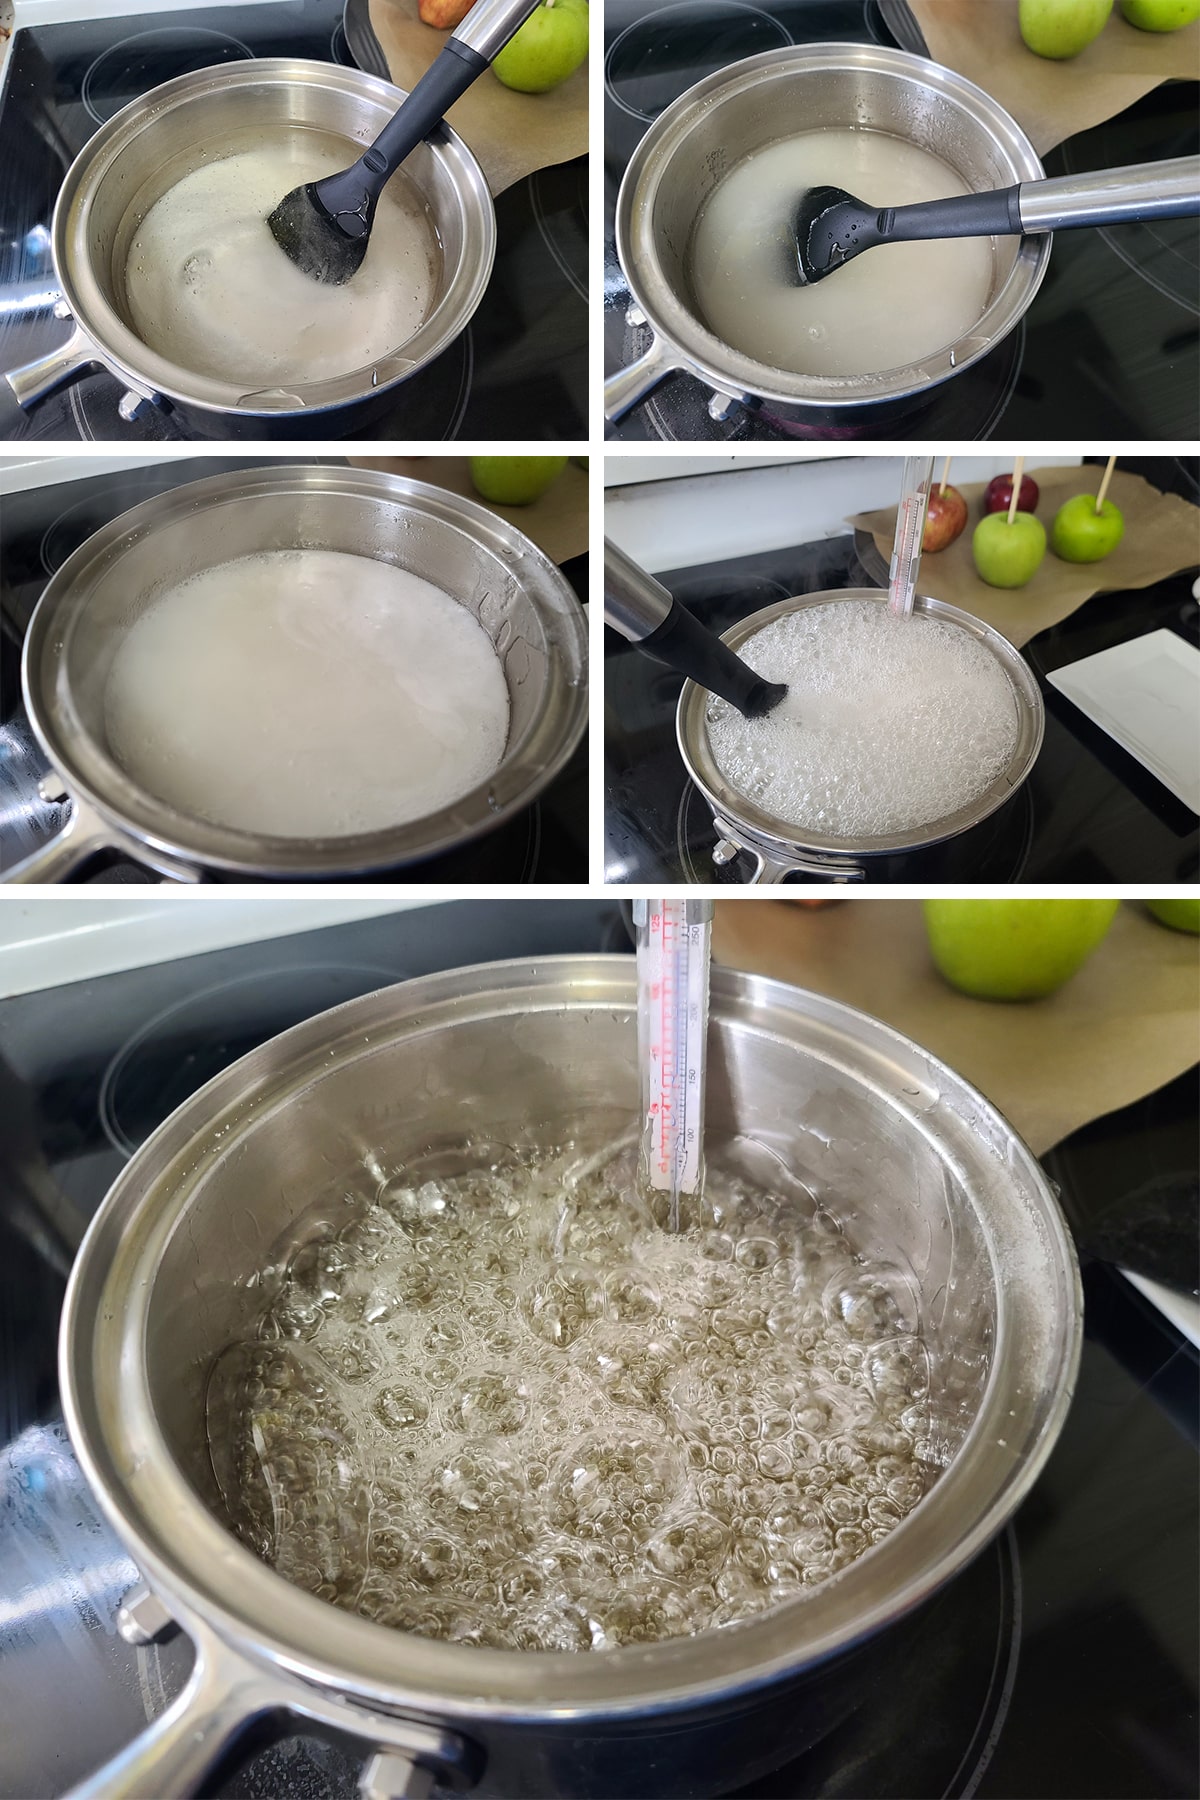
Cook sugar mixture, stirring occasionally, until it reaches 310 degrees. Try to keep it at a rolling boil.
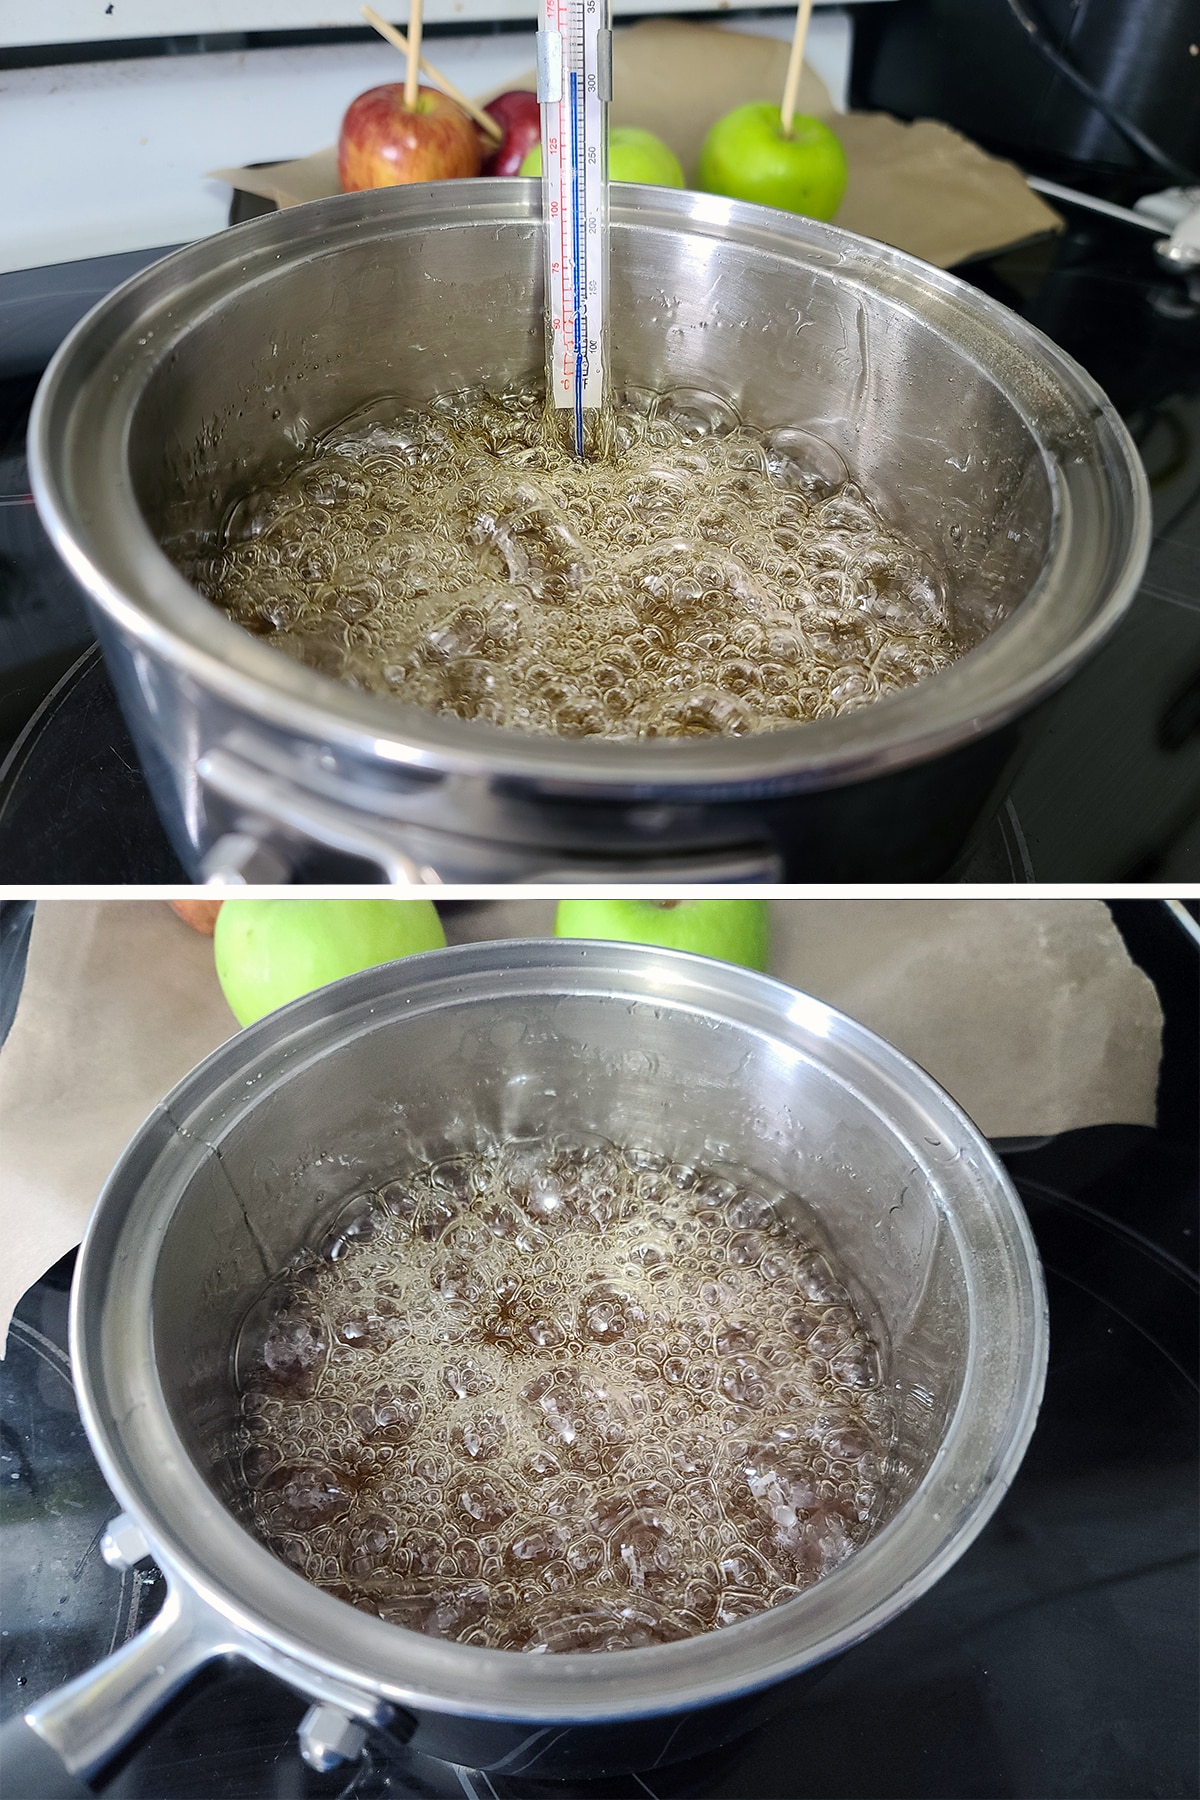
Stir candy mixture until it stops boiling, and most of the “bubbles” disappear – this will minimize texture on your finished coating.
Dip Apples
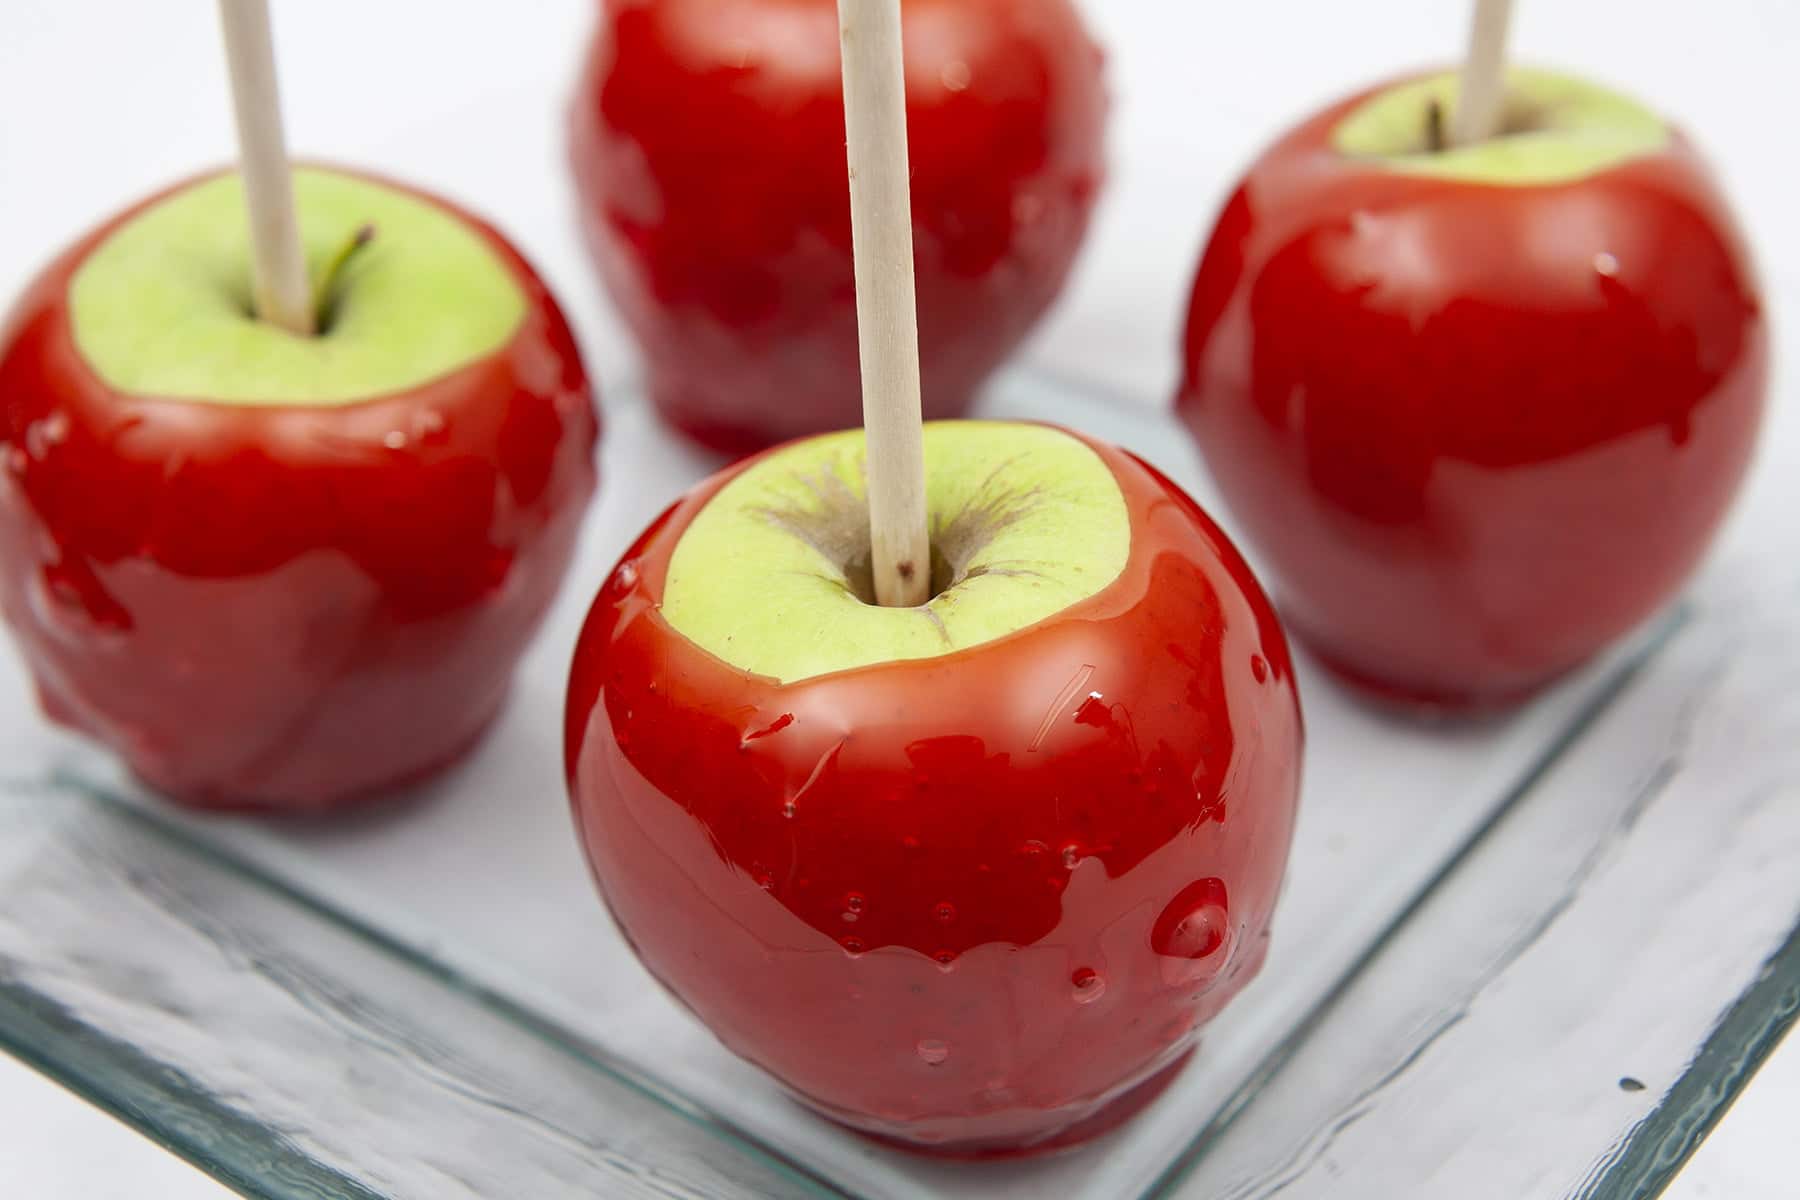
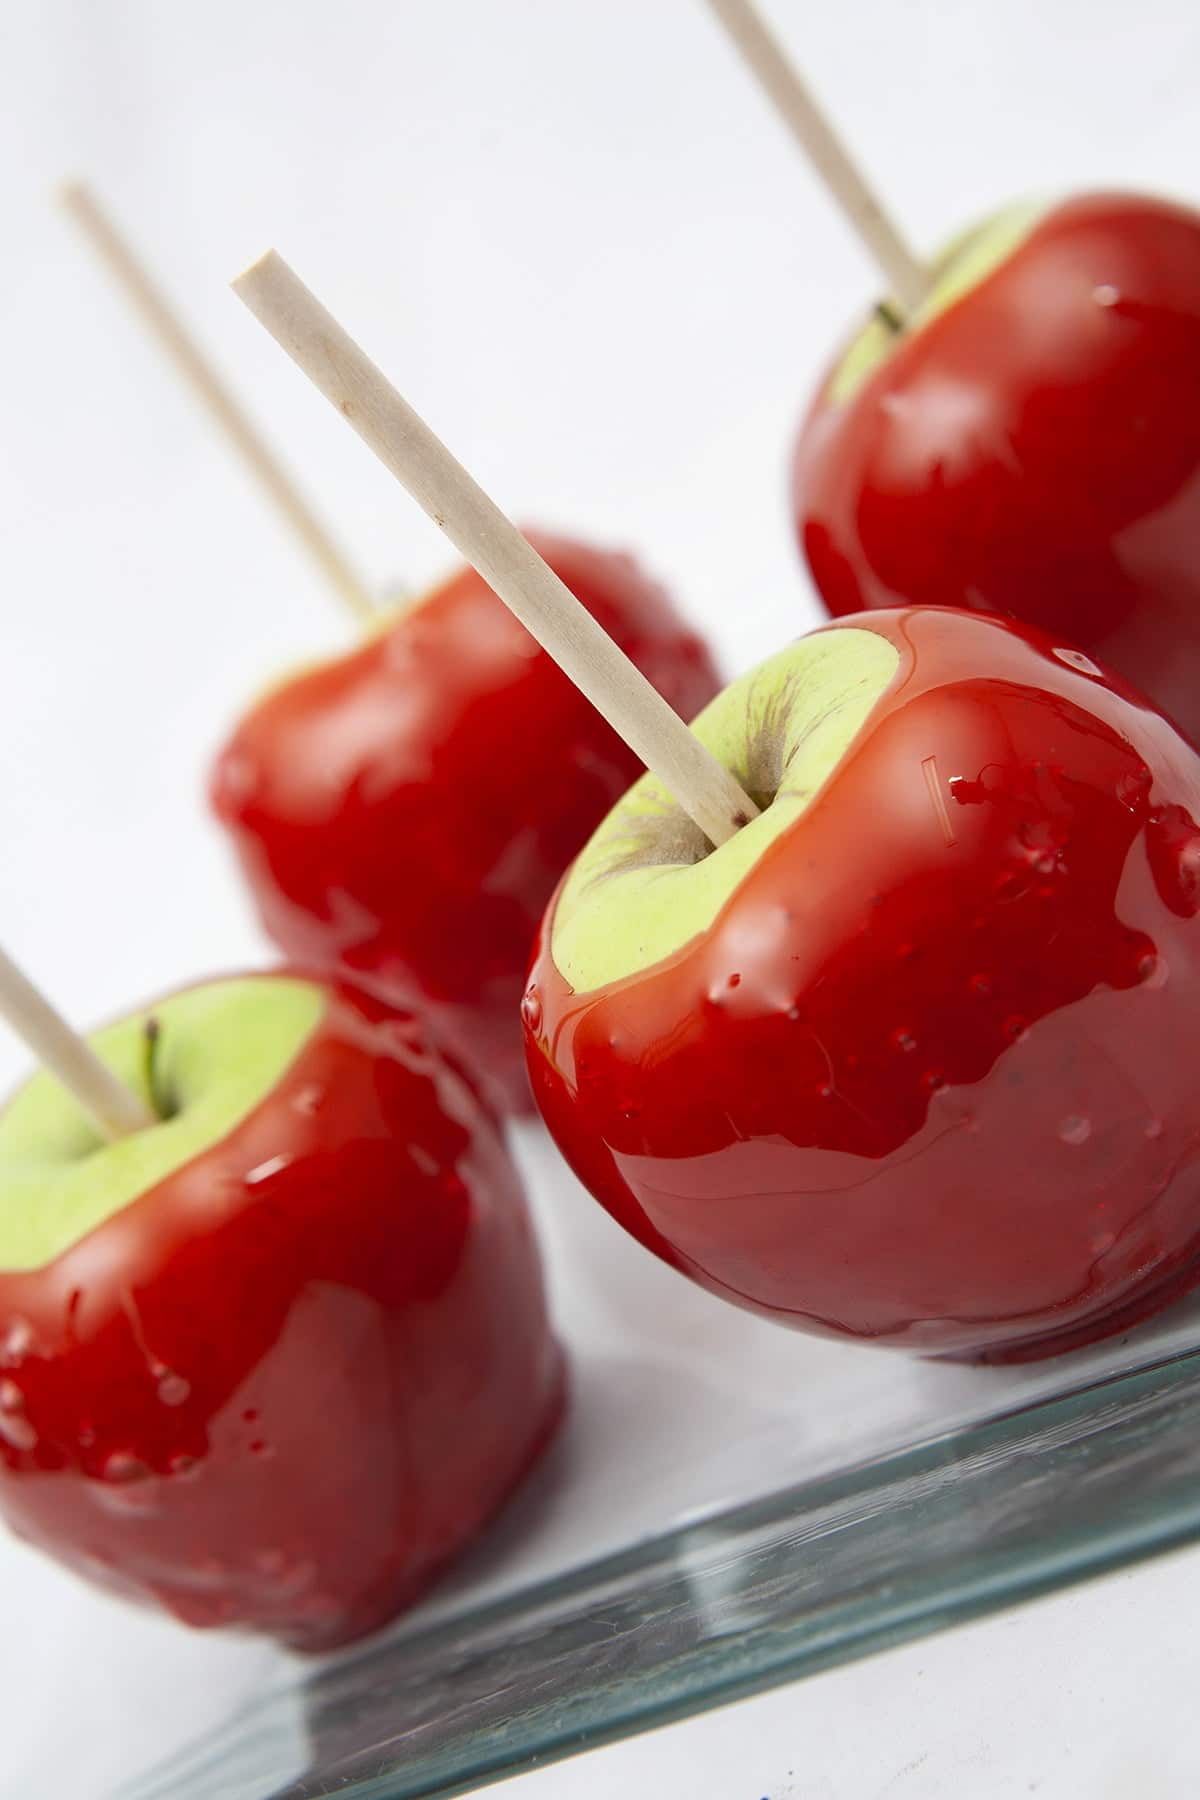
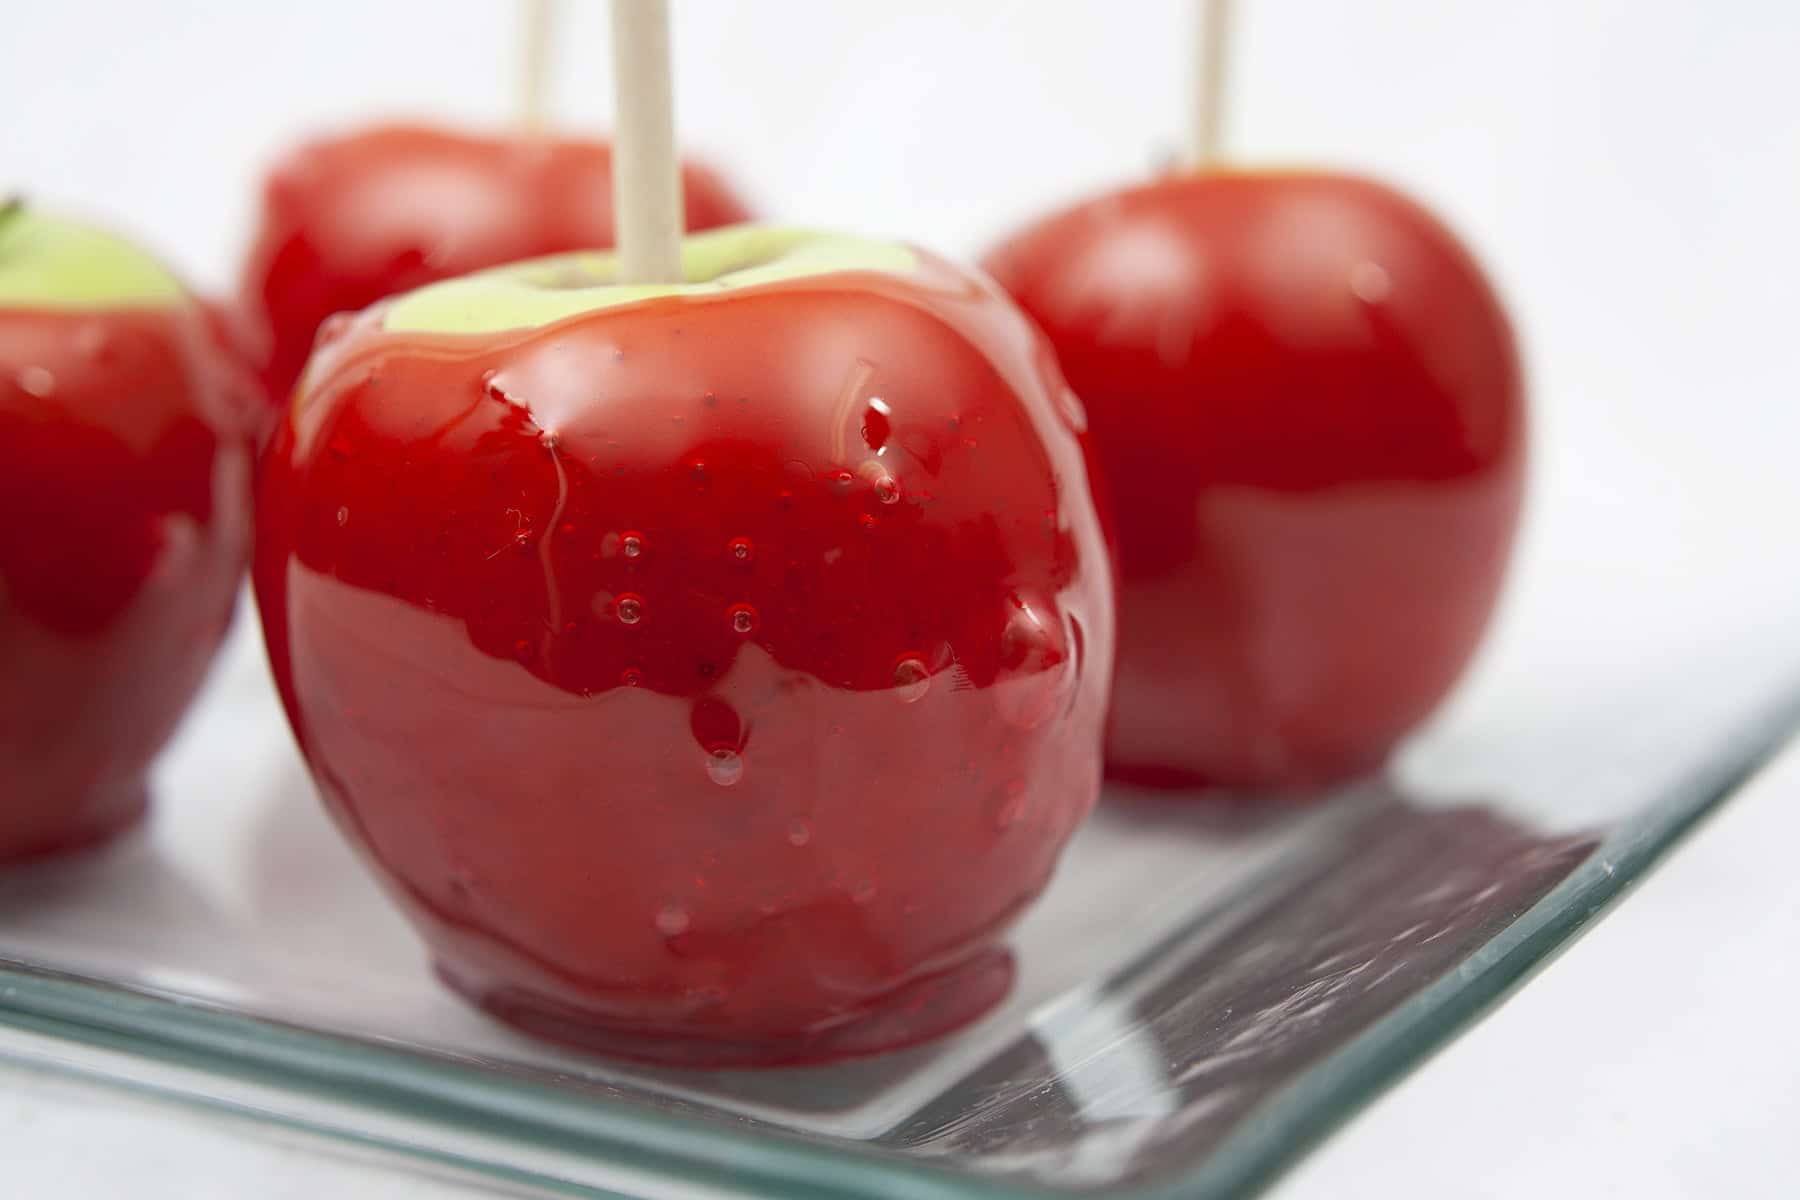
CAREFULLY dip each apple, one at a time, turning to coat evenly. I don’t tend to coat the whole apple, I like to leave a small ring of apple skin exposed at the top.
Allow excess syrup to drip into the pan, then place on prepared cookie sheet.

Allow candy coating to cool completely to room temperature.
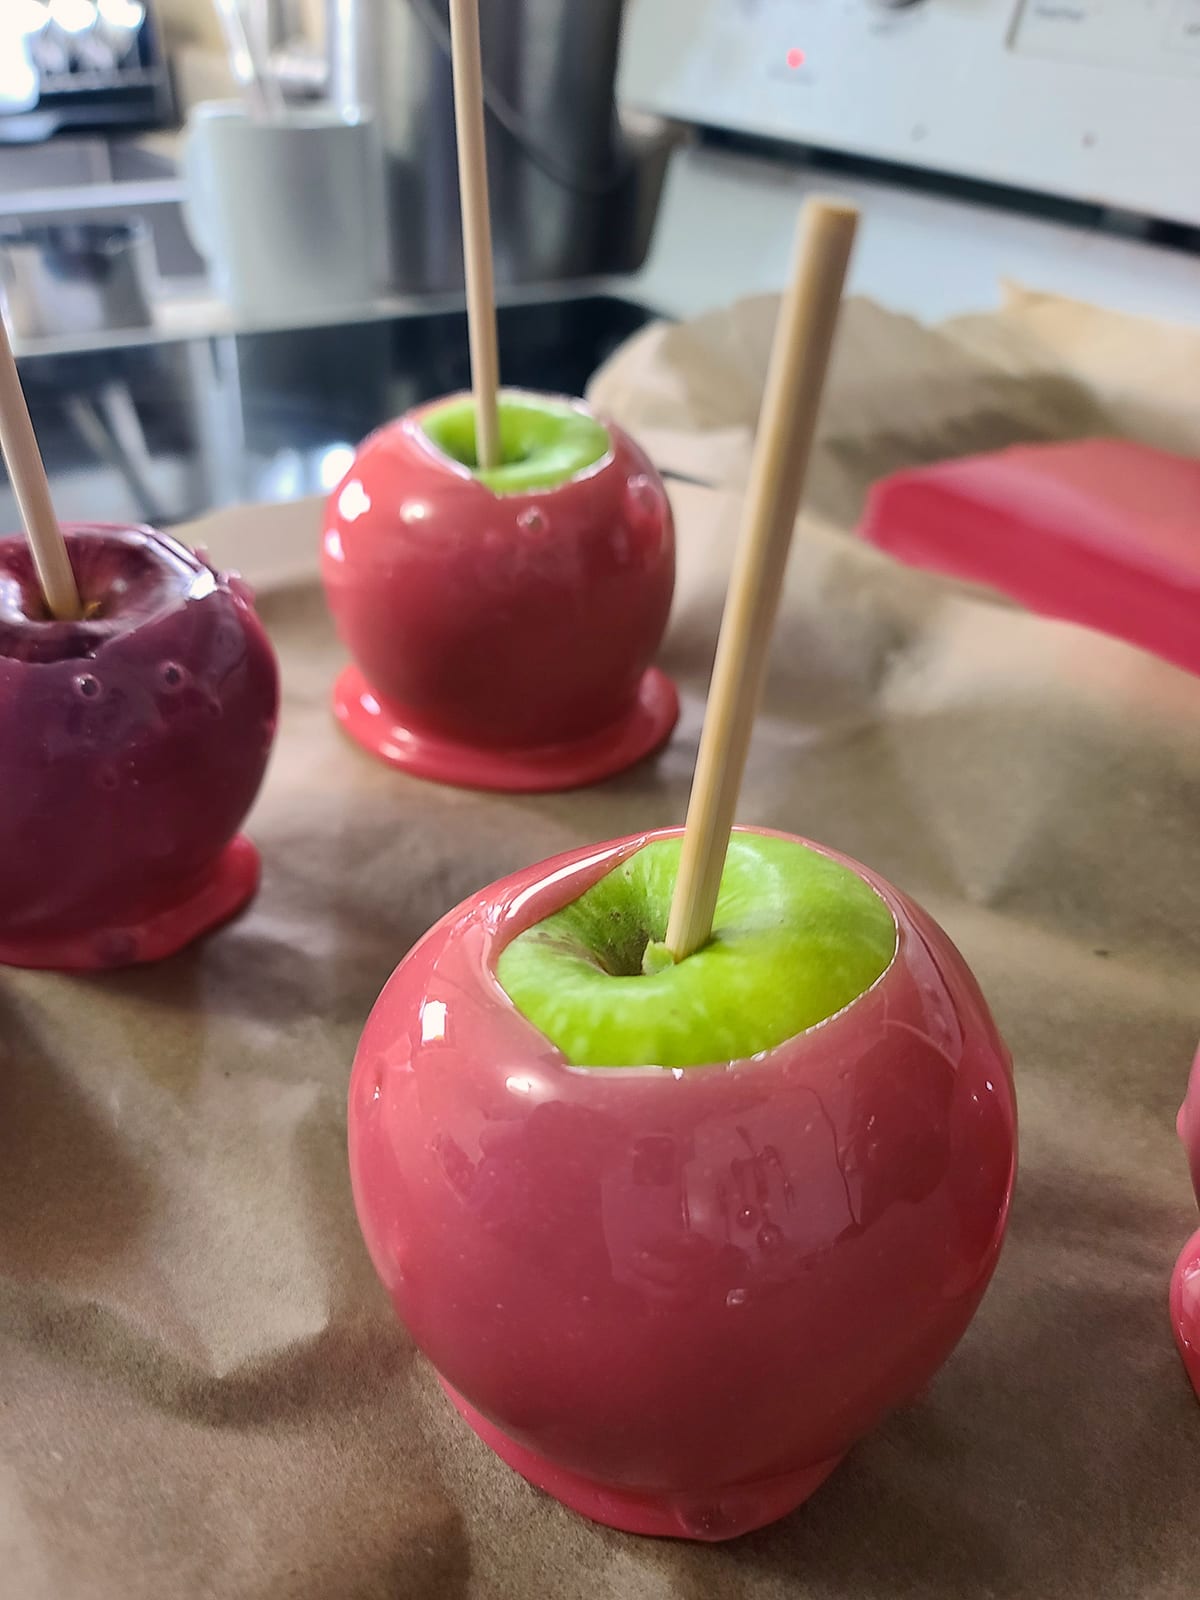
Remove from cookie sheet and enjoy, or wrap in cellophane to enjoy later.
Tips & Tricks
No Candy Thermometer?
No problem!
You’re cooking the syrup to hard crack stage. While this is easy to see on a thermometer, you can actually test for it, without one!
Have a bowl of ice cold water on hand. Once the sugar syrup starts changing color, periodically drip a small amount of mixture into the bowl of ice water.
When the drip of candy immediately turns into brittle threads that break when touched, you’ve reached the hard crack stage!
Take the candy off the heat, and go ahead with coloring and flavoring it..
Timing
Boiling the sugar can be a slow process - you basically need to boil off all of the water.
For what it’s worth, the temperature will seem to take forever to reach 250, then will steadily increase at that point.
At 280 F, it tends to shoot up a bit faster, then slows down around 300 F.
When it does hit 300 F, you want to keep a really close eye on it, it won’t be long from them!
Bubbles
I mention letting the sugar syrup finish actively boiling before dipping, but there are a couple other things that you can do to prevent bubbles on your finished candy apples:
When adding flavor and color, stir really slowly, gently, and completely. Let it rest for a few seconds after stirring - the additions can cause it to bubble up again.
Slowly dip your apple, and only move it around as much as you need to.
Waving the apple around in the syrup - or any excess motion - can cause bubbles, like this:

I whirled this one around in the candy to show what happens. Still tasty!
Leftovers
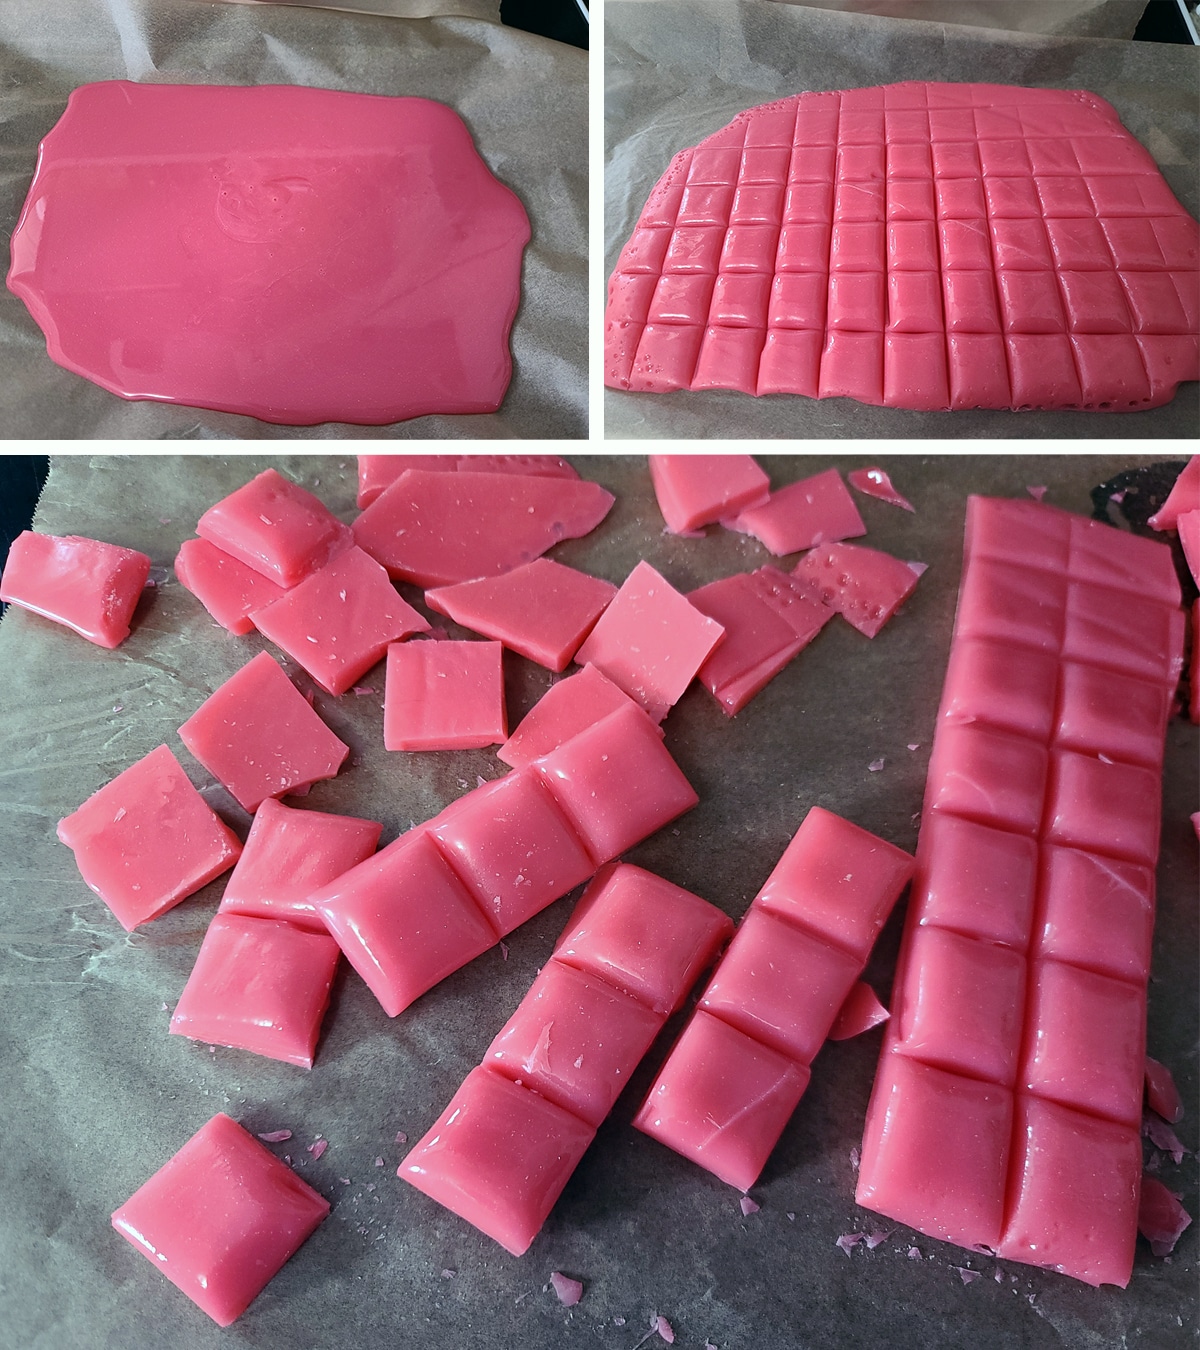
Leftover sugar syrup can be used to make homemade hard candies. I usually have a second pan lined with parchment for the leftovers.
Once I’ve finished dipping apples, I’ll pour the remaining syrup into the second pan, letting it settle itself out.
When it’s cool enough to touch - but not COOL - I’ll use a sharp knife to score it into bite sized squares, then let it fully cool.
Once it’s fully cool, it’s brittle and easy to break along those score lines.
Keep this candy in a ziplock bag or other airtight container, as it can draw water from the air and go sticky.
Other Tips
If you’re worried about burns, wear rubber gloves. You can get heat proof gloves that are perfect for working with candy.
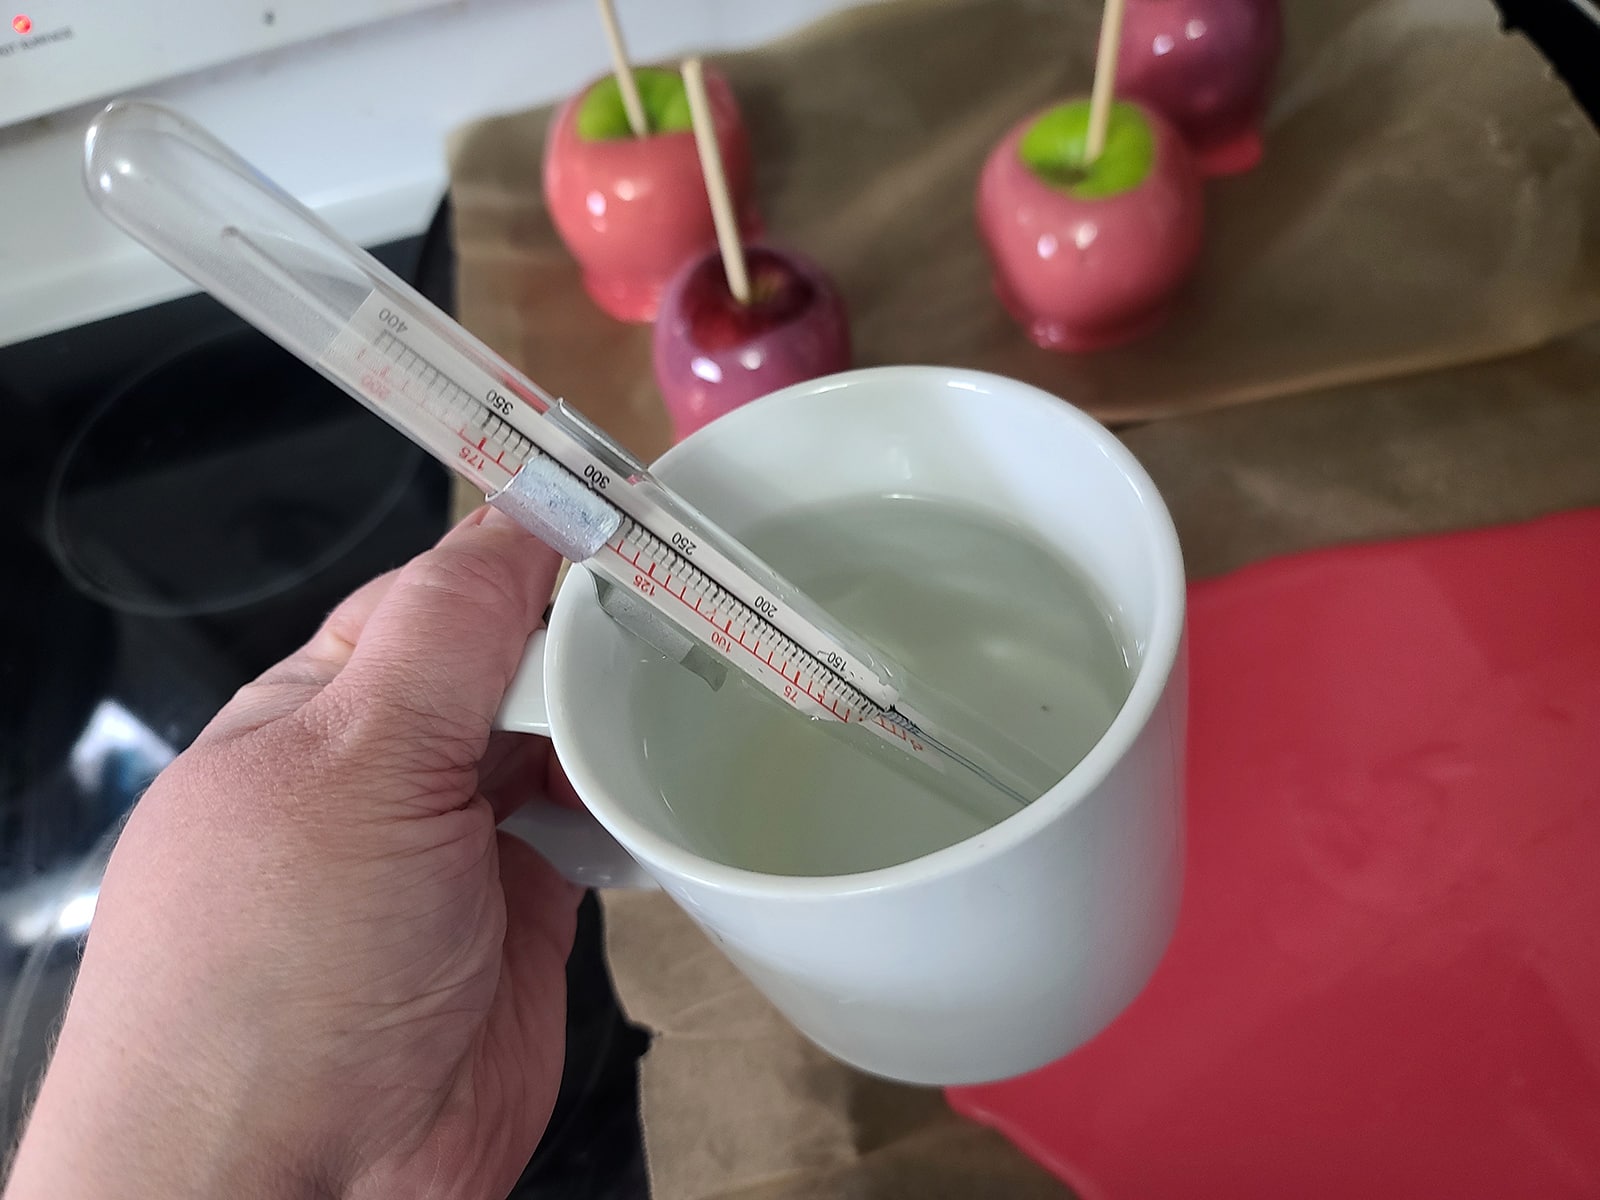
- For easy cleanup, have a mug of hot water on hand as you’re making the syrup. As soon as it reaches temp, place the candy thermometer in the mug of water.
The sugar will come off much easier! (Note: Do not fully submerge candy thermometers in water!).
On that note - as soon as you dump out the leftover candy, fill your pot with hot water and bring it to a simmer on the stove top.
Be sure to fully wrap your candy apples in cellophane or plastic wrap as soon as they cool to room temperature.
Sugar is very hydrophilic - it attracts moisture from the air.
Exposed hard candy quickly becomes sticky / “melted” hard candy, in even a mildly humid environment!
More Fall Eats
Looking for more cool weather, “autumn” type recipes to enjoy as the leaves change? I’ve got you!
Acorn Squash Tortellini with Nutmeg Cream Sauce
Hearty Corn and Black Bean Soup
Homemade Hard Apple Cider
How to Cut & Serve Pomegranate
How to Make Pumpkin Mead
How to Roast Chestnuts
Maple Pumpkin Spice Bagels
Roasted Cauliflower Soup with Smoked Serrano Drizzle
Traditional Pumpkin Mousse
Wild Rice & Sausage Stuffed Peppers
Wild Rice Stuffed Chicken Breast
Share the Love!
Before you chow down, be sure to take some pics of your handiwork! If you post it to Bluesky, be sure to tag us - @CelebrationGen. We're also on Pinterest, so you can save all your favourite recipes to a board!
Also, be sure to subscribe to my free monthly email newsletter, so you never miss out on any of my nonsense. Well, the published nonsense, anyway!
Finally, if you love this recipe, please consider sharing it on social media, and leaving a star rating and/or a comment below!


How to Make the BEST Candy Apples
Equipment
- Parchment Paper
- Candy Thermometer
- 10 Wooden Candy Apple Sticks
Ingredients
- Up to 10 large apples washed and allowed to fully dry
- Up to 10 Candy apple sticks skewers, chopsticks, whatever you want to use
- 3 cups Granulated Sugar
- 1 ½ cups Corn Syrup
- ¾ cup Water
- Several drops food coloring
- 1 tablespoon Flavoring Extract OR
- 1 teaspoon Flavour Oil
Instructions
- Grease a cookie sheet, and/or line it with parchment paper. Set aside.
- Prepare the apples: Remove all stems and stickers (if applicable). Insert stick into apple – They should go in at least halfway. Set aside.
- In a heavy saucepan, combine sugar, corn syrup, and water. Stir well, bring to a boil on medium or medium-high heat. Affix candy thermometer to pan.
- Boil mixture - occasionally stirring - until it reaches 310 degrees. Remove from heat, quickly stir in food coloring and flavoring. Stir mixture until it stops boiling, and most of the “bubbles” disappear – this will minimize texture on your finished coating.
- CAREFULLY dip each apple, one at a time, turning to coat completely & evenly. Allow excess candy to drip into the pan, then place on prepared cookie sheet. Be VERY careful – sugar burns are NOT fun!
- Allow candy coating to cool completely. Remove from cookie sheet and enjoy, or wrap in cellophane to enjoy later.
Video
Notes
Nutrition


jessica
They look great and the perfect recipe with great tips.. the only question I have is...How far in advance can you make these apples?
Marie Porter
I would think a day or two if not wrapped (assuming not in a super humid location, anyway), probably 3-4 days if wrapped in plastic to protect the candy from humidity.
Amber
I wish I could show pictures I used your recipe that worked out perfectly and it was my first time thank you so much for sharing
Sarah
This recipe...is PERFECT for first time candy apple makers. The proportions of ingredients made beautifully glassy candy apples and the liquid candy was a dream to work with. It hardens quickly to a virtually non-sticky sugar glass that doesn't imprint with fingerprints when touched (as long as they are cooled for at least 15 minutes). This was my first time making candy apples (I've done caramel apples before) and I followed the recipe exactly and got near perfect apples with almost no bubbles. I highly recommend this recipe! Thanks so much!
Tabby
Delightful recipe. PUT IT IN ME.
Marie Porter
... suddenly wishing the comment software allowed for gif replies..
Dafna
This looks fantastic. I definitely going to try... All your recipes are amazing and yummy...
Thank you
Marie Porter
Thank you!!
Ada
You know, I never knew what the candy coating was. 😂 I’m not a fan of apples, but my son is. Thanks for the recipe!
Robyn
I love how detailed you are and how carefully you explain your recipes. Thanks for this....it reminded me of when my mum used to make candy apples and I can't wait to carry on the tradition with my own kiddo.
Ana N
Super easy. I love using Asian pears for it as well.
Leslie
So easy! So VERY tasty!!!
Highly recommend!
dianne williams
I have tried over and over for success making these apples. I am trying your recipe now and it seem to be a hit thanks for everything
Bill Downes
Sweet
Leela
Looks yummy! 😍
Laura
Pure nostalgia. Can’t wait to make these
Bev
Looks like a great recipe and very well described for how to do it. I especially like that there is a suggestion for what to do with the leftover candy coating.
Cat
I’m imagining all the fun colors one could use to make pretty apples. I wonder if one could somehow incorporate edible glitter?
Marie Porter
You can definitely do edible glitter - either mixed into the candy after the color/flavor, or sprinkled on immediately after dipping. (or both!)
Tina Jenkins
Yes! I love glitter! I used Wilton spray glitter and it looks amazing!
Said
Loving the photos, mouthwatering. Thank you!
Chinmay
Nice recipe, and well presented! We have dozens of green apples on our tree just raring to go. Will try it this weekend.
Ana N
OK, it never occurred to me to put extracts in the candy. There's going to be a lot of experimenting going on in my house....
Asha
Such a helpful guide to making candy apples. Loved the tip on adding white food colouring for an opaque effect
Vanessa
One of my faves as a kid! Who knew it was more of a Canadian thing? People are missing out!
Gregory Wright
I love all the pictures that makes it so much easier to not be intimidated by the hot sugar! And I never thought to just make candy from the leftover syrup! Having links too purchase ingredients makes this so much more appealing to try! Great recipe!
Marie Porter
Thank you!
Robyn
My mum made the same ones when I was a kiddo. Love that I'm able to continue the tradition with my own child.
Emily Anderson
These look amazing!
Marie Porter
Thank you!
Kris
These look beautiful, can't wait to make them. Any recommendations for honey crisp apples?
Laura
Simple to follow!
Tabby Vos
This looks delicious!! 🙂 Will try it!
Meredyth
Amazing recipe. Can’t wait to make these again!!
Lawrie Weiser
Delicious. Brings back decades old ,memories.
Jeanne
Beautiful post!! Can’t wait to make some for the fall!
Dana
My granddaughter loves all things apple and candy. We shall give this a try!! Looks fantastic!
Juanita
Just tried making black candy apples for a Halloween event. It was a fail. Do you recommend chilling the apples first? The coating just wouldn’t stay on the apple. Kept running off to the wax paper. What am I doing wrong?
Marie Porter
Did you wash the wax coating off?
If so, your candy may have been too hot. As I mention in the recipe, sometimes you have to let it sit for a few minutes to thicken up slightly.
Robert
I need to ask a question. Can this be used on a cheesecake as a hard coating? Years ago, in NYC, a small Austrian bakery, I bought a cheesecake with hard strawberry or cherry candy coating. I'd love to be able to do that. My email is rbar128@yahoo.com
Marie Porter
I don't see why not. I'd let it cool and thicken a bit longer than I would for dipping, though.
Janee
What brand food coloring did you use? Mine turned out very transparent I want the cloudy pink like yours!!
Marie Porter
As I mentioned in the post, you'll want to add some white food colouring if you'd like an opaque / pastel candy coating! I've got links to what I used in there.
natalie
Would cherry juice work as a color/flavor option?
Marie Porter
Cherry juice isn't concentrated, and I would imagine that boiling it to that temperature would probably kill some of the flavour / taste burnt.
Alissa
How important is is it to have unmarked apples? Like the idea of using my seconds / B grade apples and giving them in red candy! Would the candy still stick or would it b hard to wrap candy neatly on a misshapen apple?
Marie Porter
Honestly, it's more aesthetic preference than anything. You might have candy pooling in dimples or whatnot, but there's no real reason NOT to, beyond just appearance.
maria chevon sallie
like to make purple grape flavored candy apples
Marie Porter
Go for it!
Kim
This didnt work well. Guess I need a candy thermometer. Candy so sticky it’s inedible and unenjoyable (candy stuck to teeth, fingers, etc. even after putting in freezer)…ended up simply eating a plain apple for dessert.
Marie Porter
Sounds like you didn't get it got enough - that's why a candy thermometer is so important.