

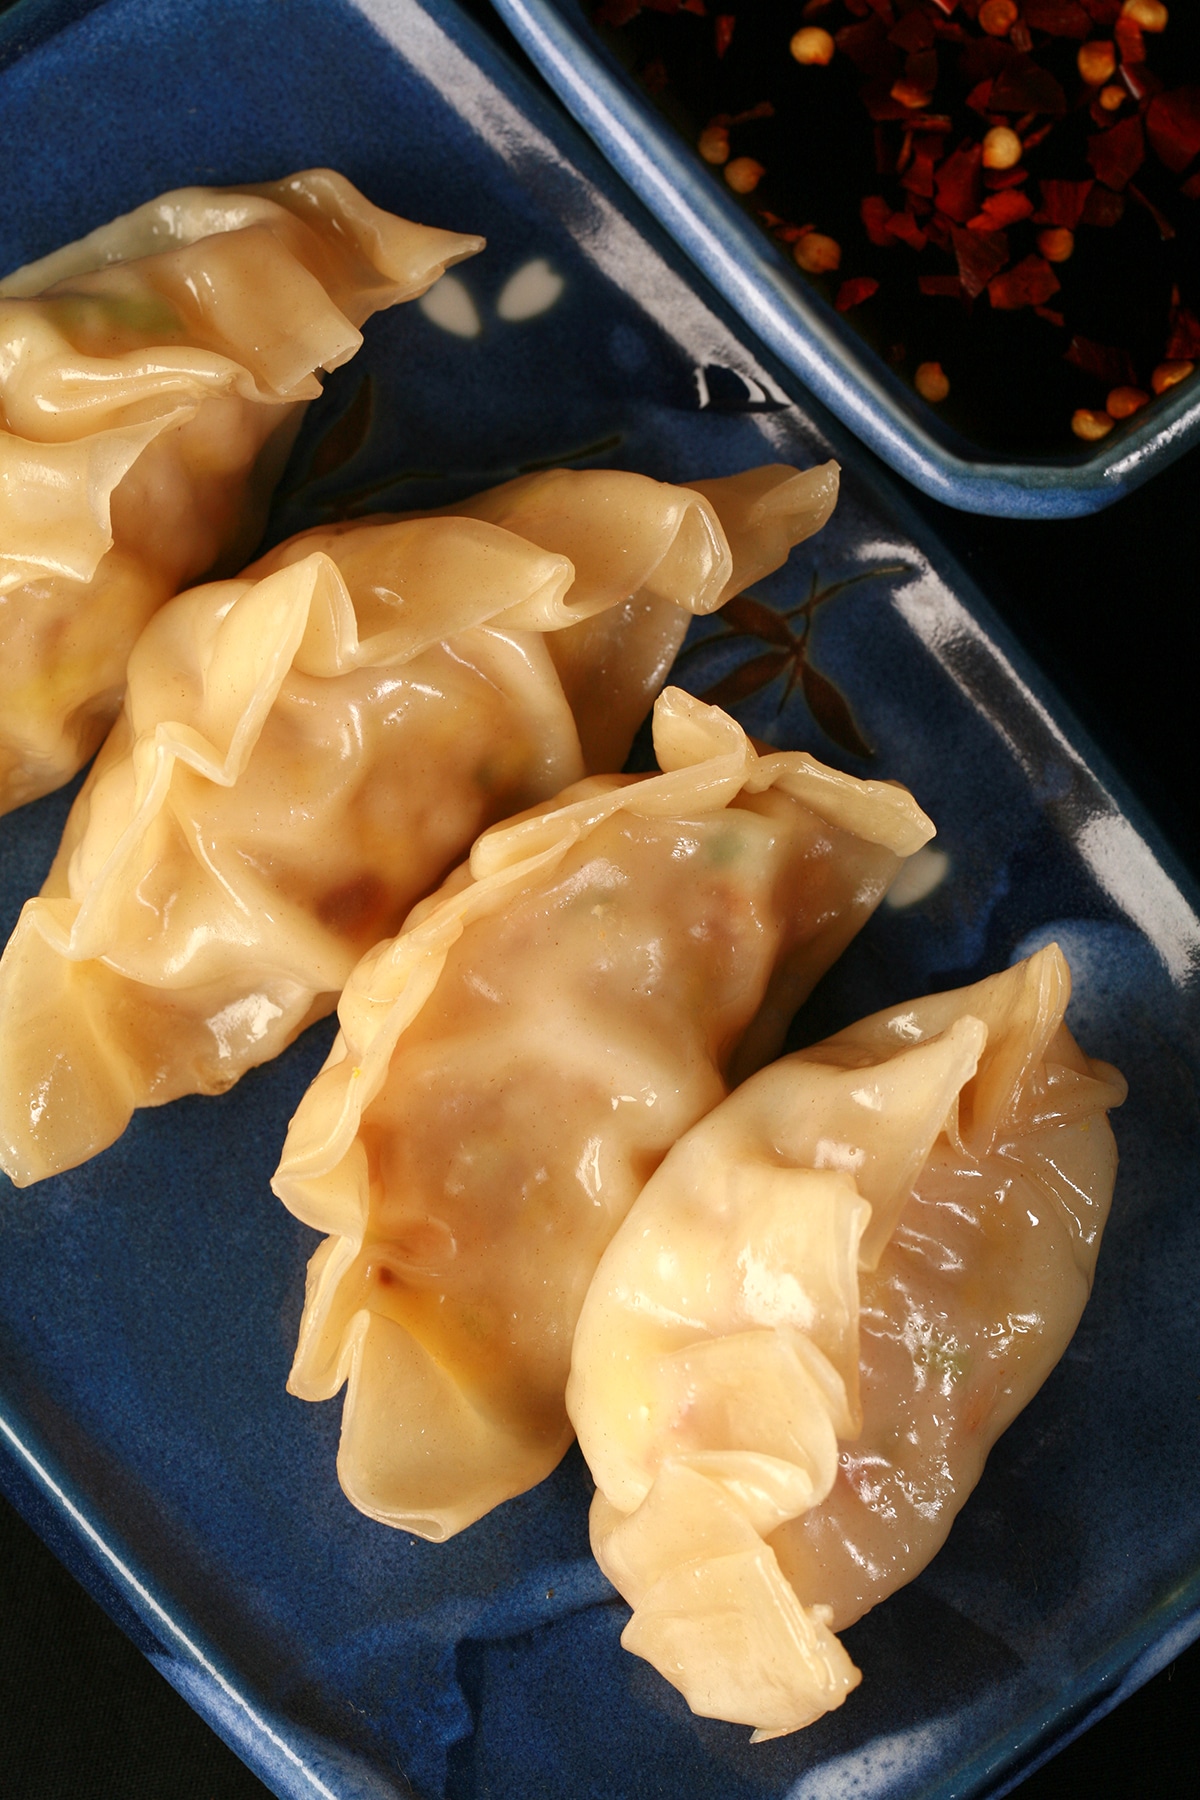
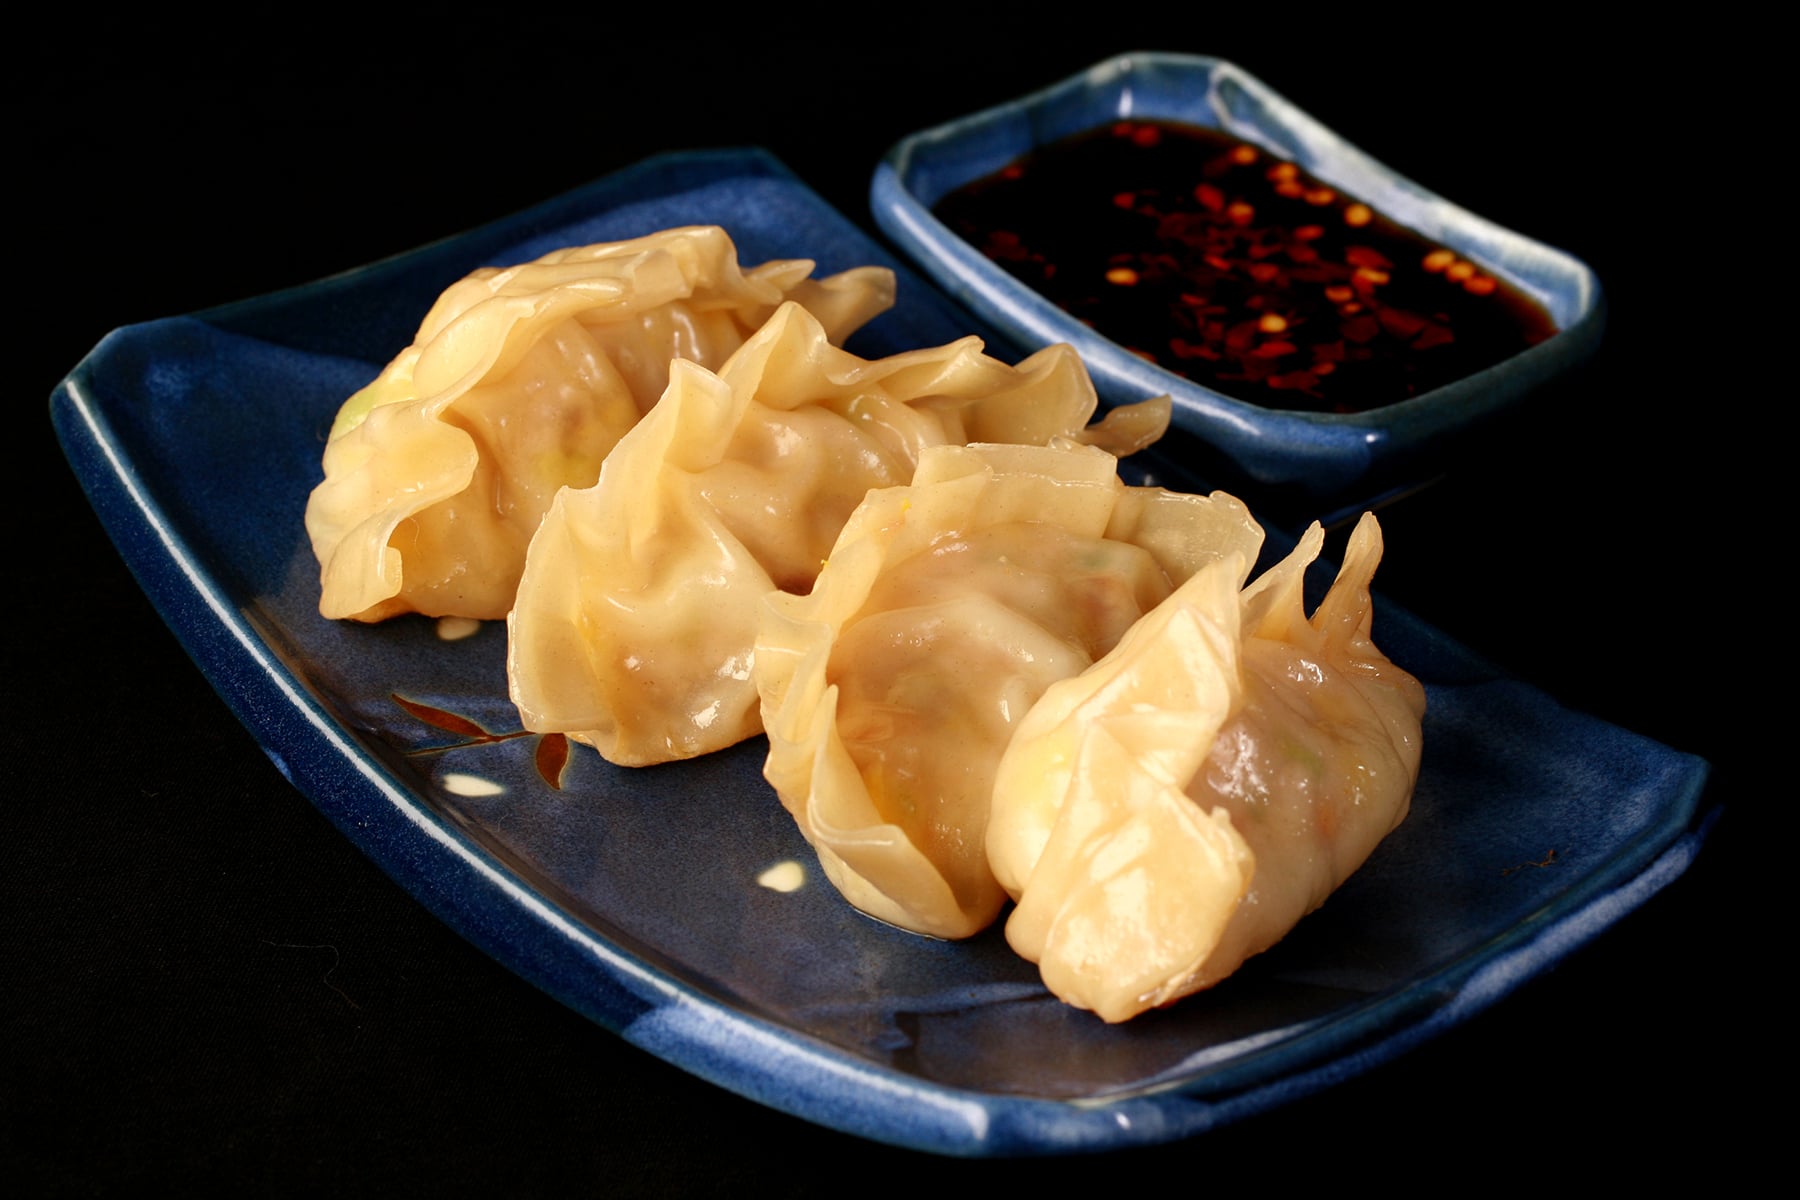
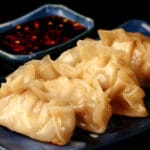
Here's my Homemade Gyoza Recipe (AKA Potstickers)! They're easier to make than you may think, and SO tasty. This makes about 40, so try them today!
Originally published April 5, 2017. Updated on 6/16/2021

Done right, these are supremely addictive.
Yes, they're supposed to be an appetizer, usually served 3-5 pieces per person... but I've lost count of how many times we've made a meal of them. (No, I'm not admitting to how many constitute a "meal", either!).
They're ingredient-intensive and a bit of work, but SO worth it!
I love gyoza with a ton of flavour, so I developed this recipe with that in mind.
The filling can be made a day ahead, just keep it well chilled. Finished gyoza can be frozen before frying/steaming - just be sure to allow them to thaw completely before cooking.
These are easy to make by hand, but even easier if you have a dumpling press, like this one. (It's what I use!)
Can’t Find Gyoza Wrappers?
When re-shooting this recipe, I ordered all of the ingredients... and couldn’t find gyoza / potsticker wrappers ANYWHERE. So, I had to get creative.
Making Gyoza with Egg Roll Wrappers
Egg roll wrappers are pretty much the same thing as gyoza wrappers, just a different size and shape.
So, I bought a pack of them, and used an English Muffin Ring as a guide. Gyoza wrappers should be about 4", and this was only 3.5", though.
Using a paring knife, I carefully cut around the ring, making my wrappers a bit bigger.
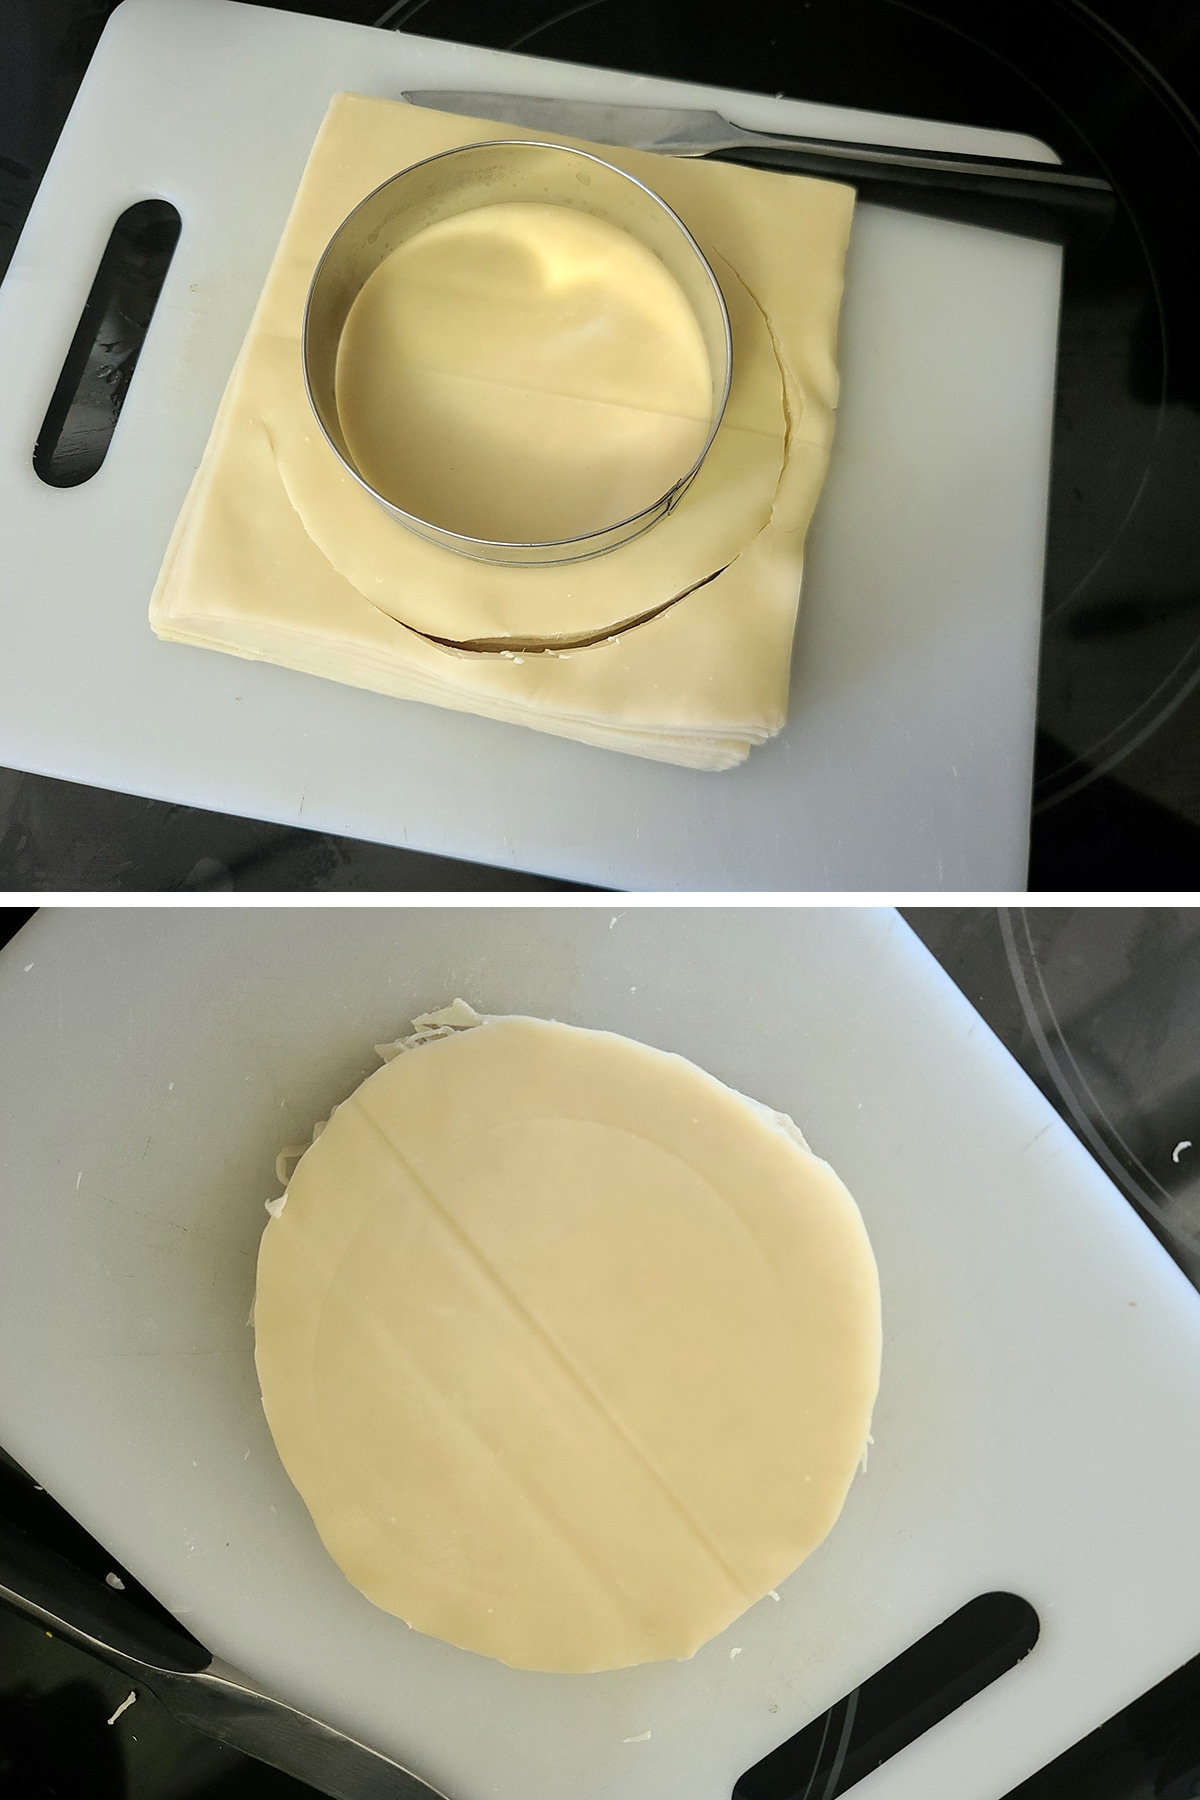
As it turned out, they were a bit too big for my dumpling press, so I trimmed the size a bit.
The normal dumplings in this post were all made with these trimmed egg roll wrappers.
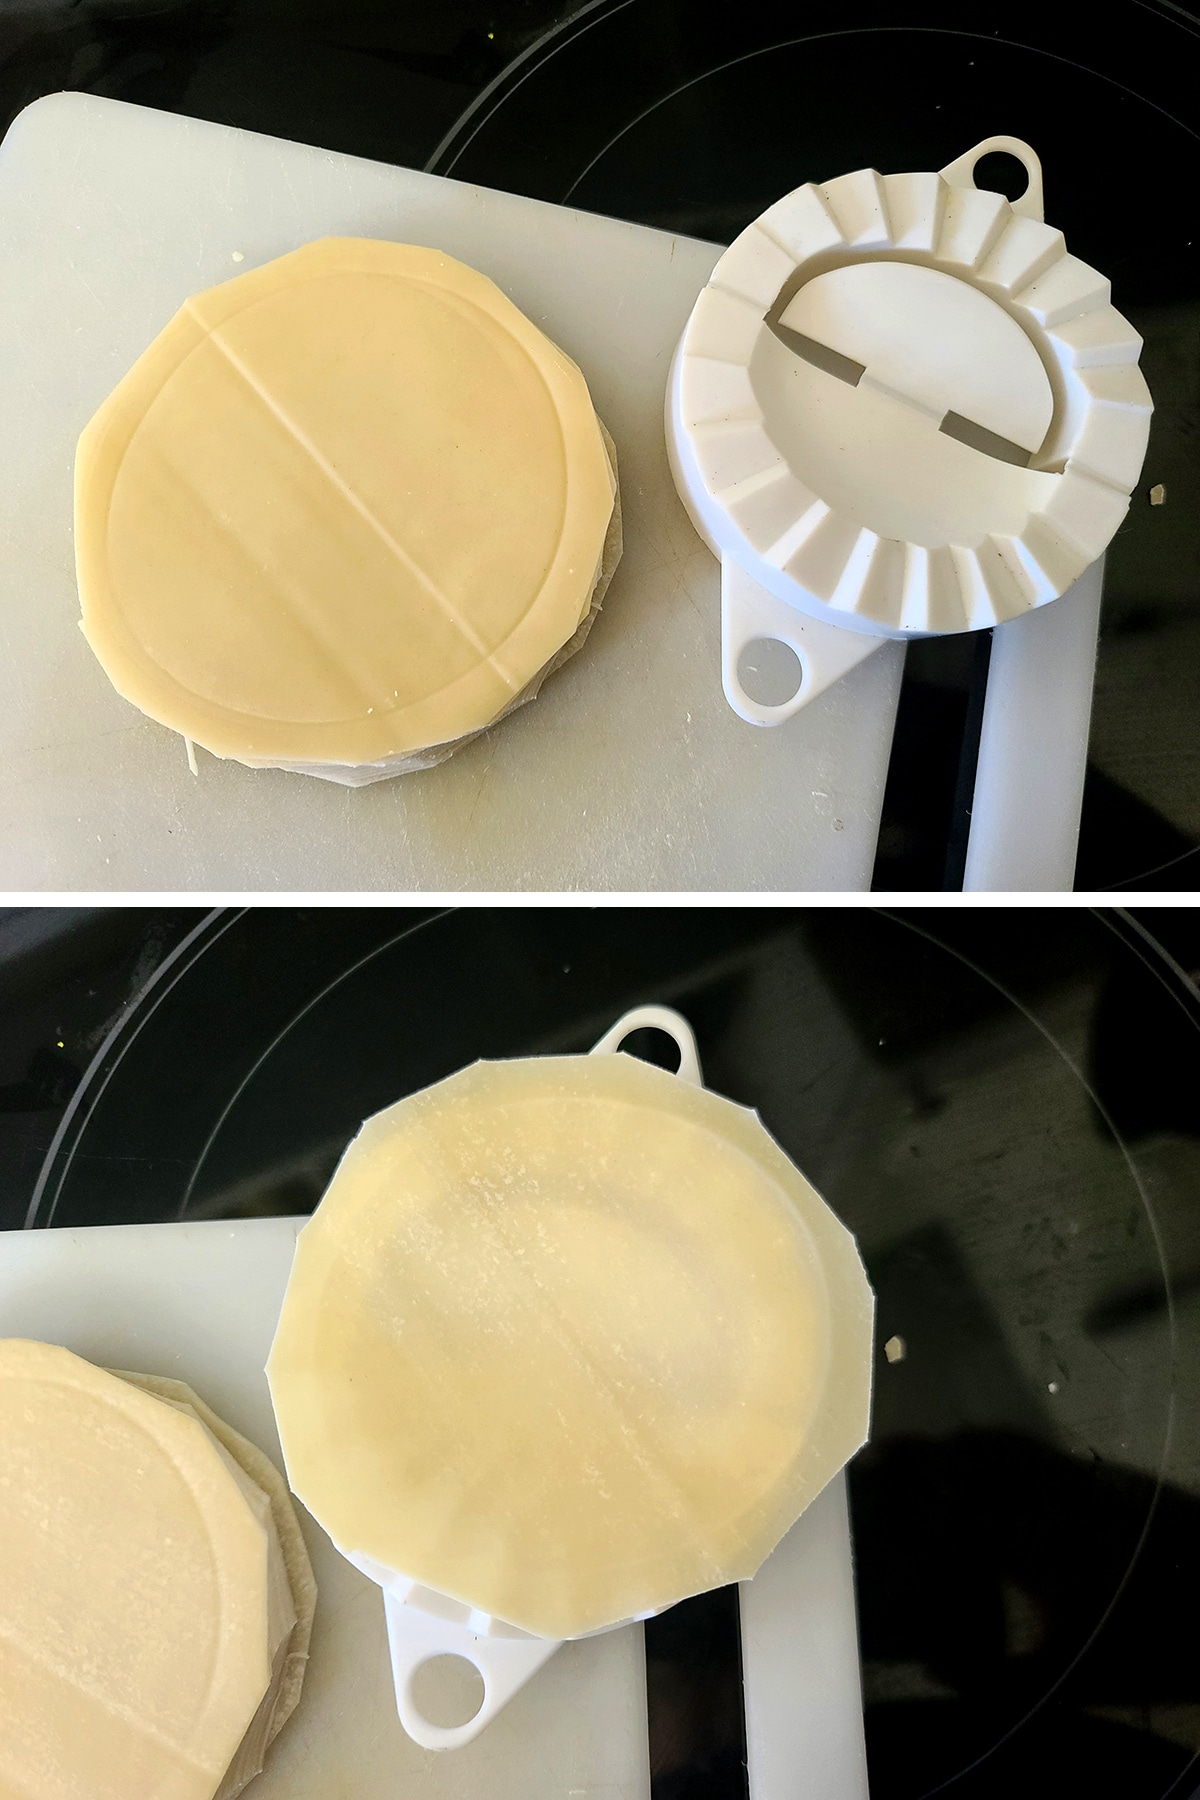
Making Gyoza with Won Ton Wrappers
I also bought a pack of won ton wrappers, as - again - they’re basically the same thing, just a different size and shape.
As it turned out, they were way too small to other with, so I got a bit lazy and made them ravioli - style. See the end of the tutorial for the full, illustrated information on how I did that!
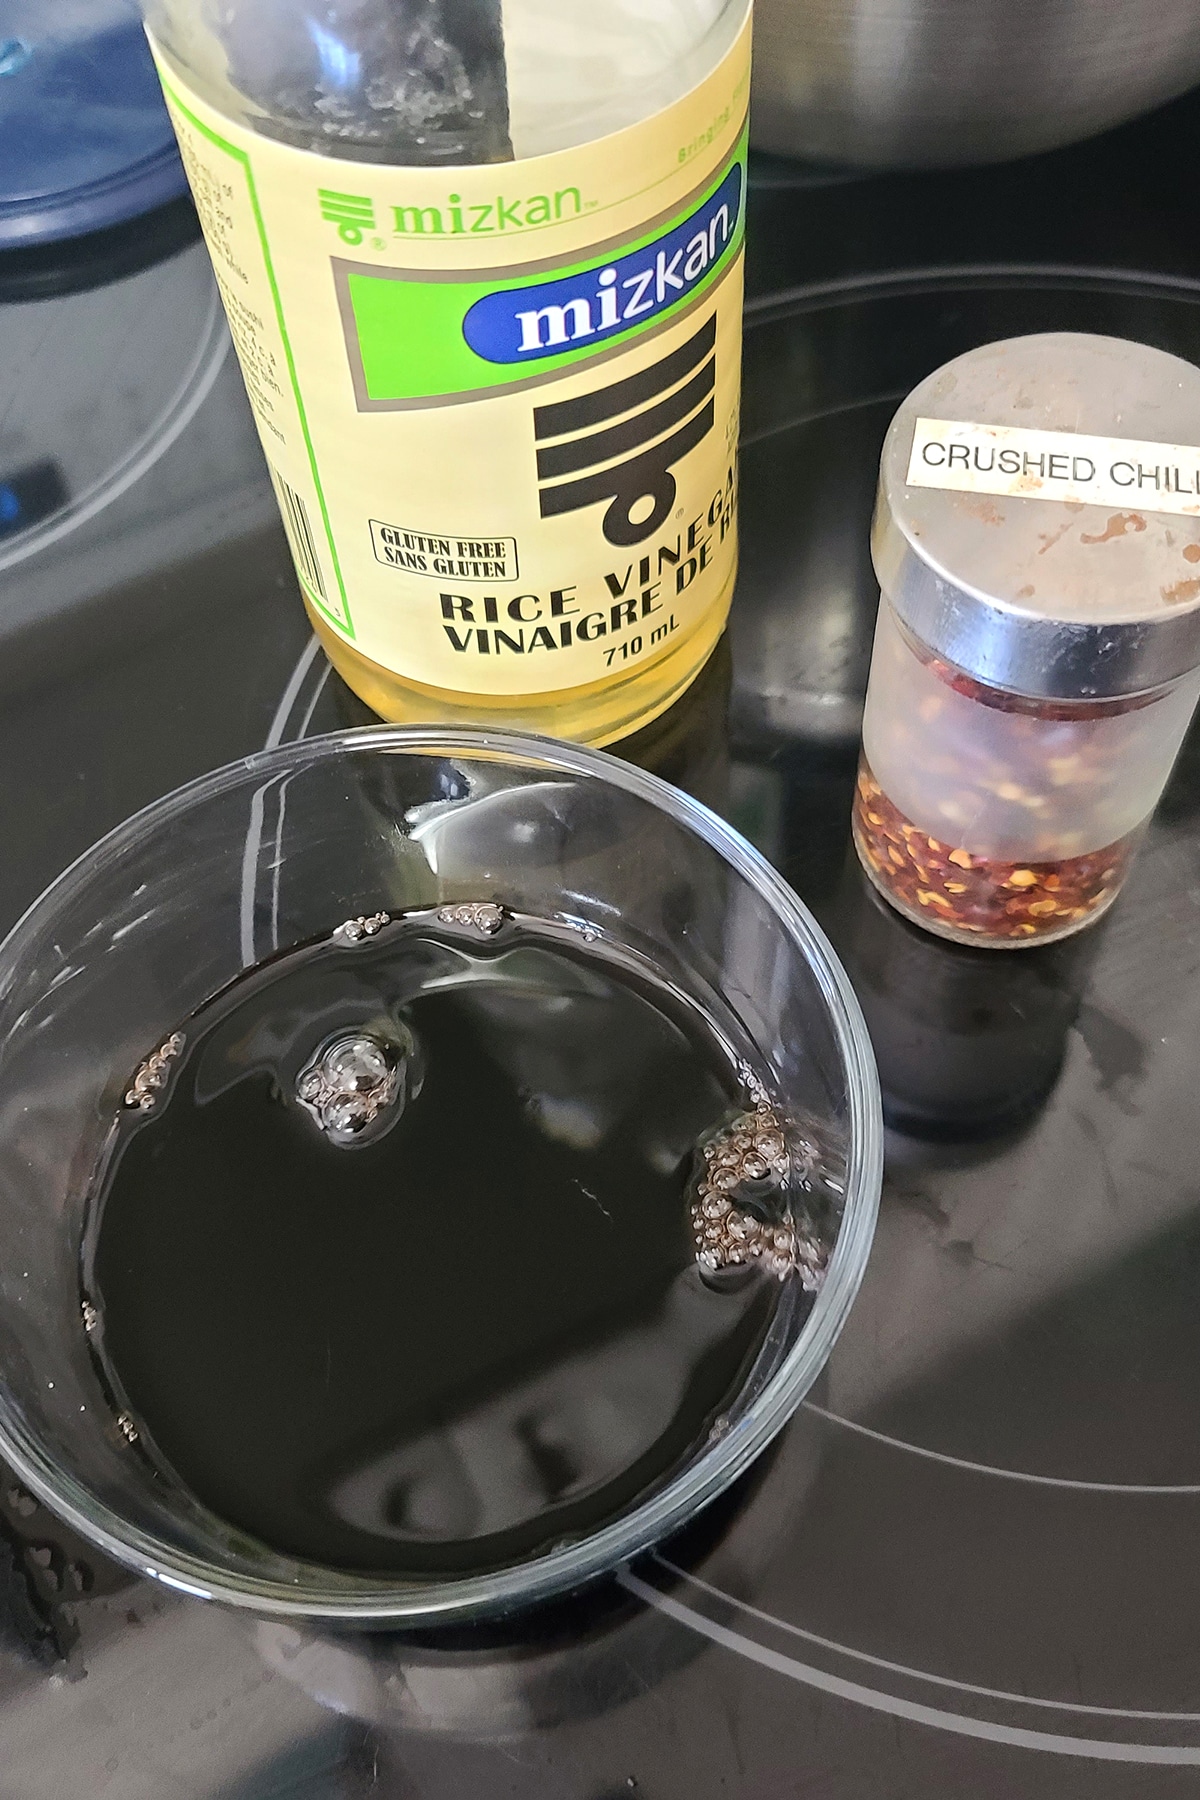
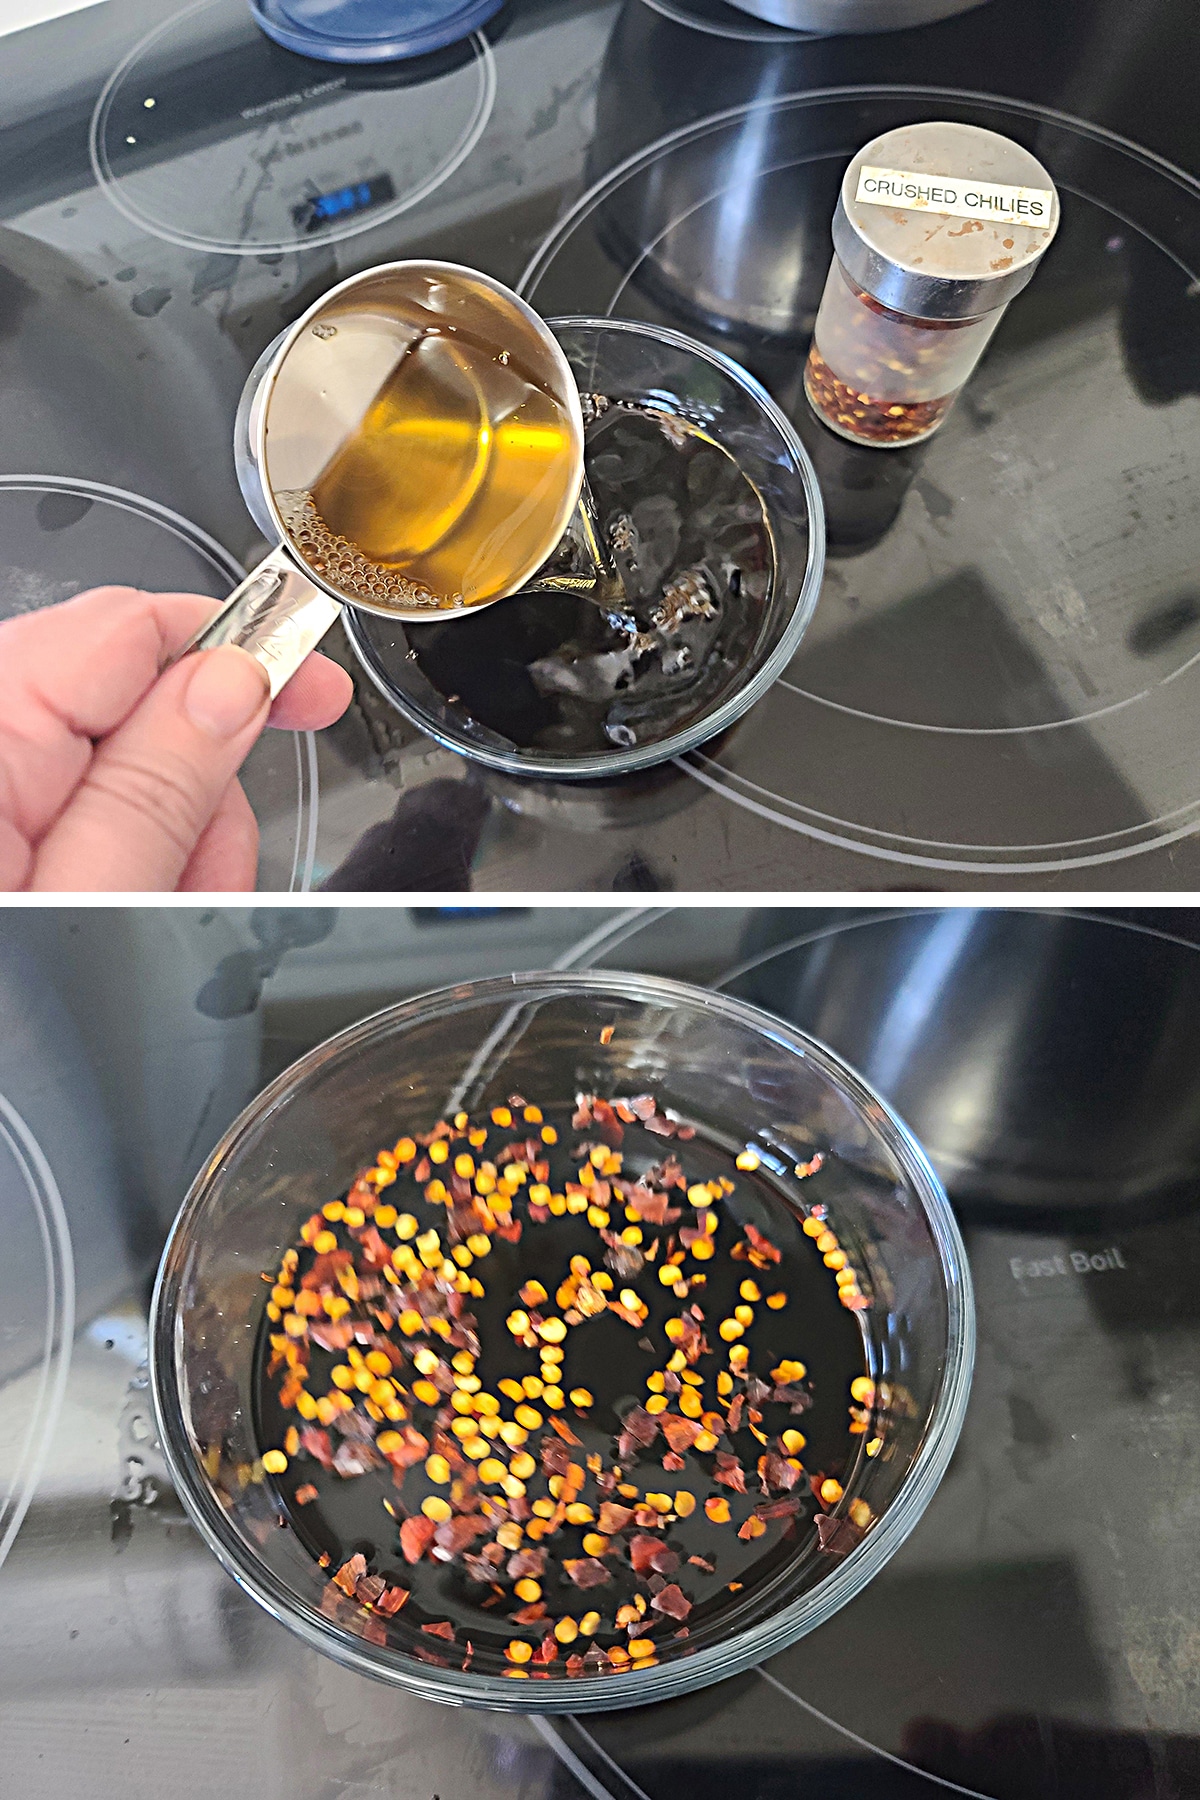
How to Make Gyoza Sauce
I like to make this before getting started on the dumplings, to give it some time for the flavours to mingle.
½ cup Soy Sauce
¼ cup Rice Vinegar
1 teaspoon Crushed Chilie
Stir sauce ingredients together, refrigerate til serving.
How to Make Gyoza / Potstickers
The full recipe follows at the end of the post, but here is a pictorial overview, for those who like the visual learning:
Prepare the Filling
Chop up only the frilly green part of the cabbage - leave out any white rib parts.

In a large mixing bowl, combine cabbage and salt, stirring to evenly distribute the salt. Allow to sit for 10-15 minutes – this will draw the moisture out of the cabbage.
While you’re waiting, add of the remaining ingredients – aside from the wrappers and oil - to a large mixing bowl.
As a note: I like to use a mini food processor for the shrimp, bringing it to almost the same texture as the ground pork.

Once time is up, squeeze as much water out of the cabbage as you can, discarding the water. Place the squeezed cabbage back into mixing bowl, with the other ingredients.

You should be able to get a fair amount of water out.
Mix the ingredients together thoroughly. I like to use my hands for this – does a much better job of distributing everything than any mixing spoon will!
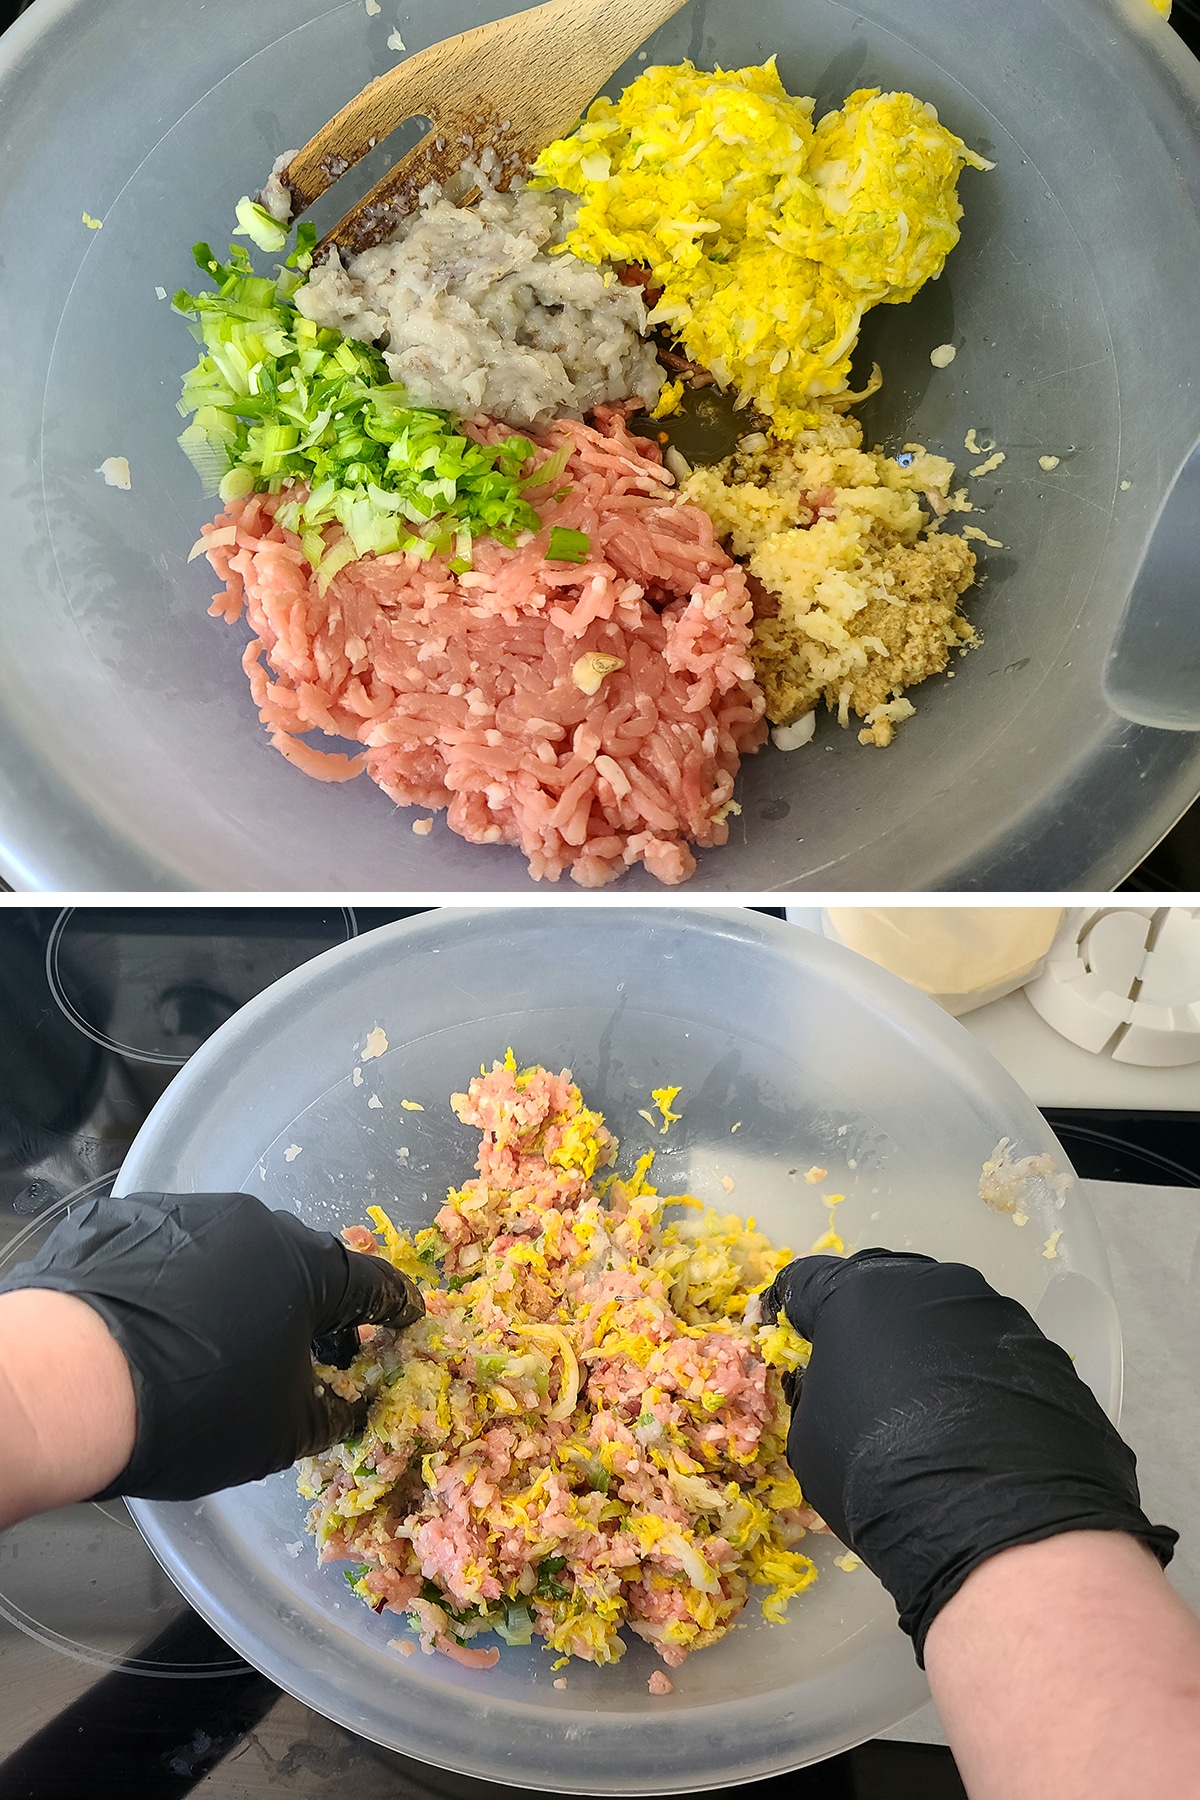
Cover and chill until ready to use.
Assemble the Gyoza Dumplings
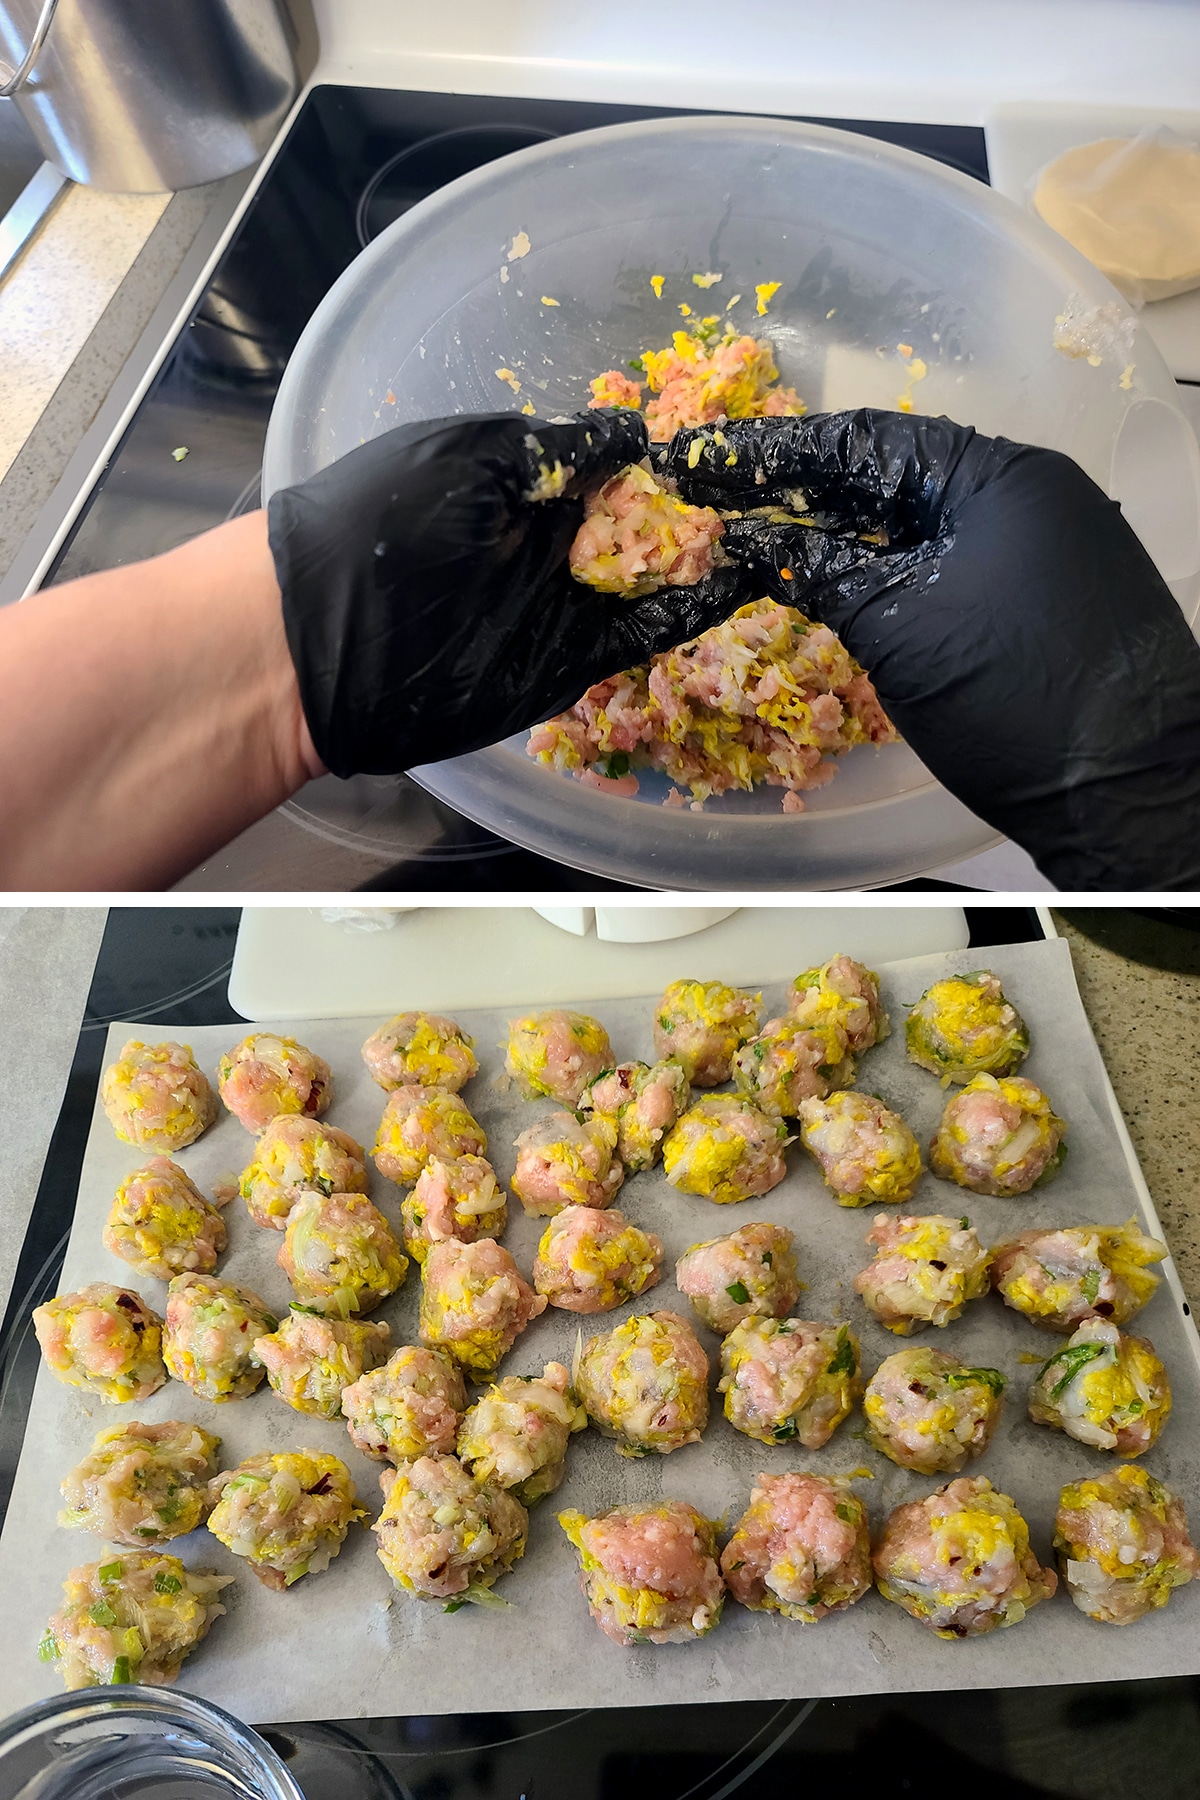
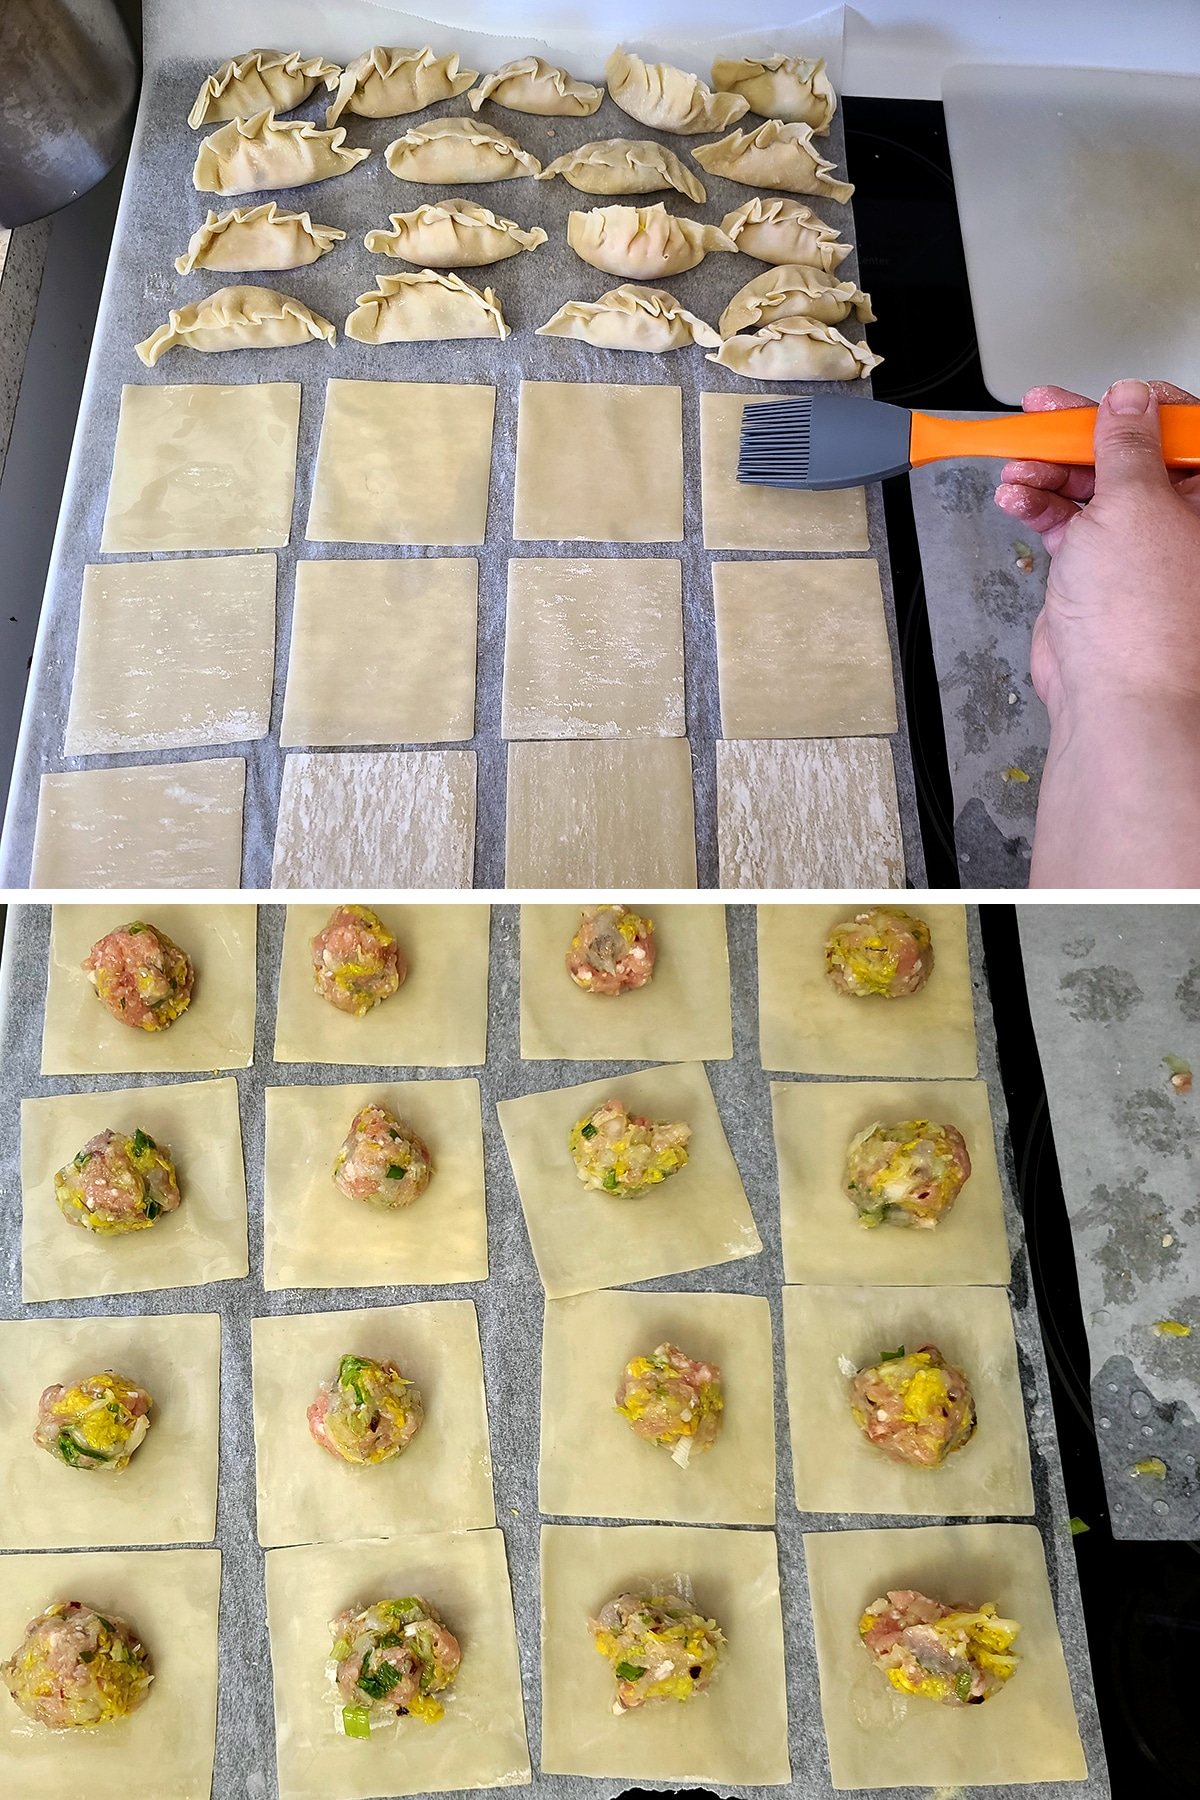
Roll filling into tight 1″ balls, placing one in the middle of each wrapper.
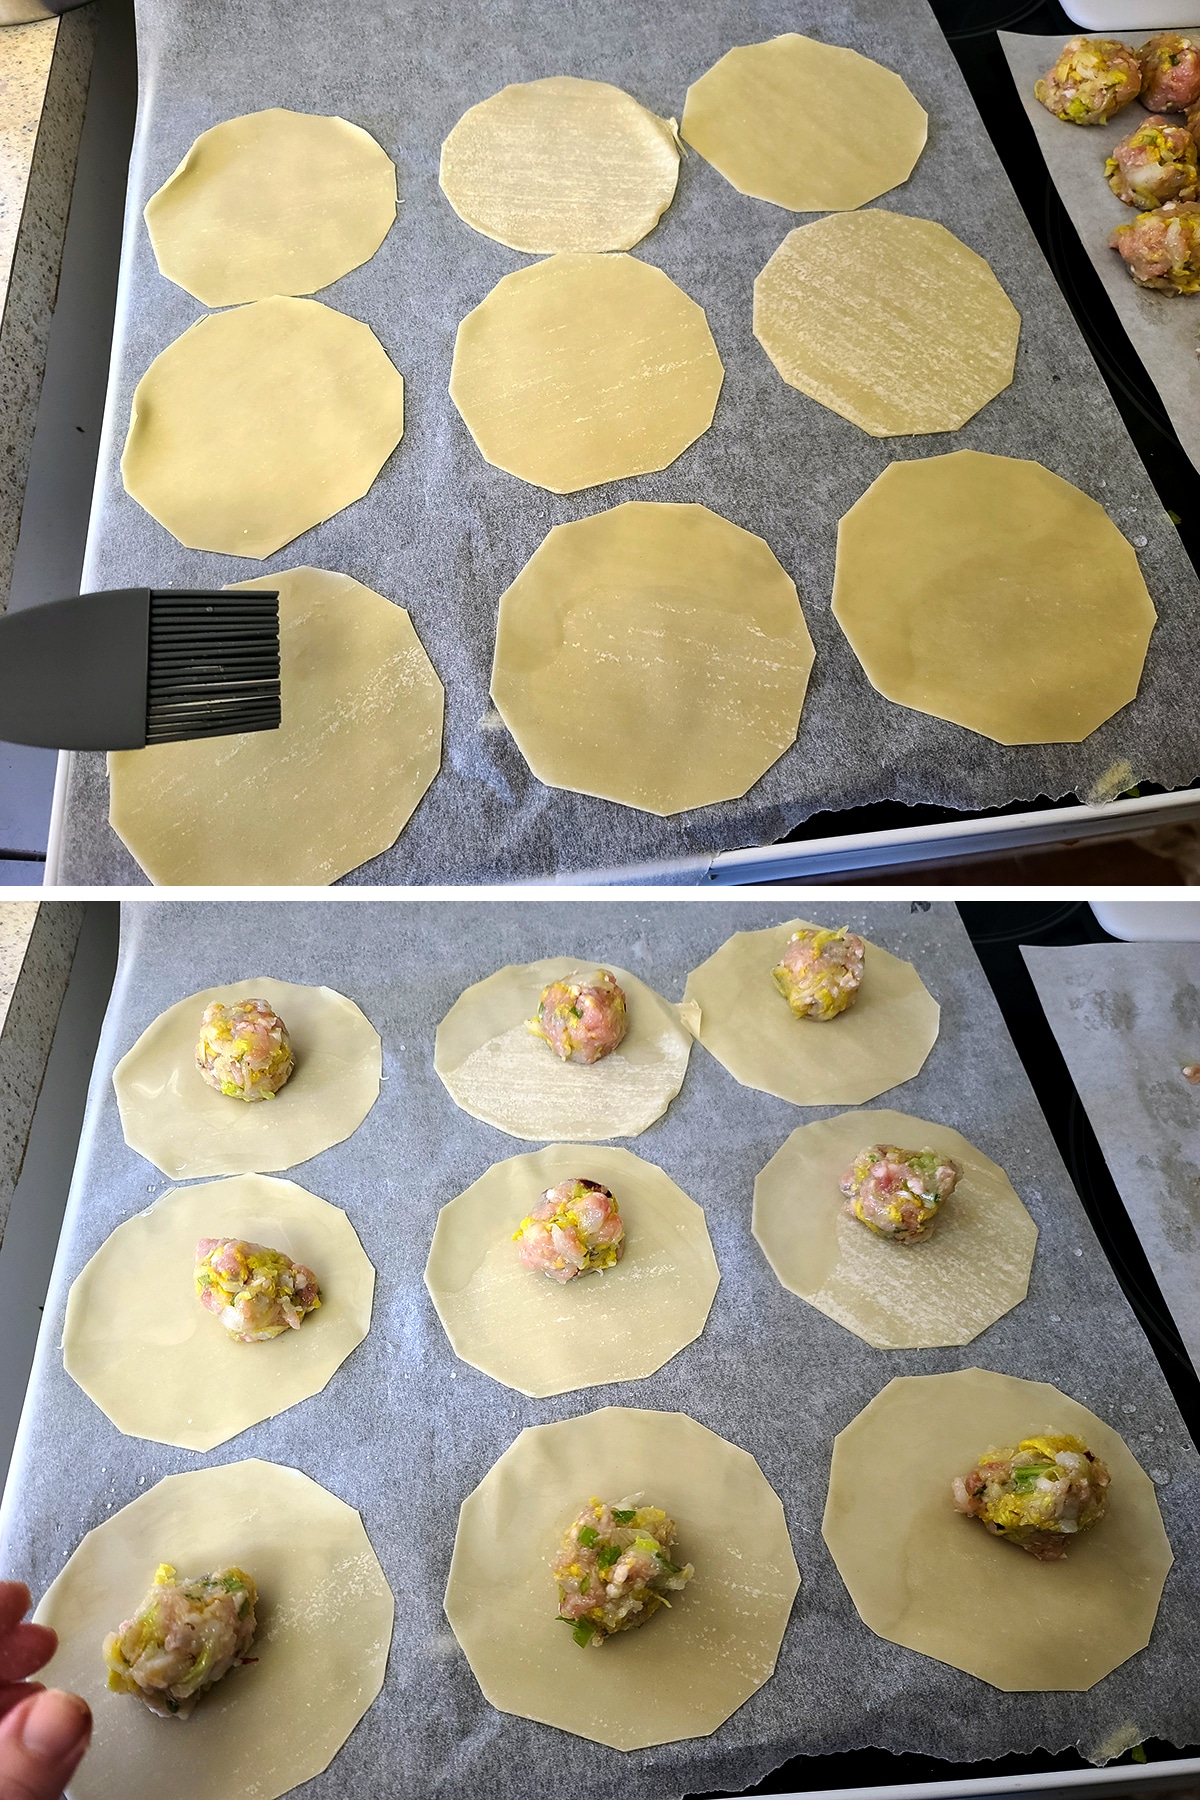
Use a finger/pastry brush dipped in water to moisten the edges of each wrapper.
Fold the wrapper over the filling, creating a half circle. As you do this, try to push out as much of the air from the inside as possible – excess air can cause them to burst.

If you have a dumpling press, use it to seal and crimp the edges, or pleat the edges like this:
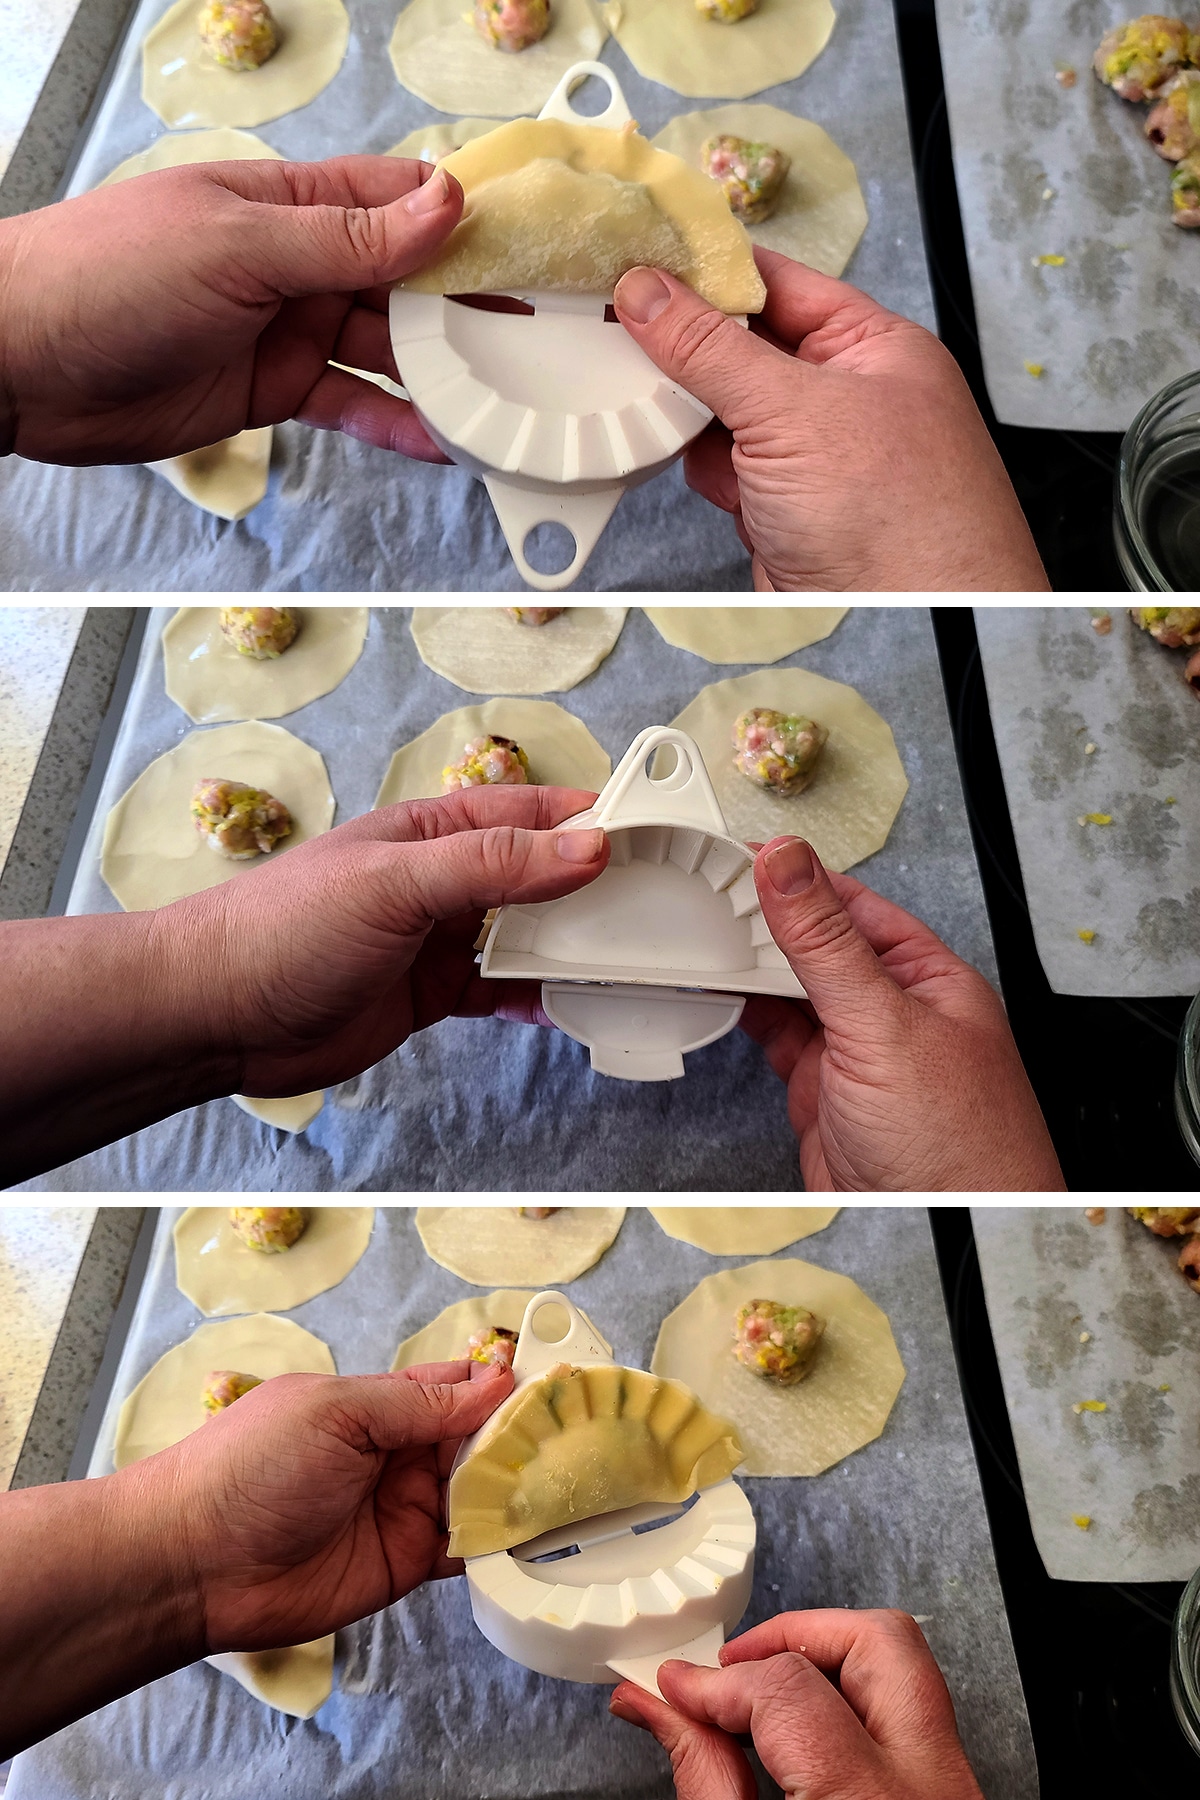
If you don’t have a dumpling press, you can fold and crimp the edges freehand. (It’s fussy though!)

Cook the Dumplings
Heat up 2 tablespoon vegetable, olive, or sesame oil in a frying pan – I prefer to use nonstick for this – and arrange a single layer of gyoza in the pan – not touching each other, frill side facing up.
Cook until bottom side is nicely browned.
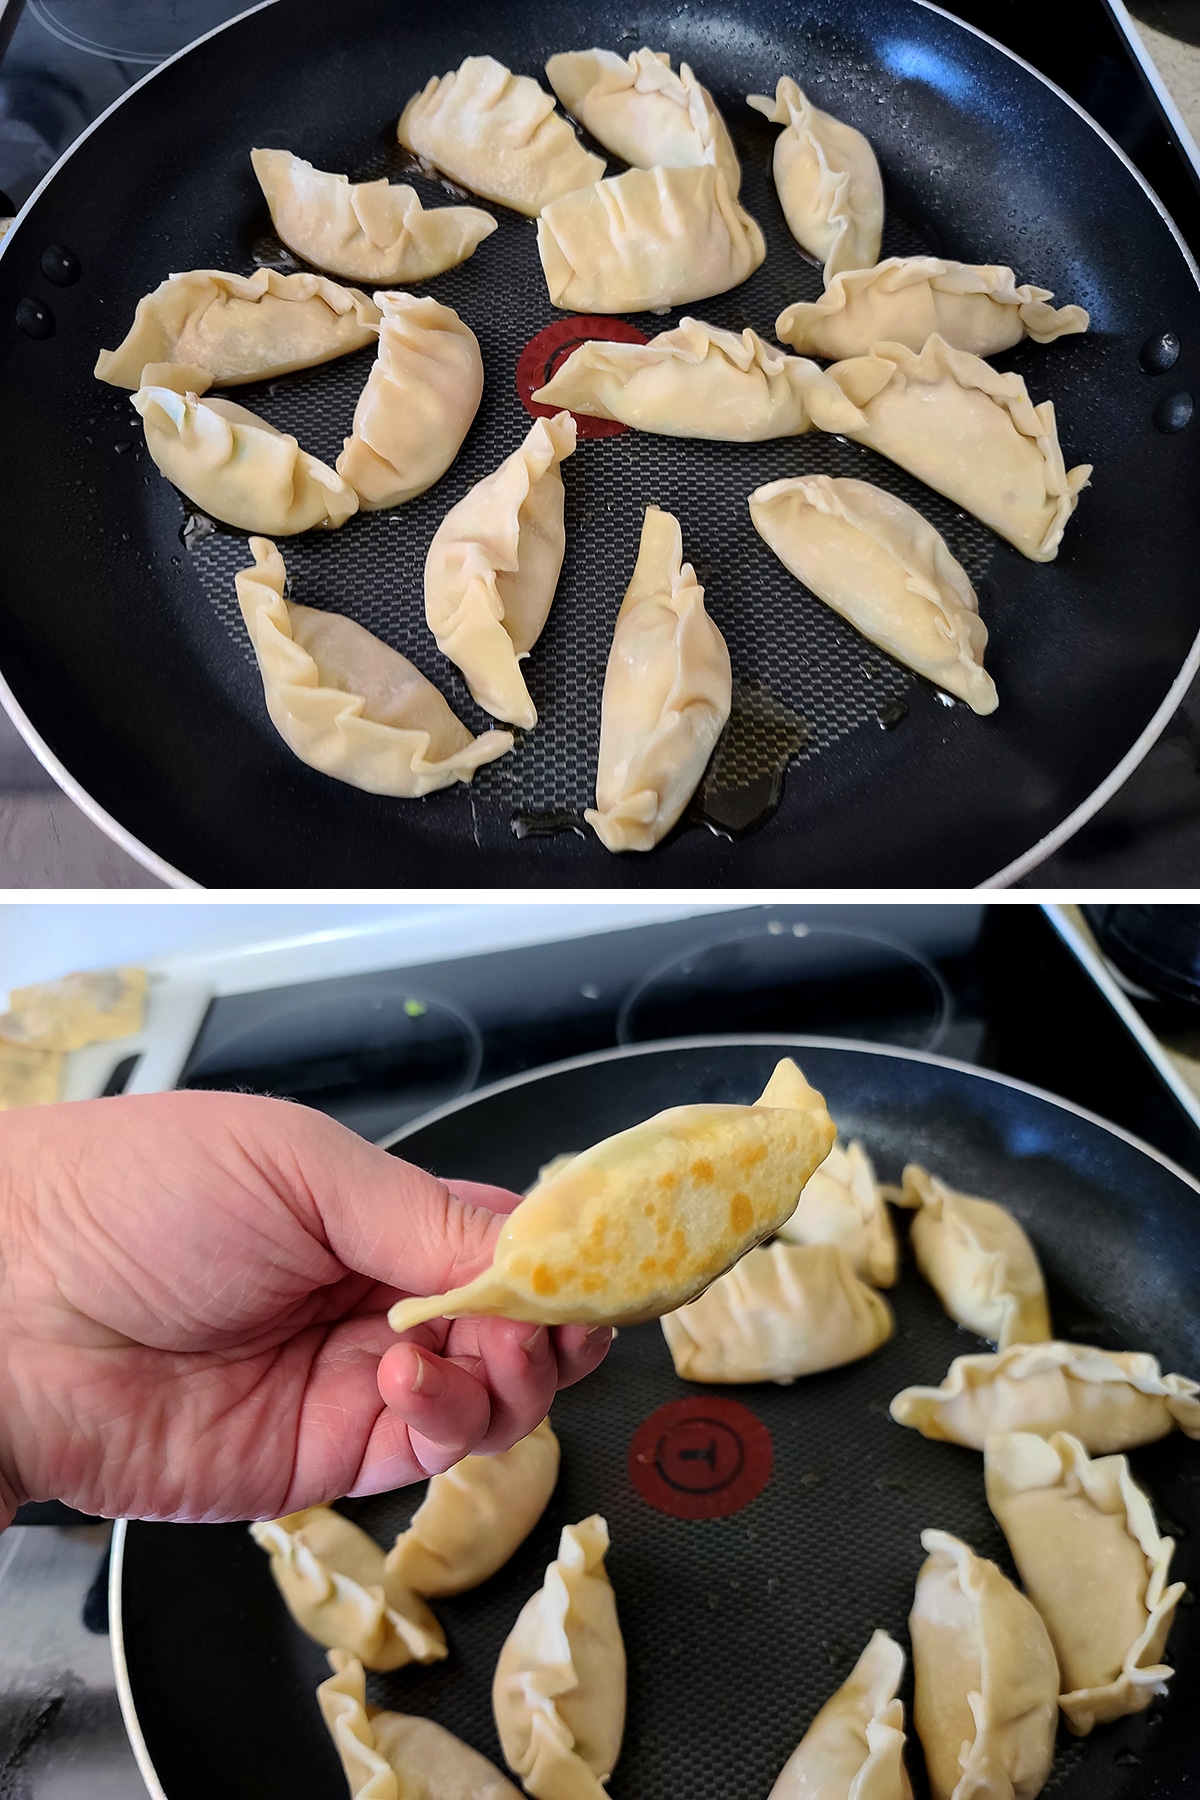
Alternatively: If you like your gyoza extra crispy, arrange them on their sides in the pan. Cook until the first side is nicely browned, flip and brown the other side before proceeding.
Once the bottom is browned to your liking, pour ½ cup of warm water into the pan, and quickly cover with a lid.
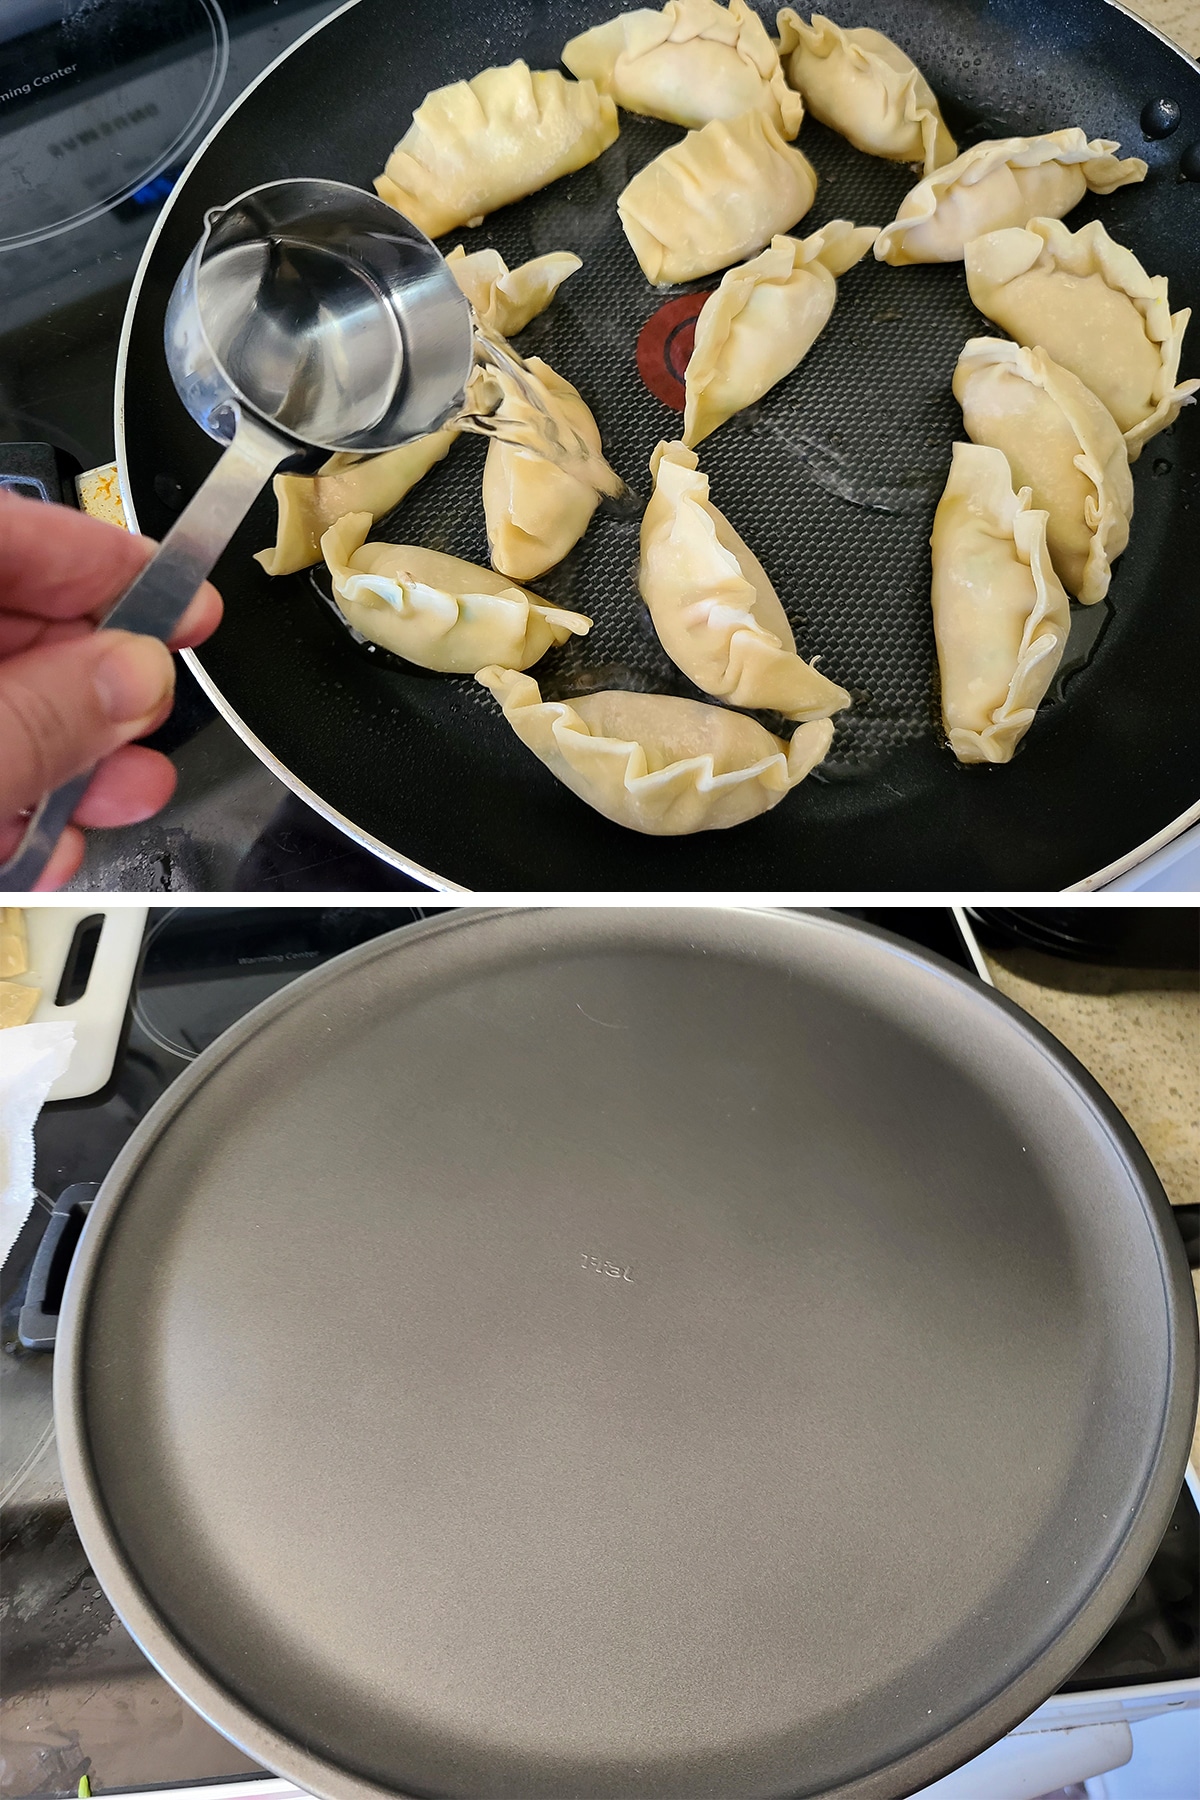
Cook for 2-3 minutes without removing the lid.
After 2-3 minutes, remove the lid and allow Gyoza to continue cooking until all of the water has cooked off.

Repeat in batches, as necessary.
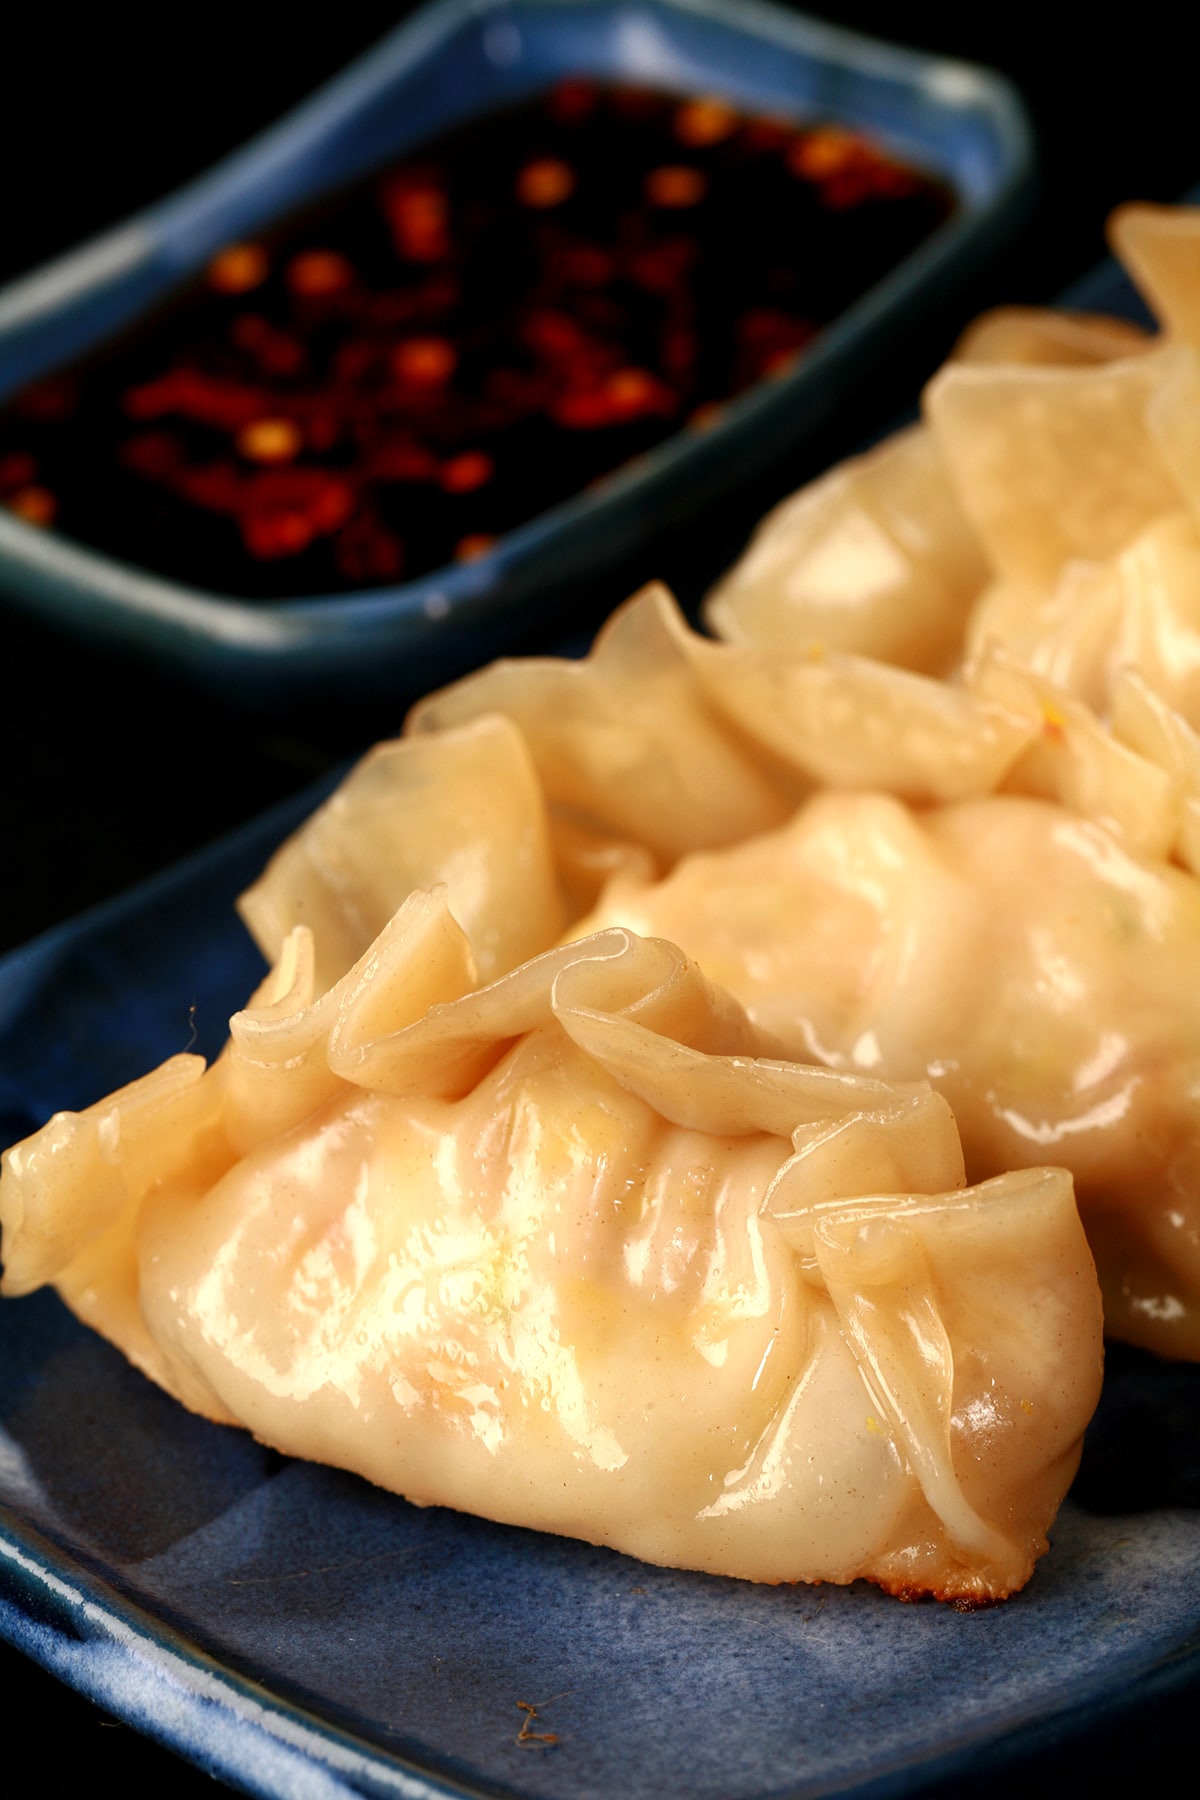
Serve hot, with Gyoza sauce

Making Ravioli Style Gyoza
After making the filling:
Lay out won ton wrappers, brush the edges with water, and center a formed ball of filling on each.
Place a fresh won ton wrapper over each filling ball, lining up the edges with the bottom wrapper.
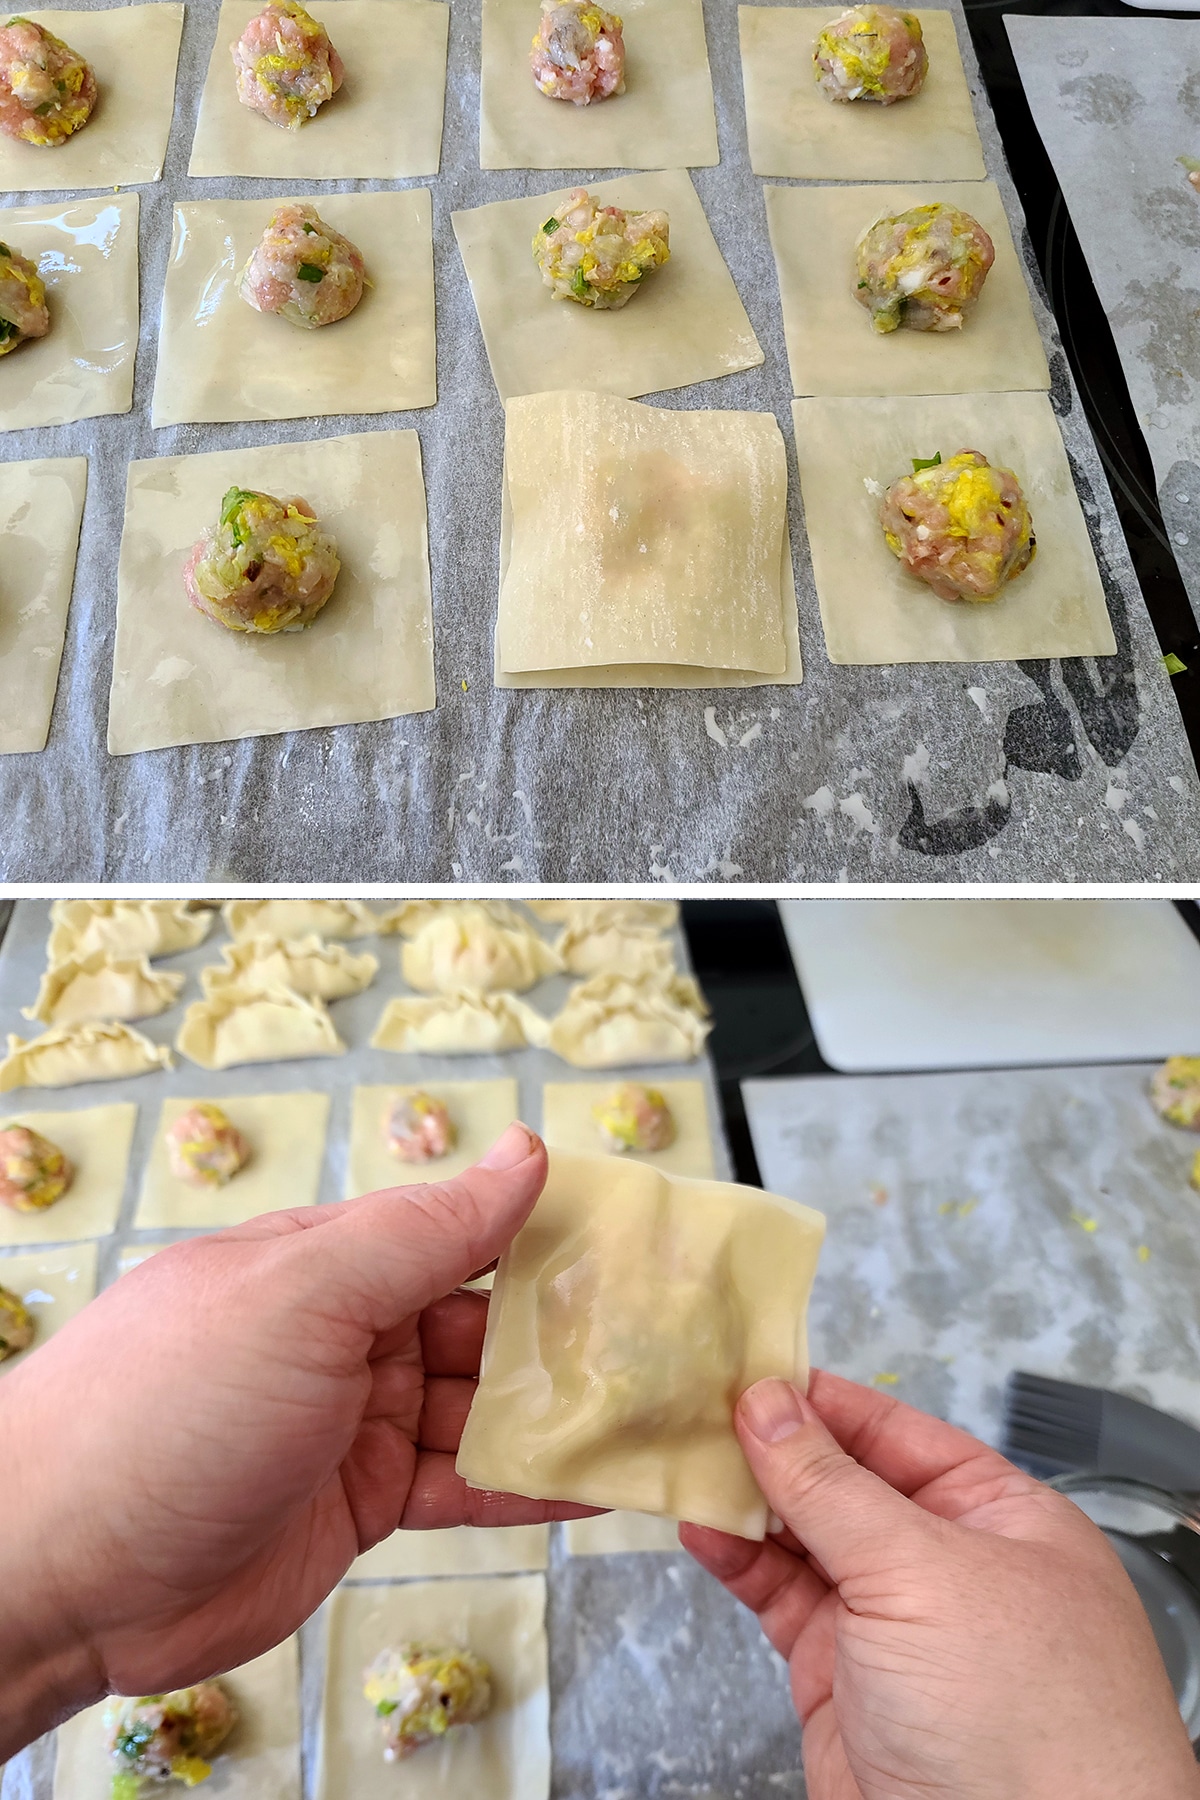
Gently press the top won ton wrapper down, lining up the edges, sealing them together, and gently squeezing out the air as you go.
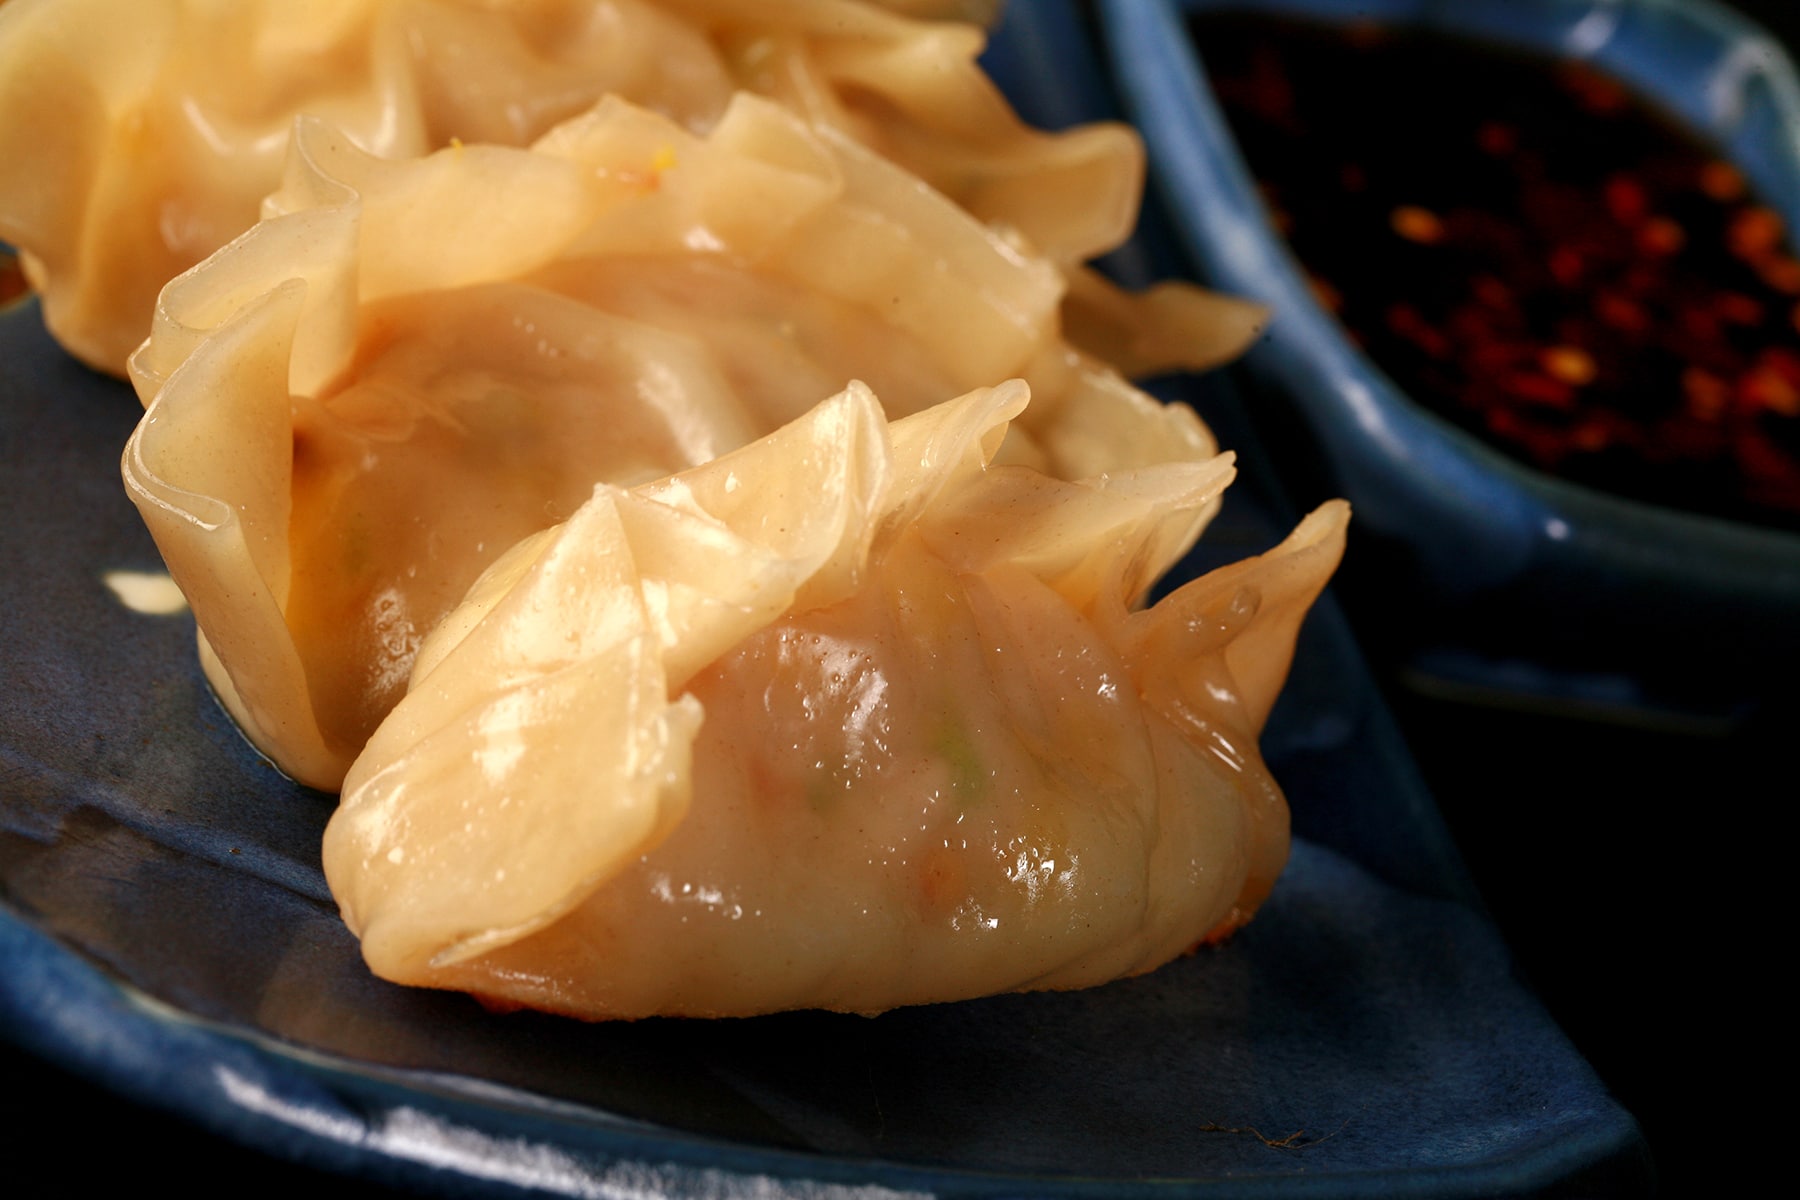
Cook the same way you do regular gyoza, and serve hot with Gyoza sauce

Alternatively:
You can also cook these as a pasta - add them to boiling salted water, and cook for 7-10 minutes, or until filling is cooked through.
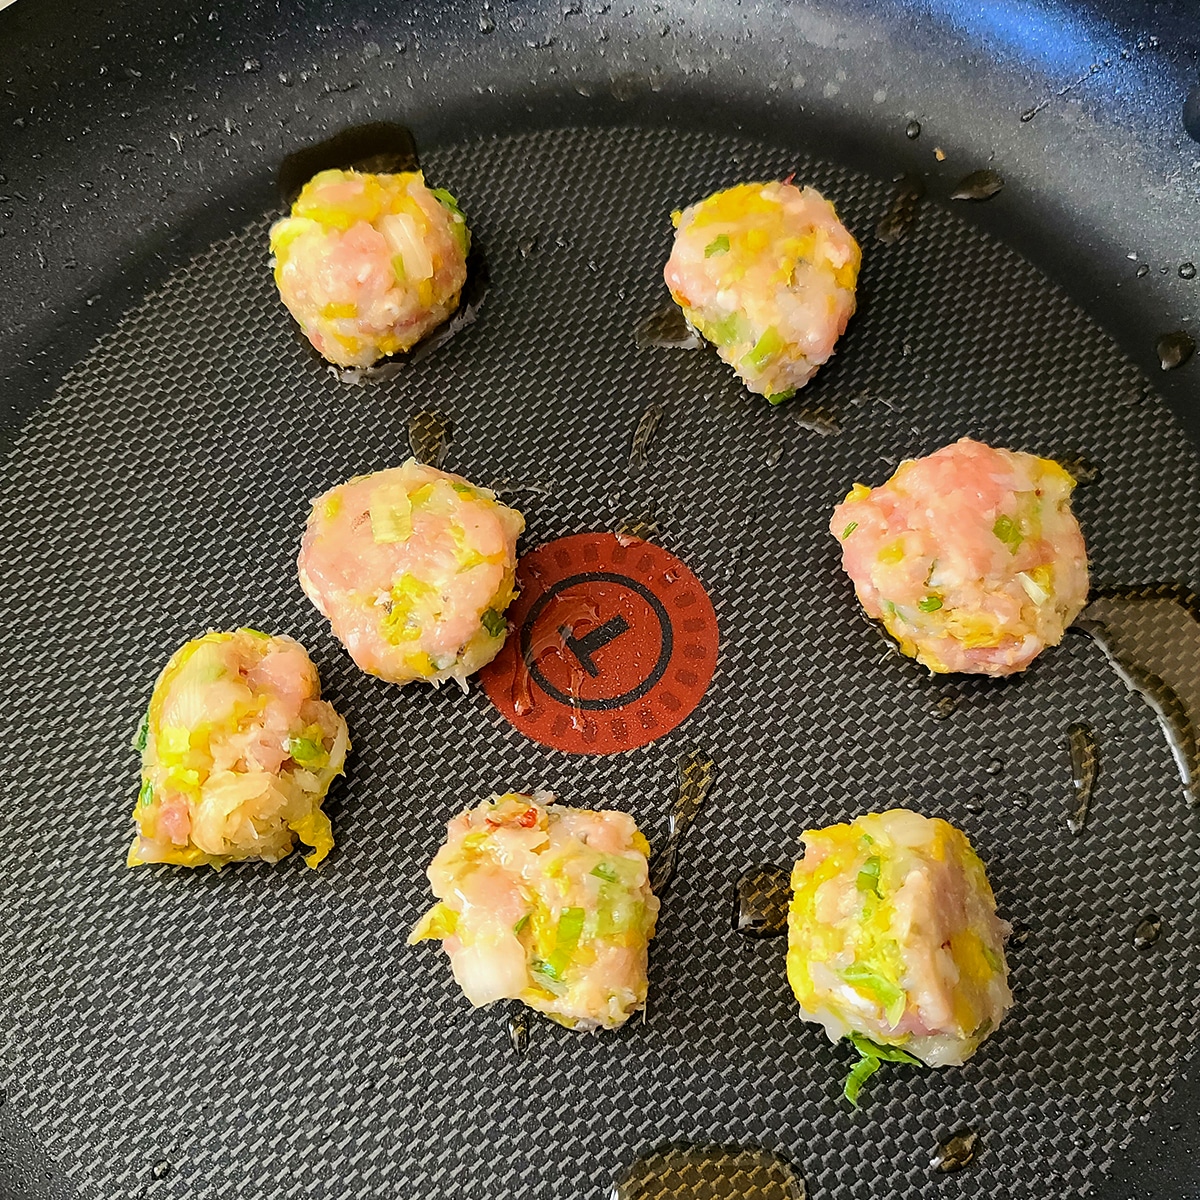
Gyoza Meatballs
If you run out of wrappers - or just get sick of folding them - gyoza filling makes fantastic meatballs!
I just fry them up in some sesame and olive oil until cooked through.
Gluten-Free Gyoza
If you're looking for a gluten-free recipe for Gyoza, look no further than my first gluten-free cookbook, Beyond Flour.

More Sushi & "Sushi-Adjacent" Recipes
Here are a few more recipes that you may enjoy!
DIY Sushi Birthday Cake
Easy Sushi Casserole
How to Make Sushi Rice
Mango Salad
Matcha Green Tea Pavlova
Pepper Crusted Tuna with Wasabi Cream Sauce
Potluck DIY Sushi Party
Spicy Tuna Maki
Sushi Sauce Recipes - Dynamite, Eel, and Mango
Tuna Avocado Mango Maki
Share the Love!
Before you chow down, be sure to take some pics of your handiwork! If you post it to Bluesky, be sure to tag us - @CelebrationGen. We're also on Pinterest, so you can save all your favourite recipes to a board!
Also, be sure to subscribe to my free monthly email newsletter, so you never miss out on any of my nonsense.
Well, the published nonsense, anyway!
Homemade Gyoza
Equipment
- Dumpling Press
Ingredients
- ½ head Napa Cabbage finely shredded
- 1 teaspoon Salt
- 1 ½ lbs Ground Pork
- 1-2 tablespoon Freshly Grated Ginger
- 5 Garlic Cloves pressed or minced
- 2 Green Onions finely chopped
- 1-2 tablespoon Sesame Oil
- 1 teaspoon Crushed Chilies
- ½ teaspoon Granulated Sugar
- ½ lb Raw Shrimp peeled, deveined and finely chopped/shredded
- 40 Gyoza/potsticker wrappers
- Sesame, olive, or vegetable oil
Gyoza Sauce
- ½ cup Soy Sauce
- ¼ cup Rice Vinegar
- 1 teaspoon Crushed Chilies
Instructions
Gyoza:
- In a large mixing bowl, combine cabbage and salt, stirring to evenly distribute the salt. Allow to sit for 10-15 minutes – this will draw the moisture out of the cabbage.
- Once time is up, squeeze as much water out of the cabbage as you can, discarding the water. Place the squeezed cabbage back into the mixing bowl.
- Add all remaining ingredients – aside from the wrappers and oil – to the bowl, and mix thoroughly. I like to use my hands for this – does a much better job of distributing everything than any mixing spoon will!
- Cover and chill until ready to use.
To Assemble and Cook:
- Roll filling into tight 1″ balls, placing one in the middle of each wrapper.
- Use a finger/pastry brush dipped in water to moisten the edges of each wrapper. Fold the wrapper over the filling, creating a half circle. As you do this, try to push out as much of the air from the inside as possible – excess air can cause them to burst.
- If you have a dumpling press, use it to seal and crimp the edges, or pleat the edges like this:
- If you don’t have a dumpling press, you can fold and crimp the edges freehand. (It’s fussy though!)
- Heat up 2 tablespoon vegetable, olive, or sesame oil in a frying pan – I prefer to use nonstick for this – and arrange a single layer of gyoza in the pan – not touching each other, frill side facing up. Cook until bottom side is nicely browned.
- Alternatively: If you like your gyoza extra crispy, arrange them on their sides in the pan. Cook until the first side is nicely browned, flip and brown the other side before proceeding.
- Once the bottom is browned to your liking, pour ⅓ cup of warm water into the pan, and quickly cover with a lid. Cook for 2-3 minutes without removing the lid.
- After 2-3 minutes, remove the lid and allow Gyoza to continue cooking until all of the water has cooked off. Repeat in batches, as necessary.
- Serve hot, with Gyoza sauce
Gyoza Sauce:
- Stir sauce ingredients together, refrigerate til serving.


Leave a Reply