

Whether summer is just ending - or just starting! - or in full swing, this Tropical Dragon Fruit Pavlova is like sunshine in your mouth!

I LOVE Pavlovas!
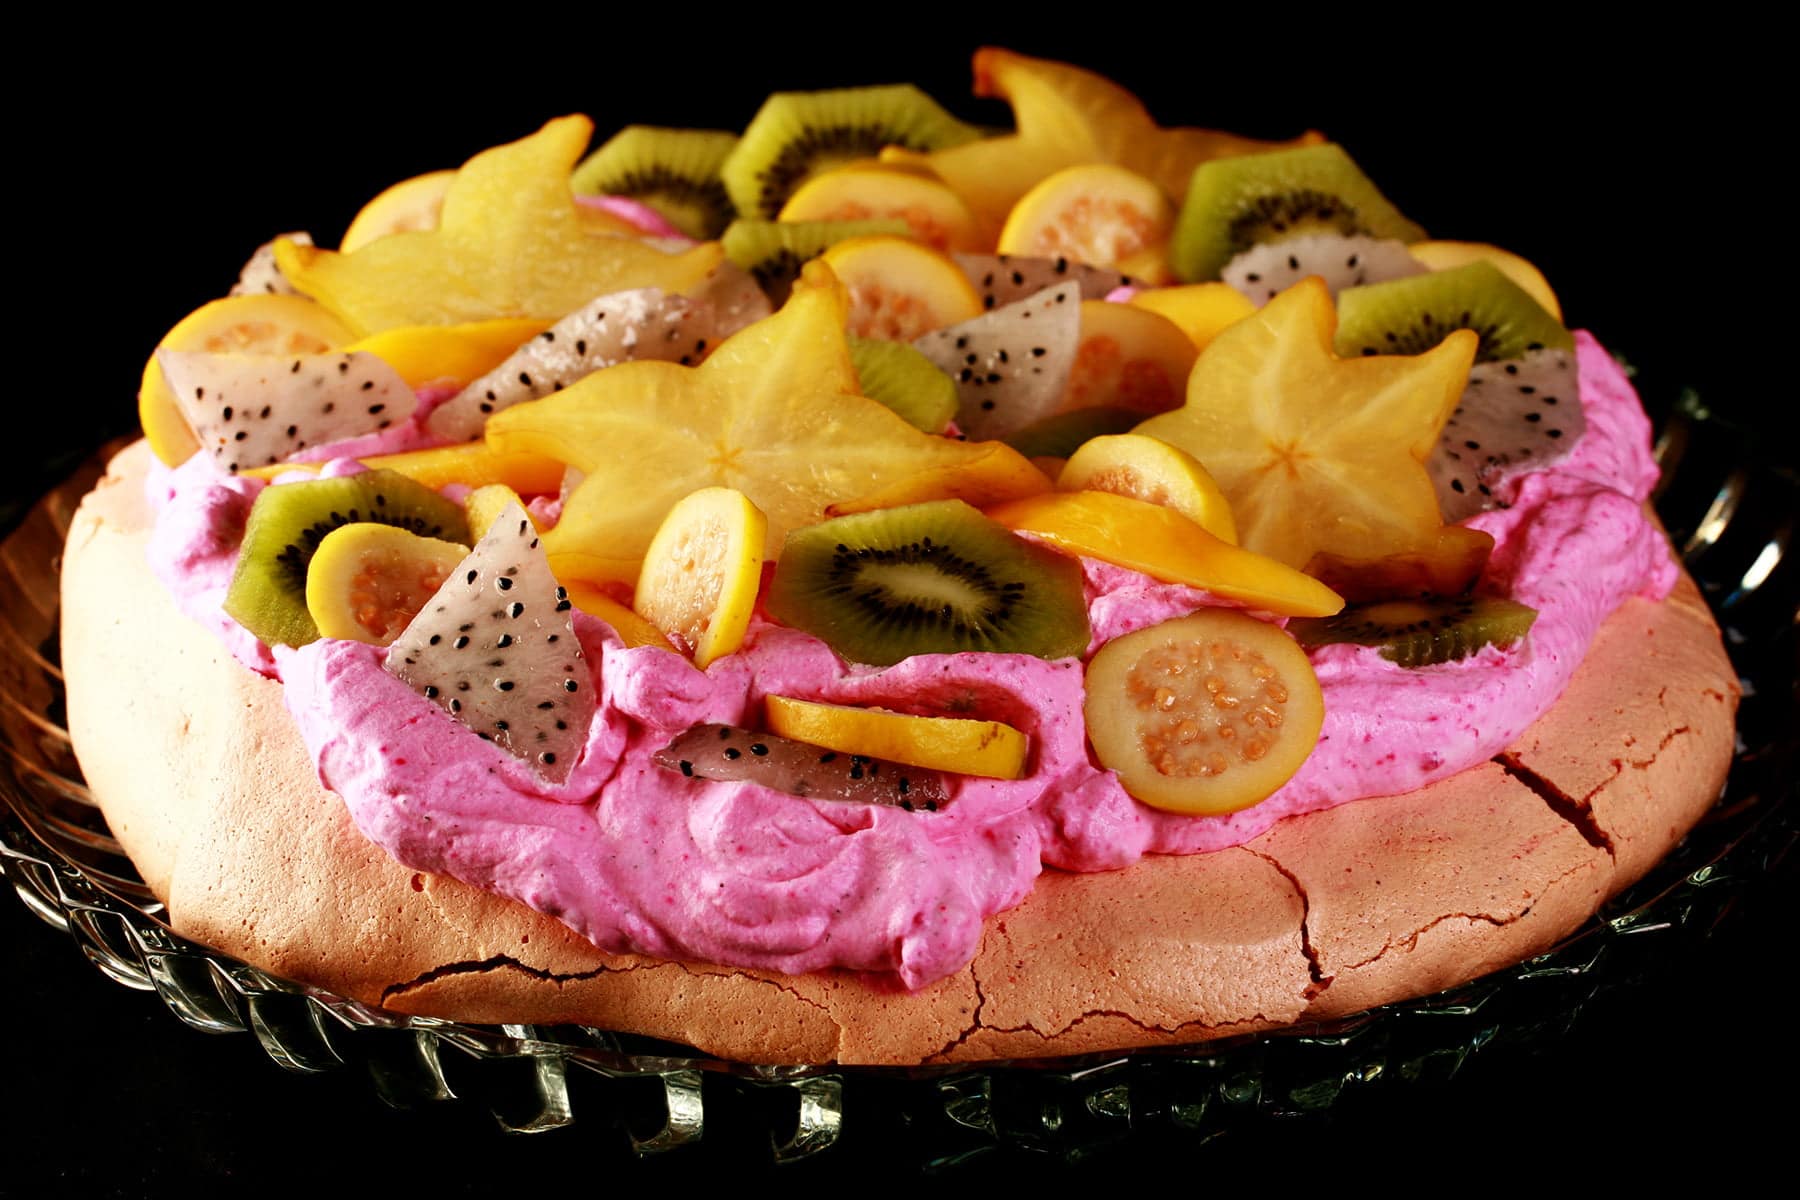
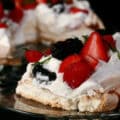
They’re probably my favourite dessert of all time - a fluffy meringue that’s baked up to be crispy on the outside, and like a big marshmallow on the inside. It’s topped with whipped cream, then piled on with fresh fruit.
It’s an Australian thing, and nowhere near as popular in North America as it should be. Pavlovas are truly a thing of beauty!
We’ve made a ton of them... for ourselves, for gatherings (when that was a thing!), for birthdays, and for Valentine’s Day.
My husband has baked a few on his own - one that was blue and green , for our anniversary (both of our fav colours)... a traditional heart shape with pink, rum flavoured whipped cream and mangos for one Valentine’s Day... and a pink and blue heart that was much more anatomically correct on another Valentine’s Day!
Anyway, it’s been a hot minute since I posted one of my Pavlova recipes, so it’s about time to change that!
Dragon Fruit Pavlova Evolution
Usually, our path from “Pavlova?” to “PAVLOVA!” is a pretty short one. Eggs, sugar, fruit, and whipping cream are all groceries that we either have on hand already, or require very little cost and effort to obtain.
The path on this one was a little more roundabout, though!
Pavlova Dream
Earlier this week, I woke up from a night of lucid dreaming. It was GREAT! It’s been a while since I had one of my “brainstorm and work through some problem solving *while I sleep* sleeps, and I missed it. Very efficient way to get stuff done, IMHO.
Anyway, I woke up Monday morning with 5 Pavlova recipes fully conceptualized and ready to go! It was very exciting!
So, I worked up a quick grocery list and headed out to get everything needed for all 5 Pavlovas. 4 went perfectly smoothly.
This one? This one made me work for it! In the end, it was totally worth it, though!

Ingredients
Overnight, my brain remembered every one of those “super fruit powder” type Instagram posts, the fact that I had a pouch of the Dragon Fruit (Pitahaya) powder in my kitchen, AND the fact that it’s been far too long since I made a Pavlova, and just mashed it all together.
I worked through the flavourings, deciding to keep it fruity and exotic - a focus on the Dragon Fruit flavour and colour in the Pavlova base, the whipped cream, and the fruit topping, with accent flavours and colours staying in the bright, tropical range.
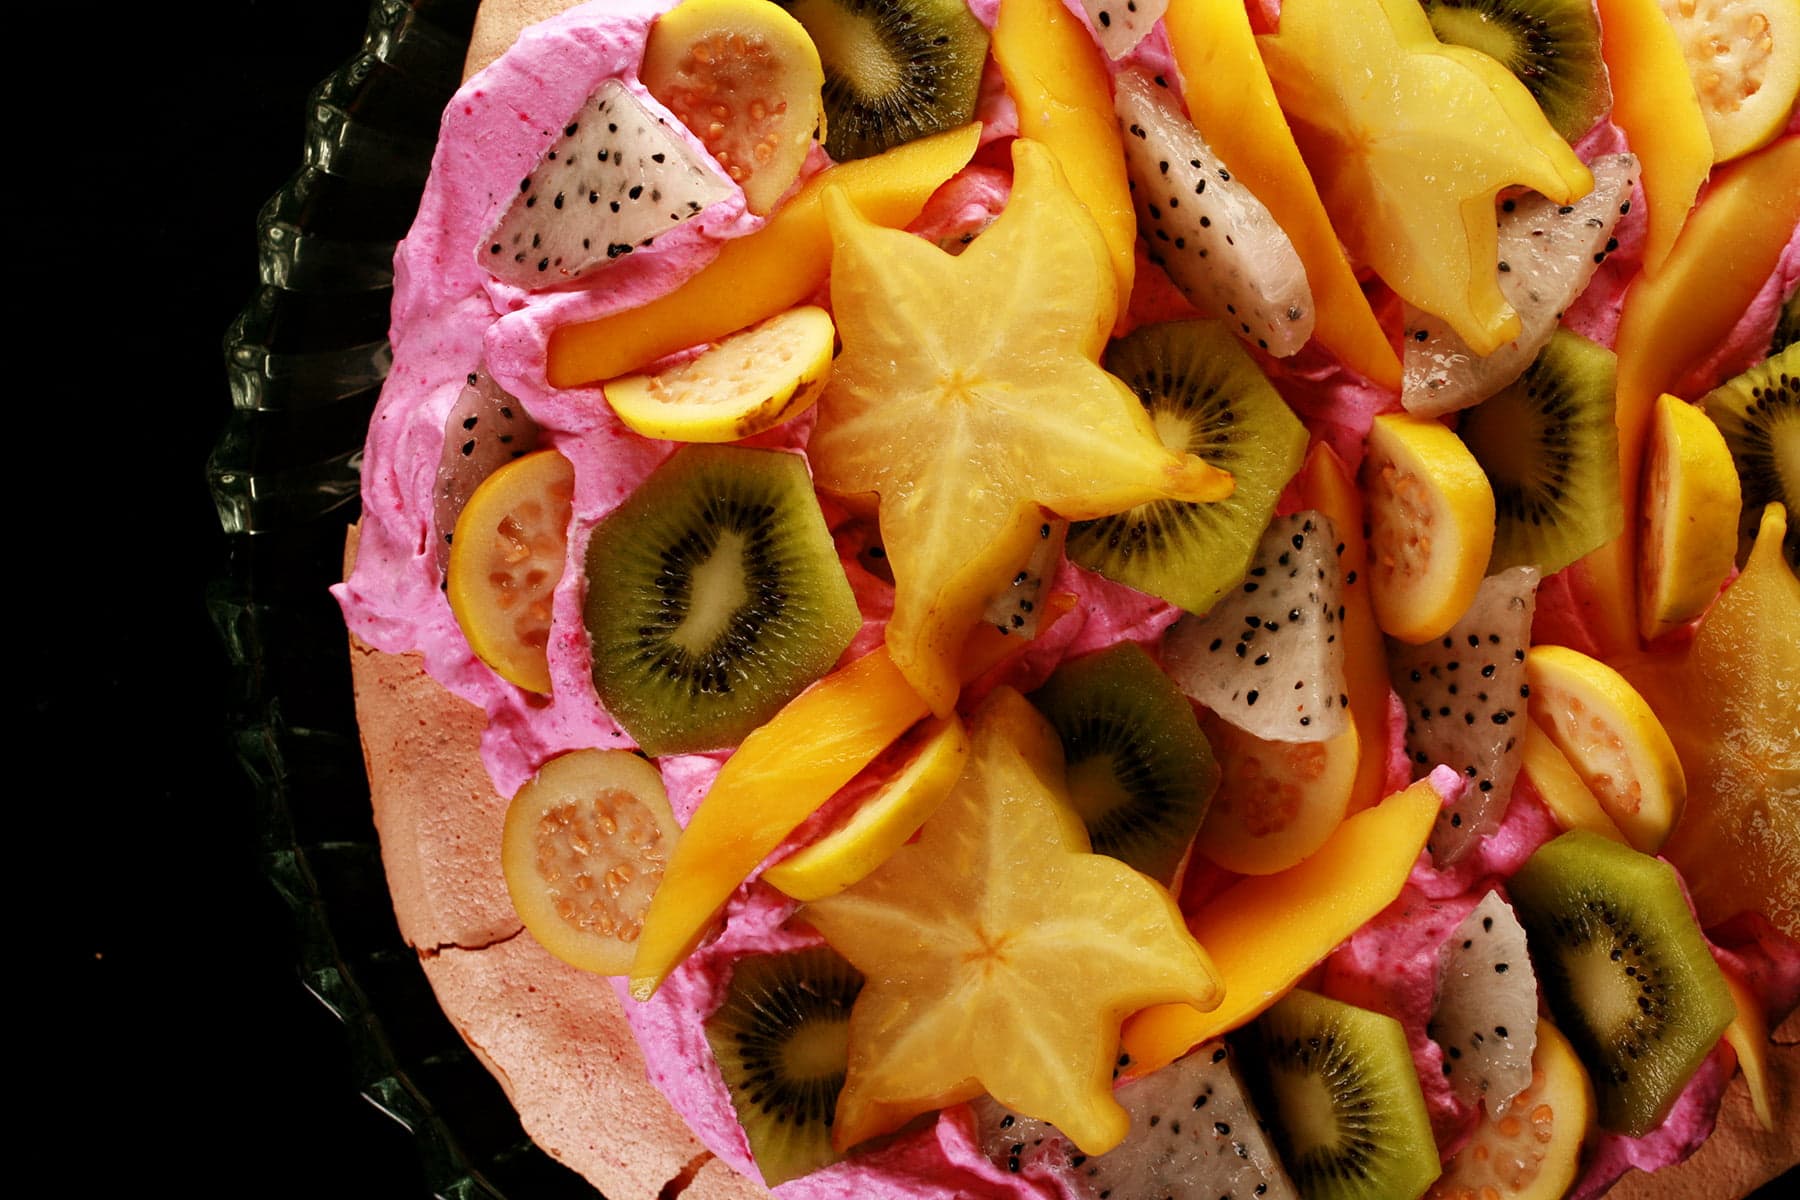
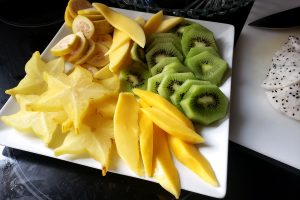
Mango and Kiwi were almost givens - they’re some of my favourite toppings for any Pav - but I’d never put Guava, Star Fruit, or Dragon Fruit on a Pavlova.
I decided to leave it there, and not add any other types of fruit to it. I couldn’t wait to see it all come together - the deep fuchsia of the Dragon Fruit, the pretty pink of a Guava, the orange of the mango, yellow of the star fruit, and green from the Kiwi.
I was ALMOST tempted to add some blueberries just to get almost a full rainbow going (Like in my Tuna Mango Poke Bowl!), but decided - in my sleep - to keep it tropical. Even passed out, I have OPINIONS.
I put Passion Fruit down as a maybe - I knew one grocery store carried them regularly, but it’s one I won’t be back to until after the pandemic. I figured if I ran into any at another shop, they’d make it onto the Pavlova.
I looked forward to the grocery trip. We are so incredibly spoiled living here. I don’t think I’d ever seen a star fruit while I was living in MN, and the dragon fruits usually cost $10 USD each!
Here, both the dragon fruit and star fruit cost under $2 CAD each!
... But then it took me 3 different grocery stores to find everything I needed.
... and then the Star Fruits were all white inside.
... and so were all the guavas!

I didn’t end up finding passion fruit at the shops I went to, but it would have gone so well on this Dragon Fruit Pavlova. If you have better luck in that area, by all means, add it! I would spoon it over the whipped cream - before topping with fruit - personally.
Anyway, in case you’re new to any of the fruits used, a couple notes:
Dragon Fruit
Slice it open, use a wide spoon to scoop out the filling - white or pink! - in one big chunk, then either slice or cube it.
Note: It can have a laxative effect on some people, so if you’re sensitive to such things... go easy on it!
Star Fruit
Look for star fruits that are a bit smaller (not as sweet as the bigger ones, but easier to serve on a pav!), and more yellow than green. The more yellow they are, the sweeter they are - and bits of brown are no problem at all.
Wash them off, and slice them - you eat the skin and all. Well, I like to take the seeds out first, so “almost all”, anyway!
Guava
Wash them well, slice them up. Like the star fruit, you can eat these rind and all. I like using the smaller varieties of guava, sliced in rounds. If you use a larger one, slice them up into smaller pieces, for ease in serving and eating.
Kiwi
Slice the ends off, stand on one end, and use a sharp paring knife to cut the fuzzy skin off. Slice them into rounds, and even halves or quarters, as you like.
Mango
Use a ripe mango. Skin it and slice it up, same as for any other pav 🙂
Passion Fruit
Look for passion fruit that are a little wrinkly.
Cut in half, use a spoon to scoop the (TASTY!) guts out. Spoon over your pavlova directly from the fruit.

Dragon Fruit Pavlova Fail
With ingredients in hand, I set about making a Pavlova.
... and it failed like I’ve never seen before. Spread everywhere, didn’t crisp up, etc. A total mess - a tasty mess, but a mess nonetheless.
Immediately, I figured it to be an acid issue. I didn’t think of Dragon Fruit as being particularly acidic, so I googled, and there it was: “Excellent source of vitamin C”!
I mixed up a bit of the powder with some water and took a Litmus strip to it to confirm - yup, very acidic.
So I adjusted my recipe, and just left out the vinegar altogether, letting the acid from the dragon fruit stand in for it.
Dragon Fruit Pavlova Success
Perfection!
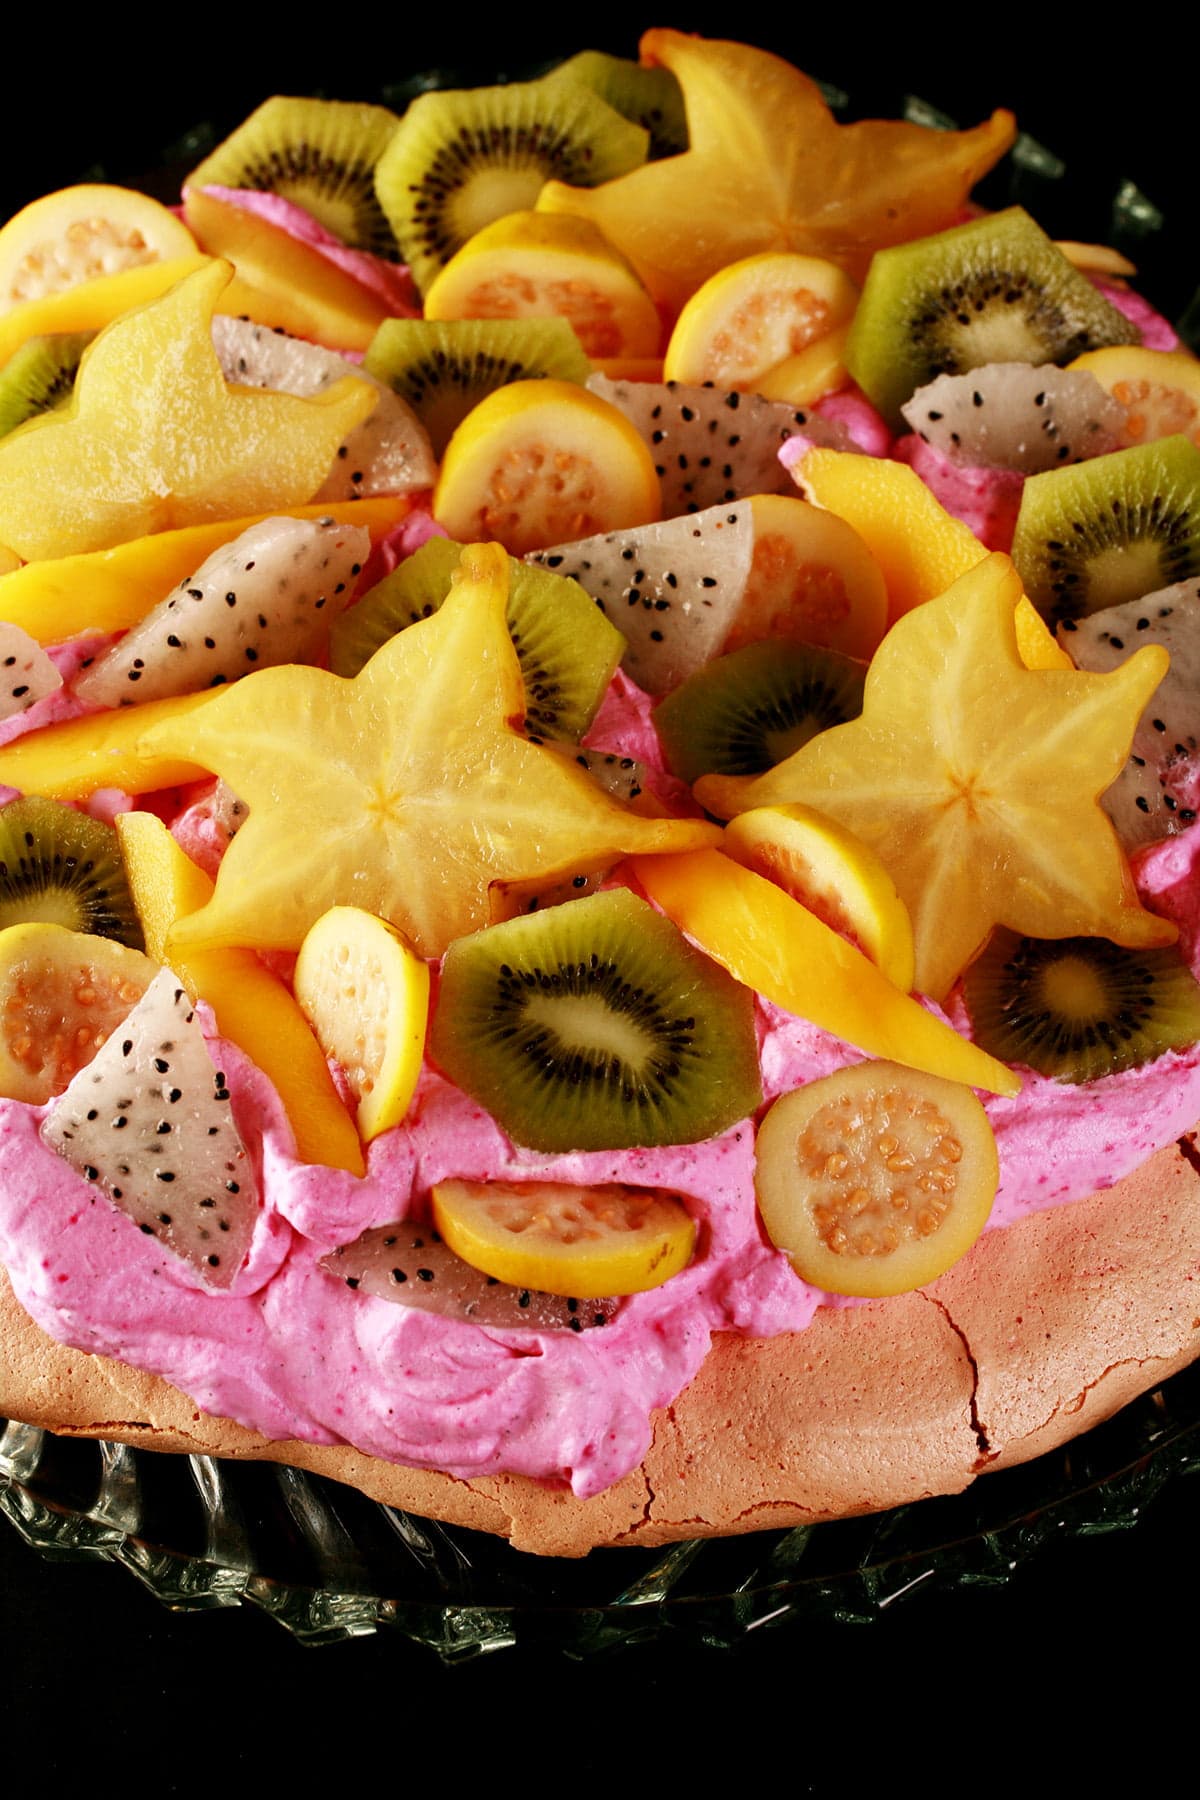
The adjusted recipe baked up perfectly - marshmallowy inside, crispy outside, with very little spread and good height retention.
... also, it tasted amazing!
While it didn’t end up looking as I had originally conceptualized it - whites, yellows, and greens, rather than most of the fruit being pink - it was gorgeous and SUPER tasty. We enjoyed it in our Pjs, while camped out on the couch, watching DS9.

Pavlova Tips
- Eggs are easiest to crack when cold, and easiest to whip at room temperature. Govern yourself accordingly!
- Be INCREDIBLY careful to not get any egg yolk into the whites, or the eggs will not whip up. For that matter, be very careful to use a very clean bowl and mixer - grease is your enemy here.
- Related: You cannot use oil-based flavoring in your pavlova meringue. Its presence will cause the meringue structure to break down.
- While I skip adding flavouring extracts altogether - letting the dragon fruit flavour shine - a bit of (NON OIL) rum extract would go beautifully in this, either in the meringue, the whipped cream, or other.
- Add your sugar SLOWLY, as you’re beating the eggs. You don’t want to overwhelm the eggs.
- Once your Pavlova is in the oven, don’t open the door until several hours after you turn the oven off. Patience!
- Don’t whip the cream and top the Pavlova until RIGHT before you serve it. This doesn’t keep well as leftovers, so be sure to eat all of it 🙂
- If your meringue is not cracked by the time you remove it from the oven, it will likely crack at some other point, and will almost certainly crack when you start garnishing. Don't worry, this is totally normal for a Pavlova, no one will notice or care!
- Be sure to take some pics of your work! If you post it to Bluesky, be sure to tag us - @CelebrationGen. We're also on Pinterest, so you can save all your favourite recipes to a board! This goes double if you use pink dragon fruit and/or guava, because I’d really love to see the original plan realized, even if I don’t have that option myself!
More Pavlova Recipes
Do you love Pavlovas like we do? Awesome! I have several more super tasty Pavlova recipes for you...
Bananas Foster Pavlova
Basic Pavlova Recipe
Blueberry Pavlova
Cardamom Fig Pavlova
Chocolate Raspberry Pavlova
Matcha Green Tea Pavlova
Pavlova Charcuterie Board
Seasonal Pavlovas
Christmas Tree Pavlova
Easter Egg Pavlova
Halloween Pavlova with Bloody Eyeballs
Heart Shaped Valentine's Pavlova
Share the Love!
Before you chow down, be sure to take some pics of your handiwork! If you post it to Bluesky, be sure to tag us - @CelebrationGen. We're also on Pinterest, so you can save all your favourite recipes to a board!
Also, be sure to follow me on Pinterest, and subscribe to my free monthly email newsletter, so you never miss out on any of my nonsense.
Well, the published nonsense, anyway!

If you’re here because you’re aware that Pavlovas are naturally gluten-free and an AMAZING dessert that can be enjoyed by both people who are and are not following a gluten-free diet, you should definitely check out my gluten-free cookbooks: Beyond Flour: A Fresh Approach to Gluten Free Cooking & Baking, and the sequel... Beyond Flour 2. You can order them right here on my website, through Amazon, or through any major bookseller.
Anyway, on to that recipe!

Tropical Dragon Fruit Pavlova
Equipment
- Parchment Paper
- Baking Sheet
Ingredients
- 4 Large Egg Whites
- Pinch Salt
- 1 cup Super Fine / Castor Sugar *
- 2 tablespoon Dragon fruit / Pink Pitahaya Powder
- 1 teaspoon Cornstarch
- 1 ¼ cup Heavy Cream
- 1-2 tablespoon Granulated Sugar optional
- 2-3 tablespoon Dragon fruit / Pink Pitahaya Powder
- Tropical Fruit Dragonfruit, Guava, Kiwi, Mango, Passionfruit, Star fruit
Instructions
- Get ready: Preheat your oven to 350 degrees. Line a baking (cookie) sheet with parchment paper, and set aside. Fit your electric mixer with the whisk attachment.
- Remove eggs from fridge, separate out the whites, and allow to warm to room temp (about 5 minutes).
- In your mixer bowl, beat egg whites together with salt until glossy peaks form. Slowly add in the sugar, and continue whipping until stiff peaks form. Turn off mixer, remove bowl.
- Sprinkle Pink Pitahaya Powder and cornstarch over meringue, gently fold in till combined.

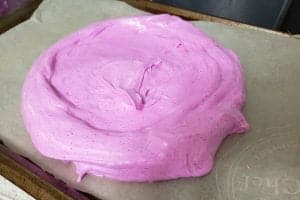
- Heap meringue onto the center of your baking sheet.
- Use a spatula to spread the meringue out to approximately an 8-9″ circle. I like to have my meringue a fairly even depth throughout – some like a mound, some like it to be a little concave. If you want to get really fancy, put the meringue into a pastry bag and pipe it out as a mass of swirls that form your 8″ circle! It’s really up to you!

- Put the baking sheet into your oven, and turn the temperature down to 250 degrees. Bake for 1 hour and 20 minutes.
- Once your timer goes off, turn the oven off and let the meringue cool in the oven for several hours. The baking of the meringue can be done the day before, if needed!
- Just before serving, prepare your fruits, THEN whip the heavy cream.I like my pavlovas a little sweeter, so I add about 2 tablespoon of sugar – add as much or as little as you want. Purists may not want to sweeten the cream at all! I also like to add a little flavoring, again – optional
- Once heavy cream is whipped to the desired thickness, add the Pink Pitahaya Powder, mix until well incorporated.
- Mound the whipped cream on your pavlova, and top with the prepared fruits. Serve immediately!


Leave a Reply