

Wine Making at Home, Part III : The Brewing Process

So now that you know why wine making is a great hobby, and know about the equipment you need to get started, all that's really left to address is the actual brewing process. After that, I can start plying you with yummy wine recipes to try!
The nice thing about wine making is that it can be as simple or as complex as you want to make it.
On one end of the spectrum, you can take some fruit concentrate, add water and yeast, and let it do its thing. On the other, you can extract the juice from fresh fruits, combine them in many ways, add herbs or spices to add flavor. You can age them with wood chips, you can carbonate, you can use special ingredients to help clarify your wine...
At its heart, however, wine making starts with a very simple concept.
You start with fermentable sugars in a liquid, introduce yeast, and let it do its thing. The yeast digests the sugars, and alcohol is the byproduct - this is fermentation. The yeast reproduce and stay suspended in the wine as it ferments. As the alcohol content in the solution goes up, the yeast cells are less able to tolerate their living environment, and they die off.

A 6 gallon batch of our mango wine, on day 1. Yum!
As the yeast die, they settle on the bottom of the fermenting vessel. Throughout the fermentation process, the wine is removed from the layer of fruit & dead yeast sediment on the bottom, being transferred to a clean fermenting jug (carboy) every few months. This process is called “racking”. When fermentation is complete, the wine is left to clarify as the last of the yeast settle to the bottom of the fermenter. The wine is then bottled, and aged (if desired).
.. and then, you drink it. Yum! Read on for more information about the brewing process..
Yeast
Let’s start by looking at the yeast. There are many varieties of brewing yeast available, which are all suited to different applications. Basically, they’ll work better in different conditions - different temperatures, alcohol content, etc. What you choose to work with can have a big impact on your final product.
For instance, a yeast strain that is better able to tolerate alcohol in their environment can take the fermentation process further than a more sensitive yeast strain, resulting in a finished product with a higher alcohol content by volume (ABV). As attaining the highest ABV is not the goal, using a less robust yeast strain can result in a sweeter, smoother wine. It’s all about what you want out of it.
Because wine recipes tend to specify the yeast that should be used, and because there are a ton of resources online for the differences between the yeast varieties, I’m not going to get into a bunch of yeast discussion here. For more information, click here to see a great yeast chart at Wine Maker Magazine’s site, here.
Bacteria & Wild Yeast
Bacteria is not your friend when it comes to wine making - just a small amount of bacterial contamination can take a great wine, and turn it into vinegar. Wild yeast, when present on fresh fruits, can tamper with not only the flavor of your finished wine (for better or worse!), it can interact negatively with the yeast you’ve chosen to use. For these reasons:
- Make sure that all of your equipment (fermenting buckets, car boys, spoons, measuring tools, etc) are sanitized before use, following the instructions / recommendations on your choice of sanitizer. Also be sure to re-sanitize anything that has come into contact with anything not sanitized (and is therefore potentially contaminated). Drop it on the floor? Re sanitize. Wash your hands well.
- An airlock is used to prevent additional bacteria and yeast - present in the air - from contaminating the wine as it ferments.
Fruit / fruit juice should be treated before you start your wine. The 2 main ways of preparing your fruit juice for wine making are pasteurization or the use of a Campden tablet:
To pasteurize, fruit juice is heated to a high enough temperature to kill the yeast and bacteria that may be present. The only real downside to pasteurization is that - when done incorrectly - it can cause fruit pectins to set, causing a cloudy wine. Pectins are present in fruits, and is what causes jams and jellies to... well, jell. A desirable attribute in some cases, in wine - not so much. Avoiding bringing the juice to a boil, and the use of pectinase (an enzyme that breaks down pectins) are both ways to prevent pectin from impacting your wine.
After pasteurization, your fruit juice must cool down to at MOST 100 degrees F before adding your yeast - too hot, and the yeast will just die
If you want to avoid the pasteurization process, Campden tablets are cheap, readily available additives found at brew supply stores. Wikipedia has a bit of an article on it, here. Basically, Campden is a sulfur product that kills / inhibits the growth of bacteria and wild yeast strains.
Campden tablets are added to fresh juice / pulp / sugar (This mixture is called a “must”), and allowed to work overnight. After waiting 12-24 hours, the sulfur will have dissipated for the most part, and you are able to add your yeast of choice.
Personally, I prefer to use pasteurization. I don’t like messing around with Campden tablets, and with the way we make our wine, I find that pasteurizing allows for more flavor to be extracted from the fruit we use. Don’t worry too much about this - it’s all very simple, and covered in each of our coming wine recipes!

Record Keeping
In addition to the complexity of your recipe, you can also choose how in-depth you want to go with record keeping.
It’s always a good idea to make note of what you did, and with what ingredients. If you produce something you love, you’re going to want to be able to reproduce the results! Beyond that, record keeping can get fairly intense. You can track the specific gravity, acidity, brix, temperature, and appearance, among other things.
Personally, we like to keep things relatively simple. We record our recipe and technique, and track specific gravity. This is so we have a general idea of the ABV reading as it goes along, and of the final product. We don’t measure acidity, brix, etc because really... we don’t feel like messing around with that. Your mileage may vary, of course!
To get started with charting, click here for a pdf of our wine making record sheet. We start a new one of these for each batch we put on!
Specific Gravity
“Specific gravity” is a reading taken at various stages of your brewing process. It measures the density of your wine, and is what’s used to calculate the ABV of your finished wine.
To take a reading, siphon some of your juice / wine / must (just liquid, no fruit chunks, etc!) into a freshly sanitized hydrometer test jar. (Alternatively, use a freshly sanitized turkey baster or “wine thief” to transfer some over to your test jar). You will want the liquid to come at least ⅔ up, assuming that the (sanitized!) hydrometer is not yet in the jar. (Almost full, if it is!)
Place your hydrometer - a graduated instrument, looks kind of like a thermometer - in the test jar liquid, and make note of how far up the liquid extends. Make sure that the hydrometer itself is vertical and bobbing freely, not tilted and leaning against the edge of the jar. Write down that reading.
To find out what your final ABV is, you absolutely MUST have an original (“Starting”) gravity reading, taken at room temperature, before any fermentation has taken place. You take that number, as well as your final gravity reading, and plug them into an online calculator, which will tell you if you made rocket fuel or not.
Personally, we like the calculator at: Hilltop Brew.
Racking your Wine
Once initial fermentation has slowed significantly, you will need to rack your wine to another clean, freshly sanitized carboy. To determine “slowed significantly”, we tend to look at the air lock. When it bubbles up only once every 10 seconds or so, we know it’s time to rack it!
To rack your wine, the fermenting vessel containing the wine is placed on a higher surface (we use our washing machine!), and the carboy that will be receiving the wine is placed below it, on a lower surface (In our case, on the floor). A clean, freshly sanitized siphon is placed into the wine, while the attached hose ends up in the empty carboy below. Pump the siphon a couple times to establish a good flow, and watch your wine travel from one carboy to the next. As you reach the bottom of your initial carboy, ease up on the siphoning before you start taking up the sediment. Cork your new carboy with a sanitized airlock, dispose of the sediment, and wash out your initial carboy.
This process is repeated every few months - the intervals are usually prescribed in the recipe for the specific wine you are making. At each racking, we like to take a gravity reading, and have a little taste!
Patience
While we advise tasting your wine along the way, just know that the initial tastings may not be very pleasant. The yeast can and will impart a sour, gross taste at first, which will mellow and disappear with time. What tastes nasty a couple weeks in can be fabulous just six months later.
If your wine - even a year into the game, with all fermentation and clarifying complete - has a harsh alcohol taste, bottle it and put it away. Aging can mellow it and refine the taste into something quite drinkable - even tasty! Age can make all the difference - know that you should be in it for the long haul!
Stabilizing and Back Sweetening Your Wine
Ready to keep learning? Wine Making at Home, Part 4: How to Stabilize and Back Sweeten Wine is Part 4 in this Home Wine Making series!
Home Brewing Recipes!
Looking to get started with home brewing? Here are a few of my other wine, cider, and mead recipes:
Wine Recipes
Banana Wine Recipe
Blackberry Wine Recipe
Blackcurrant Wine Recipe
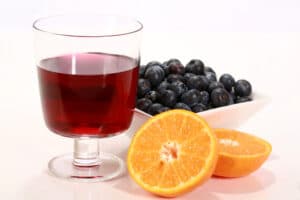
Blueberry Wine Recipe
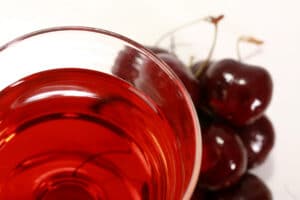
Cherry Wine Recipe
Cranberry Clementine Christmas Wine Recipe
Cranberry Wine Recipe
Faux Lingonberry Wine
Lychee Wine Recipe
Mango Strawberry Wine Recipe
Mango Wine Recipe
Mint Wine Recipe
Lychee Wine Recipe
Partridgeberry Wine Recipe
Passionfruit Wine Recipe
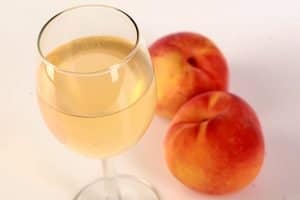
Peach Wine Recipe
Stone Fruit Wine Recipe
Strawberry Wine Recipe
Ube Wine Recipe
Watermelon Wine Recipe
Mead Recipes
Black Cherry Mead Recipe
Blueberry-Clementine Mead Recipe
Blueberry Mead Recipe
Clementine Mead Recipe
Pumpkin Mead Recipe
Wildflower Mead Recipe
Cider & Miscellaneous Homebrew Recipes
Hard Apple Cider Recipe
Home Brew Hard Iced Tea Recipe
Maple Hard Apple Cider Recipe
Share the Love!
Once you've got something brewing, be sure to take some pics of your handiwork! If you post it to Bluesky, be sure to tag us - @CelebrationGen. We're also on Pinterest, so you can save all your favourite recipes to a board!
Also, be sure to subscribe to my free monthly email newsletter, so you never miss out on any of my nonsense.
Well, the published nonsense, anyway!


william beckett
what a great post ive read alot lately on wine making and youve explained it really well and simple thanks great post
Joanne Ledvinka
Hi! We're going to try making mango wine! I keep reading about "sanitized" this or that but have not yet found any instructions on how to do it.
Marie Porter
Hi Joanne,
You'll need some sanitizer - homebrew supply shops sell it. I think the various brands are used slightly differently, so just follow the directions on the package!
Tony Paitakis
Hello Marie Porter I have bin brewing Beer for two and a half years now with 18 five gallon batches under my belt I decided to make a Banana wine and came across your information. I decided to make your Banana wine recipe I actually am going to start making it this evening I have all supplies and the Banana's are looking nice and ripe. I am splitting your recipe in half. I like your posts thanks for them I have learned quite a bit reading them. Thanks again from Tony
Johnnie Hood Drain
Hi, I just have one question about the instruction for the peach wine. In reference to line 6 and 7 when the wire strainer is sterilize but no mention of when to use it. Please excuse me if it should be obvious ,
I guess I’m a stickler for following instructions.
Thank you
Marie Porter
The wire strainer is going to depend completely on the recipe you actually use, not all use them. It's just that if you use one, you need to sterilize it.