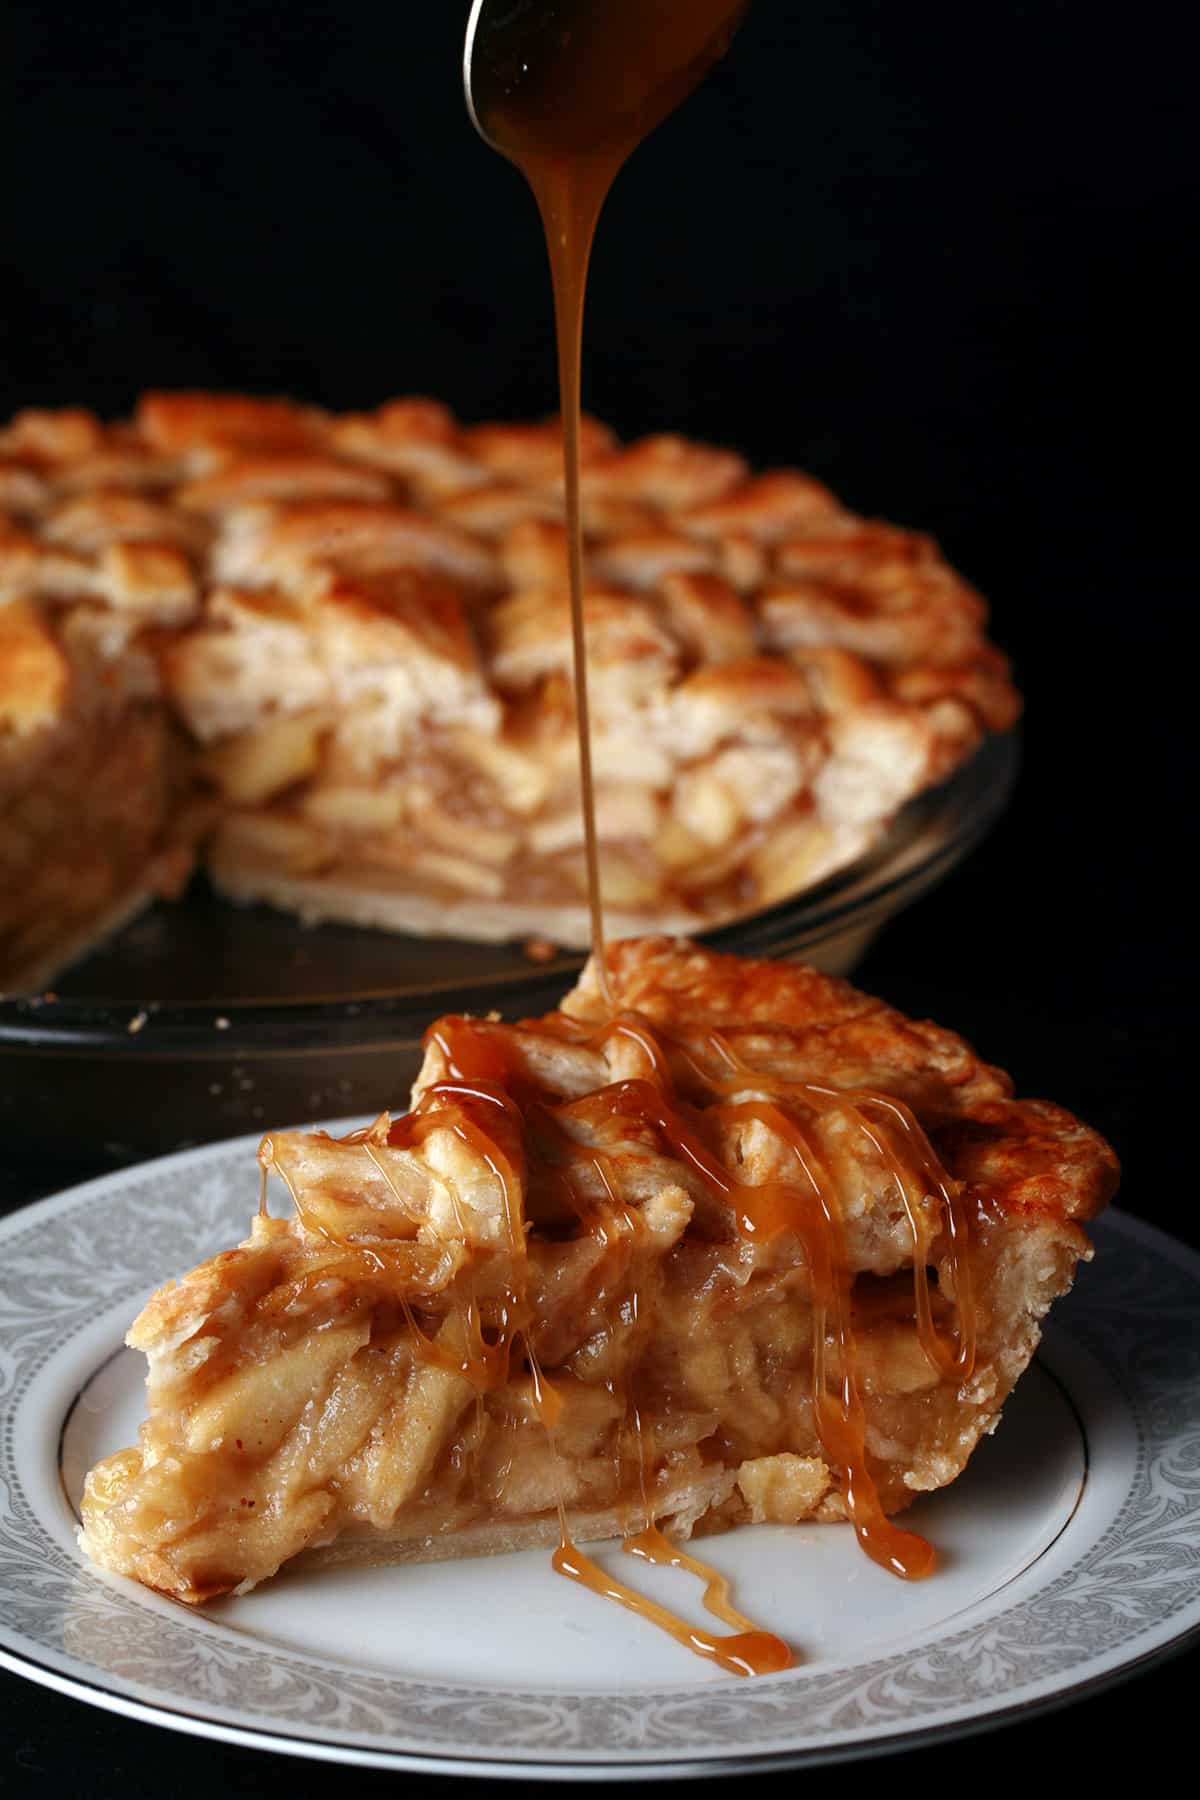
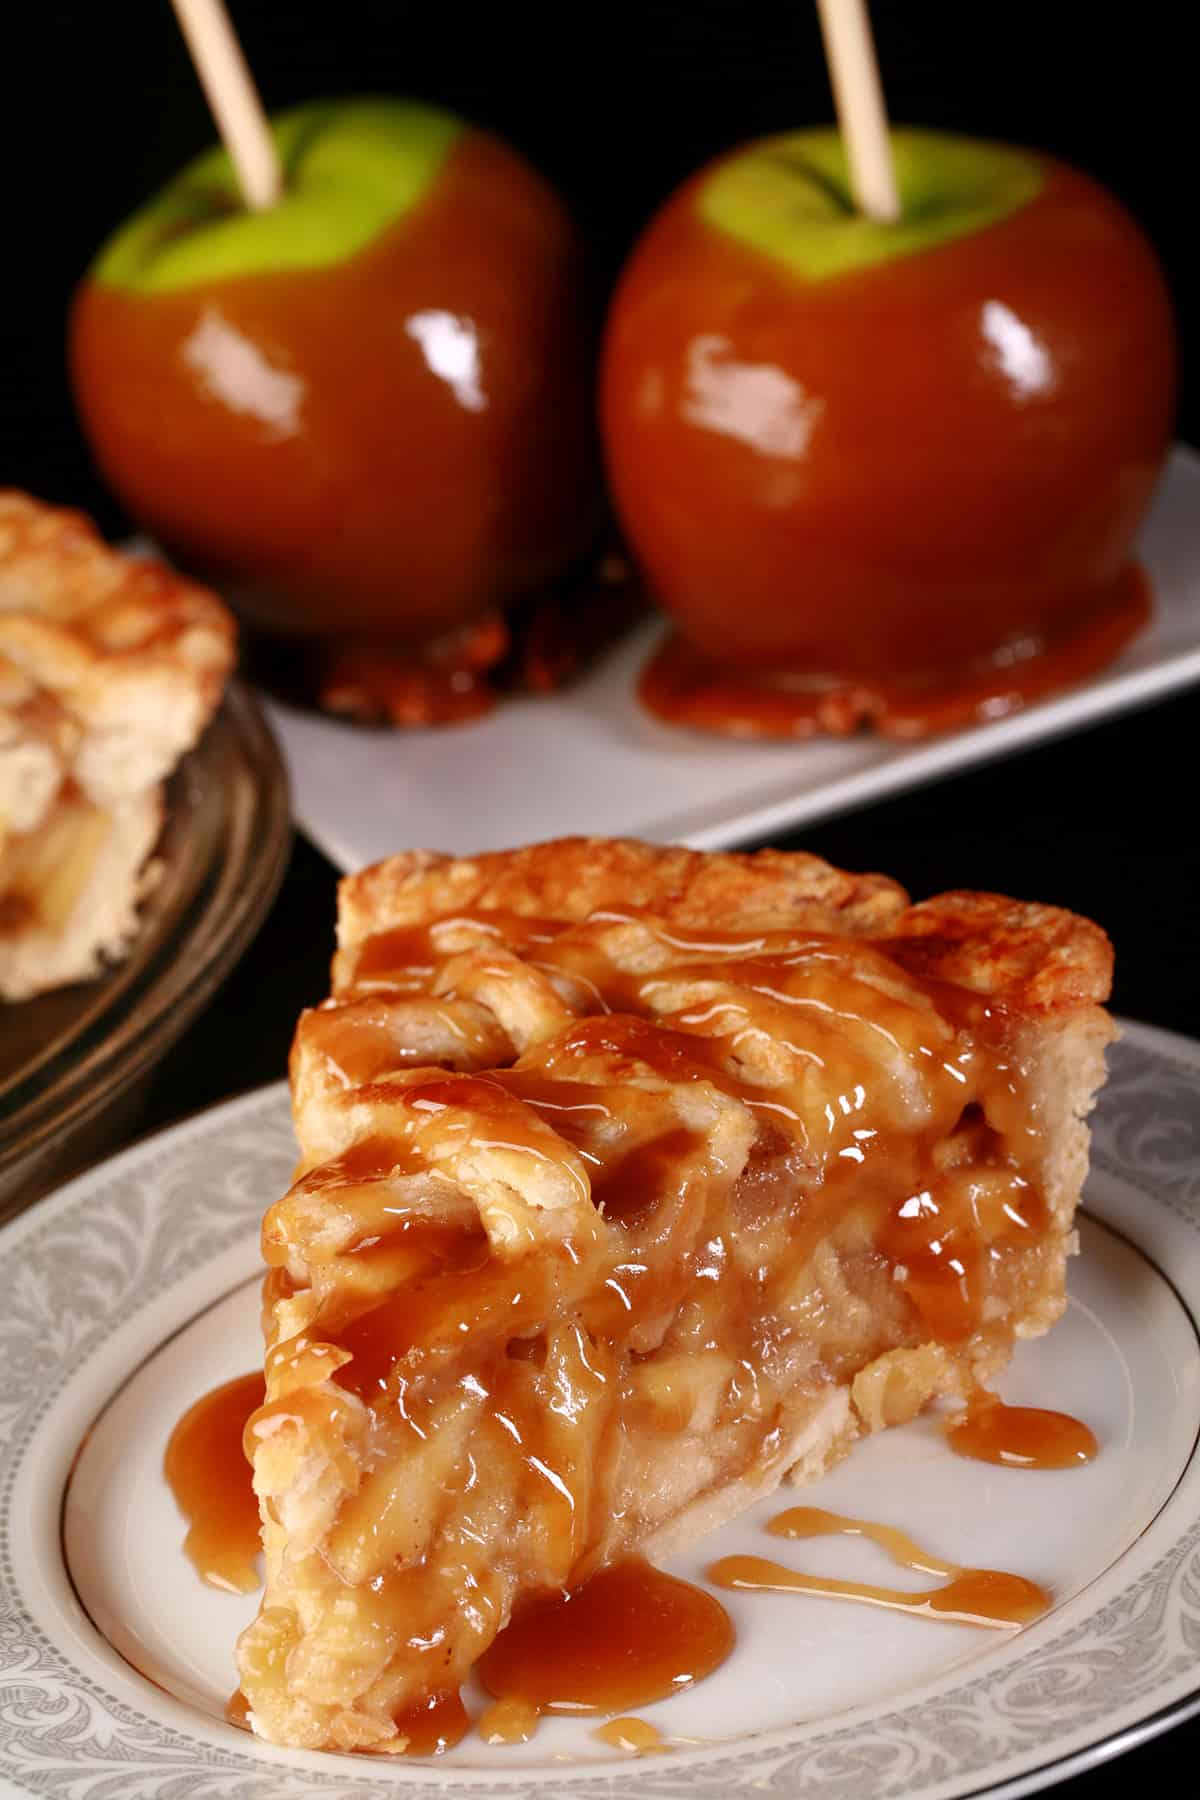
Classic apple pie recipes are usually great, but this caramel apple pie recipe takes it to another level. Bonus? It's a maple syrup based caramel - delicious!

It’s a rough life, I tell ya.
(TBH, as someone who’s currently keto... It actually is. LOL. I digress...)
It’s currently apple season here in southern Ontario, so we’ve been going through a LOT of apples. We’ve got SO many fantastic recipes in the pipeline, I’m excited!
Anyway, today’s blog post is one of those rare examples where the final recipe took a wild turn, and ended up very different from what I had originally conceptualized it as.
The general idea was simple: A pie with the taste of caramel apples.
In the beginning, this was going to be a Dutch caramel apple pie - a Dutch apple pie, with the inclusion of maple caramel sauce under the crumb topping. It also had a drizzle of that homemade caramel sauce over the whole thing.
A delicious pie, no doubt... but it wasn’t very pretty, and it kind of made a mess.
Round 2
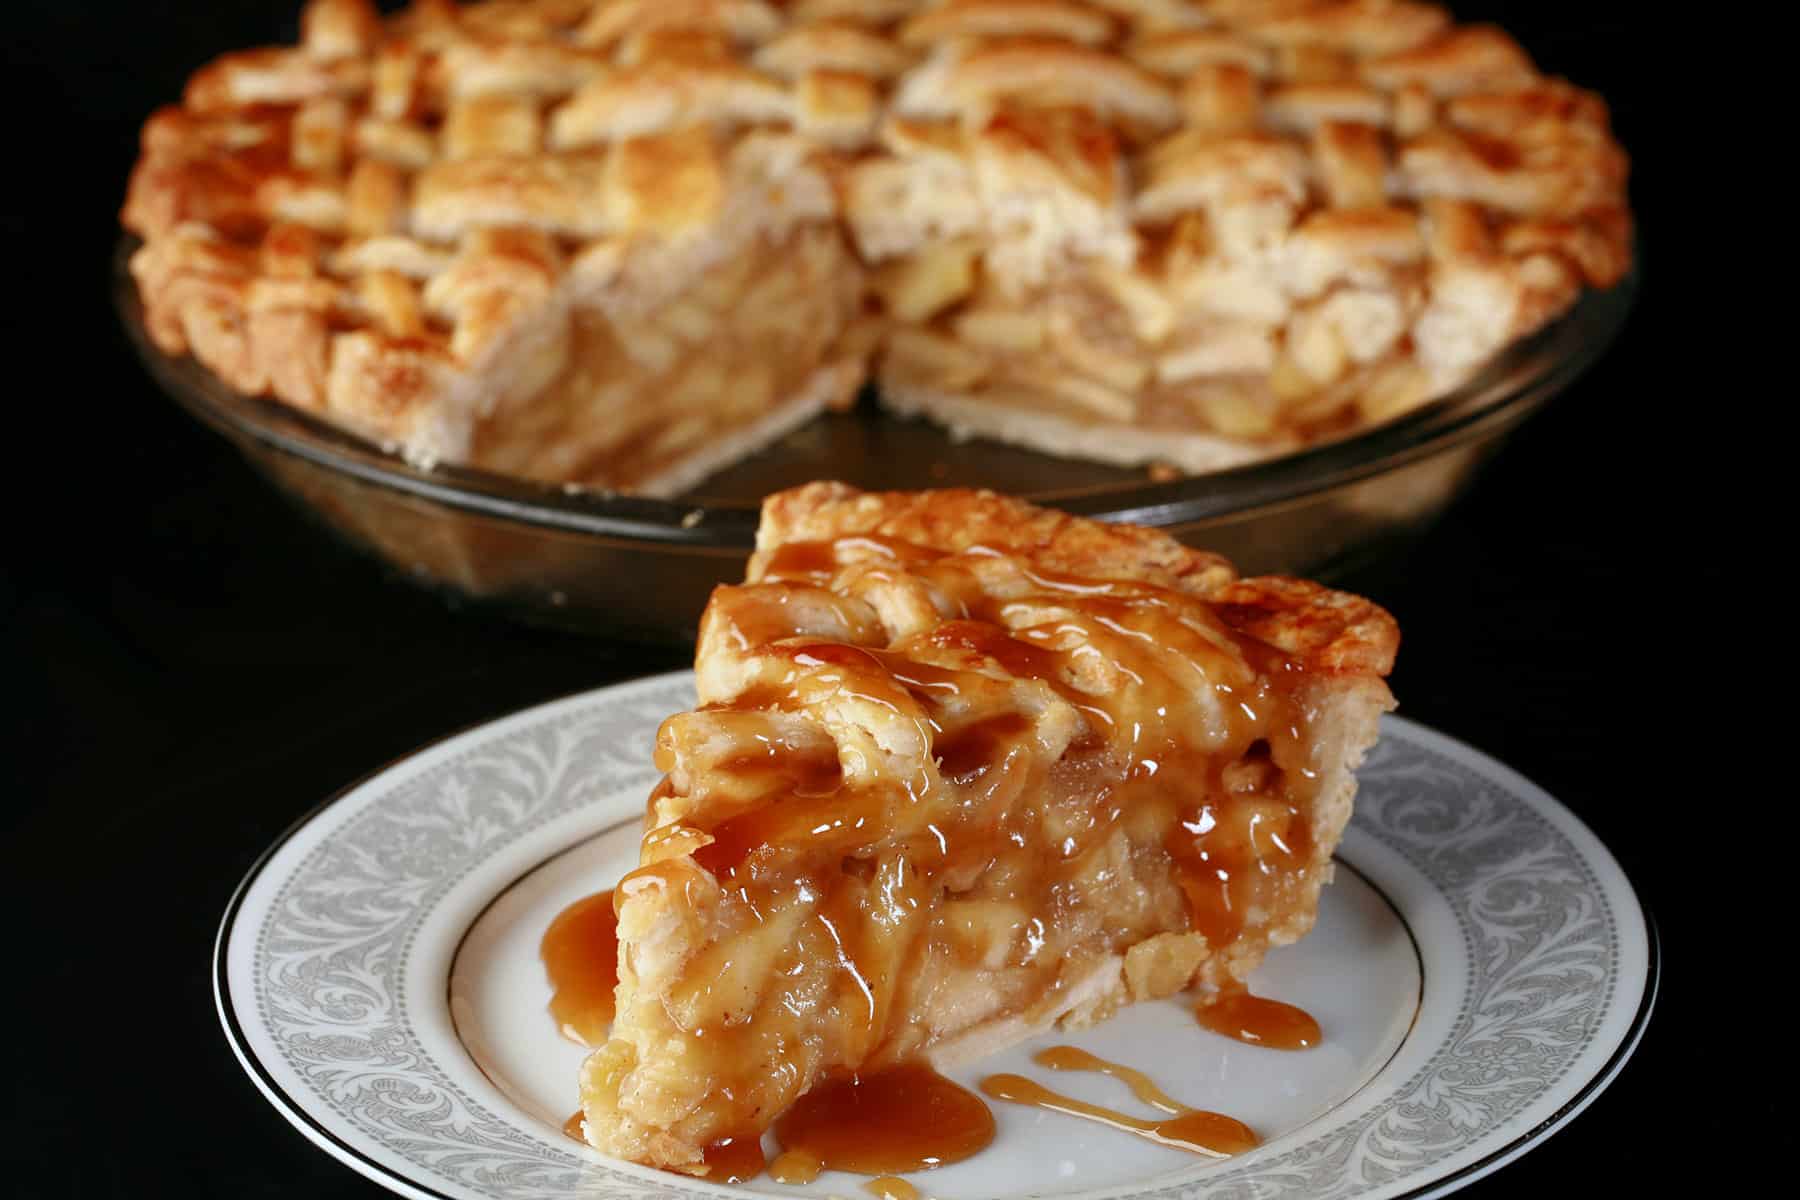
I decided to go in the other direction with the recipe, now basing it on my traditional apple pie - lattice crust and all - with maple caramel in the filling AND with extra caramel drizzled on top.
SO GOOD - and the perfect addition to your Thanksgiving table!
Don’t think that this kind of pie needs to be reserved for special occasions like Thanksgiving dinner, though!
It doesn’t take a lot of work or a long time to make, and some of the prep work - like making the crust and filling - can be done ahead of time.
It’s worth it - this is a pie the whole family will adore.
So, pour yourself a cup of coffee, and I’ll tell you all about it!

Ingredients
There are 3 main parts to this recipe: The apple filling, the sweet caramel topping and the assembly of the pie.
Not a ton of ingredients, though, and you can find all of them in any grocery store.
A few notes:
Fresh Apples
Apples form the basis of the caramel apple pie filling, and are - obviously - the most important ingredient here.
Personally, I find tart apples to be the best apples for this recipe - the tartness provides the perfect balance for the rich caramel sauce they’re topped with.
As for variety of apple, I’ll usually default to Pink Lady, Golden Delicious, or Granny Smith apples, alone or in combination.
When the season is right, I LOVE making this with Mutsu apples from the local apple orchards. 100% the best apples ever, IMHO!
Pure Maple Syrup
This is the base of the Maple Caramel Sauce - there’s no additional sugar added, so you get the most maple flavour possible.
I like to use the darkest, strongest tasting Pure Maple Syrup I can get my hands on, to really balance out the flavor of the apples.
Until relatively recently, that would have meant using maple syrup designated as “B grade”, but they changed the grading a few years ago.
Now, you’d be looking at “Dark” or “Very Dark”, sometimes with “Grade A” tacked on in front of that description.
Homemade Pie Crust
You’ll need two crusts for this recipe, and I recommend my Great Uncle Tom's Perfect Pie Crust Recipe.
It’s a lard based flaky pie crust that comes together SUPER easily. It makes a total of 6 crusts, more than enough for this recipe.
If you prefer a buttery pie crust, you can substitute cold butter for the lard in that recipe.
It’ll still be a flaky crust, just a little more fussy to work with. If you’ve got a decent pastry blender, it shouldn’t be a problem!
That said, you can use any double crust pie recipe you like - or even a store bought uncooked buttery crust product.
It’s all good!
Gluten Free Caramel Apple Pie
Need to make this gluten-free? Use my Gluten Free Pie Crust Recipe.
It’s a double crust recipe, and works perfectly with this easy caramel apple pie!
Everything Else
Rounding out this recipe, you’ll need:
Heavy cream
Brown sugar
Unsalted butter
Cornstarch
1 Large egg
Vanilla extract (Try my Homemade Vanilla Extract recipe!)
Ground Cinnamon
Salt
No notes on these ingredients, just including them here for the sake of completion!
Equipment
Beyond basic measuring, mixing, and cooking implements, there are a couple basic pieces of equipment you’ll need to make this easy apple pie recipe. Odds are good that you already have them on hand:
Rolling Pin
I like to use a Rolling pin with adjustable thickness guides, as it makes it SUPER easy to roll the dough to a consistent thickness. (⅛" for pie crusts, btw!).
Bonus: That one - the one I use - comes with a silicone mat that works both as a work surface - easy cleanup! - AND has a size guide for rolling the dough out!
Pie Plate
I use a standard 9-inch pie plate for this recipe, but it also works with a deep-dish pie pan. There’s enough filling for deep dish, you just won’t have as much of the mounding in the middle.
Personally, I recommend using a glass pie plate, as they tend to cook more evenly than metal ones.

Homemade Caramel Apple Pie Filling
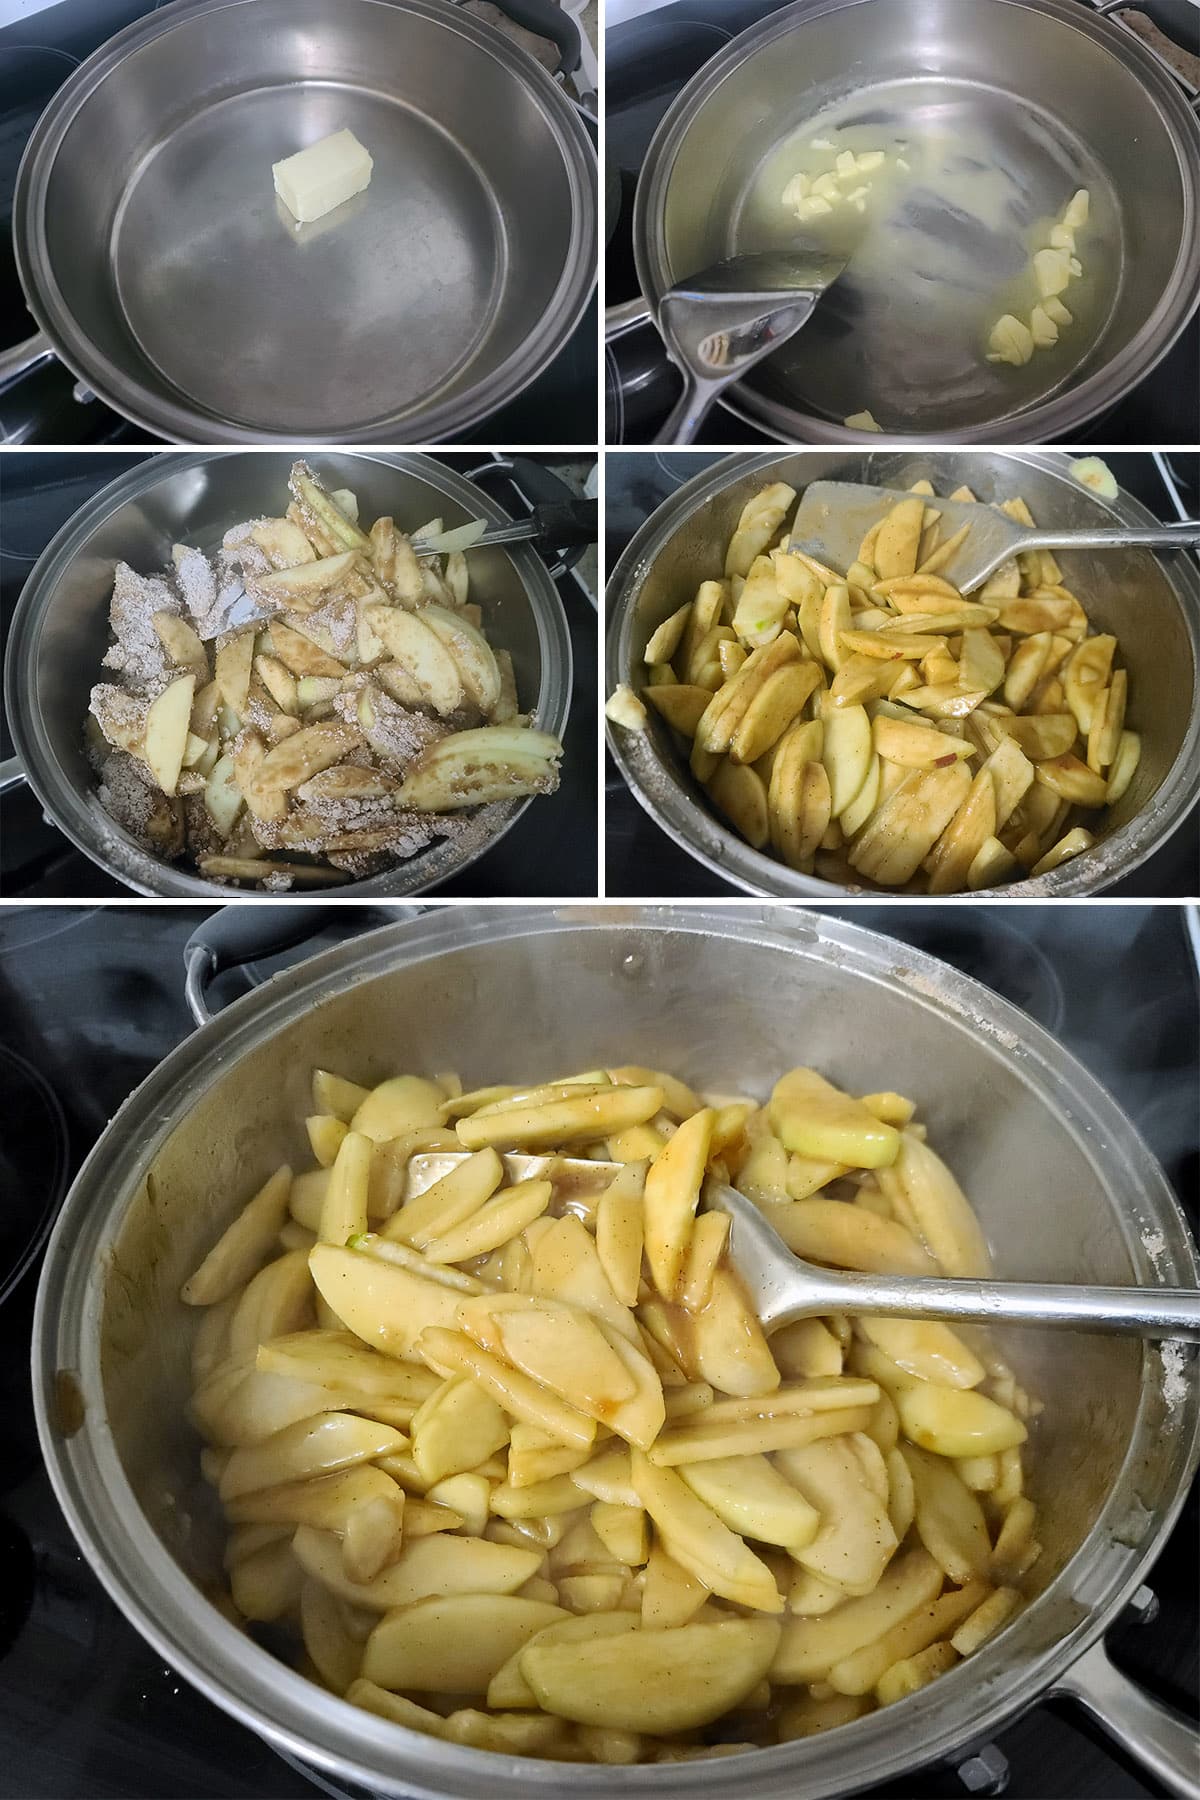
The full recipe is in the recipe card at the end of this post, this is a pictorial walk through with step by step photos and more detailed instructions.
In a large bowl, combine brown sugar, cornstarch, cinnamon, and salt, set aside.
Use a sharp knife to peel, core, and slice the apples into medium thick slices. Place apple slices in a large mixing bowl, gently toss to coat apples with the sugar mixture. Set aside.

Add the apple mixture to the pan, stir well to incorporate the butter
Simmer for about 5 minutes, just until the apples start to soften and give off some liquid.
Remove from heat and allow to cool to room temperature.
Maple Caramel Sauce
In a medium saucepan, combine everything except the vanilla extract.
Bring to a boil over medium heat, stirring constantly.
Once boiling, affix a candy thermometer to the pan. Make sure the tip of the thermometer is in the sugar mixture, but not touching the bottom of the pan.
Boil - without stirring- until mixture reaches 225 F
Once mixture reaches 225, remove from heat, gently stir in the vanilla. Allow to cool completely, chill until you’re ready to use it.

Assembly
Set an oven rack to the lowest position, preheat oven to 425 degrees F.
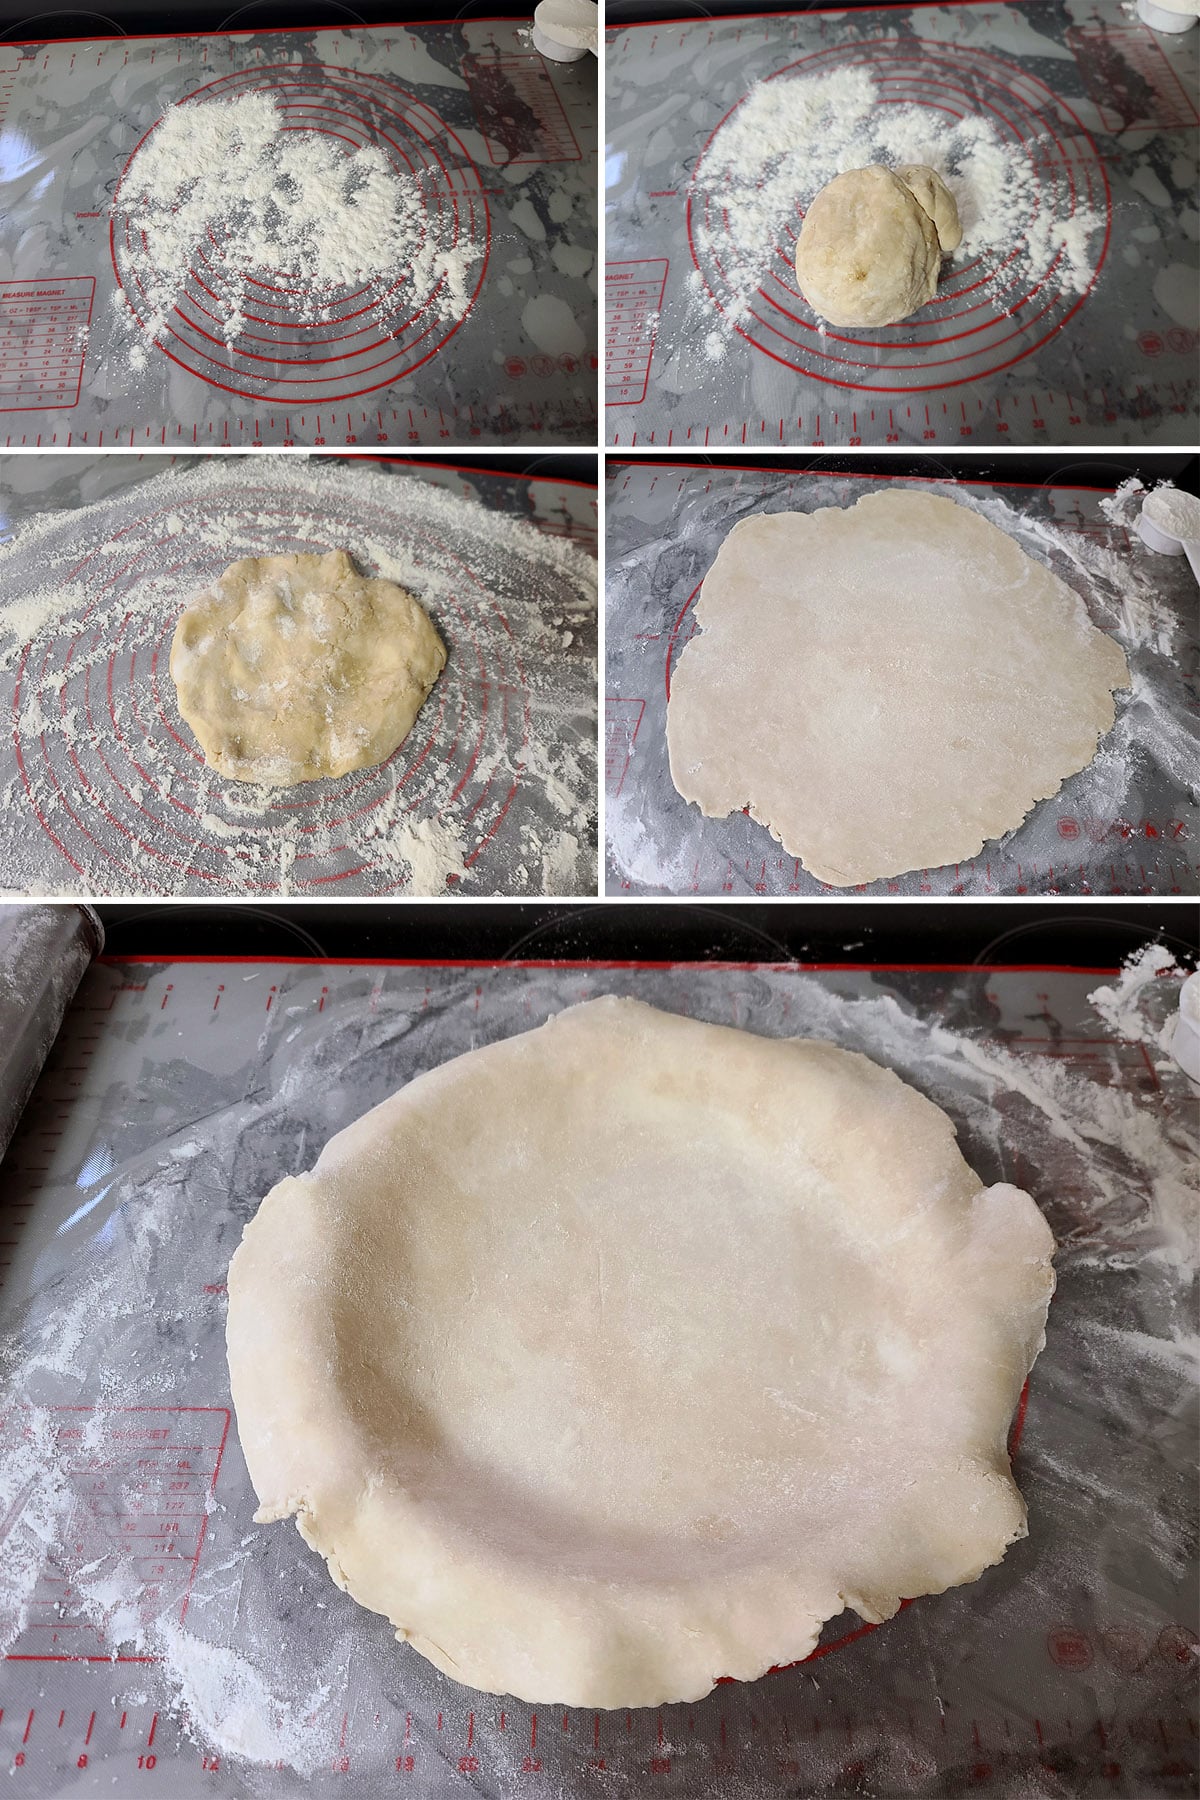
Dust your clean work surface with flour.
Roll out half of your pie dough to form an 11 to 12-inch circle - this will be your bottom crust.
Carefully transfer rolled pie crust to a 9-inch pie pan.
Drizzle about ½ cup of the caramel sauce over top of the apples.

You can transfer it as-is to cover the pie filling, or slice it into 1-inch strips to make a lattice crust design. Personally, I like doing a lattice top for this pie.

How to Make a Lattice Pie Crust
Lay out a row of pastry strips across the pie filling.
Fold back every second strip at about the halfway point.
Lay a fresh strip of pie crust across the half row of strips, close to the fold point. Return the folded strips to the starting point.
Fold back the strips that hadn’t been folded back in the first round, place another new strip across them. Place the folded strips back where there were.
Repeat these two steps until you reach the end of the pie.

Repeat the alternating fold/weave steps until the whole pie is covered in woven pastry strips.

Anyway, apply the crust whichever way you’d like.
Trim pastry to about ¾" overhang. Tuck the top edges of the crust under the edge of the bottom crust, and crimp edges of the upper and lower crusts together.
Note: To crimp / flute the edge of the crust, I tend to place two finger tips (Pointer and middle) on the top edge of the crust, and bring my thumb up under the bottom of the crust.
I gently squeeze the edge of the crust in a wave between those 3 fingers, then repeat all the way around the edge of the pie.
Note: If you’re doing a whole / solid top crust, be sure to cut a few slits in the top, to allow air to escape.
In a small bowl or mug, whisk together egg and heavy cream, use a pastry brush to apply this egg wash over the top of the pie crust.
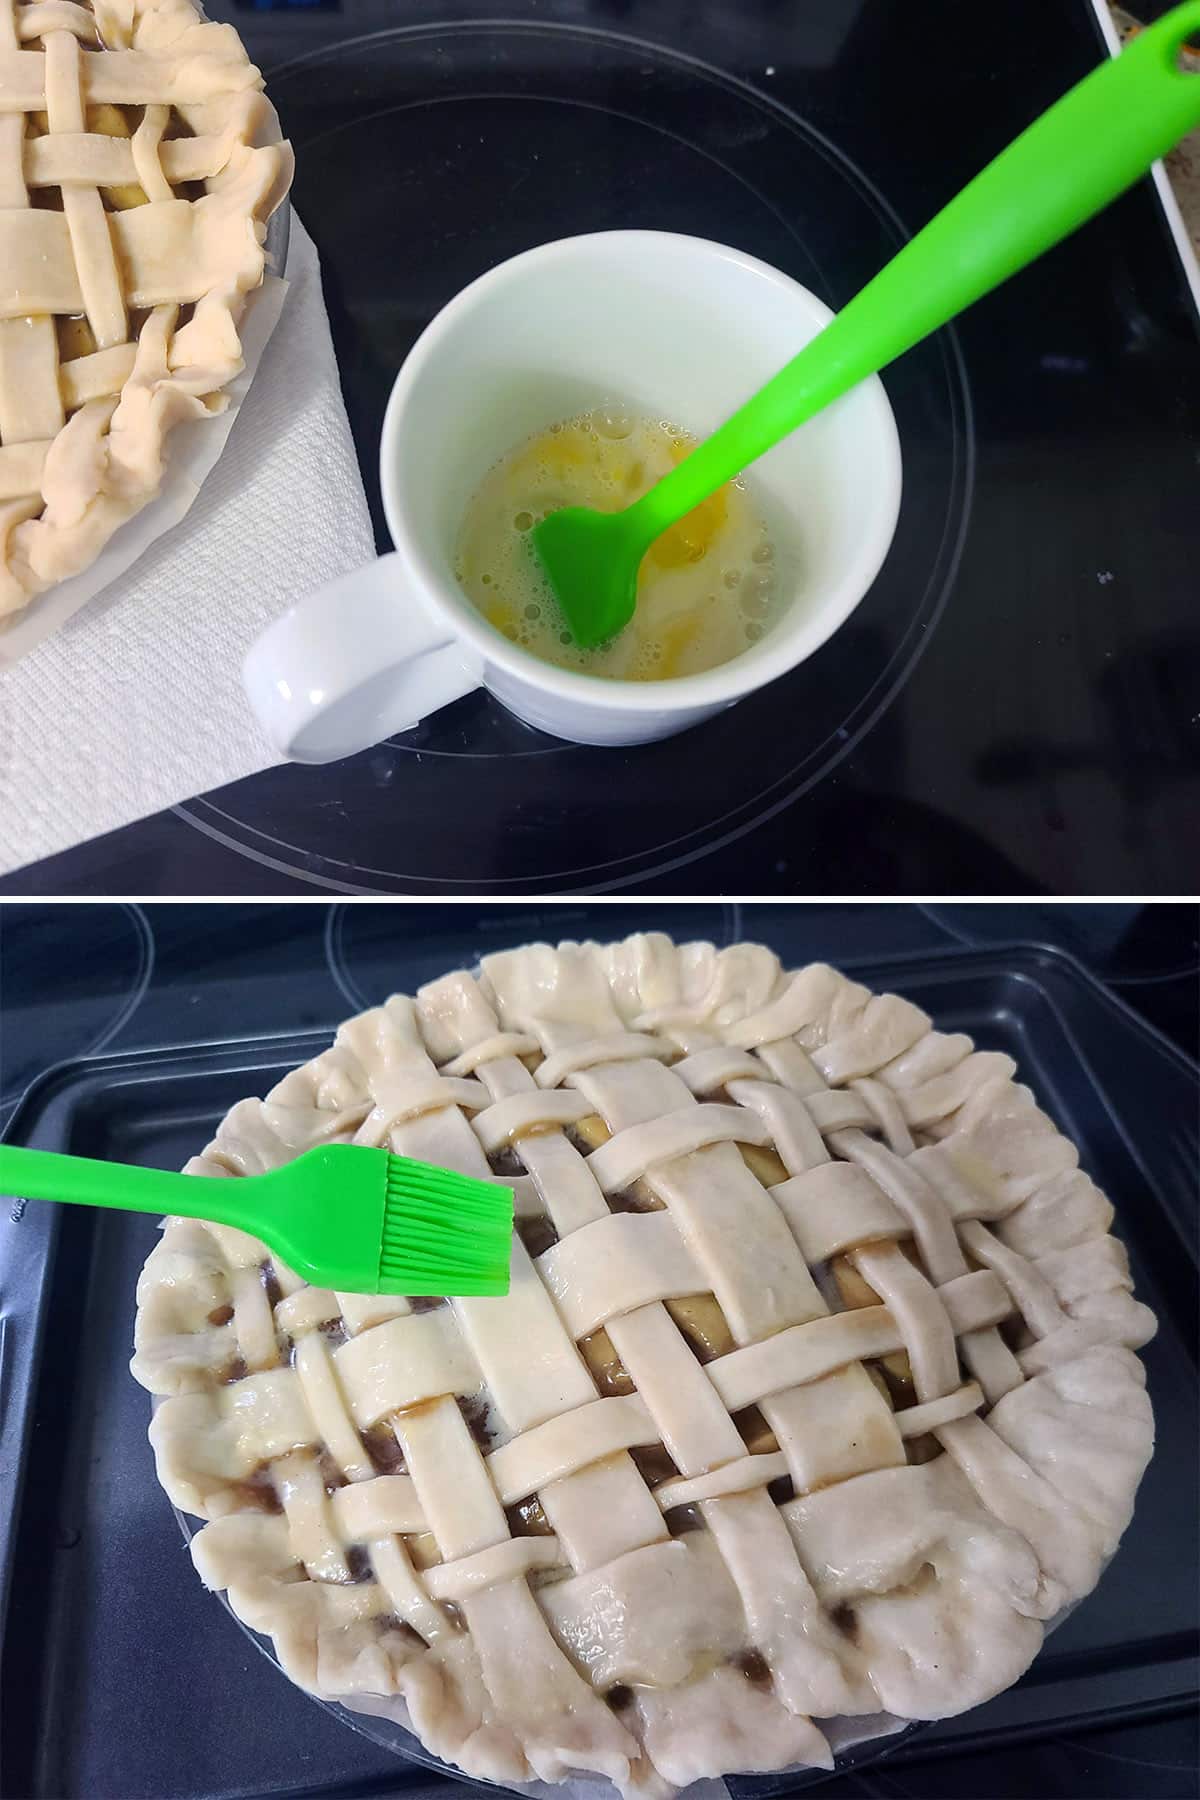
Reduce oven temperature to 375, cook for another 25-30 minutes, or until crust is golden brown.
Note: keep an eye on it while the pie bakes. If the crust starts browning too fast, use a pie shield or wrap a bit of aluminum foil around the edge of the crust.
Remove from heat, let the pie cool for at least two hours before serving. (A wire rack can help it cool faster).

As with all apple pie, this is also great with a scoop of vanilla ice cream! I’ll usually drizzle the caramel on top of ice cream, when serving it that way.
Leftovers
After pie has cooled to room temperature, it can be covered in plastic wrap and kept in the fridge for several days.
I like to let like slices of leftover pie warm up to room temp before serving, but you can also serve it straight out of the fridge, or even warmed up.

Tips and Tricks
Variations
I love this pie as-is, but there are some variations I do sometimes:
For a homemade salted caramel sauce, add ¼ teaspoon salt to the maple syrup caramel when you add the vanilla.
Sometimes I’ll sprinkle coarse sugar / Pearl Sugar over the pie crust, after doing the egg wash. This gives it a nice crunch!
Want to get really extra?
You can sprinkle Maple Sugar Flakes or Maple Sugar Pebbles on the crust, instead of pearl sugar!
When I make my Maple Caramel Apples Recipe, sometimes I like to roll them in nuts... so sometimes I’ll add nuts to the pie filling after it cools.
Usually ½ - 1 cup pecans or walnuts, depending on what we’re in the mood for.
Easier Clean Up
When making the caramel, I like to have a cup of hot water on hand. I put the used candy thermometer in there as soon as I take it out of the caramel. The water dissolves the caramel and makes cleanup super easy!
If I’m feeling paranoid about boil over as the pie cooks, I’ll put it on a rimmed baking sheet before putting it in the oven.
Realistically, though?
Doing this as a pre-cooked filling pretty much killed all risk of that - haven’t had a boil over since I stopped using uncooked apples!
I like to line my pie plates with parchment paper - It makes it SO much easier to cut and serve.
I cut an 11-inch circle out of parchment paper, using my silicone mat as a guide.
Then I spray my pie plate with baking spray, and center the parchment over it.
Press the parchment down into the bottom of the pan, smoothing it out and forcing air bubbles out the side.
Then I cut slits from the edge of the parchment circle, down to the bottom edge of the pan, spacing them out every 1.5 - 2" or so.
Smooth those out so everything is laying flat - slightly overlapping each other.
Then I add the pastry crust, checking to ensure that everything is still laying smooth underneath.
Once it’s baked and cooled, you can leave it in, or gently pull it out after cutting the first slice. I usually pull it out when doing photos, but I’ll leave it in when I’m not.

Preventing a Soggy Crust
If you follow the recipe as-is, there are several steps built in, which reduce the chance of a soggy bottom crust:
Pre-cooking the filling reduces the excess liquid that can be absorbed by the flour in the crust.
Using chilled filling reduces the risk of moisture transfer to the crust.
Preheating the oven before you start assembling the pie, and immediately putting the assembled pie in the oven gives it less time for the crust to absorb liquid from the filling.
Baking on the lowest rack in your oven lets the bottom crust cook quickly, helping to prevent it from soaking up moisture before it cooks.
Cutting “Clean” Slices
Wondering how to get those nice, picture-perfect sharp pie slices?
After cooling the pie to room temperature, chill it for at least 3 hours before cutting it.
Cold pie slices cleaner - that’s it!
More Tasty Apple Recipes
Looking for some more apple desserts (and more!)? I’ve got you covered with even more amazing recipes!
Apple Cider Cake
Apple Crisp Macchiato
Brandied Apple Upside Down Cake
Candy Apples
Caramel Apple Pancakes
Chicken Burgers with Apple, Basil, & Gouda
Easy Apple and Blackberry Crumble
Easy Apple Blueberry Muffins
Gluten Free Apple Cake
Gluten-Free Apple Crisp
Gluten Free Apple Pie
Gluten-Free Caramel Apple Pancakes
Hard Apple Cider
Healthier Apple Oatmeal Muffins
Homemade Apple Turnovers
Maple Apple Roses with Puff Pastry
Maple Caramel Apples Recipe
Spiced Apple Cinnamon Rolls
Spiced Apple Caramel Popcorn
Share the Love!
Before you chow down, be sure to take some pics of your handiwork! If you post it to Bluesky, be sure to tag us - @CelebrationGen. We're also on Pinterest, so you can save all your favourite recipes to a board!
Also, be sure to subscribe to my free monthly email newsletter, so you never miss out on any of my nonsense. Well, the published nonsense, anyway!
Finally, if you love this recipe, please consider leaving a star rating and/or a comment below, and maybe even sharing this post on social media!

Maple Caramel Apple Pie Recipe
Equipment
- 9" pie pan
Ingredients
Caramel Apple Pie Filling:
- ⅔ cup Brown sugar packed
- 3 tablespoon Cornstarch
- ½ teaspoon Ground cinnamon
- ¼ teaspoon Salt
- 3 lbs Apples
- ¼ cup butter
Maple Caramel Sauce
- 1 cup Pure maple syrup
- ¼ cup Butter
- ⅓ cups Heavy cream
- ¼ teaspoon Salt
- 1 teaspoon Vanilla extract
Assembly:
- 1 Double crust pie recipe
- Extra flour for rolling
- 1 Large egg
- 1 tablespoon Heavy cream
Instructions
Caramel Apple Pie Filling
- In a large bowl, combine brown sugar, cornstarch, cinnamon, and salt, set aside.
- Peel, core, and slice the apples. Add to the large mixing bowl, gently toss to coat apples with the sugar mixture. Set aside.
- Melt the butter in a large saucepan over medium heat.
- Add the apple mixture to the pan, stir well to incorporate the butter
- Simmer for about 5 minutes, just until the apples start to soften and give off some liquid.
- Remove from heat and allow to cool to room temperature.
Maple Caramel Sauce
- In a large saucepan, combine everything except the vanilla extract.
- Bring to a boil over medium heat, stirring constantly.
- Once boiling, affix a candy thermometer to the pan. Make sure the tip of the thermometer is in the sugar mixture, but not touching the bottom of the pan.
- Boil - without stirring - until mixture reaches 225 F
- Once mixture reaches 225, remove from heat, gently stir in the vanilla. Allow to cool.
Assembly
- Set an oven rack to the lowest position, preheat oven to 425F.
- Dust your clean work surface with flour.
- Roll out half of your dough to form a circle about 11-12" in diameter.
- Carefully transfer rolled pie crust to a 9" pie plate.
- Mound cooled apple filling into the lined pie pan, taking care to avoid getting pie filling around the top edge of the pan/crust. Drizzle with about ½ cup of the maple caramel sauce.
- Roll out your second crust.
- You can transfer it as-is to cover the pie filling, or slice it into strips to make a lattice design. Apply the crust whichever way you’d like, trim and crimp the edges of the upper and lower crusts together.
- Note: If you’re doing a whole top crust, be sure to cut a few slits in the top, to allow air to escape.
- Whisk together egg and heavy cream, brush over the pie crust.
- Bake pie on the lowest rack in the oven for 15 minutes.
- Reduce heat to 375, cook for another 25-30 minutes, or until crust is golden brown.
- Remove from heat, allow to cool for at least two hours before serving.
- Drizzle pie slices with remaining maple caramel as you serve them








Leave a Reply