

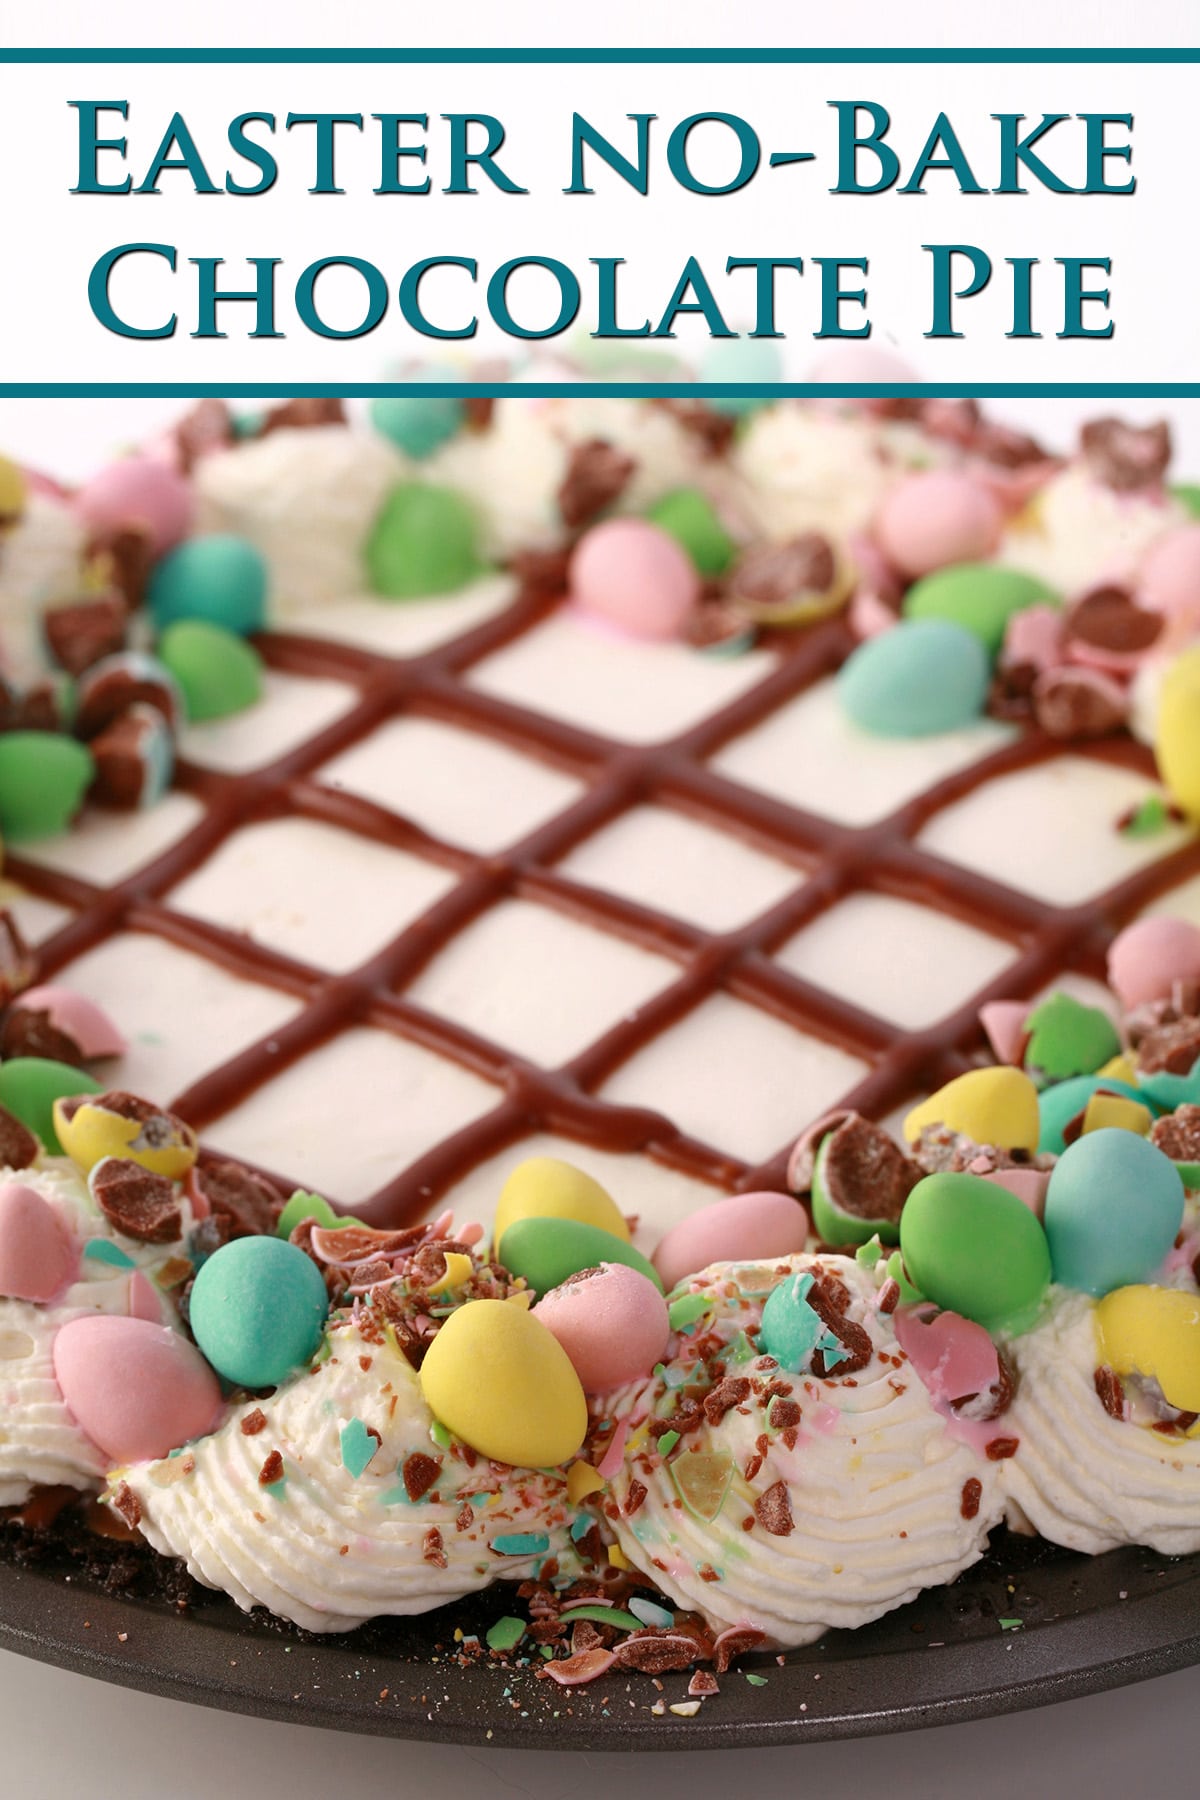
Looking for a delicious pie to serve this Easter? Try this No-Bake Chocolate Pie! A no bake chocolate cream pie, laden with Cadbury Mini Eggs!
Originally Published Apr 1, 2022, Updated on 2/27/2023.
Unlike French silk pie - which involves raw eggs and more steps - this is an easy chocolate pie to make.
The homemade crust whips up in just minutes - and making your own crust tastes SO much better than off-the-shelf crusts.
The rich chocolate flavor from the crust works well for all kinds of no bake pie recipes, and definitely helps make this the perfect dessert for chocolate lovers.
No need for an instant pudding mix, this easy recipe for rich chocolate filling takes very little time or effort.
Anyway, while my homemade chocolate pie is great any time of the year - and no bake desserts are particularly nice in the hot summer months - I actually developed this no bake chocolate pie recipe specifically for Easter!
I love, love, LOVE Cadbury Mini Eggs, and always love an excuse to have them on hand 🙂
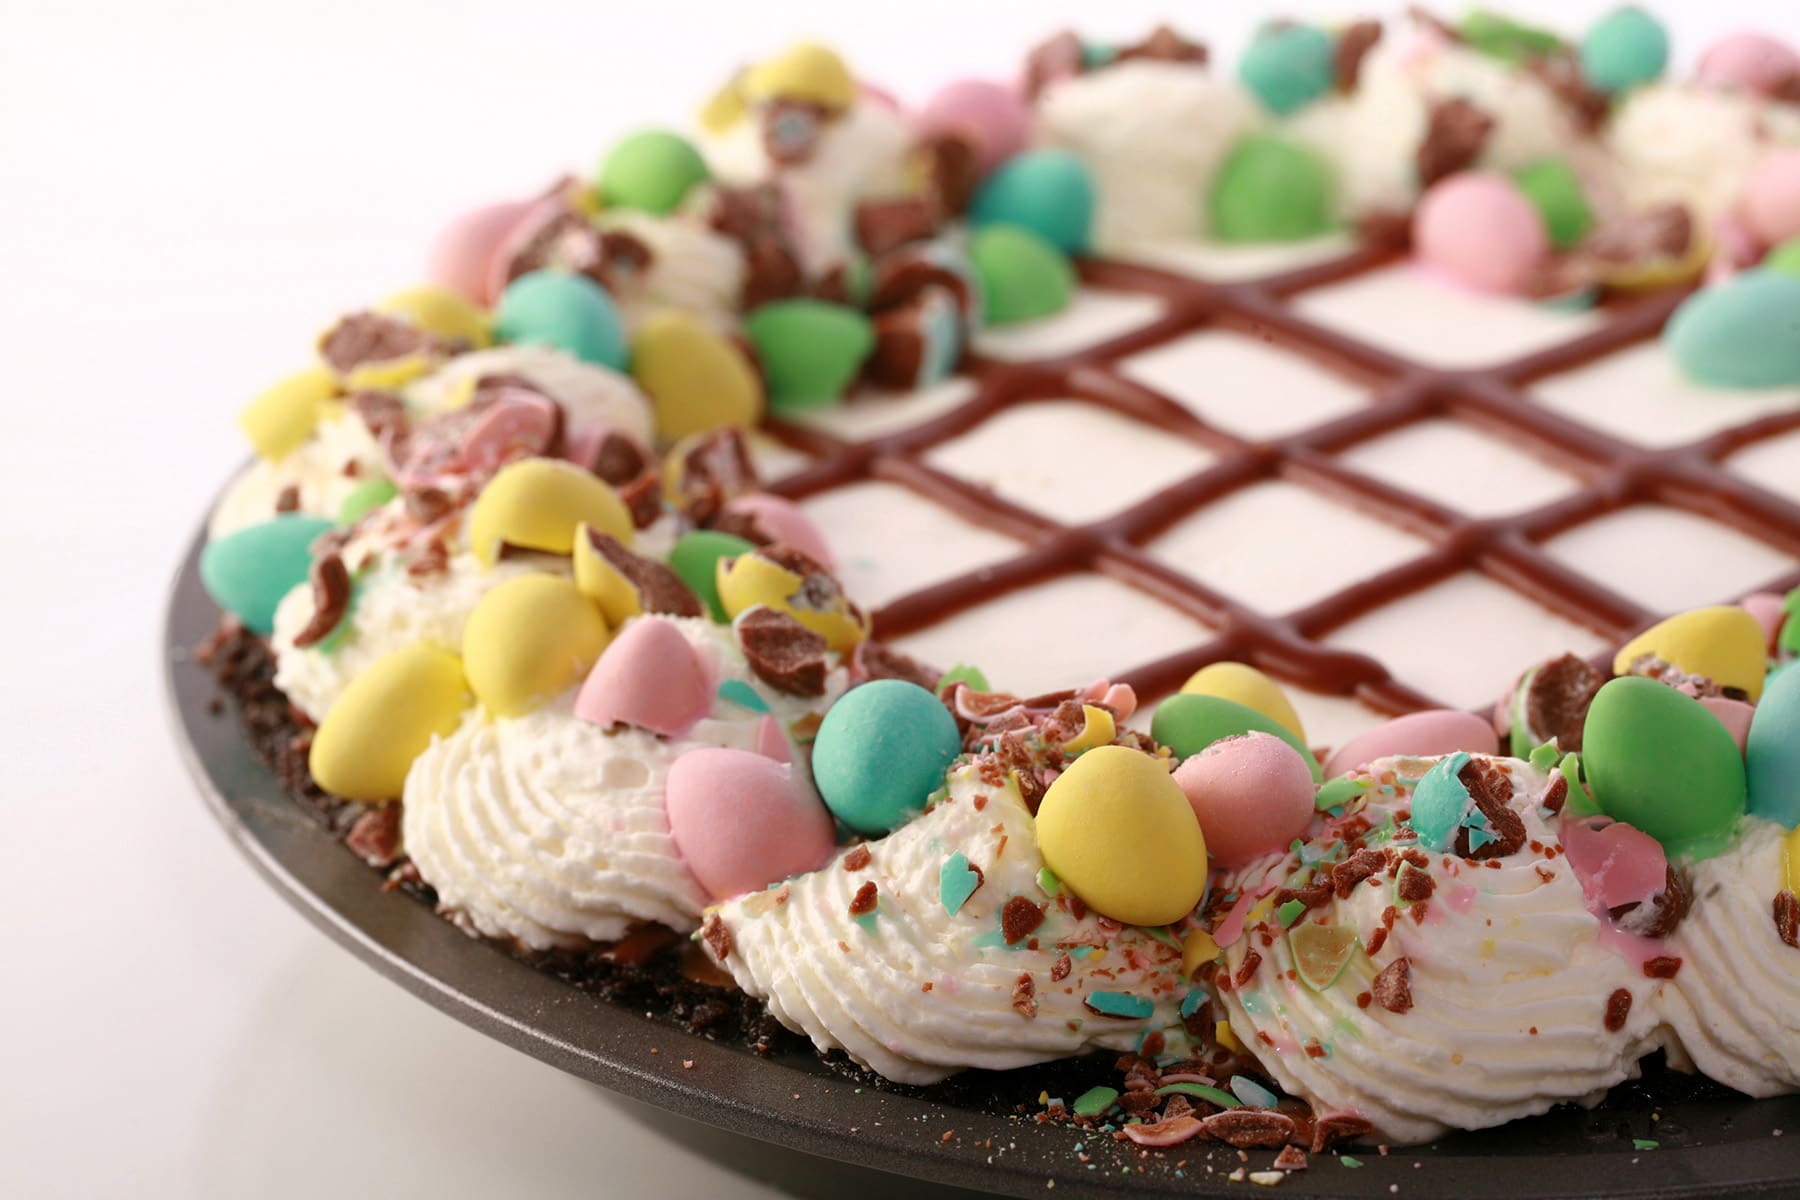
Not only are they tasty, they look super cute when piled up on this chocolate lover’s dream of a pie!
Anyway, let’s get to it...
Chocolate Pie Recipe Ingredients
This creamy chocolate pie is made up of simple ingredients, that you should be able to find in your local grocery store, but there’s a handful of them.
I have a few notes on some of the ingredients themselves, the full list of ingredients with measurements is included in the recipe card at the end of this post.
Chocolate Cookie Crust
The Oreo cookie crust is super simple to make, and only involves 2 ingredients: oreo cookies and butter.
I used an entire small package of Oreo cookies for this Oreo crust - 24 cookies.
I break them up before running them through the food processor, filling and all. I find that the filling helps stick the crust together.
While this is a no bake pie recipe, you CAN bake the crust if you want - I have directions for that option further down in the “variations” section.
Chocolate Cream Filling
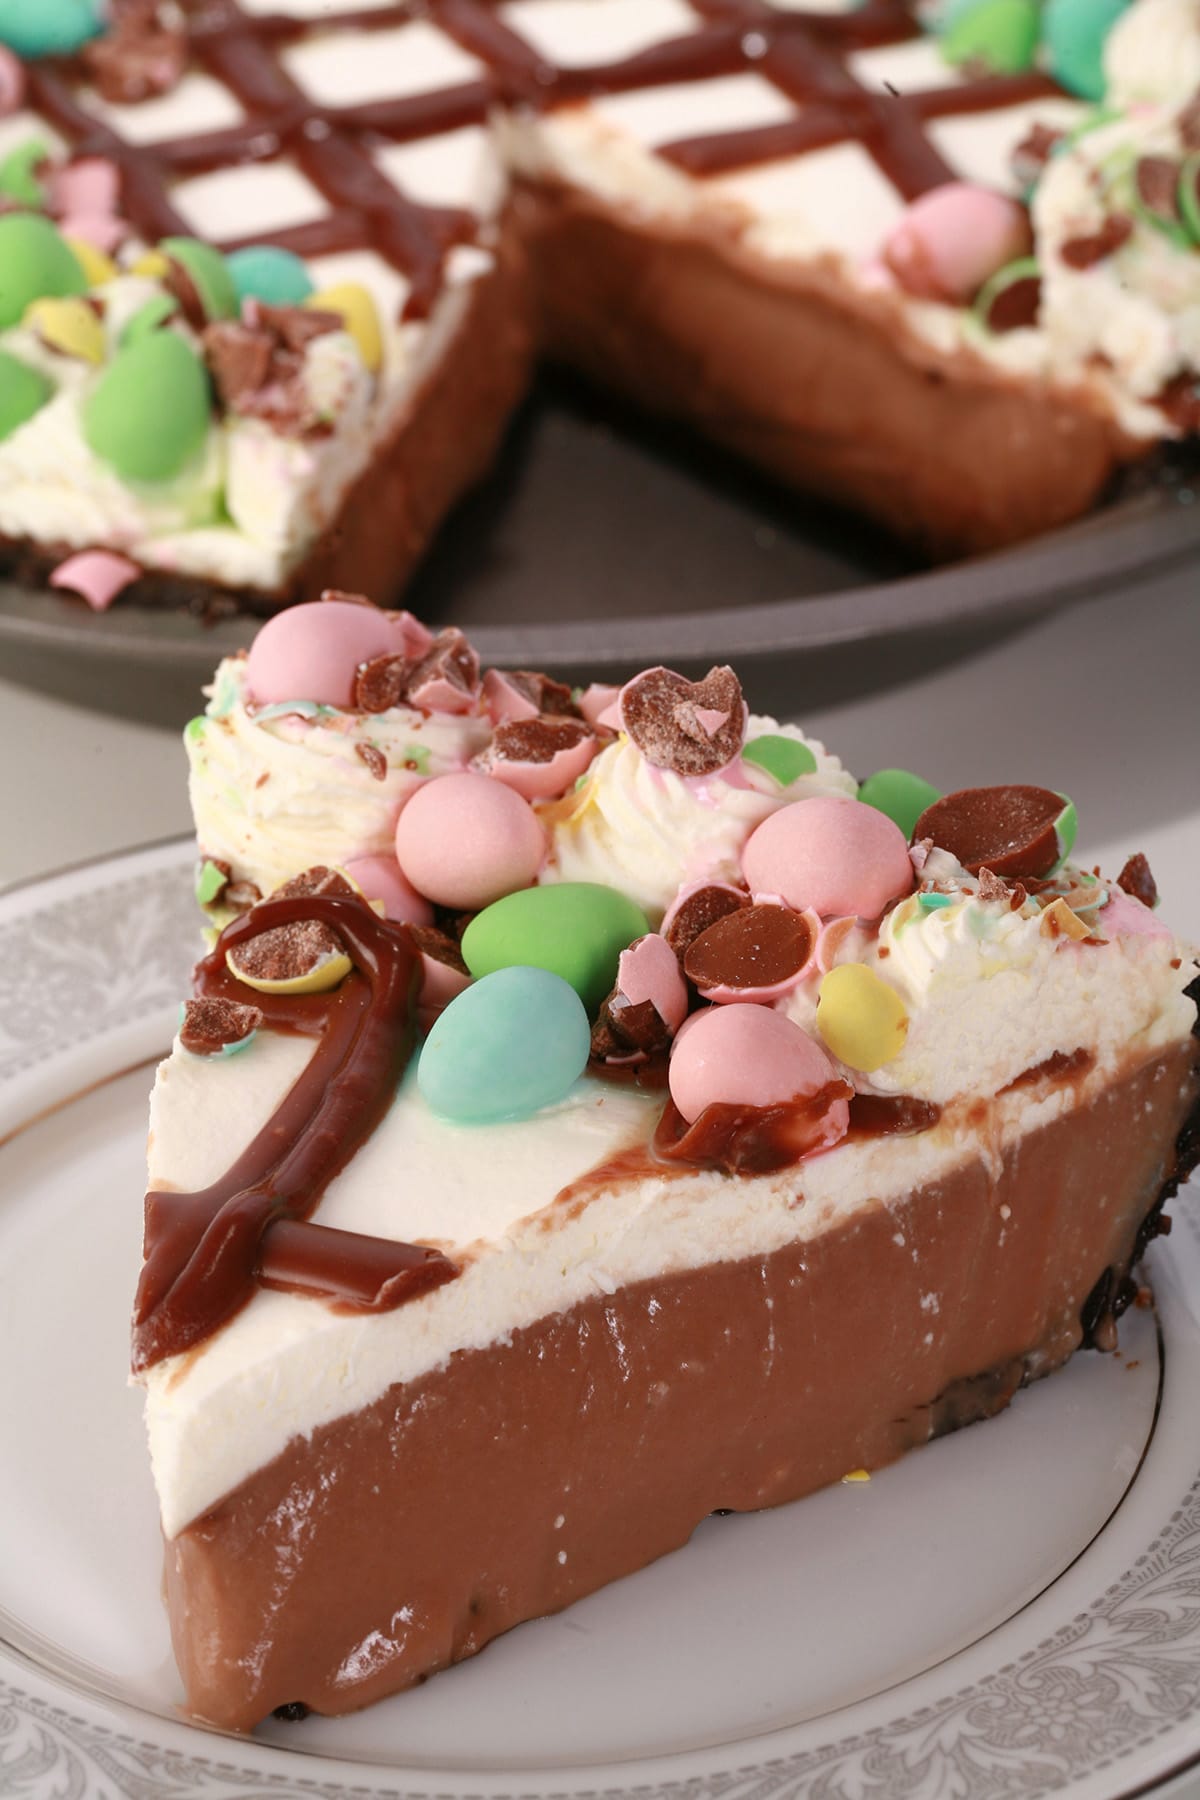
While some chocolate pie fillings involve instant chocolate pudding mix, I like to make mine from scratch. I just find it tastes better and cuts cleaner.
This chocolate pudding filling started out as my chocolate pudding recipe, but with the addition of egg yolks - this is what helps it set up firmer, to slice nicely.
Chocolate Chips
Rather than cocoa powder, I call for milk chocolate chips in this recipe, to go along with the Cadbury Mini Eggs. I just find milk chocolate to feel more “Easter” to me, than any other type.
The quality of chocolate will affect the flavour and texture of your finished chocolate pie filling, so I recommend using the best quality chocolate chips - or chocolate bars - you can get a hold of.
Guittard Milk Chocolate Chips, Ghirardelli Milk Chocolate Chips, and Callebaut Milk Chocolate Callets are all high quality chocolate chips, and great options for this no bake chocolate pudding pie.
I use these brands for many of my chocolate desserts in general - love em!
The Other Pie Filling Ingredients
Aside from the chocolate, you will need:
Whole milk
Granulated Sugar
Large egg yolks
Cornstarch
Unsalted butter
Vanilla extract
Salt

Stabilized Whipped Cream & Topping
Stabilized whipped cream is slightly more effort than basic homemade whipped cream - or using something like Cool Whip - but it’s worth it.
The addition of gelatin helps the whipped cream maintain its shape, and prevents it from breaking down / “weeping” as it sits, and is what makes this recipe a great make ahead dessert!
This makes it ideal for a dessert that you would serve at an Easter gathering - you can make it ahead of time, and even travel with it!
Just note: you’ll want to spread and pipe it on top of your pie soon after making it, though - before the gelatin sets!
Heavy whipping cream
Icing sugar / powdered sugar / confectioners’ sugar
Unflavored Gelatin Powder
Pure Vanilla Extract
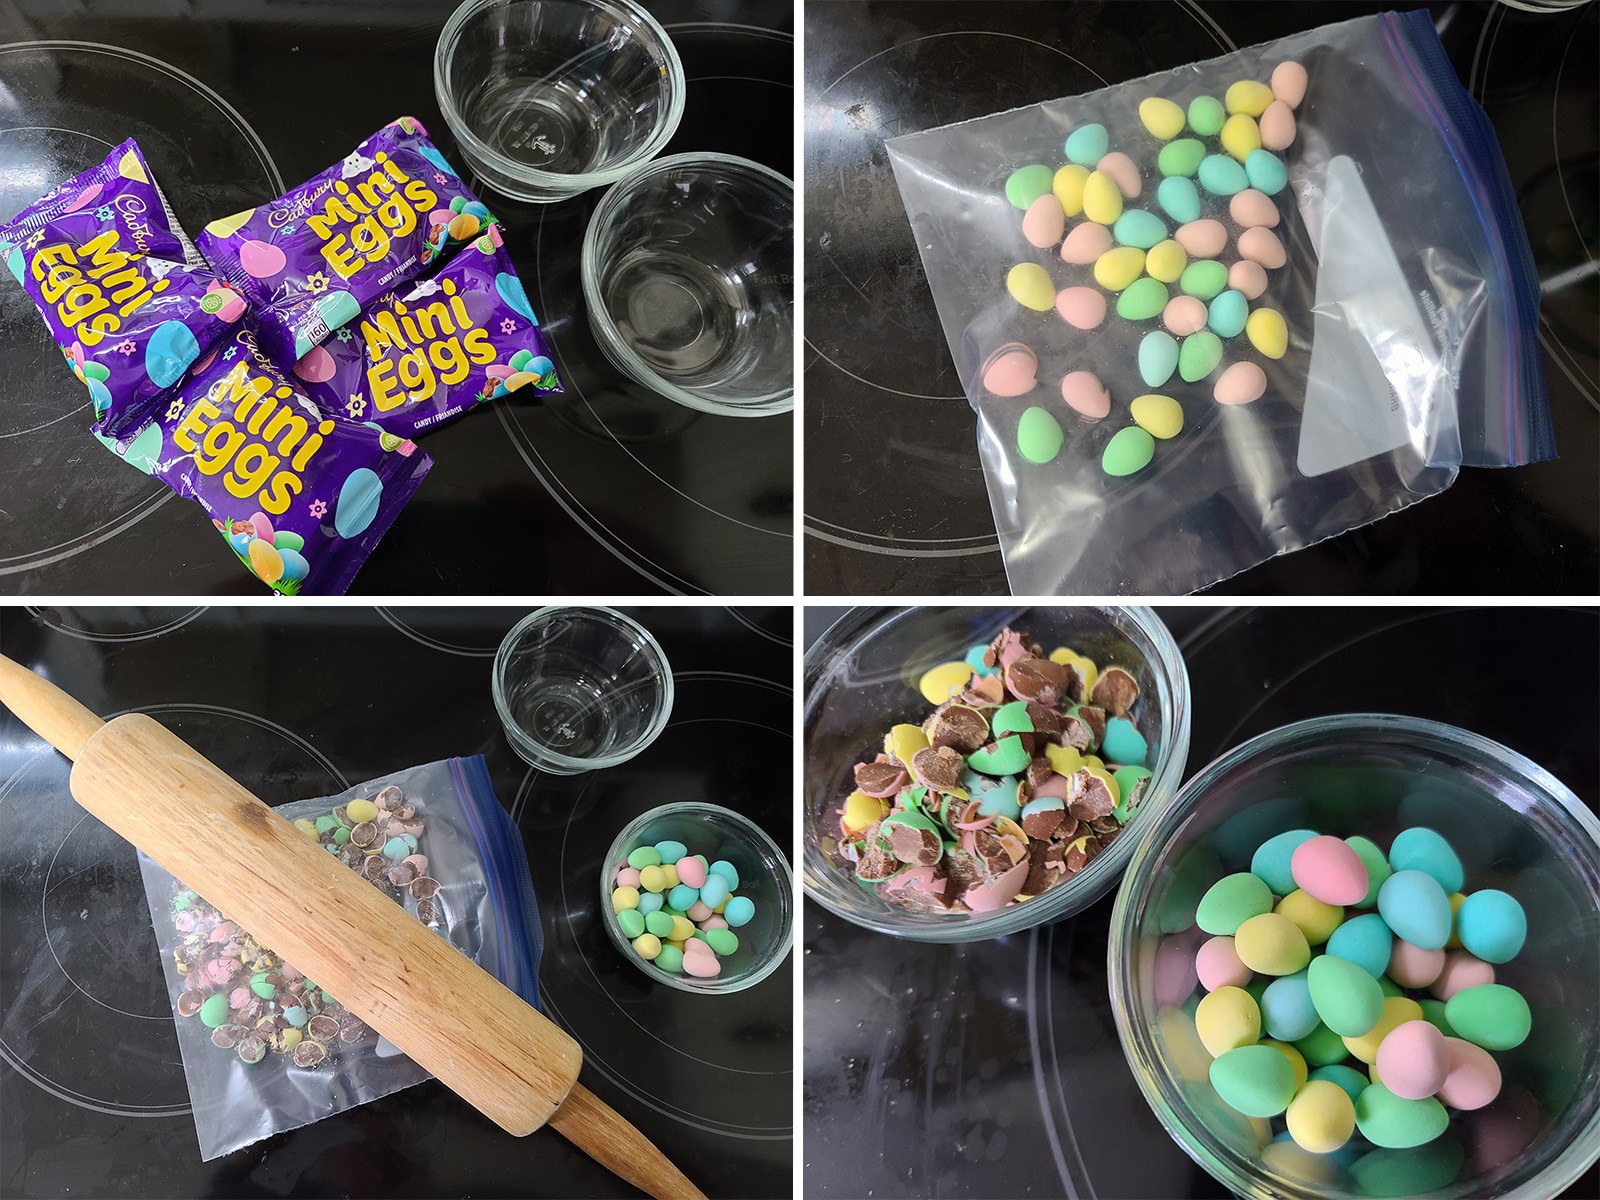
In addition to the whipped cream, there’s the garnish : Chocolate sauce (optional), and Cadbury Mini Eggs!
Personally, I think Mini Eggs are the best thing about this season... well, after Paska Easter Bread, anyway!
I used 4 tiny packets, I think they were 33g each. A couple 100 gram packets or a 200 gram packet would also work.

How to Make No Bake Chocolate Cream Pie
This recipe comes together in a few parts - the crust, the filling, the topping, and the decoration. It’s a lot of info, but it really does come together quickly!
The full recipe is in the recipe card at the end of the post, this is a pictorial overview, with more information included.
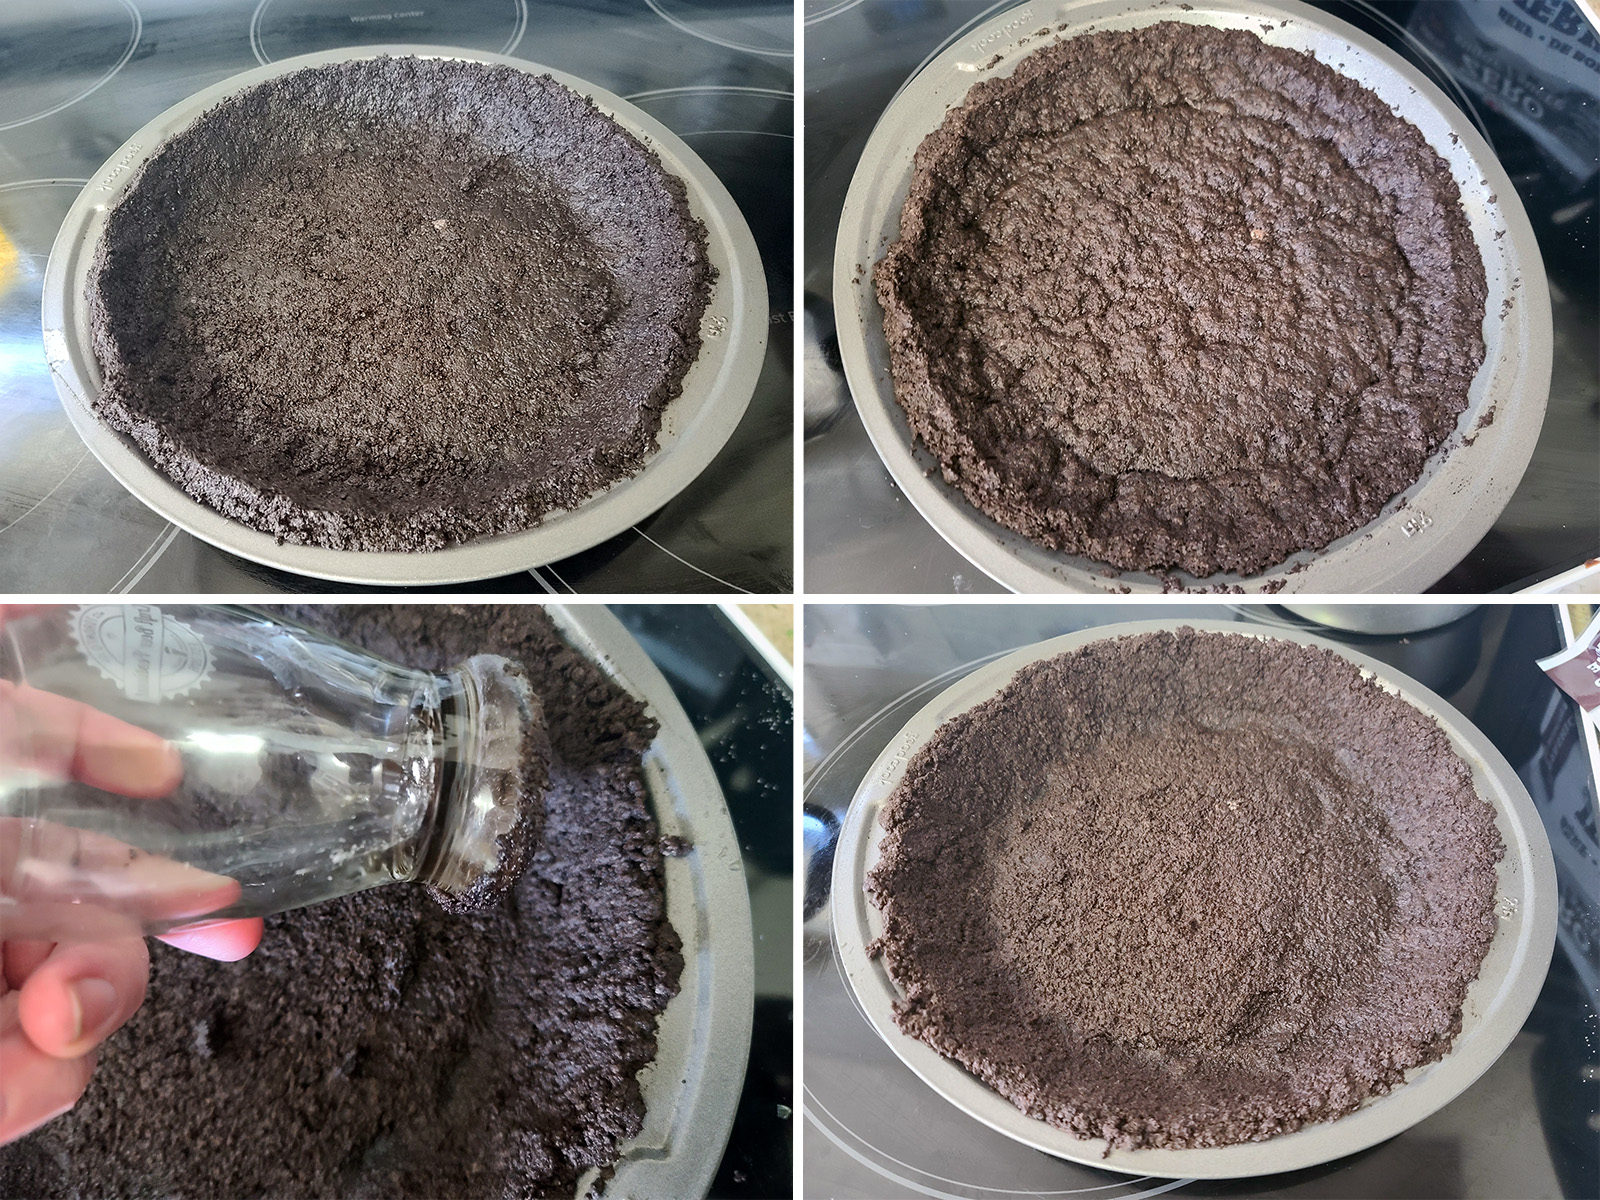
Chocolate Cookie Crust:
Grease a 9 inch pie pan with butter or shortening, set aside.
Crumble the Oreos a bit, then blitz in your food processor - filling and all - until finely ground.
Pour crumbs into a medium bowl. Add melted butter to the mixing bowl, stir well to combine.

I'll usually use a small glass to press it all firmly into place.

Chocolate Cream Filling:
In a medium saucepan, whisk together the sugar, cornstarch, and salt.
In a separate bowl, beat the egg yolks. Add milk - a bit at a time - whisking until well combined. Add this mixture to the pot, whisking to fully combine.
Once everything is fully combined - and being careful to scrape the bottom of the pan - bring to a just to a boil over medium-high heat, whisking constantly.
As the mixture starts to boil, turn heat down to low and continue to simmer until quite thick. Remove from heat.

Whisk constantly until the chocolate and butter are completely melted and everything is well incorporated into the chocolate mixture. Melted chocolate should be completely distributed throughout.
Pour chocolate filling into the cooled pie crust, using an offset or rubber spatula or the back of a spoon to smooth and flatten the top of the filling.

Cover with plastic wrap - right against the surface of the filling - and chill for 8 hours. For best results, I like to chill it overnight.

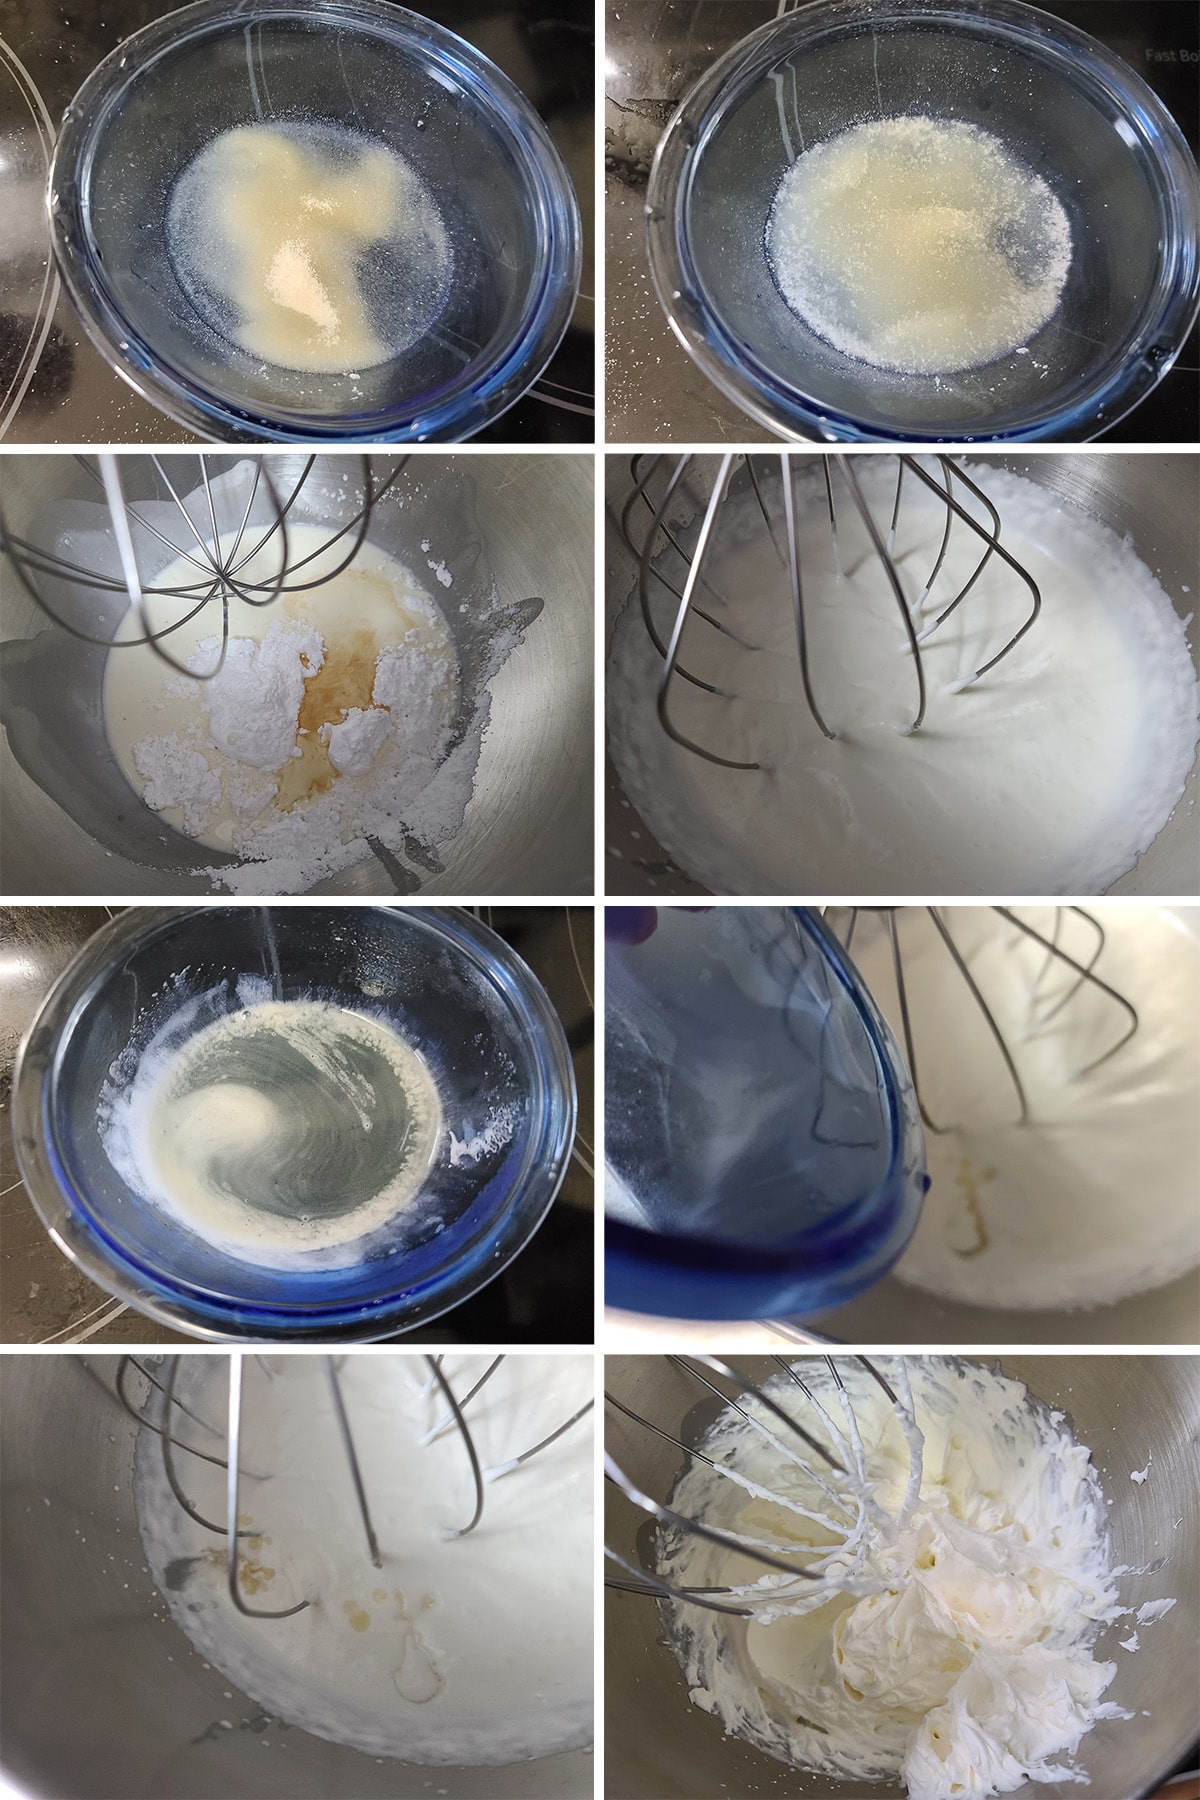
Stabilized Whipped Cream:
Sprinkle gelatin over the cold water in a small bowl and let it absorb for five minutes.
Combine heavy whipping cream, powdered sugar, and flavor extract in a mixing bowl (a large bowl) - if using a hand mixer / electric mixer - or in the bowl of a stand mixer set up with a whisk attachment.
Whip until soft peaks start to form.
Transfer gelatin mixture to the microwave. Heat in 10 second increments until the gelatin dissolves into the water.
Fold gelatin mixture to cream mixture, then whip until stiff peaks form.
To Assemble:
Crush some of the mini eggs - I put them in a plastic baggie and roll over it with a rolling pin - sprinkle over the rosettes.
Pipe a lattice of chocolate sauce over the top of the whipped cream, if you’d like.

Pipe rosettes of whipped cream around the edge of the pie, as shown.
Finish off with whole mini eggs, chill until serving.

Variations
While this pie is fantastic as-is, there’s definitely room to customize it to your preferences. Here are some ideas:
Baked Oreo Cookie Crust
This crust works as both an unbaked cookie crust, or a baked one. IMHO baking it makes it a bit more solid than it is as a no bake recipe, but it’s not necessary.
If you want to bake the pie crust, bake it for 9 minutes at 350 F.
While it’s still hot, re-press it into shape and allow it to fully cool to room temperature before filling.
Graham Cracker Pie Crust
Need to temper your chocolate with something else? You can make this recipe with a graham crust if you’d like.
Swap graham crumbs - store bought, or graham crackers processed to fine crumbs in your food processor - in place of the Oreo crumbs, add ⅓ cup sugar, and increase the butter to 8 Tablespoons.
Alternately, save the effort and just use a pre-made graham cracker crust!
Richer filling
Feel free to swap out the granulated sugar for some packed brown sugar, to give an even richer chocolate flavor.
Alternately - or in addition to the brown sugar - you can add 1-2 tablespoon espresso powder to the simmering milk.
Stir well to dissolve before removing the pot from the heat.
Dark Chocolate Filling
You can swap out the milk chocolate chips for dark chocolate, for a less over-the-top sweet pie.
Add to the Garnish
Want even more chocolate?
Add some chocolate sprinkles in with the crushed Cadbury Mini Eggs, or use a vegetable peeler to make some chocolate shavings or chocolate curls to add with the whole mini eggs.
Make a Quick Chocolate Ganache
No chocolate sauce? I tend to whip up a quick chocolate ganache to pipe on.
I’ll just measure ¼ cup chocolate and about 1 teaspoon of butter and 2 teaspoon Heavy whipping cream into a microwave safe bowl or measuring cup.
Heat it for 30 seconds at a time until melted, then thin out with a little bit of heavy cream if necessary. Pipe it while it’s hot, and it will set up as it cools.
I’ll set up a small cup with the pastry bag - holding it in place while I fill it, to make that whole thing quicker, easier, and cleaner.

Year Round No Bake Chocolate Pie
While I would personally eat Mini Eggs all year round if available, I can understand not wanting to serve an aggressively Easter themed dessert in October!
Swap out the mini eggs for chopped mini peanut butter cups, M & Ms, chopped peppermint patties, or whatever other chocolate candy makes sense at the time!

More Easter Content!
Looking for more fun / tasty ways to observe Easter? Here are a few suggestions:
Chocolate Zombie Easter Bunnies
Easter Creme Egg Brownies
Easter Pavlova
Easy Pysanky [Epic Easter Eggs]
Gluten-Free Paska [Easter Bread]
Keto Paska
Paska - Ukrainian Easter Bread
Paska Bagels
Pastel Easter Charcuterie Board
Southern Comfort Glazed Ham

Share the Love!
Before you chow down, be sure to take some pics of your handiwork! If you post it to Bluesky, be sure to tag us - @CelebrationGen. We're also on Pinterest, so you can save all your favourite recipes to a board!
Also, be sure to subscribe to my free monthly email newsletter, so you never miss out on any of my nonsense. Well, the published nonsense, anyway!
Finally, if you love this recipe, please consider leaving a star rating and/or a comment below, and maybe even sharing this post on social media!

Easter No Bake Chocolate Pie
Equipment
- 1 9" pie pan
- Pastry bag
- Large star tip and coupler
Ingredients
Oreo Cookie Crust:
- 24 Oreo cookies About 2 cups of crumbs
- 4 tablespoon Unsalted butter melted
Chocolate Cream Filling:
- ½ cup Granulated Sugar
- ¼ cup Cornstarch
- ¼ teaspoon Salt
- 4 Large egg yolks
- 3 cups Whole milk
- 8 oz Chocolate of choice melted
- 2 tablespoon Unsalted butter
- 2 teaspoon Vanilla extract
Stabilized Whipped Cream & Topping:
- 2 teaspoon Unflavored gelatin powder
- 2 tablespoon Cold Water
- 1 ½ cups Heavy whipping cream
- ¼ cup Icing powdered Sugar
- ½ teaspoon Vanilla extract
- Chocolate sauce optional
- Cadbury Mini Eggs
Instructions
Oreo Cookie Crust:
- Grease a 9" pie plate with butter or shortening, set aside.
- Crumble the Oreos a bit, then blitz in your food processor - filling and all - until finely ground.
- Pour crumbs into a large bowl, stir in melted butter
- Dump the mixture into your pie plate. Distribute crust mixture evenly over the pan, press firmly to form a pie crust with even thickness throughout.
Chocolate Cream Filling:
- In a medium saucepan, whisk together the sugar, cornstarch, and salt.
- In a separate bowl, beat the egg yolks. Add milk - a bit at a time - whisking until well combined. Add this mixture to the pot, whisking to fully combine.
- Once everything is fully combined - and being careful to scrape the bottom of the pan - bring to a just to a boil over medium-high heat, whisking constantly.
- As the mixture starts to boil, turn heat down to low and continue to simmer until quite thick. Remove from heat.
- Immediately add the chocolate, butter, and vanilla. Whisk constantly until the chocolate and butter are completely melted and everything is well incorporated.
- Pour into the cooled pie crust, using an offset spatula or the back of a spoon to smooth and flatten the top of the filling.
- Cover with plastic wrap - right against the surface of the filling - and chill for 8 hours.
Stabilized Whipped Cream & Topping:
- Sprinkle gelatin over the cold water in a small bowl and let it absorb for five minutes.
- Combine heavy whipping cream, powdered sugar, and flavor extract in a mixing bowl. Whip until soft peaks start to form.
- Transfer gelatin mixture to the microwave. Heat in 10 second increments until the gelatin dissolves into the water.
- Fold gelatin mixture to cream mixture, then whip until stiff peaks form.
To Assemble:
- Spread ½ of the whipped cream evenly over the chocolate pie filling, smoothing with a hot offset spatula if desired.
- Pipe a lattice of chocolate sauce over the top of the whipped cream, if you’d like.
- Spoon remaining whipped cream into a pastry bag set with a large star tip.
- Pipe rosettes of whipped cream around the edge of the pie, as shown.
- Crush some of the mini eggs, sprinkle over the rosettes. Top with whole mini eggs.
- Chill until serving.
Notes
Nutrition


Asha
What an adorable Easter pie! I love the crushed mini eggs and chocolate lattice details.
Bernice
For me, pie season never ends!! There's a pie for every season and I'm very excited to add this adorable pie to my Easter dinner menu.
nancy
you had me at no bake. This cake was super easy to put together and the kid loved it
Elaine
Loved the homemade chocolate filling (and the Cadbury mini eggs, of course!) So cute! Definitely a keeper!
Lori
Can you freeze it?
Marie Porter
Haven't Tried