

Originally published August 31, 2012. Updated on 6/8/2021

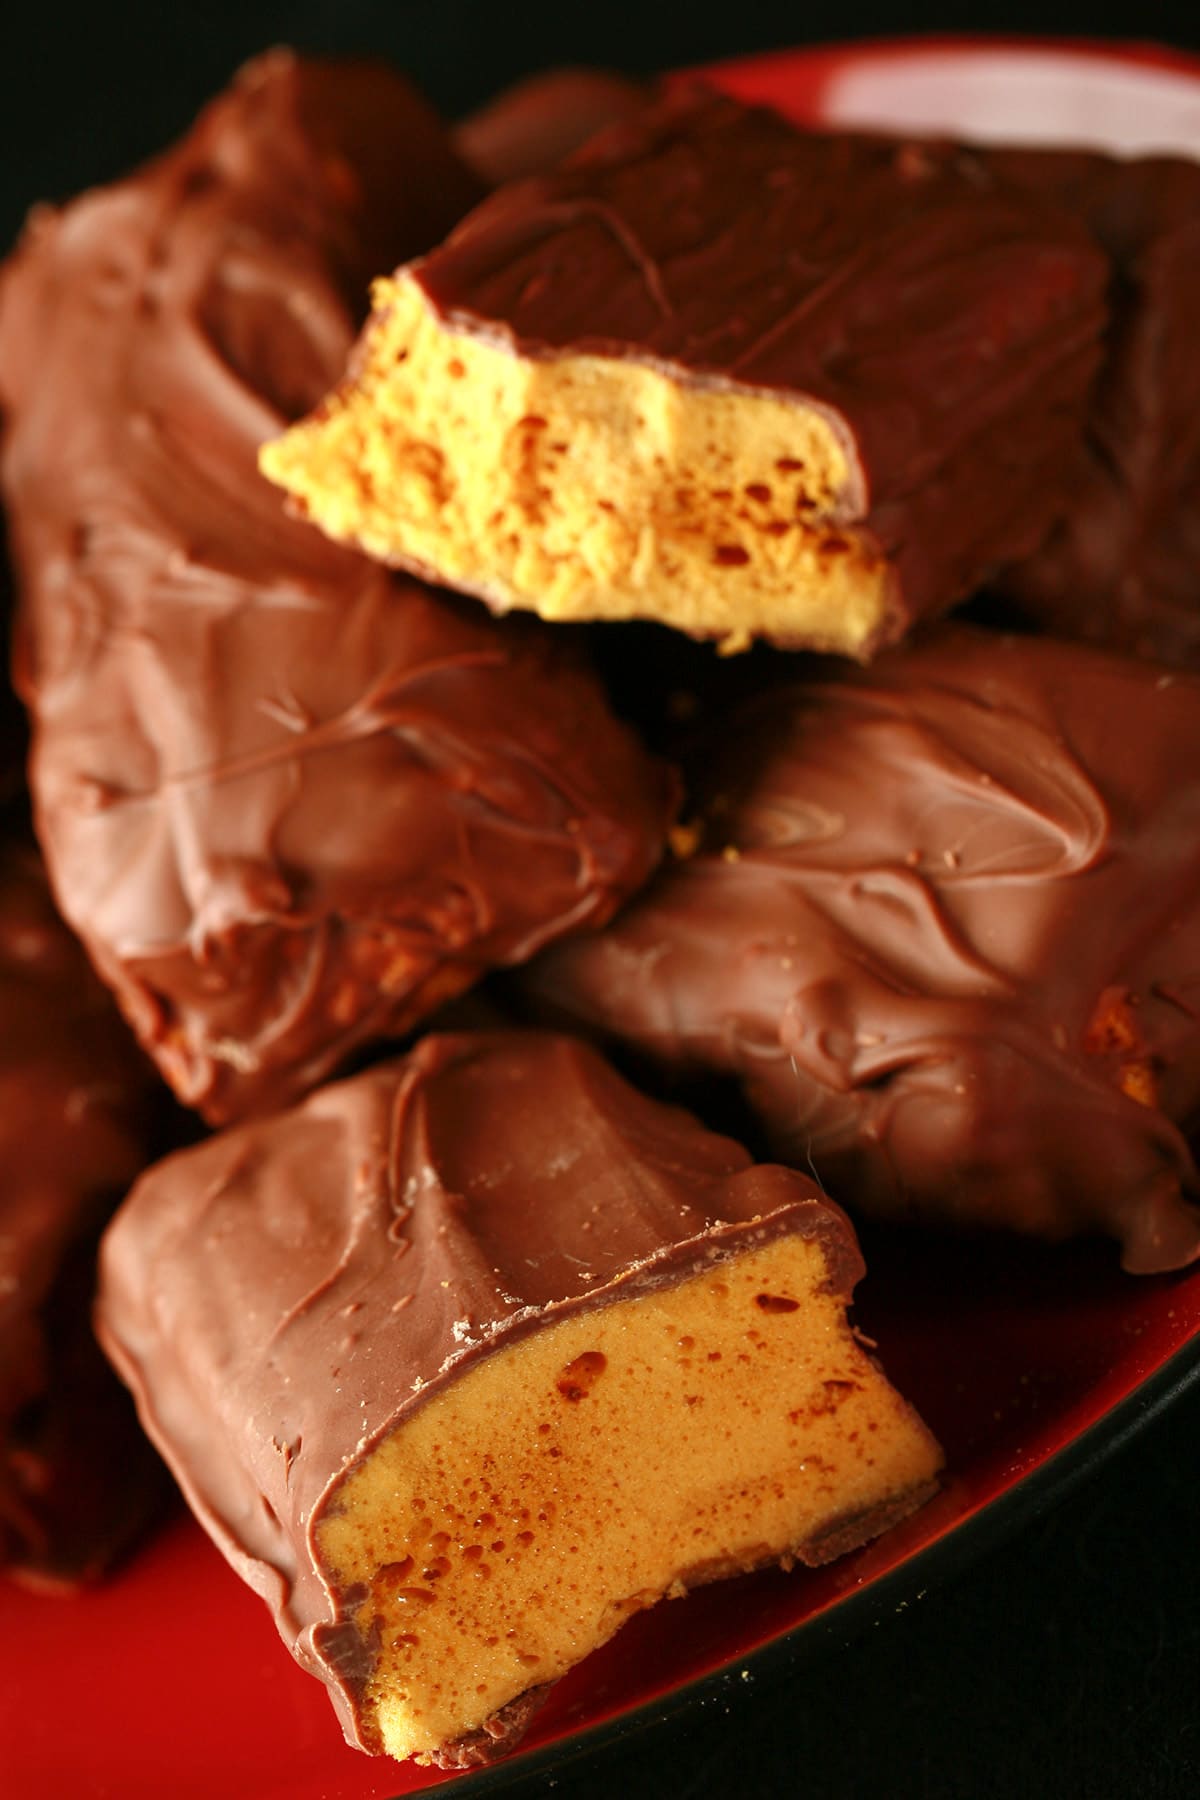
Homemade Crunchie Bars! A fun way to have Crunchie Bars - one of my favourites - on hand, wherever in the world you may live.
Wow, it's been a while since I've posted - sorry about that! Things have been utterly wild around here.
We're still working on tornado repairs. We got our walnut back from the mill, and are about to start working on building kitchen cabinet doors, etc. Exciting - I can't wait to see it finished - and to BE done!
In addition to that, yesterday we had the release of my first sewing manual in over a decade: "Spandex Simplified: Synchro Swimwear".
It's been really amazing to see the evolution of this (and my other!) sewing manual.
What started out as scrawled notes in a booklet and a black/white photocopied amateur publishing job over a decade ago is now a full color, photographic, professionally printed book. Love it!
No real time to breathe, though, as my next one - "Spandex Simplified: Sewing for Skaters" is coming up quickly, with a release date in just one month!
Whew!

Canadian Candy Bars
Anyway, taking a moment to post a great recipe for you!
As I've mentioned before, one of the crummy things about being an immigrant is the difficulty in obtaining a lot of the "homeland" foodstuffs that we love and miss.
My homeland, Canada, in particular, has some really great candy bars.
Mr Big, Sweet Marie, Wunderbar, Eat-More, Coffee Crisp, Crispy Crunch - Sigh! I'm not even much of a chocolate person, and I'll find myself craving em from time to time.
So, of course - I'm in the process of creating make-at-home versions of each. Well, when I have a minute, here and there! Coming up soon, I’ll be posting my recipes for a couple more famous Canadian chocolate bars!
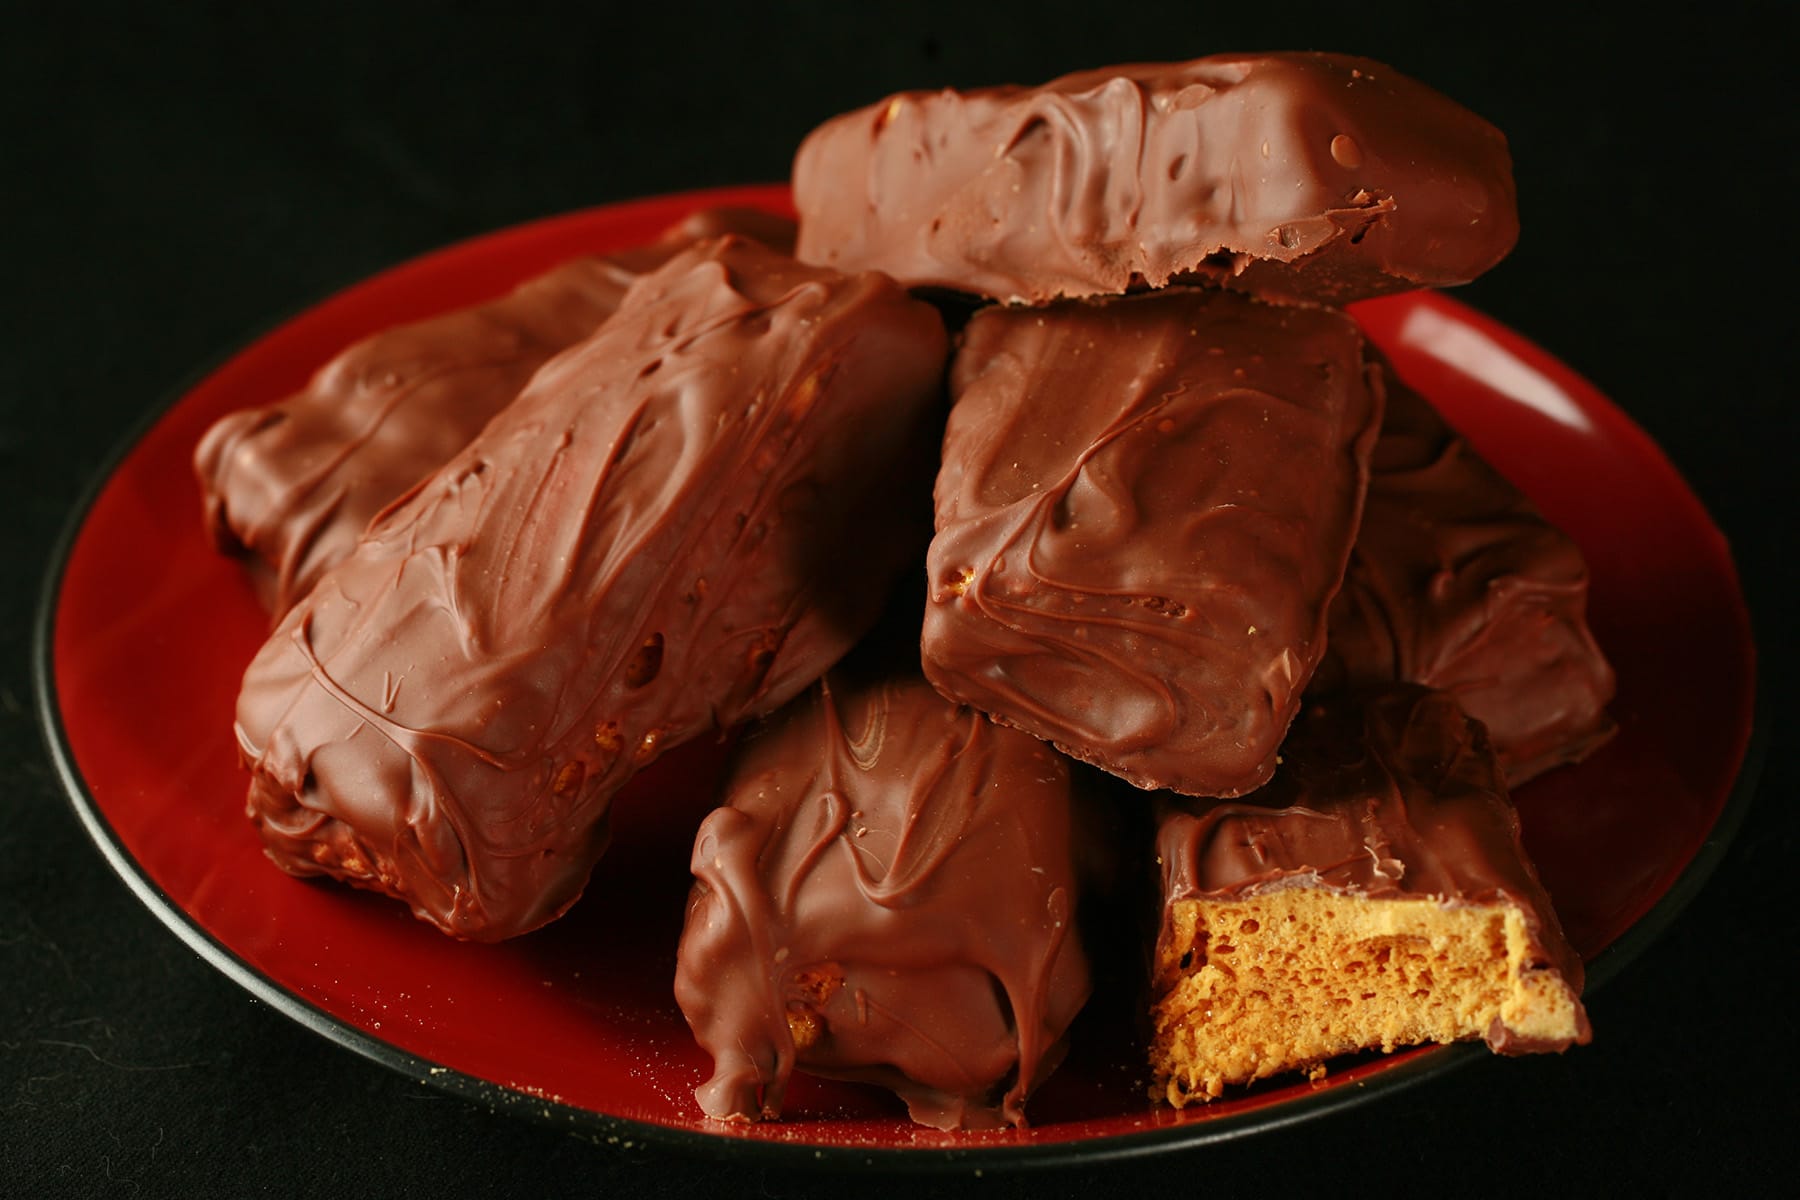
Today, though... I’m going to show how to make Crunchie Bars - a bar popular not only in Canada, but in Great Britain and other countries, as well!
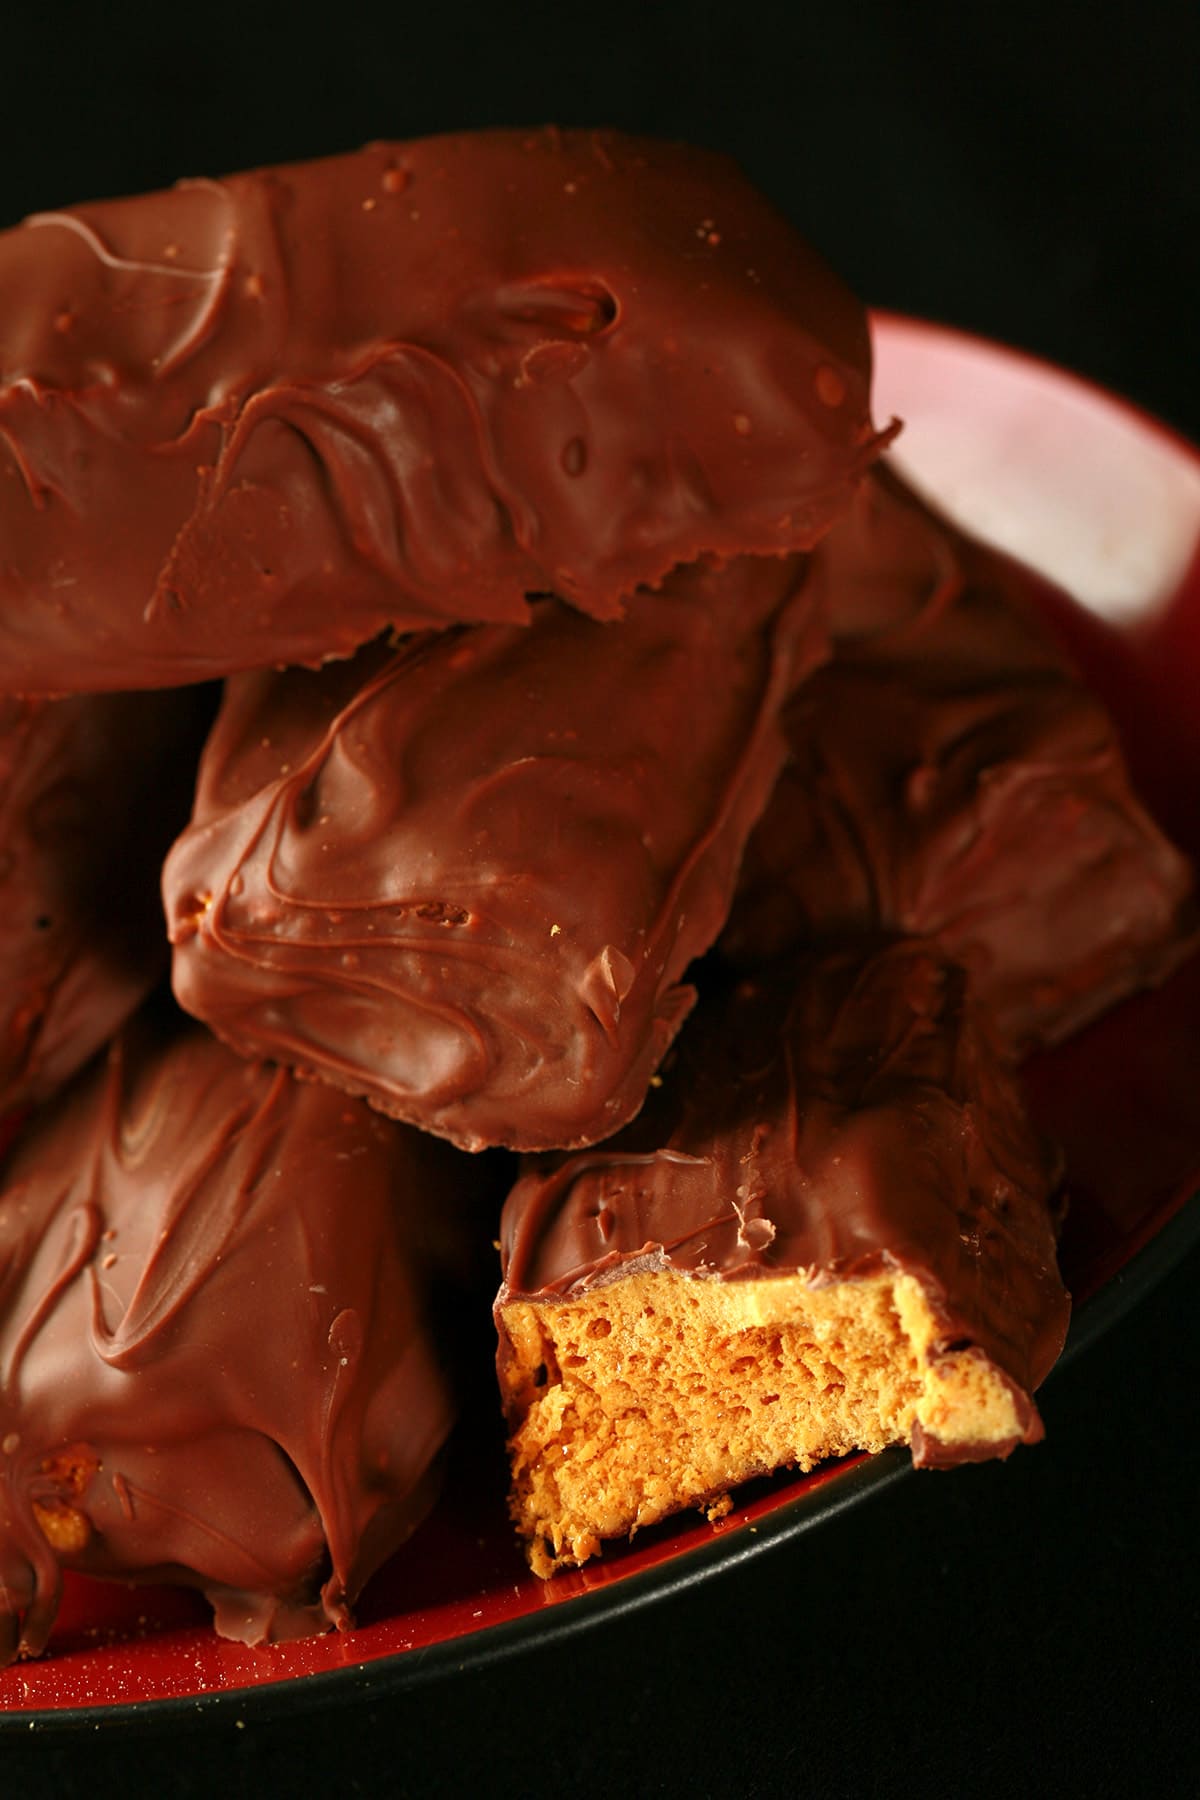
What is in the Middle of a Crunchie Bar?
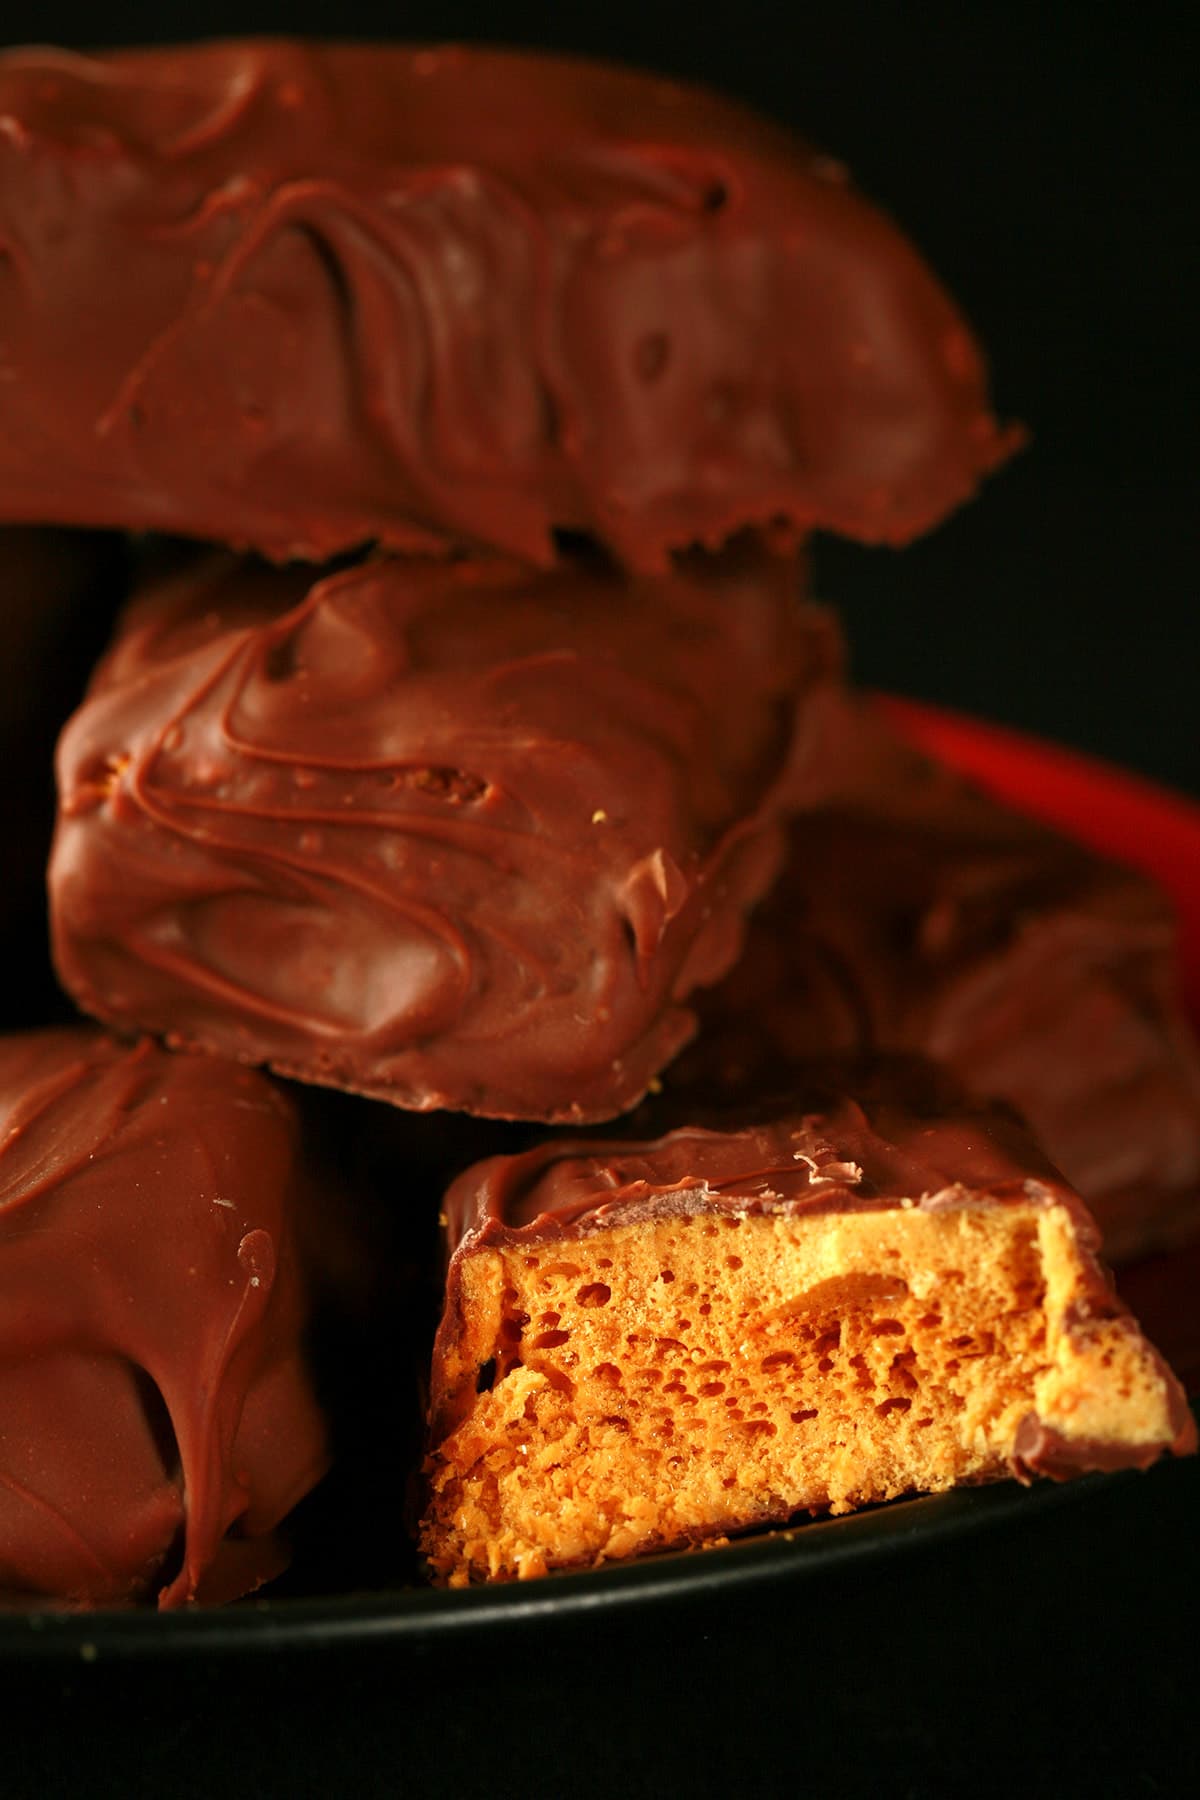
This is a chocolate-coated sponge toffee, and has been a favorite of mine since I was a young kid.
Sponge Toffee - sometimes known as “honeycomb” or “honeycomb candy” - is what happens when you cook a caramel to a certain point, then add baking soda.
The baking soda reacts with the mixture, causing it to fizz and bubble up.
The candy hardens with air pockets all throughout it, giving it a fun texture.
More Candy Making Recipes
In the mood to melt some sugar, make some gummies, or play with chocolate? I've got you!
Bananas Foster Pralines
Banana Walnut Brittle
Candy Apples
Clodhoppers
Dill Pickle Gummy Worms
Festive Easy Fudge
Ginger Molasses Sponge Toffee
Homemade BCAA Gummies
Homemade Jolly Rancher Candies
Hop Flavoured Beer Lollipops (LolliHOPS!)
How to Make Marshmallow Cones
Jalapeno Beer Peanut Brittle
Milk Chocolate Chai Truffles
Peppermint Patties Recipe
Pistachio Brittle
Sponge Toffee
Ube White Chocolate Fudge
White Chocolate Almond Amaretto Truffles
How to Make Homemade Crunchie Bars
The full recipe is at the bottom of the page, but here’s an overview, with extra tips:
Make the Sponge Candy
1. Prepare a 9″ x 13″ cake pan with parchment paper, nonstick spray, a light coating of vegetable oil or shortening. Set aside.
2. In a LARGE pot (it will bubble up like mad as it cooks!), stir together sugar, corn syrup, and water. Attach a candy thermometer to the pan, making sure that it does not touch the bottom of the pan.
3. Bring mixture to a boil, and allow to cook until temperature reaches 300 degrees F (hard crack stage). From the time mixture starts boiling to the time it reaches 300F, do not stir.
4. Once mixture reaches 300F, remove from heat. Add vanilla and baking soda, beating to incorporate.
The mixture will start foaming quite a bit when you add the baking soda (chemical reaction!), so using a LONG wooden spoon is a good idea.
The sugar will be very hot, and will burn if you get any on your hand as you stir. Be very careful and work FAST.
Continue beating the mixture until the foaming starts to slow down.
As a hint: The more you beat the mixture, the finer the bubbles will be, and the more dense the candy will be.
If you prefer your sponge toffee to have bigger bubbles, beat it only enough to distribute the baking soda.
Cool and Form the Bars
5. Dump foaming mixture into prepared cake pan, spreading it out as evenly as possible. Allow it to cool for 15-20 minutes.

Again, watch how you handle it - the more handling, the finer the bubbles. You want some air in there. If you overwork it, you may end up with just a brick of toffee!
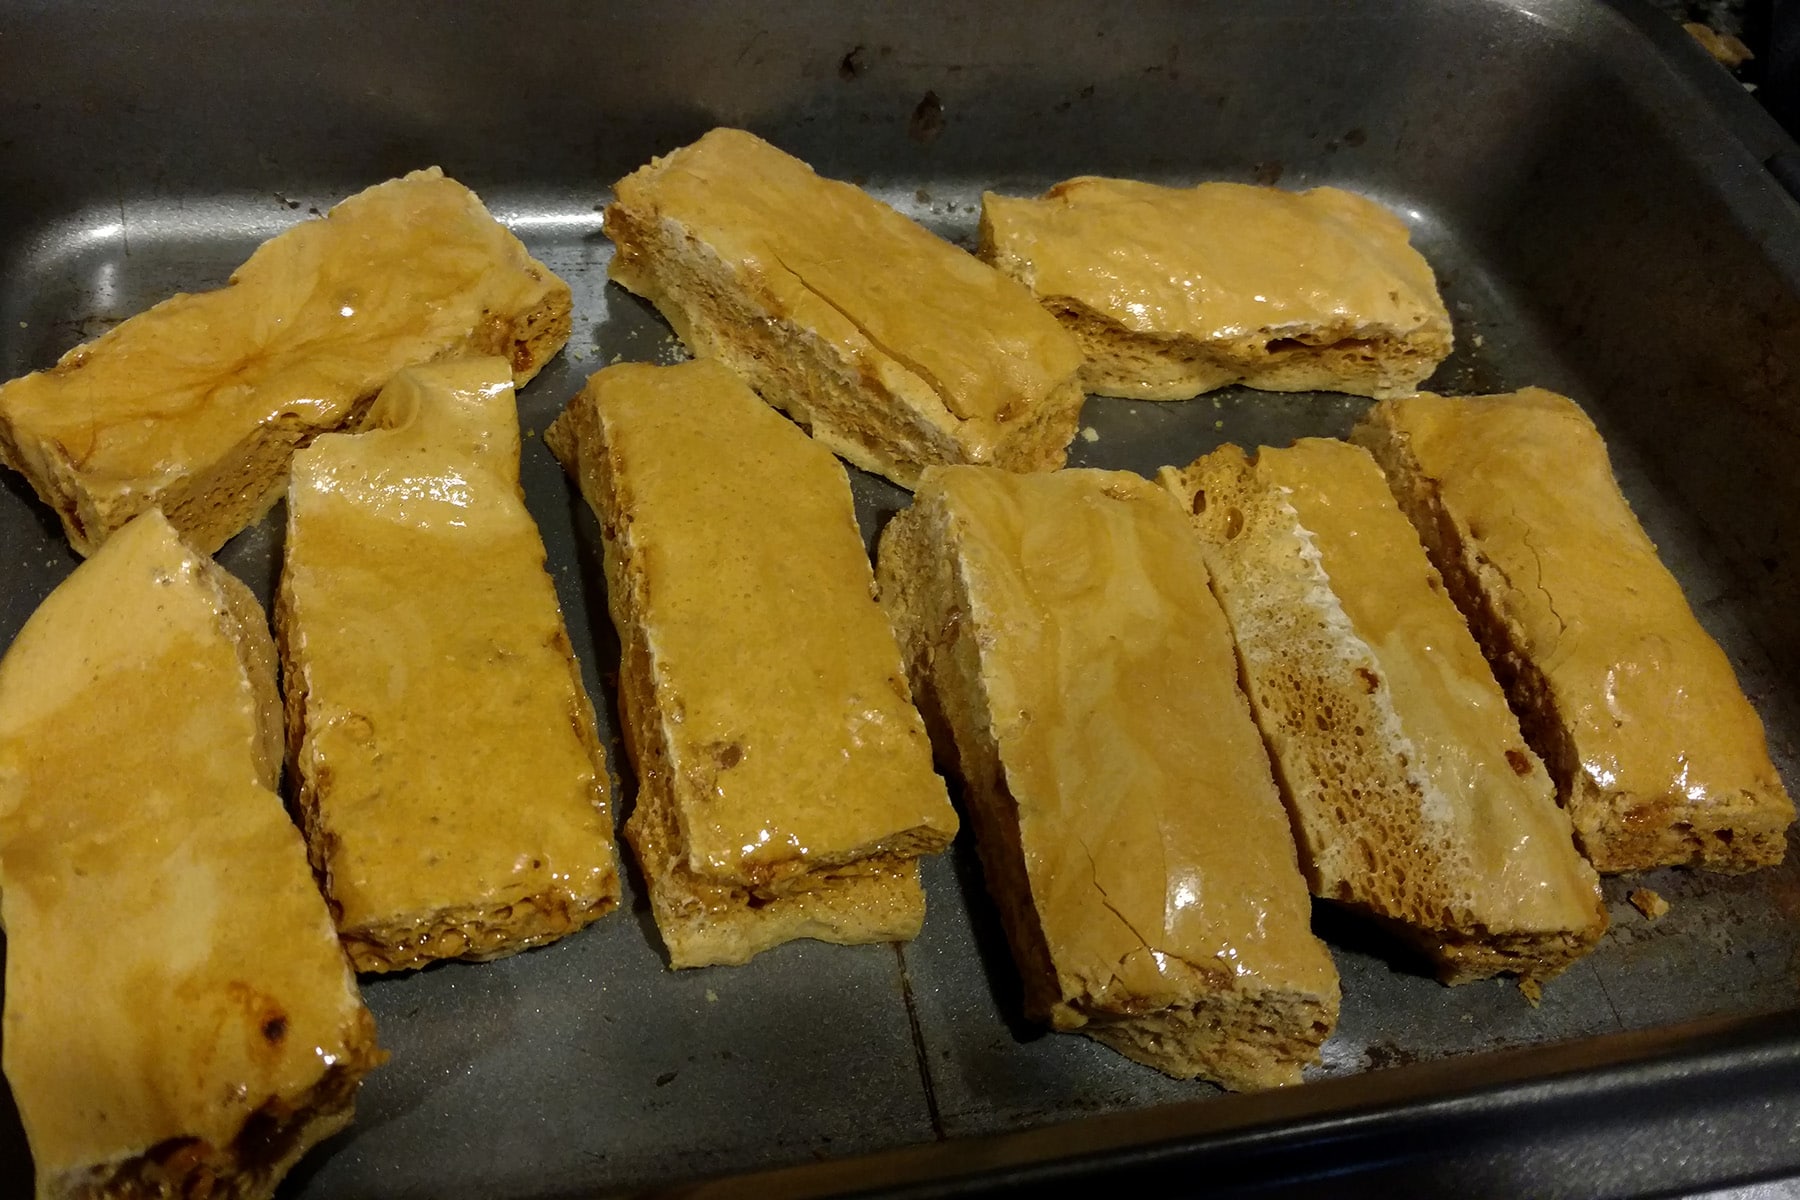
6. When the sponge toffee is starting to harden – but is still quite warm – use a serrated knife to score lines, about ¼″- ½″ deep in the warm candy.
These will be the shapes of your candy bars – I like to make them about 1.25″ x 3″, or so. Keep in mind that this is not an exact science, and you WILL have breakage in there.
7. About 20 minutes later, go back and re-score the lines you already made, gently cutting a little deeper than last time. Allow to cool completely.
8. Once toffee is cooled all the way through, remove from pan and gently snap along your score lines.
Dip and Store Your Crunchie Bars
If you don’t plan to dip these right away, be sure to store toffee in an airtight container – the sugar will attract water from the air, and the toffee can go soggy.
9. In a large bowl, carefully melt your chocolate using whatever method you prefer.
I like to use a glass bowl, nuking for 30 seconds at a time in the microwave, many swear by a double boiler. So long as you don’t scorch it - or get liquid in it - it’s all good.
10. Using a fondue fork, candy dipping utensil, or (Clean!) fingers, gently dip each piece of sponge toffee, swirling around to coat fully.

11. Allow excess chocolate to drip off before placing each piece on wax paper, parchment, or foil to harden.

12. Enjoy!

This recipe is one of many fantastic Canadian recipes in my cookbook, "More Than Poutine: Favourite Foods from my Home and Native Land”. "More than Poutine" is a Canadian cookbook like no other - written by a Canadian living away, it includes both traditional home cooking recipes, as well as accurate homemade versions of many of the snacks, sauces, convenience foods, and other food items that are hard to come by outside of Canada! Order your copy here on this site, through Amazon, or through any major bookseller!
Share the Love!
Before you chow down, be sure to take some pics of your handiwork! If you post it to Bluesky, be sure to tag us - @CelebrationGen. We're also on Pinterest, so you can save all your favourite recipes to a board!
Also, be sure to subscribe to my free monthly email newsletter, so you never miss out on any of my nonsense.
Well, the published nonsense, anyway!


Homemade Crunchie Bars
Equipment
- Candy Thermometer
Ingredients
- 2 ½ cups Granulated Sugar
- ⅔ cup Corn Syrup
- 6 tablespoon water
- 2 tablespoon Baking Soda
- 2 teaspoon Vanilla Extract
- 2-4 cups Chopped Chocolate of your Choice. I prefer milk chocolate for this
Instructions
- Prepare a 9″ x 13″ cake pan with nonstick spray, or a light coating of vegetable oil or shortening. Set aside.
- In a LARGE pot (it will bubble up like mad as it cooks!), stir together sugar, corn syrup, and water. Attach a candy thermometer to the pan, making sure that it does not touch the bottom of the pan.
- Bring mixture to a boil, and allow to cook until temperature reaches 300 degrees F (hard crack stage). From the time mixture starts boiling to the time it reaches 300F, do not stir.
- Once mixture reaches 300F, remove from heat. Add vanilla and baking soda, beating to incorporate. The mixture will start foaming quite a bit when you add the baking soda (chemical reaction!), so using a LONG wooden spoon is a good idea. The sugar will be very hot, and will burn if you get any on your hand as you stir. Be very careful and work FAST. Continue beating the mixture until the foaming starts to slow down.
- Dump foaming mixture into greased cake pan, spreading it out as evenly as possible. Allow it to cool for 15-20 minutes.
- When the sponge toffee is starting to harden – but is still quite warm – use a serrated knife to score lines, about ¼″- ½″ deep in the warm candy. These will be the shapes of your candy bars – I like to make them about 1.25″ x 3″, or so. Keep in mind that this is not an exact science, and you WILL have breakage in there.
- 20 minutes later, go back and re-score the lines you already made, gently cutting a little deeper than last time. Allow to cool completely.
- Once toffee is cooled all the way through, remove from pan and gently snap along your score lines. If you don’t plan to dip them right away, be sure to store toffee in an airtight container – the sugar will attract water from the air, and the toffee can go soggy.
- In a large bowl, carefully melt your chocolate using whatever method you prefer. I like to use a glass bowl, nuking for 30 seconds at a time in the microwave, many swear by a double boiler. So long as you don’t scorch it, it’s all good.
- Using a fondue fork, candy dipping utensil, or (Clean!) fingers, gently dip each piece of sponge toffee, swirling around to coat fully. Allow excess chocolate to drip off before placing each piece on wax paper, parchment, or foil to harden.
- Enjoy!
Nutrition


nicole
Yeah.... Use the highest pot you own. I mean... Your standard saucepan won't cut it. Think double the hight. At least. Good thing sugar dissolves in water..... Also good thing my kitchen didn't catch on fire 😉 Next try I'll be using my pasta/stock pot.
Kellt
Sounds like we had the same issue. I don’t own a stock pot and through my big dutch oven would work. NOPE. No crunchies for Xmas this year LOL
Marie Porter
Yeah, I wasn't kidding with the *LARGE*!
I think mine is just over a gallon in size.
Skye
So glad to find this recipe. I got hooked on honeycomb a lifetime ago when I visited Australia.
Linda
I hear you…my candy thermometer wasn’t working right I burnt my batch, the house stinks and I had a huge mass of burnt stuff overflowing the large pot like lava and the 9x13 pan I was trying to put it in. Not sure I was cut out for candy making 🙁 I will stick to store bought…
Jessica
YAY!!! I adore Crunchies but they have become harder and harder to find in the U.S., my ex was from South Africa and introduced me to this WONDERFUL candy bar that is my all time favorite now!
Paul
Cool, I am planning to try this recipe next week-end!
Did you ever make other chocolate bars? I'd love to try Coffee crisp, Kit Kat, Oh Henry, etc...
Thanks for the recipe.
Marie Porter
I do - and I'm starting to work on recipes for them for an upcoming book! (It'll be geared towards Canadians living away, foods we can't get!)