

We have some really cool tutorials coming, so it's time to share our "Homemade Cutting Boards 101" primer!

Everything you ever wanted to know about Homemade Cutting boards. A great primer before we start posting custom cutting board tutorials!
Booze Bouquet Tutorial.
DIY Mustard Bath Gift Set
Homemade Hop Spa Bath Set
Homemade Peppermint Eucalyptus Spa Bath Set
How to Sew A Cute Makeup / Toiletry Bag Travel Set
Mop Doll Air Freshener Covers
... So we decided to get “extra” with it, and work on a custom cutting board tutorial together.
Of course - as always - we "If You Give a Mouse A Cookie"-d out and ended up with at least 3 custom cutting board tutorials in progress!

Two of our homemade cutting boards - tutorials coming soon!
Homemade Cutting Boards
If you have a cook in your life - and a bit of ambition! - these homemade cutting boards will make an absolutely fabulous gift that will be cherished for many years to come. There's a fair amount of info that you should know before designing and making Homemade Cutting Boards - or Charcuterie board! - so we want to address allllll of that ahead of time.
Heads up - this post is going to be LONG, but it’s also comprehensive!
We wanted to address everything you want to know - and keep in mind - when designing and making fancy homemade cutting boards. Really, wouldn’t you rather have all the info you need in one place?
I think time is better served designing and making, rather than chasing down separate bits of information to piece together a plan!
So, not a lot of preamble here, as we have a LOT to address!
We’ve tried to divide and label each section clearly to help you decide which sections you need to read, as some of this is going to be review for some people.
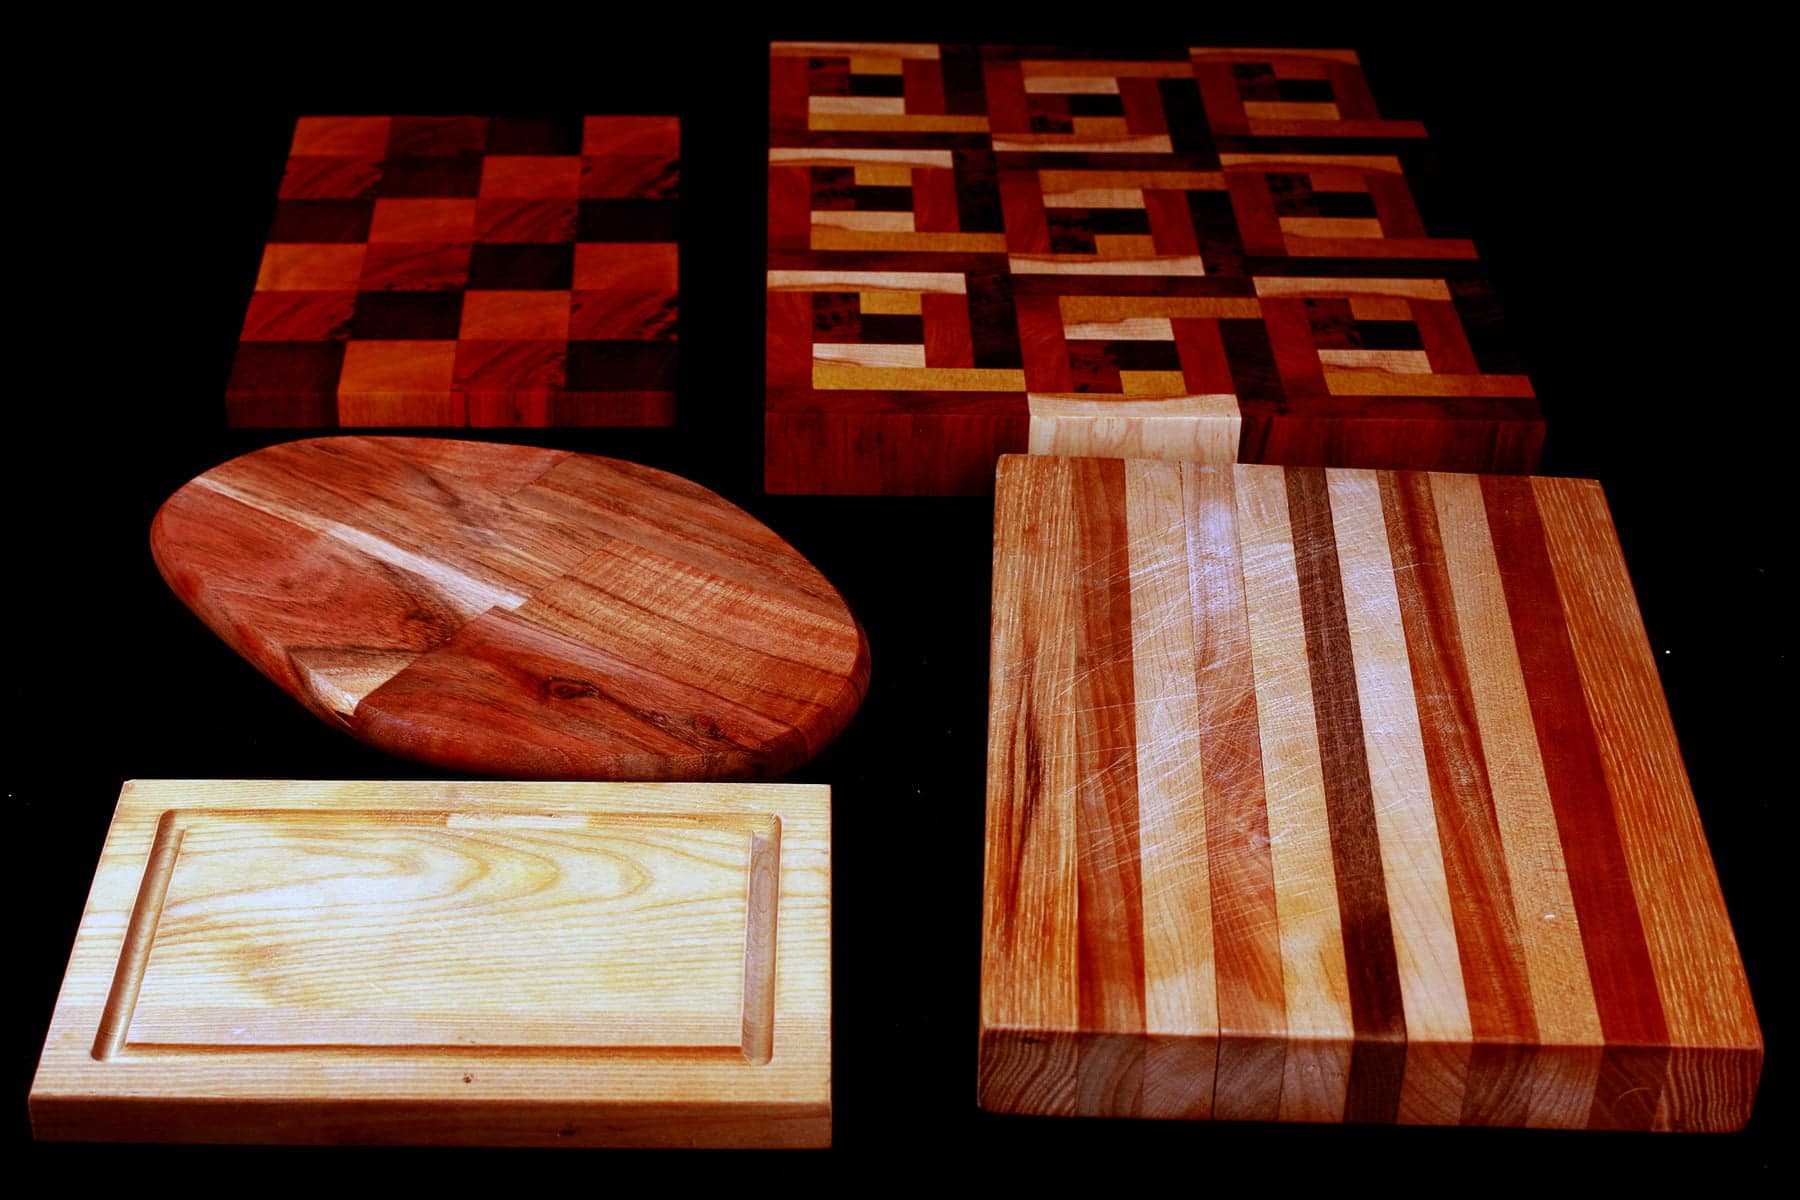
A selection of our cutting boards. Some we've made (The 2 in the back), one we purchased - the oblong IKEA one - and two gifts we've received.
Getting Started
Your design process can start in one of two ways. I’d say which you choose depends on your work style, but really... I flip back and forth between the two.
For the projects to be photographed for this tutorial, I started with one and ended up going the other way!
Design First
Going into this, I was planning to design my projects first, then purchase materials to make them.
The benefit to going this way is that you can walk into a lumber store with a list of exactly what you need, and buy exactly what you need.
This is the most cost efficient way to design, for a couple of reasons:
1. You eliminate potential waste.
By knowing exactly what you need (with margins built in for loss to trimming/sanding, of course), you avoid over purchasing in the first place.
Additionally, you avoid UNDER purchasing... and a subsequent trip to pick up more, which - depending on the formats available - could mean being forced to buy more than you would have, had you gone in with a proper list.
2. You avoid being DAZZLED.
I think that’s the best way to put it. You walk into the lumber store with a vague idea of what you want, come across a big display of all kinds of COOL stuff, and all of a sudden, you’re checking out with a random pile of “I don’t know what I’m going to do with it yet, but I NEED it.”
Not that I’m speaking from experience or anything.... 😉

My preliminary design for a cutting board we will be posting a tutorial for. I designed this AFTER buying the wood, and based it around what we found.
Materials First
If you haven’t been shopping for lumber lately, you may not have any idea of what’s out there, either in terms of colour/type, or format.
We hadn’t been to any specialty lumber stores since moving to Ontario, so we really had no idea what was out there.
So, while we started out with the best of intentions, we ended up running into a lot of “What if they don’t have this wood?” and “What if we can’t get this in that thickness?”.
The solution? FIELD TRIP.
We googled and found Exotic Woods Inc, which is basically a wonderland for fancy lumber - and it's LOCAL!
I’m glad that I was the one holding on to the credit cards during that trip - as my husband had (jokingly, I THOUGHT) suggested when we left the house that morning. It could have gone poorly, had he been in *ahem* charge.
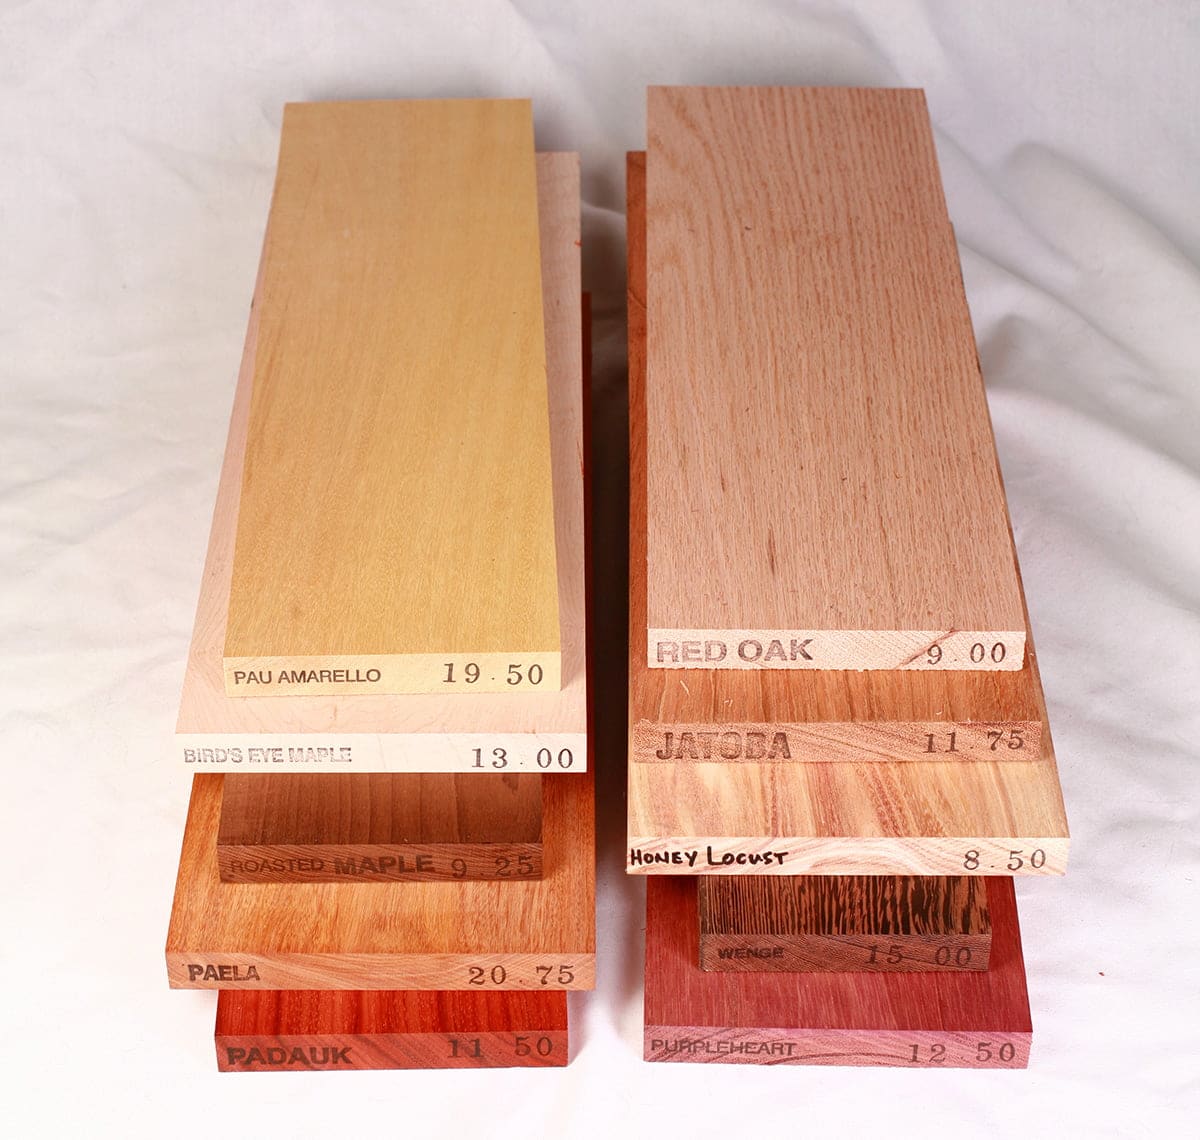
Here are a few crappy cell phone pics from our little field trip:


We wandered through the whole store, saw what the options were, then discussed the possibilities.
We ended up getting a bit overwhelmed in the process, and decided to go the “Not sure what we’re doing with it yet, but this sure is pretty!” route. Oh well. In our defense, now we know what to expect - and what’s available - for next time!
Materials
The materials you’ll need to make homemade cutting boards fall into 3 main categories. Here they are, in chronological order:
Wood
Obviously this is the big one: in volume, importance, and cost.
There are a few other considerations to keep in mind when choosing wood for a cutting board:
Appearance
Obviously, you’re going to want to choose woods that look good, alone and together.
If you’re going to splurge on exotic woods, be sure you’re getting ones that are different enough from each other that the cost of each one is going to be worth it - and that you’ll be getting the effect you’re looking for.
... unless you’re going for a muted, gradient look, of course! Given the variety of woods out there, you can absolutely find a few that are similar to each other, but different *enough* as to create a subtle but gorgeous effect when used together.
Keep in mind: The wood you buy is going to look very different once it’s sanded and finished with oil. If you have any doubts, be sure to google to see what finished projects of your choice of wood look like.
Generally speaking, though, they’re going to look brighter and more vibrant when finished.

Porosity
Some woods are far more porous than others, which can present an issue for homemade cutting boards, with regards to food safety and staining.
While I personally only cut meat on plastic boards (and, truthfully, I rarely cut anything on my nice boards... they’re too PRETTY!)... cutting meat on wooden boards is something to keep in mind.
Very porous woods can absorb juices, and it’ll be hard to get them really clean.
Of course, if you’re just using this for a charcuterie or cheese board, that’s far less of an issue than for a general purpose cutting board.
Food safety isn’t the only consideration, though. A light coloured, very porous wood could be susceptible to staining from whatever food you use on it.
It would definitely be a shame to put time, money, and effort into a project... and then stain the white parts with berries, for instance!
In the same vein (ha!) as porosity, you’ll also want to avoid woods that have knots in them, for much the same reason.
Hardness
Overall, you’ll want to aim to have the whole board in hardwood. Not only will this stand up better to a knife, it’ll lessen the chance of warping over time.
Flavour
Some woods can impart a flavour on food if they remain in contact for extended periods of time.
This is obviously less of an issue if it’s meant to be decorative (ie: on a wall) or as an actual cutting board. It’s something you should definitely keep in mind if you’re aiming for board meant to serve or display food - cheese or charcuterie boards, for example.
Pine, walnut are examples of some woods that may impart a flavour to your food.
Toxicity, etc
Some woods are toxic, allergenic, or irritants... and the degree to which any of that is the case varies wildly between wood types, the use, and the individual in question.
The Wood Database has a GREAT page about Wood Allergies and Toxicity with a ton of information and a fantastic chart, so I definitely recommend checking that out as you design / buy the wood for your project.
As you can see, many commonly used woods - even woods that are recommended for cutting boards - are listed as being some degree of allergenic/irritant.
A few important take aways:
- Very few woods are ACTUALLY - directly - toxic
- Allergenic or irritant properties of woods are greatly diminished when you finish them
- ALL wood is hazardous when inhaled, so no matter what would you choose, you need to avoid inhaling the dust... both as you’re cutting/sanding it, and as it hangs in the air for your workspace.
Recommended Woods
A good rule of thumb when choosing the wood for your project is - especially when making a board that will actually be cut on - to pick wood types that belong to trees known for producing something edible. Maple syrup, cherries, walnuts, etc.
With all of that said, here are some of the recommended woods for making homemade cutting boards:
Bamboo (Technically this is a grass!)
Beech
Cherry
Maple
Teak
Walnut
That said, we’re going for a pretty, “Not for everyday use” homemade cutting board here, so we’re going for the more exotic woods, and here's what we decided on.
Some of these woods may not be outright toxic, but aren’t considered 100% food safe either, in general. Once finished, these are perfectly fine for display or very light use (cheese, charcuterie, etc)
Honey Locust
Jatoba
Padauk
Paela (AKA Orangeheart)
Pau Amarello
Purple Heart
Wenge
Glue
You’ll want to use a Type 3 wood glue that is strong, waterproof, well suited for the job, and is food safe.
The gold standard here is Titebond III.
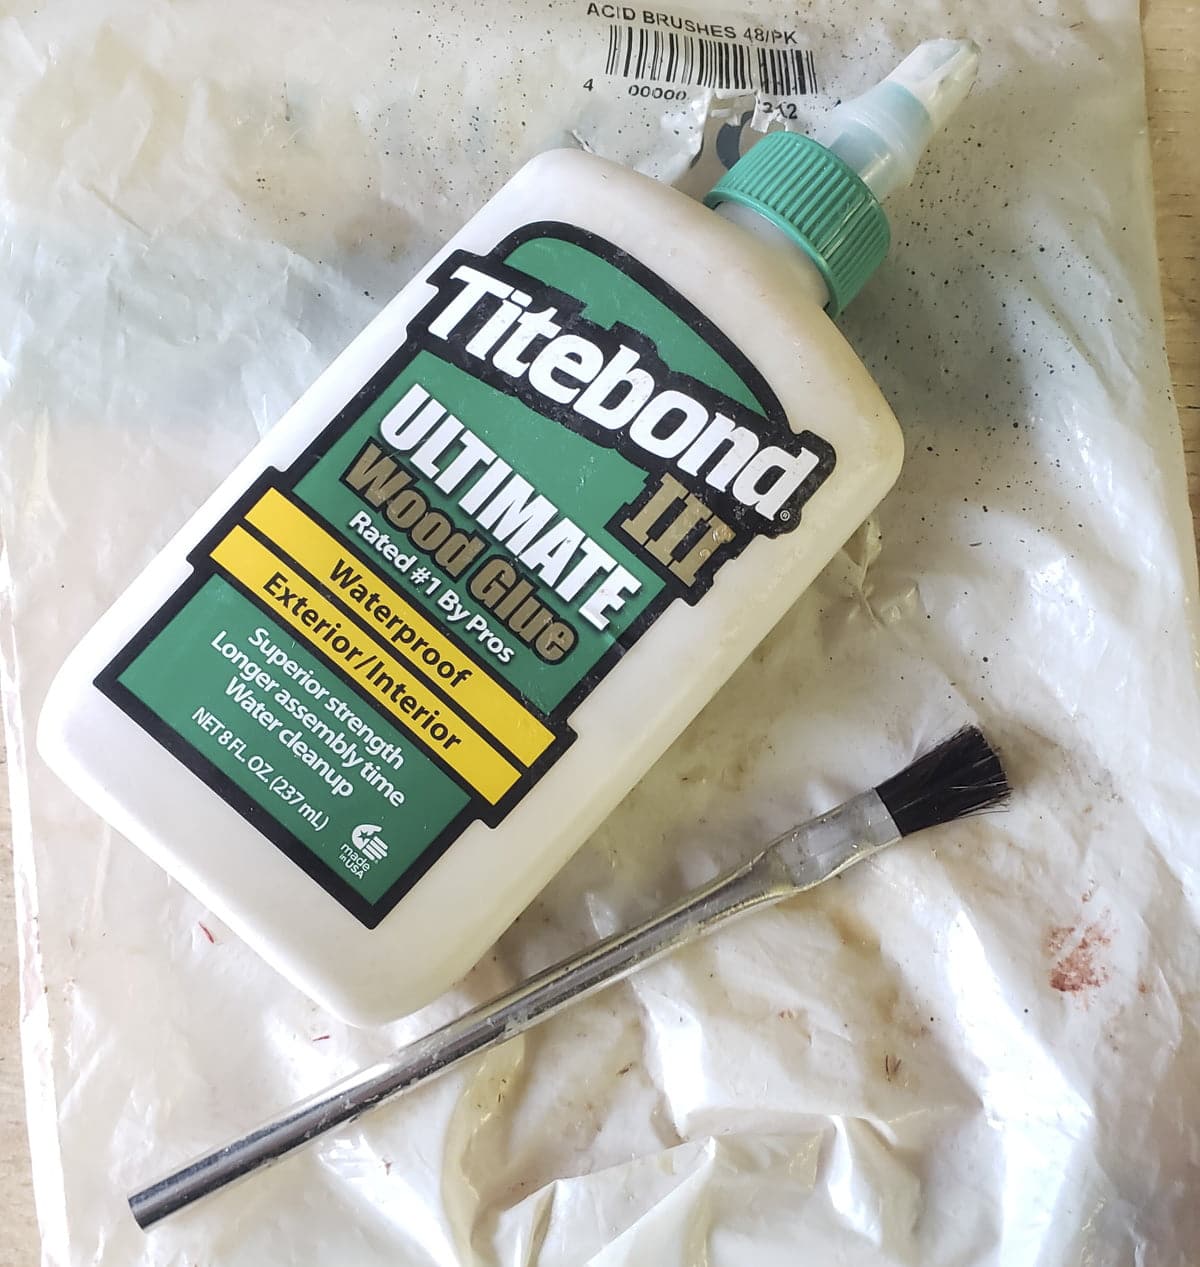
Note: While it's cheaper to buy a quart or gallon, per unit, we like to buy it in the 8 oz or 16 oz bottles. It's easier to use, and has a handy applicator attached to the bottle! 16 oz is a ton and will last you through several homemade cutting boards, anyway!
Good news! Applying glue does not require large equipment! Titebond III, and may other glues, have a wide tip meant for spreading out the glue during application. I do, however, recommend glue brushes, which will help spread the glue across the entire surface and drive the glue into the grain for maximum adhesion. They are very inexpensive, and can be washed and re-used several times if desired. Really, I only end up throwing them away if I forget to rinse them quickly.
Finishing

Everything you need to put a nice - and safe! - finish on your homemade cutting board
Sanding
The good news is there’s no need to get a glass-smooth surface. In fact, 80-120 grit are all that is needed while assembling, then 180 grit is a good way to finish out the board before the oiling. The slightly rough surface is better for gluing, since it leaves tiny little grooves for more surface area.

One of our original board designs, unfinished and ready for oiling.
Oiling
The final step in making your custom cutting board is to finish it with a food-grade oil.
There are two different categories for this finishing:
Requires Upkeep
Butcher block oil or food grade mineral oil are your options for this category.
One-and-Done
Personally, I don’t have the spoons for dealing with oiling a custom cutting board every time I was it, so we opt for “one and done”. So, we tend to use a solvent-free monocoat oil called "Bio-Supra". A little goes a long way!
Note: It's called a monocoat oil, but we do 2 coats.
When applying any kind of finish for the first time, the grain will open up and the surface will become slightly rough. The course buffing pad will knock down these edges and do a course buff on the finish. Many people leave it at this point, but by applying a second coat and using the polishing pad, you'll end up with a smoother, polished look with more luster.
For both buffing and polishing, it's best to follow the grain if possible. If the design has the grain going multiple directions, some people will use a circular pattern but we prefer to so a straight buff lengthwise so any marks tend to get lost along the length of the board.
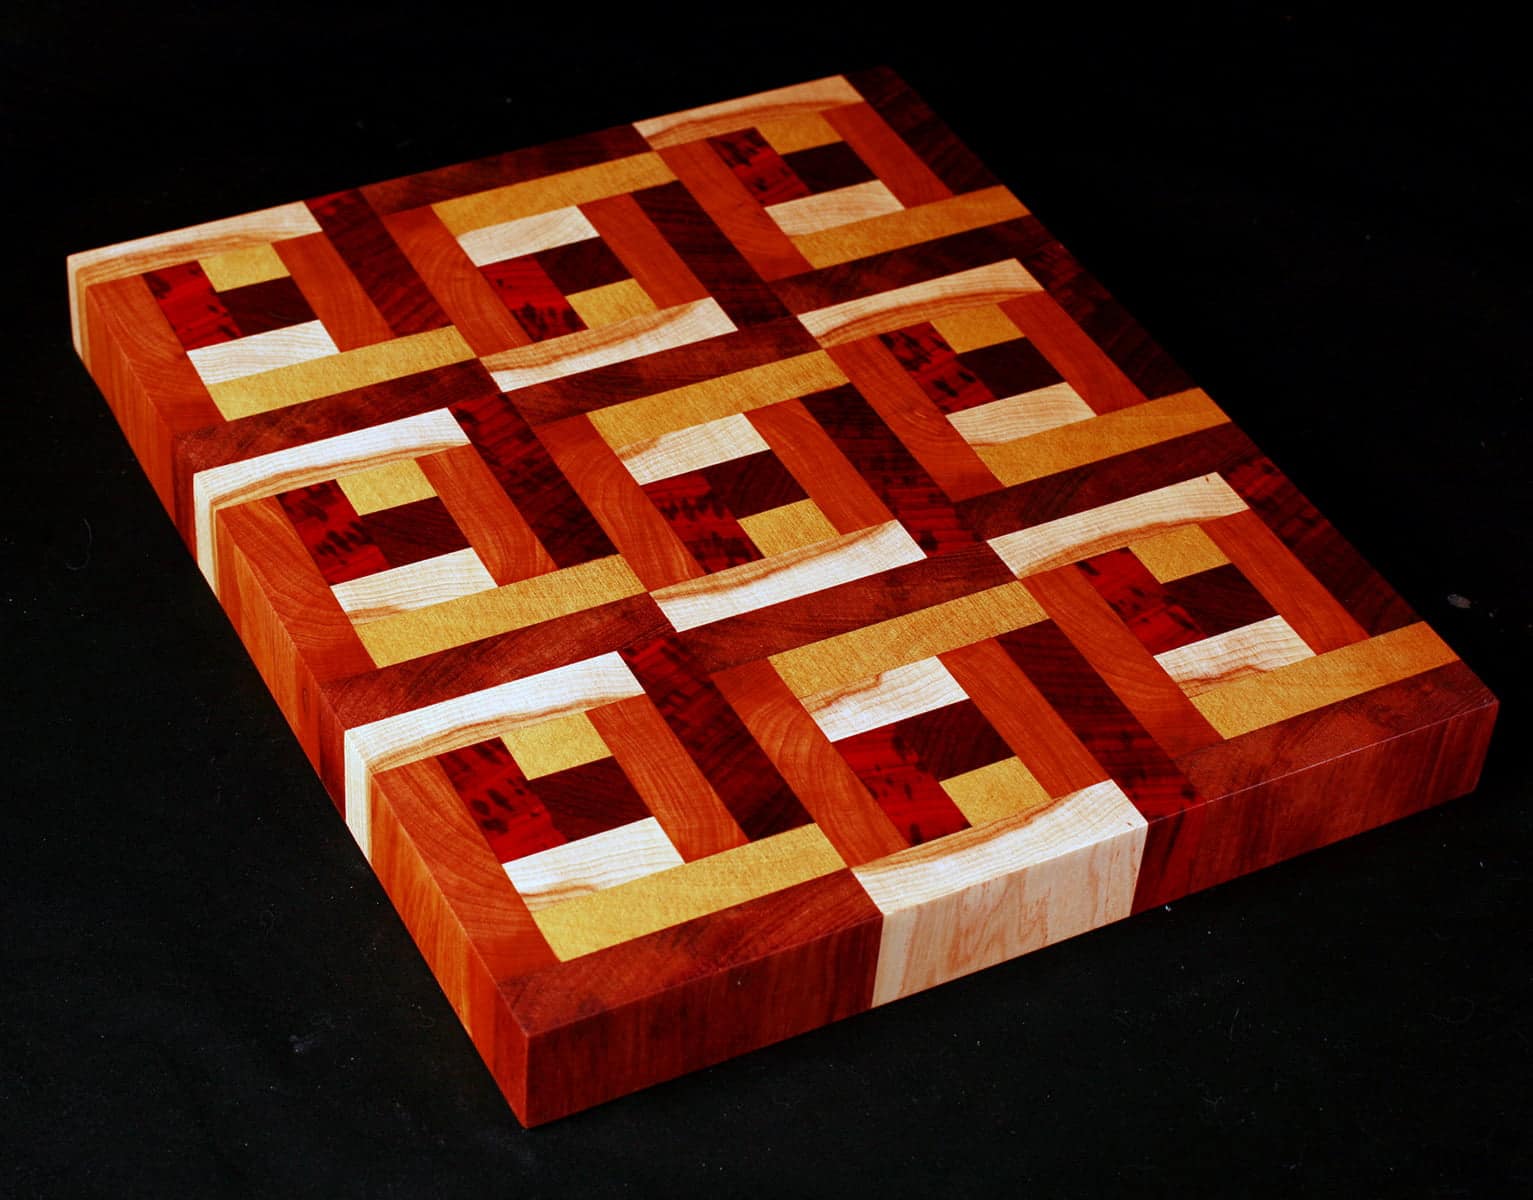
Our finished "Log Cabin" style cutting board!
Tools
The list of tools may sound daunting, as building a complete woodworking shop takes a lot of room and money. For each type of tool needed, we list alternatives with a modest cost, but requires more manual labor.
Many cities have complete shops that are available to rent for shared use. These shops have large equipment, and folks around that generally like to help out. This can be a great alternative to creating your own shop.
If you’re just getting into woodworking, try out the low-cost alternative equipment, it’s good equipment to have on hand no matter how large your shop is!
This post should not serve as an instruction manual for your tools; please refer to the manufacturer instructions for safe use of each tool.
Cutting

A table saw is ideal, as it allows smooth cuts at precision widths. A fence and a miter gauge, standard accessories for a table saw, will help guide the pieces through to obtain this precision.
A band saw also works here, but it does leave rougher edges. The planing step will take care of these rough spots. The band saw has one advantage: it can cut taller pieces in one step. Additionally, in some situations it can be safer for making thin cuts.
A jig saw or a hand saw could be used, but in order to get the precision needed, a straight guide should be used for all cuts. By clamping a straight board or bar across the piece, it helps force the blade to stay straight. Trying to guide a hand saw by simply following a drawn line often ends with wavy or angled cuts. Practice with some inexpensive wood! After a couple of cuts you’ll see this is a completely reasonable way to get straight cuts, though it takes more time and effort.
Planing
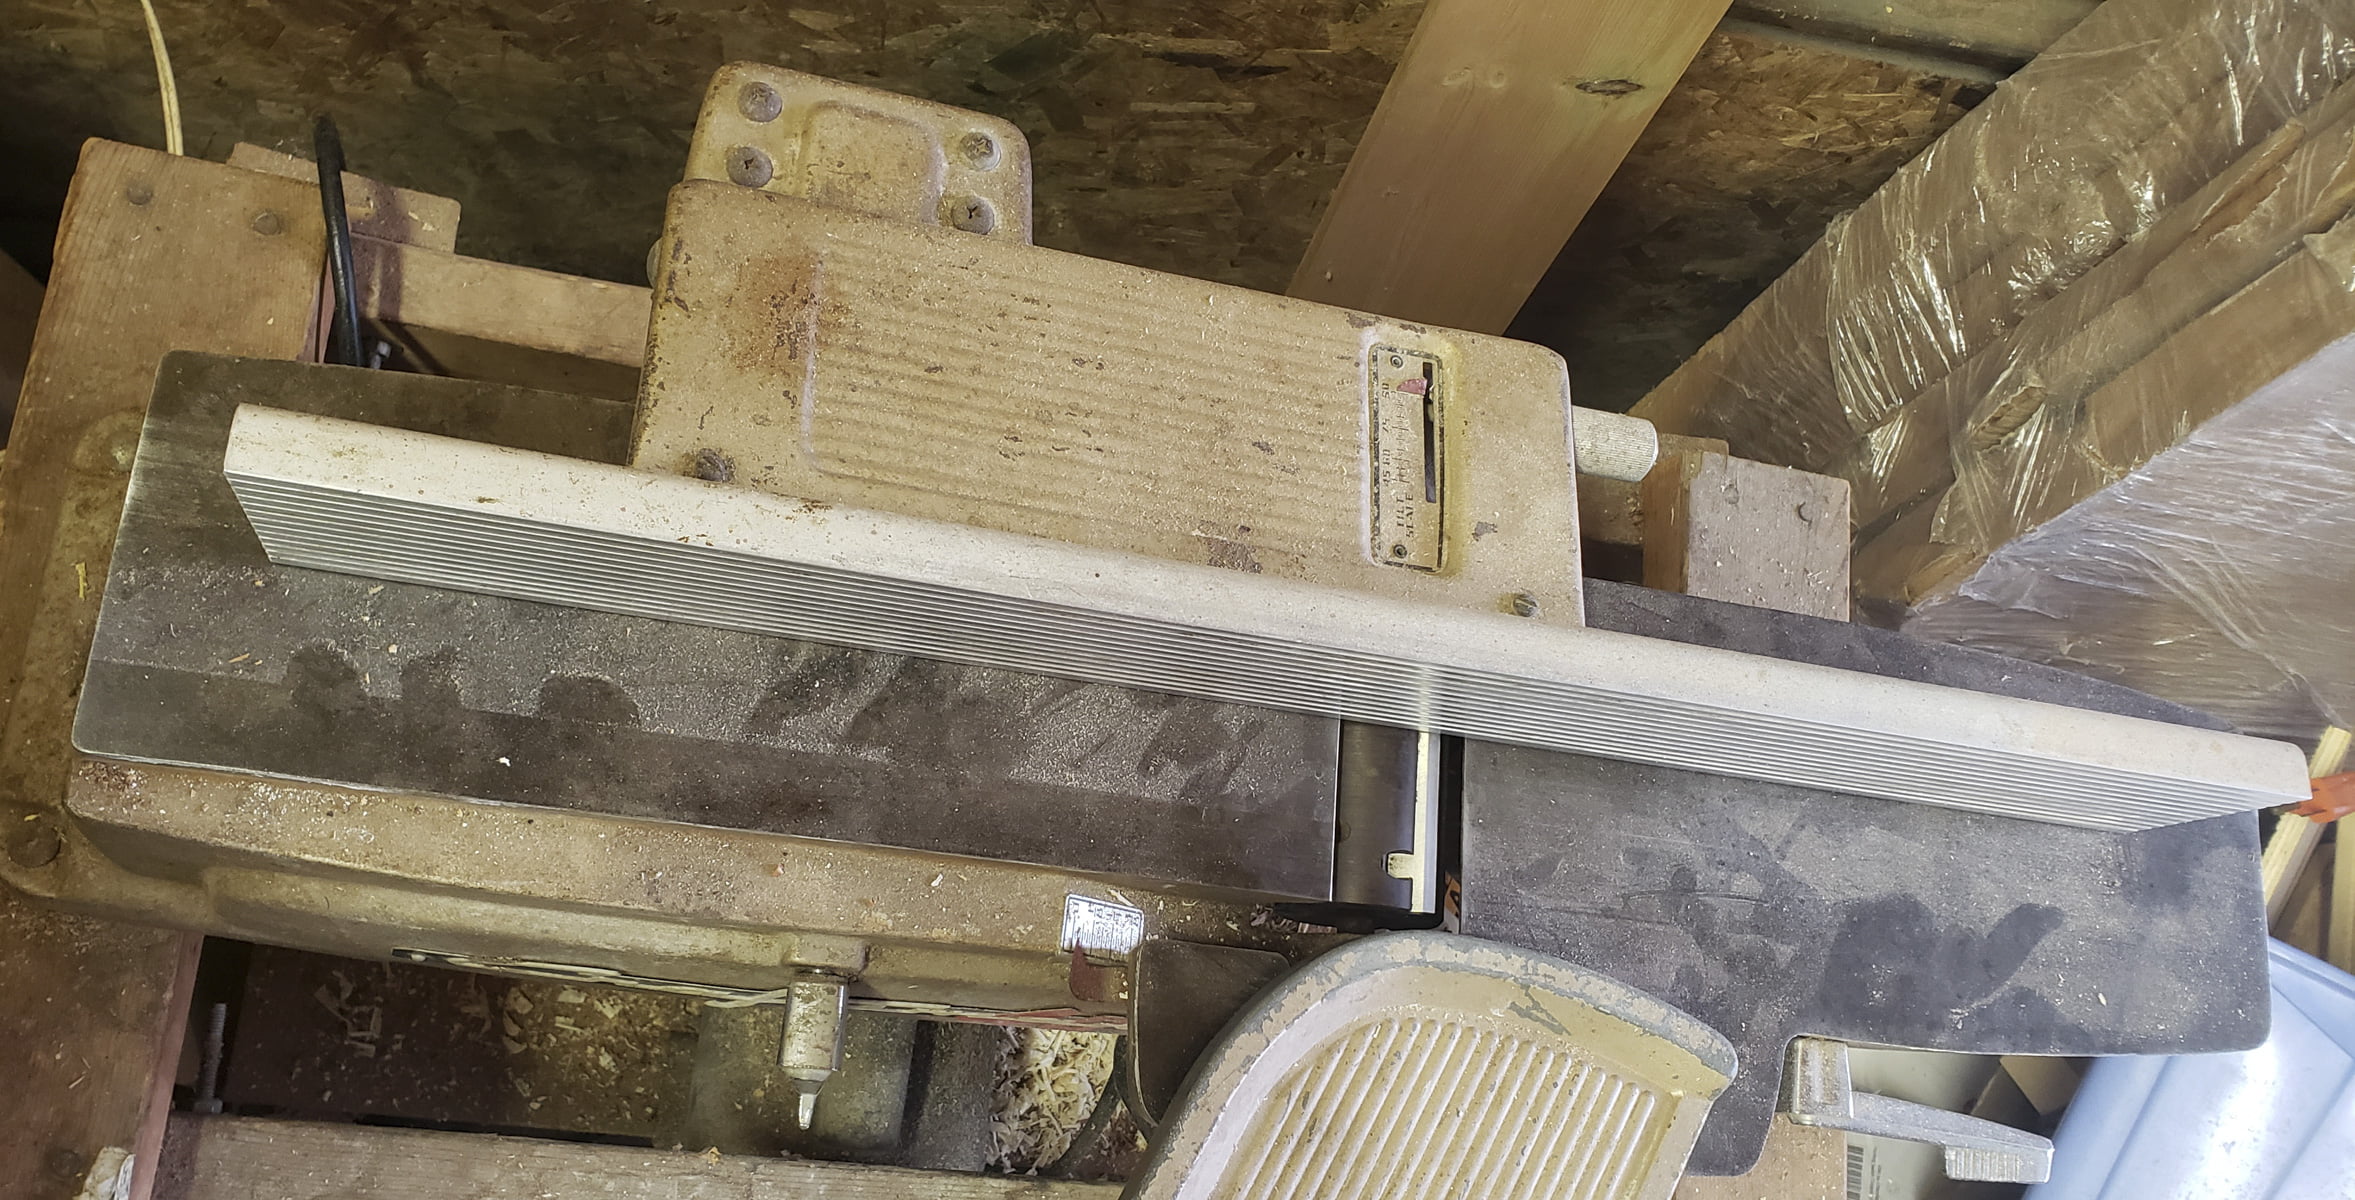
The best tool for the job here is a thickness planer. These tend to be larger, handling pieces 12" wide or even more. This is certainly convenient, but the main advantage of this type of tool is that is guarantees the pieces will be uniform thickness because the part slides across a flat base, and the rotating blades trim the top as the piece goes by.

A Planer.
The next best tool is a jointer. These are usually smaller, with 4" or 6" wide blades. The part is fed across the base which has a slight offset at the blades (blades are on the bottom), which trim the piece to a smooth surface. If you plan on using triangles or other non-rectangular pieces, this is what you’ll want. For traditional rectangular pieces, the jointer doesn’t guarantee parallel faces like the planer.
A router sled would also work, but is time-consuming to set up. A set of rails guides a router with a flat bit across the surface, and yields very good results. This technique is often used on very large pieces without large equipment, such as dining room tables cut from a single slab.
Historically, the tool that would have been used is a hand plane. These are still available, and still used by many woodworkers. It is important to remove only a small sliver of material at a time, using multiple strokes to work the piece to final dimensions.
Finally, sanding could be used as a way to plane the wood. This will take a lot more time, as a significant amount of material needs to be removed to eliminate the cut marks. This may work with a simple design, such as three boards glued together. This technique will be too time-consuming and is too prone to poor surface smoothness for complex board designs.
Sanding
The drum sander is king, but these are large, expensive machines that are out of reach for many. You many see one if you rent a shared woodworking facility. It allows for precise, flat surfaces.
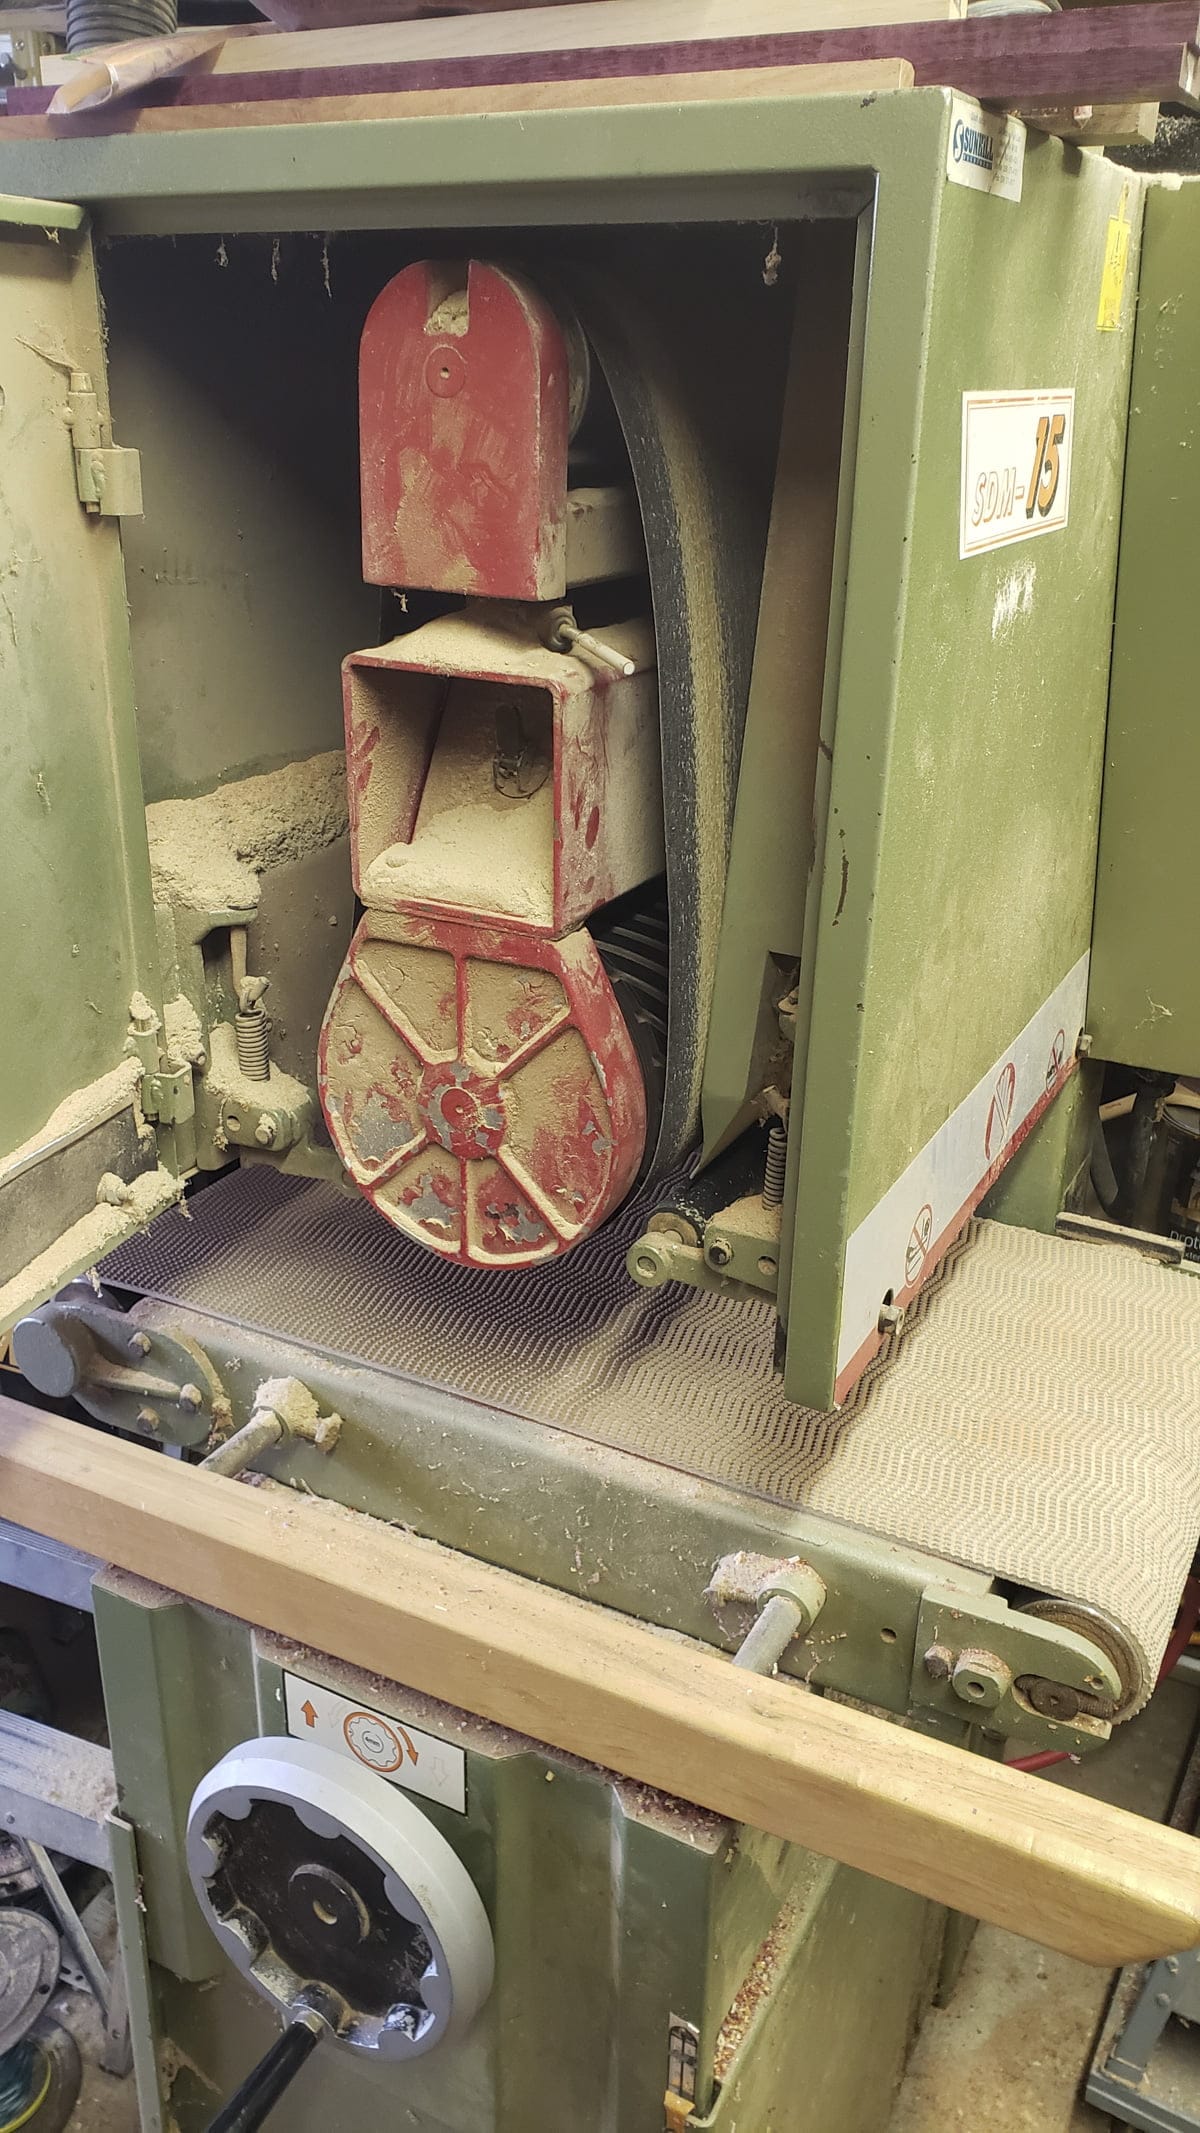
Our drum sander
A palm sander is a nice low cost, simple machine. With easily replaceable sanding pads, it makes quick work of sanding. The biggest drawback is that it’s easy to accidentally round over the edges. If this occurs, pieces glued together will have gaps at the surface. Keeping the sander flat against the work, and not pressing down too hard will obtain the desired finish. Also, repairing minor blemishes is possible, using sawdust and glue or epoxy to fill in gaps.
A manual sanding block, simply a piece of sandpaper on a block, is not recommended as this would take an excessive amount of effort.
Clamping
Pipe clamps are very versatile, and what is used the most in our garage. The drawback is the clamping surface is only a couple of inches thick, meaning you’ll need more of them to get complete top and bottom coverage to prevent warping.
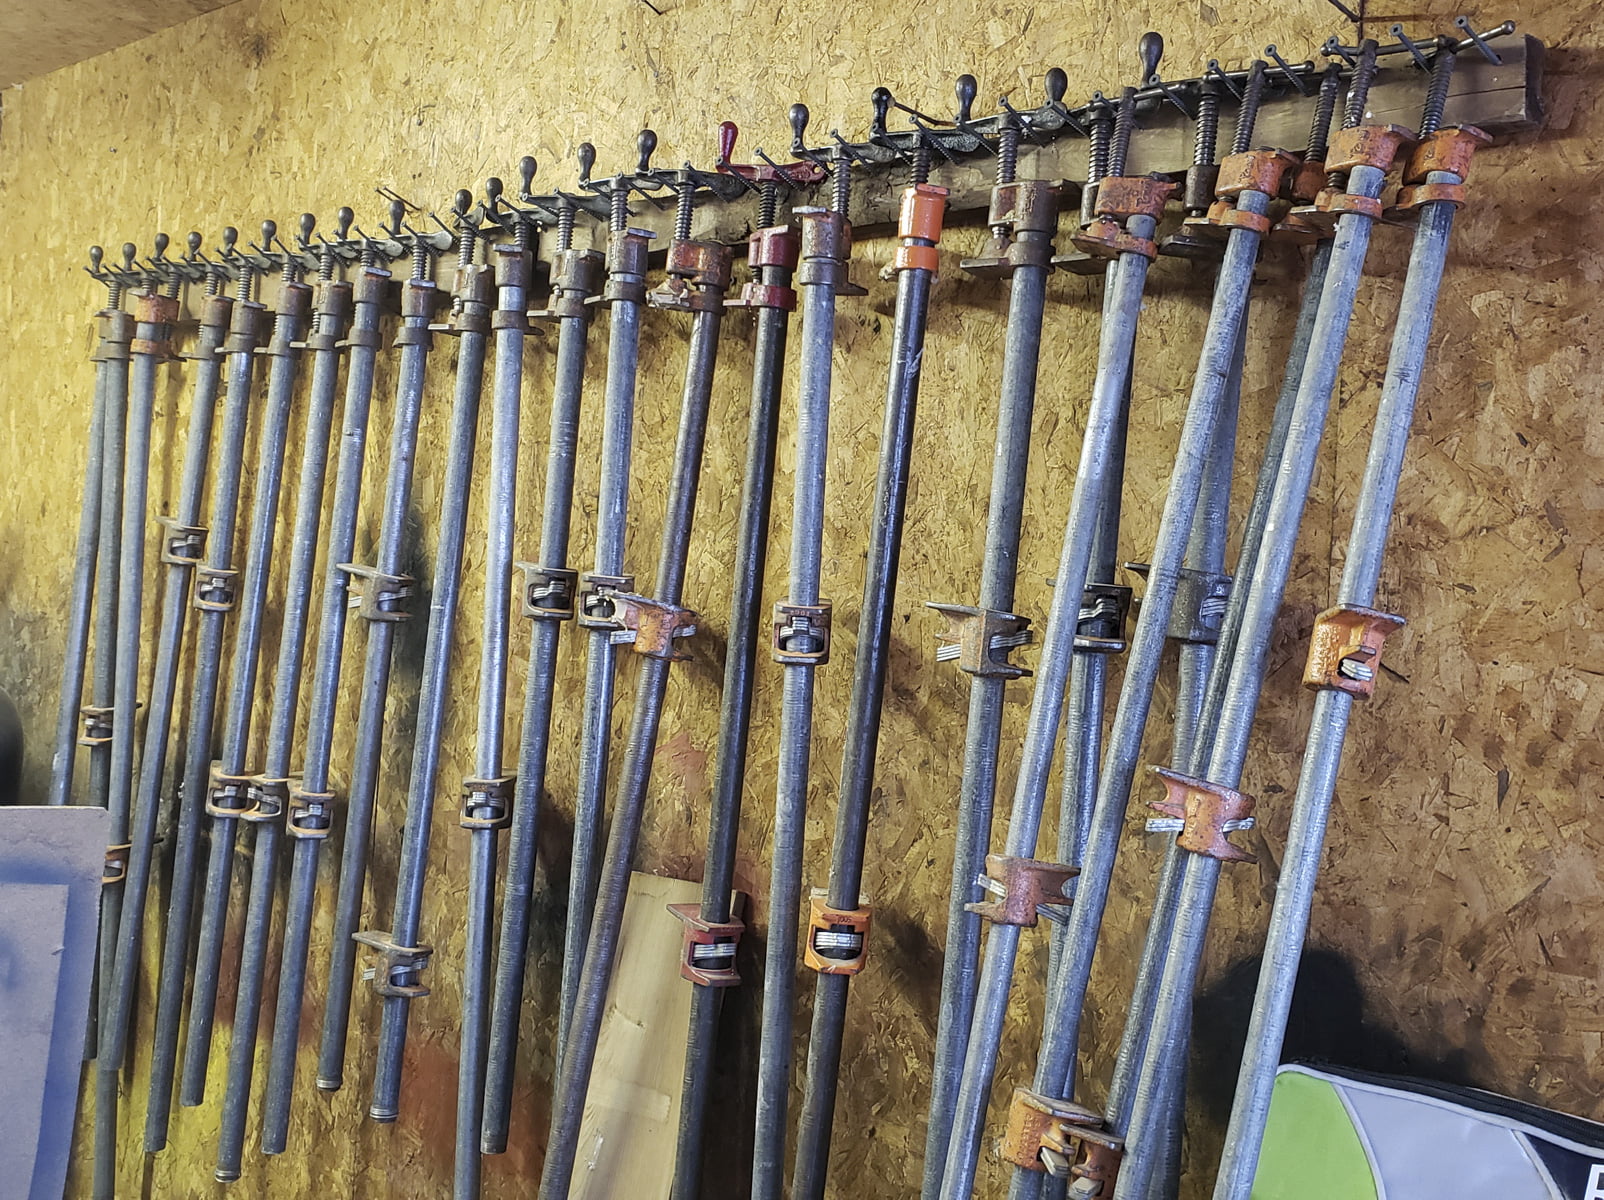
Pipe clamps
F-clamps are really great, and really inexpensive. They can reach a little deeper, allowing precise control of clamping location. Various lengths are available.
A specific type of F-clamp that I recommend are Irwin Quick Grip clamps. They open with the pull of one finger, and clamp tight by squeezing the handle. They have plastic clamping surfaces, which reduce the chance of damaging the surface. I do recommend always using a clamping board, however, to really make sure the pieces are clamped evenly and without damage.

A selection of clamps
Safety Equipment
There are several pieces of safety equipment that you should use. Here's the minimum of what you should be using:
Hearing protection - there are many types available but don't cheap out. We use a 30db earmuff style. They fit tight, and work great. You should have a second set on hand for guests, or if you misplace your primary set. For our second one we just picked out a cheap set.

Eye protection - Squinting or only keeping one eye open while cutting does not count as eye protection, sorry. Have a couple of sets of safety glasses or goggles around. Those of us that wear glasses hate the goggles, but they work. If you do a lot of woodworking or other crafts, you can consider buying a set of prescription safety glasses. They're much more comfortable and you can just leave them on the entire time you're in the shop, you won't forget to put them on when you're doing dangerous work.
Hand protection - not gloves, but tools. Use push sticks and/or push blocks to feed parts through a table saw. Don't wear leather or other thick gloves around any rotating machinery. If it gets caught, it will pull your hand in.
Lung protection - first off, you'll want a good mask. We use North Half Masks with interchangeable cartridges. For woodworking you'll want HEPA cartridges.

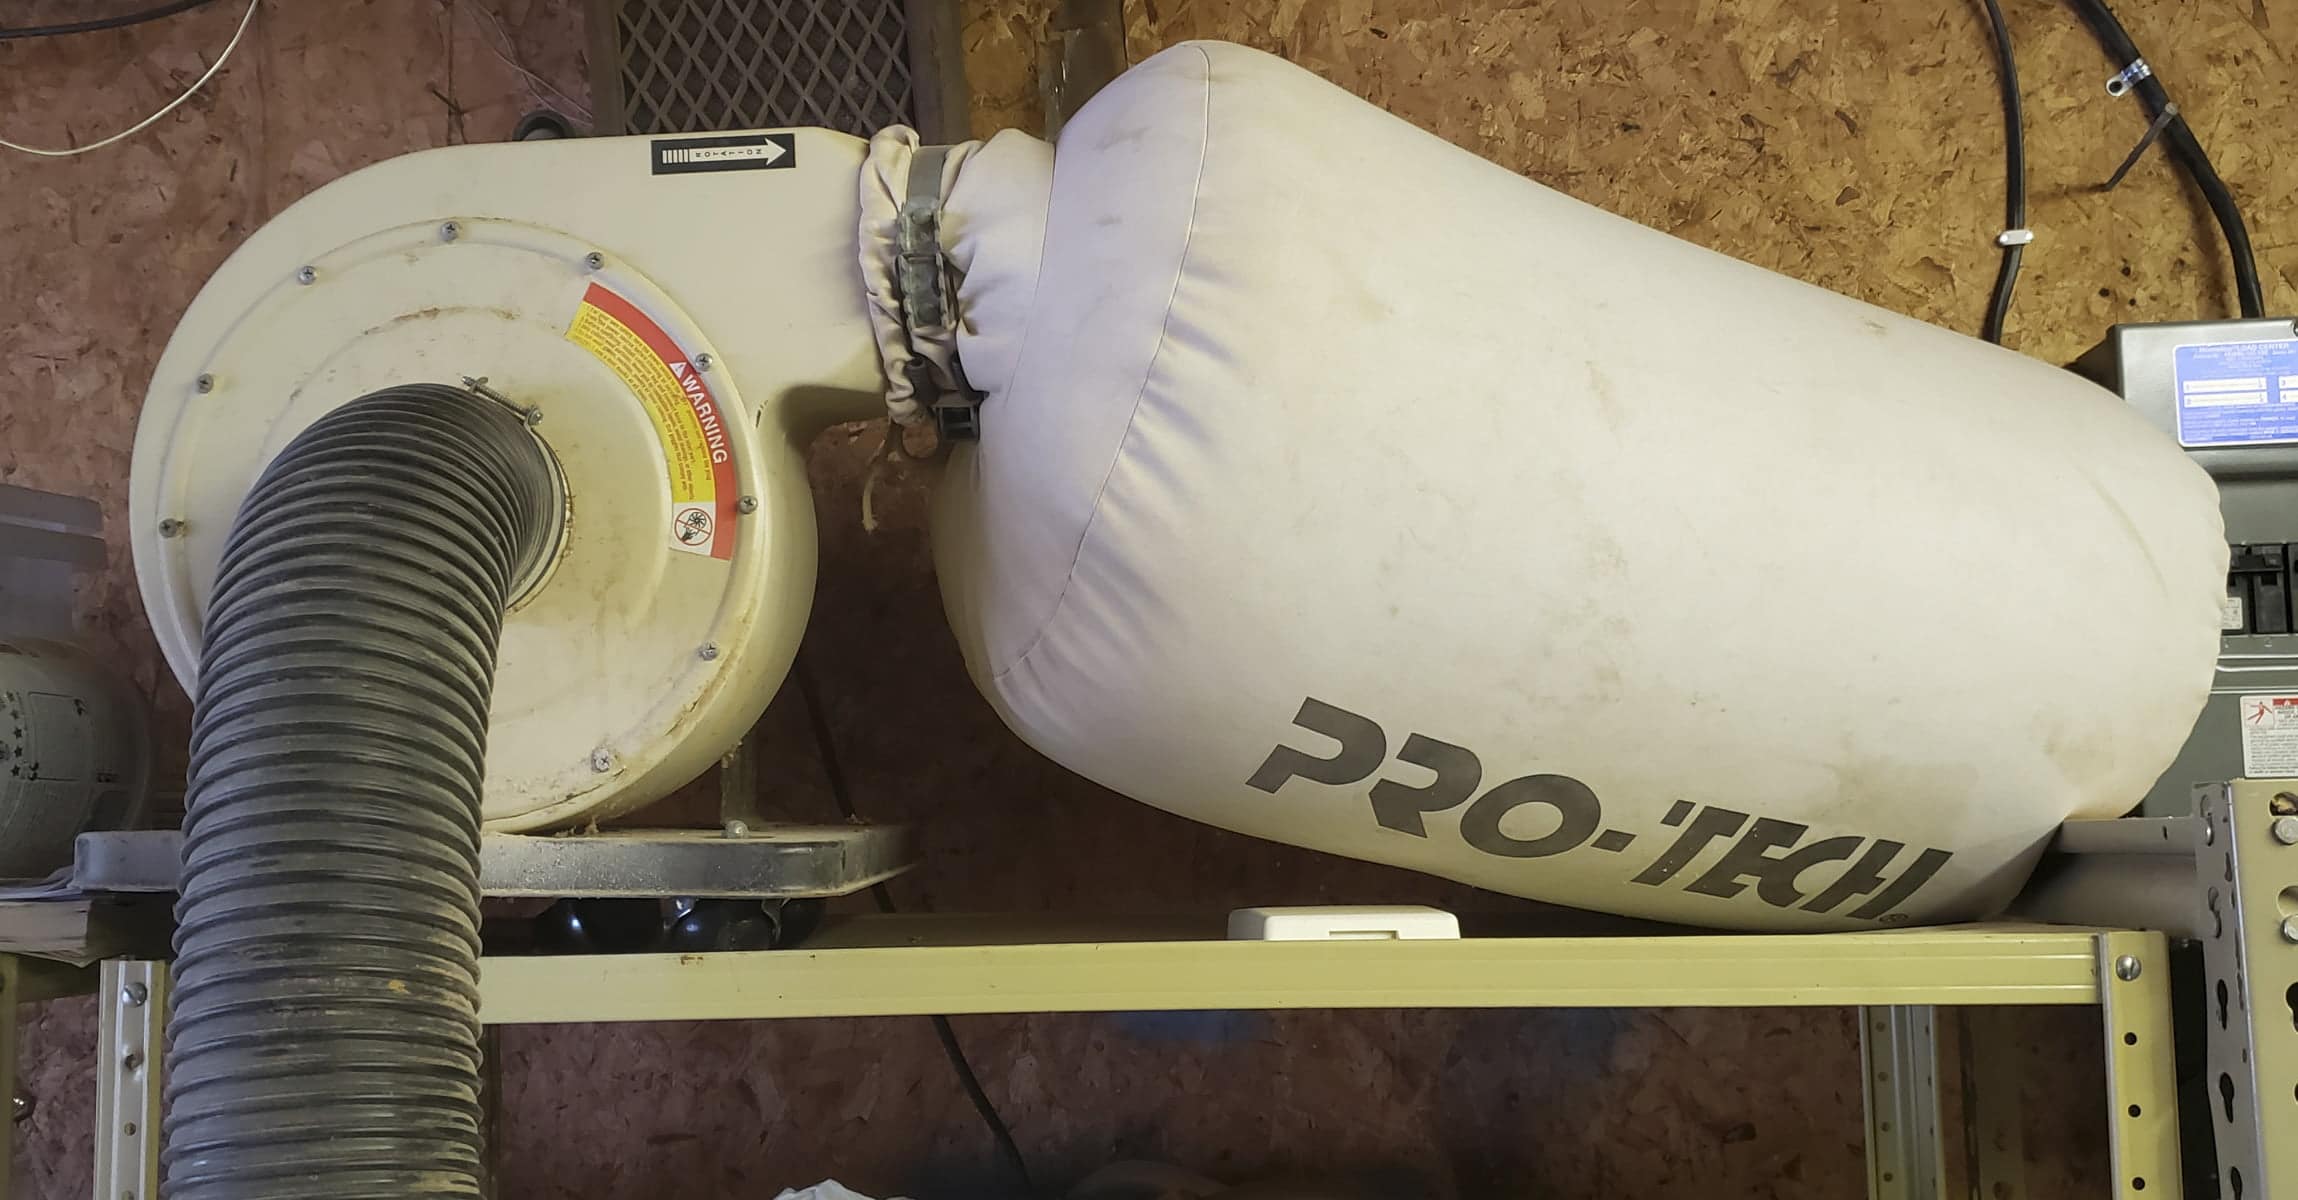
Next, consider dust collection. If your equipment has dust collection ports, you can make your shop floor and air much cleaner. A shop vac works great for a small shop, and is quite versatile. For larger equipment or multiple people working at the same time, consider a larger dust collection system.
Fire protection - have at least one fire extinguisher handy. More is better. Larger is better. Know how to use them so you're ready if ever needed.
Other tools to have on hand
Have a set of very cheap chisels on hand. They’re great for scraping off excess glue from joints, and taking down minor issues left behind from cutting.

Paper towels or rags should be handy, for wiping excess glue.
Carpenter’s pencils are great for marking pieces, to maintain the correct orientation while processing.
5-minute epoxy, craft/popsicle sticks, and disposable mixing containers (look for a pack of plastic shot glasses at the dollar store!) and ziplock baggies (to hold sawdust) will be required if you have to do any minor repairs. A heat gun or hairdryer can be helpful to apply a repair. This can be gaps in boards not discovered until after glue is dry, or wormholes naturally found in wood.

Design Considerations
Size
The size you choose is going to be highly dependent on what the intended use is.
If you’re aiming for a decorative wall hanging type of custom cutting board, you’ll want something on the smaller end.
If you’re wanting a cheese board or charcuterie style board, you’ll want to size it based on your needs for those applications. A cheese board for 2 is going to be a very different size than a charcuterie board intended for large gatherings, after all!
If you’re looking to make a custom cutting board for actual use, a good rule of thumb is that it should be big enough for your knife of choice to lay across it - diagonally - with a couple inches clearance on either end.
This is a matter of knife handling safety - cutting boards that are too small for the knife being used put the user at risk of injuries.
Thickness
Wooden cutting boards are generally between 1-2" thick.
In general, the thicker they are, the more durable - they have more surface glued together. Additionally, thicker boards are less likely to warp over time.
However, thicker also means more expensive to make... which can definitely be a consideration when you’re using a lot of fancy, exotic woods.
Grain
This is important when figuring out the amount of wood you’ll need, based on the format you can get it in.
Decorative or Light Use
For more decorative custom cutting boards - wall handing, cheese/charcuterie, or light use - you want the grain running across the surface of your board, or “edge grain”. That is, you want to see the grain, not the ends of the grain.
These look the nicest - IMHO - but are most susceptible to wear and tear from knife use.
Heavy Duty
If you’re making something intended to be more hardcore - heavy use, pro chefs, etc - you’ll want to consider using the end of the grain as your surface - AKA a “Butcher’s Block”, rather than a “cutting board”.
When the end of the grain is making up the cutting surface of a cutting board, it acts almost self-healing. Rather than cutting across a grain - and damaging it over time - you’re cutting across many ends of wood grain. Damage doesn’t happen - or show up - as easily in this case.
Because end grain projects require gluing together a LOT more pieces than edge grain ones, they’re a lot more labour intensive to make... and expensive to purchase.

Shape
While you can do cutting boards in any shape, squares and rectangles are the most popular, for a few reasons.
- Ease in cutting and assembling
- Ease in sanding
- Ease in drying and storage
If you’re designing your board to be a shape other than rectangular, I recommend incorporating a handle or hole in one end for a hook / etc for storage.
Juice Groove?
If you’re designing a board that will actually be used for cutting, decide if you want a juice groove.
This is a trench that is routered around the perimeter of a cutting board, to catch any juice runoff from what you’re cutting.
It’s an especially nice feature if you’re cutting meat or really juicy fruits - saves a lot of mess!

A small cutting board with a juice groove
Care of Your Custom Homemade Cutting Board
ALWAYS wash your homemade cutting board soon after use, and wash it by hand. Period. No questions.
These are NOT dishwasher safe, and you really shouldn’t soak them for long periods of time, either.
Different woods absorb water at different rates, and dishwashers and soaking can cause warping and permanent damage.
Once you’ve washed your homemade cutting board, allow it to dry upright - this will prevent any moisture from pooling on the surface and staining it.
If you’ve used one of the oils that requires upkeep after washing, be sure to follow the regimen recommended for your particular choice of finishing.
Also, a word of advice: butcher blocks dry out faster than edge grain cutting boards, and require oil more frequently.
WHEW! That was a ton of information!
Stay tuned for those tutorials!


jc culver
i wish i could find the book . if you could sell me the book so i could learn how to make it my self.
Marie Porter
... what book?