

If you're looking for a unique gift to make, check out this Mini Liquor Bottle Alcohol Bouquet Tutorial! Easily dress up mini liquor bottles, for a fun gift!
Originally Posted February 7, 2012. Updated 1/31/2024

We don't really have any need for the traditional V Day gifts (and I am SO not a jewelry person!), it ends up feeling pretty contrived, so we usually just hang out and chill.
Of course, external pressures usually have us checking in with each other every year, with "do you WANT to do anything...?
It always feels like we *should*.
This year, we decided that we'll be brewing a small batch of a red, "Valentine's Day" wine or mead.
I think we're leaning towards a sweet raspberry mead. Anyway, I digress...

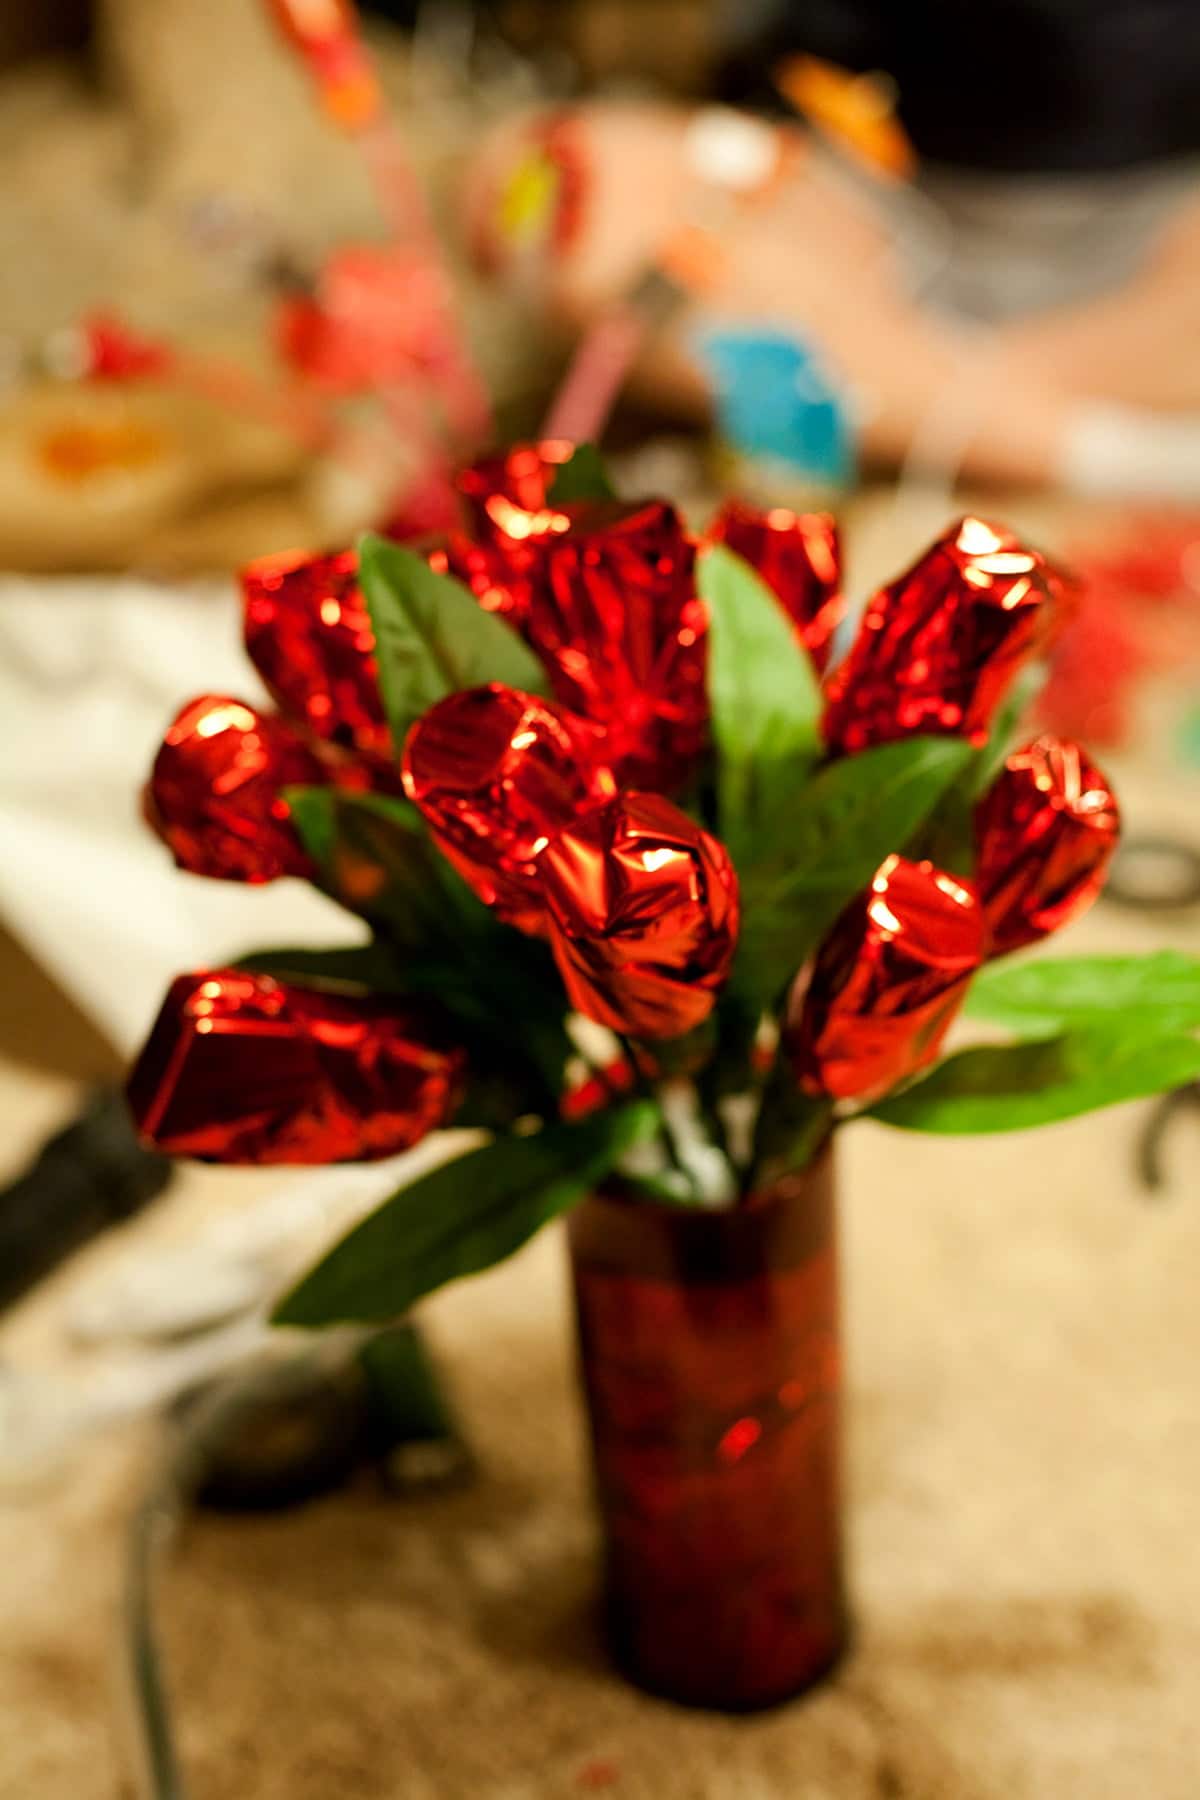
Mini Liquor Bottle Roses!
Last night we were eating dinner and discussing the various funny stuff we'd seen on the net, when I mentioned a booze bouquet I'd seen on Pinterest.
The person had affixed mini booze bottles onto sticks, and made a little bouquet of it.
It was the perfect gift for the right kind of person - A step away from fresh flower bouquets, and much cuter than those mass produced liquor gift baskets with like... white wine and crackers in them.
As we'd recently been reminiscing on how much fun we'd had doing V-day ceramic mugs for each other a few years back, the idea of making alcohol bouquets for each other came up.
These booze bouquets made the BEST gifts - for the right people.
While not for everyone - and I hope you’d know the person you were making it for! - these booze bouquets are a great special occasion gift.
Even beyond Valentine’s Day gifts, they can work as a birthday, Mother’s Day, or hostess gift.

Buying Supplies for Making a Booze Bouquet
We headed to a craft supply store to pick up all kind of crazy Valentine's Day craft stuff on clearance.
Neither one of us really knew what we were planning to do as we poured over ever manner of red, pink, and sparkly V Day nonsense, discussing ideas, and ultimately purchasing our respective supplies.
After that, we went to our favorite liquor store, and each bought a dozen mini bottles for each other, each not letting the other see the surprise selections.
Neither of us could WAIT to get home and dig into the craft supplies, and seeing what we could come up with.
We had a blast.
Weird crafty projects with my husband are always a ton of fun (Pi Day Pi-natas, Chocolate Zombie Easter Bunnies, and epic Pysanky using Crayons, for instance!).
Also? Men + Booze + Craft supplies are a pretty epic combination. Just WAIT til you see what he came up with!
How to Make a Mini Liquor Bottle Bouquet
First, a quick tutorial on making boozy "roses". I knew all that floral design background would be useful someday! 😀
What you need:
12 or so mini bottles of liquor
Sheets of Mylar, foil, or cellophane, in the color(s) of your choice.
Thick floral wire - 18 gauge or thicker (ie: 16 or smaller for the number)
A container for the "vase" (A flower pot would work!)
Weight for the container (We used rocks)
Piece of styrofoam that will fit snugly in the container. (Buy it too big if necessary, cut it down)
Random "stuff" to decorate with - ribbons, decorative wire, pipe cleaners, stickers, faux flowers, other accessories
Hot glue gun (Optional)
Make Your Booze Bottle Roses
Note: There’s a video clip in the recipe card at the end of this post, showing a rose being made
Cut Mylar, foil, or cellophane into rectangles that are about 3x the height of the bottles, and about 2 "bottle-heights" wide.
Place a bottle in the middle of a sheet, with the nicer side of the sheet facing down.
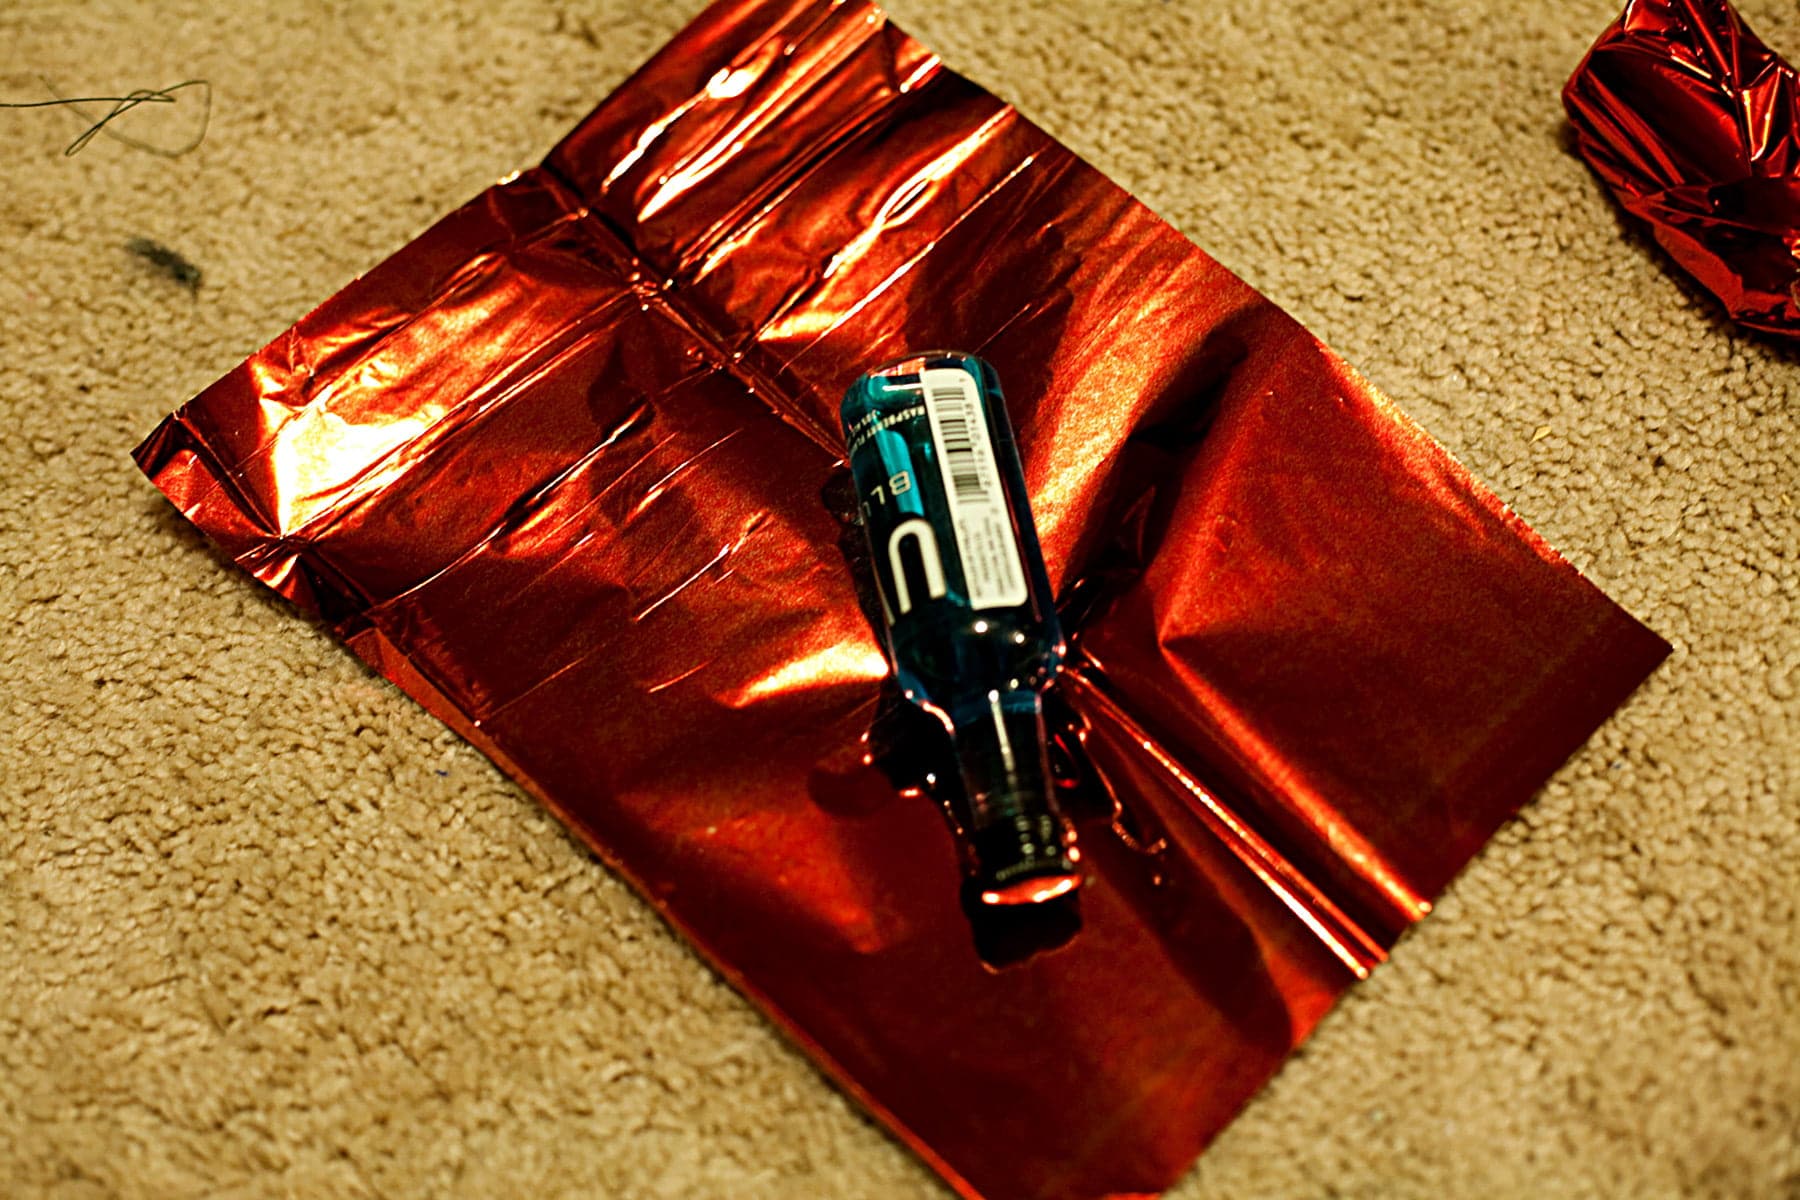
Fold about half of the sheet over the bottle, so that it's fairy snug across the bottom of the bottle (top of the "rose")
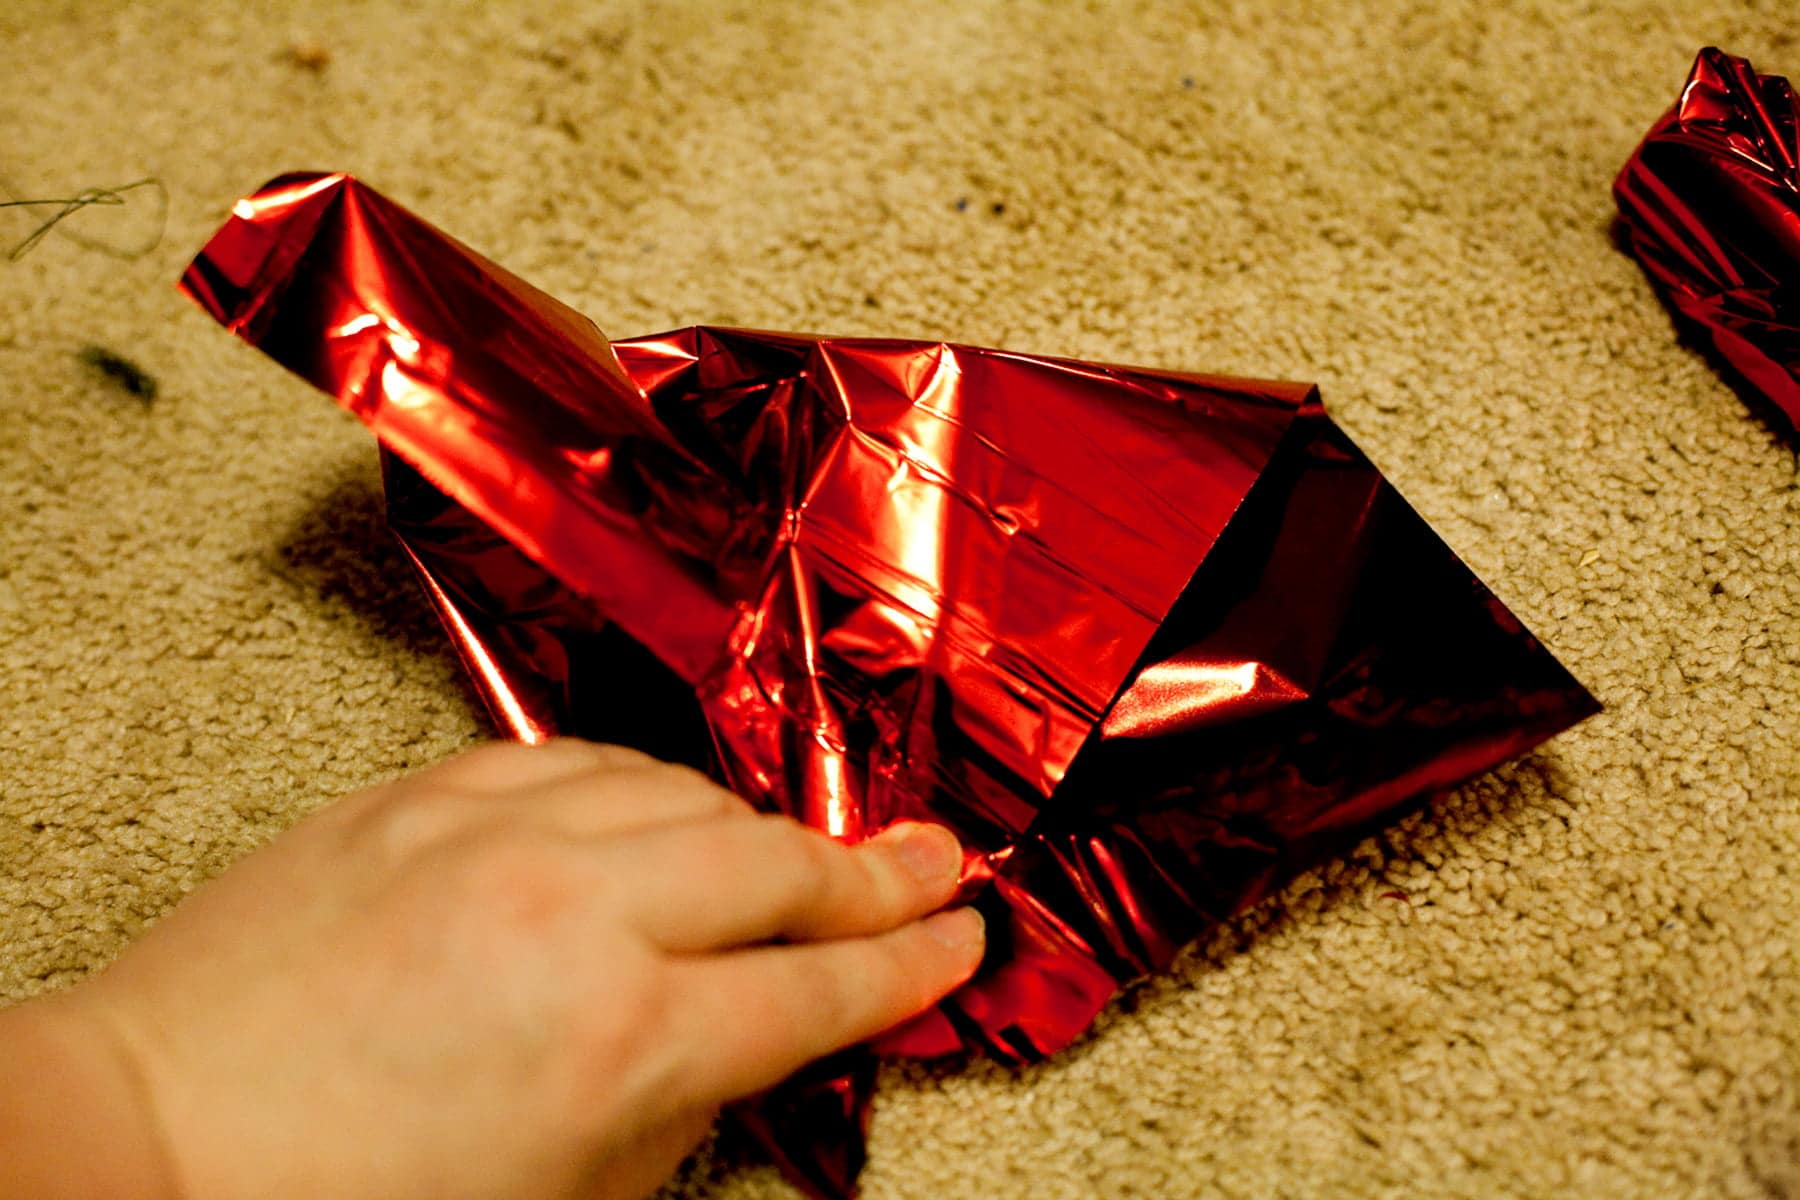
I took the top fold of the sheet and folded it straight down against the bottle, then wrapped the new flap edge forward - kind of like wrapping a present.
Repeat on the other side, crossing the new flap in front of the first flap.

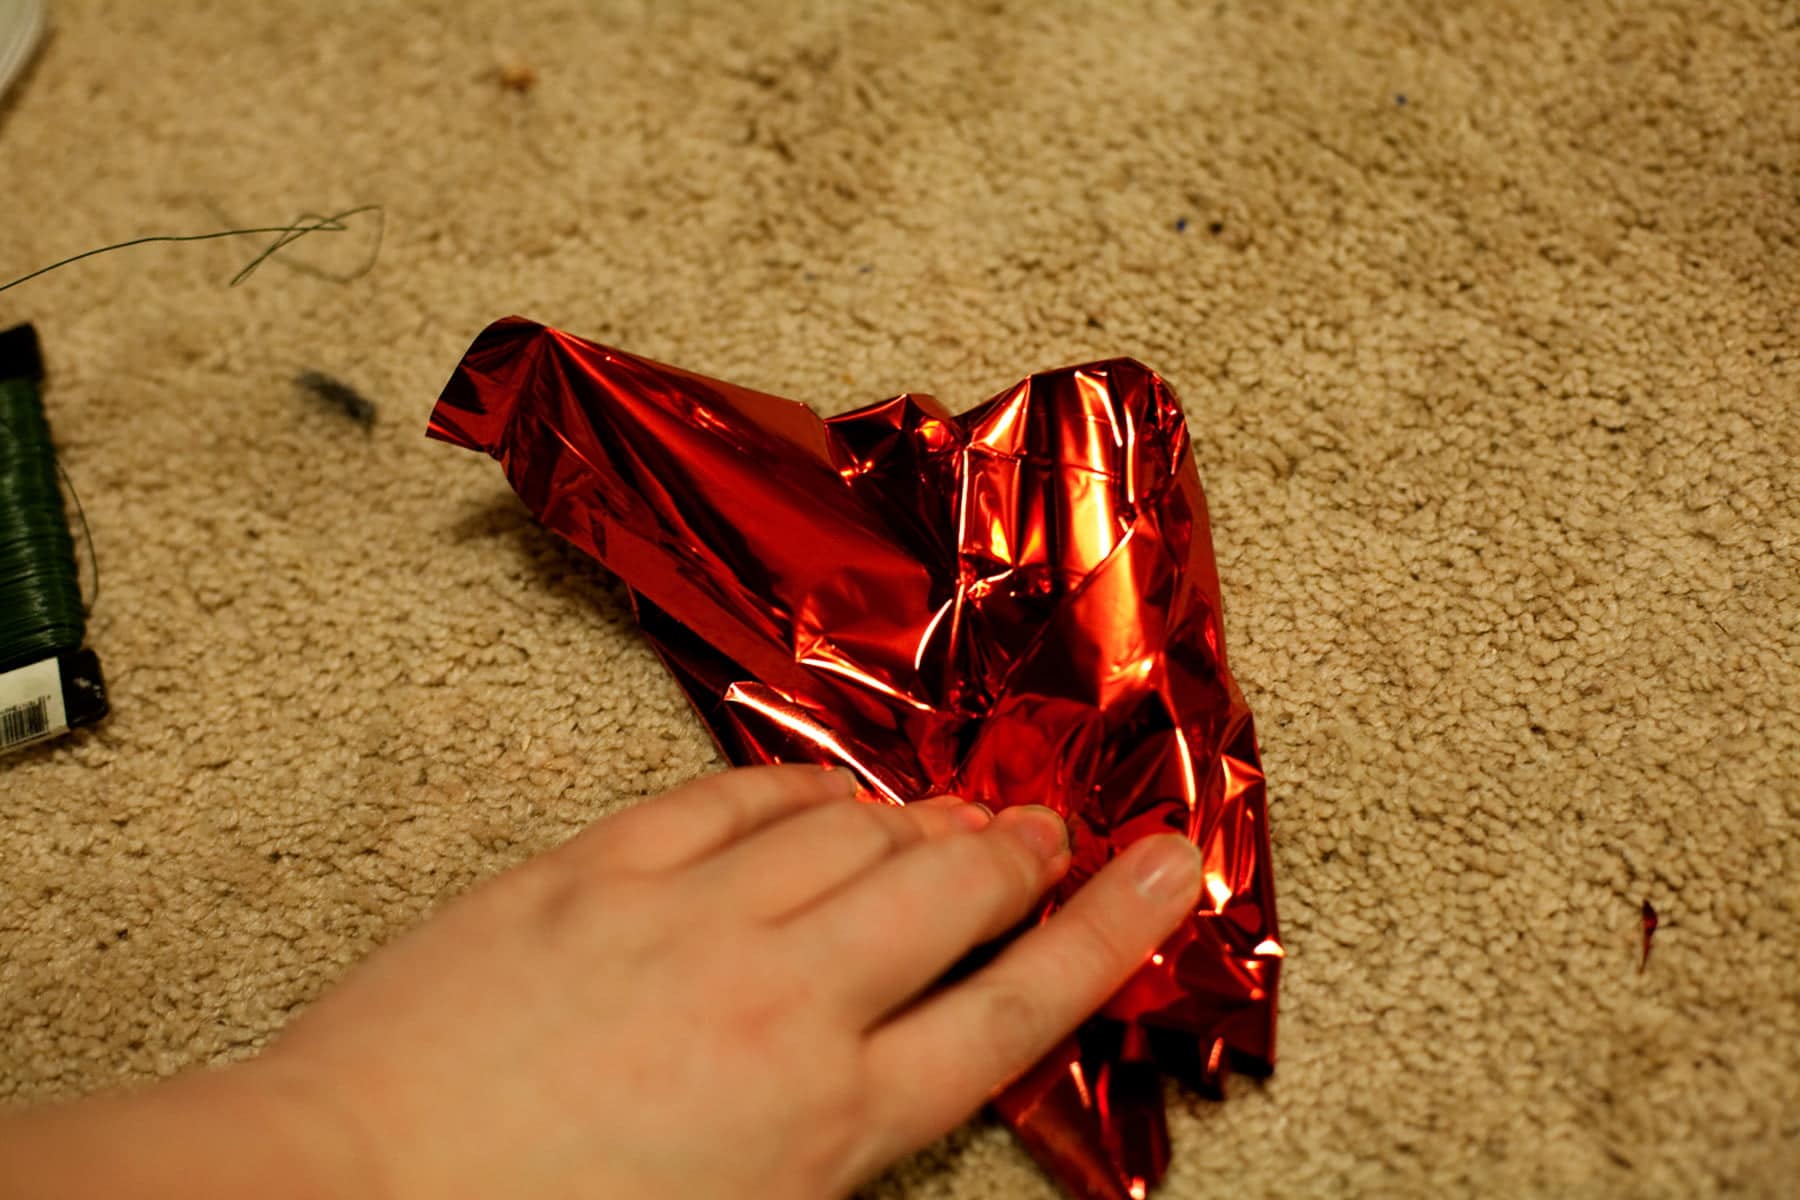
Gather the loose ends and edges around the neck of the bottle, secure with a small strip of clear tape.

Wrap the two ends of the wire around the neck of the bottle, so they're on the opposite side from the twist in the wire. This is the best way to give it a bit of extra stability.
Bend "downwards" - away from the bottle.

The tape should overlap itself a small amount at each pass, and should completely cover the exposed wire.

Continue wrapping the floral tape tightly around the two wire ends - securing them together - all the way to the end of the "stem".
Repeat with all of your bottles.

Arrange Your Mini Booze Bottle Roses
Weigh the "vase" container down - we used rocks - and secure styrofoam into the top of the container - it should fit snuggly and NOT move around.
If your vase is clear like mine was, you may want to hide the styrofoam - I used silk leaves wrapped around the inside of the vase, moss would also work.
If you want to add silk leaves to your "roses", use floral tape to attach them to individual stems.
Bend both ends of the wire down and away from the leaf, then wrap with floral wire.
Starting with your heaviest bottles in the middle, stick your stems into the foam. Make sure to jam them in far enough to be stable.
Note: if anything is too heavy for your wire, use the green floral tape to secure it to a wooden skewer, from the bottle neck down the full length of the wire
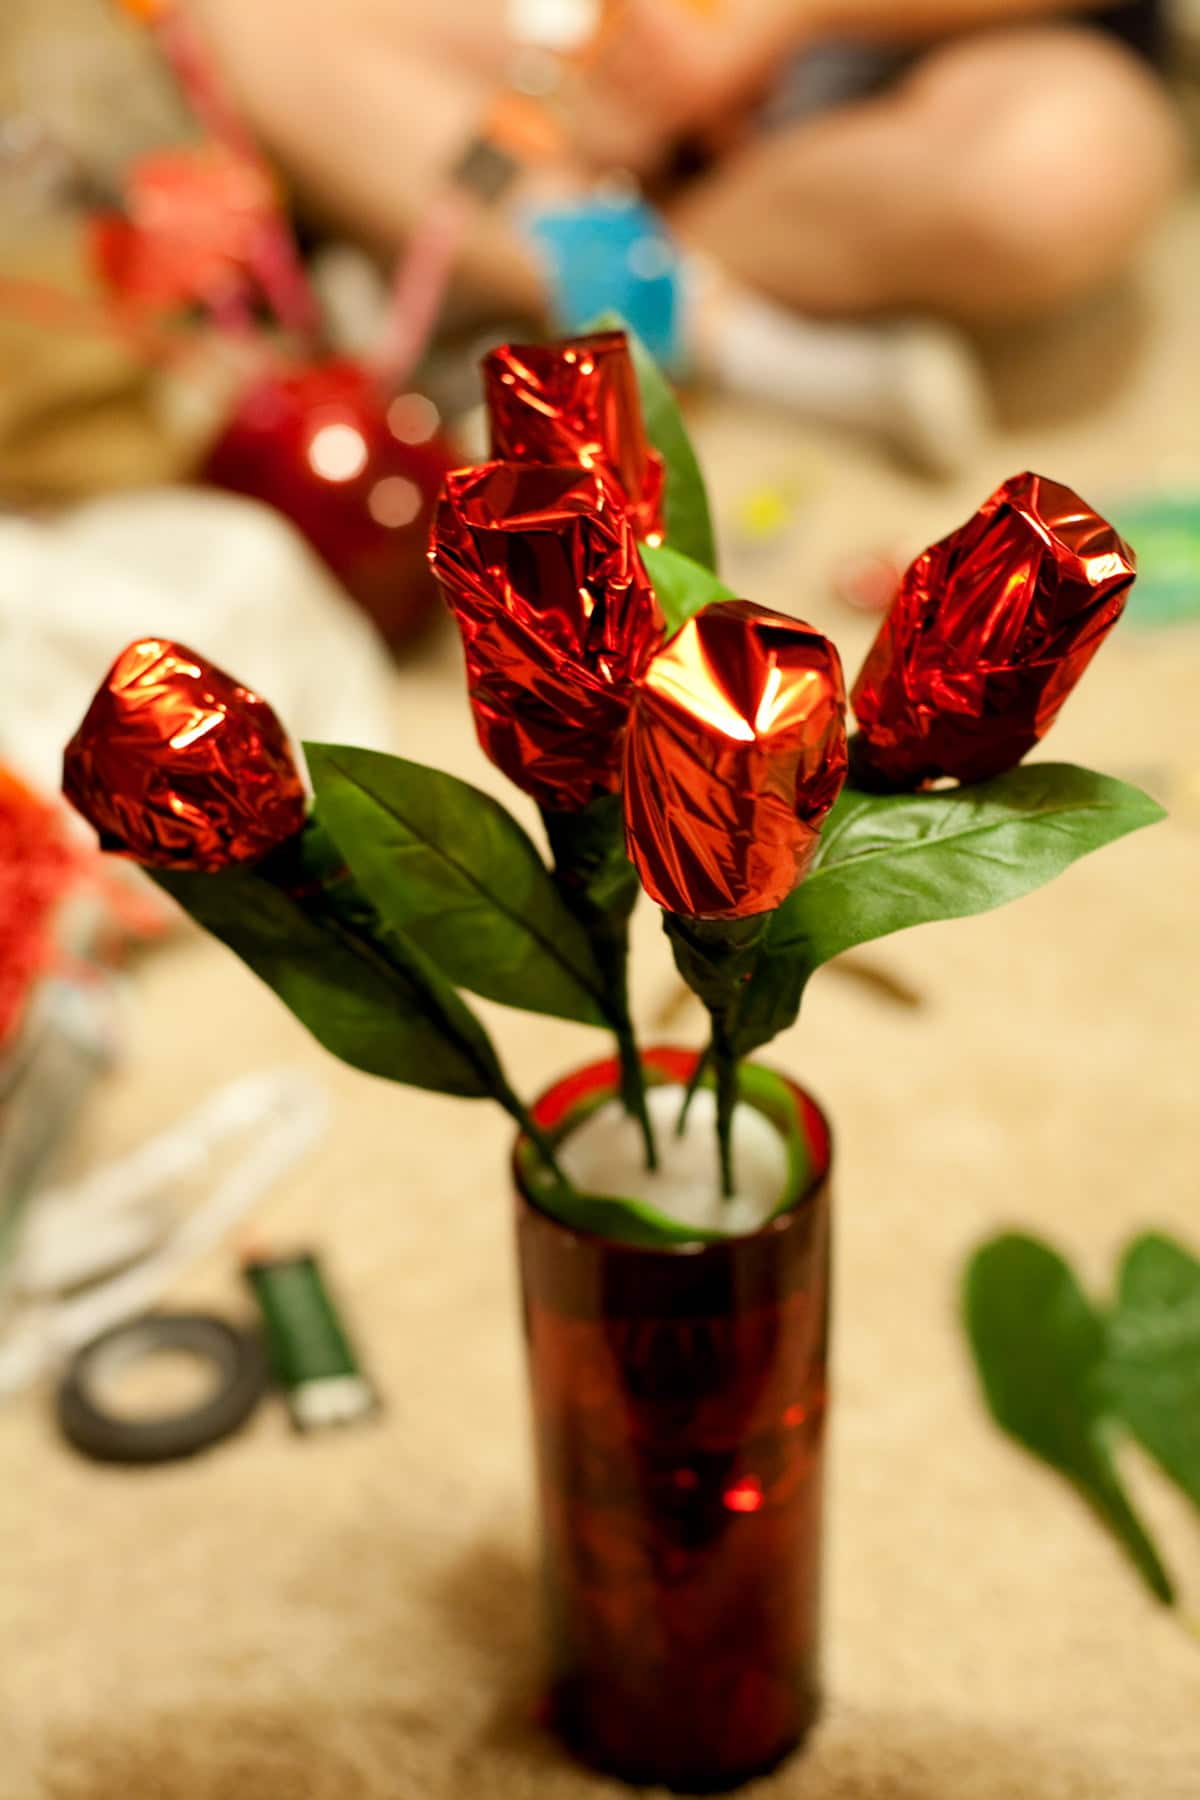
Once all of your "roses" are in place, add other items - starting with the largest/bulkiest, and working your way down to the most delicate.
For me, I added wired leaves and then some decorative wire loops.
Be sure to take some photos of your handiwork (and send them to us!) before giving your bouquet away!

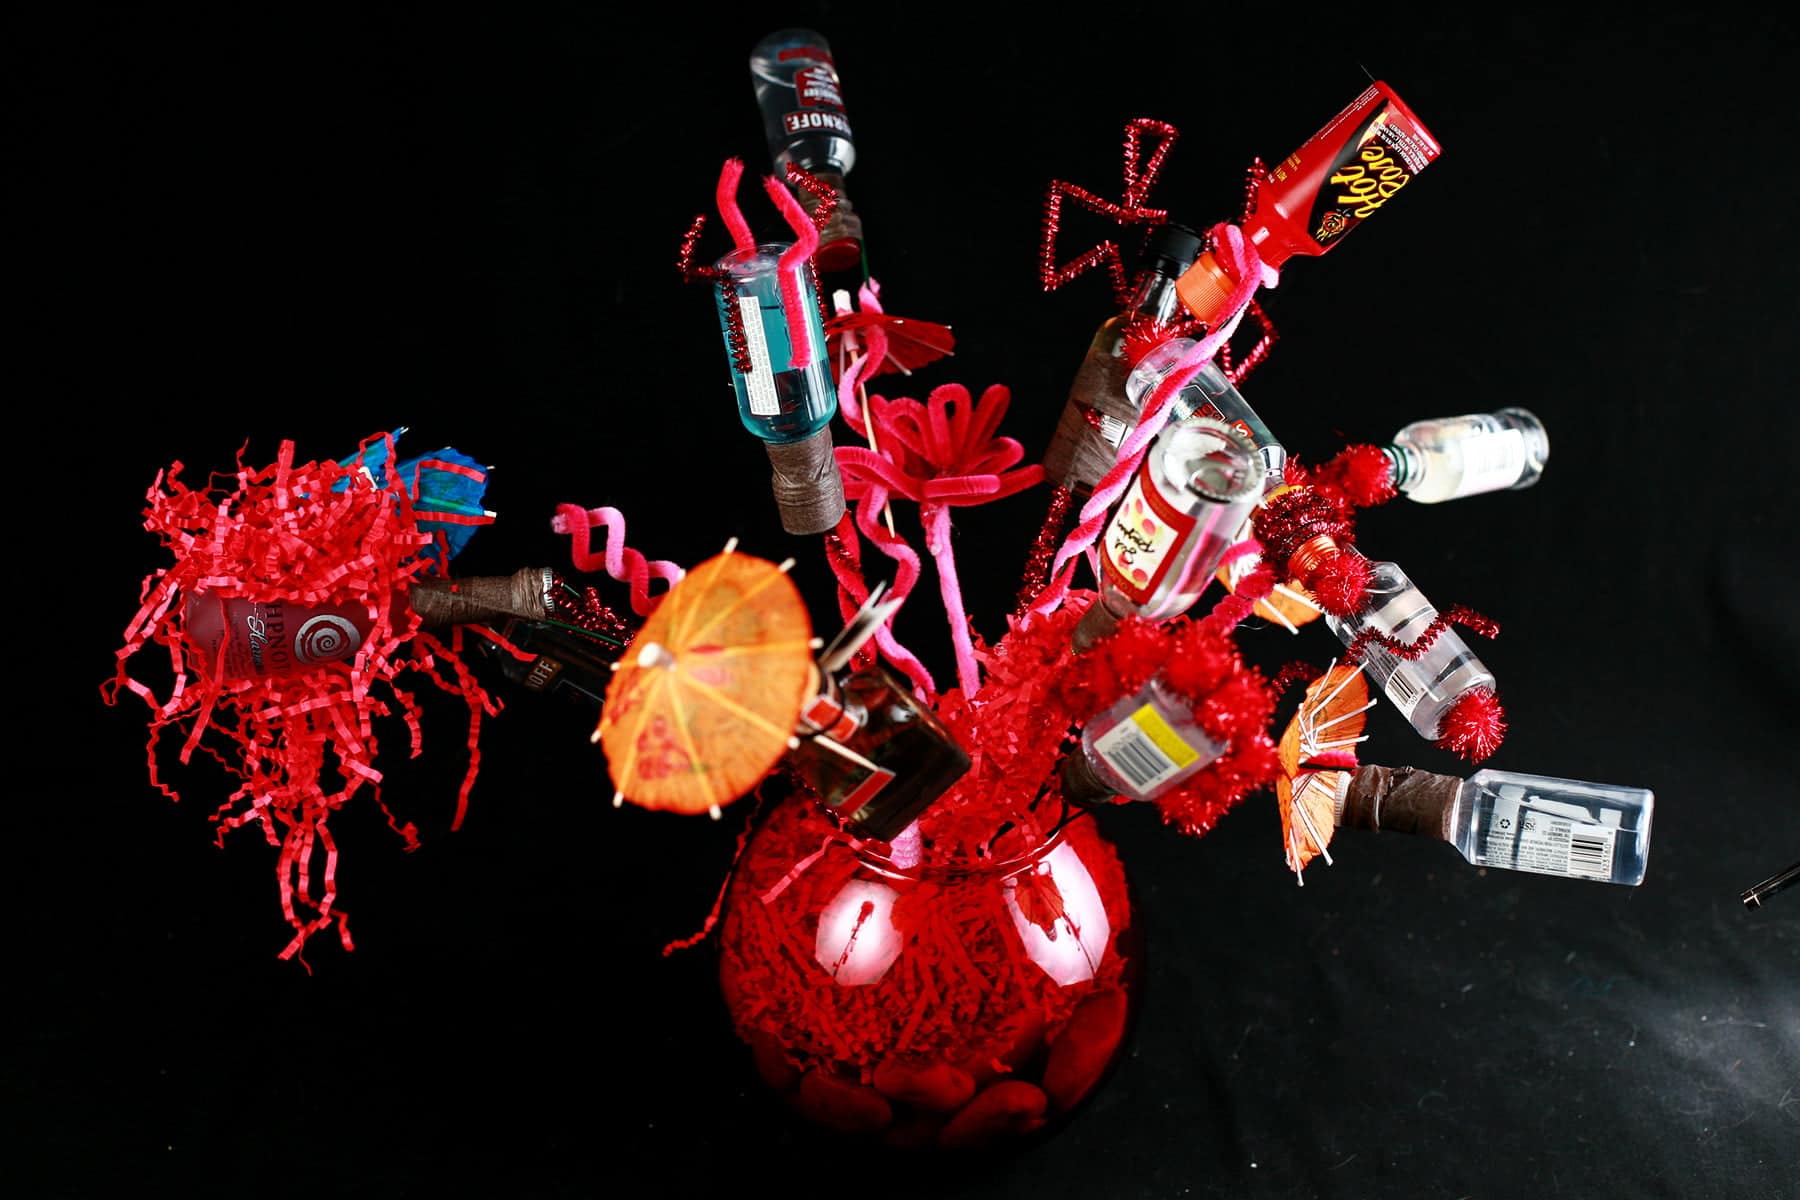
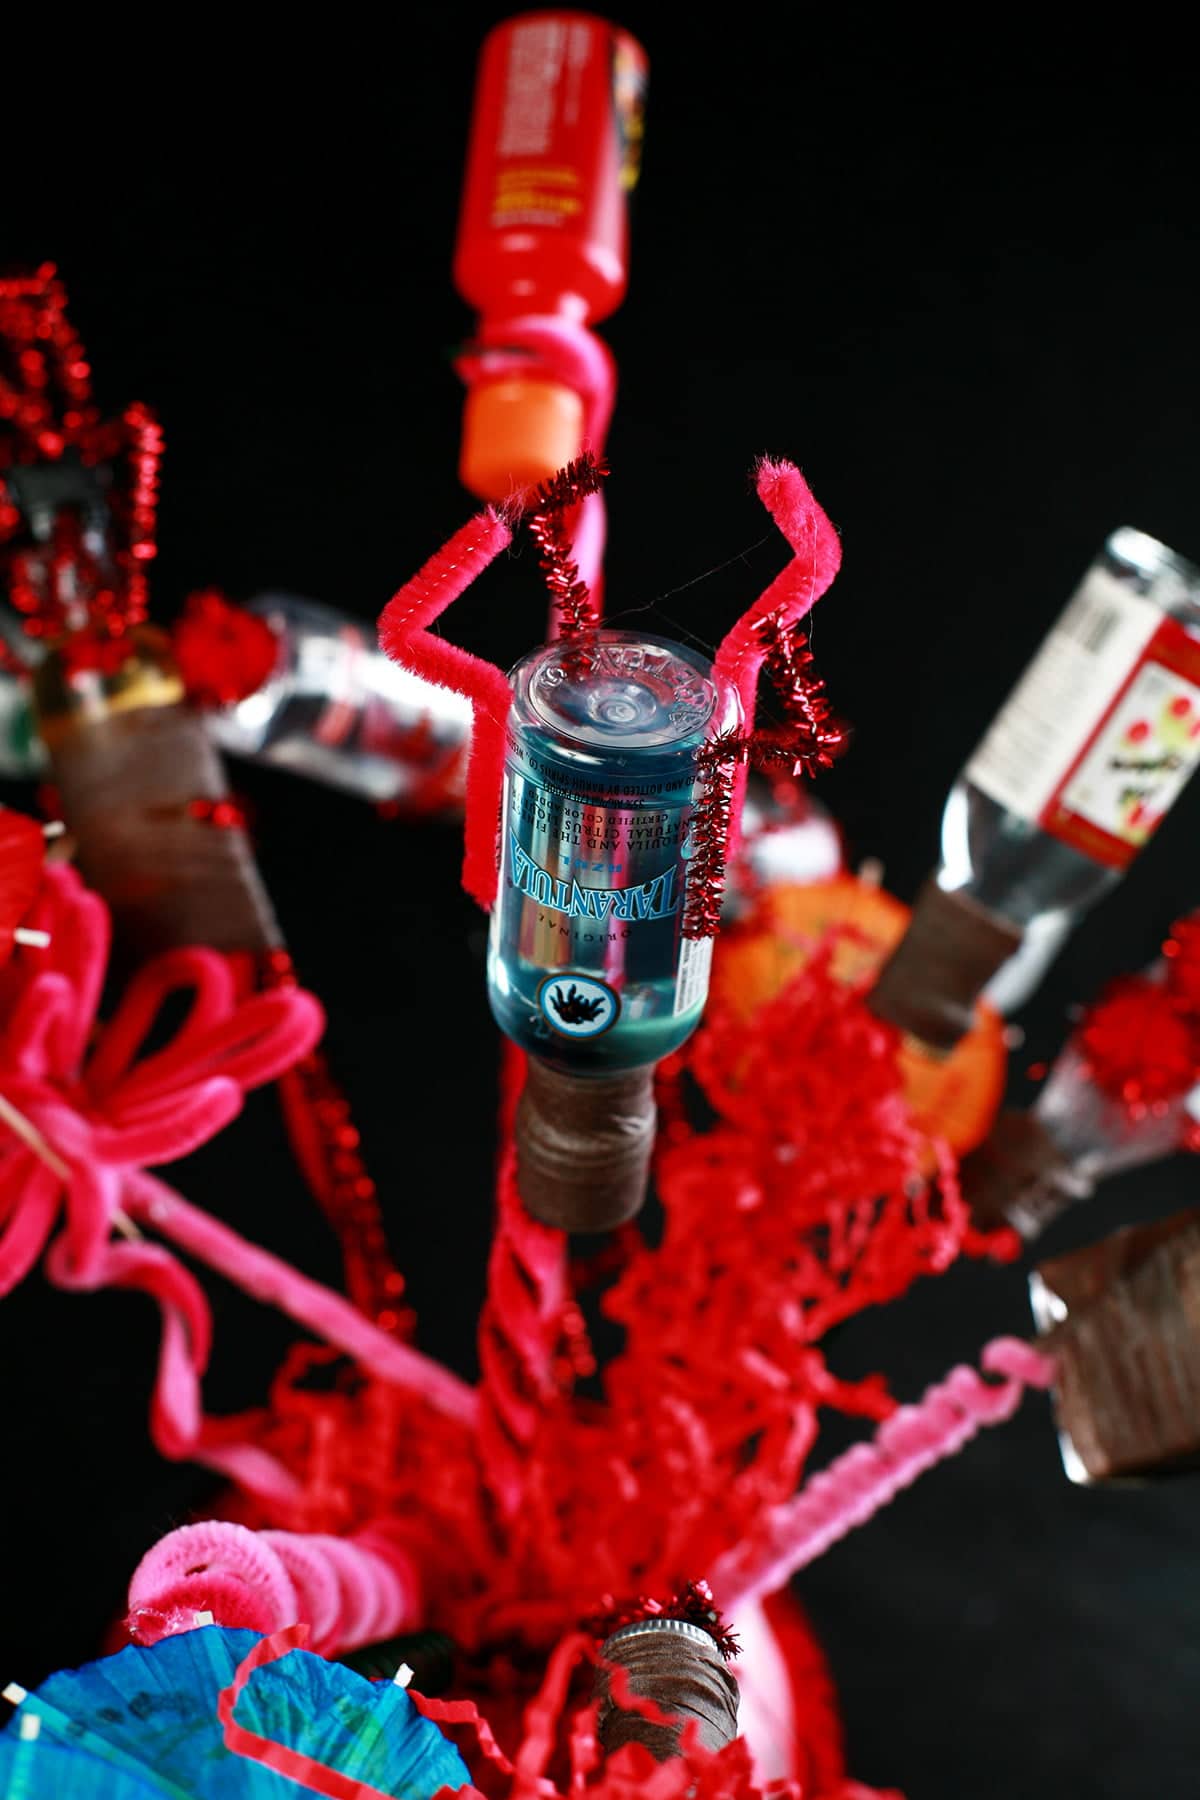
...Or Just Go Wild with your Liquor Bouquet!
Of course, if going all "floral designer" with it isn't quite your speed, you can always decorate the bottles themselves, and get REALLY creative with it... like my husband did:
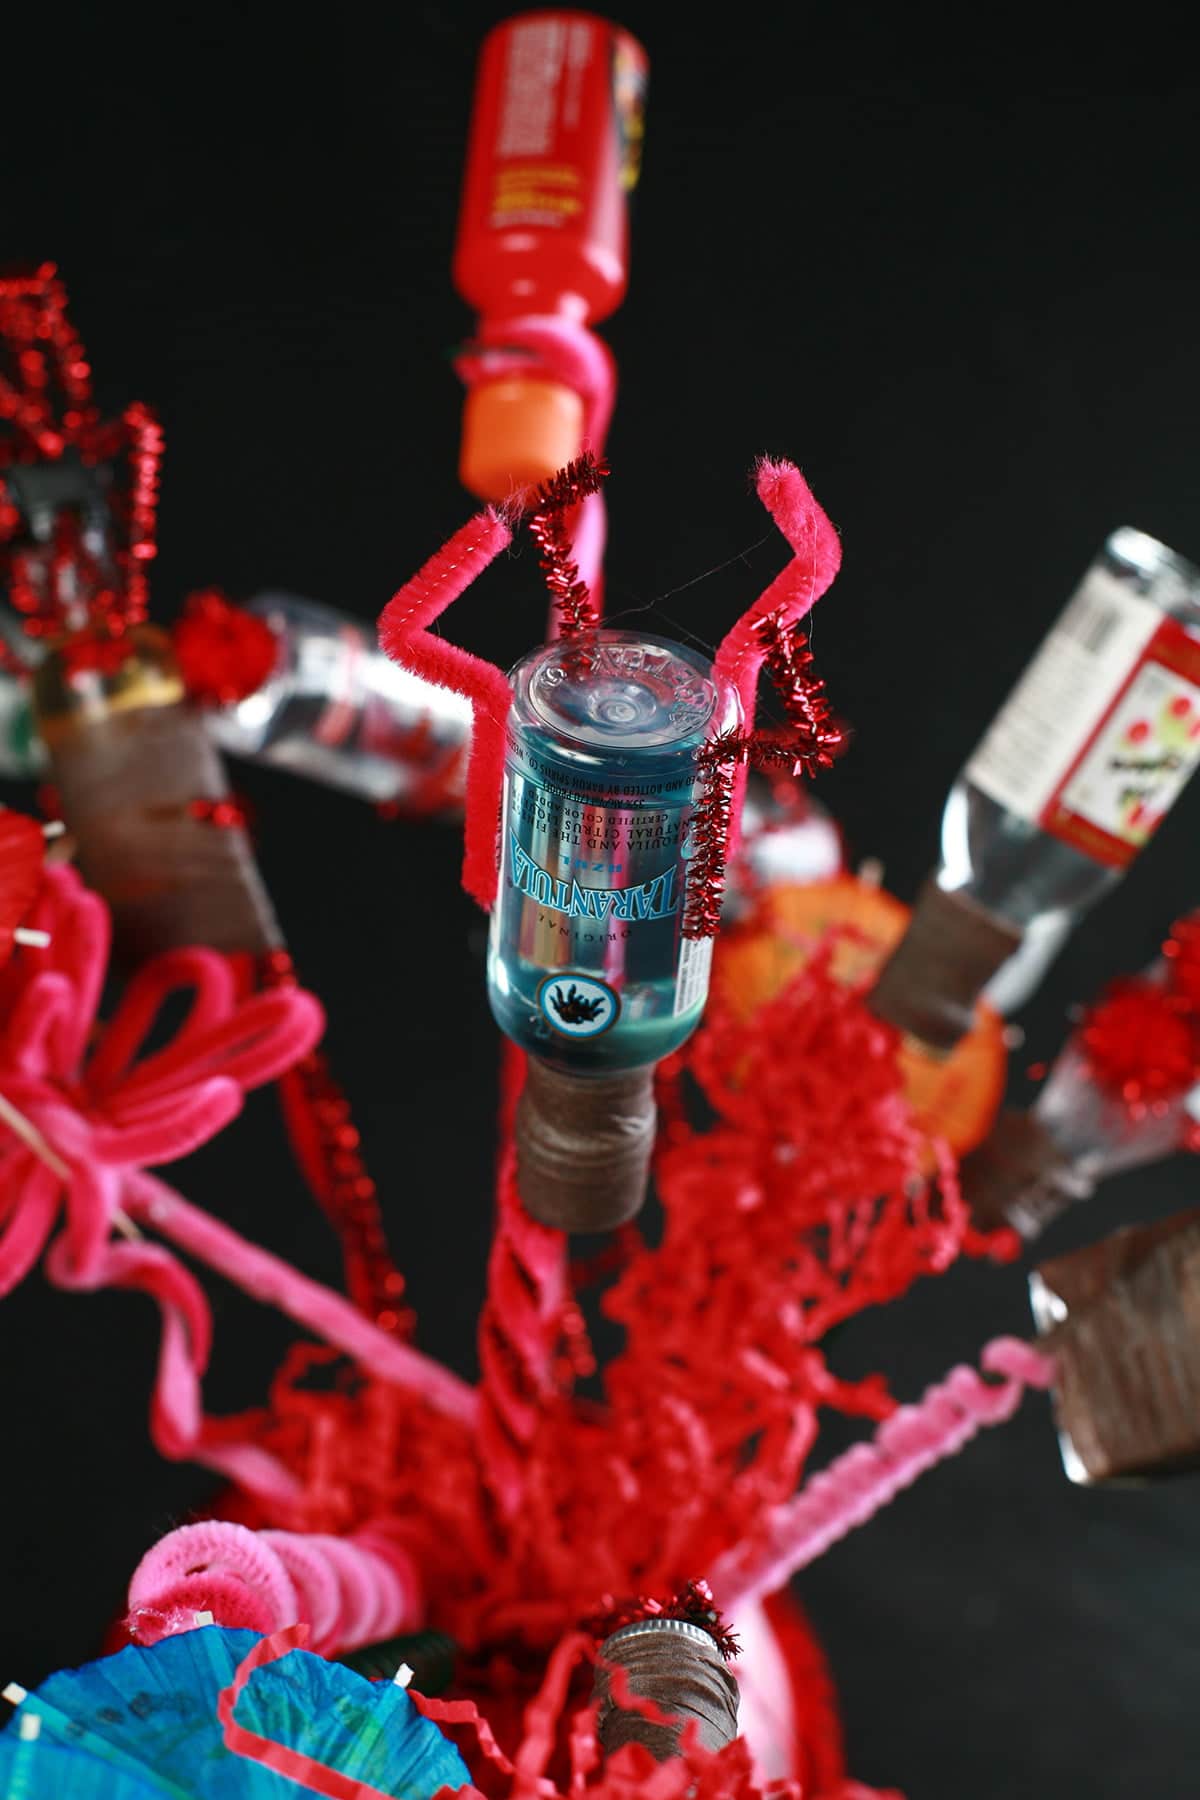
Yes, those are spider "legs" on the bottle of Tarantula tequila! Here are some other views:

As you can see, we had a blast shopping for - and then making - our boozy bouquet gifts for each other. Hope you have as much fun as we did!
More Valentine's Day Ideas
Looking to do something a bit different for Valentine's Day? Here are a few ideas!
6 Inch Cheesecake
Baklava Cheesecake
Balsamic Mushroom Baked Brie
Booze Bouquet Tutorial
Chocolate Leaves Cake Tutorial
Chocolate Raspberry Pavlova
Chocolate Ravioli
Dark Chocolate Truffles
Deviled Strawberries
Heart Shaped Beer Pretzels with Jalapeno Jack Dip
Heart Shaped Pavlova
Mini Eclairs
Mushroom Goat Cheese Braid
Pepper Crusted Tuna with Wasabi Cream Sauce
Phyllo Crab Triangles
Pink Heart Shaped Bagels
Red Velvet Bagels
Red Velvet Brownies
Savory Tomato Shortcake
Traditional Raspberry Mousse
Valentine's Day Charcuterie Board
Special Diet Treats
Need it gluten free* or low carb? Check out these Valentine's Day recipes on my other blogs:
Gluten-Free Crab Cakes
Keto Raspberry Truffle Tart
Gluten Free Crepes
Keto Chocolate Truffles
Gluten-Free Fried Brie
Keto Chocolate Truffles
Heart Fruit Skewers with Raspberry Cheesecake Dip
Keto Creme Brulee
Low Carb Chocolate Mousse
Keto Crab Cakes
Low Carb Tiramisu
Keto Cheesecake
Keto Red Velvet Cookies
Keto Chocolate Thumbprint Cookies
Seafood Cobb Salad
Keto Raspberry Truffle Tart
Gluten Free Red Velvet Chocolate Chip Cookies
* Some of the recipes in the first link section are inherently gluten free, too!
Share the Love!
Before you chow down, be sure to take some pics of your handiwork! If you post it to Bluesky, be sure to tag us - @CelebrationGen. We're also on Pinterest, so you can save all your favourite recipes to a board!
Also, be sure to subscribe to my free monthly email newsletter, so you never miss out on any of my nonsense. Well, the published nonsense, anyway!
Finally, if you love this recipe, please consider leaving a star rating and/or a comment below, and maybe even sharing this post on social media!

Alcohol Bouquet Tutorial [Mini Liquor Bottle Roses]
Equipment
- Scissors
- Wire Cutters
Ingredients
- 12 Mini bottles of liquor
- Sheets of mylar, foil, or cellophane, in the color(s) of your choice
- Clear tape
- Thick floral wire - 18 guage or thicker.
- Green floral tape
- Container for "vase"
- Weight for the container We used rocks
- Piece Styrofoam that will fit snugly in the container. Buy it too big if necessary, cut it down
- Random "stuff" to decorate with Ribbons, decorative wire, pipe cleaners, stickers, other accessories
Instructions
- Cut Mylar, foil, or cellophane into rectangles that are about 3x the height of the bottles, and about 2 "bottle-heights" wide.
- Place a bottle in the middle of a sheet, with the nicer side of the sheet facing down.
- Fold about half of the sheet over the bottle, so that it's fairy snug across the bottom of the bottle (top of the "rose")
- Wrap one side around the front of the bottle. I took the top fold of the sheet and folded it straight down against the bottle, then wrapped the new flap edge forward - kind of like wrapping a present.
- Repeat on the other side, crossing the new flap in front of the first flap.
- Gather the loose ends and edges around the neck of the bottle, secure with a small strip of clear tape.
- Bend a length of floral wire around the neck of the bottle, twisting once or twice to secure it tightly against it.
- Wrap the two ends of the wire around the neck of the bottle, so they're on the opposite side from the twist in the wire. Bend "downwards" - away from the bottle.
- Starting slightly above the wire twist, start wrapping floral tape tightly around the neck of the bottle. Tape should overlap itself a small amount at each pass, and should completely cover the exposed wire.
- Continue wrapping the floral tape tightly around the two wire ends - securing them together - all the way to the end of the "stem".
- Repeat with all of your bottles.
- Weigh the "vase" container down - we used rocks - and secure styrofoam into the top of the container - it should fit snuggly and NOT move around.
- If your vase is clear like mine was, you may want to hide the styrofoam - I used silk leaves wrapped around the inside of the vase, moss would also work.
- If you want to add silk leaves to your "roses", use floral tape to attach them to individual stems.
- For loose leaf stems, pierce a silk leaf with a piece of floral wire, close to the stem end. Bend both ends of the wire down and away from the leaf, then wrap with floral wire.
- Starting with your heaviest bottles in the middle, stick your stems into the foam. Make sure to jam them in far enough to be stable.
- Continue to add "roses" to your bouquet, making sure to distribute the "roses" and their weight evenly.
- Once all of your "roses" are in place, add other items - starting with the largest/bulkiest, and working your way down to the most delicate. For me, I added wired leaves and then some decorative wire loops.
- Once all of your items are added and you are happy with your arrangement, use moss, shredded paper, or whatever filler you want to cover any exposed styrofoam is still showing.


aspieside
You are both so awesome! I love it.
We do the same "we aren't doing anything right???" LOL
Jess
My sister is turning 21 in January and I had seen the mini bottle bouquets on Pinterest. I was looking for a tutorial when I stumbled on to this! I love the way you made them actually look like roses! I'll be pinning this on Pinterest after her birthday (but just in time for Valentine's!) so she doesn't see. I can't wait!
Marie Porter
Thank you! Be sure to take a photo of your creation and either post it to our Facebook, or email us - we love seeing what people do with it! (And so do our other readers!)