

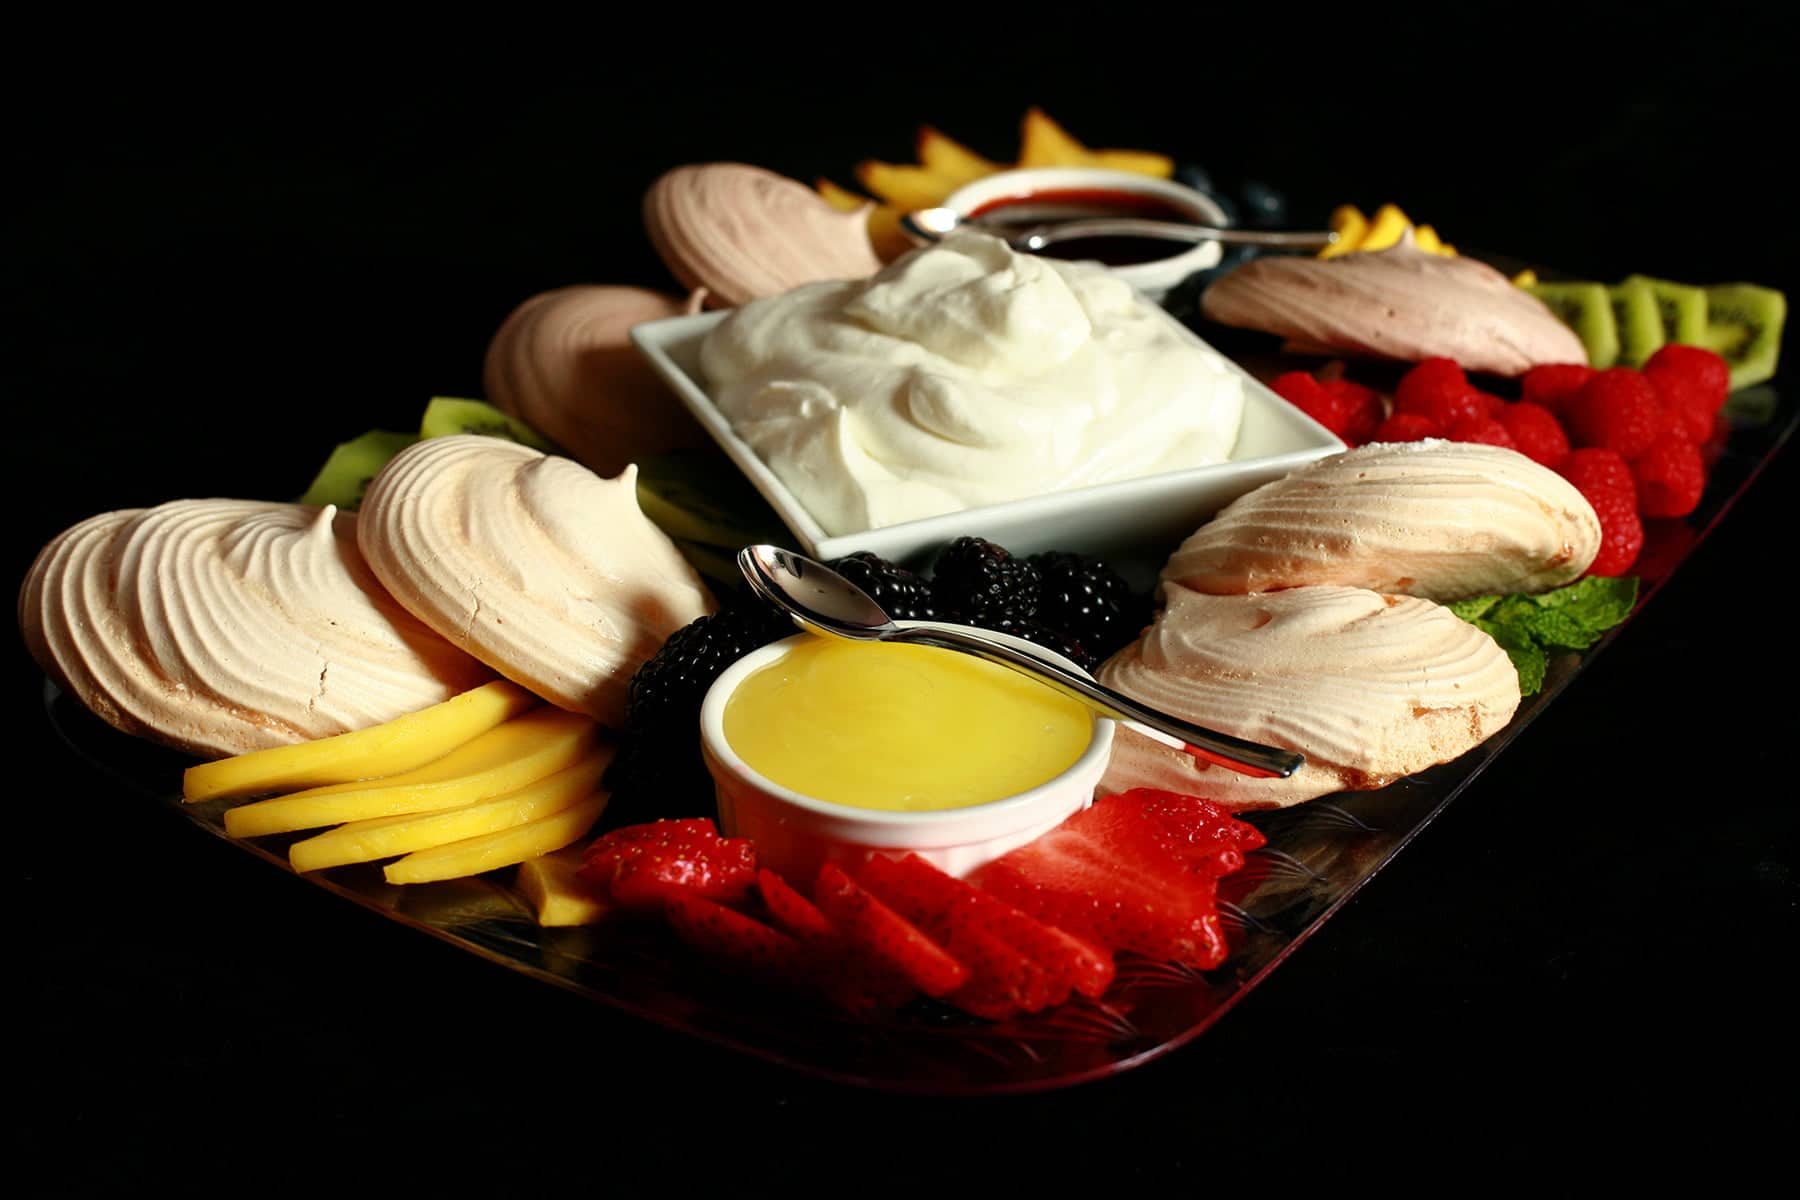
You’ve seen grazing boards, and you’ve probably seen dessert grazing boards... but have you ever seen a Pavlova Grazing Board?
DIY Pavlova bars are a fun dessert idea to include in your holiday plans
Originally posted October 28, 2020. Updated on 11/22/22.

This is actually the 6th Pavlova recipe I’ve posted in the last month or so.
5 of them - including this recipe - resulted from an incredibly productive night of nocturnal recipe development.
I tend to problem solve in my sleep, and woke up one morning with 5 fully conceptualized pavlova recipes in my head, ready to go.
The 6th was the most recent Pavlova - my Halloween Pavlova recipe. There are fruit “bloody eyeballs” involve, it’s... something! 🙂
Anyway, lots to discuss with this one, so I’ll keep the commentary to a minimum!
Pavlova Boards
Traditional savoury cheese boards - with cold meats, pickles, etc have long been a popular option for holiday parties and Christmas day nibbles.
Today’s recipe takes the idea of that cheese platter, and crosses it with a modern take on the traditional Pavlova.
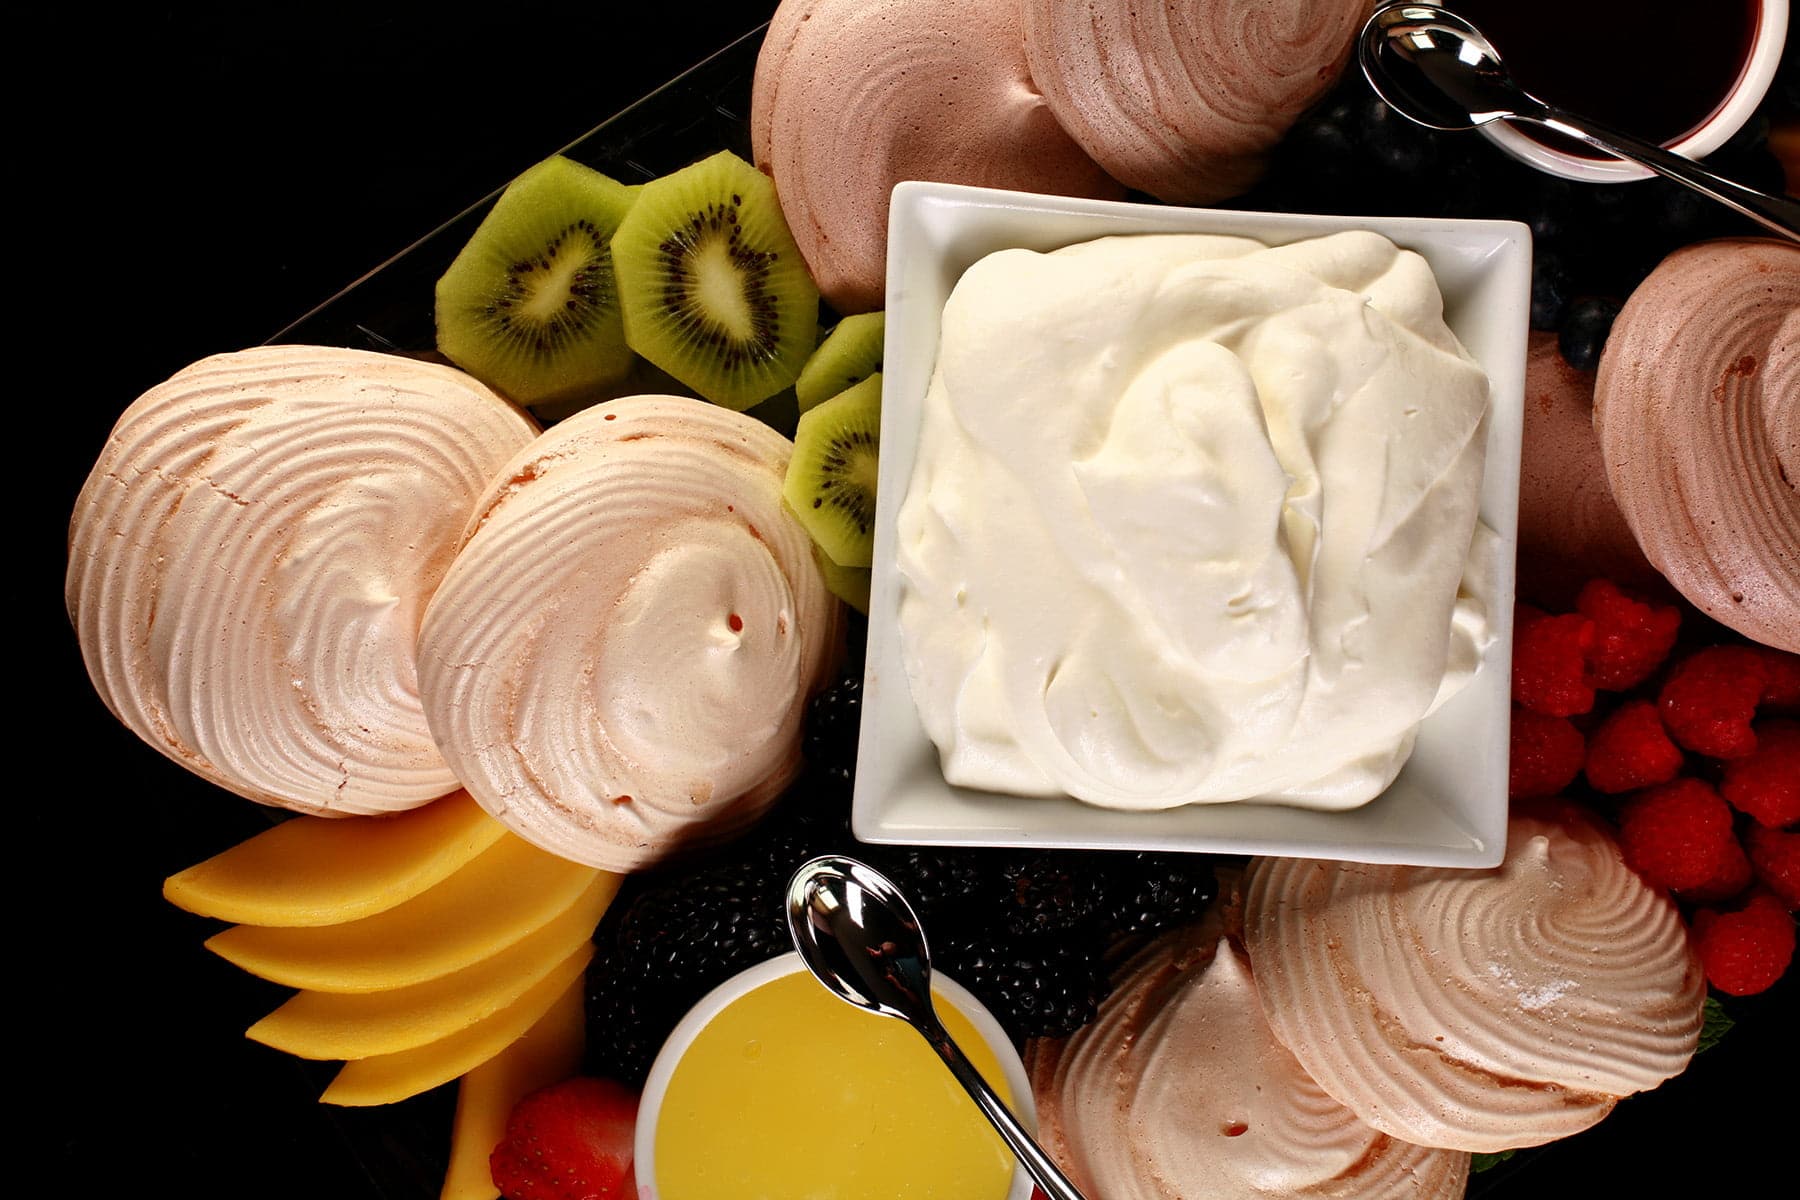
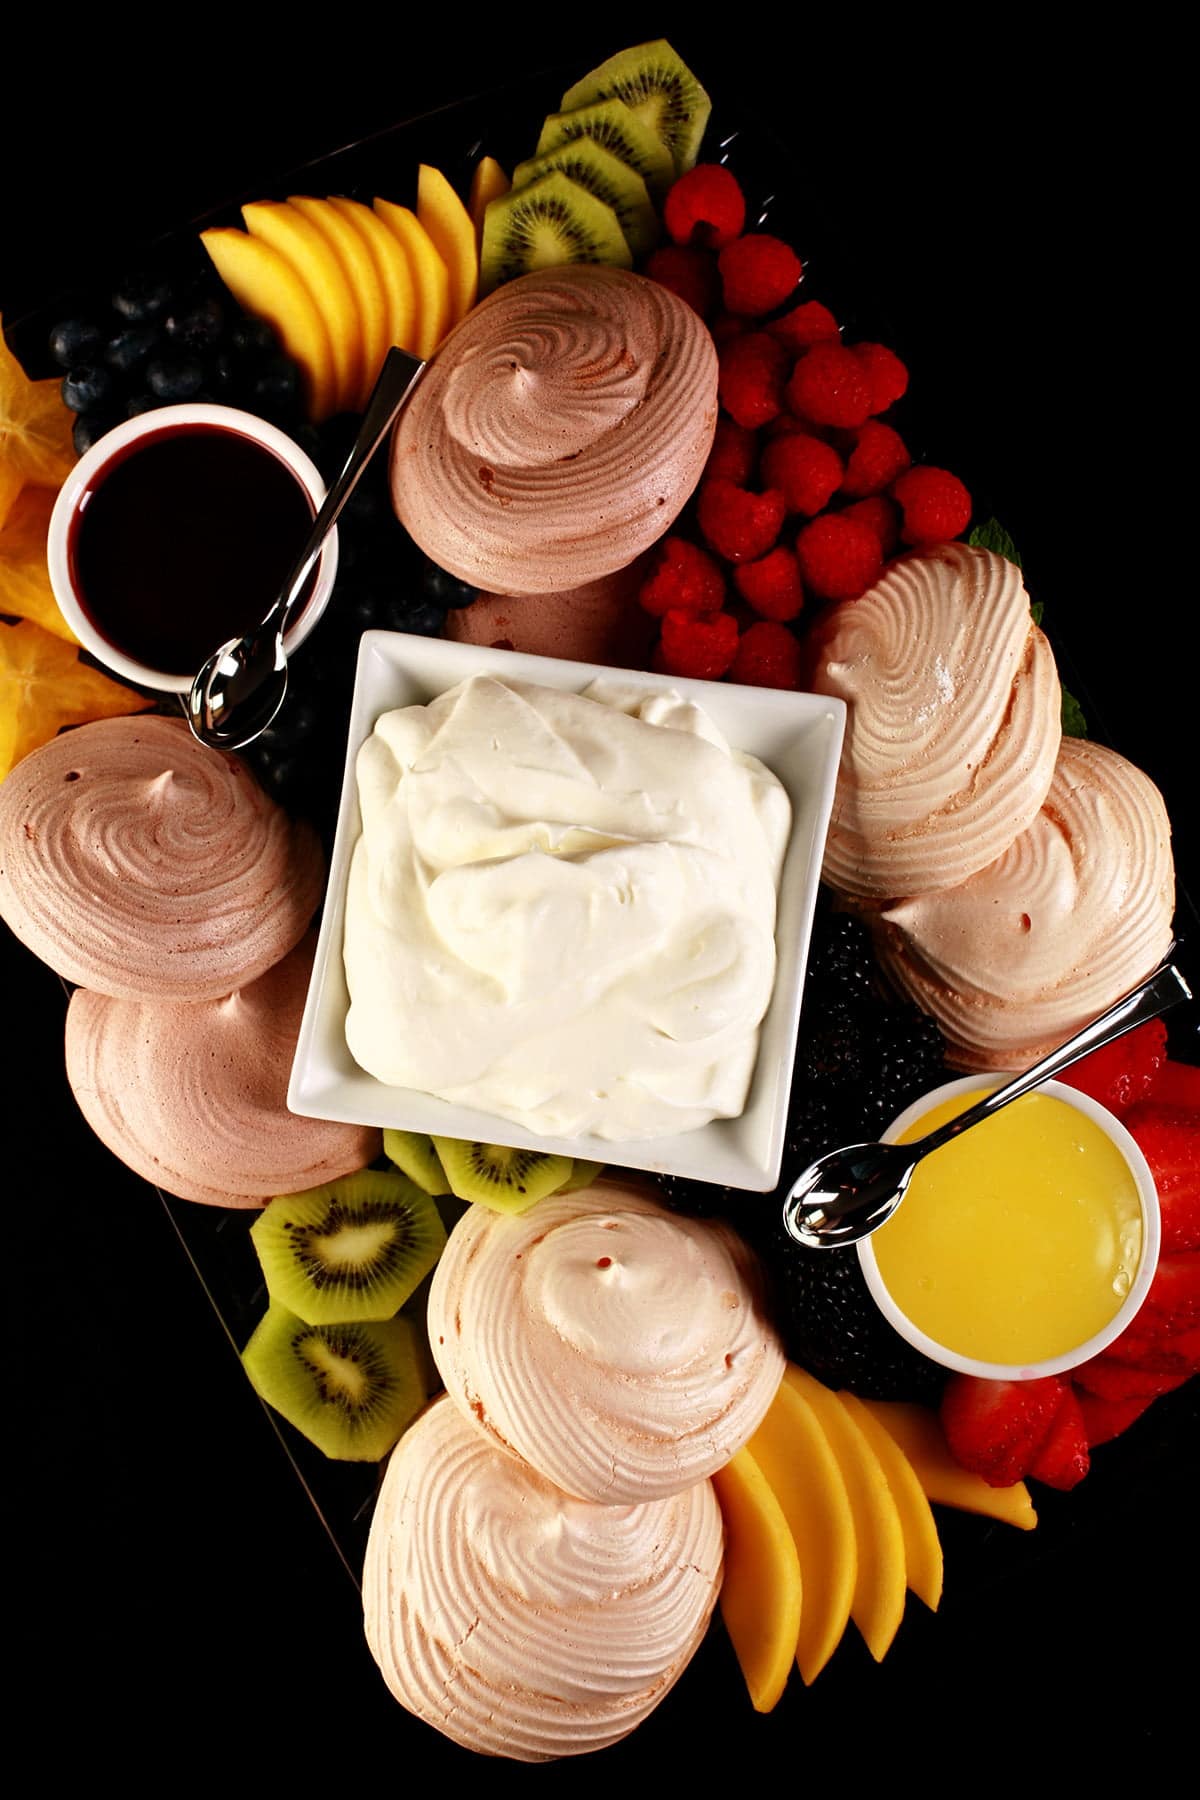
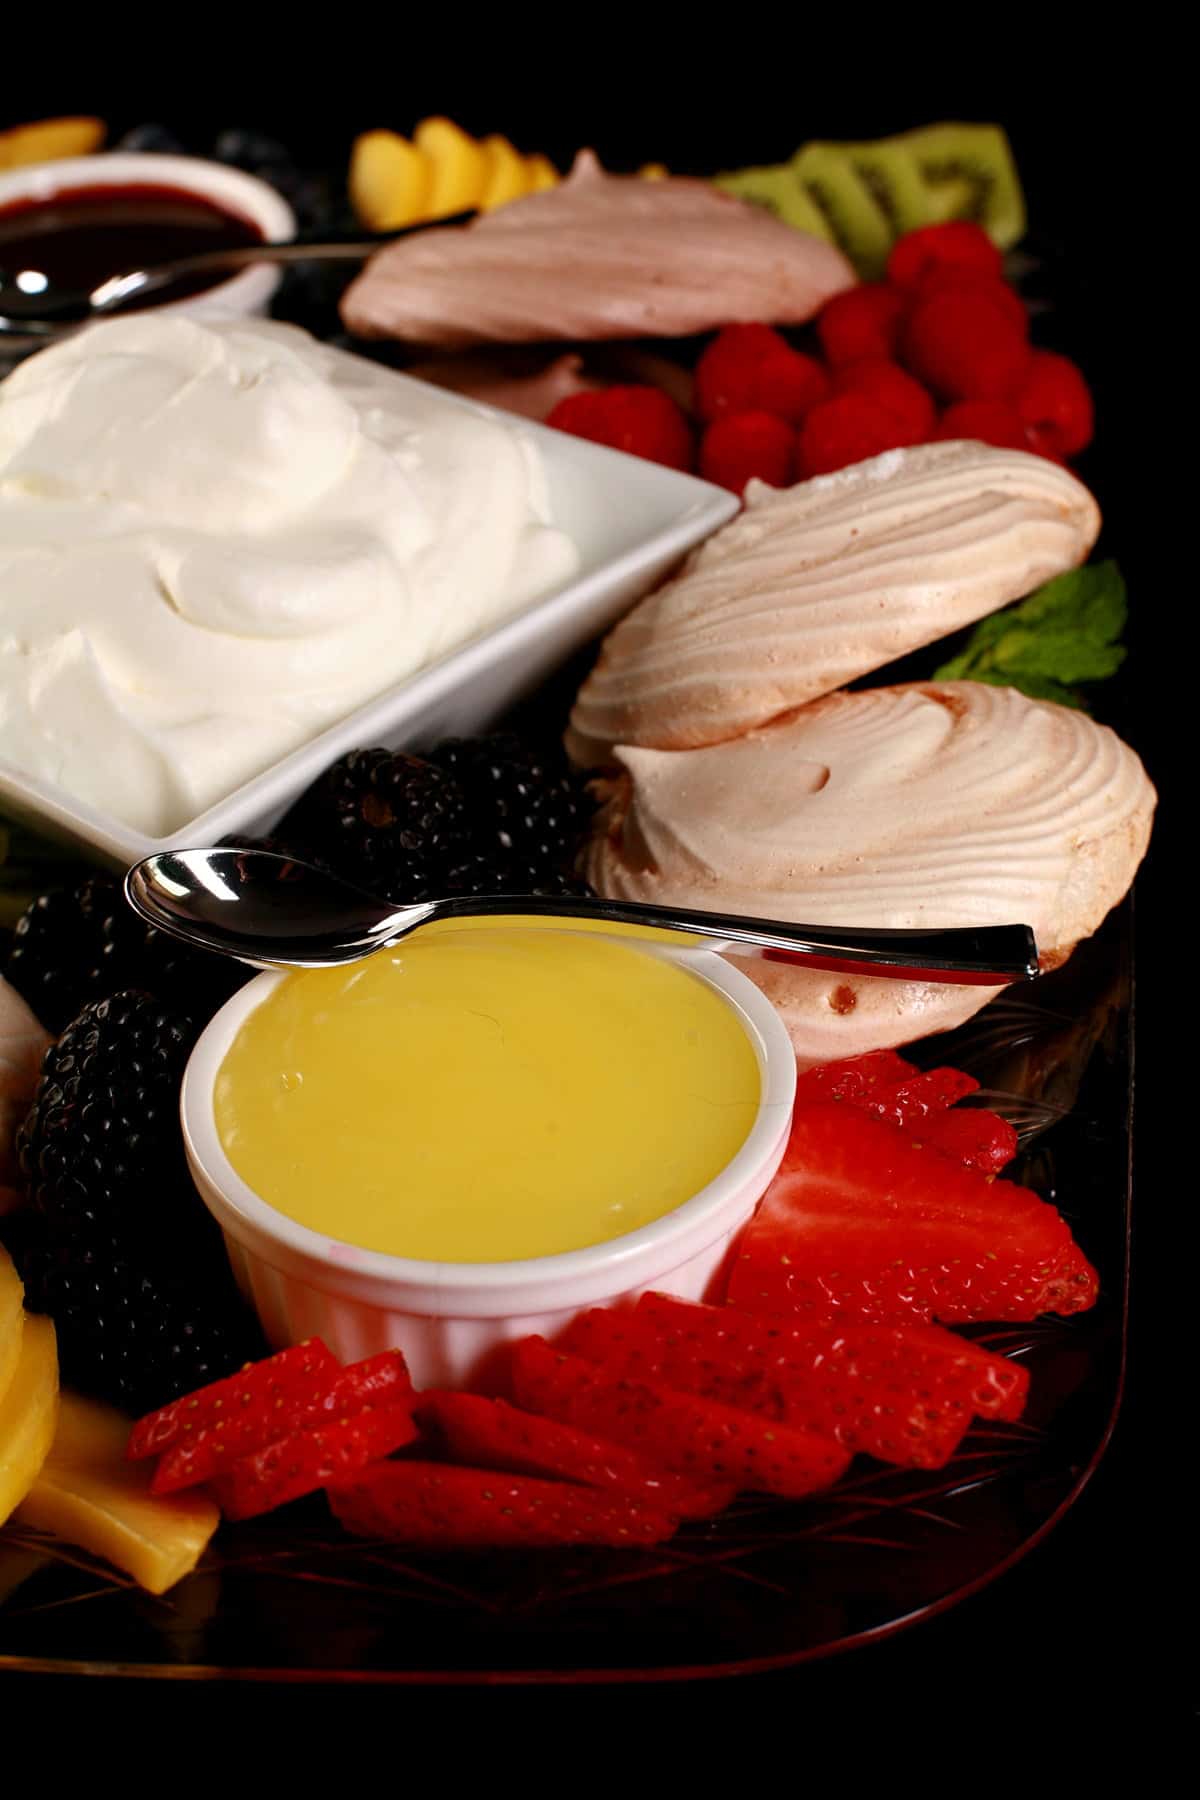
Instead of one big meringue, this recipe is for mini meringues, served in the form of a grazing board - with lots of fruit and sauce options.
Served as DIT pavs, guests have the opportunity to each customize their own pavs, suited to their different tastes.
Most of them tend to be arrangements of candy, but I’ve seen some for cookies and pancakes as well (We’re DEFINITELY going to have to make a pancake breakfast board some day!).
... but I’d never seen one for Pavlova.
Given our obsession with them, that seemed kinda... sad. Obviously we would have to do the thing!
So many possibilities for toppings - everyone is guaranteed to get a great flavor combination. with making their own custom pavs.
Party Pavlova Grazing Board
This Pavlova “Charcuterie” board would be a lovely thing to serve for smallish get togethers, and can easily be scaled up for larger ones, when that’s a thing again.
Of course, after we did up our board and started getting this post ready to go, I Googled the idea - it already existed.
Ah well.
It was original to me at the time, and the fact that others have done it already doesn’t make it any less awesome, I figure.
I increased my usual base recipe by 50%, and made 16 mini Pavlovas from it.
So, this board - as is - would be good for 8 people as the only dessert, or 16 people as part of a spread of other desserts.
(The nutritional info listed in the recipe block is assuming 16, though - without the sauces, or fruits.)
Anyway, let’s talk about all the options for your Pavlova Grazing Board, and how to customize them as a fun addition for different holiday celebrations!

Ingredients
Let’s look at this in two sections - what you’ll need for the mini pavlova nests, and what you’ll need to assemble the boards.
Pavlova Shell Ingredients
As I mention in the recipe itself, I split the batch of meringue in half, and added cocoa to one half. This allowed me to make 8 vanilla mini Pavlovas, and 8 chocolate flavoured mini Pavlovas.
The beauty of a grazing board IS variety, after all!
Egg Whites
Super Fine / Caster Sugar *
Cocoa Powder
Vinegar (Can use lemon juice)
Cornstarch
Pure Vanilla Extract
Pinch Salt
Super fine sugar is usually sold near the sugar in the baking aisle, in small boxes – sometimes resembling milk cartons.
If you aren’t able to find actual super fine sugar, you can process regular granulated sugar in your food processor until fine. Measure AFTER you process!
Whipped Cream
Whipped cream isn’t optional when it comes to Pavlovas, so it’s a must for your Pavlova Charcuterie board!
No matter what you do with it in the end, please do yourself a favour and start with heavy whipping cream, rather than an oil-based convenience product!
Whipped cream is easiest to make when your whipping cream is very cold.
Some people like to chill their mixing bowl and whisk attachments also, but I don’t bother.
Once your whipped cream is ready, there are a few ways you can go with it, if you don’t want to stick with plain fresh cream.
(And really, this is a dessert board - you can divide it up and flavour it a few different ways!)
Sweetened Whipped Cream
I like to add a tablespoon or two of sugar to the whipped cream, as it’s being whipped.
If you’re dividing your batch up, you’d want to cut the amount of sugar being added.
Chocolate Whipped Cream
Chocolate whipped cream can be accomplished in a couple of different ways.
The method you use will help you determine whether or not you’ll want to sweeten it - and how MUCH you want to sweeten it - so I recommend doing chocolate first, before sweetening it.
You can add a little cocoa powder - as much as you’d like - to your whipped cream after whipping it.
Sprinkle or sift it on, and be sure it’s fully incorporated when you finish beating it.

You can melt some chocolate - baking squares, chocolate chips, your favourite chocolate bar, etc - and add that to the whipped cream.
Just put a small amount in a heatproof bowl and microwave it on low for short amounts of time, until it’s about ⅔ melted. Stir until it’s fully melted, allow to cool slightly before mixing into the whipped cream.
Flavoured Whipped Cream
Flavoured whipped cream can be a fun addition to your dessert charcuterie board.
Personally, I like to pick the fruit first, and use that to determine which flavour(s) I’ll go with for the flavoured whipped cream.
Flavour extracts
Vanilla extract is traditional, but have some fun with it. Rum extract is particularly nice if you’ve got a fair amount of tropical fruit involved with the dessert board.
Whichever you use, just add a bit to taste - again, the amount is going to depend on how much whipped cream you’re flavouring!
A bit of lemon zest and juice goes a long way in flavouring whipped cream, and you can do the same with lemons and/or limes.
Alternatively, you can puree a bit of your favourite berries, and fold that into your whipped cream. Strawberry whipped cream, blueberry whipped cream, etc.
Fruit powders are also an option, and can lead to some fun possibilities. Dragonfruit powder, for instance, can yield a really pretty, bright pink whipped cream!
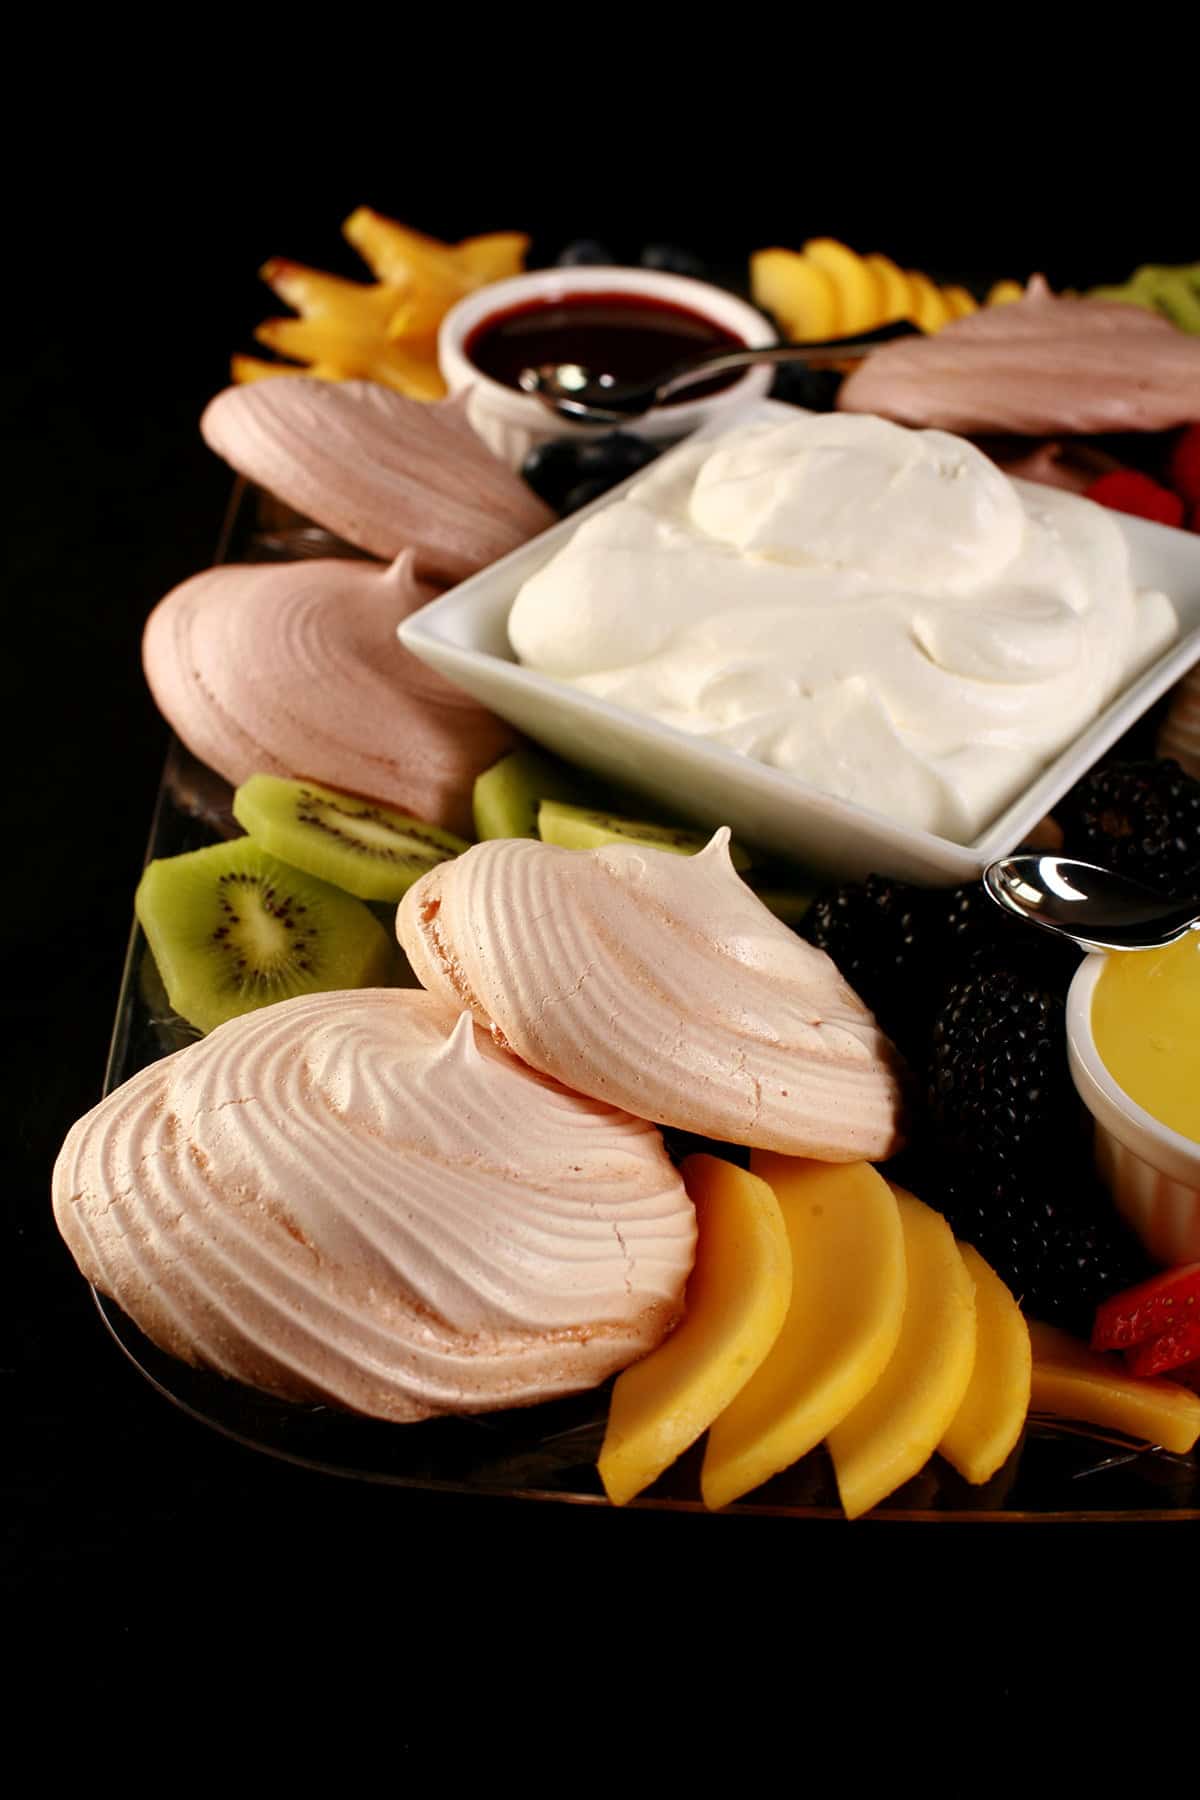
Pavlova Fruit Ideas
Realistically, you can use pretty much any fresh fruit on a Pavlova, so this is really more a matter of narrowing down what’s in season / available to you, and deciding what you’d like.
Maybe you’ll go with a theme. As a few ideas:
Christmas Pavlova Board
Green and red fruits! Kiwi, green grapes, honeydew melon, guava for the greens, strawberries, raspberries, pomegranate, etc for the reds
Tropical Pavlova Board
Pineapple, mango, star fruit, guava, kiwi fruit, passionfruit, papaya, etc.
Canada Day Pavlova Board
Reds and whites! Strawberries, Raspberries, Red pears, apples, banana slices, lychee, white dragonfruit, etc. Apples and bananas should be tossed with a bit of lemon to preventing browning.
Valentine’s Day Pavlova Board
Pink and red fruits, obviously. Strawberries, raspberries, pomegranate, pink guava, pink dragonfruit, etc
4th of July Pavlova Board
Basically the Canadian board, but with blueberries and blackberries added.
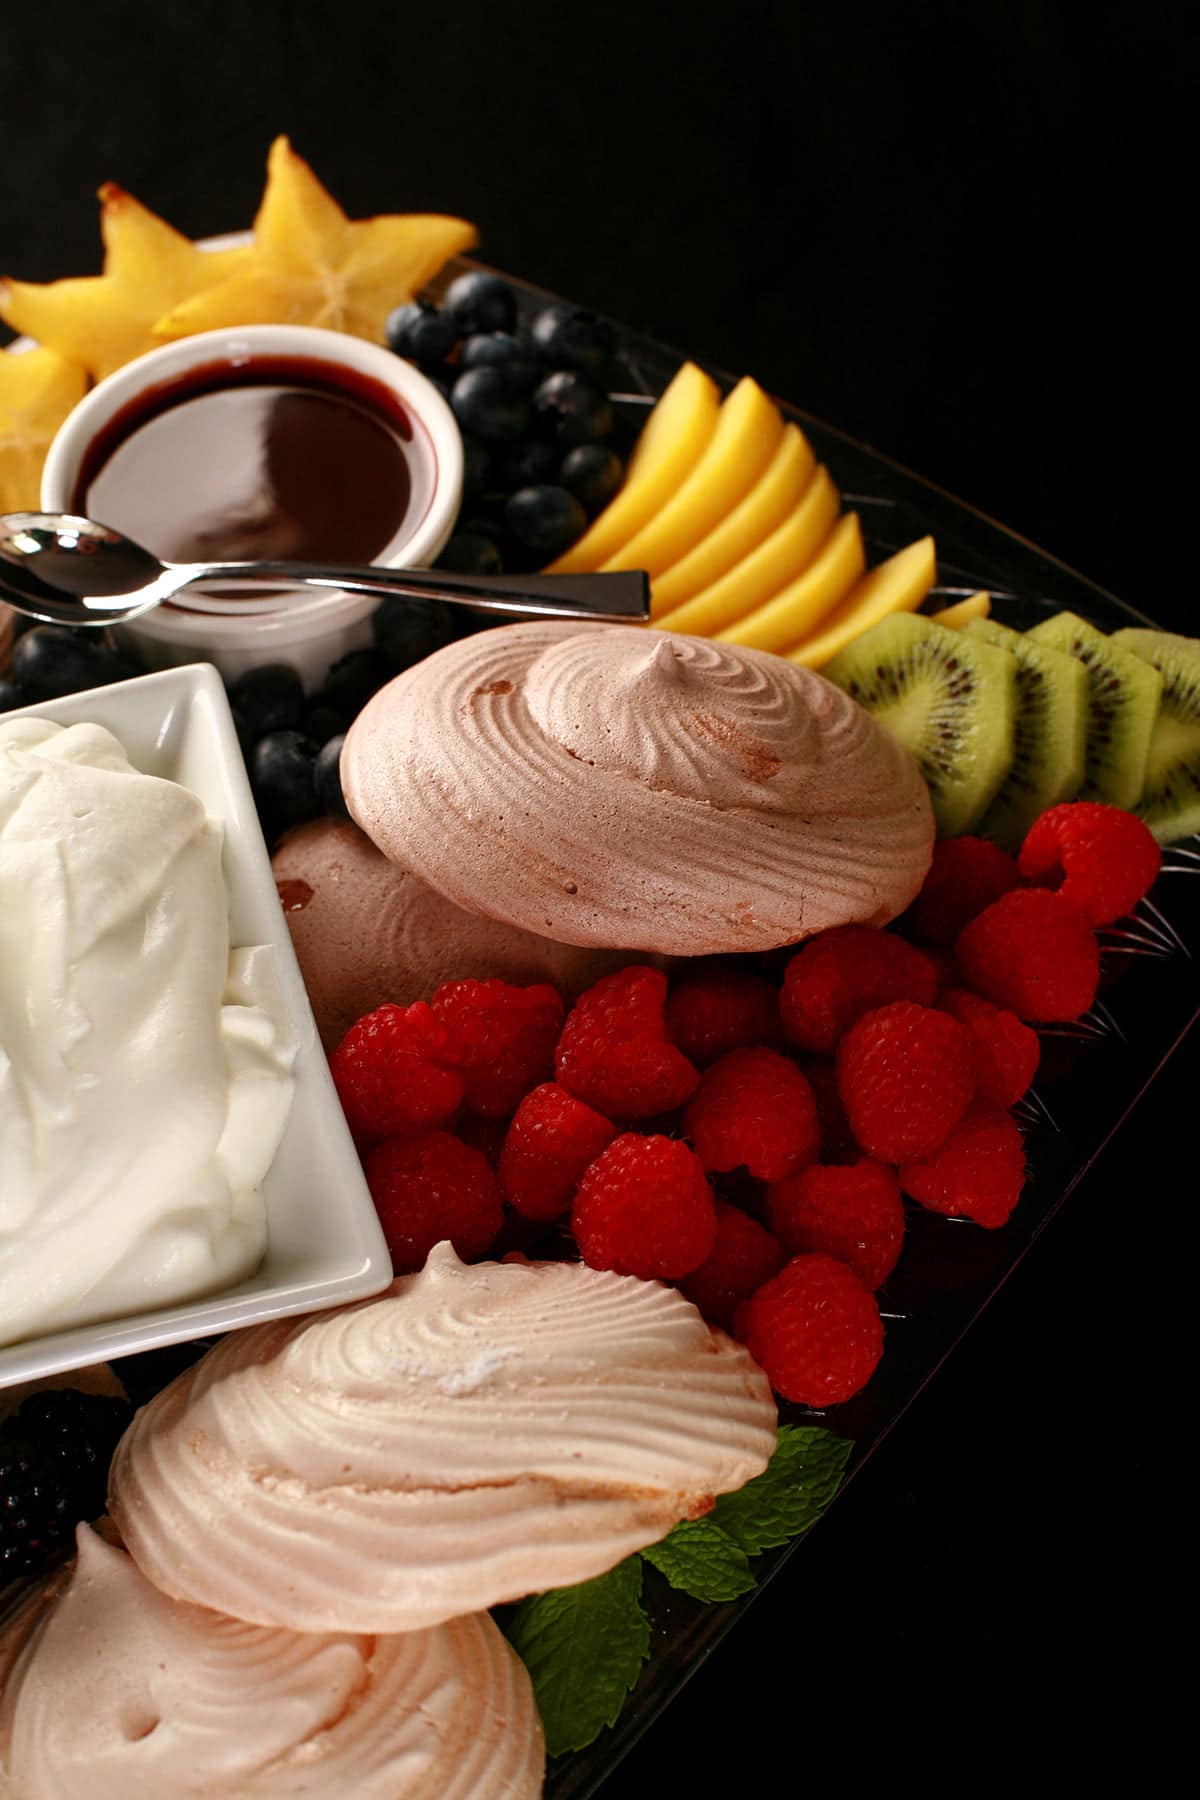
Pavlova Grazing Board Sauce Ideas
How many sauces you have will depend on how much space you have for everything, what you’re into, and how much time, money, and effort you’d like to put into your Pavlova dessert charcuterie board.
For any of the sauce ideas mentioned, you can either purchase it ready made, or make a from-scratch version.
Again, it’s all about choosing the amount of effort you’re willing to put in!
The nice thing is that sauces can usually be made several days in advance, if you’re going that route.
Chocolate Sauce
Caramel Sauce
Salted Caramel Sauce
Lemon Curd (or lime curd!) *
Fruit sauce! Homemade Raspberry Sauce, Strawberry Sauce, or Blueberry Sauce
Canned mango pulp
Passionfruit pulp
Balsamic Vinegar
* See my post How to Make Fruit Curd to learn how to make all kinds of different fruit curds - including lemon and lime!/

Pavlova Dessert Board Garnish Ideas
While you can definitely keep it to just mini Pavlovas, whipped cream, fruit, and sauce... garnishes and toppings can be a lot of fun also. A few ideas:
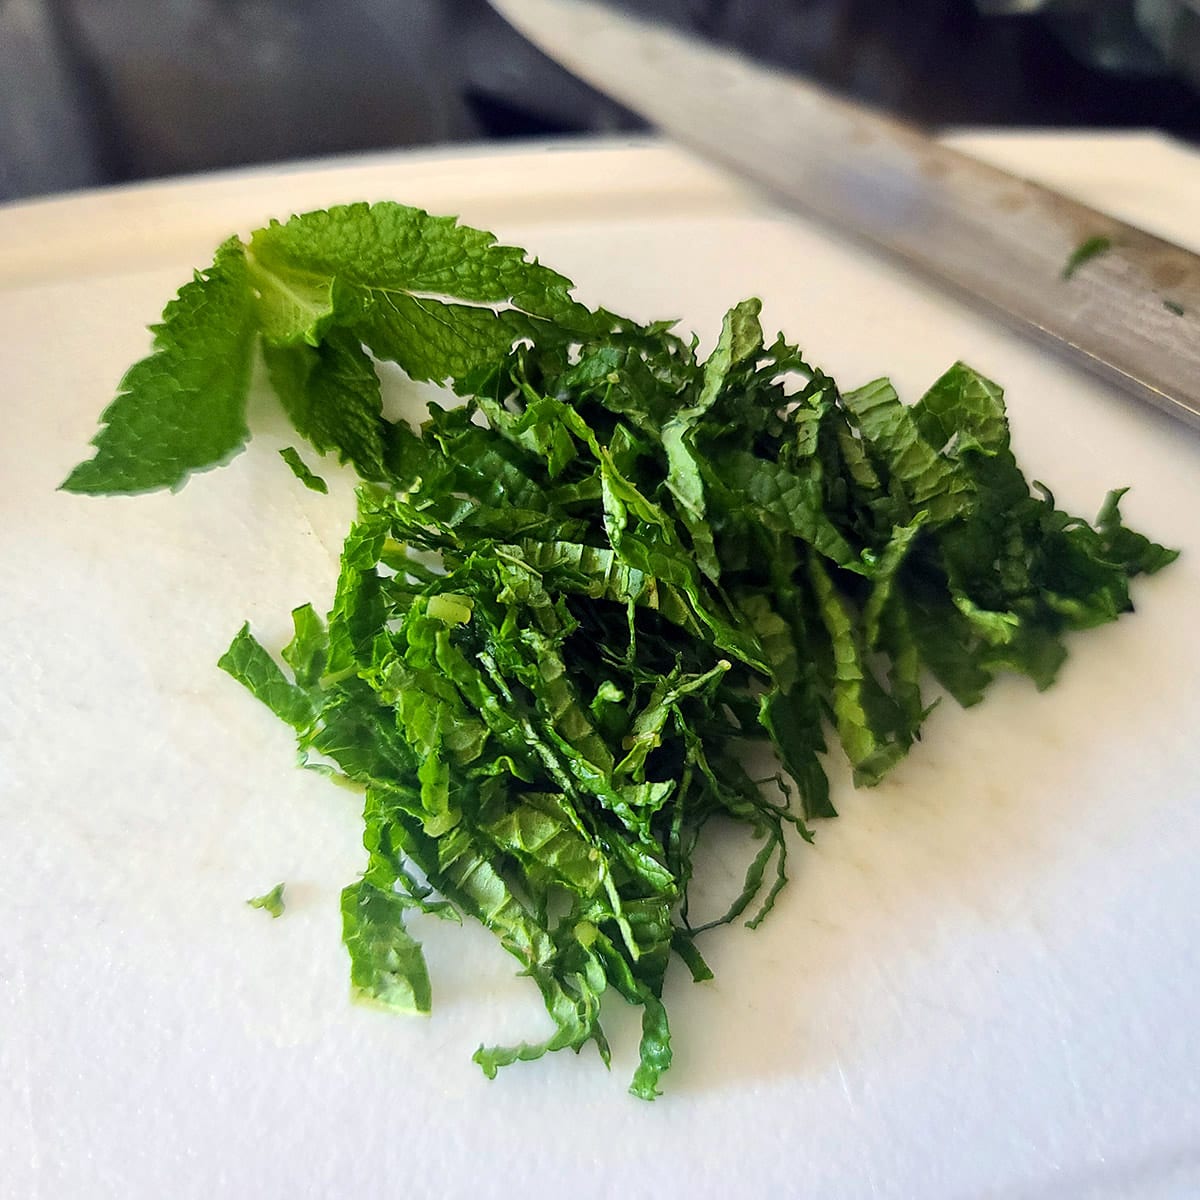
Fresh mint leaves (I like to cut them into thin strips - chiffonade).
Coconut flakes (the big, showy kind)
Toasted coconut flakes
Citrus twists or spirals*
Nuts: Almond slices, chopped nuts, etc
Chocolate shavings / curls
Mini chocolate chips
Cake sprinkles / jimmies / etc
* Use a citrus zester/channel knife to make easy work of this!
Pavlova Dessert Charcuterie Board Equipment
The Charcuterie Board
Commercially Available Grazing Boards
You’ve got a few options for buying a ready made board - you’ll want a large platter for this.
On the cheapest end - which we used for this! - Dollar stores tend to have disposable party platters, and sometimes they’re actually pretty decent.
We needed something on short notice, that wasn’t really going to show anyway. So, we literally just bought a $1 plastic tray.
If you’re actually serving to guests, rather than photographing for a blog, you might want to go a step up from that, and use a nicer serving platter!
Most home goods stores and specialty cooking stores will sell “charcuterie boards”, but you can also buy any large cutting board. I find that you’ll pay a bit more for something specifically labeled “charcuterie”, but your mileage may vary.
Artisinal Charcuterie Boards
Our Facebook marketplace is always full of people selling gorgeous homemade charcuterie boards, and we also see them at farmers markets, etc. I’m sure it’ll be the same in most areas. If not, there’s always Etsy!
These are usually slabs of a gorgeous variety of wood - usually a black walnut, around here - that’s been cut, sanded, and finished with a food grade oil.
Easy to make, but the base wood is usually quite expensive, so expect to pay more for these, than commercially available boards. Worth it, for a thing of beauty!
DIY Charcuterie Board
Of course, if you have the time and inclination, you can always custom make your own charcuterie board! I have a big “Cutting boards 101" post that gives a ton of overview information, as well as two tutorials: One for a fancy “Log Cabin” Style board, the other for a more basic “Colourful squares” style board.

Sauce Containers
You can use whatever kind of sauce container you like, just keep your over all space in mind.
Personally, I like to use mini ramekins - either the 1 oz ramekins or 2 oz ramekins.
The more sauces you’re offering, the smaller the sauce bowls / sauce cups you can use.
Mini Spoons
We used cute little plastic demitasse spoons that we bought at the dollar store, as I didn’t really have time or inclination to go searching for other options.
Demitasse spoons can definitely be ordered online, as well.
How to Make a Pavlova Grazing Board
The full recipe is in the recipe card at the end of this post.
Make the Meringue Nests
Get ready: Preheat your oven to 250 degrees, Line 2 baking (cookie) sheets with parchment paper, and set aside.
Fit your electric mixer with the whisk attachment.
Remove eggs from fridge, separate out the whites, and allow to warm to room temp (about 5 minutes).
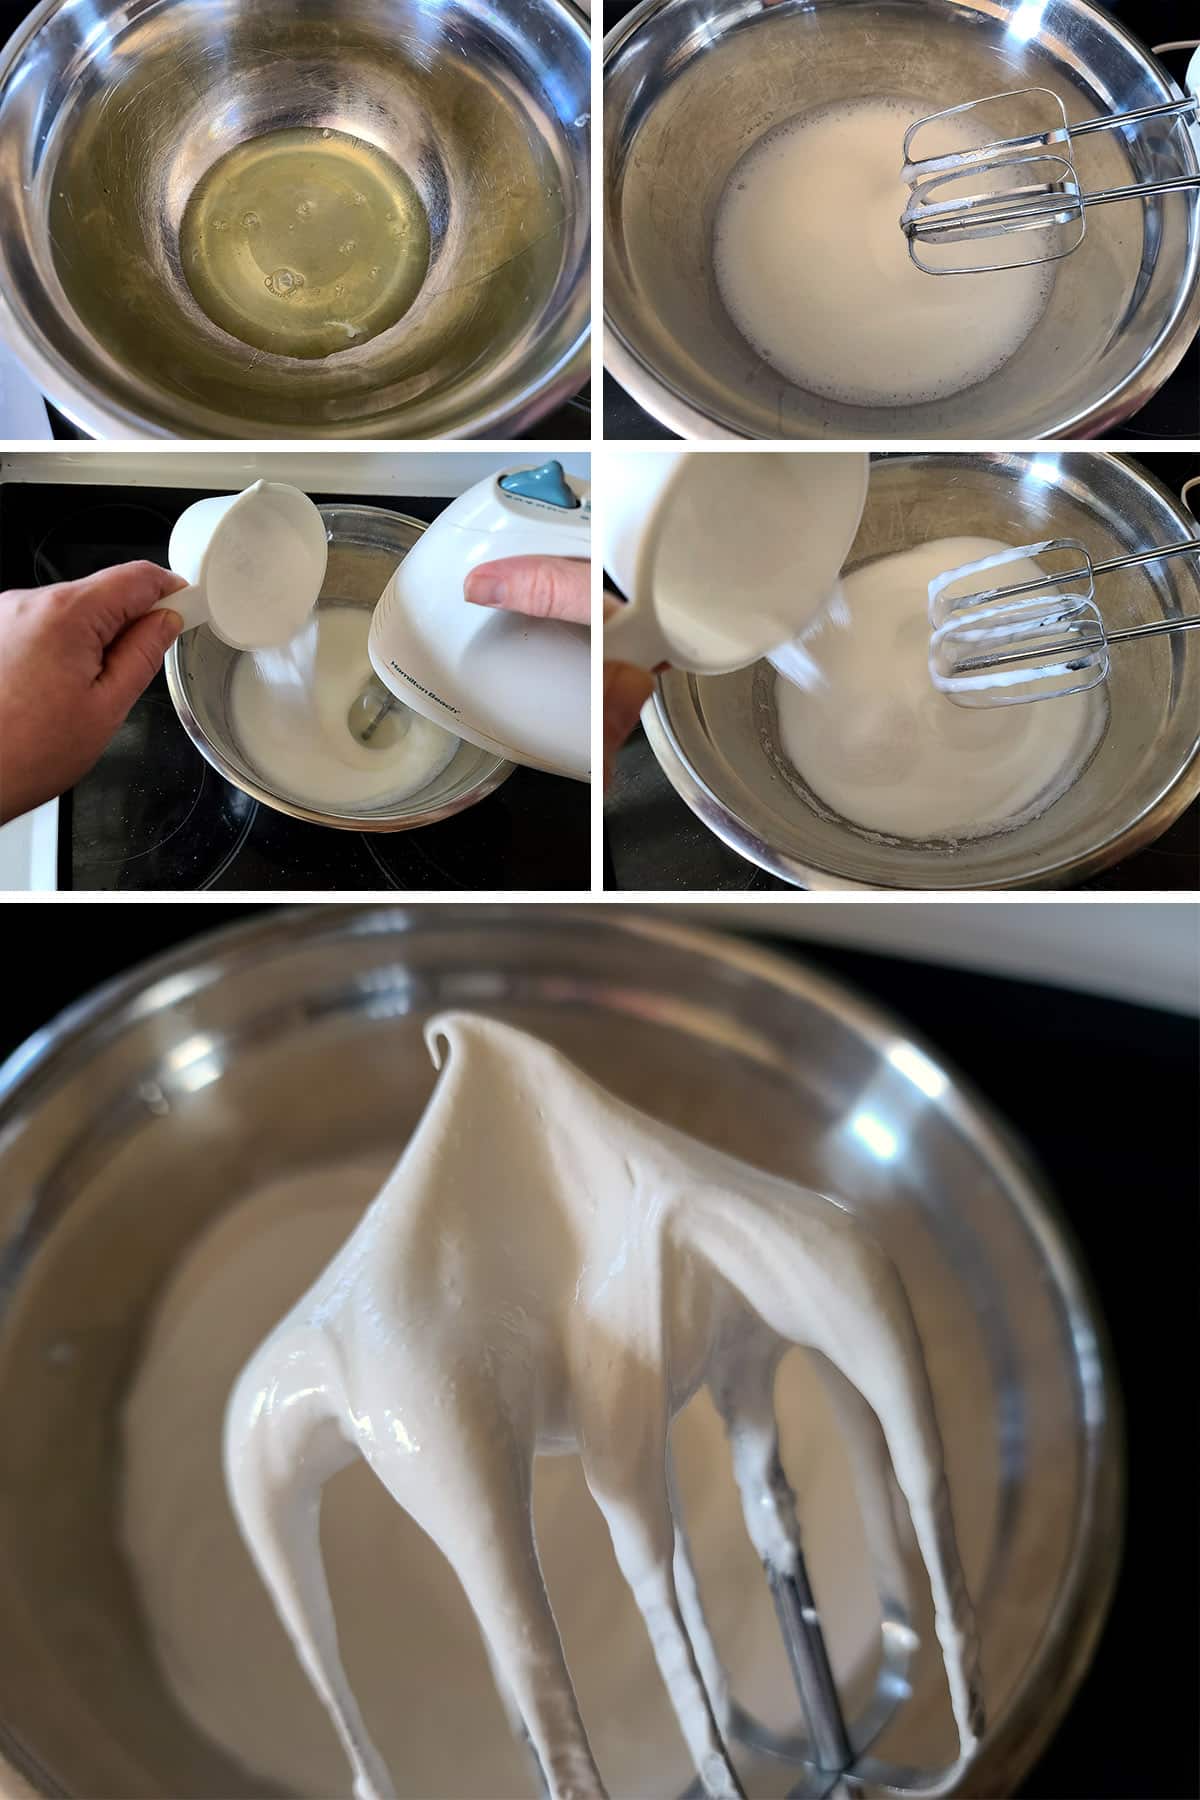
In the large bowl of an electric mixer, beat egg whites together with salt until glossy soft peaks form.
Slowly add in the sugar, and continue whipping until stiff peaks form.
Turn off mixer, remove bowl.
Note: If you’re going thematic, you can add a drop of colouring in this step, as well.

Divide meringue into two equal portions. Sift cocoa into one of the portions, gently fold in until well combined.

Note: You can skip the bags and just spoon meringue onto the prepared pans, if you prefer.
Fill one piping bag with vanilla meringue, and the other with chocolate meringue. If the meringue doesn't fit in the bag, you can always top it up later.
Pipe out 8 little rounds from each of the two meringues, about 3-4" in diameter.
If you're not using a pastry bag, you can just use a spoon to create these rounds.
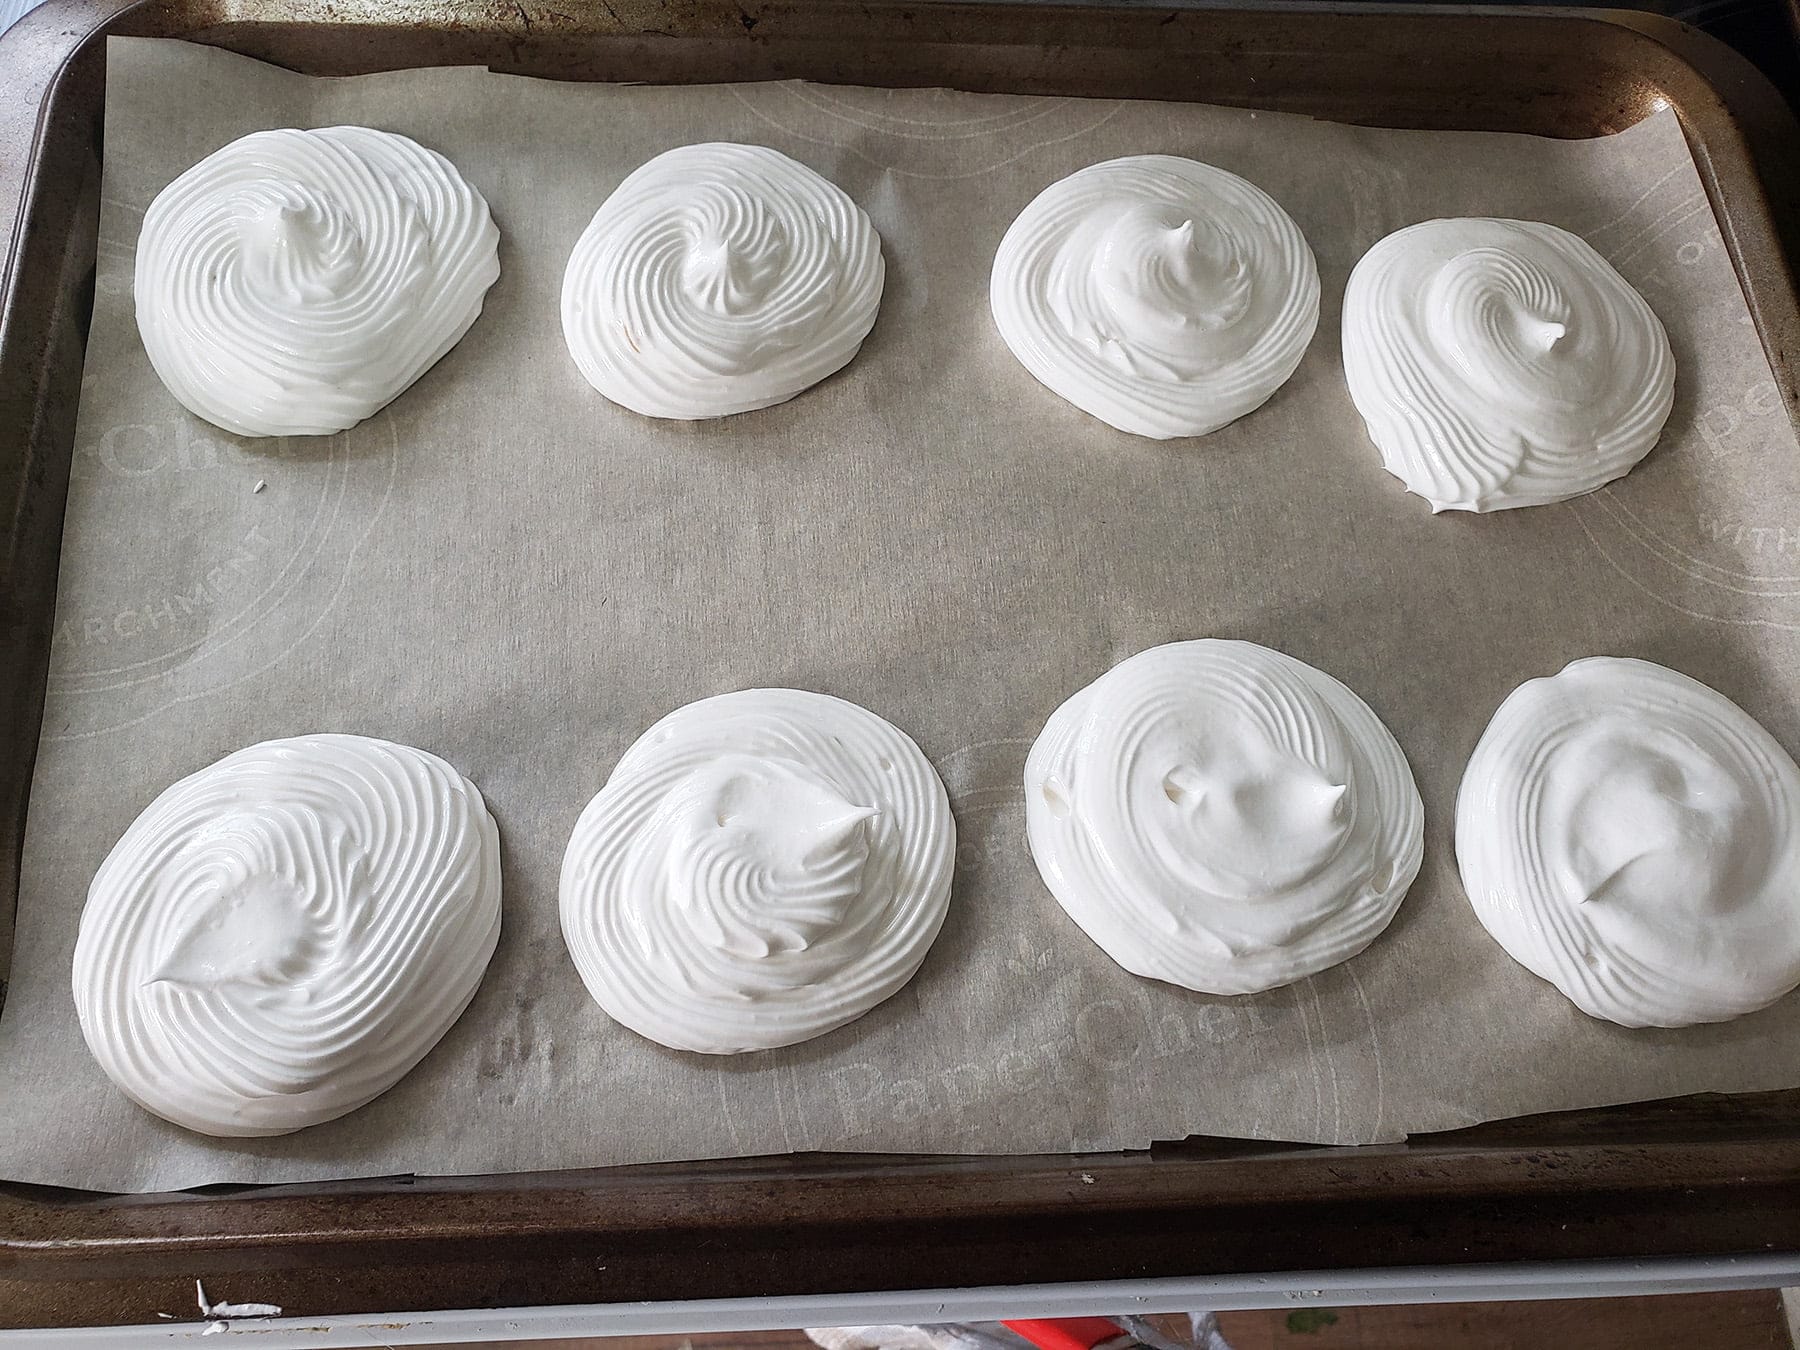
Once your timer goes off, turn the oven off and let the meringue cool in the oven for several hours.
Note: The baking of the meringue can be done the day before, if needed!
Make the Whipped Cream
Just before serving, whip the heavy cream.
I like my pavlovas a little sweeter, so I add about 2 tablespoon of sugar – add as much or as little as you want.
Purists may not want to sweeten the cream at all! I also like to add a little flavoring, again – optional
Once heavy cream is whipped to the desired thickness, add any desired flavourings, if applicable. Spoon into a serving bowl.
Assemble the Pavlova Charcuterie Board
Portion out your desired sauces into mini ramekins, small bowls, or sauce cups.
Arrange your whipped cream, Pavlovas, sauce cups, fruit, and any other toppings onto your presentation board or tray.
Serve immediately!
Tips for Making Mini Pavlovas
All of the usually advice for making Pavlovas applies to Mini Pavlovas:
1. Make sure not to get any egg yolk in the egg whites, or it won’t whip up.
2. Make sure your mixer and whisk are very clean, because any oil in there will also prevent it from whipping up. Also: Make sure not to use an oil based flavouring, for that same reason!
3. Eggs are easiest to separate when very cold, and whip up best after they’ve warmed to room temperature.
4. Add the sugar slowly, so you don’t overwhelm the structure as it’s building.
5. Don’t open the oven til a few hours after you turn it off.
6. Store Pavlovas in an airtight container - in a cool place - until you set up your Pavlova dessert board, or they may get soggy from ambient humidity in the air.
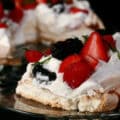
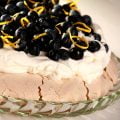
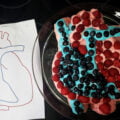
More Pavlova Recipes
Do you love Pavlovas like we do? Awesome! I have several more super tasty Pavlova recipes for you...
Bananas Foster Pavlova
Basic Pavlova Recipe
Blueberry Pavlova
Cardamom Fig Pavlova
Chocolate Raspberry Pavlova
Matcha Green Tea Pavlova
Tropical Dragonfruit Pavlova
Seasonal Pavlovas
Christmas Tree Pavlova
Easter Egg Pavlova
Halloween Pavlova with Bloody Eyeballs
Heart Shaped Valentine's Pavlova
Share the Love!
Before you chow down, be sure to take some pics of your handiwork! If you post it to Bluesky, be sure to tag us - @CelebrationGen. We're also on Pinterest, so you can save all your favourite recipes to a board!
Also, be sure to subscribe to my free monthly email newsletter, so you never miss out on any of my nonsense. Well, the published nonsense, anyway!
Finally, if you love this recipe, please consider leaving a star rating and/or a comment below, and maybe even sharing this post on social media!


Pavlova Grazing Board
Equipment
- Parchment Paper
- Baking Sheet
- Frosting Bags
- Large board or tray
- Sauce Cups
- Mini Spoons
- Cake Decorating Set (Optional)
Ingredients
Mini Pavlovas
- 6 Large Egg Whites
- Pinch Salt
- 1 ½ cup Super Fine / Castor Sugar *
- 3 teaspoon Vinegar
- 1 ½ teaspoon Cornstarch
- 1 ½ teaspoon Vanilla Extract
- 2 tablespoon Cocoa Powder
Whipped Cream
- 2 cup Heavy Cream
- 1-2 tablespoon Granulated Sugar optional
- 1 teaspoon Vanilla Extract
Serving
- Fruit
- Sauces
- Garnishes
Instructions
- Get ready: Preheat your oven to 250 degrees. Line 2 baking (cookie) sheets with parchment paper, and set aside. Fit your electric mixer with the whisk attachment.
- Remove eggs from fridge, separate out the whites, and allow to warm to room temp (about 5 minutes).
- In your mixer bowl, beat egg whites together with salt until glossy peaks form.
- Slowly add in the sugar, and continue whipping until stiff peaks form. Turn off mixer, remove bowl.
- Sprinkle vinegar, cornstarch, and vanilla over meringue, gently fold in till combined.
- Divide meringue into two equal portions. Sift cocoa into one of the portions, gently fold in until well combined.
- If you're using a cake decorating tip, affix two pastry bags with couples and desired star tips. Fill one with vanilla meringue, and the other with chocolate meringue.If the meringue doesn't fit in the bag, you can always top it up later.
- Pipe out 8 little rounds from each of the two meringues, about 3-4" in diameter. If you're not using a pastry bag, you can just use a spoon to create these rounds.
- Put the baking sheets into your oven, bake for 1 hour.
- Once your timer goes off, turn the oven off and let the meringue cool in the oven for several hours. The baking of the meringue can be done the day before, if needed!
- Just before serving, whip the heavy cream.I like my pavlovas a little sweeter, so I add about 2 tablespoon of sugar – add as much or as little as you want. Purists may not want to sweeten the cream at all! I also like to add a little flavoring, again – optional
- Once heavy cream is whipped to the desired thickness, add any desired flavourings, if applicable. Spoon into a serving bowl.
- Portion out your desired sauces into mini ramekins or sauce cups.
- Arrange your whipped cream, Pavlovas, sauce cups, fruit, and any other toppings onto your presentation board or tray, serve immediately!


Leave a Reply