Making a Festive St Patrick's Day Charcuterie Board is a fun way to mark the occasion, and celebrate all things Irish. Here's how I make mine!

So, today’s blog post is going to be another fun charcuterie board recipe.
As you may remember, I went on a charcuterie designing binge a few months ago, coming up with all kinds of holiday Charcuterie Boards.
I love a good charcuterie - it’s the perfect appetizer to share with a group of friends, or just a festive way to have a themed date night.
And hey, it’s our wedding anniversary, so why not go all out and make a St. Patrick’s Day snack board, right?
Colours: Green, White, and Orange are the colours of the Irish flag, and green is most commonly associated with the holiday.
Irish culture: Check out your local import shop for find tasty treats that are unique to Ireland! Use Irish cheeses and hearty crackers, etc.
St Patrick’s Day imagery: Think “Pot of gold at the end of the rainbow”, shamrocks, leprechaun hat arrangements, just doing a full rainbow board, etc.
There are SO many ways you can go with your board, the really are so much fun to make!
Lots of options to talk about, so let’s get to it!
More Charcuterie Boards!
Looking for more holiday charcuterie boards, and charcuterie ideas in general? I've got you covered!
Game Day Charcuterie Board
Valentine's Day Charcuterie Board
Easter Charcuterie Board
Rainbow Charcuterie Board
S'Mores Charcuterie - Camping Dessert Board!
Canada Day Charcuterie Board
Thanksgiving Charcuterie Board
Halloween Charcuterie Board
Christmas Charcuterie Board
Charcuterie Wreath
Charcuterie Tree
Colourful Squares Cutting Board
Cutting Boards 101
Log Cabin Cutting Board
Pavlova Grazing Board
Salami Roses
Charcuturie Ingredients
Unlike the vast majority of my recipes, charcuterie doesn’t require a set list of ingredients.
Think more “choose your own adventure”, or “pick 3 from column A, and a few from column B”.
Here are the major categories you’ll want represented, and some ideas of the kinds of ingredients I’ll use from each, to fit in with the St. Patrick’s Day theme.
I went with a mixture of traditional Irish foods, American Irish foods, and ingredients picked to develop the theme through colour:
Meats
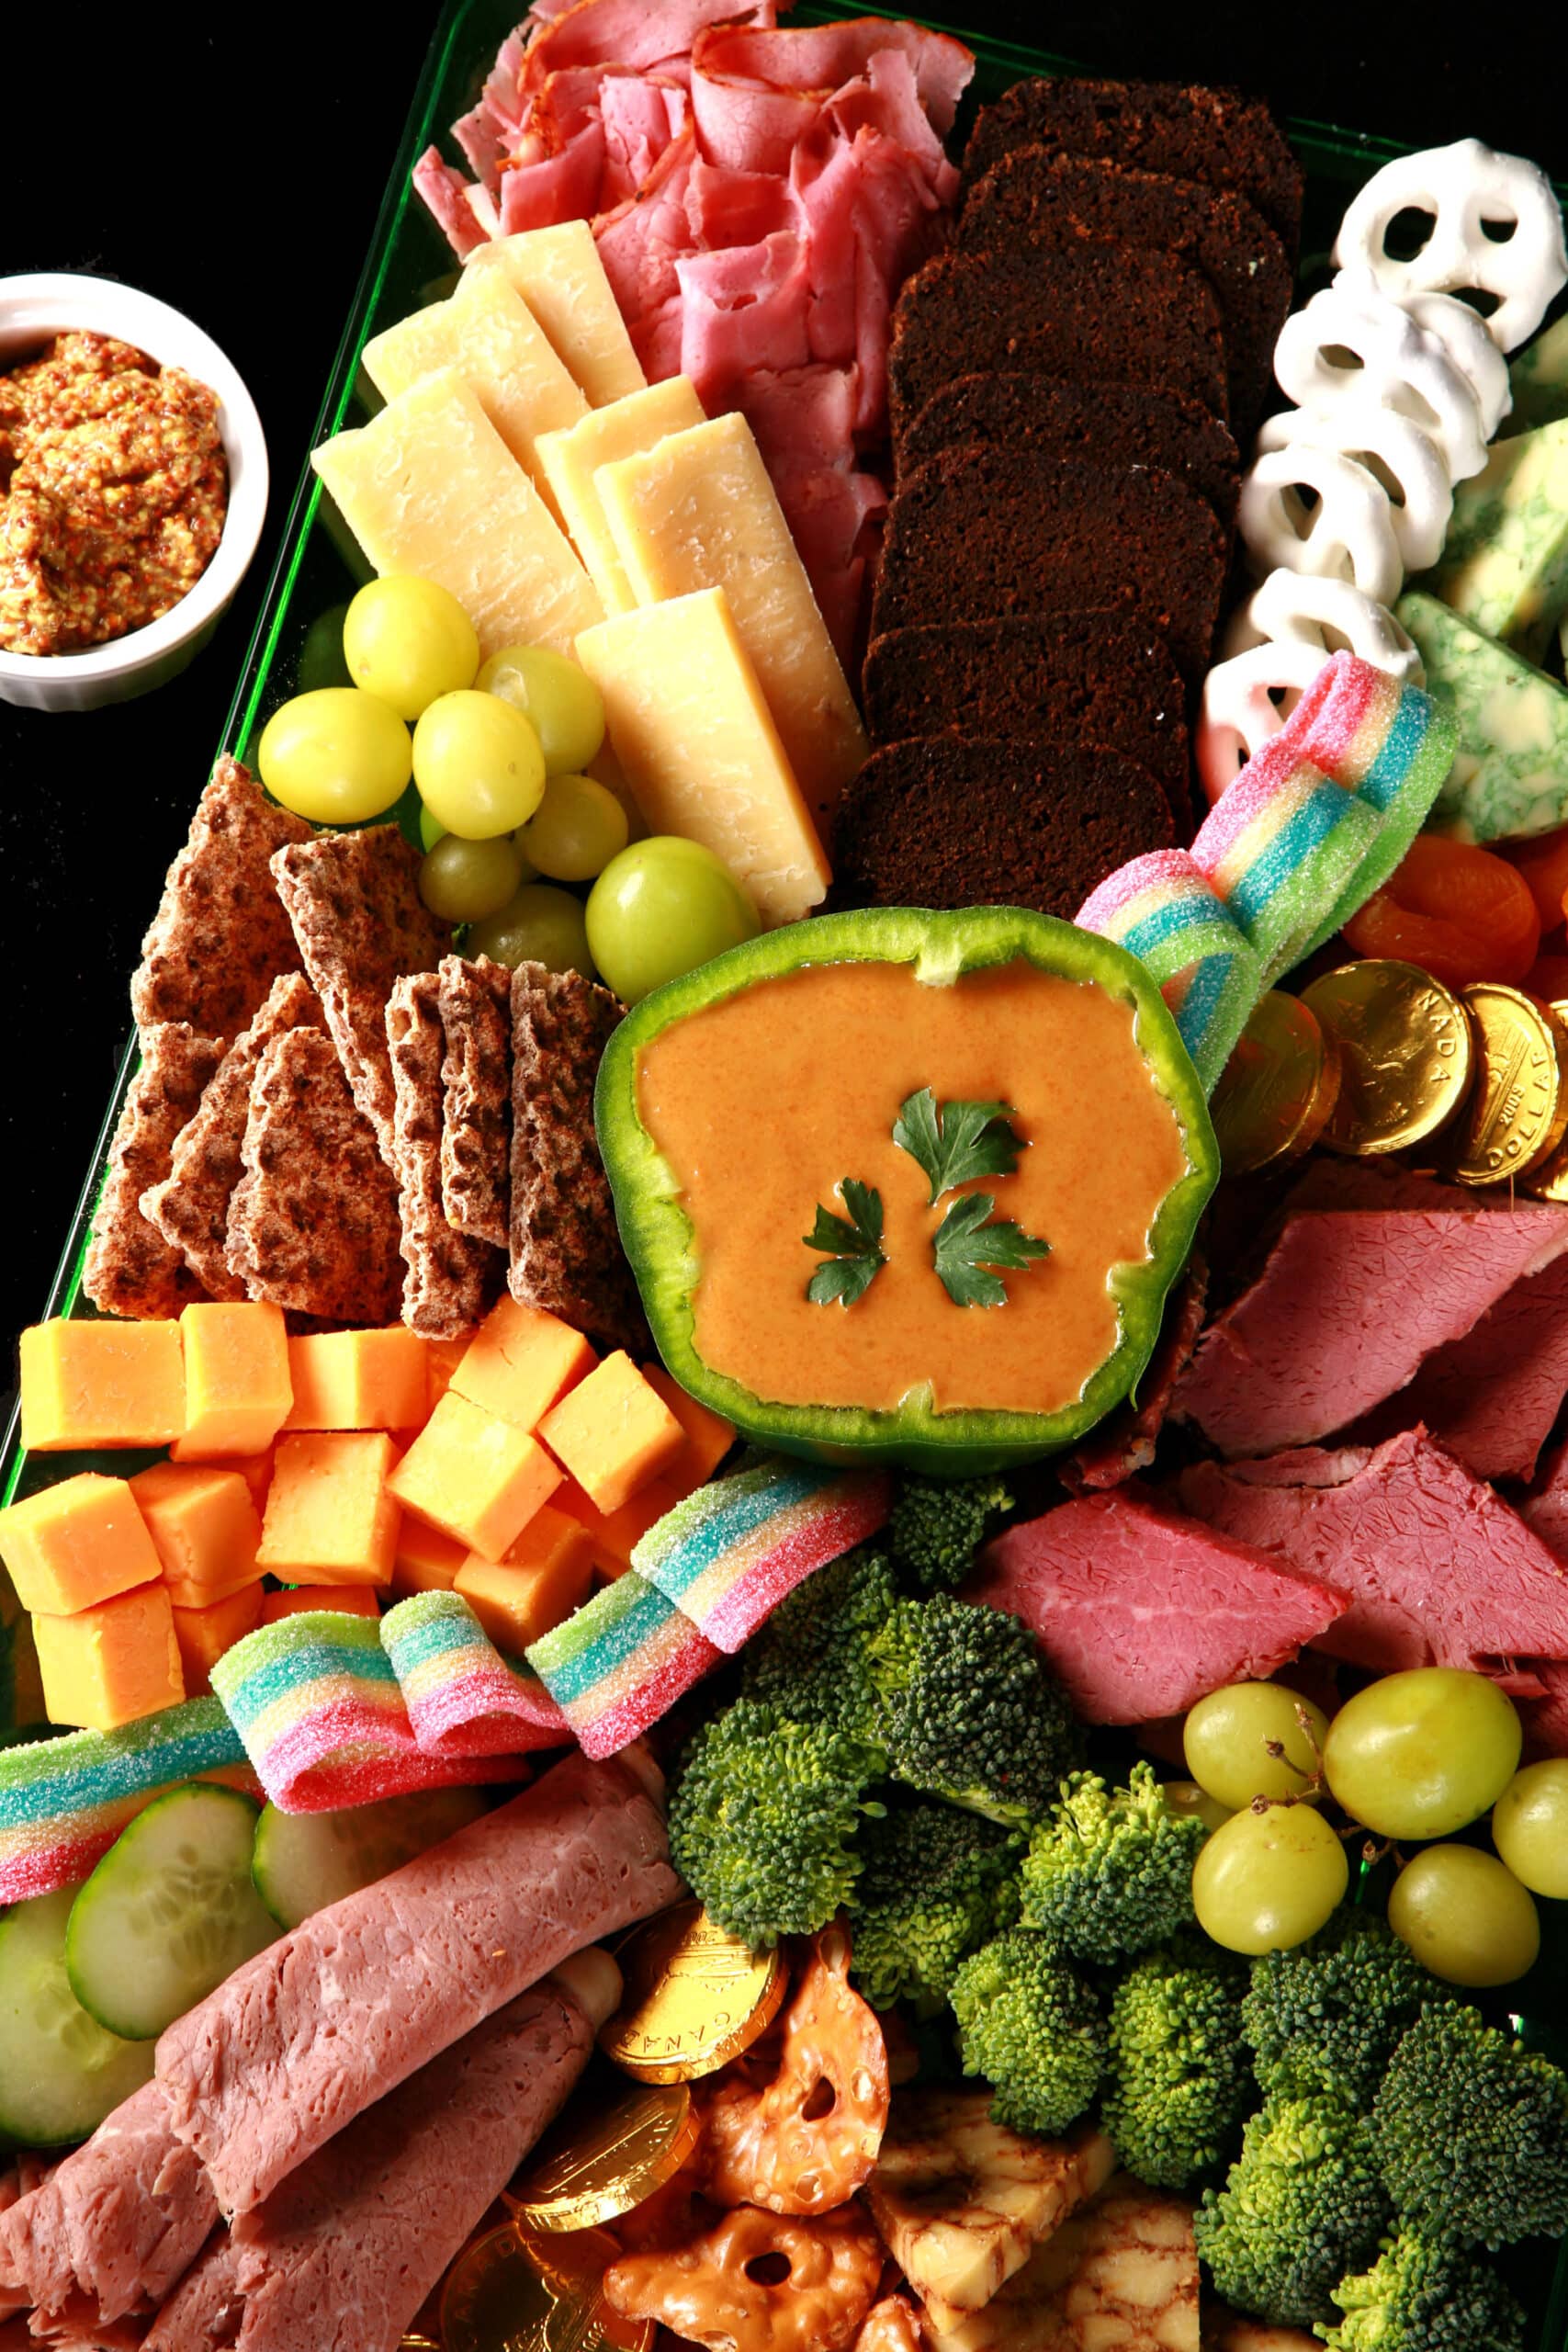
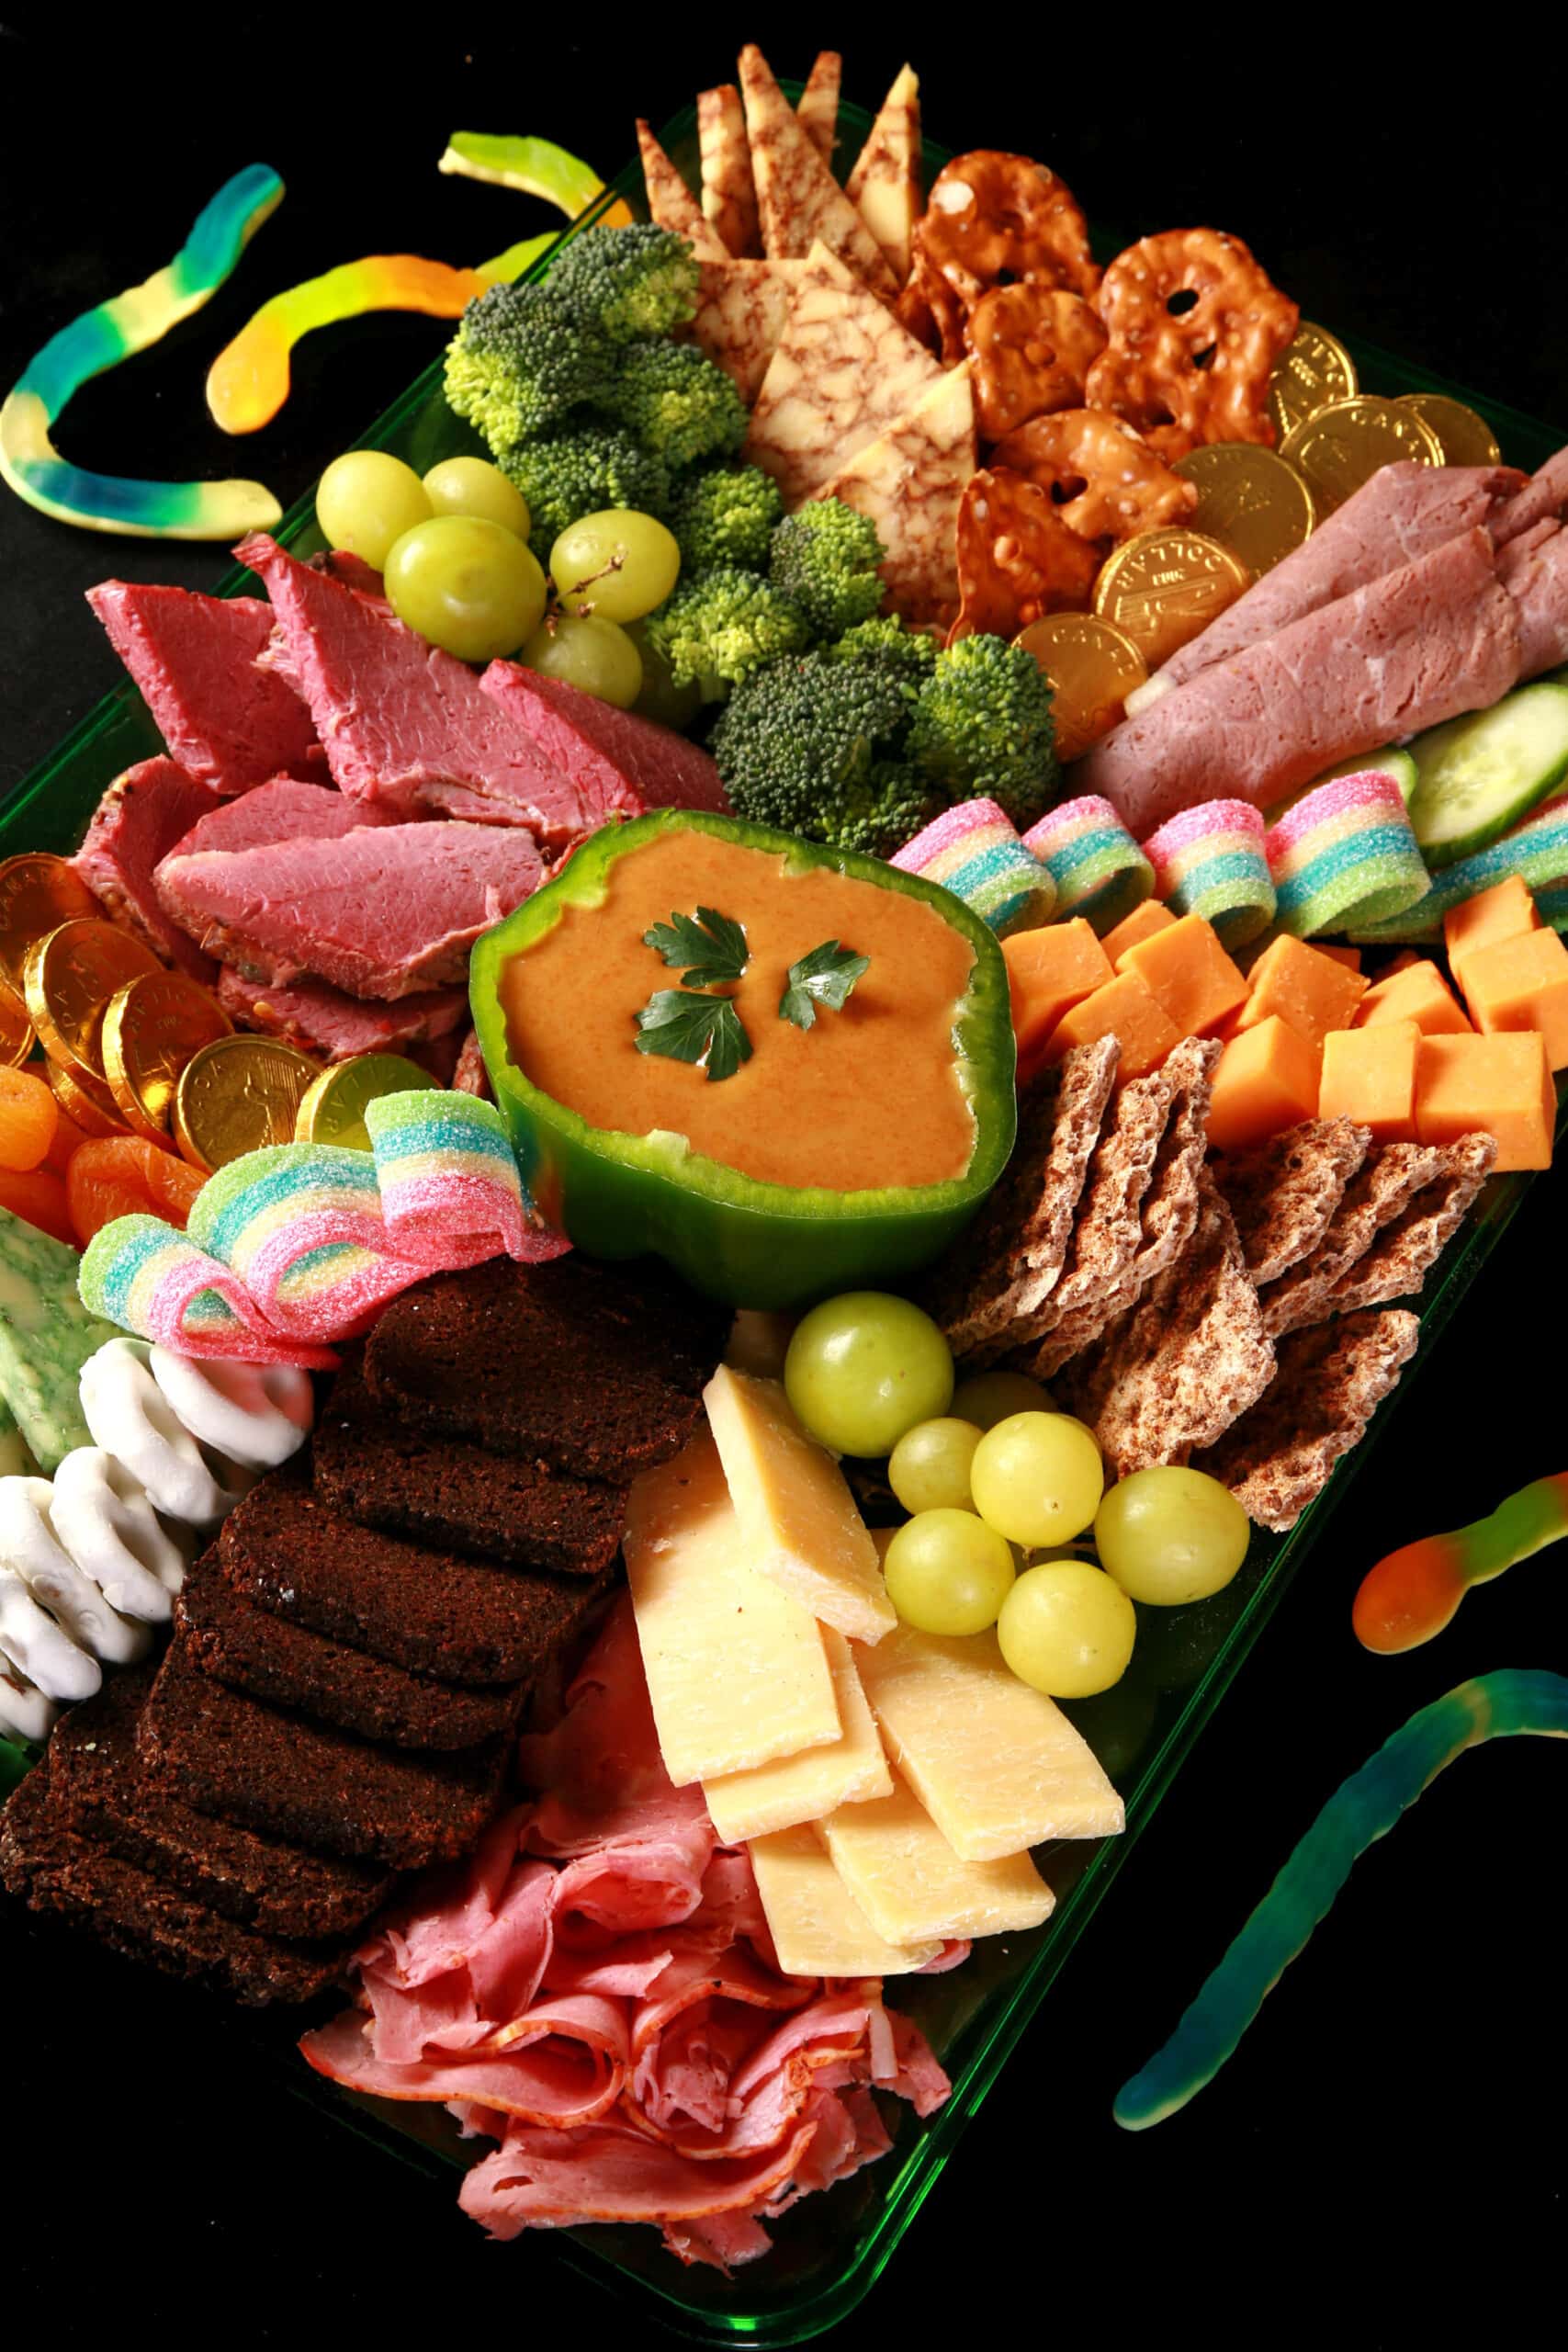
I went pretty simple with my meat selection - two forms of corned beef, and some roast beef.
One of the corned beef selections and the roast beef were fresh cut at the deli. (In general, plan for 3-4 slices of meat per person.)
Beyond the deli meat, I sliced some nice pieces off a batch of my Homemade Corned Beef - just be sure to plan a little more than a week in advance if you’re making your own - it needs to sit in the brine for 7 days!
Cheeses
I went a bit against that 3 3 3 3 rule on this St Patrick’s Day board, and used 4 different cheeses.
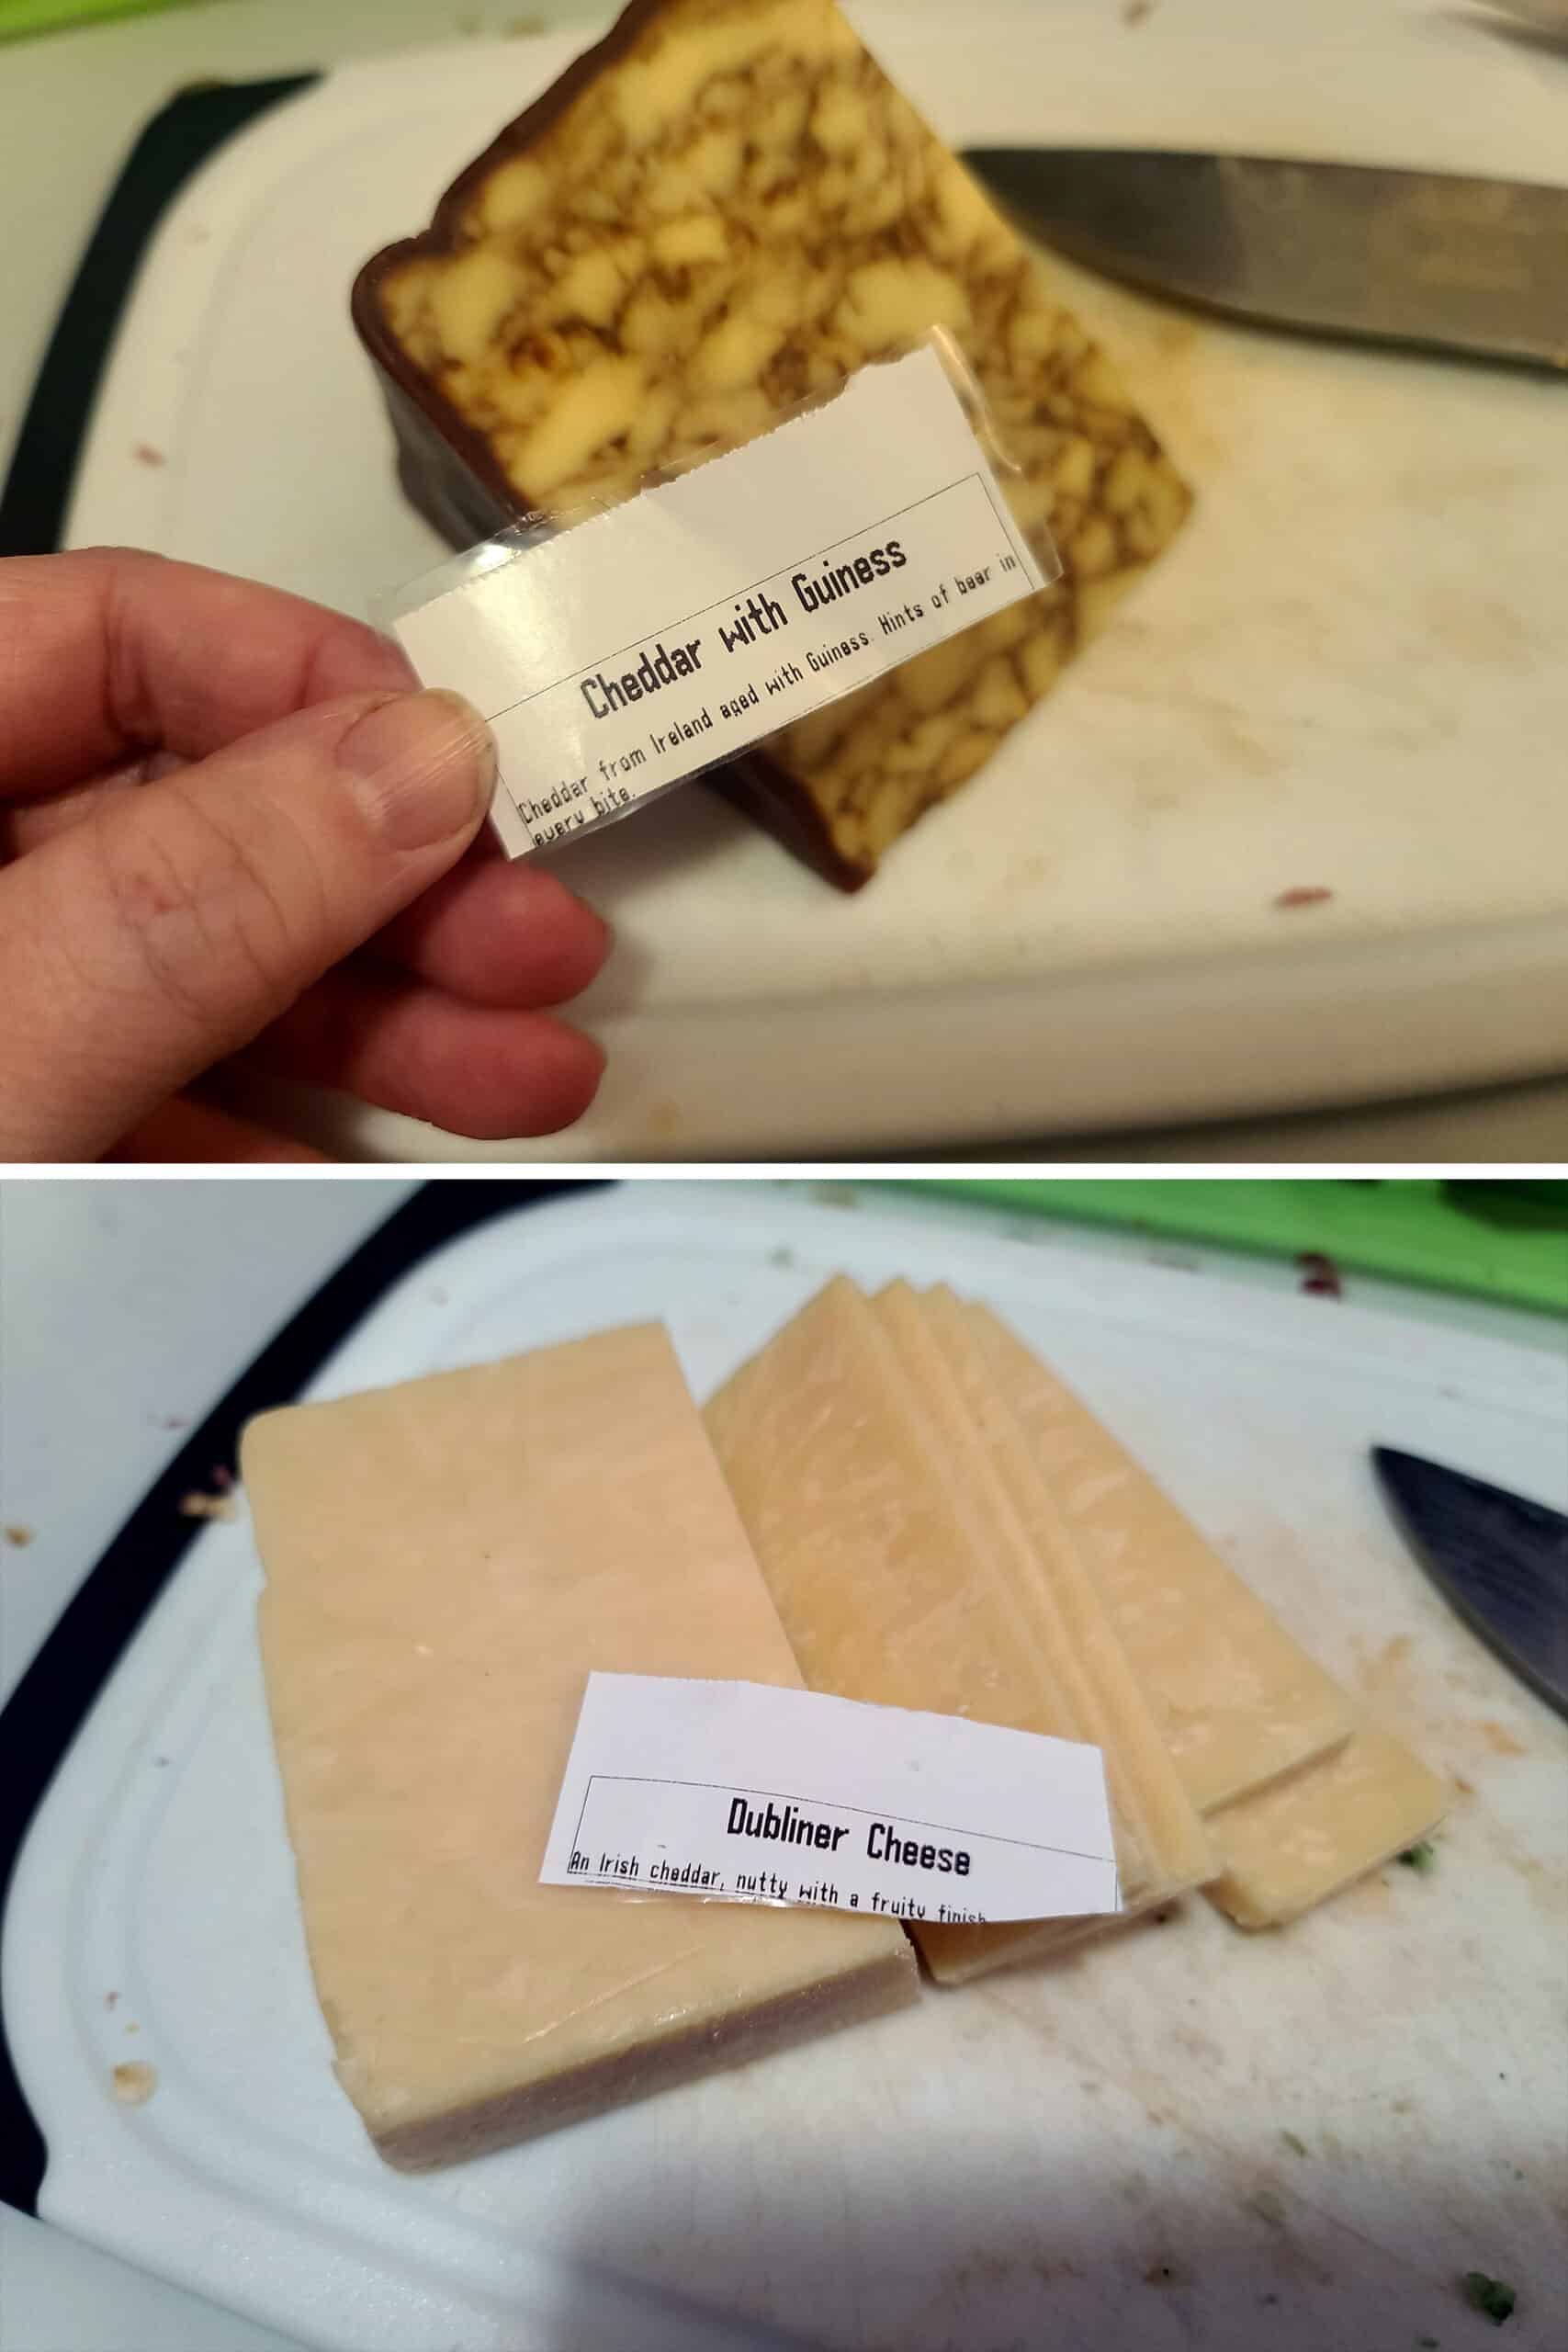
First, I went with Sage Derby cheese, Dubliner Irish Cheddar, and a sharp cheddar (orange), representing the 3 different colors of the Irish flag.
Then I added in some Guinness cheese, because obviously I did.
Irish cheeses in general are an easy way to bring the theme into your cheese selection.
Alternately, you can get creative with a shamrock cookie cutter - see what I did in my Valentine's Day Charcuterie Board, with the brie?
Same idea, I’d just use pesto or a tasty green jelly in this case.
Starches
Generally speaking, you’ll want to have some sort of crackers or bread product to serve with your meats and cheeses.
In this case, I used a small loaf of Pumpernickel Bread that came pre-sliced into little squares, some Rye Crispbread, and Pretzel Crisps.
Slices of rye bread or Irish soda bread would also be great choices, thematically.
In terms of colour, most crackers are sort of white - Stoned Wheat Thins, Vinta, Sociables, Water Crackers, Ritz Crackers, etc.
Rice Crackers, Mary's Gone Crackers, and Schar Entertainment Crackers are good gluten-free options... and you can always put on a batch of my Gluten-Free Cheez Its for a bit of orange!
Crunchy Keto Crackers and Keto Tortilla Chips are some great low carb options, even if they’re not technically starches.
Homemade cookies are a fun way to bring some colour and themeatic elements to your Irish themed charcuterie board.
Use some St Patrick's Day Cookie Cutters and my Sugar Cookie Decorating to make some cute decorated sugar cookies.
I have fantastic recipes for Cut Out Sugar Cookies, Gluten-Free Sugar Cookies, and even Keto Sugar Cookies!
Less into making homemade treats? Most larger grocery stores will have St Patrick’s themed goodies in the week or so leading up to the big day!
Produce
The fresh produce is an easy way to get some orange and green foods on your platter.
I used seedless green grapes, broccoli florets, and cucumber slices for my green produce, but green bell peppers, snow peas or sugar snap peas, and sliced kiwi fruit are some other great ideas.
If you find green peppers with 4 even-ish lobes, you can tops of the green peppers, scoop the seeds out, then slice “rounds” of the pepper, rather than slices. Each will have sort of a shamrock shape.
As far as orange options go, consider orange slices, wedges, or segments, slices of orange bell peppers, and baby carrots.
Another fun produce idea is to go a step further with the “green pepper as a shamrock” idea, and use one as a dip bowl - I did!
Sauces, Spreads, and Dips
I like to include a few smaller bowls of sauces and spreads on any charcuterie board I make, but went in a different direction this time.
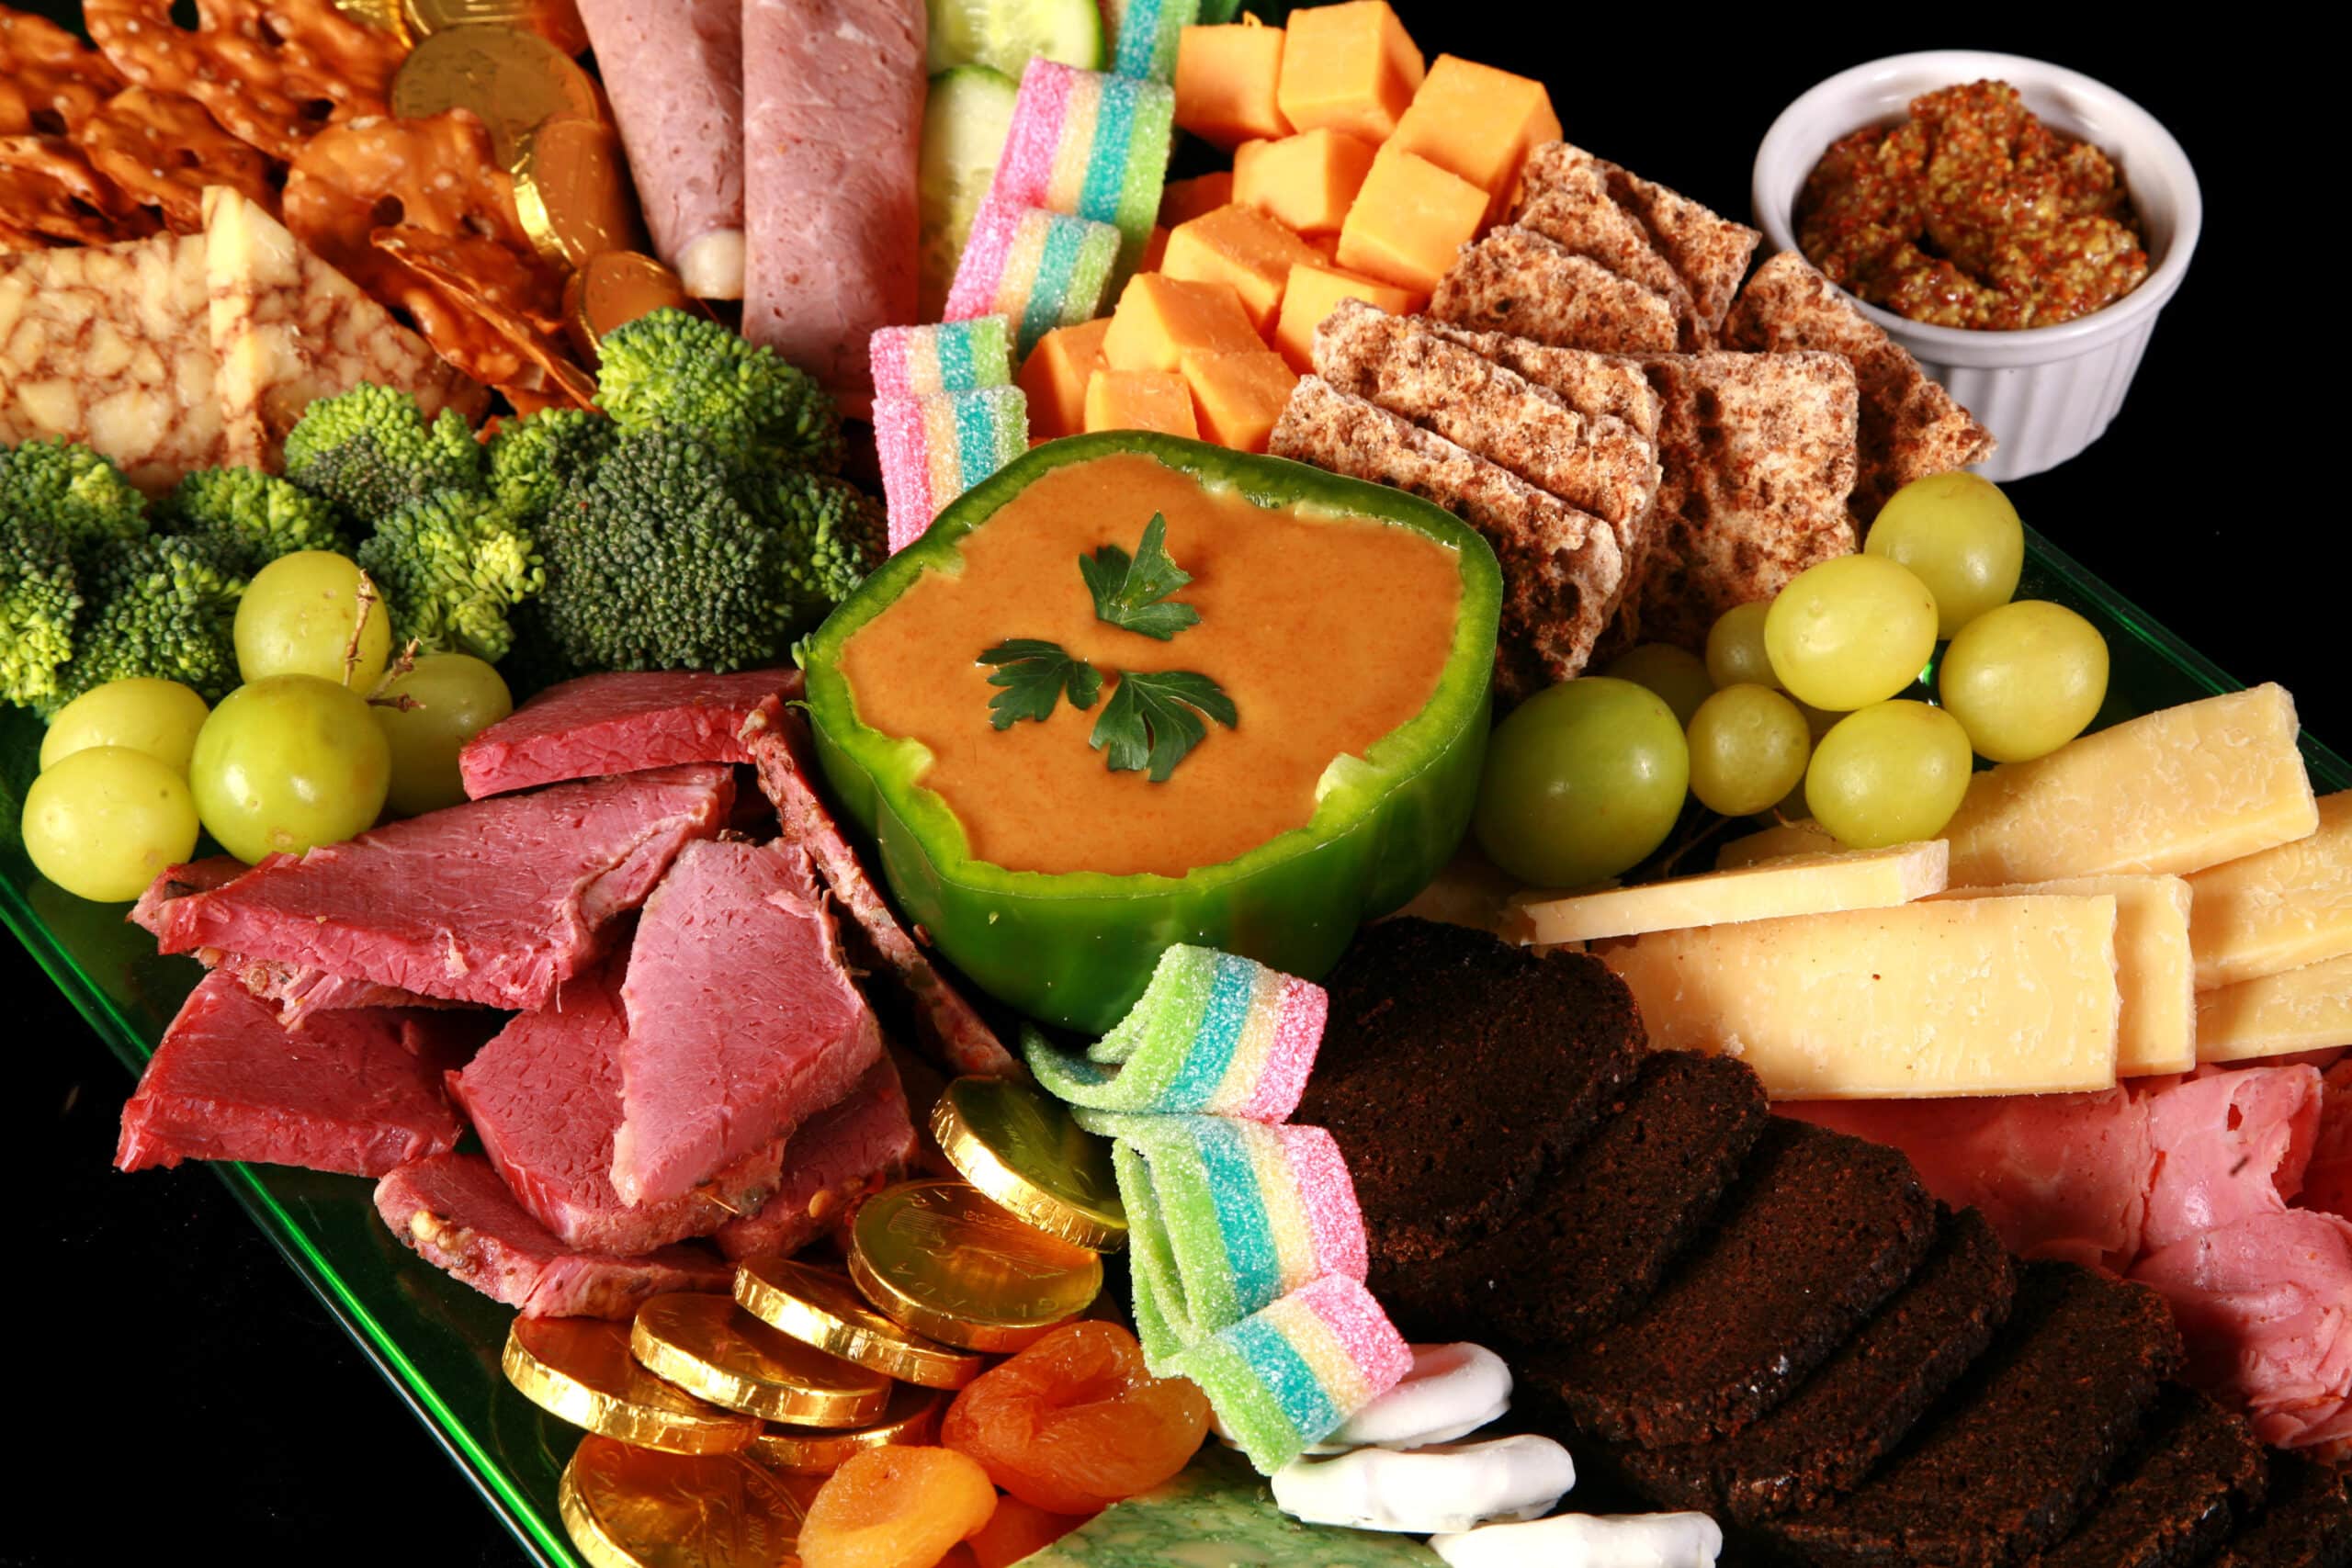
I did have a little bowl of spicy brown mustard off to the side of this board when serving it. Mustard is always a good choice to include with charcuterie boards - it works so well with the cured meats.
I’m a big fan of Kozlik’s Canadian Mustard, and usually have a difficult time picking just one of their flavours. SO many of their offerings are perfect for charcuterie!
Beyond the mustard, I also whipped up a hot Guinness Cheese Dip ... but didn’t write down what I did, so... no recipe, sorry! I’m sure there are plenty of them out there, though!
As I mentioned, I love the idea of green bell pepper bowls for St Paddy’s Day charcuterie, so I was mostly just looking for an excuse to serve SOMETHING in one.
As “single focal point in the center of the board” options go, Guinness cheese dip is always a safe bet, IMHO
Depending on what else you’re serving, Thousand Island dressing is another option to consider. It goes well with corned beef, AND it’s orange!
Munchies
Munchies are all those additional items that aren’t cheese, meat, produce, spread, or starch.
Think nuts, sweet treats, dried fruits, pickles, etc - these are all traditional items to find on a good charcuterie board.
When it comes to designing a themed snack board, you can have a lot of fun deciding which of your favorite snacks would work.
Green items - Cornichons, Pepitas, Pickled Green Beans, green candy, etc are a great place to start.
I felt I had enough green - from the produce and cheese - so I skipped to white and orange.
I’d considered some orange candy, but between the chocolate and rainbow belts, I felt I had enough candy on the board already. I wasn’t aiming to make a candy board or dessert board, after all!
The white to round out my “green, white, and orange” came in the form of White Chocolate Pretzels, which are always popular.
When it came to brainstorming some fun st patricks day charcuterie boards, I played with the idea of “pot of gold”, and almost included little piles of Gold-Wrapped Rolo Candy at the base of the rainbows, but was unable to find any!
So, I used Chocolate Coins instead of Rolo.
Gold coins are probably more accurate to the “pot of gold” idea, anyway!
Garnish and “Other”
Finally, you’ll want to consider the possibility of little finishing touches.
In this case, I used some Sour Rainbow Belts Candy to bring a pop of colour to the platter - and as a nod to the gold coins - and some fresh Italian Parsley.
The 3 3 3 3 Rule
While I’m not enough of a purist to hold tight to it, I figure I should mention this charcuterie “rule”.
The 3 3 3 3 rule says that you should have 3 meats, 3 cheeses, 3 starches, and 3 other accoutrements - munchies, sauces, spreads - for a proper charcuterie board.
Personally, I’m all about “you do you”. Have more meats, more cheeses, not as many starches.. Whatever you like.
If it looks good and tastes great, that’s really all you need. No one is going to judge you for not having 3 of each category!
(Well, that may not be true, I’m in a Facebook group where some people DO judge. The rest of us find them obnoxious, and really... no one needs people like that in their lives!)
Share the Love!Before you chow down, be sure to take some pics of your handiwork! If you post it to Bluesky, be sure to tag us - @CelebrationGen. We're also on Pinterest, so you can save all your favourite recipes to a board! Also, be sure to subscribe to my free email newsletter, so you never miss out on any of my nonsense. Well, the published nonsense, anyway! |
Charcuterie Supplies
Aside from the actual ingredients you’ll be serving to your guests, there are a few other supplies you’ll want for your St. Patrick’s Day board.
A Charcuterie Tray
You can use almost anything as Charcuterie Boards, as long as it’s food safe.
The size and shape of your serving trays will depend on how many people you’re serving, the amount of space you have to serve it on, etc.
A Large Cutting Board will work for smaller displays, and most party supply and dollar stores have plastic platters that work really well for mid range charcuterie displays.
Note: You can even make your own - see our Cutting Boards 101 post, and our two cutting board tutorials:Colourful Squares Cutting Board & Log Cabin Cutting Board!
In terms of colour, I like using a very neutral coloured tray. Sure, going with a seasonal colour can be fun - but it can also distract from the food being served, and/or make it look weird.
Maybe I’m boring, but 9 times out of 10, I’m serving my seasonal charcuterie boards on a plain white tray.
Dip Bowls, Ramekins
If you’re serving a dip - or certain types of small food items - you’ll want some sort of Small Dip Bowl.
Be sure to size your small bowls on your tray before actually using it - you’d be surprised how much real estate some bowls can take up!
For smaller servings of spreads - mustard, jelly, etc - or to contain smaller items like nuts, I recommend using small ramekins. 2 oz Ceramic Ramekins work perfectly!
Serving Utensils
Depending on what you’re serving, you’ll want to consider supplying certain utensils for your guests.
If you’re not pre-slicing all of your cheese, have some appropriate Cheese Knives on hand.
Small spoons are good to have on hand for things like sauces and dip - Espresso Spoons are perfectly sized for this..
If you’re serving to any kind of a crowd - rather than, say, a small board for 2 - I recommend having several Cocktail Picks, Cocktail Tongs, or even Bamboo Cocktail Forks on hand.
This will help keep fingers out of the food that other people will eventually be eating!
Cheese Markers are little signs you can stick in your cheeses, to identify them to your guests.
I generally skip them - just as a matter of aesthetics.
Finally, having small plates and napkins on hand is always a great idea!
How to Make a St. Patrick’s Day Charcuterie Board
Much like with the ingredients, putting together a St. Patrick’s Day grazing board is more of a freestyle thing, rather than a list of directions that *have* to be followed, and done in the right order.
There’s no wrong way to do a board, IMHO.
Here’s how I do it:
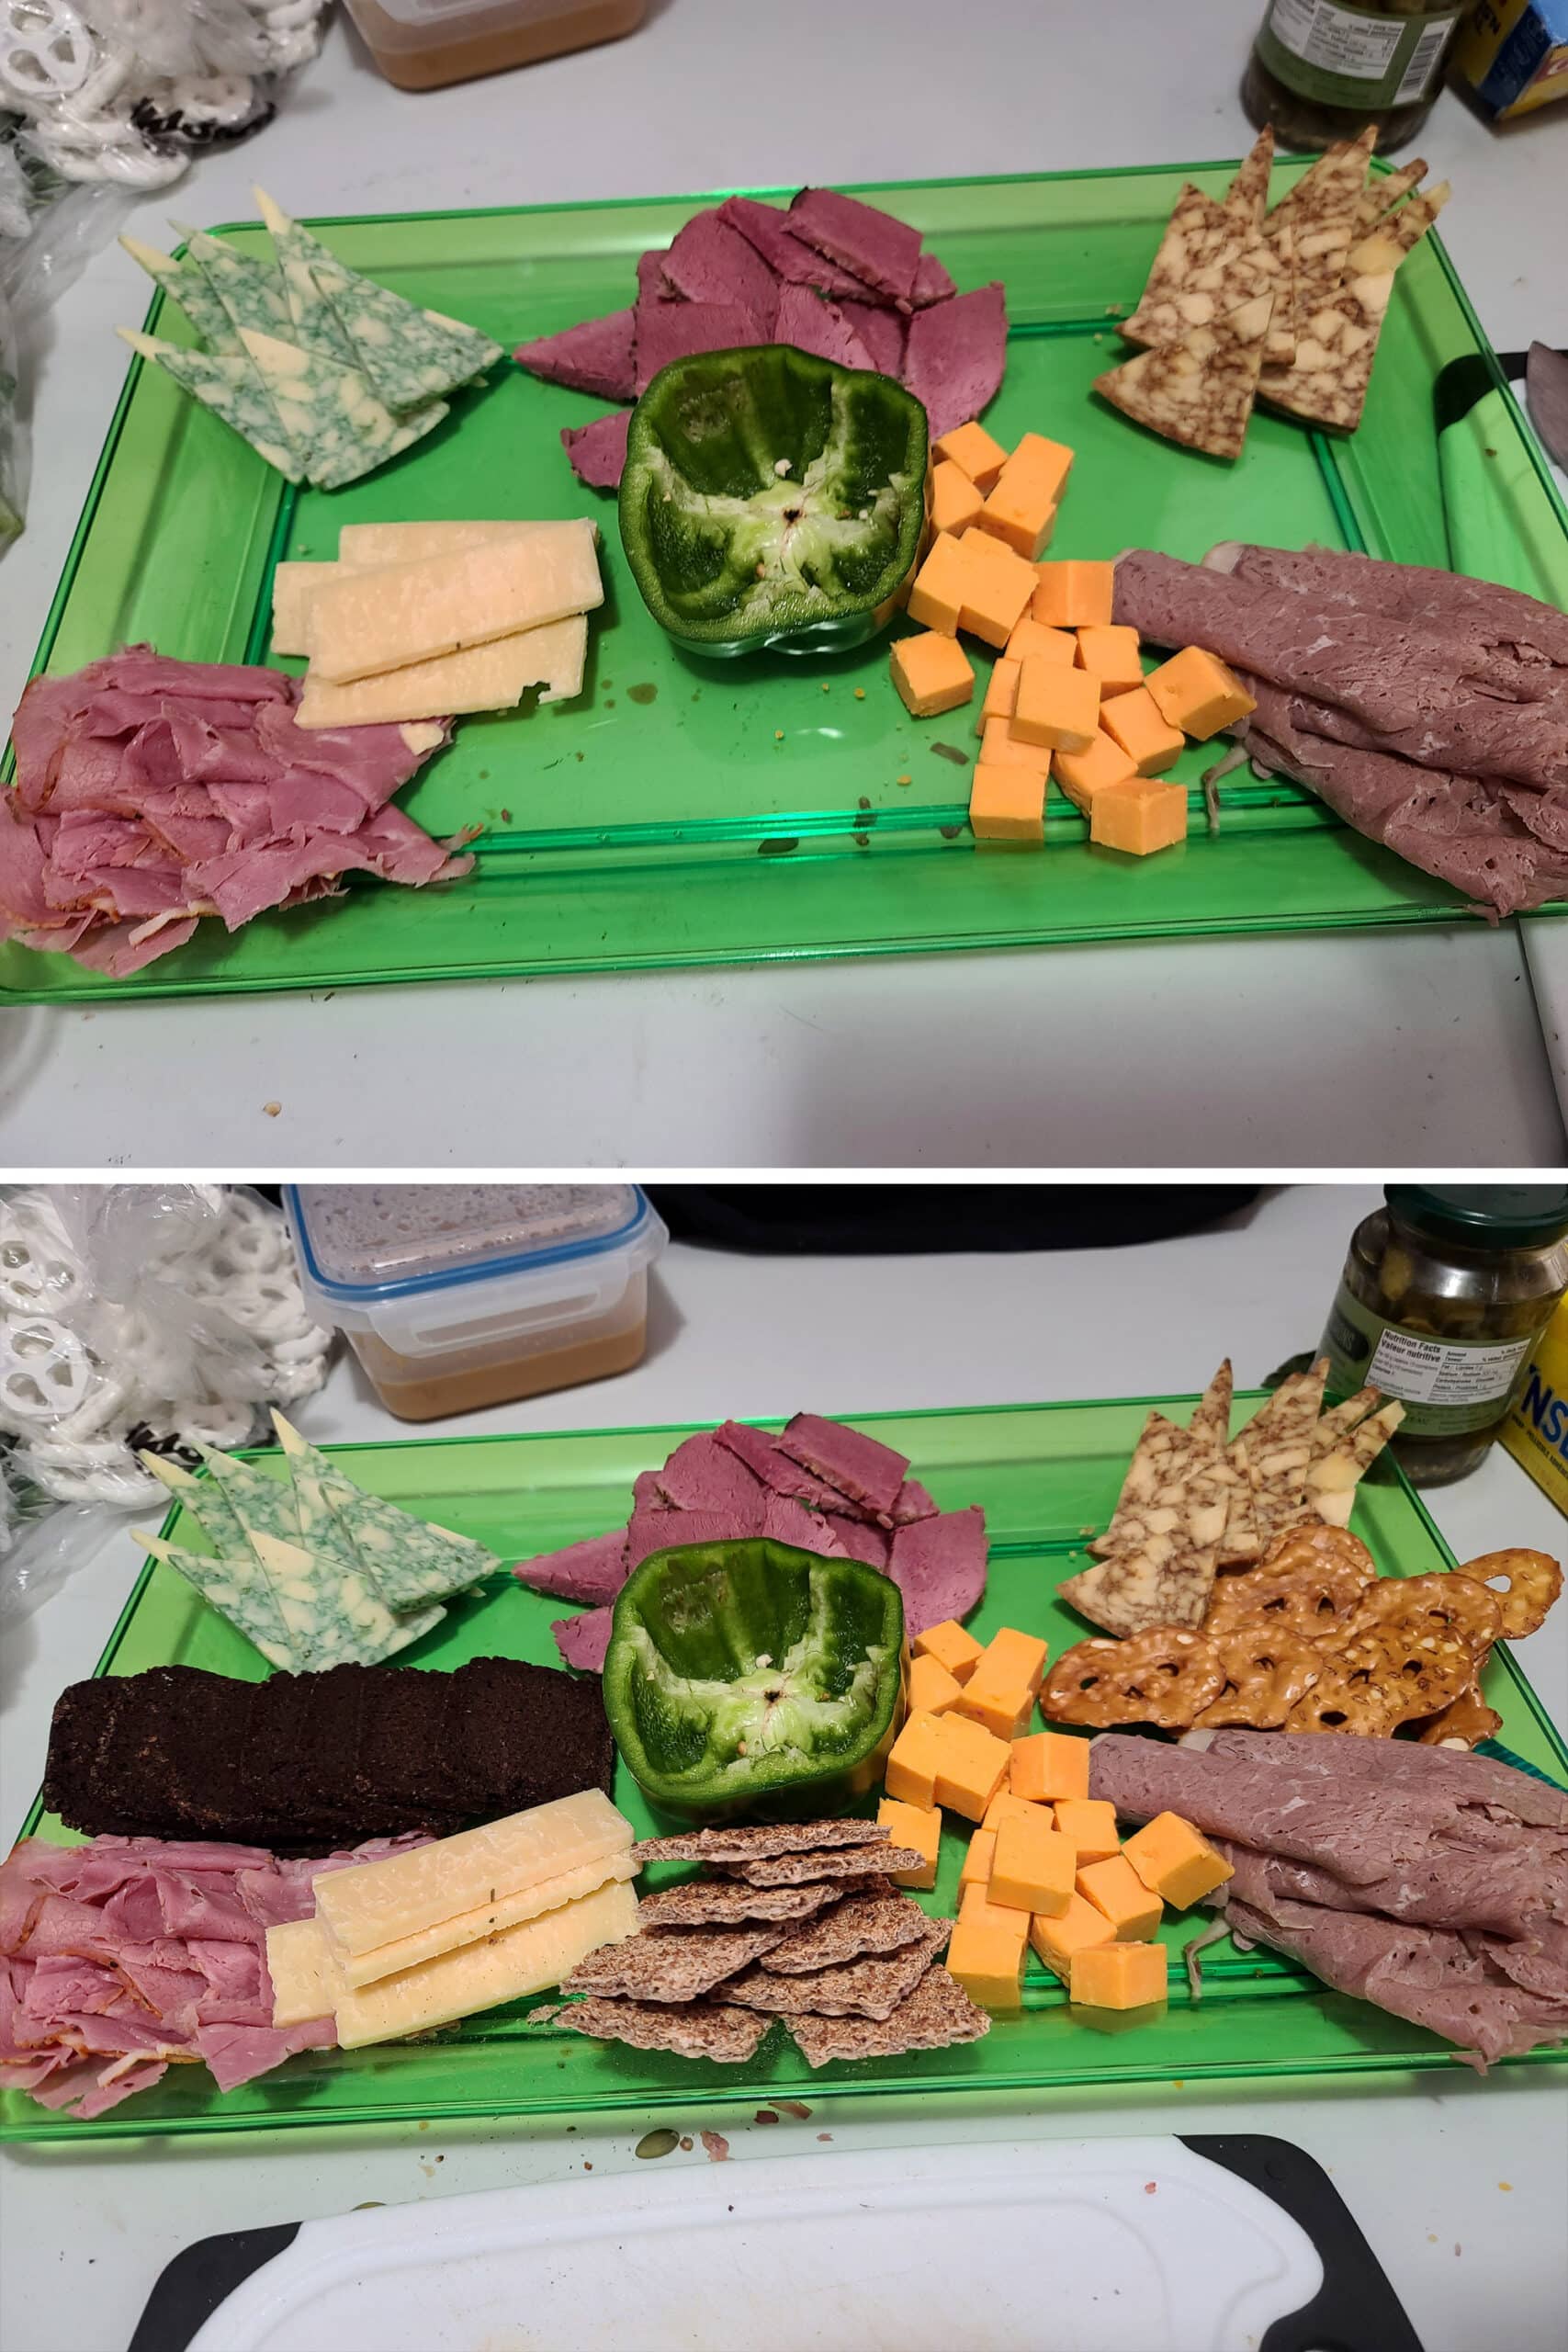
Place the Main Items
1. Figure out what your “solid” focal points are. This is generally things like sauce ramekins and dips, but could also be a cheese or meat - depending on the presentation.
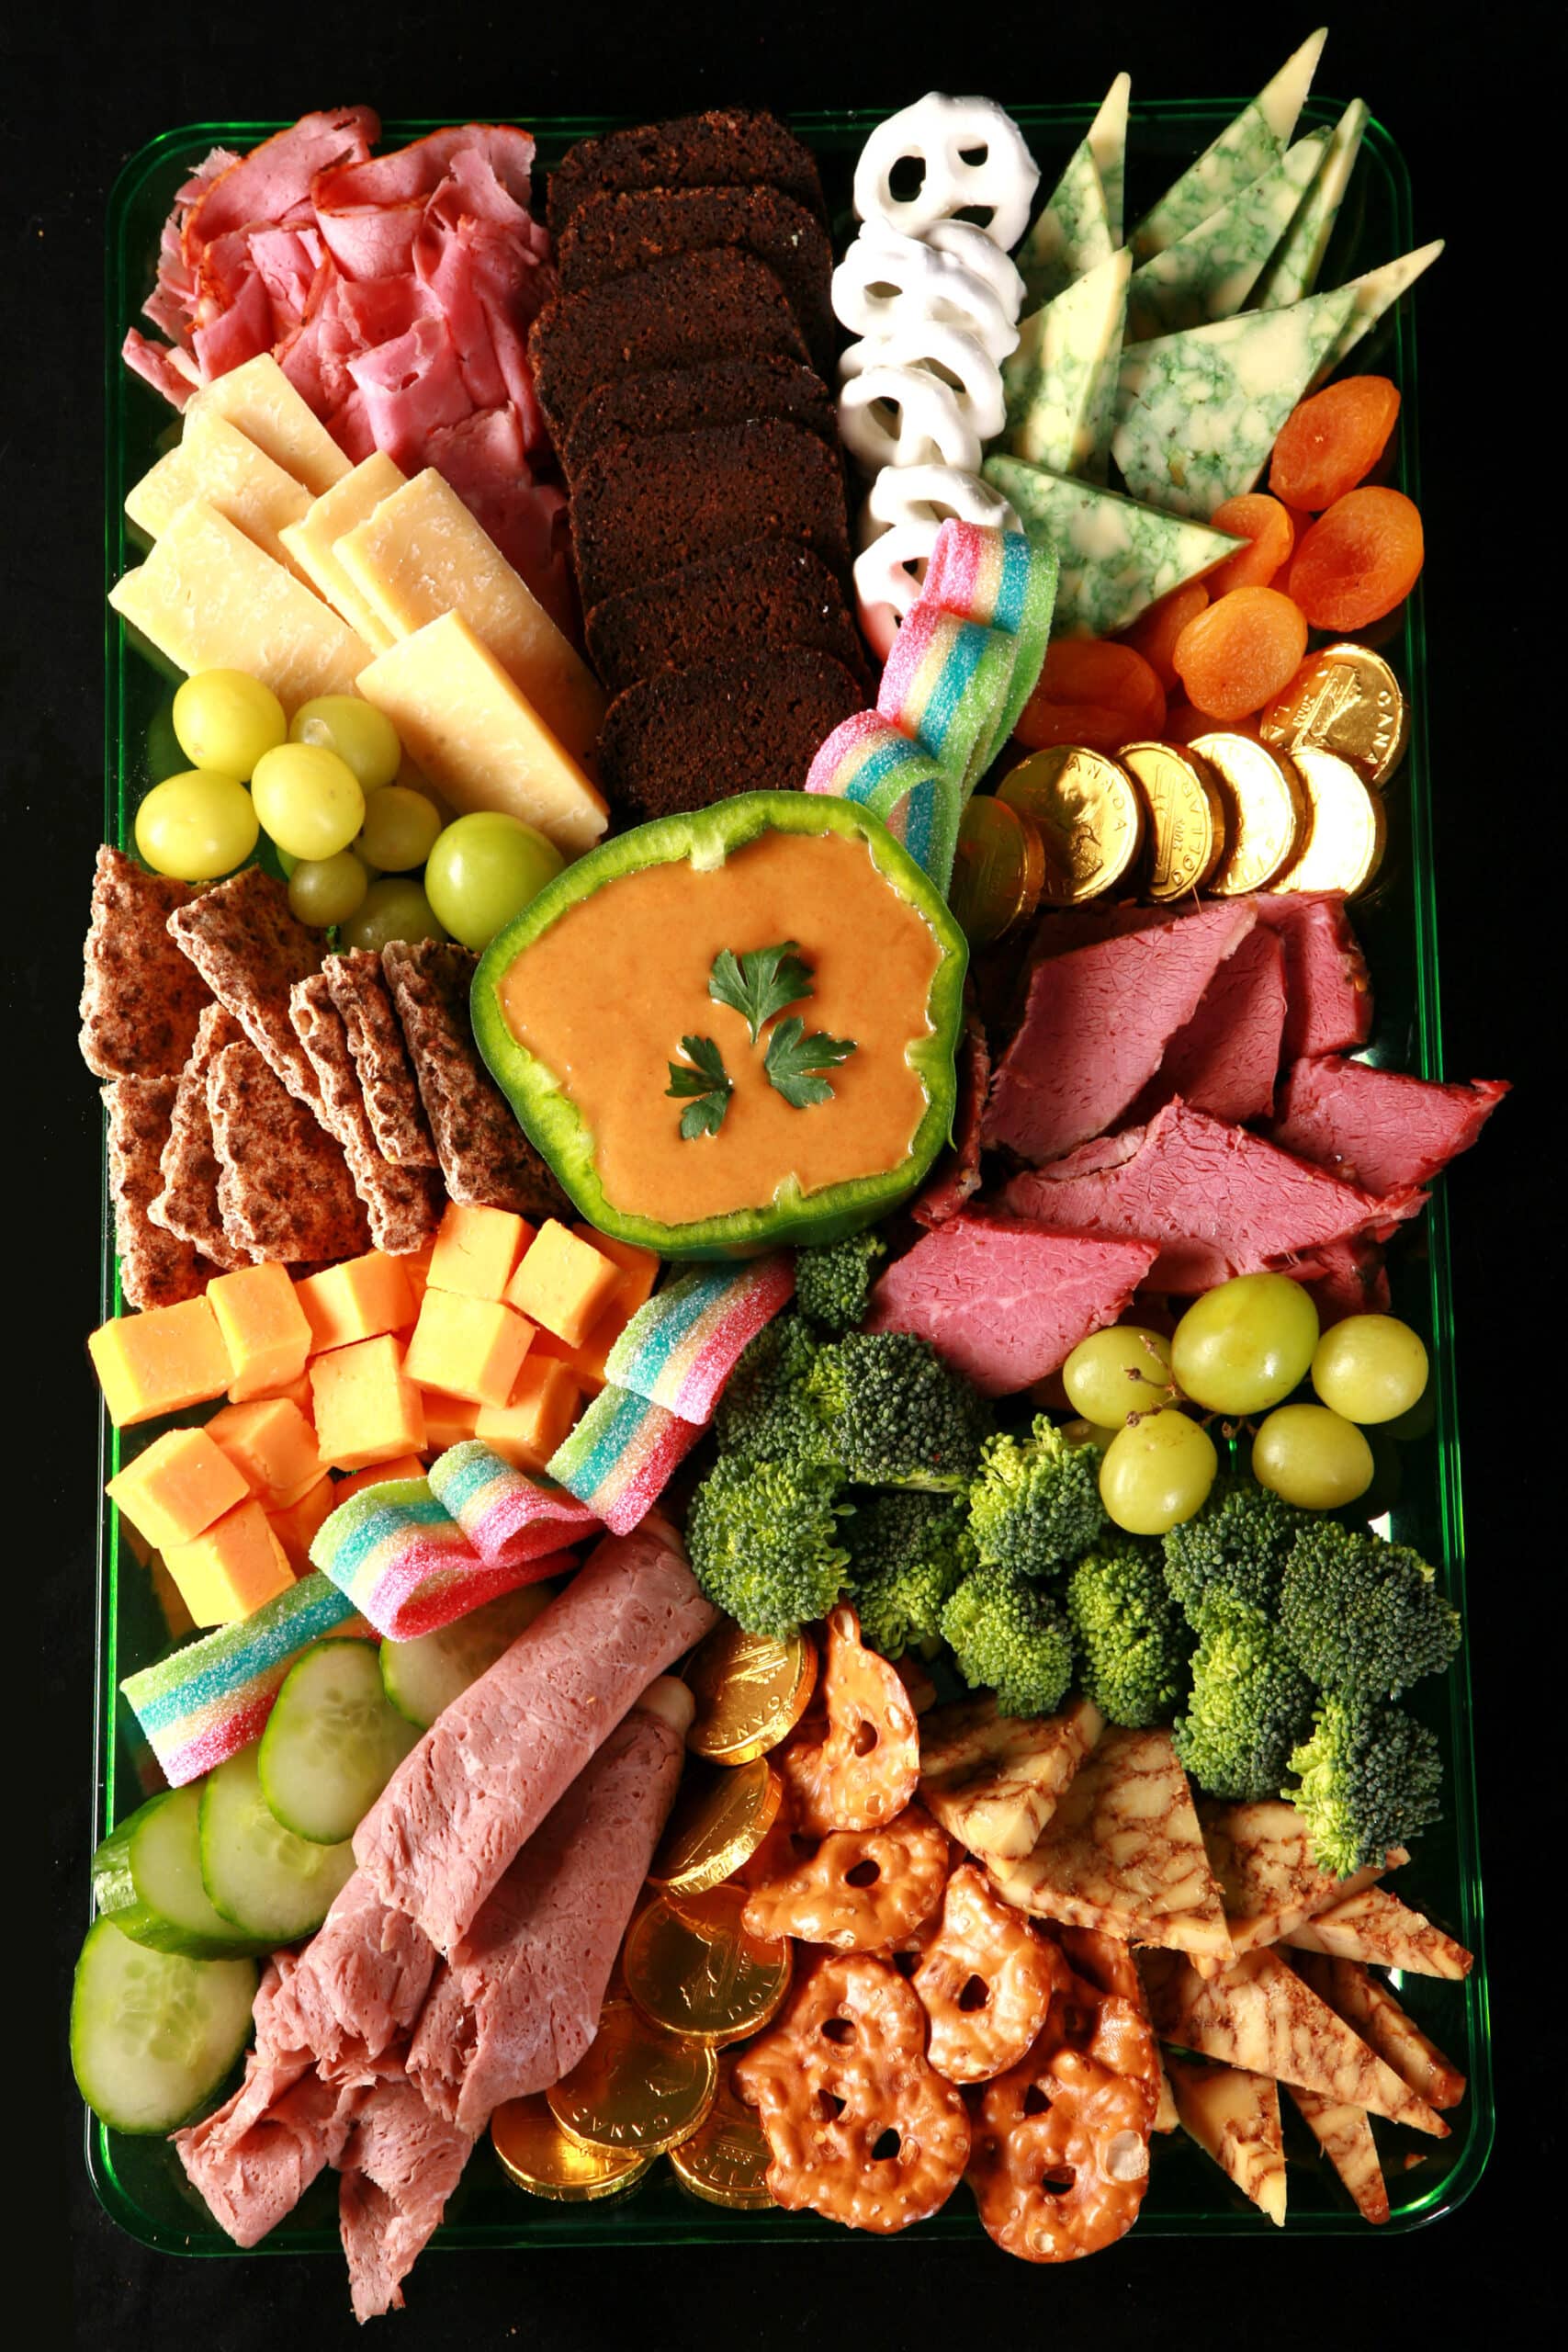
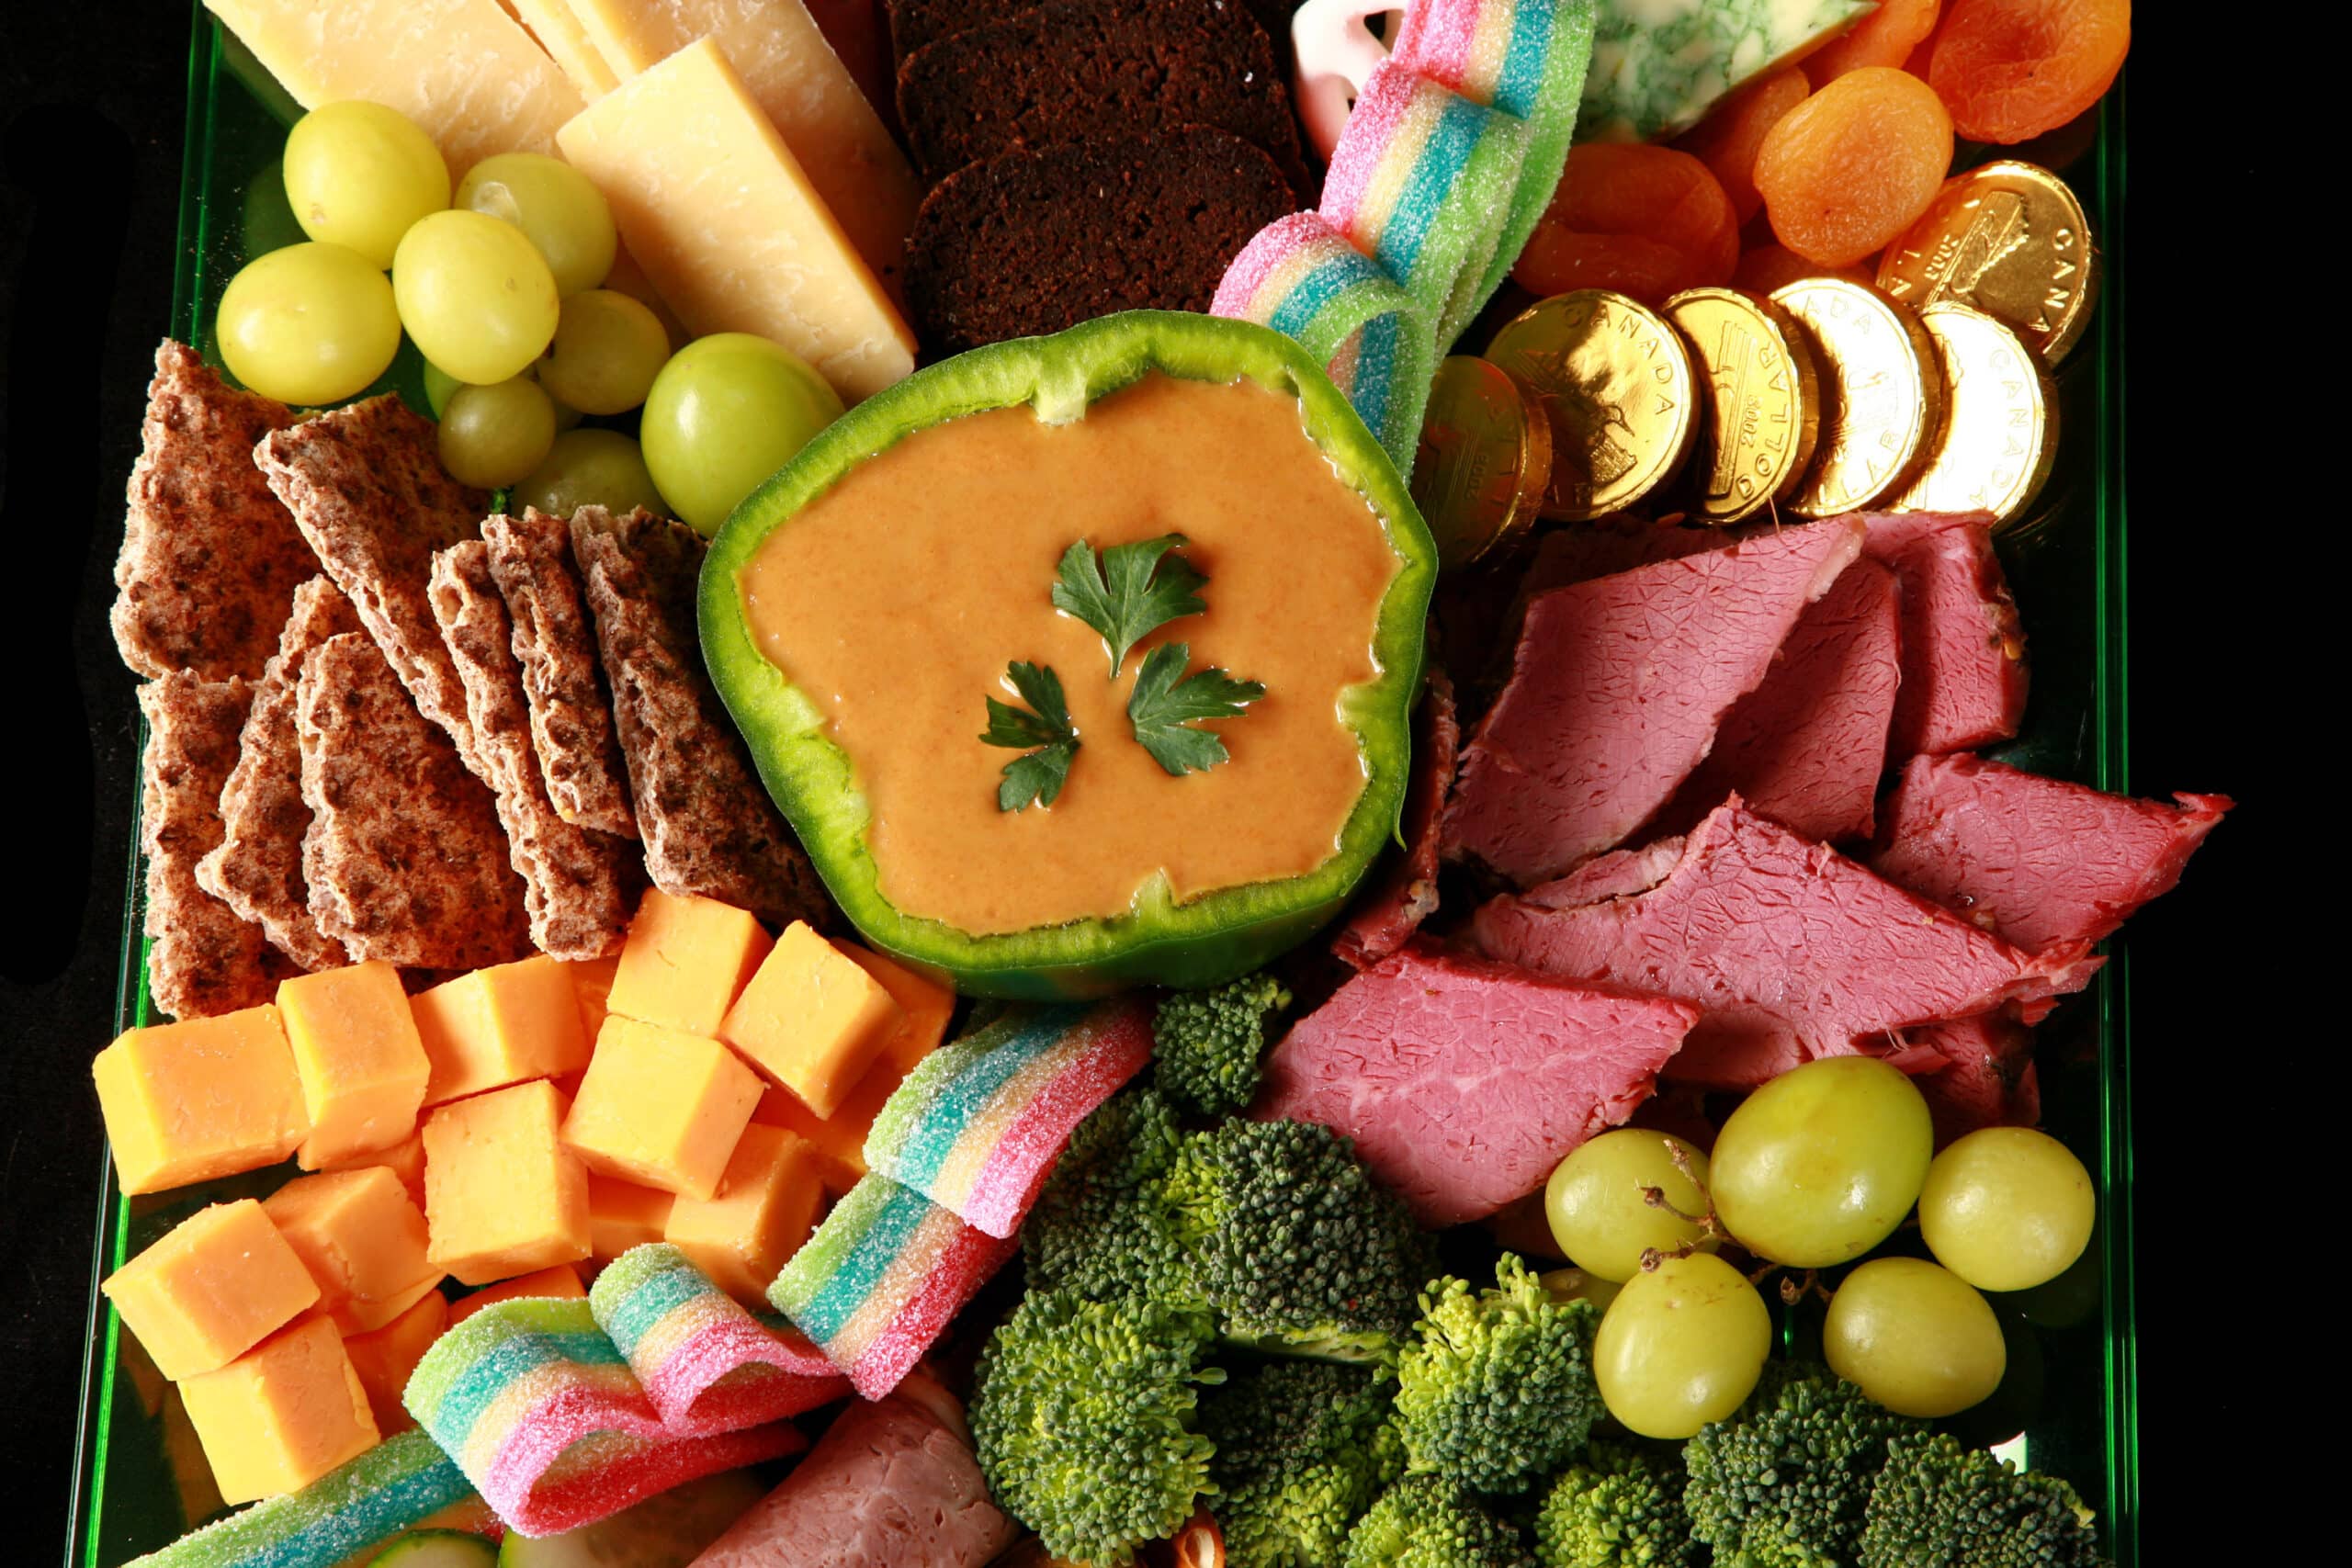
In this case, I used a green bell pepper - with the top cut off and hollowed out - which would act as a dip bowl when I served this fun snack board.
If you are including log of goat cheese, a wheel of brie, any kind of cheese ball, or a pate / terrine of some kind, those would count as “solid” focal points, IMHO.
Place those focal points on your charcuterie board, leaving space between. I like to keep colour and texture in mind when placing, not placing things that are too similar next to each other.
Because I only had one larger focal point item, I put it near the middle of the board.
Note: If any of your focal points is a bowl of dip, place the bowl - add the dip later!
3. Place your cheeses roughly where you’d like them, spacing them out relative to each other. I’ll usually leave some space between each meat and cheese.
Fill in the Secondary Items
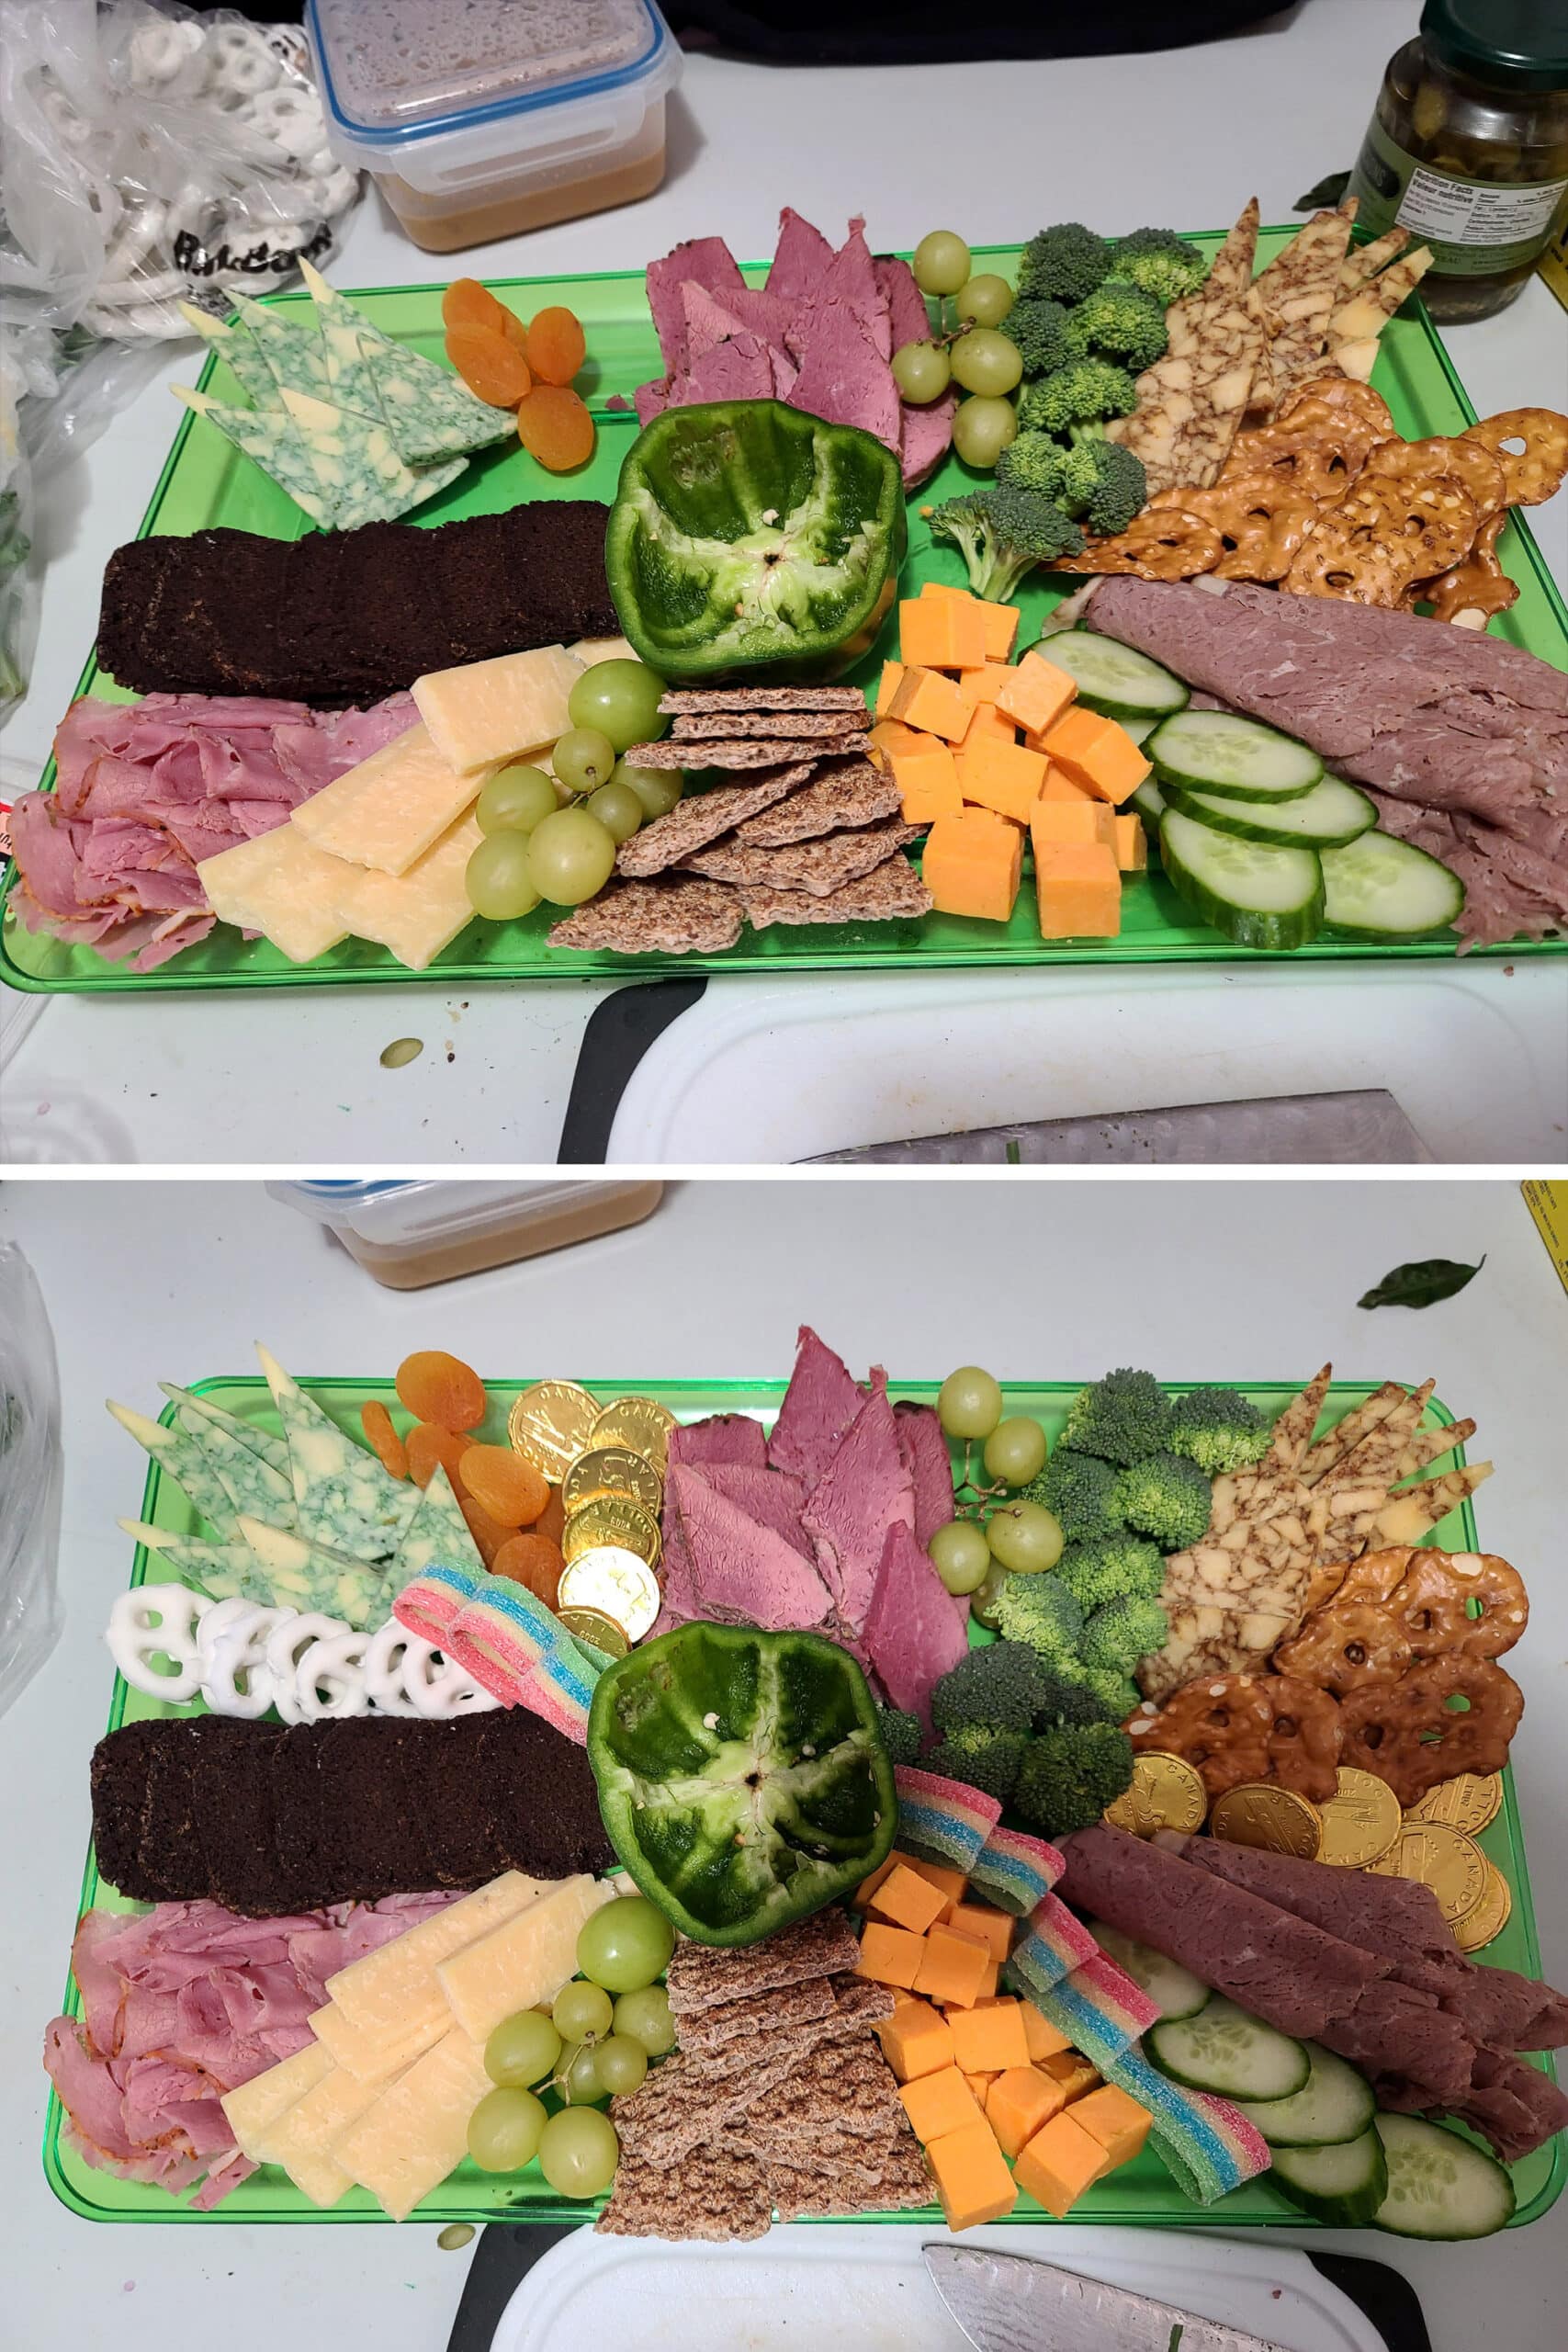
4. Arrange sections of your starches. I like to keep the types of crackers - and cookies, if using - separate from each other. In this case, I used dark Pumpernickel slices, rye crispbread, and pretzel thins.
6. Place sections of your “Munchies” items, filling in any larger empty spaces. This would be the white chocolate pretzels, foil covered chocolate coins, and dried apricots.
Final Touches
7. If you haven’t arranged your meat slices and cheese slices the way you want to yet, do so now. I’ll usually use more meat / cheese / surrounding items to prop slices up, if needed.
8. Fill in any empty spaces with more meat, cheese, produce, or munchies - whatever makes sense for that space on your specific board.
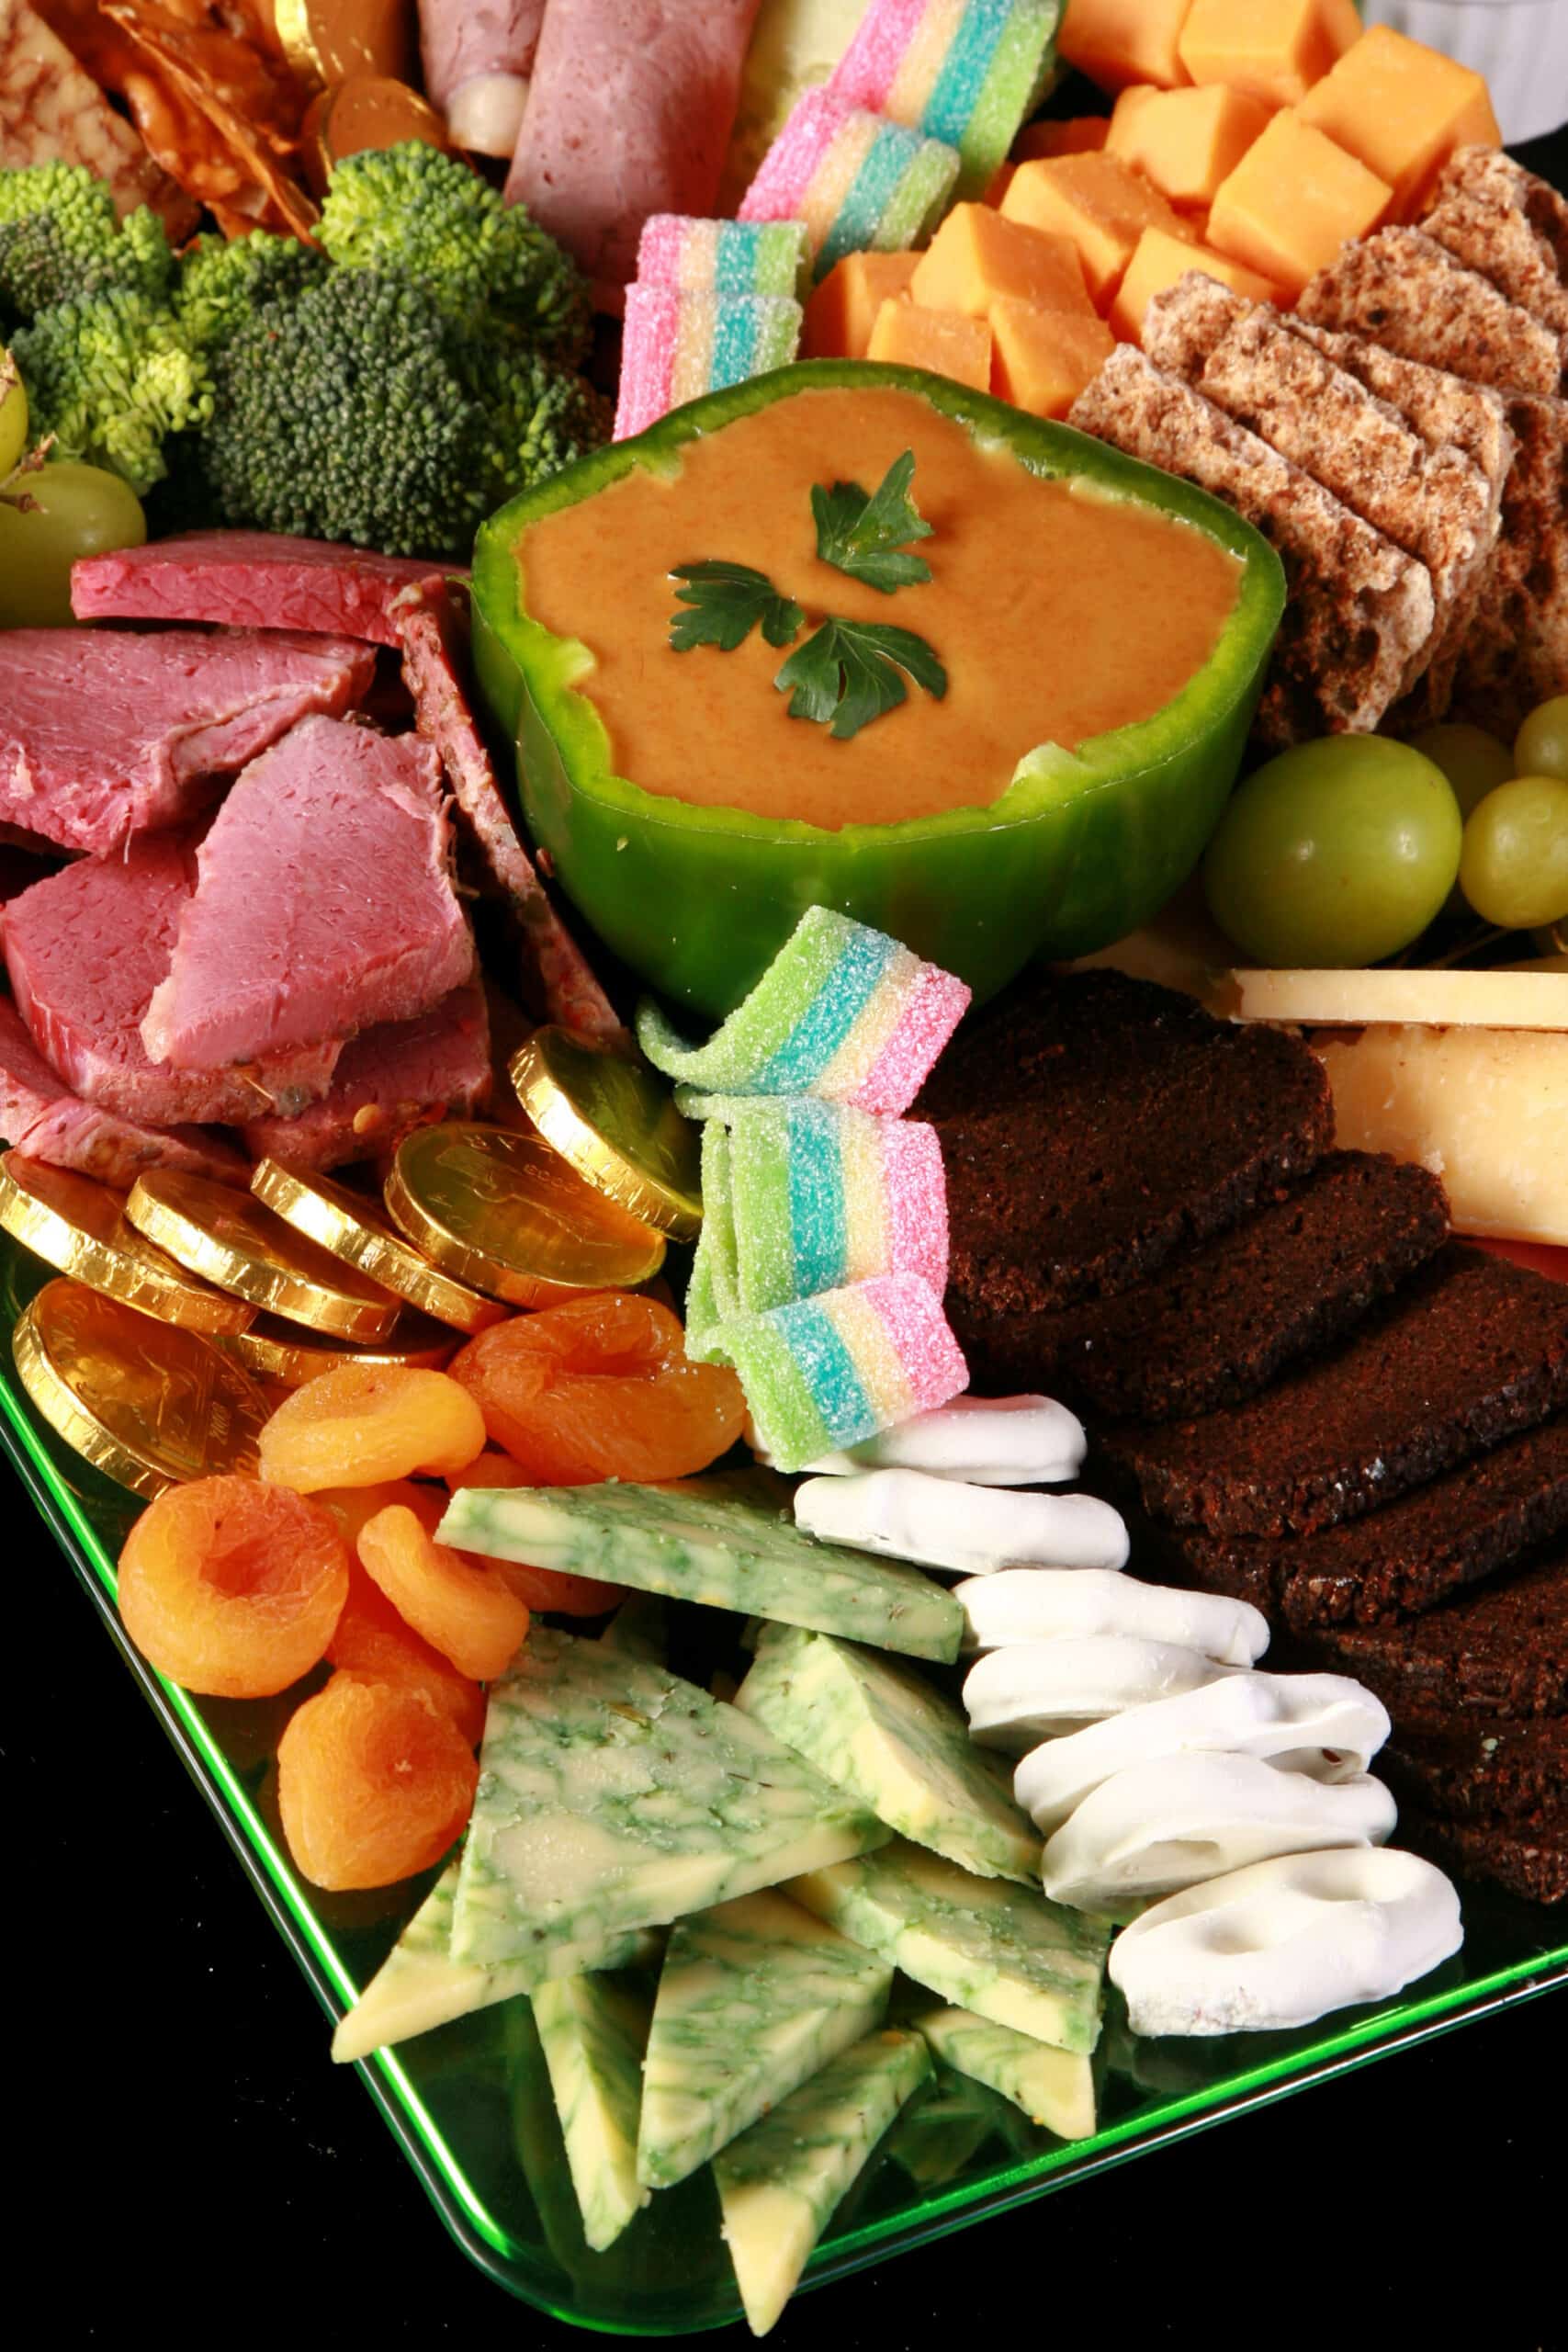
9. Place any of your more “garnish” produce, and any other items that may be acting as a pseudo-garnish. In this case, that would be rainbow ribbon candy.
10. Do any last minute fussing you may need to.
11. If you were holding off on adding dips to the bowls, do so just before serving.
12. If you’re adding any fresh herbs as garnish, place them now. I just did a bit of parsley on the Guinness cheese dip, but herbs are a great way to bring more green to a board in general.
13. Serve and enjoy!
Tips for Charcuterie Success
Because of the different types of ingredients - and the different ways they need to be handled and stored - timing is really important when it comes to serving a St Patrick’s Day Charcuterie plate.
Here are some things to keep in mind:
Food Safety
1. Make sure your charcuterie board itself is food safe. Some trays are meant for display only, using woods or finishes that aren’t food safe.
That’s not to say you CAN’T use them for charcuterie - just be sure to line them with parchment paper, so non of the food directly touches the surface.
Thoroughly wash all produce, and work with clean equipment.
This is a cumulative time - it includes the amount of time you’re preparing the foods and working on your plate.
So, you’ll want to minimize the amount of time your meats and cheeses are out of the fridge.
I recommend preparing each meat or cheese separately, when possible: Take one from the fridge, slice it up, cover and return it to the fridge.
Keep all ingredients chilled until you start assembling your board, and assemble it as close to serving time as possible.
If you expect the board will be out for more than a few hours, make it smaller than needed, and keep rounds of refill items - in baggies - in the fridge. Cycle food items out as their time expires.
Food Quality
1. Be sure to check expiration dates on items like packaged cheeses and meats, and use them well before the expiry date. When buying a cut wedge of cheese, it should be used within 2 weeks of purchase - as a general rule of thumb.
2. Check all fresh produce for mold, blemishes, etc before using. Use only ripe produce.
3. Don’t let your cheeses be exposed to the air for too long before use - whether in the fridge or not. Wrap or bag everything when not in use.
4. Keep the cheeses separate when stored. Ideally you’ll be serving cheeses in a variety of flavors - when stored together, those flavors can mingle. Not a great thing, in this case!
Presentation
1. Aim to assemble your charcuterie board as close to the time you’ll serve it, as possible. This will prevent flavors from mingling, juicier produce from “bleeding” onto surrounding items, moisture from spreading, etc.
Aside from food safety issues mentioned above, it’ll also keep things the proper texture. If you make your board, wrap it, and chill it ... you’re going to end up with soggy crackers.
2. I like to leave dips OUT of the bowls until the last minute. It’s really easy to accidentally knock dip out or get the side of a hand in the dip, as you’re assembling your board. Get it all assembled - with empty bowls - THEN spoon the dips in.
3. If you’re traveling with your charcuterie board, it’s best to do so with the ingredients prepared and bagged, but not assembled. Not only will the flavors and textures stay good, you don’t risk an assembled board getting jostled in transit.
4. Try to be inclusive, when you’re serving a mixed crowd. If you know that some people are gluten free, leave the crackers off the board altogether, and provide some gluten free cracker options on the side. Be sure to minimize cross contamination wherever possible.
More St Patrick's Day Recipes
Looking for more fun, tasty recipes to serve on St Paddy's Day? Here are a few fun Irish - and Irish-inspired - recipes to try:
Green Velvet Cake
Keto Irish Cream
Irish Pizza
Shepherd's Pie
Keto Shepherd's Pie
Homemade Corned Beef
Irish Nachos
Irish Stew Meatballs
Hearty Beef Stew
Keto Beef Stew
Rainbow Bagels
Rainbow Charcuterie Board
Rocky Road to Dublin Brownies
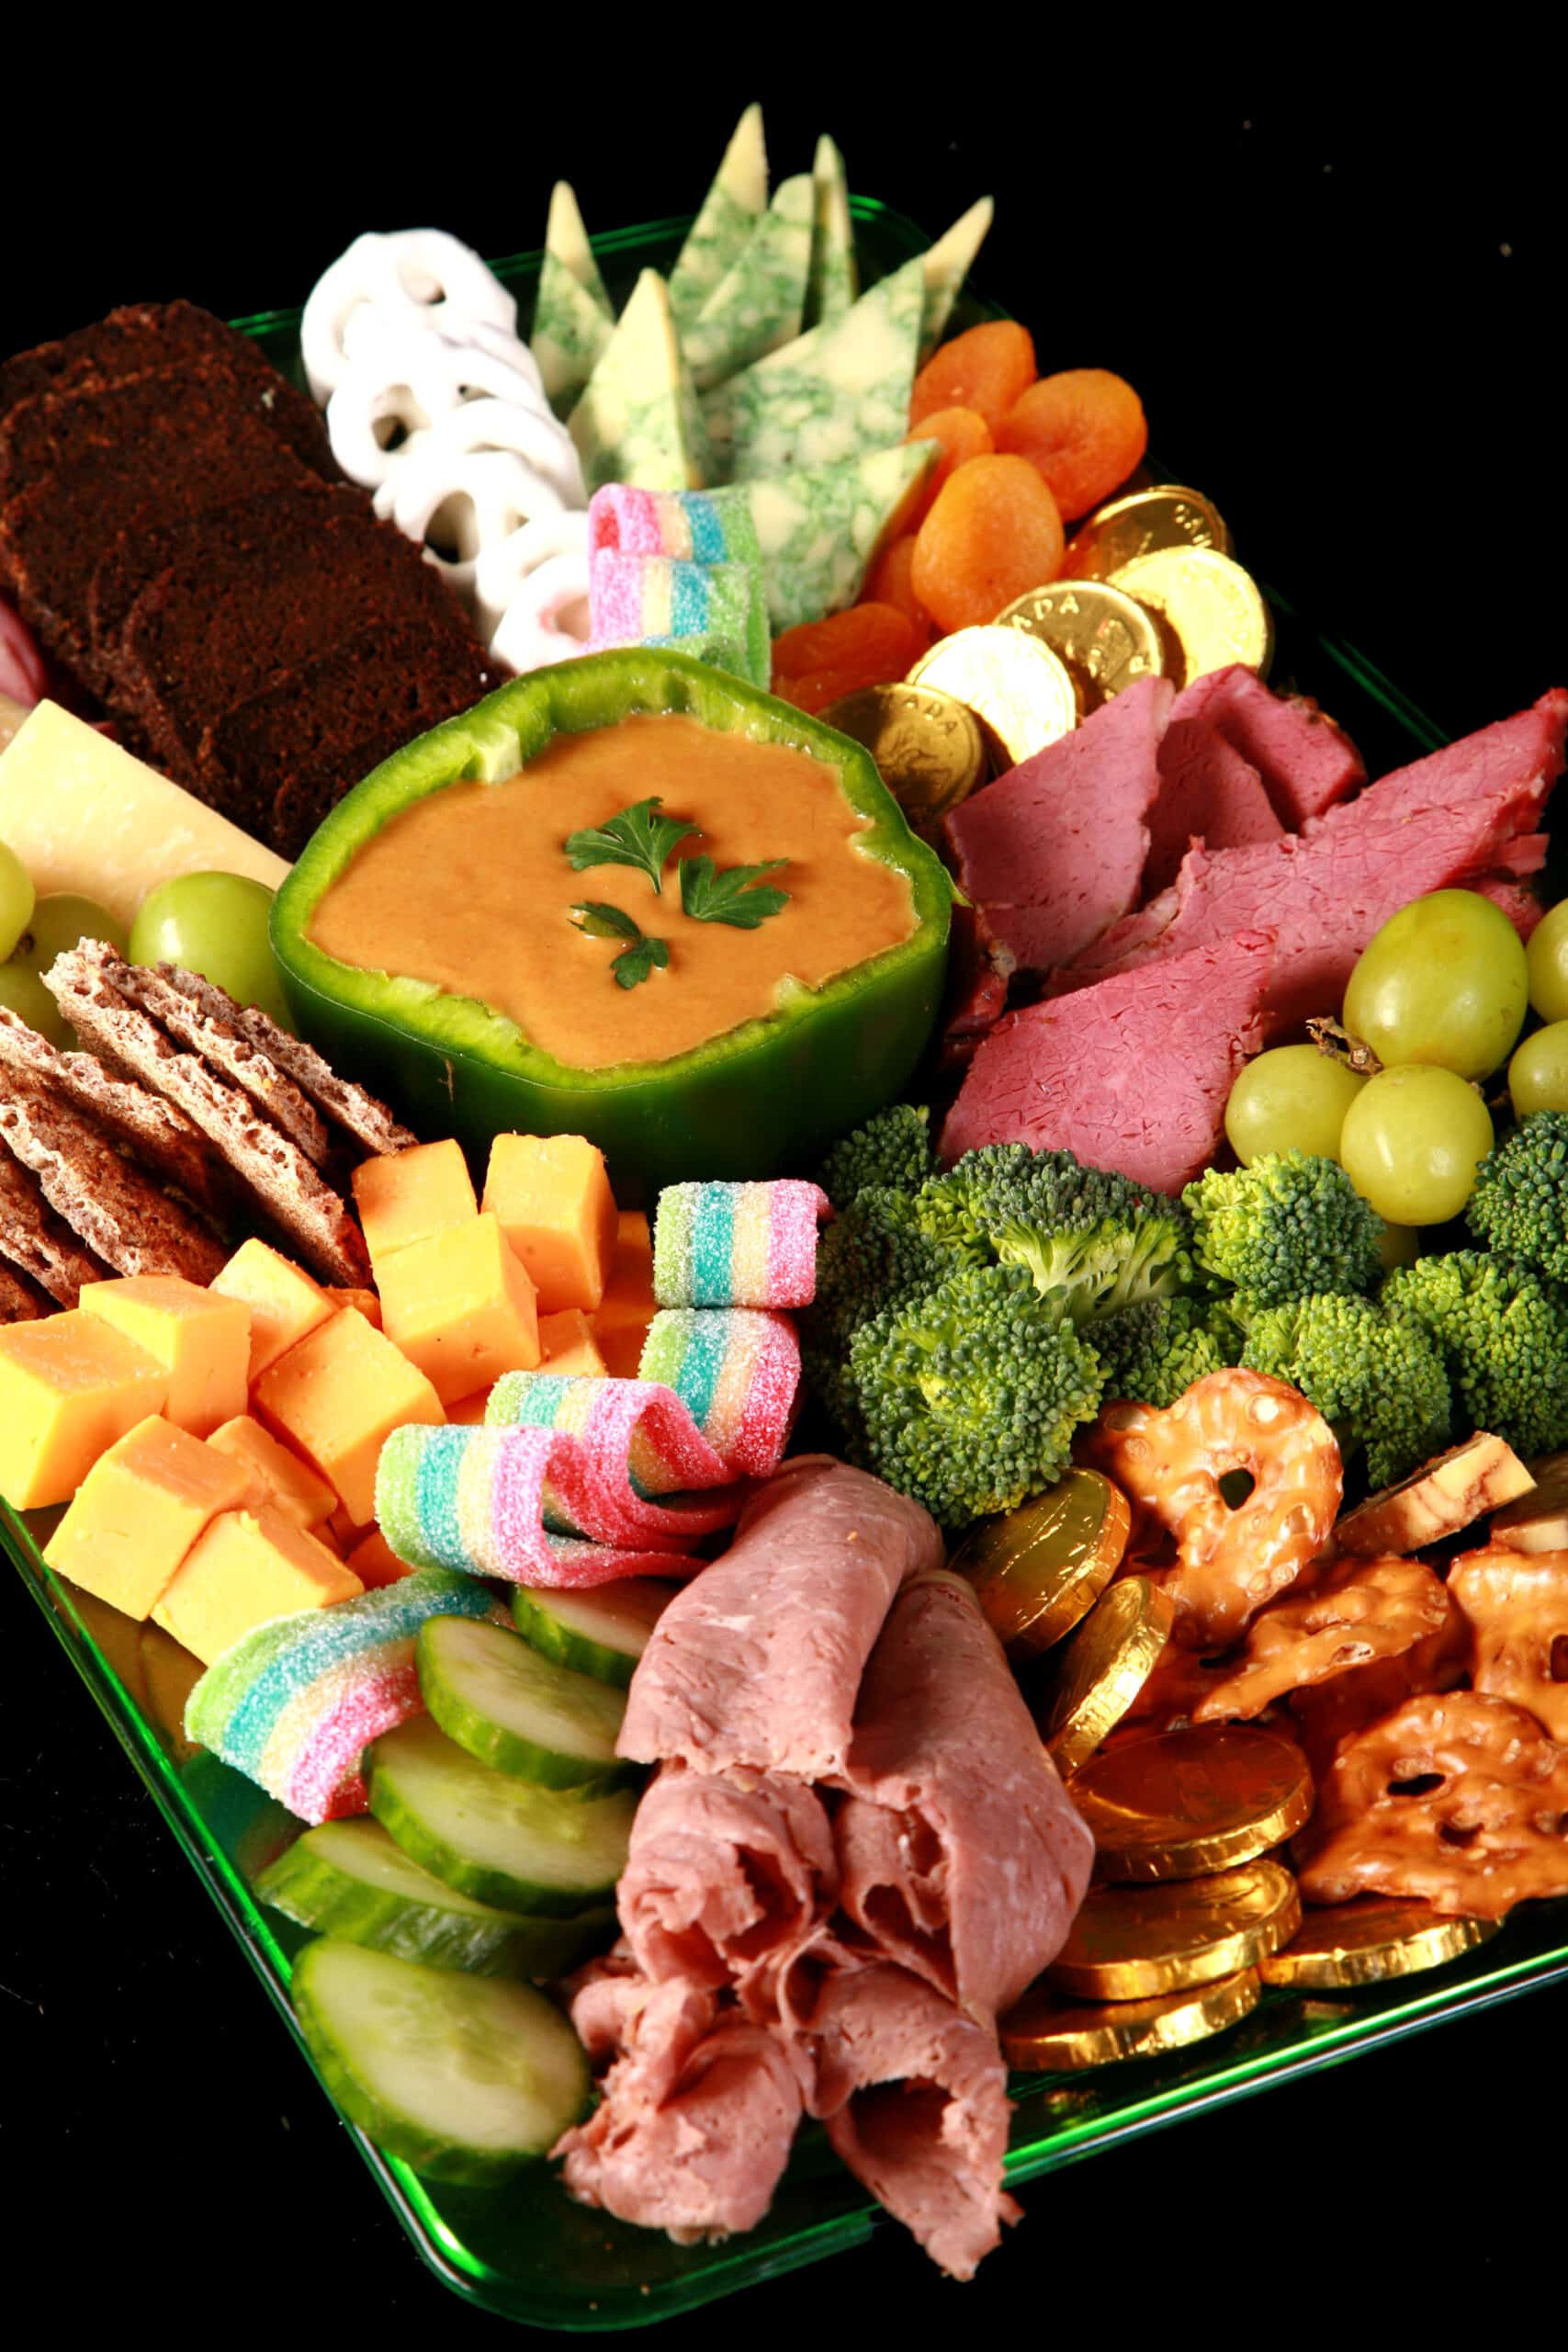
Fun & Festive St Patrick's Day Charcuterie Board
Equipment
- Charcuterie Board
- Ramekins and Dip Bowls
- Cheese Knives, etc
Ingredients
- 3 oz Cured or smoked meats see post for suggestions
- 3 oz Cheese see post for suggestions
- Crackers see post for suggestions
- Produce Sauces, Snack Items, and Garnishes as desired - see post for suggestions.
Instructions
Place the Main Items
- Place your focal point items - wheels or chunks of cheese, sauce ramekins, dip bowls, etc - on the charcuterie tray. In this case, it was a green pepper with the top cut off, and seeds spooned out. This would later become a dip bowl, for the Guinness Cheese Dip.
- Place your other meats roughly where you’d like them to go, then place your cheeses.
Fill in the Secondary Items
- Arrange sections of your starches - crackers, cookies, bread. In this case, I used rye crisp bread, a dark pumpernickel bread, and pretzel thins.
- Fill in your sections of the more “snacky” produce. In this case, that's cucumber slices, broccoli florets, and green grapes.
- Place sections of your “Munchies” items, filling in any larger empty spaces. This is the white chocolate pretzels, foil covered chocolate coins, and dried apricots on the charcuterie board as pictured.
Final Touches
- Arrange your meat and cheese slices more artfully, if desired.
- Fill in any sparsely covered areas with more meat, cheese, produce, etc.
- Add dips to the bowls, if applicable, then garnish as desired. I used rainbow belt candies to bring a pop of colour to the board.
- Serve and enjoy!
Notes
Nutrition
Thanks for Reading!... and hey, if you love the recipe, please consider leaving a star rating and comment! |






Leave a Reply