

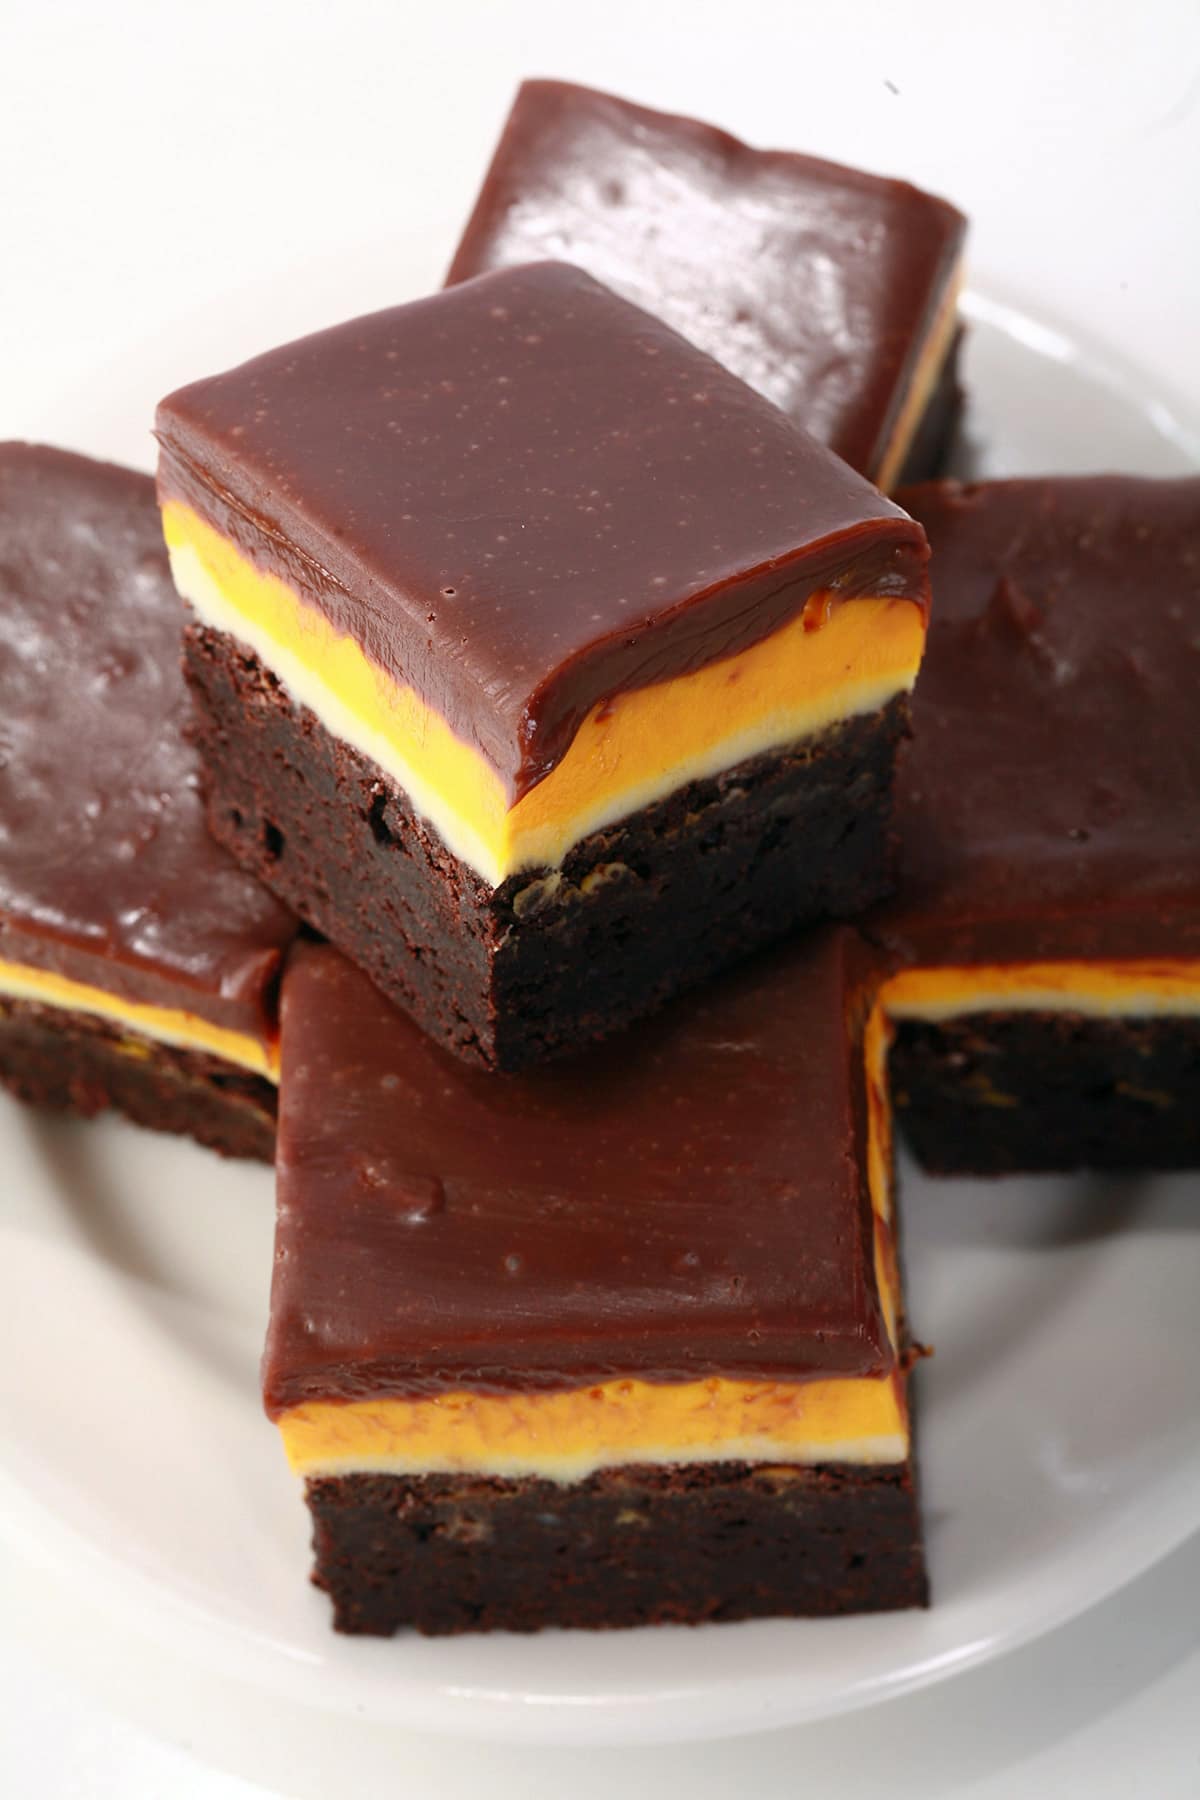
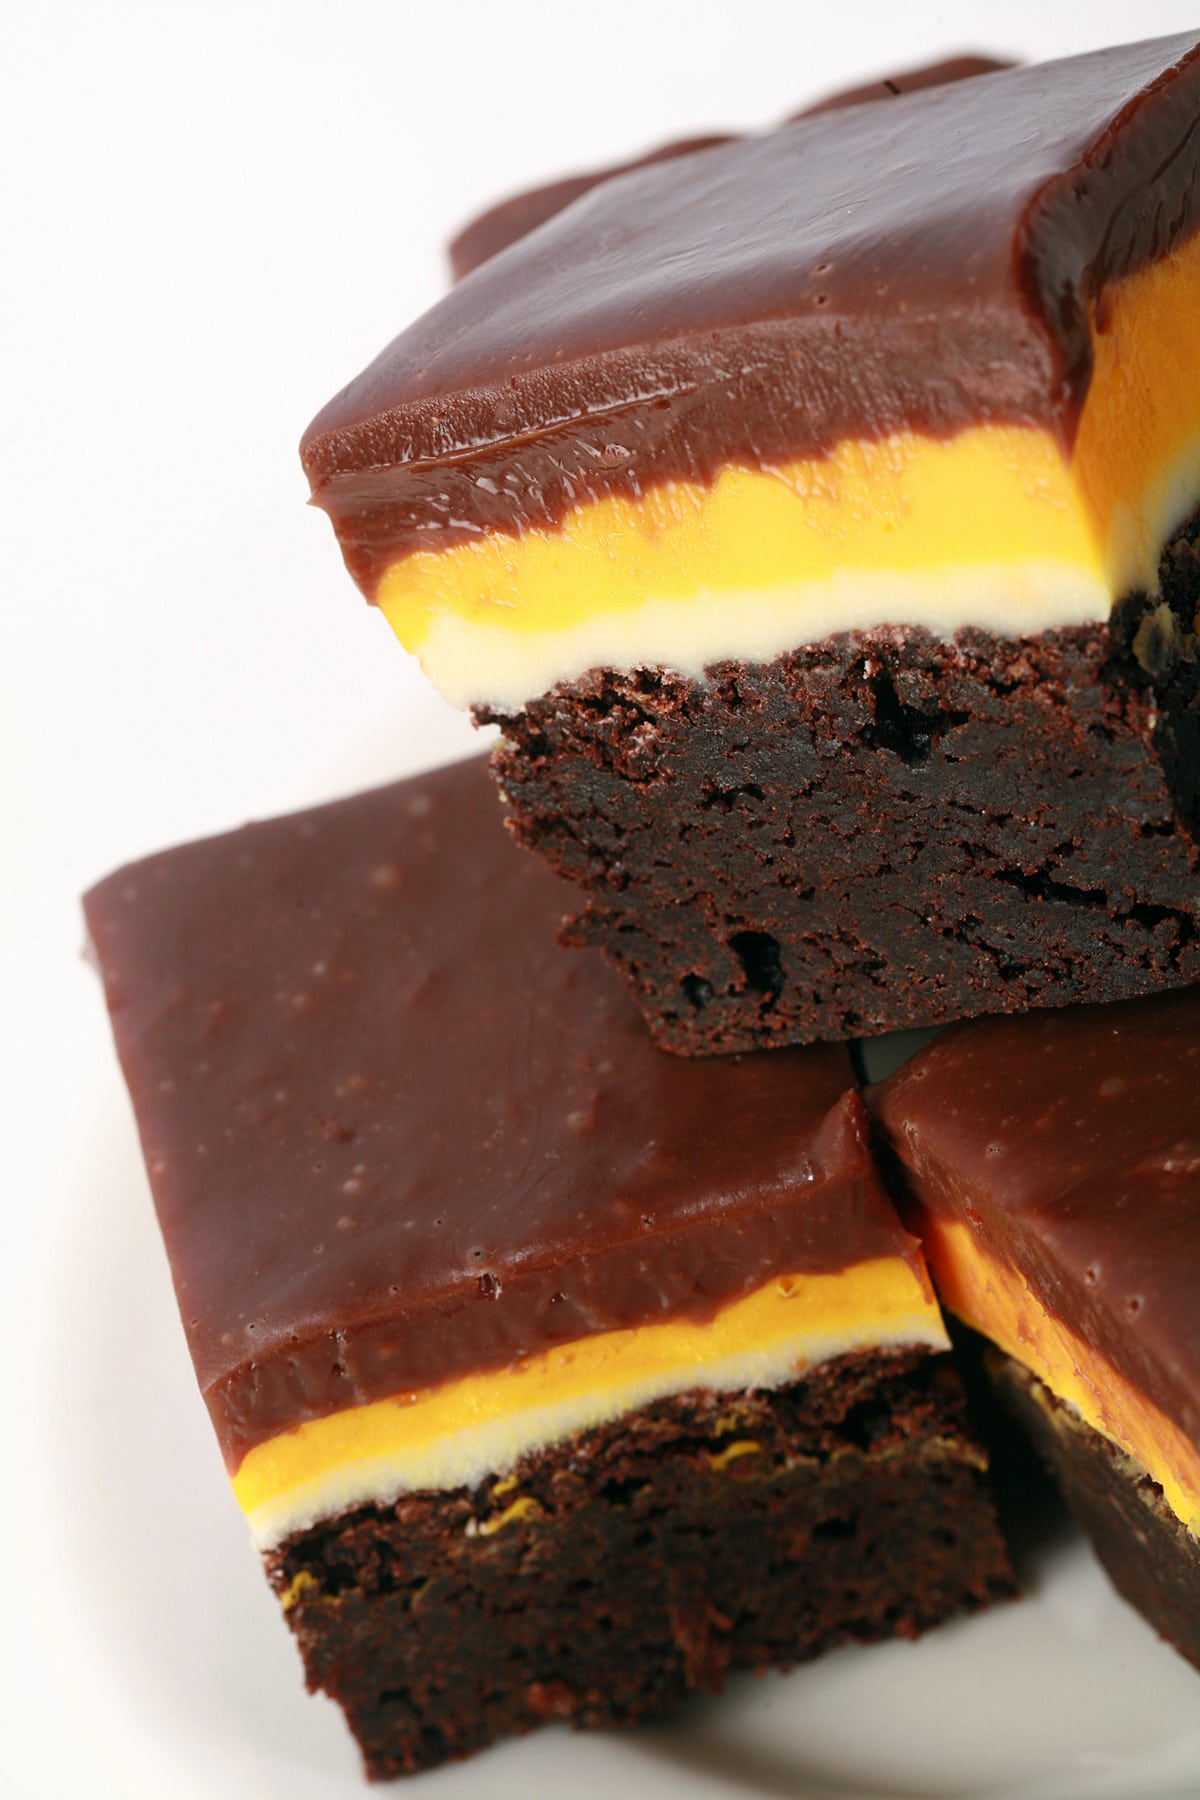
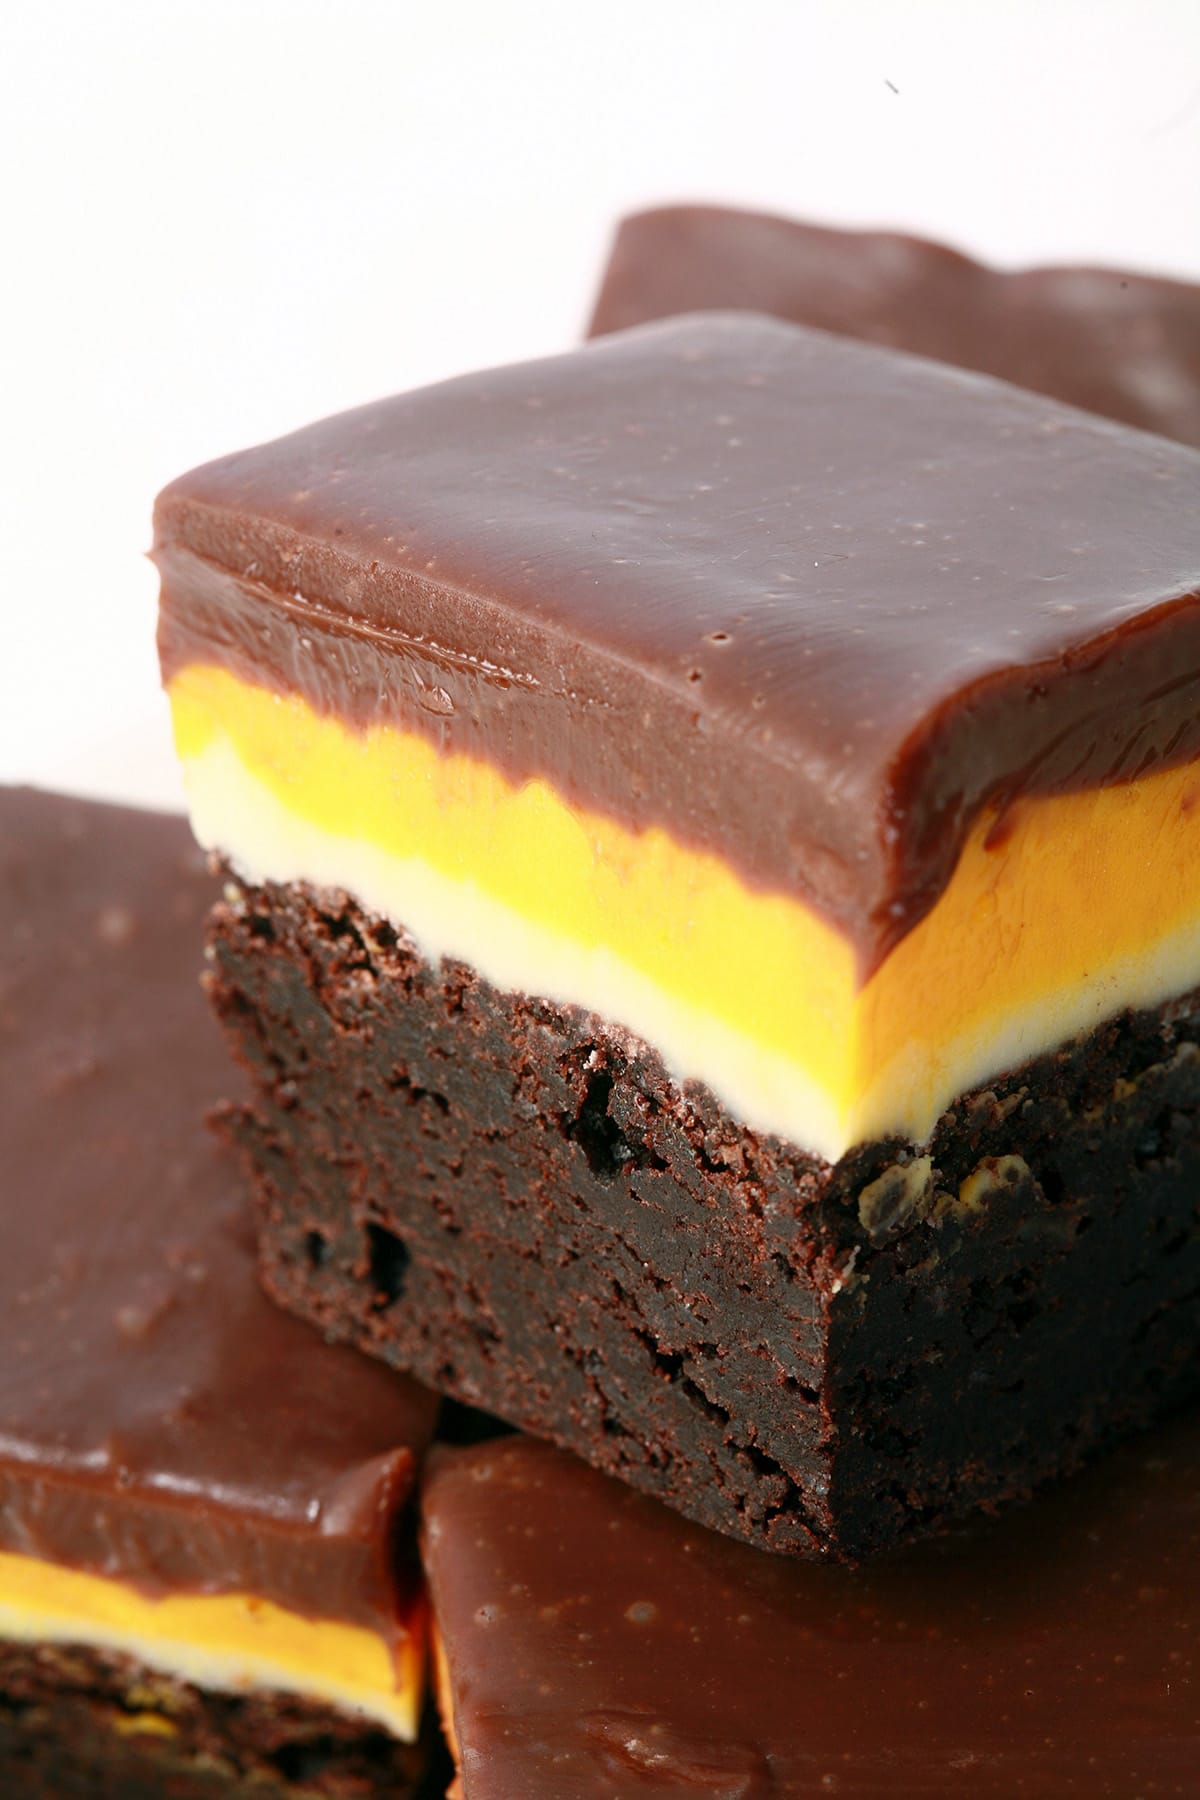
These Easter Creme Egg Brownies are a little bit of work, but worth it - rich, fudgy brownies with 3 layers of ganache as the topping! A festive, fun dessert for the time of year.
Originally published March 28, 2022, updated on 3/5/2023.

They always have amazing Easter treat offerings, but - as a Cadbury Creme Eggs addict - these brownies caught my eye above all else - they were basically the perfect Easter treat!
It was a 4 layered Easter brownie. I remember the brownie itself having a relatively fudgy texture - and I think there make have been mini creme eggs baked into it? - but the crowning glory was the triple layer white/yellow/chocolate topping.
I didn’t end up trying it, as it wasn’t gluten-free... but the visual of the brownie has stuck in my mind for a couple/few years now.
In pursuit of the ultimate Easter dessert for the blog this year, I decided to come up with my own creme egg brownies recipe. I don’t have enough Easter recipes in general, and Cadbury creme egg brownies are just too much fun to NOT make!
While there are many mini egg brownies - or cakey brownies with halved Cadbury's creme eggs baked into them - out there, I loved the visual of those local ones a few years back.
This version takes the usual idea of triple chocolate brownies in a whole other direction: gooey brownies topped with 2 layers of white chocolate ganache, AND a layer of milk chocolate ganache!
As brownie recipes go, this creme egg brownie recipe is a little bit more work than many - but it’s easy work, and actually goes quicker than you may think!
These are the perfect brownies for your Easter celebrations, or to sell at a spring bake sale. Serve them after your Easter egg hunt, after loading up on the OG Cadbury eggs.
Anyway, let’s get to it!
Gluten-Free Easter Creme Egg Brownies
Want to make these gooey chocolate brownies, but as a gluten free version? Make a half batch of my Easy Gluten Free Brownies in a square baking pan ... or do a full batch, and double the ganache topping amounts!

Easy Creme Egg Brownies Ingredients
Overall, this recipe calls for pretty simple ingredients - and no special equipment needed! It’s all in how you bring them together:
Brownie Ingredients
Cocoa Powder
Granulated Sugar
Light brown sugar
All-purpose flour
Unsalted butter
Large eggs
Salt
Creme Egg Topping Layer Ingredients
White chocolate chips
Good quality milk chocolate chips*
Heavy whipping cream
Yellow gel food colouring **
* I chose to use Milk chocolate, as that’s what the source material - large creme eggs - uses. You can use dark chocolate if you like, but you’ll want to add another tablespoon or so of heavy cream to that layer.
Just try to use the best chocolate chips you can get your hands on. Guittard Milk Chocolate Chips, Ghirardelli Milk Chocolate Chips, and Callebaut Milk Chocolate Callets are all great options.
As for white chocolate, I recommend a couple of the same brands:
Ghirardelli White Chocolate Chips and Callebaut White Chocolate Callets.
I was sure that Guittard also made white chocolate chips, but I haven't seen them around lately, if so!
Ingredient Notes
** I highly recommend using gel food colouring, to get a nice intense colour without thinning the cream out too much. The colours I used were both ChefMaster gel paste colourings, in "Lemon Yellow" and "Sunset Orange". I felt the mix brought it closer to the colour of Cadbury Creme Egg filling, but this was completely optional fussiness on my part - you can definitely use one or the other, or something else entirely!
Americolor is another great option for gel colouring. I used to use it all the time when I was still in the USA, it's just hard to find here in Canada.
Either way, the colors are widely available at cake decorating supply stores, as well as online... but any food colouring will work!

This is when water - or watery liquid - is added to melted chocolate, causing it to clump up into a grainy mess. You definitely want to avoid that!

How to Make Easter Creme Egg Brownies
The full recipe is in the printable recipe card at the end of this post. This is the pictorial overview, with additional tips and information
Brownie Base Layer
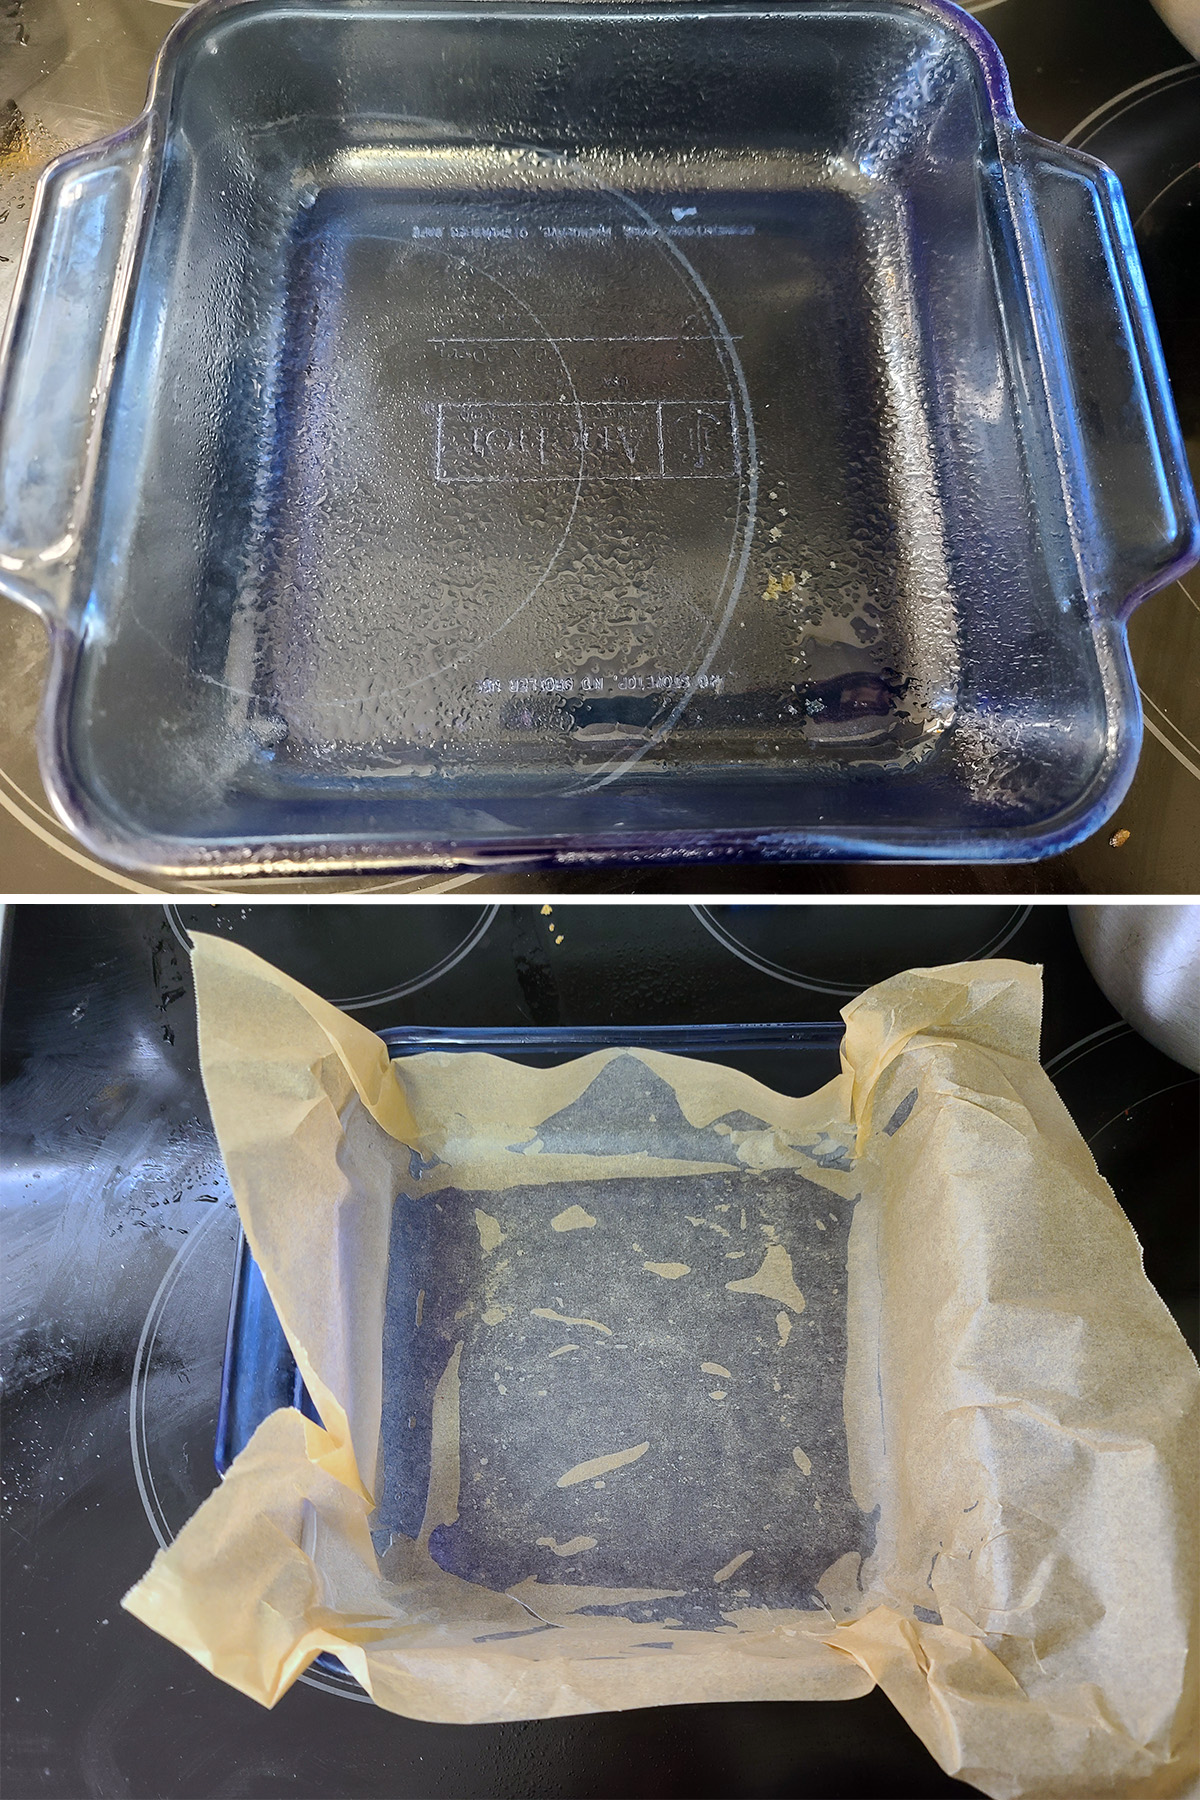
Preheat oven to 350°. Spray an 8 x 8" or 9 x 9" square baking tin with pan spray, then line with parchment paper / baking paper. Set aside.
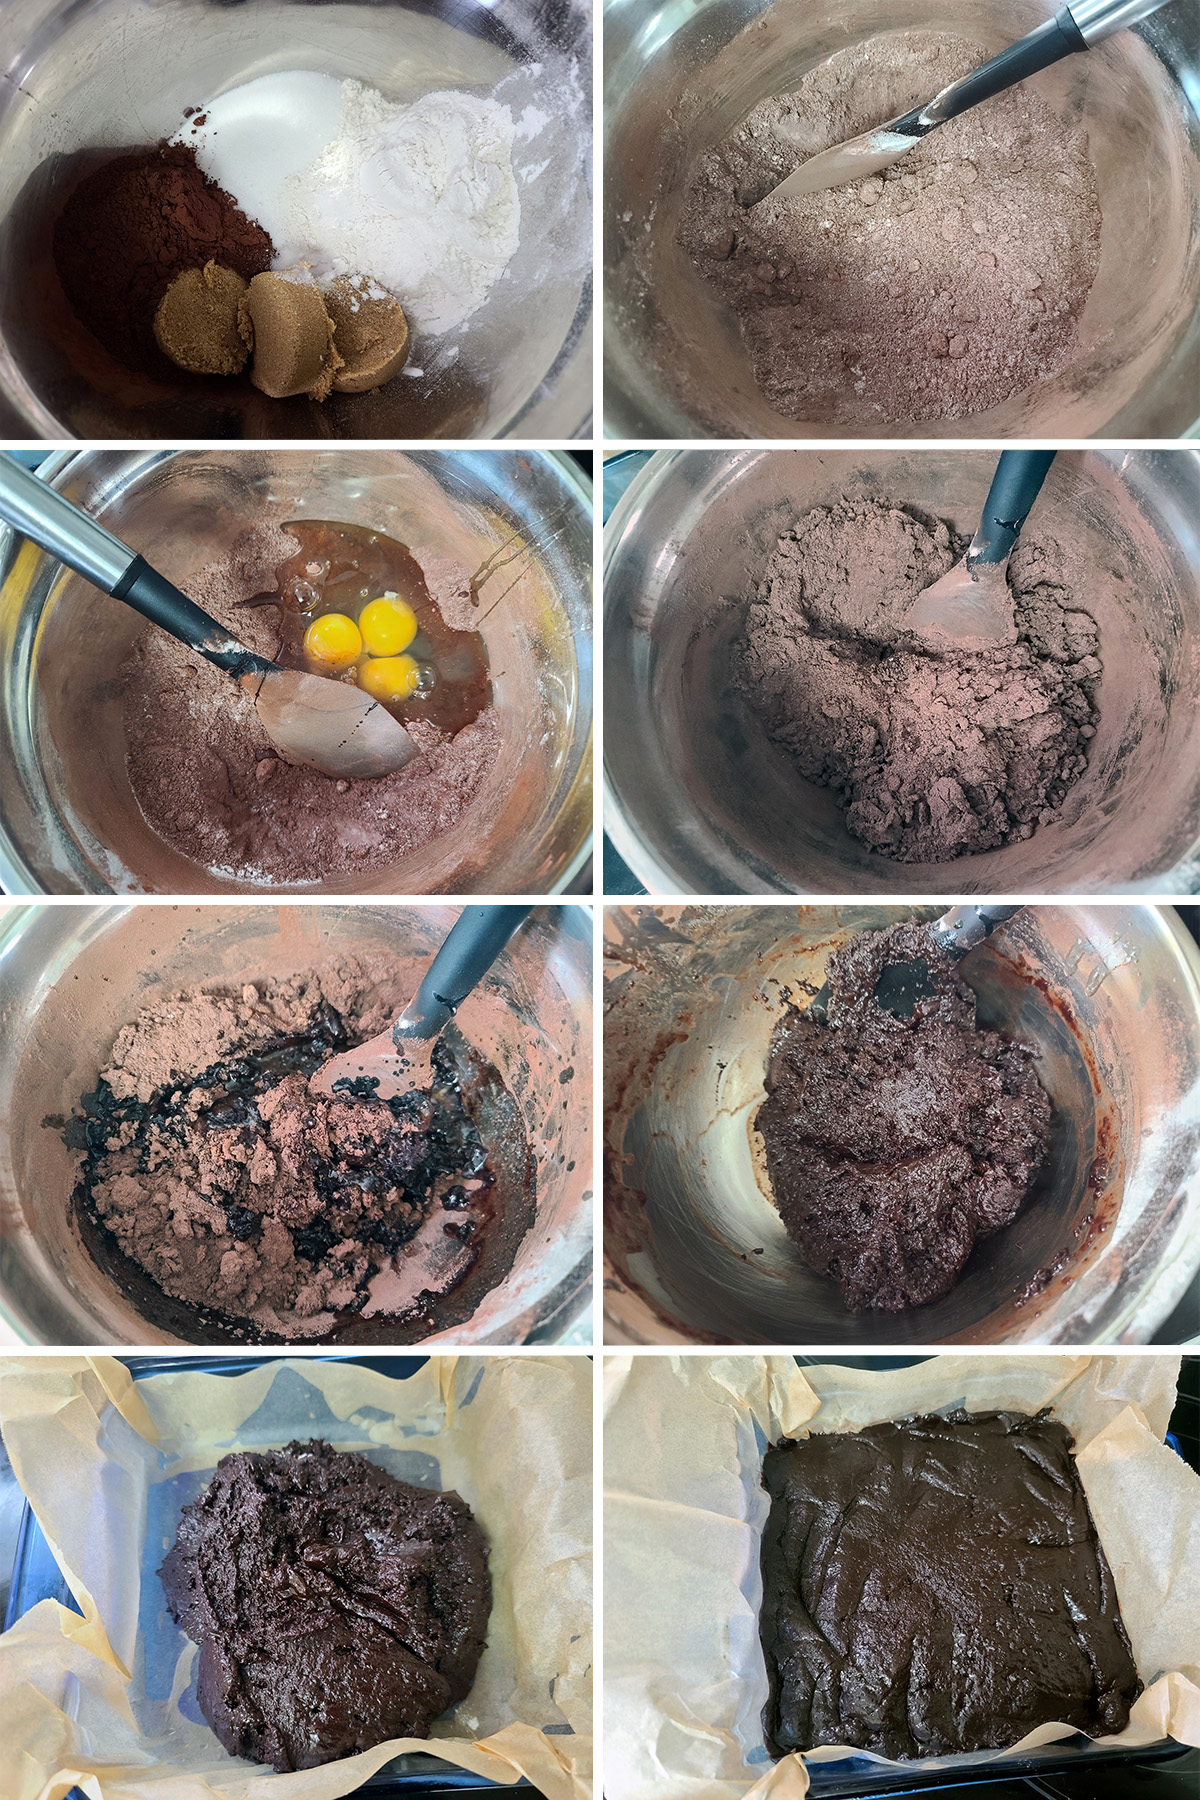
Add beaten eggs and melted butter, stir until dry ingredients are well incorporated and wet, scraping the bottom of the bowl as you go.
Alternately, you can beat the eggs and melted butter (cooled) together, before adding this egg mixture to the large bowl.
Note: I just mix this up by hand, but feel free to use an electric mixer if you prefer!
Pour batter prepared pan(s), use a silicon spatula to spread brownie batter evenly in pan.
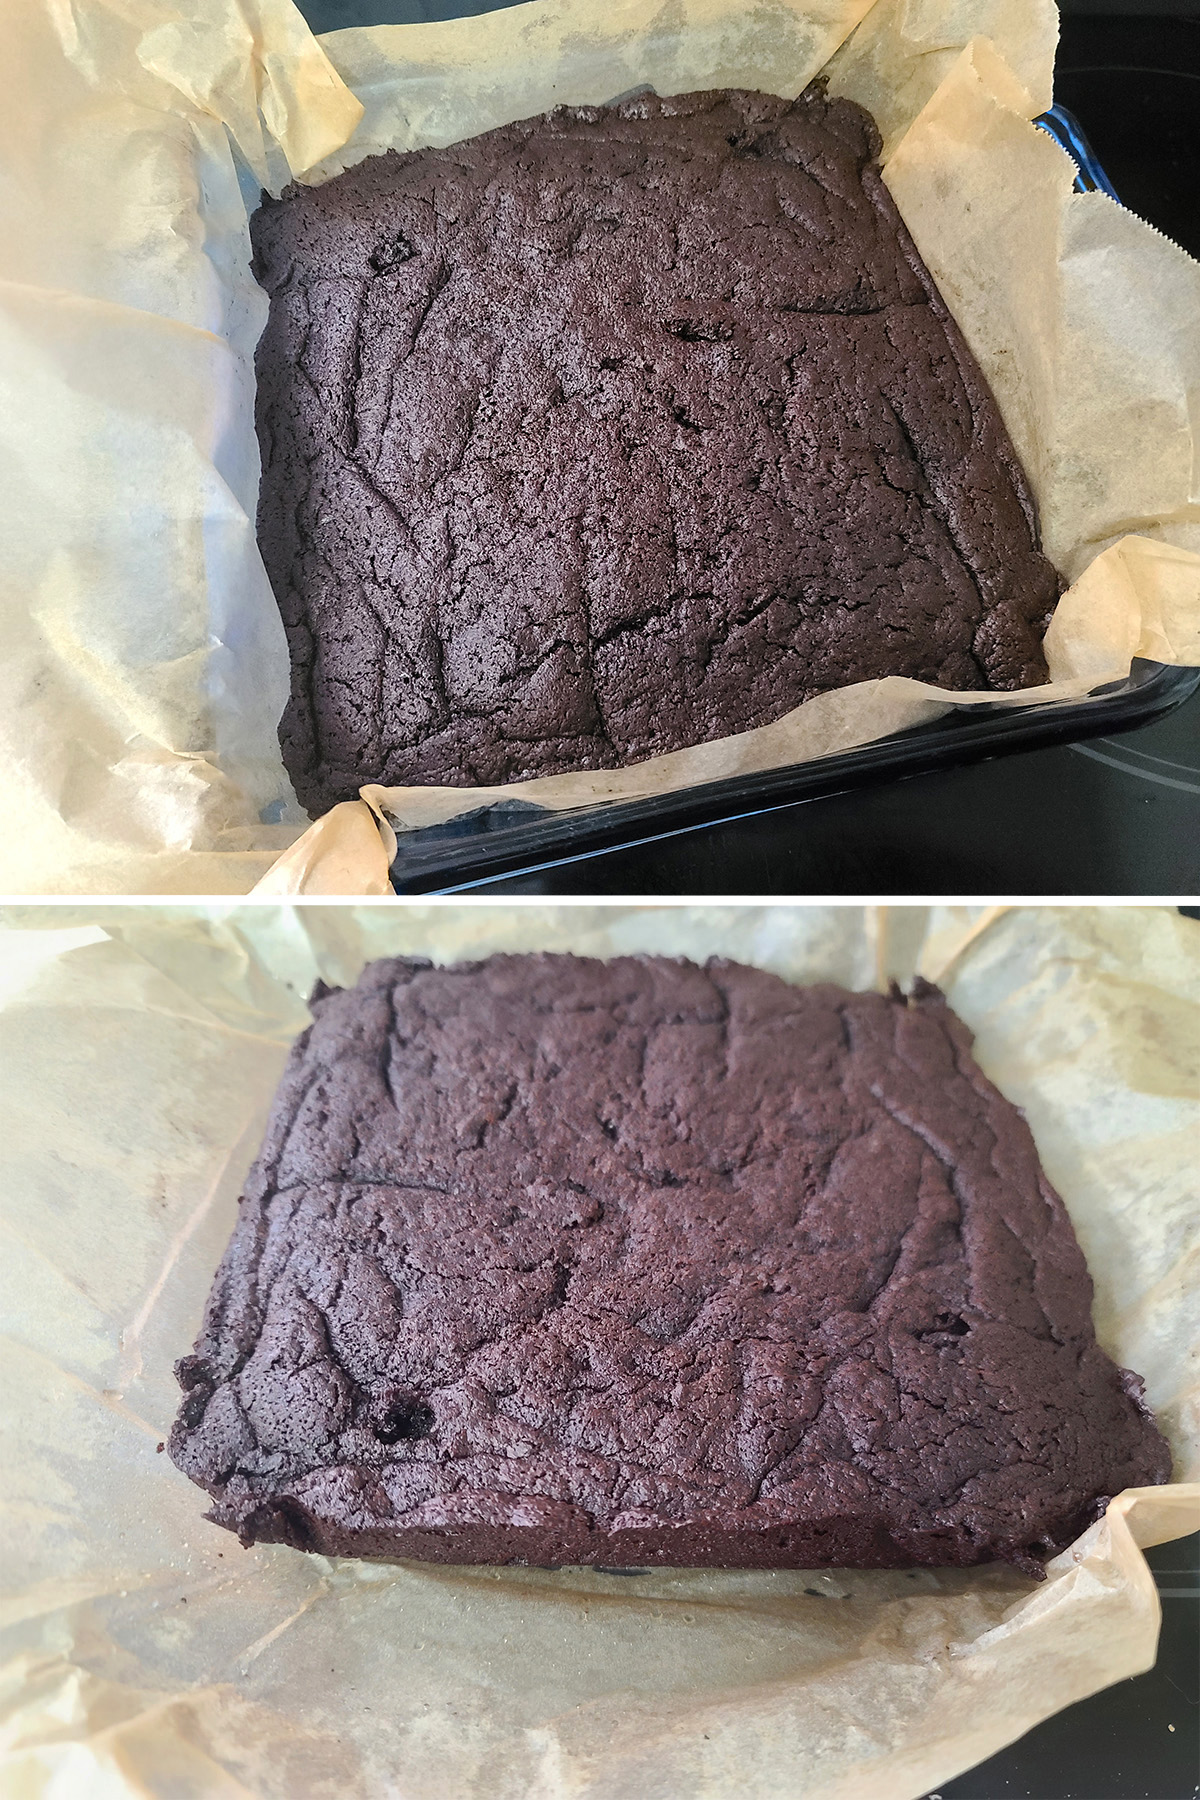
Bake for 30 – 35 minutes. Brownies are done when knife inserted into center comes out *almost* clean - don’t overbake them!
IMHO, half-baked brownies are better than over baked brownies!
You can use the parchment to carefully lift the brownie from the pan before doing the chocolate layers, I find it better to leave it in the brownie pan, especially as it comes to the upper layers. Both ways shown!
White Chocolate Layer
Place half of the white chocolate in a heat safe bowl, set aside.
In a small saucepan over medium heat, heat half of the heavy whipping cream to a boil, remove from heat.
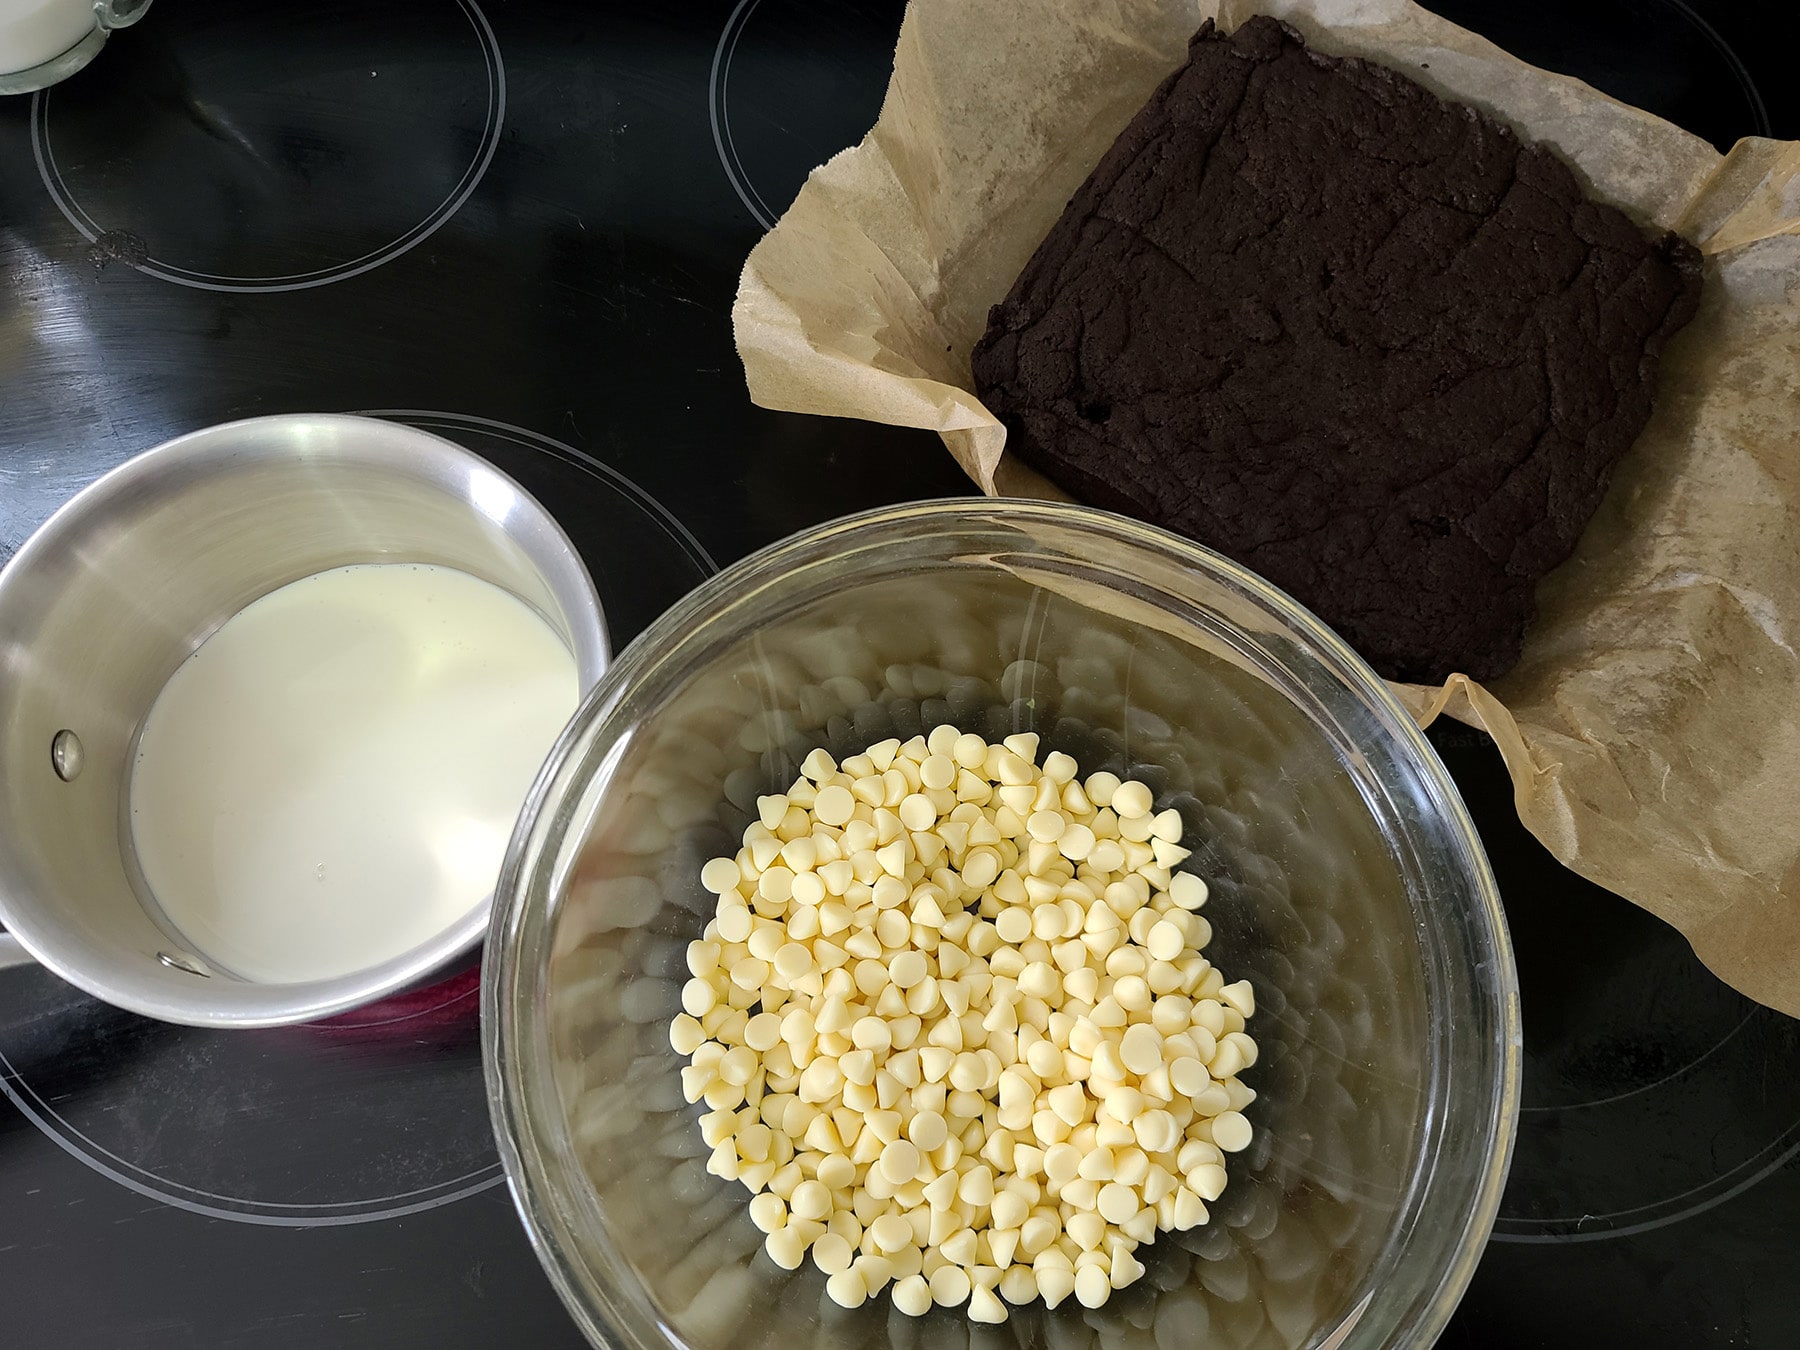
Starting in the middle of the bowl, slowly start stirring the chocolate and cream until all of the chocolate is melted and the cream has disappeared into it – it should be smooth, completely melted chocolate.
Allow to cool slightly, then spread cooled chocolate mixture over top of the brownies. Place in the fridge to chill while you prepare the next layer.
Note: Alternately, place the chips and the heavy cream into a large microwave-safe bowl. Microwave on low heat and/or in short bursts - 30 second intervals or so.
Stir in between each interval, until ALMOST completely melted, then stir until completely smooth.

Yellow Chocolate Layer
Place the remaining white chips in the same bowl, measure the remaining heavy cream into the same small pot.
Add enough yellow gel food colouring to BRIGHTLY colour the cream - remember, it’s being added to the white chocolate chips, which will dilute the colour a bit.
Bring to a boil, pour over the white chips, let it sit, then stir, as you did with the first layer.
Spread yellow ganache over the set - or partially set - white layer, return to the fridge to fully set, before adding the milk chocolate layer.

Milk Chocolate Layer
Place the chocolate chips in a heat-safe bowl, set aside.
In a small saucepan, heat the heavy whipping cream to a boil, remove from heat.
Pour the hot cream mixture into the bowl of milk chocolate chips. Let sit for 3-5 minutes.
Starting in the middle of the bowl, slowly start stirring the chocolate and cream until all of the chocolate is melted and the cream has disappeared into it – it should be smooth.
Allow to cool slightly, then spread over the yellow layer of the brownies. I like to use a small offset spatula to smooth the top of the mixture, as this will be the fully visible layer.

Place in the fridge to set completely - usually overnight - before cutting.

Serving
For best results, chill thoroughly before cutting.
I like to run a large sharp knife under hot water and wipe it dry between each slice, for the cleanest cuts.
These are kinda messy, so don’t self-critique too hard if the cuts aren’t *super* clean. Crème eggs aren’t tidy either!
Store brownies in an airtight container in the fridge. For the best texture, allow brownies to warm to room temperature before serving.
More Easter Content!
Looking for more fun / tasty ways to observe Easter? Here are a few of my favourite recipes:
Chocolate Zombie Easter Bunnies
Easter No-Bake Chocolate Pie with Mini Eggs.
Easter Pavlova
Easy Pysanky [Epic Easter Eggs]
Gluten-Free Paska [Easter Bread]
Keto Paska
Paska - Ukrainian Easter Bread
Paska Bagels
Pastel Easter Charcuterie Board
Southern Comfort Glazed Ham
Share the Love!
Before you chow down, be sure to take some pics of your handiwork! If you post it to Bluesky, be sure to tag us - @CelebrationGen. We're also on Pinterest, so you can save all your favourite recipes to a board!
Also, be sure to subscribe to my free monthly email newsletter, so you never miss out on any of my nonsense. Well, the published nonsense, anyway!
Finally, if you love this recipe, please consider leaving a star rating and/or a comment below, and maybe even sharing this post on social media!


Easter Creme Egg Brownies
Equipment
- 8" Square baking pan
- Parchment Paper
- Small offset spatula
Ingredients
Brownies:
- ¾ cup Cocoa Powder
- ¾ cup Granulated Sugar
- ¾ cup Light Brown Sugar packed
- ¾ cup All-purpose flour
- ¼ teaspoon Salt
- 3 Large eggs
- ¾ cup Unsalted butter, melted
White Chocolate Layers:
- 14 oz White chocolate chips divided
- ⅔ cup Heavy whipping cream divided
- Yellow gel food colouring
Milk Chocolate Layer
- 10-11 oz Good quality milk chocolate chips
- ½ cup Heavy whipping cream
Instructions
Brownies:
- Preheat oven to 350°. Spray an 8 x 8" or 9 x 9" square pan with pan spray, then line with parchment paper. Set aside.
- In large mixing bowl, combine first five ingredients. Add beaten eggs and melted butter, stir until dry ingredients are well incorporated and wet.
- Spread batter into prepared pan(s), Bake for 30 – 35 minutes. Brownies are done when knife inserted into center comes out *almost* clean - don’t overbake them!
- Let brownies cool to room temperature before removing from the pan and frosting with ganache:
White Chocolate Layers:
- Place half of the white chocolate in a heat safe bowl, set aside.
- In a small saucepan, heat half of the heavy whipping cream to a boil, remove from heat.
- Pour hot cream mixture into bowl of white chocolate chips. Let sit for 3-5 minutes.
- Starting in the middle of the bowl, slowly start stirring the chocolate and cream until all of the chocolate is melted and the cream has disappeared into it – it should be smooth.
- Allow to cool slightly, then spread over the brownies. Place in the fridge to chill while you prepare the next layer.
- Place the remaining chips in the same bowl, measure remaining heavy cream into the same small pot.
- Add enough yellow gel food colouring to BRIGHTLY colour the cream - remember, it’s being added to the white chocolate chips, which will dilute the colour a bit.
- Bring to a boil, pour over the white chips, let it set, then stir, as you did with the first layer.
- Spread yellow ganache over the set - or partially set - white layer, return to the fridge to fully set, before adding the milk chocolate layer.
Milk Chocolate Layer:
- Place the chocolate chips in a heat safe bowl, set aside.
- In a small saucepan, heat the heavy whipping cream to a boil, remove from heat.
- Pour hot cream mixture into bowl of milk chocolate chips. Let sit for 3-5 minutes.
- Starting in the middle of the bowl, slowly start stirring the chocolate and cream until all of the chocolate is melted and the cream has disappeared into it – it should be smooth.
- Allow to cool slightly, then spread over the yellow layer of the brownies. Place in the fridge to set completely before cutting.
Nutrition


Asha
Love these! Was such a big fan of creme eggs as a kid. Great tip on using the gel food colouring. Thanks for sharing 🙂
Bernice
Okay you've sold me on this Easter treat. I think the whole family will enjoy them and they're so much nicer than pigging out on grocery store chocolate.
Elaine
You're right! This looks like the ultimate Easter treat for Cadbury cream egg lovers! Thanks for the easy-to-follow detailed instructions!
Vanessa
Creme egg in brownie form (jaw drop) - these are a must make for Easter!
nancy
WOW what a delish brownie! i love easter chocolate season!
Terri
We are Easter Creme Egg crazy in this house - my kids are going to LOVE this!
Oromë
These are fantastic and really do taste like the candy, and they look beautiful. We had them at our Easter dinner today and they were the perfect way to end the meal.