

When holidays are looming, do you stress out about roasting a turkey? Never fear, here's what you need to know to roast a stuffed turkey!

It’s a key part of almost any Thanksgiving menu, and plenty of Christmas dinners, as well!
Whether you prefer roast turkey breast meat, or are all about the dark meat, the right techniques are key to cooking the perfect turkey.
Roasting a stuffed turkey requires different times and techniques than roasting an unstuffed turkey.
It contains a ton of information and tips to ensure you end up with the perfect thanksgiving turkey, so I recommend NOT skipping to the recipe card - you’ll miss all the good stuff!
So if this is your first time roasting a bird, give yourself plenty of time to read everything over.
Take a breath, it’s easier than you may think! Have some fun with it - you’re just a few hours away from roasty deliciousness!
Ingredients
Roasting a stuffed turkey requires just a few basic ingredients, all of which can either be found in pretty much any grocery store, or can be put together from basic ingredients that are also easy to find.
You will need:
A Whole Turkey
You can use a fresh turkey or a frozen turkey (thawed - more on that in a bit!). Plan on 1 ½-2 pound of turkey per person.
This allows for inedible weight (the bones, etc), as well a bit for leftovers.
On that note, I prefer to use a smaller size turkey, as I find they consistently turn out amazing.
When you have a large turkey, you have a higher risk of some parts overcooking, and can end up with dry turkey as a result of that longer cooking time.
When I need to feed a LOT of people, I’ll do 2 smaller turkeys.
Stuffing
You can use any stuffing you like. Personally, I recommend my Savory Mushroom Chestnut Stuffing, as it's my absolute favourite of all time.
If you're gluten free - or cooking for people who are - there's my Gluten Free Turkey Stuffing, or my AIP / Paleo Bread Stuffing, for those following a more restricted diet.
Finally, there's my Keto Stuffing, which is low carb and ALSO gluten free, but tastes like normal bread stuffing!
That said, my grandma would just saute up some celery and onion in butter and chicken stock, toss some bread cubes with Poultry Seasoning and black pepper, and it was the bomb.
Stuffing doesn’t need to be complicated, just tasty!
Fat
For the BEST turkey skin, you’ll want a little fat to coat it with.
Personally, I use melted butter, but olive oil or vegetable oil would work as dairy-free alternatives.
Skin Seasonings
At the very least, you’ll want some salt and pepper (or white pepper) to season the skin with, before roasting your turkey.
Personally, I love a generous sprinkling of Summer Savory , as well.

Pan Stuff
This isn’t so much about roasting the turkey itself, but preparing for the best turkey drippings ... and, by extension, the Best Turkey Gravy!
At the very least, you’ll want some chicken stock or turkey stock. Adding a bit of liquid to the bottom of the pan collects the drippings, and infuses with the flavour from them, as the turkey roasts.
It also prevents the drippings and browned bits - the FLAVOUR - from just burning or drying out.
Aside from the broth, I like to toss some celery (especially the inner ribs, and/or leaves - the parts I don’t normally use), onions, and sometimes carrot into the pan, before putting the turkey in.
It cooks down and gives a nice flavour to the drippings - I just discard the vegetable solids, before pouring the drippings out.
Equipment
There are a couple things that you’ll need for roasting a turkey, and then some optional niceties.:
Roasting Pan
You want a roasting pan with sides (I like about 4" tall), that is large enough to not only hold your turkey, but to allow some space around it, as well.
This helps ensure that you get an even roast and crispy skin, rather than a turkey that steams itself because of close proximity to the pan.
As part of your roasting pan set up, I recommend having a small wire rack - many pans come with them - to lift the turkey off the pan.
Much like I was mentioning above, this allows for a better roast. In this case specifically, it’s about not having the turkey boil in its own drippings.
Meat Thermometer
Using an Instant-Read Thermometer is the best way to keep track of the internal temperature of your turkey.
This will let you know when it’s fully cooked - and safe! - while also helping prevent overcooking the bird.
To use an instant read thermometer, you’ll just stick the probe into the thickest part of the thigh, and see what it says.
Be sure to avoid touching the thigh bone with the food thermometer - you need the temperature of the meat, not the bone!
Note: There are ovenproof meat thermometer products out there, but I don’t bother with them.
I like to test the temperature in a few areas to be sure, so it doesn’t make sense to just leave the thermometer in one, IMHO.
Optional Items
Honestly, the roaster and the thermometer are all you really need.
That said, there are a couple other items you may want to have on hand:
Kitchen Twine
If you want to truss your turkey, you’ll need some Kitchen Twine / kitchen string.
Trussing a turkey is when you tie the legs together over the large body cavity of the turkey, to help ensure even cooking.
The idea is to make the turkey a compact, solid item, and prevent any more “exterior” parts - like legs - from burning, as the rest of the turkey cooks.
Personally, I don’t truss turkeys.
We tend to buy turkeys that are on the smaller side, so trussing is generally unnecessary - the main bird cooks pretty quickly.,.
Also? Trussing decreases the skin surface area exposed to direct heat, which means less of the beautifully crispy skin that I LIVE FOR.
Fat Separator
Finally, if you’re planning to make gravy from the drippings, you can consider having a Fat Separator.
Back in the day, this was a plastic cup with a long spout that angled up from the BOTTOM of the cup. Honestly, I found them to be more hassle than they were worth.
Now that I look up “fat separators” to link one for example, I see there’s a newer style, that strains at the top as you pour the drippings in, then pours the defatted drippings from the BOTTOM.
THAT looks promising.
TBH, I’ll probably end up buying this one: OXO Good Grips Good Gravy 4-Cup Fat Separator ... because that\s pretty brilliant.

How to Roast A Stuffed Turkey
Thaw Your Turkey
If you’re dealing with a frozen bird, the first thing you’re going to need to do is thaw it. (If you’re using a fresh bird, skip to the next section).
The safest way - according to the USDA - is to put your frozen turkey in the fridge, allowing 24 hours for every 5 lbs of weight.
So, a 15 lb turkey will need 3 full days in the fridge, a 25 lb turkey will take 5 full days, etc.
If your fridge is colder than most, it’ll take even more time, so plan accordingly.
Prepare the Oven and Pan
Before getting started, place your oven rack on the lowest position - or second lowest place - you want to allow plenty of space between the top of your turkey, and the top of the oven.
Once your oven rack is in place (and extra racks removed from the oven to make space, if needed!), preheat your oven temperature to 325 degrees F.
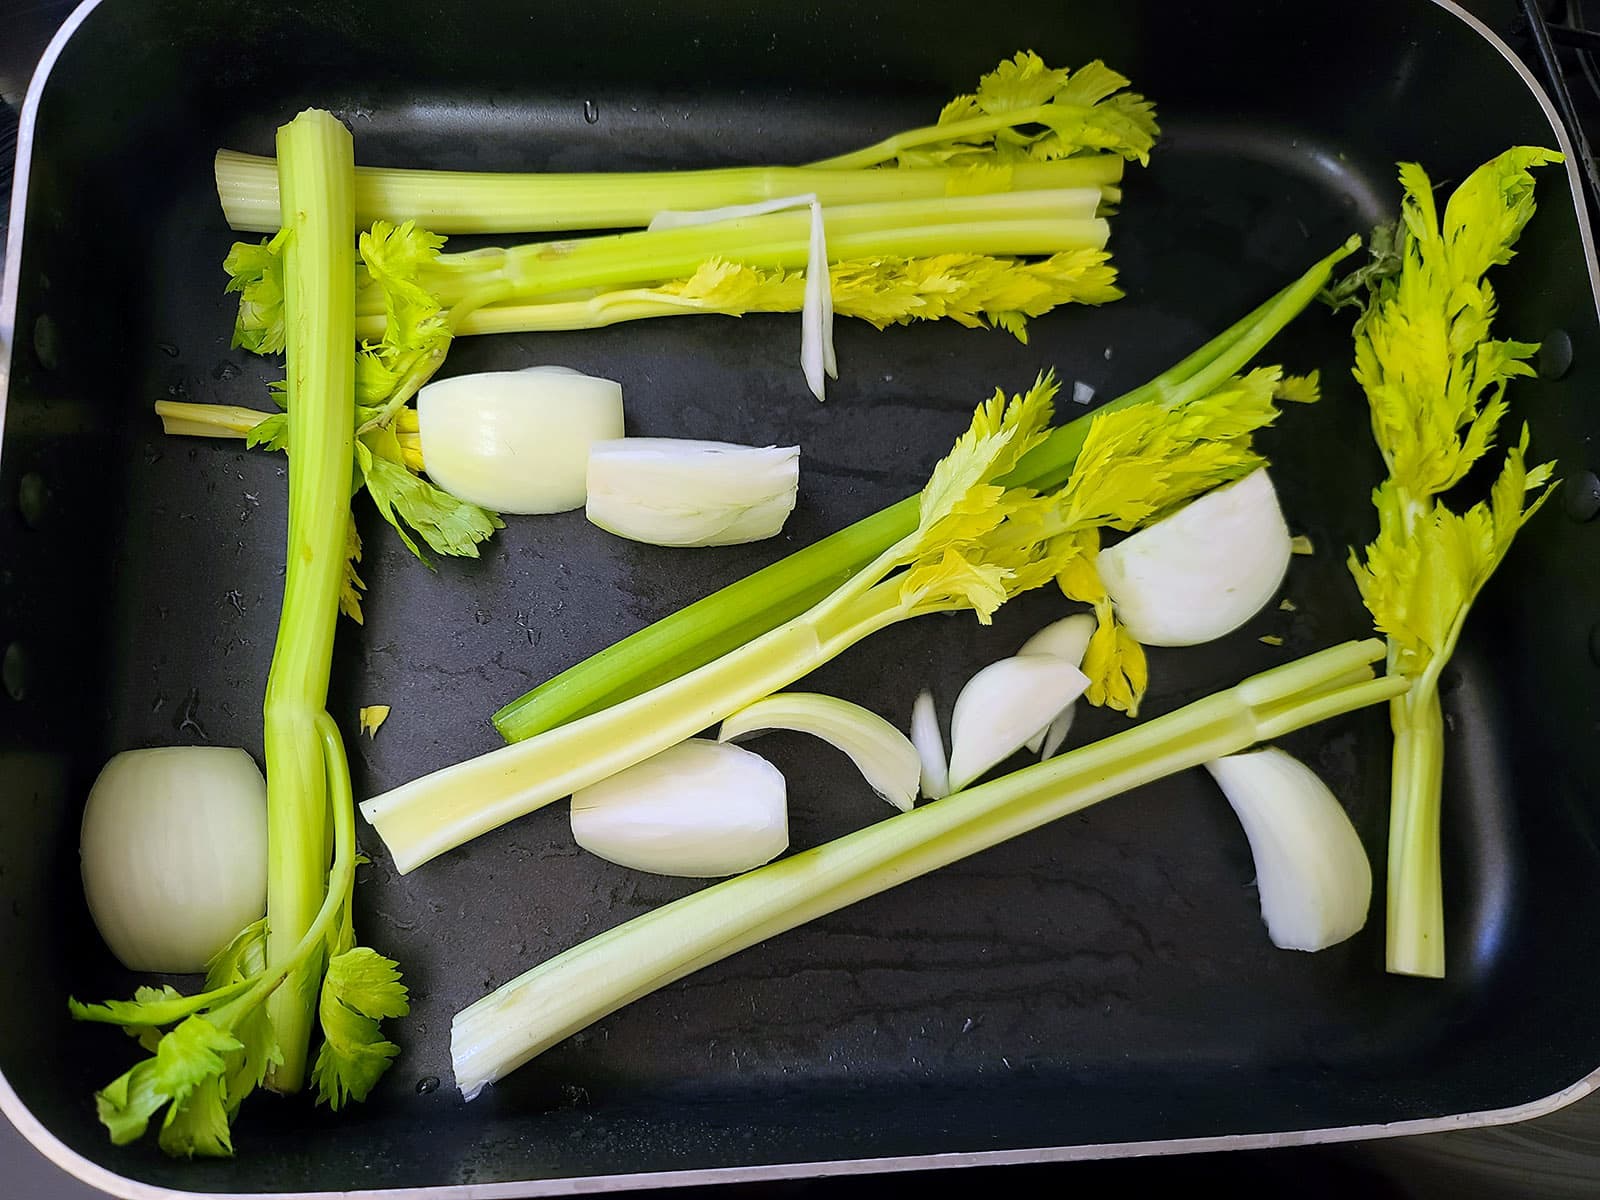
Clean your roasting pan if you haven’t used it in a while.
Peel and chop some onions into chunks, place the onions and celery in the bottom of the pan, seasoning with a little salt and pepper.
Place the roaster rack on top of the vegetables, moving the vegetables around to allow the rack to sit flat on the pan.
Pour a cup or two of chicken broth or turkey broth over the vegetables, set the pan aside while you prepare the turkey.
Prepare the Turkey
Check both the neck cavity and the large cavity - one on either end of the bird - for any “Extras” that might have been included.
This is usually a turkey neck inside the main turkey cavity, and a baggie of the giblets (the internal organs) stuff into the neck cavity.
Remove these items and either set aside* or discard them.
Rinse the interior of the turkey out with cold water, drain well. Pat the outside of the turkey dry with paper towels.
Transfer turkey to the prepared pan, breast side up.
* I don’t use the giblets, but I do wrap the neck in plastic wrap and either refrigerate or freeze it for later use in making turkey stock.

Food safety is important!
Stuff the Turkey
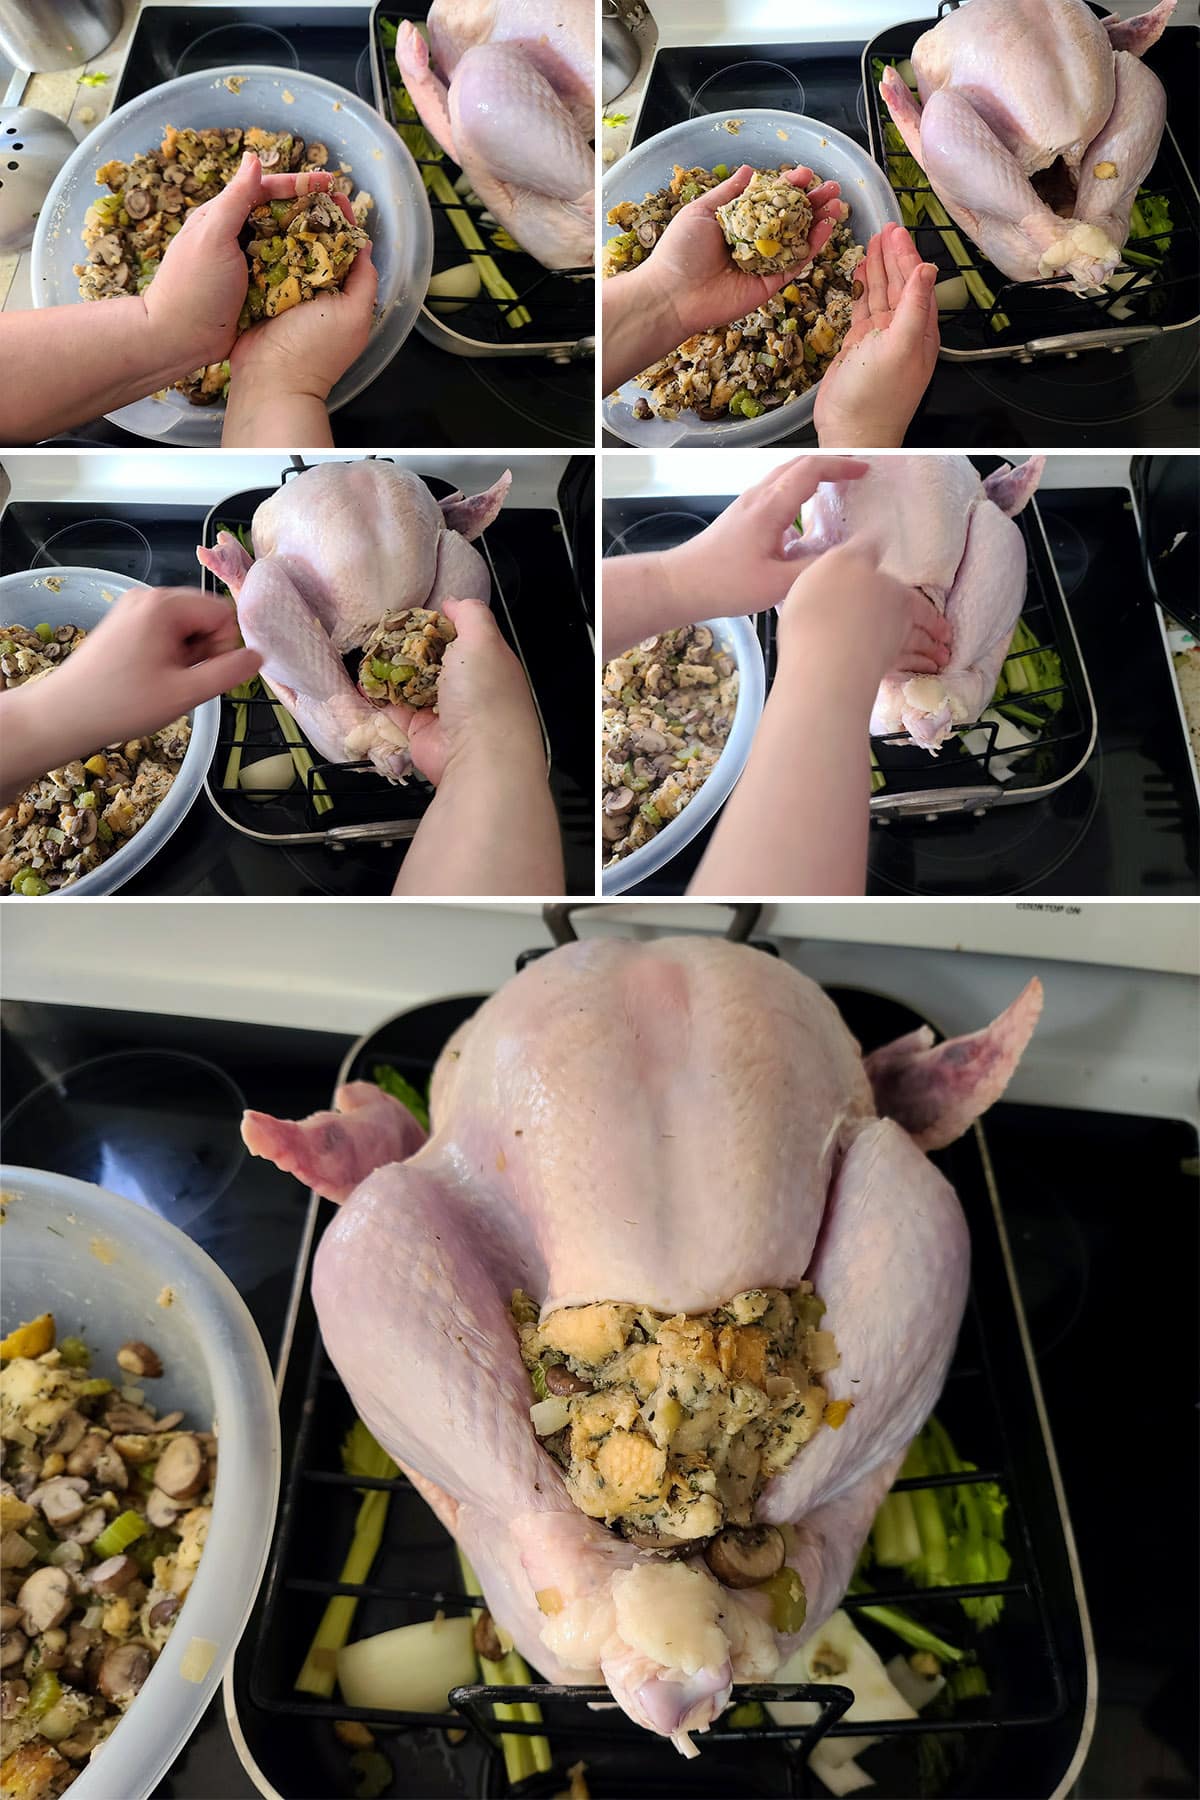
Have your prepared stuffing on hand, in a large mixing bowl.
Gently stuff turkey dressing into the cavity of the bird. I like to have it “loosely compact” , if that makes sense.
I will gently make balls of the stuffing - NOT squishing them - and place them toward the back of the cavity, working my way forward.
You want it filled nicely, but not packed into a solid mass.
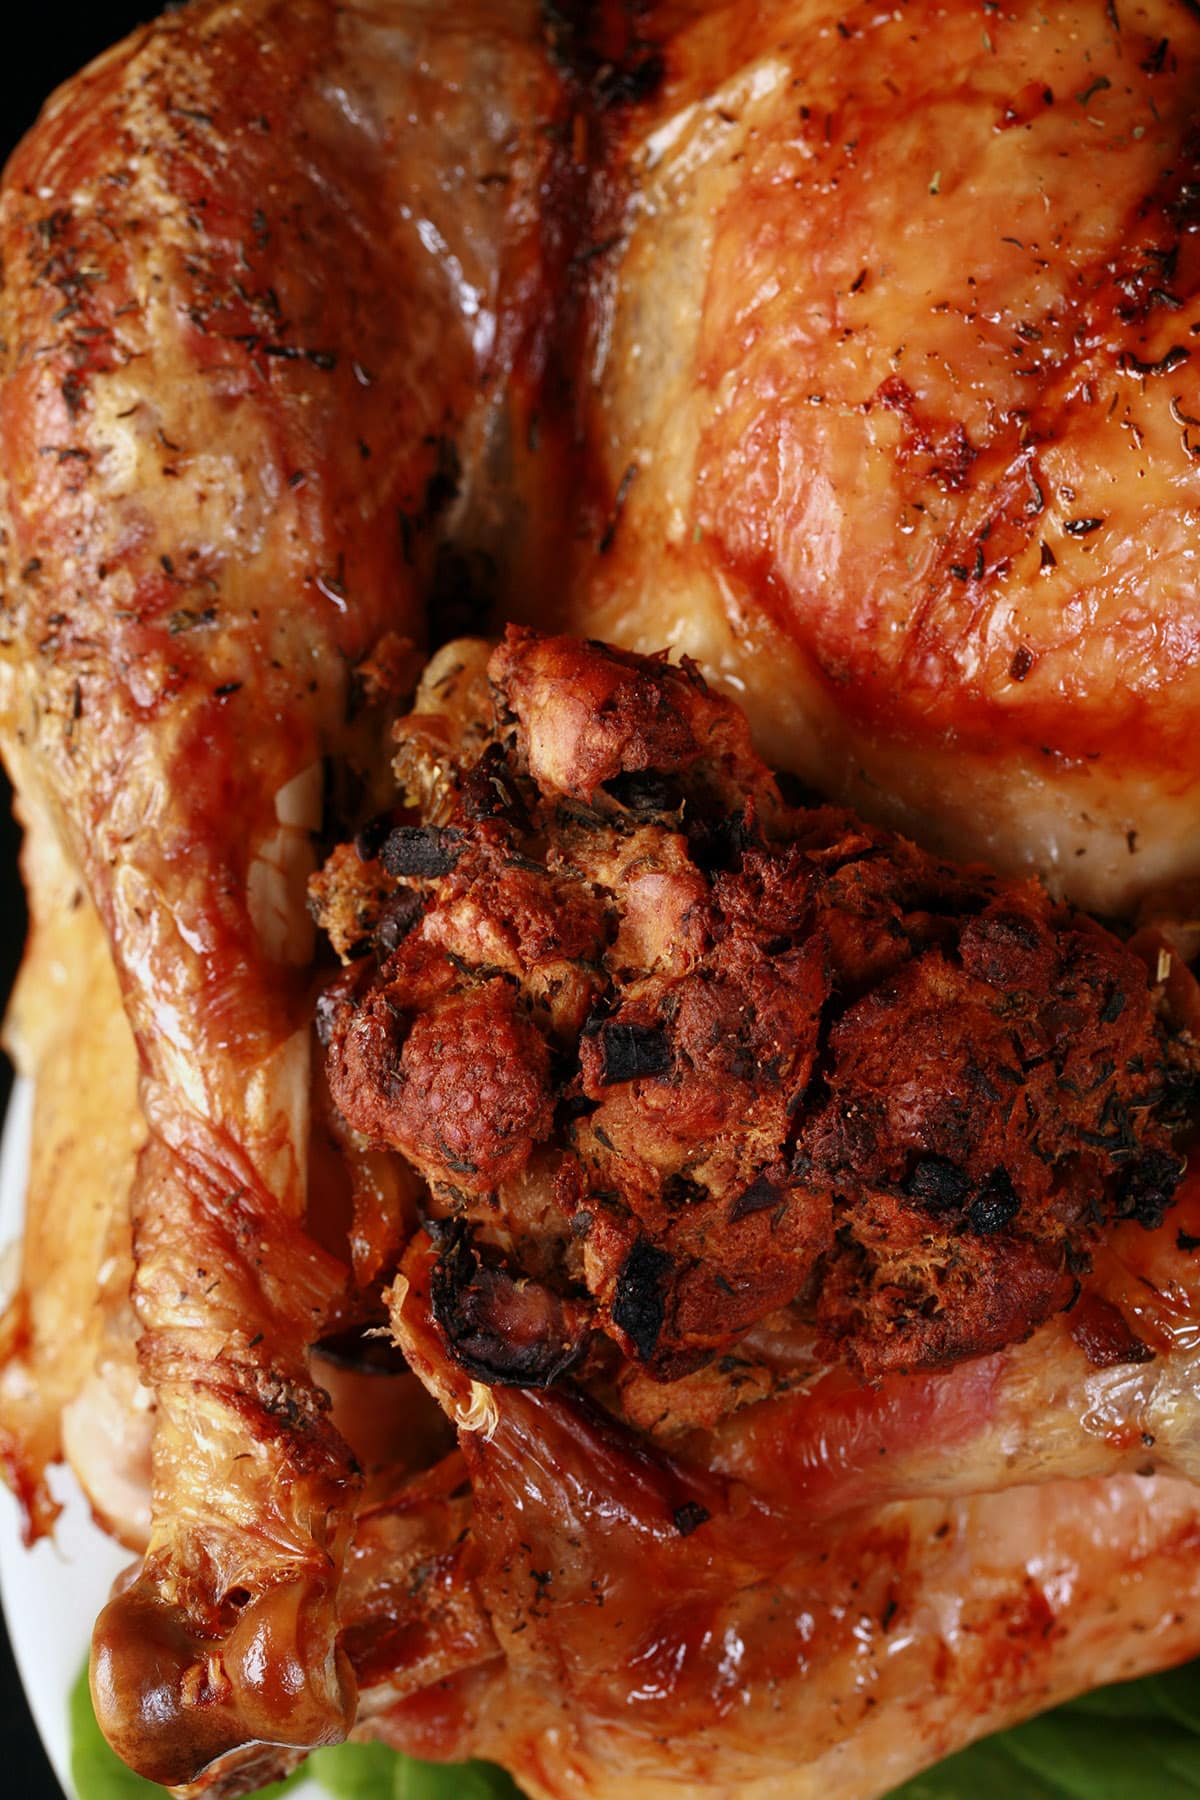
I like to mound some extra stuffing sort of outwards from the main cavity, as shown - this gives a bit more surface area of stuffing to get nicely browned and crispy - just the way we like it!
Transfer any remaining stuffing from the large bowl to the prepared pan, cover with foil, and store in the fridge until you’re ready to bake it.
Note: This stuffing is now contaminated - you were handling it at the same time as the raw turkey.
It MUST be cooked thoroughly before serving! See your recipe for instructions for how to bake the stuffing outside of a turkey - I’ll usually do 30 minutes or so at 350, then take the foil off and let it brown up for another 15 minutes or so.
Prepare the Top of the Turkey
I like to pour a bit of melted butter over the top of the turkey, using a pastry brush to ensure all of the exposed skin is coated with butter.
Others like to rub softened butter over their bird. Either way, get it coated with some kind of fat.
Note: Don’t worry about excess fat - it’ll drip down into the pan, and eventually be removed from the actual drippings in the gravy process.
Once coated, sprinkle generously with salt, pepper, and any other seasonings that you want to use.
I’m a fan of Summer Savory , but Dried Parsley, Dried Rosemary, Dried Sage, and Dried Thyme are other great options as far as herbs go.
Other than that, Garlic Powder, Onion Powder, Paprika, and Smoked Paprika are the other options I tend to use, depending on what mood I’m in, and what I’m stuffing / serving it with.
Now you’re ready to roast your turkey!

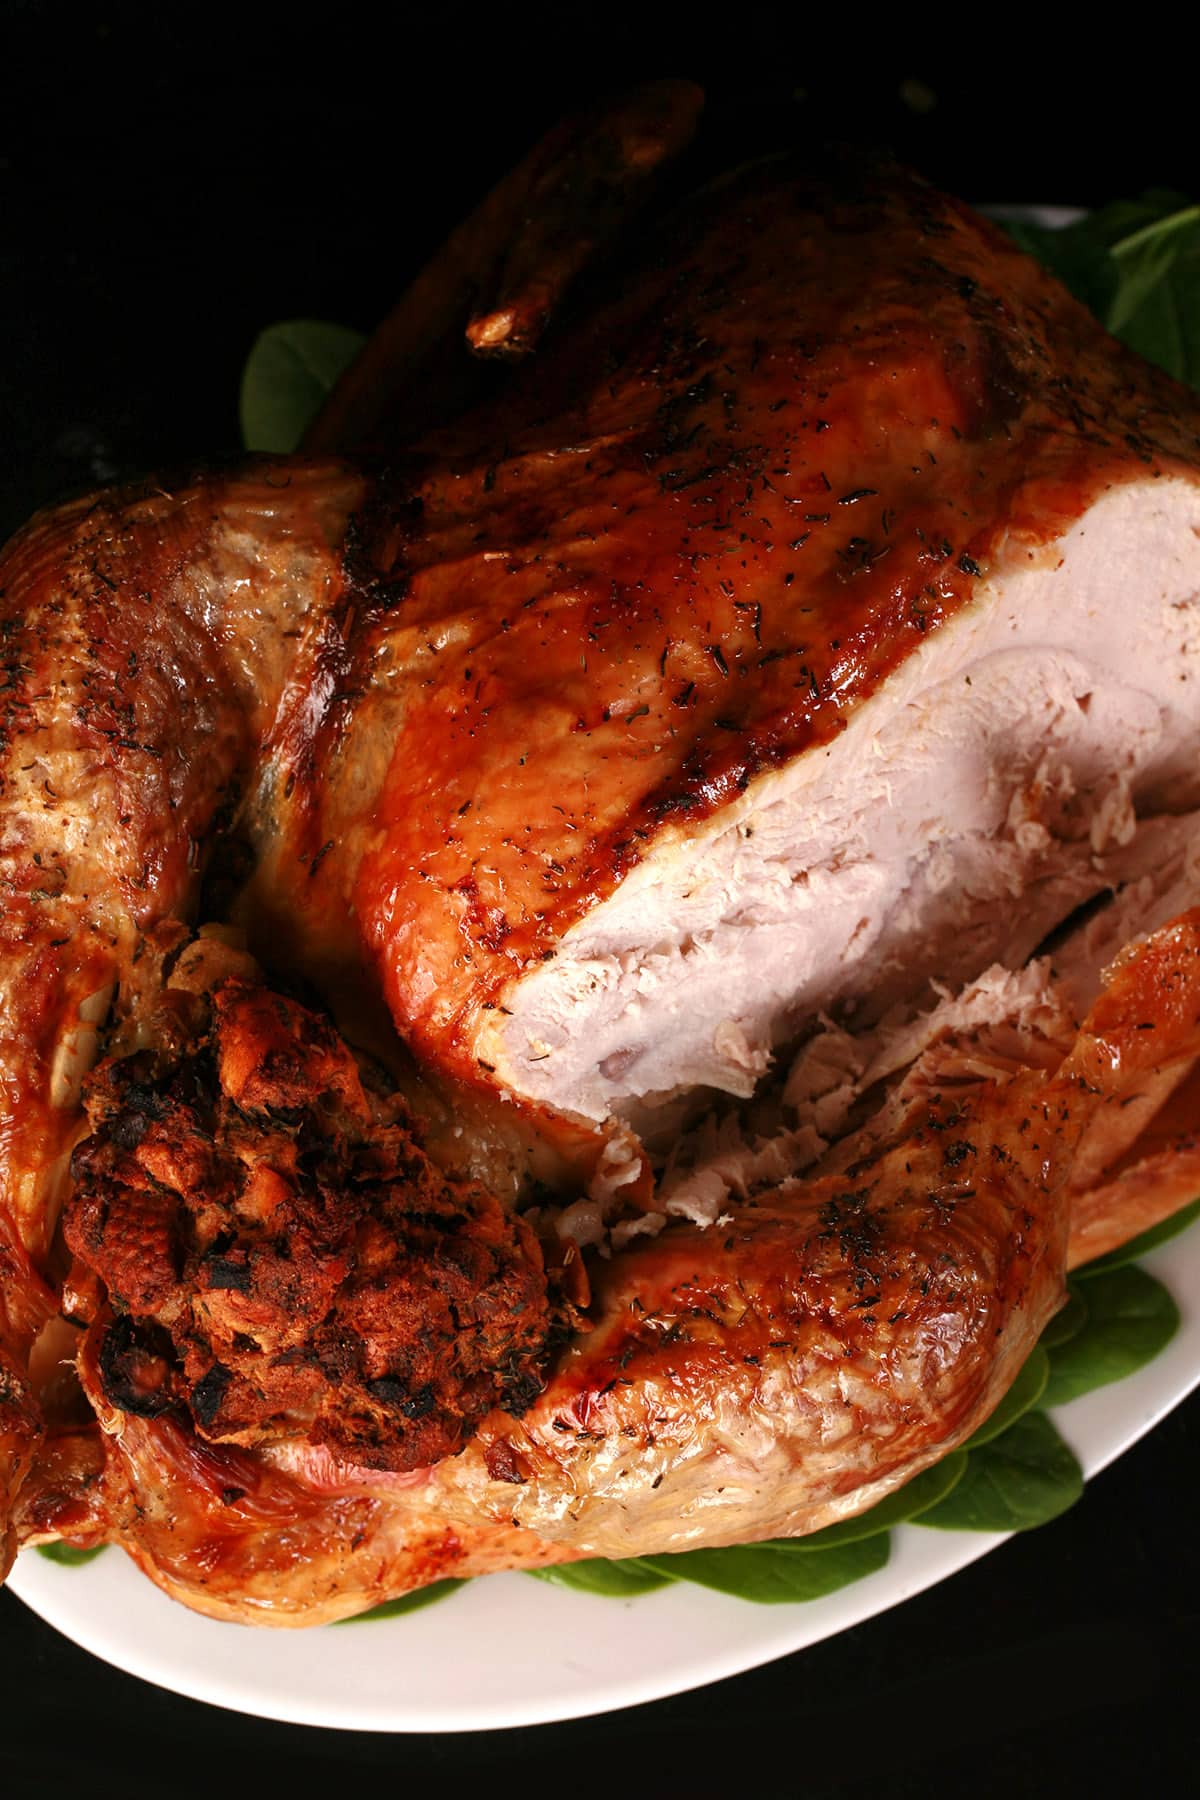
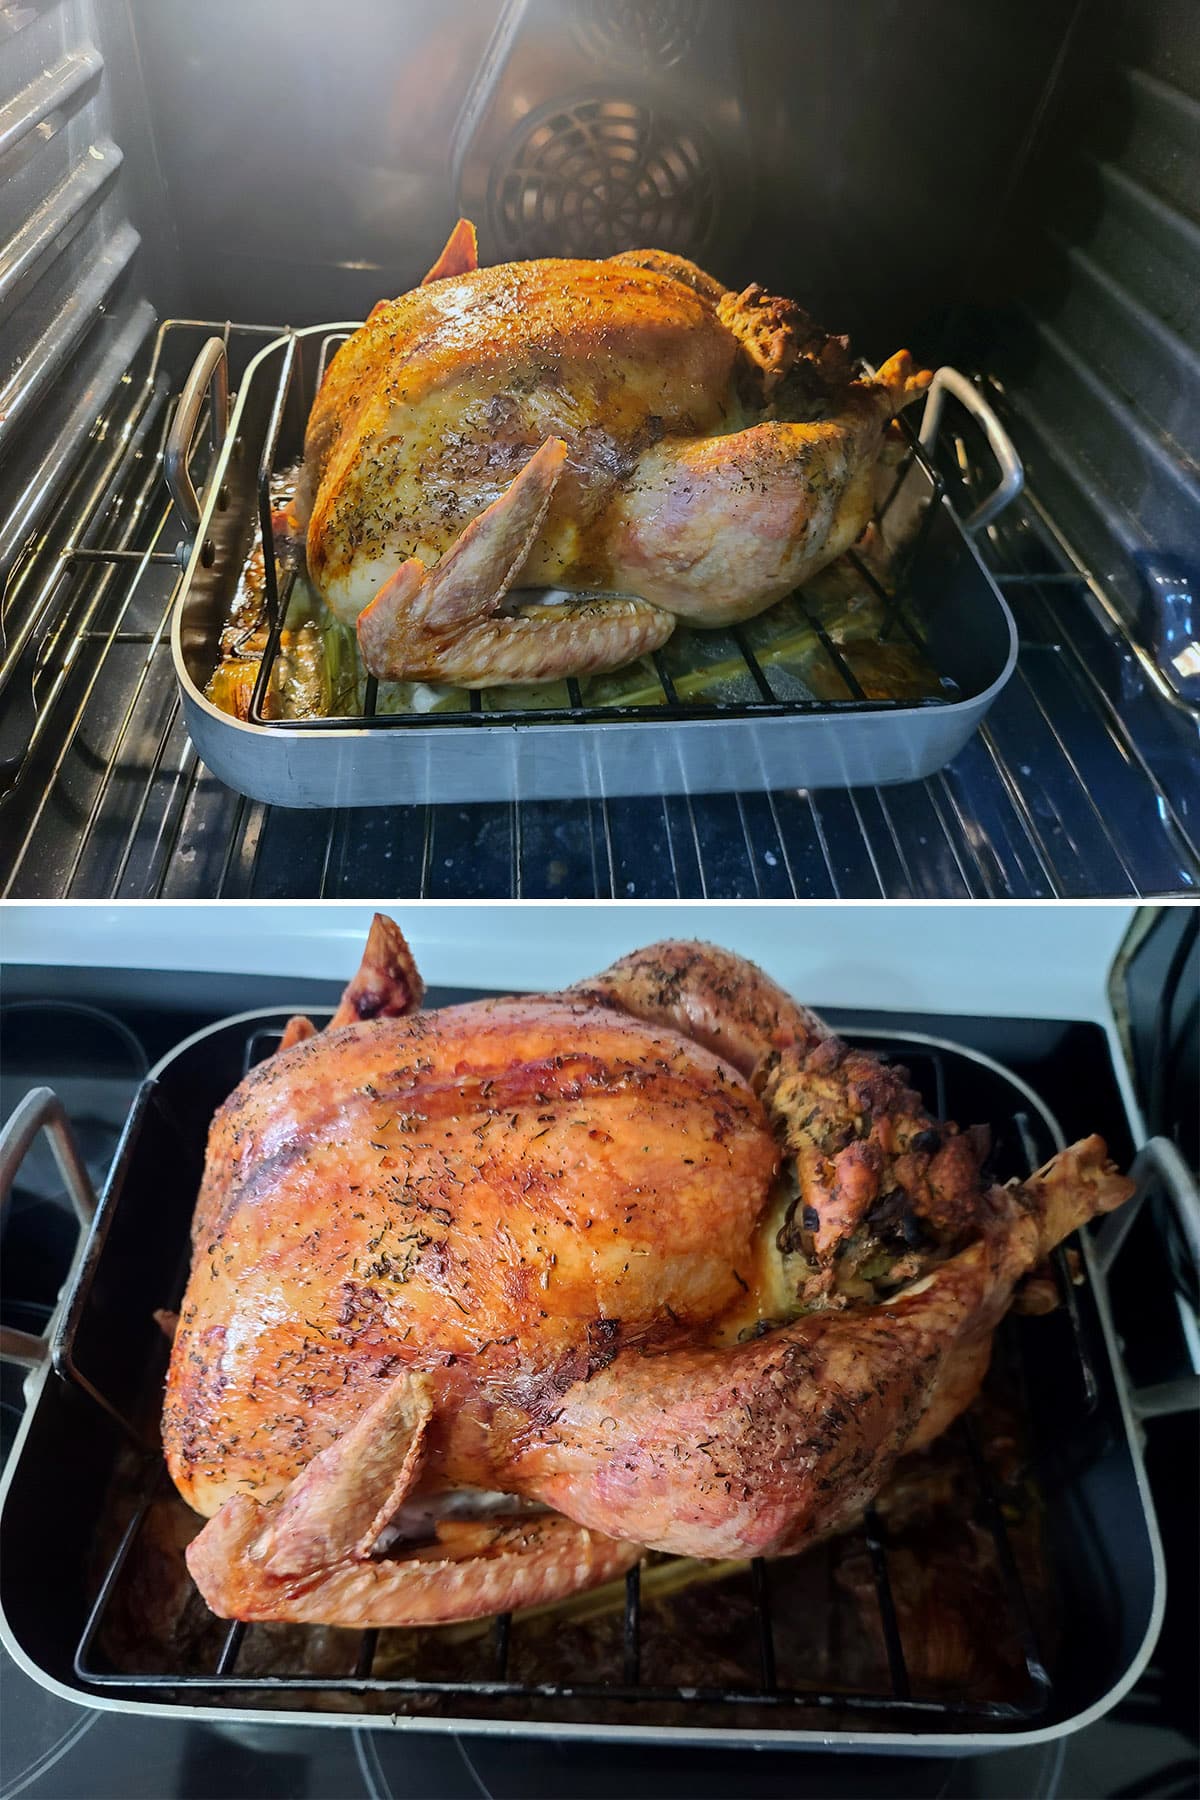
Roast the Turkey
Place the prepared turkey in your 325 F oven, and set your timer for a little less than the shortest amount of time indicated for your size of turkey, in the handy charts below.
Keep an eye on the turkey through the oven door - if it looks like the breast meat is getting too dark, cover that portion with a bit of aluminum foil for the remaining cooking time.
Once you hit the early side of your cooking window, insert meat thermometer into the thickest part of thigh, and then deep into the center of stuffing.
You want the turkey meat to reach at least 165 F, and the stuffing to reach 165.
Shielding the breast meat will help prevent overcooking - and drying out - there.
When it comes to the dark meat, it can be cooked to quite a bit higher than 165, due to the fat content. Personally, I prefer the dark meat around 180 F.
Expect 175-180 in the thigh, 170 in the breast, and 165 for the stuffing.
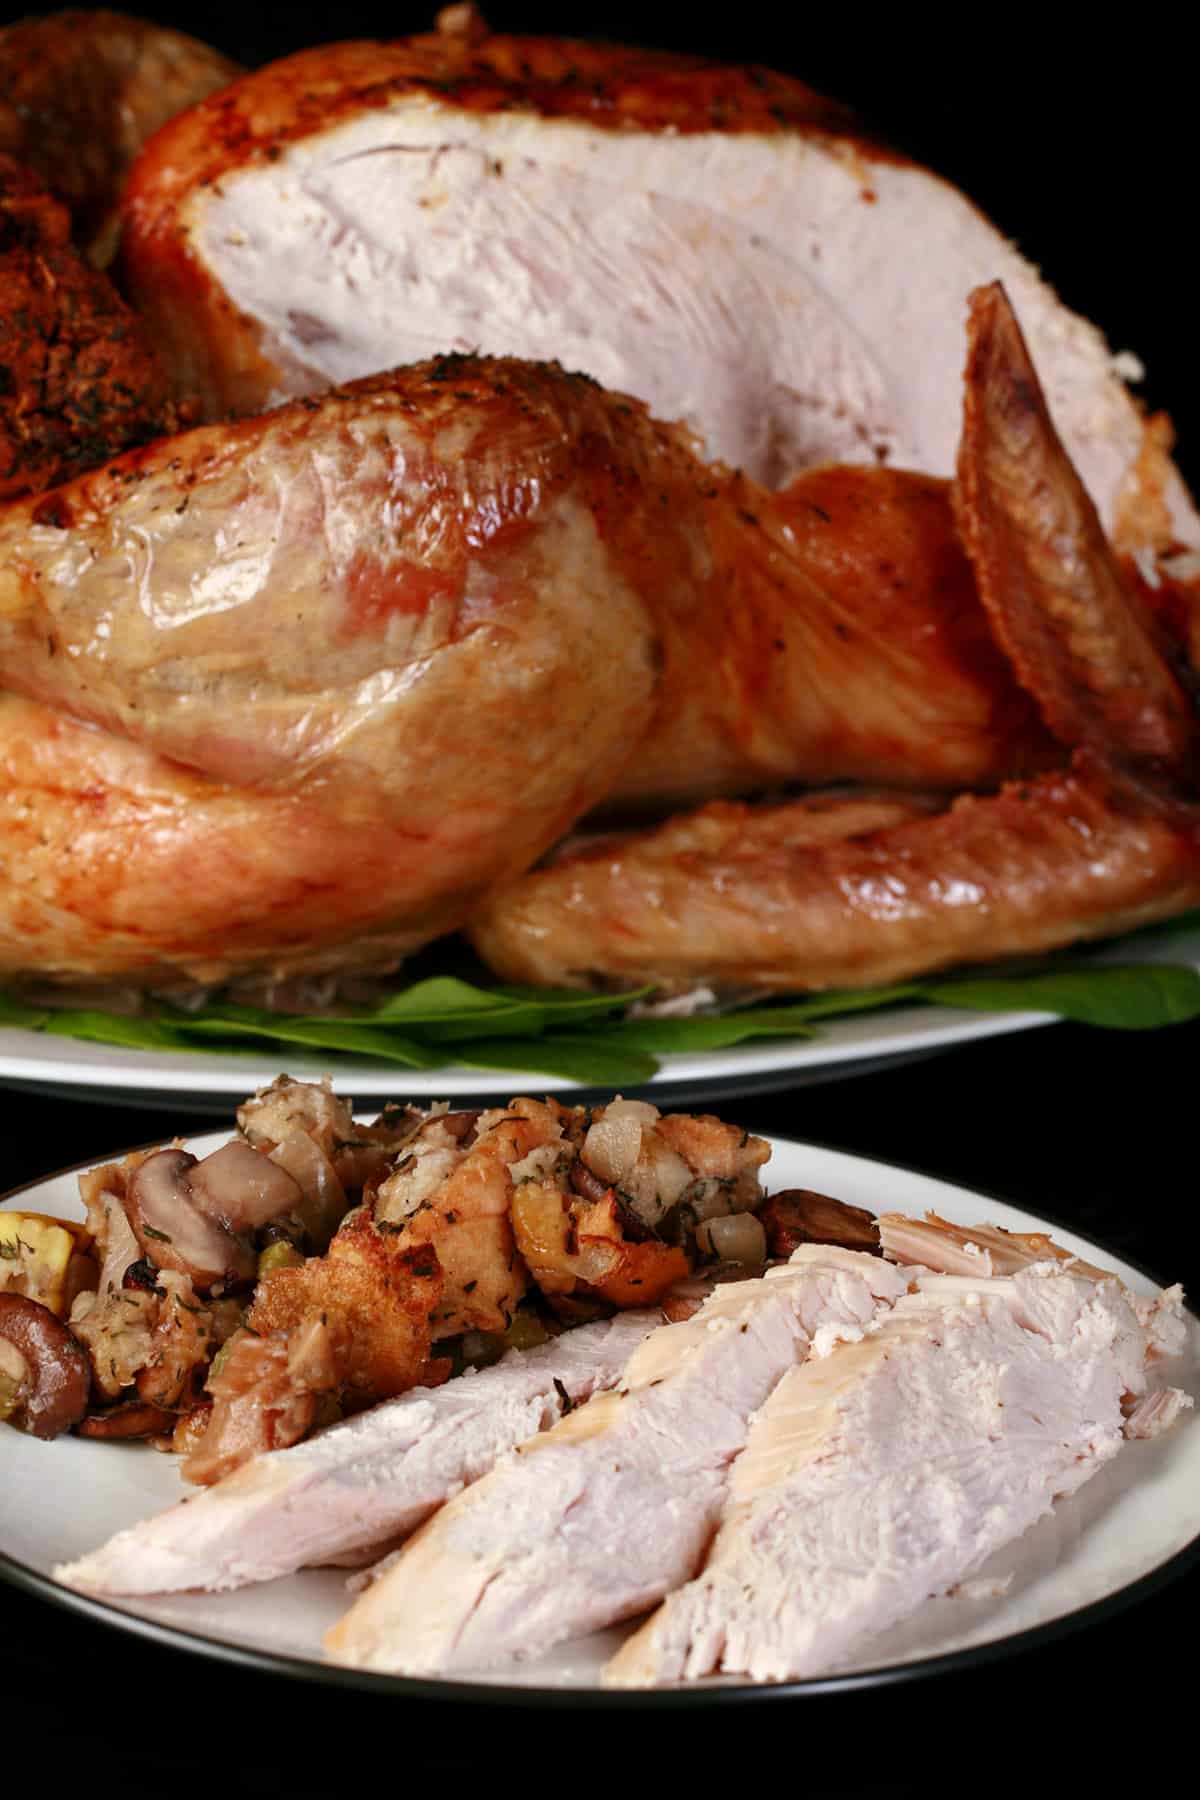
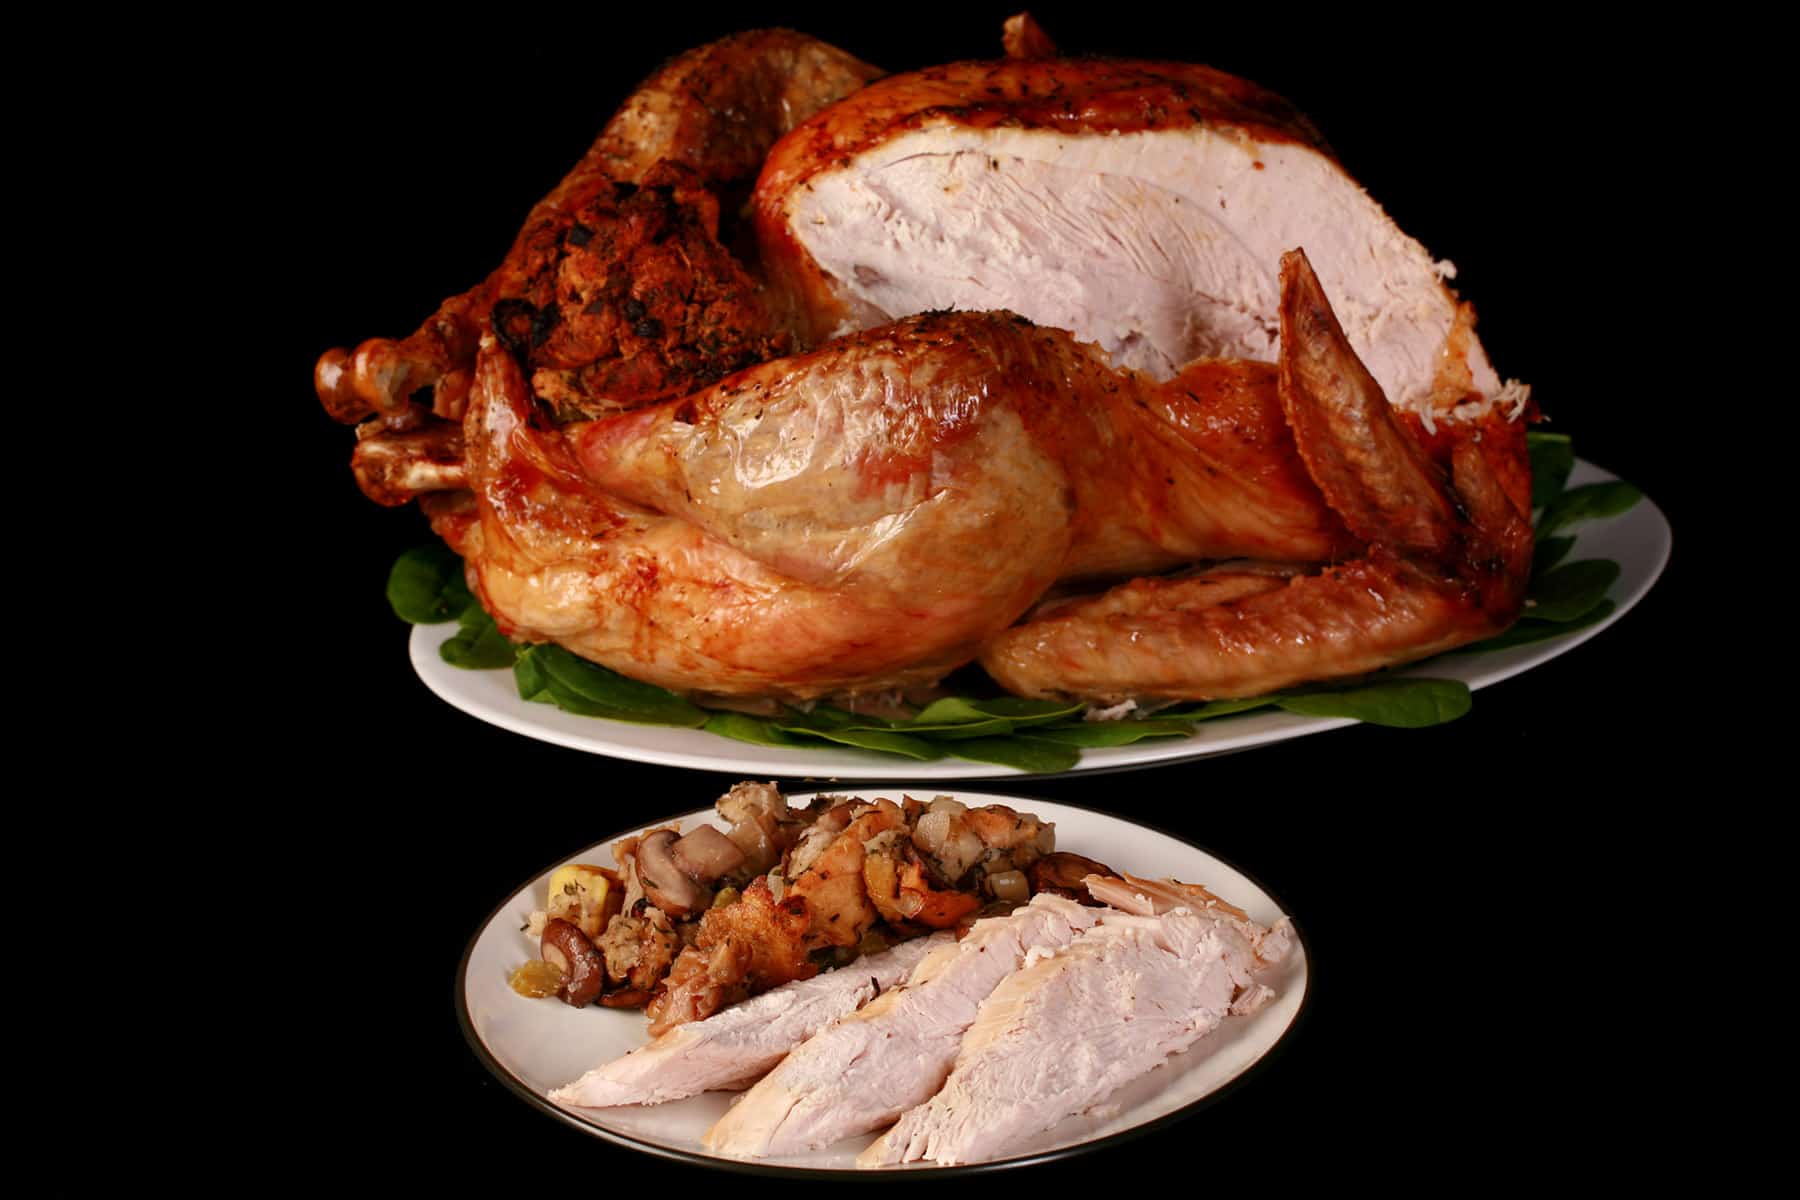
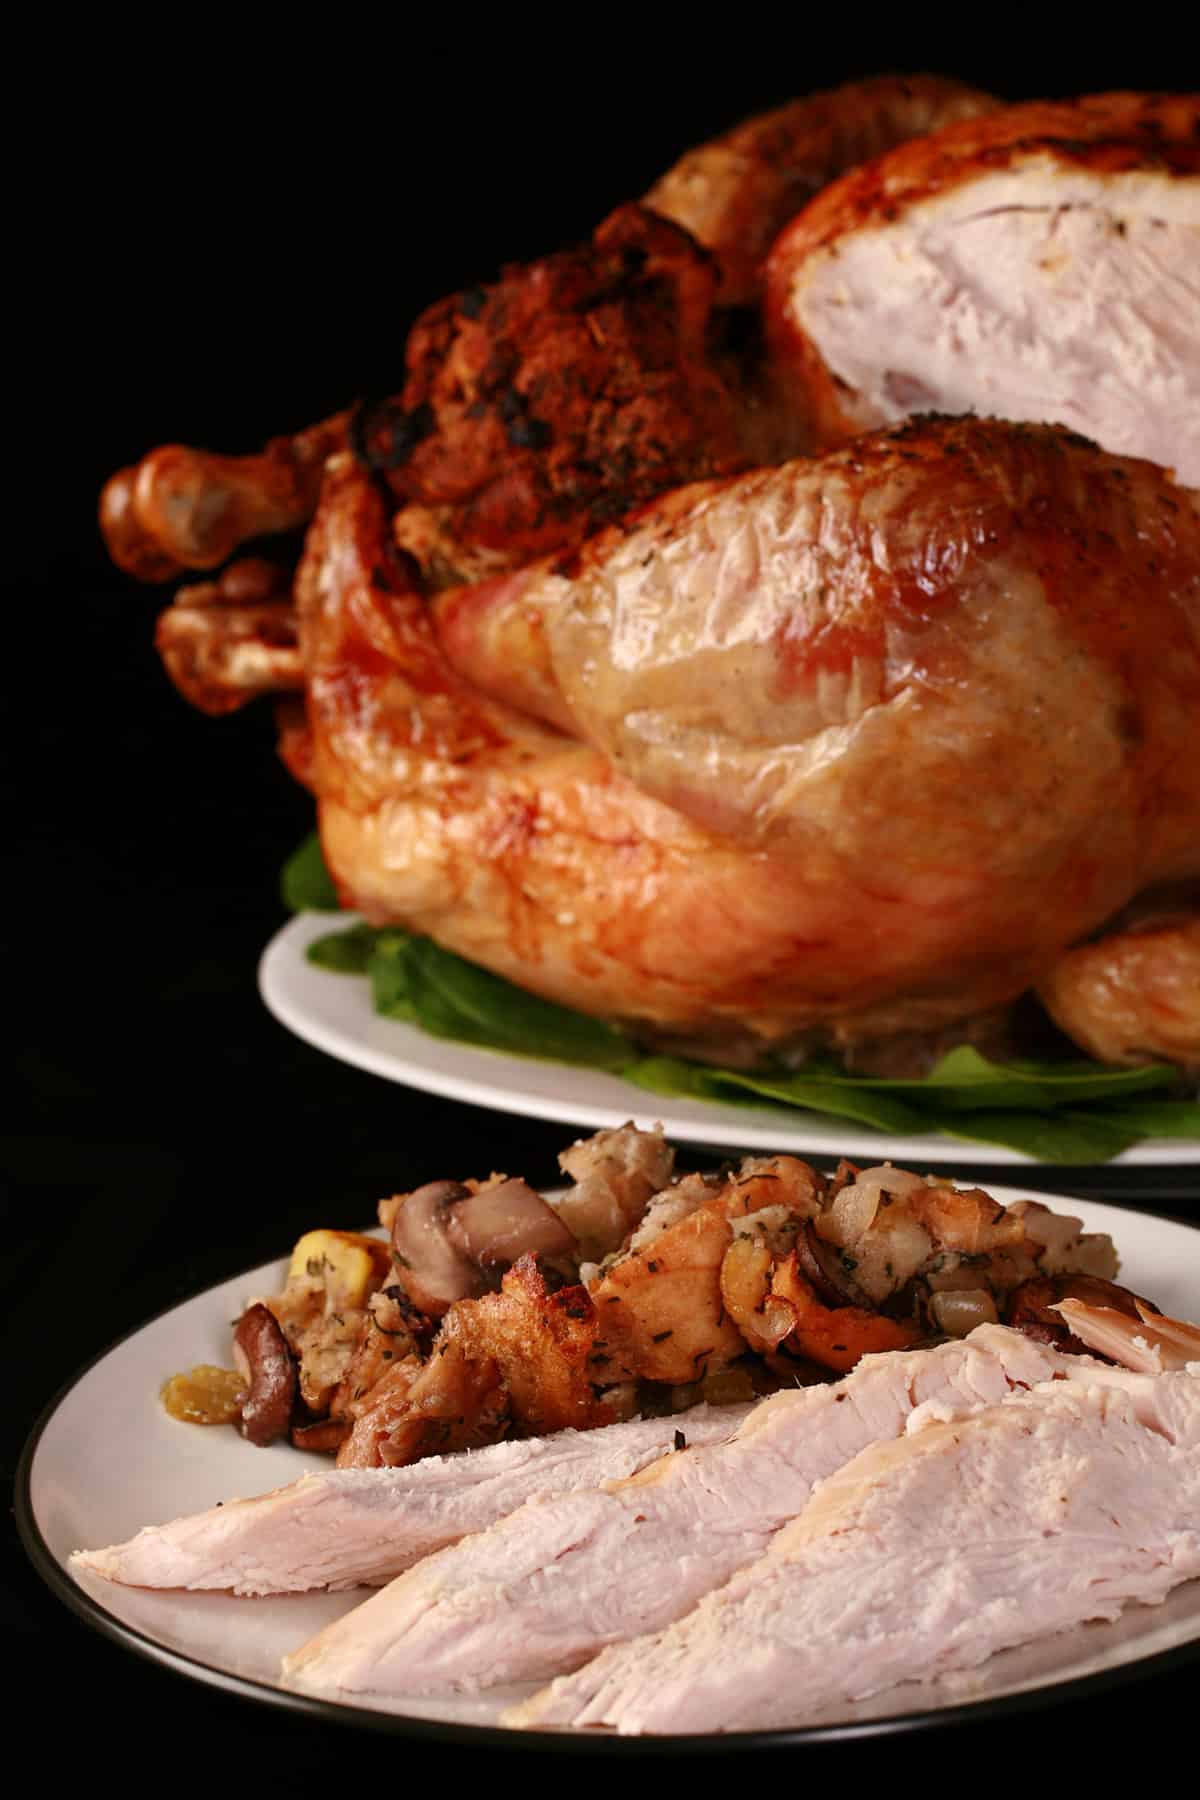
Serving Roast Turkey
Remove the turkey from the oven, and transfer the turkey - I’ll usually do this rack and all - to a cookie sheet.
Cover turkey with aluminum foil, and let the turkey rest at room temperature while you make gravy from the pan juices.
See my post How to Make Turkey Gravy for all of the details!
When you’re ready, serve the turkey with your stuffing, cranberry sauce, and whatever other sides you’re doing.
Bacon Roasted Brussels Sprouts
Cranberry Jello Salad
Gouda Mashed Potatoes
Hasselback Turnips
Homemade Creamed Corn
Honey Roasted Carrots and Parsnips
Keto Scalloped Potatoes
Low Carb Cauliflower Mash
Maple Bourbon Glazed Carrots
Next Level Scalloped Potatoes
Orange Ginger Cranberry Sauce
Scalloped Corn
Smoked Mac and Cheese
Sweet Potato Souffle
Stuffed Turkey Cooking Time
As a quick guide to timing, this is what you’re looking at for roast times, depending on the size of your turkey:
10- to 12-pound turkey: 3¼ hours to 3½ hours.
12- to 14-pound turkey: 3½ to 4 hours.
14- to 18-pound turkey: 4 to 4¼ hours.
18- to 20-pound turkey: 4¼ to 4¾ hours.
20- to 24-pound turkey: 4¾ to 5¼ hours.
Remember that these are guidelines and approximates only - keep an eye on it, and always go by the internal temp, NOT the time.
Holiday Treats
Looking for some inspiration for your holiday goodies tray? Here are a few festive ideas for you!
Brandied Apple Upside Down Cake
Boozy Chocolate Haystack Cookies
Candied Orange Slices
Creme de Menthe Nanaimo Bars
Easy Pistachio Macarons
Egg Nog Sticky Buns
Festive Easy Fudge
Fruitcake Cookies
Gluten Free Candy Cane Cookies
Gluten-Free Fruitcake Cookies
Gluten Free Gingerbread Cookies
Noelles
Pecan Pie Cookies
Peppermint Patties
Traditional Cranberry Mousse
Traditional Pumpkin Mousse
Ultimate Cowboy Cookies
Share the Love!
Before you chow down, be sure to take some pics of your handiwork! If you post it to Bluesky, be sure to tag us - @CelebrationGen. We're also on Pinterest, so you can save all your favourite recipes to a board!
Also, be sure to subscribe to my free monthly email newsletter, so you never miss out on any of my nonsense. Well, the published nonsense, anyway!
Finally, if you love this recipe, please consider leaving a star rating and/or a comment below, and maybe even sharing this post on social media!


How to Cook a Stuffed Turkey
Equipment
- Roasting pan
Ingredients
- 14 lb Turkey Size is only for nutritional info, you can use whatever size you need.
- Stuffing of choice
- ⅓ cup Butter Melted
- Salt
- Seasonings of choice See post for details
Instructions
Thaw Your Turkey
- The safest way to thaw a turkey is to put the frozen turkey in the fridge, allowing 24 hours for every 5 lbs of weight. If your fridge is colder than most, it’ll take even more time, so plan accordingly.
Prepare the Oven and Pan
- Place your oven rack on the lowest position , preheat your oven temperature to 325 degrees F.
- Peel and chop some onions into chunks, place the onions and celery in the bottom of the pan, seasoning with a little salt and pepper.
- Place the roaster rack on top of the vegetables, moving the vegetables around to allow the rack to sit flat on the pan.
- Pour a cup or two of chicken broth or turkey broth over the vegetables, set the pan aside while you prepare the turkey.
Prepare the Turkey
- Check both the neck cavity and the large cavity - one on either end of the bird - for any “Extras” that might have been included - the neck, giblets, etc. Remove these items and either set aside* or discard them.
- Rinse the interior of the turkey out with cold water, drain well. Pat the outside of the turkey dry with paper towels.
- Transfer turkey to the prepared pan, breast side up.
Stuff and Season the Turkey
- Gently stuff turkey dressing into the cavity of the bird. You want it filled nicely, but not packed into a solid mass.
- Pour a bit of melted butter or oil over the top of the turkey, using a pastry brush to ensure all of the exposed skin is coated with butter.
- Once coated, sprinkle generously with salt, pepper, and any other seasonings that you want to use.
Roast the Turkey
- Place the prepared turkey in your oven, and set your timer for a little less than the shortest amount of time indicated for your size of turkey, as indicated in the post.
- Once you hit the early side of your cooking window, insert meat thermometer into the thickest part of thigh, and then deep into the center of stuffing.
- You want the turkey meat to reach at LEAST 165 F, and the stuffing to reach 165. Expect 175-180 in the thigh, 170 in the breast, and 165 for the stuffing.
Serving Roast Turkey
- Remove the turkey from the oven, and transfer the turkey - I’ll usually do this rack and all - to a cookie sheet.
- Cover turkey with aluminum foil, and let the turkey rest at room temperature while you make gravy from the pan juices.
- When you’re ready, serve the turkey with your stuffing, cranberry sauce, and whatever other sides you’re doing.
Video
Notes
12- to 14-pound turkey: 3½ to 4 hours.
14- to 18-pound turkey: 4 to 4¼ hours.
18- to 20-pound turkey: 4¼ to 4¾ hours.
20- to 24-pound turkey: 4¾ to 5¼ hours. Remember that these are guidelines and approximates only - keep an eye on it, and always go by the internal temp, NOT the time.


Ligita & Šarūnas
Very well presented with lots of ideas for seasonings. Especially liked the 1-2 cups of broth and root vegetables in the pan. Simple things that get forgotten when not routinely roasting a turkey. Our family thanks you.