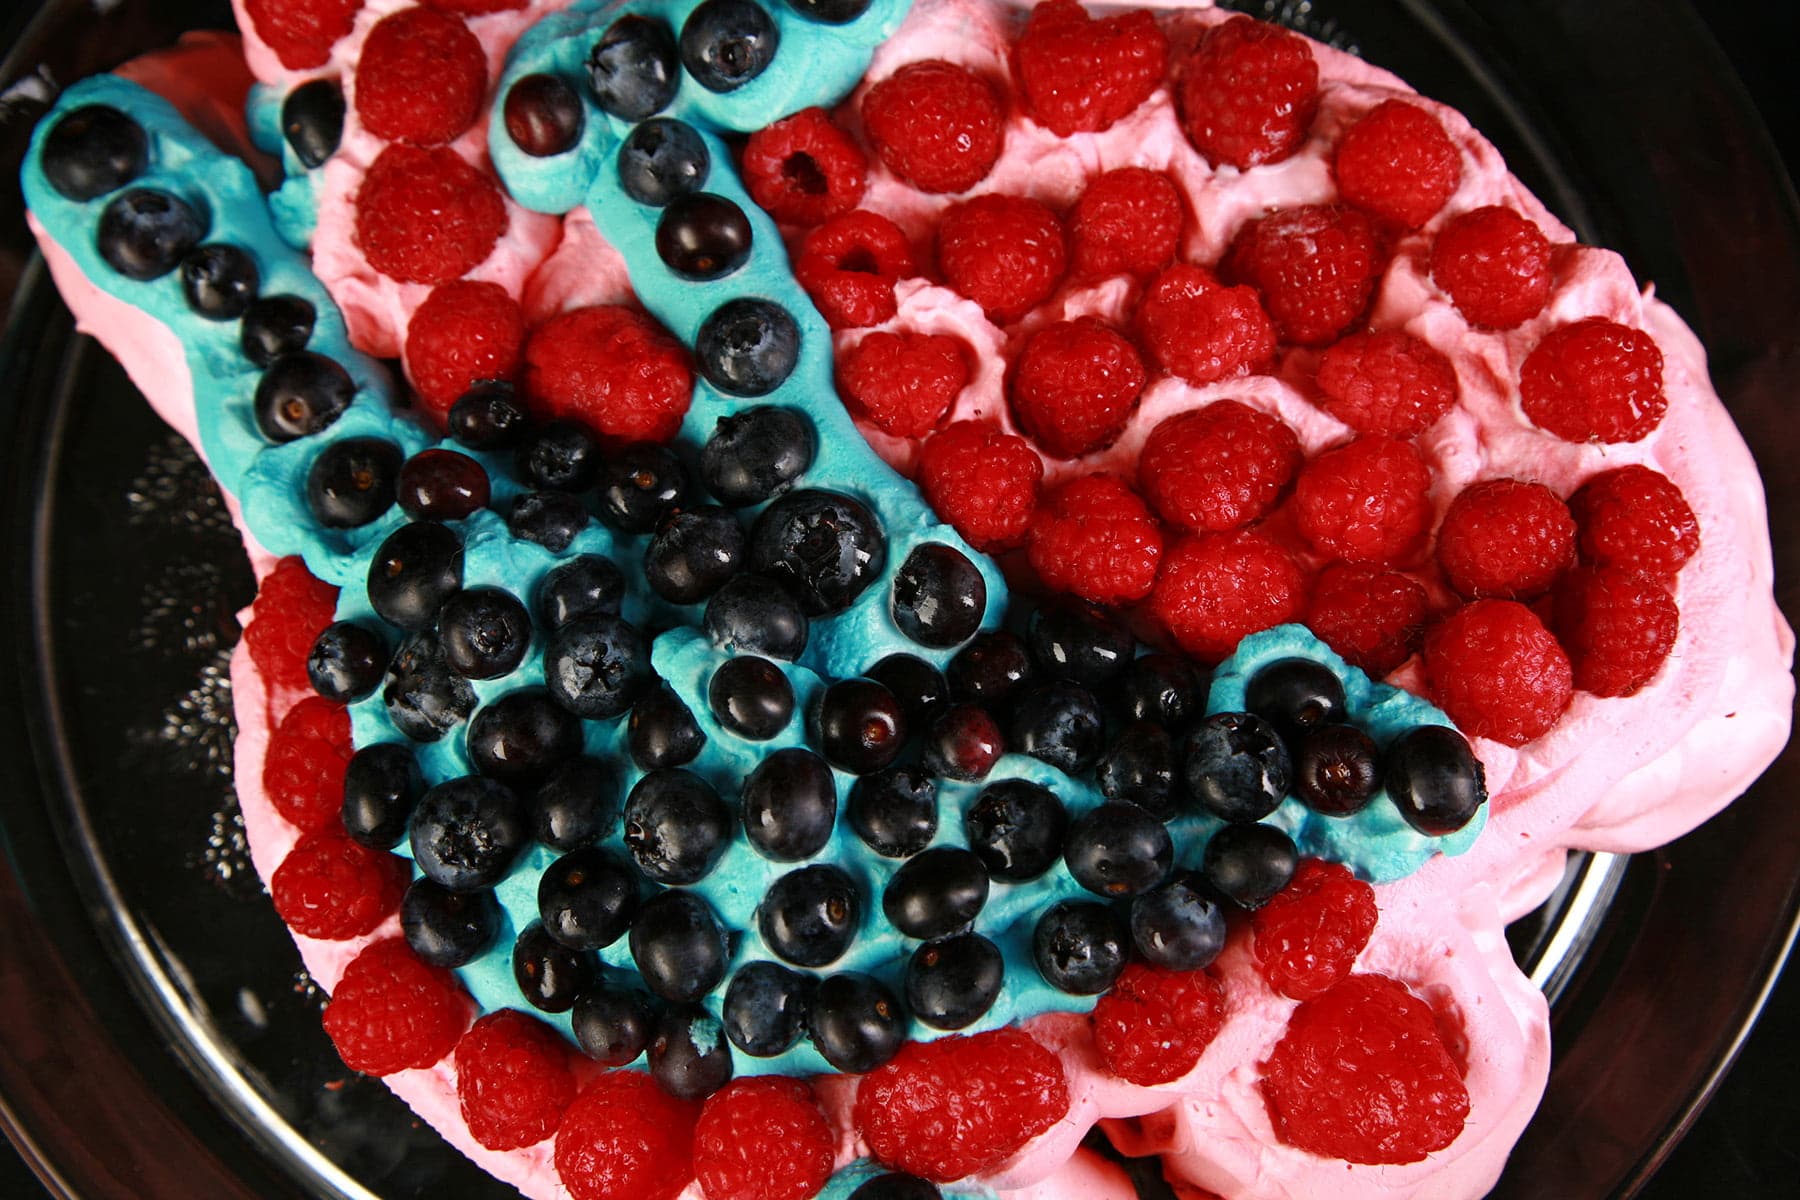
Valentine's Day is coming up, and this Raspberry & Blueberry Heart Shaped Pavlova is the perfect dessert for the more ... literal... nerds out there!

Hey, remember when I went on a weird tear a few months ago, and ended up making a relatively gross/awesome looking Halloween “Bloody Eyeballs” Pavlova... and then followed it up with a fun Christmas Tree Pavlova, and later an Easter Egg Pavlova?
I think I’ve basically concluded that there should be a pavlova for every occasion, so here we are... with a Valentine’s Day Heart Shaped Pavlova.
I can’t actually take credit for this idea, mind you. This is all on my husband.
As I’ve mentioned before, a few years ago he was in charge to Valentine’s Day dessert, and surprised me with this:
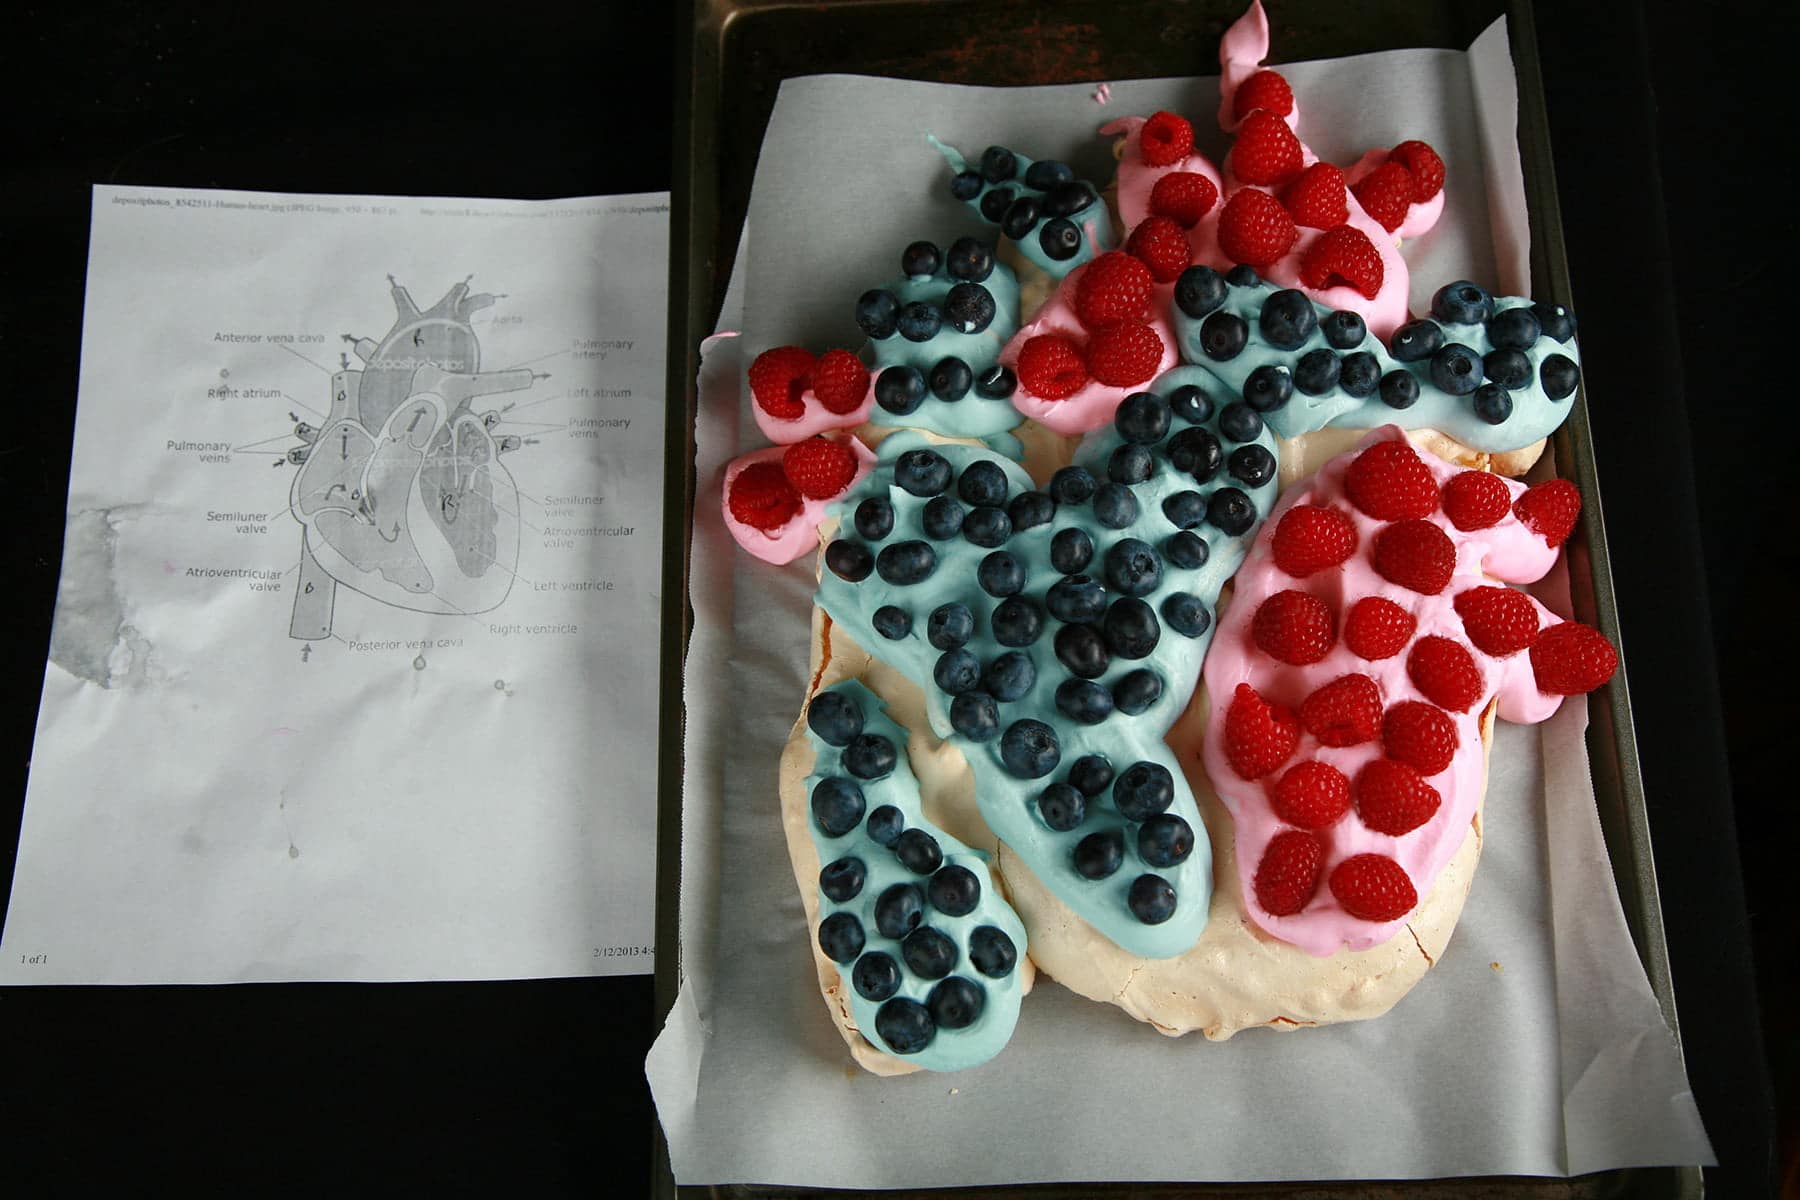
My husband's original Heart Shaped Pavlova
Amazing, eh?
So, this year... we decided to make another one, together - and how you how!
First off, some general Pavlova tips:
Tips for Pavlova Success
Pavlovas are super easy to make, if you keep a few basic things in mind. Here are a few tips to help you successfully make a Pavlova:
1. Eggs are easiest to separate when cold, and easiest to whip up when they’re room temperature.
Crack them right away when you take them out of the fridge, then cover the bowl and let it sit for a bit to warm to room temp. 10-15 minutes should be plenty of time, you don’t want to leave them out all day, as salmonella is a THING.
Honestly, if you have a good stand mixer - I LOVE my Kitchenaid! - you should be good to go, right out of the fridge. If you’re using a hand mixer... I’d let them warm up.

2. When cracking and separating your eggs, be VERY CAREFUL to not get any yolk in your whites.
Any yolk at all - even a speck - will prevent your whites from whipping up as they’re supposed to.
If you do get yolk in the whites, and can’t get it out... start from scratch. Seriously. You can make a nice omelette from those whites, but you won’t be able to get a Pavlova out of them.
3. Fat is the enemy of meringue
For the same reason yolks will mess you up, you also have to be careful to not let fat, oil, grease, etc touch your meringue.
Make sure your mixer and bowl are clean, and use a parchment lined baking sheet - do NOT grease it!
Also, when flavouring the meringue, be sure you’re not using an oil based flavour.
Yes, I used Lorann Flavour oil... no, that’s not actually oil based. LOL!

4. Don’t over-beat your egg whites
Over beating the egg whites can lead to a weeping meringue, and/or affect the texture. Get them to stiff peaks and that’s it!
5. Don’t open the oven door!
Once the pavlovas are in the oven, shut the door *and leave it shut* until you’re ready to use it. At the very least leave it in there for a few hours, for the sake of structural integrity.
I’ll usually leave it in there right up until I’m ready to assemble and serve it, as it’s nice and protected in there. Pavlovas are delicate and fragile and really, Murphy’s Law is a thing.
6. Understand that cracks are almost inevitable
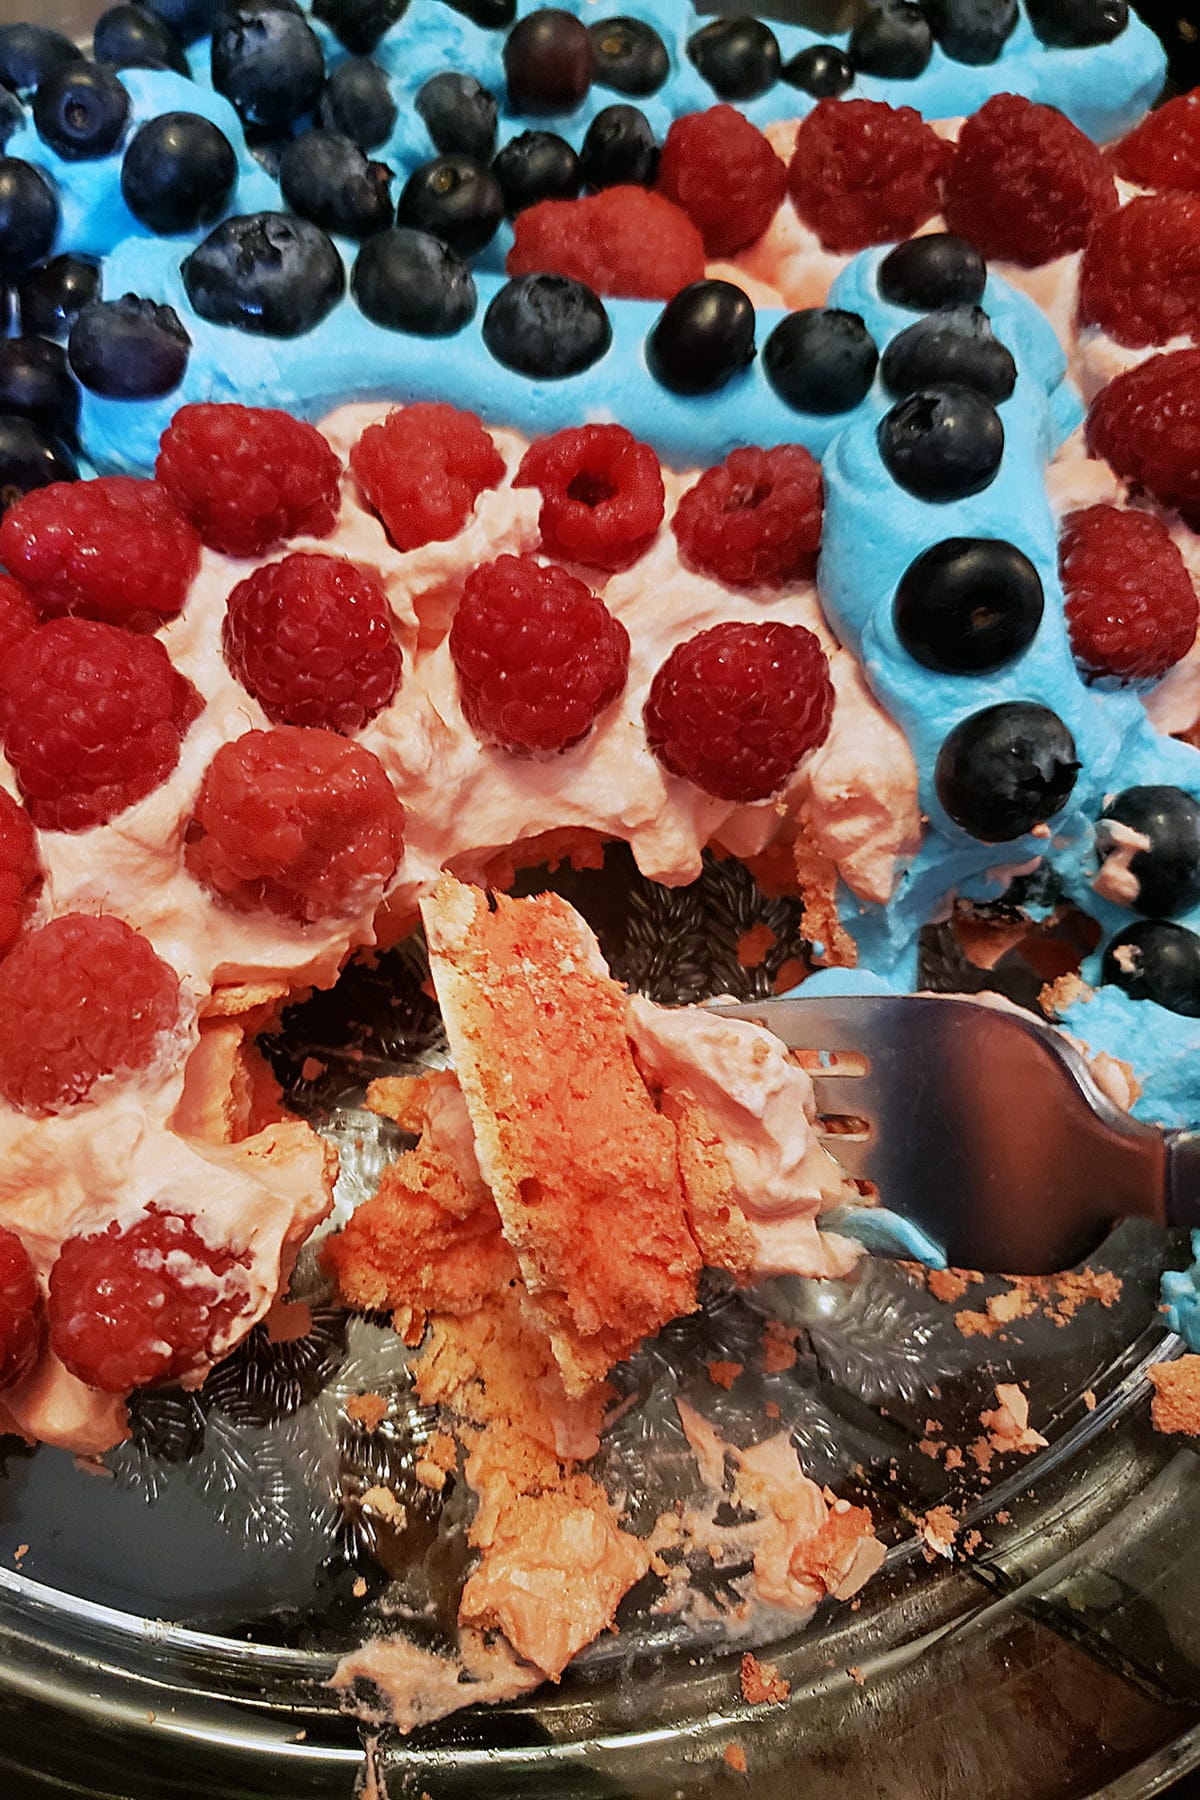
Pavlovas crack - especially when you mound them up with whipped cream and fruit - and that’s just a fact of life. Embrace it.
Don’t mourn “perfection” lost, realize that it’s literally collapsing under the weight of its own awesomeness.

7. Timing matters
Once you start whipping the cream for your Pavlova, the timer is started. Before even make the whipped cream, have your fruit good and ready to go, and be ready to serve it right away.
Whipped cream breaks down over time - unless you stabilize it with some gelatin. That’s neither here nor there, in this case, as Pavlovas need to be eaten pretty soon after assembling.
So, have everything ready to go when you make the whipped cream, serve it right away, and don’t leave anything behind - it really doesn’t hold up as leftovers.
8. Understand that “serving size” is a mere suggestion
Can this Pavlova serve 6 people (some say 8!)? Sure, when you’re listening to the same people who think that a serving size of dip is 2 Tbsp.
TWO TABLESPOONS!!!
Personally, I think this makes 4 good sized servings... 2 if you’re ambitious.

How to Make a Heart Shaped Pavlova
Get Ready
- Preheat your oven to 250 degrees. Fit your electric mixer with the whisk attachment.
- While you can freehand this, I like to use a template. Here’s the one I did up for the occasion:

- If you - like me - don’t think ahead enough to print this as a mirror image, place it right side DOWN on a work surface. Place a piece of parchment paper (larger than the paper) over it, and use sharpies to trace the design onto the parchment.
If you have a hard time seeing the design through the wrong side of the paper and the parchment paper, use the sharpies to darken the lines on the paper, first.
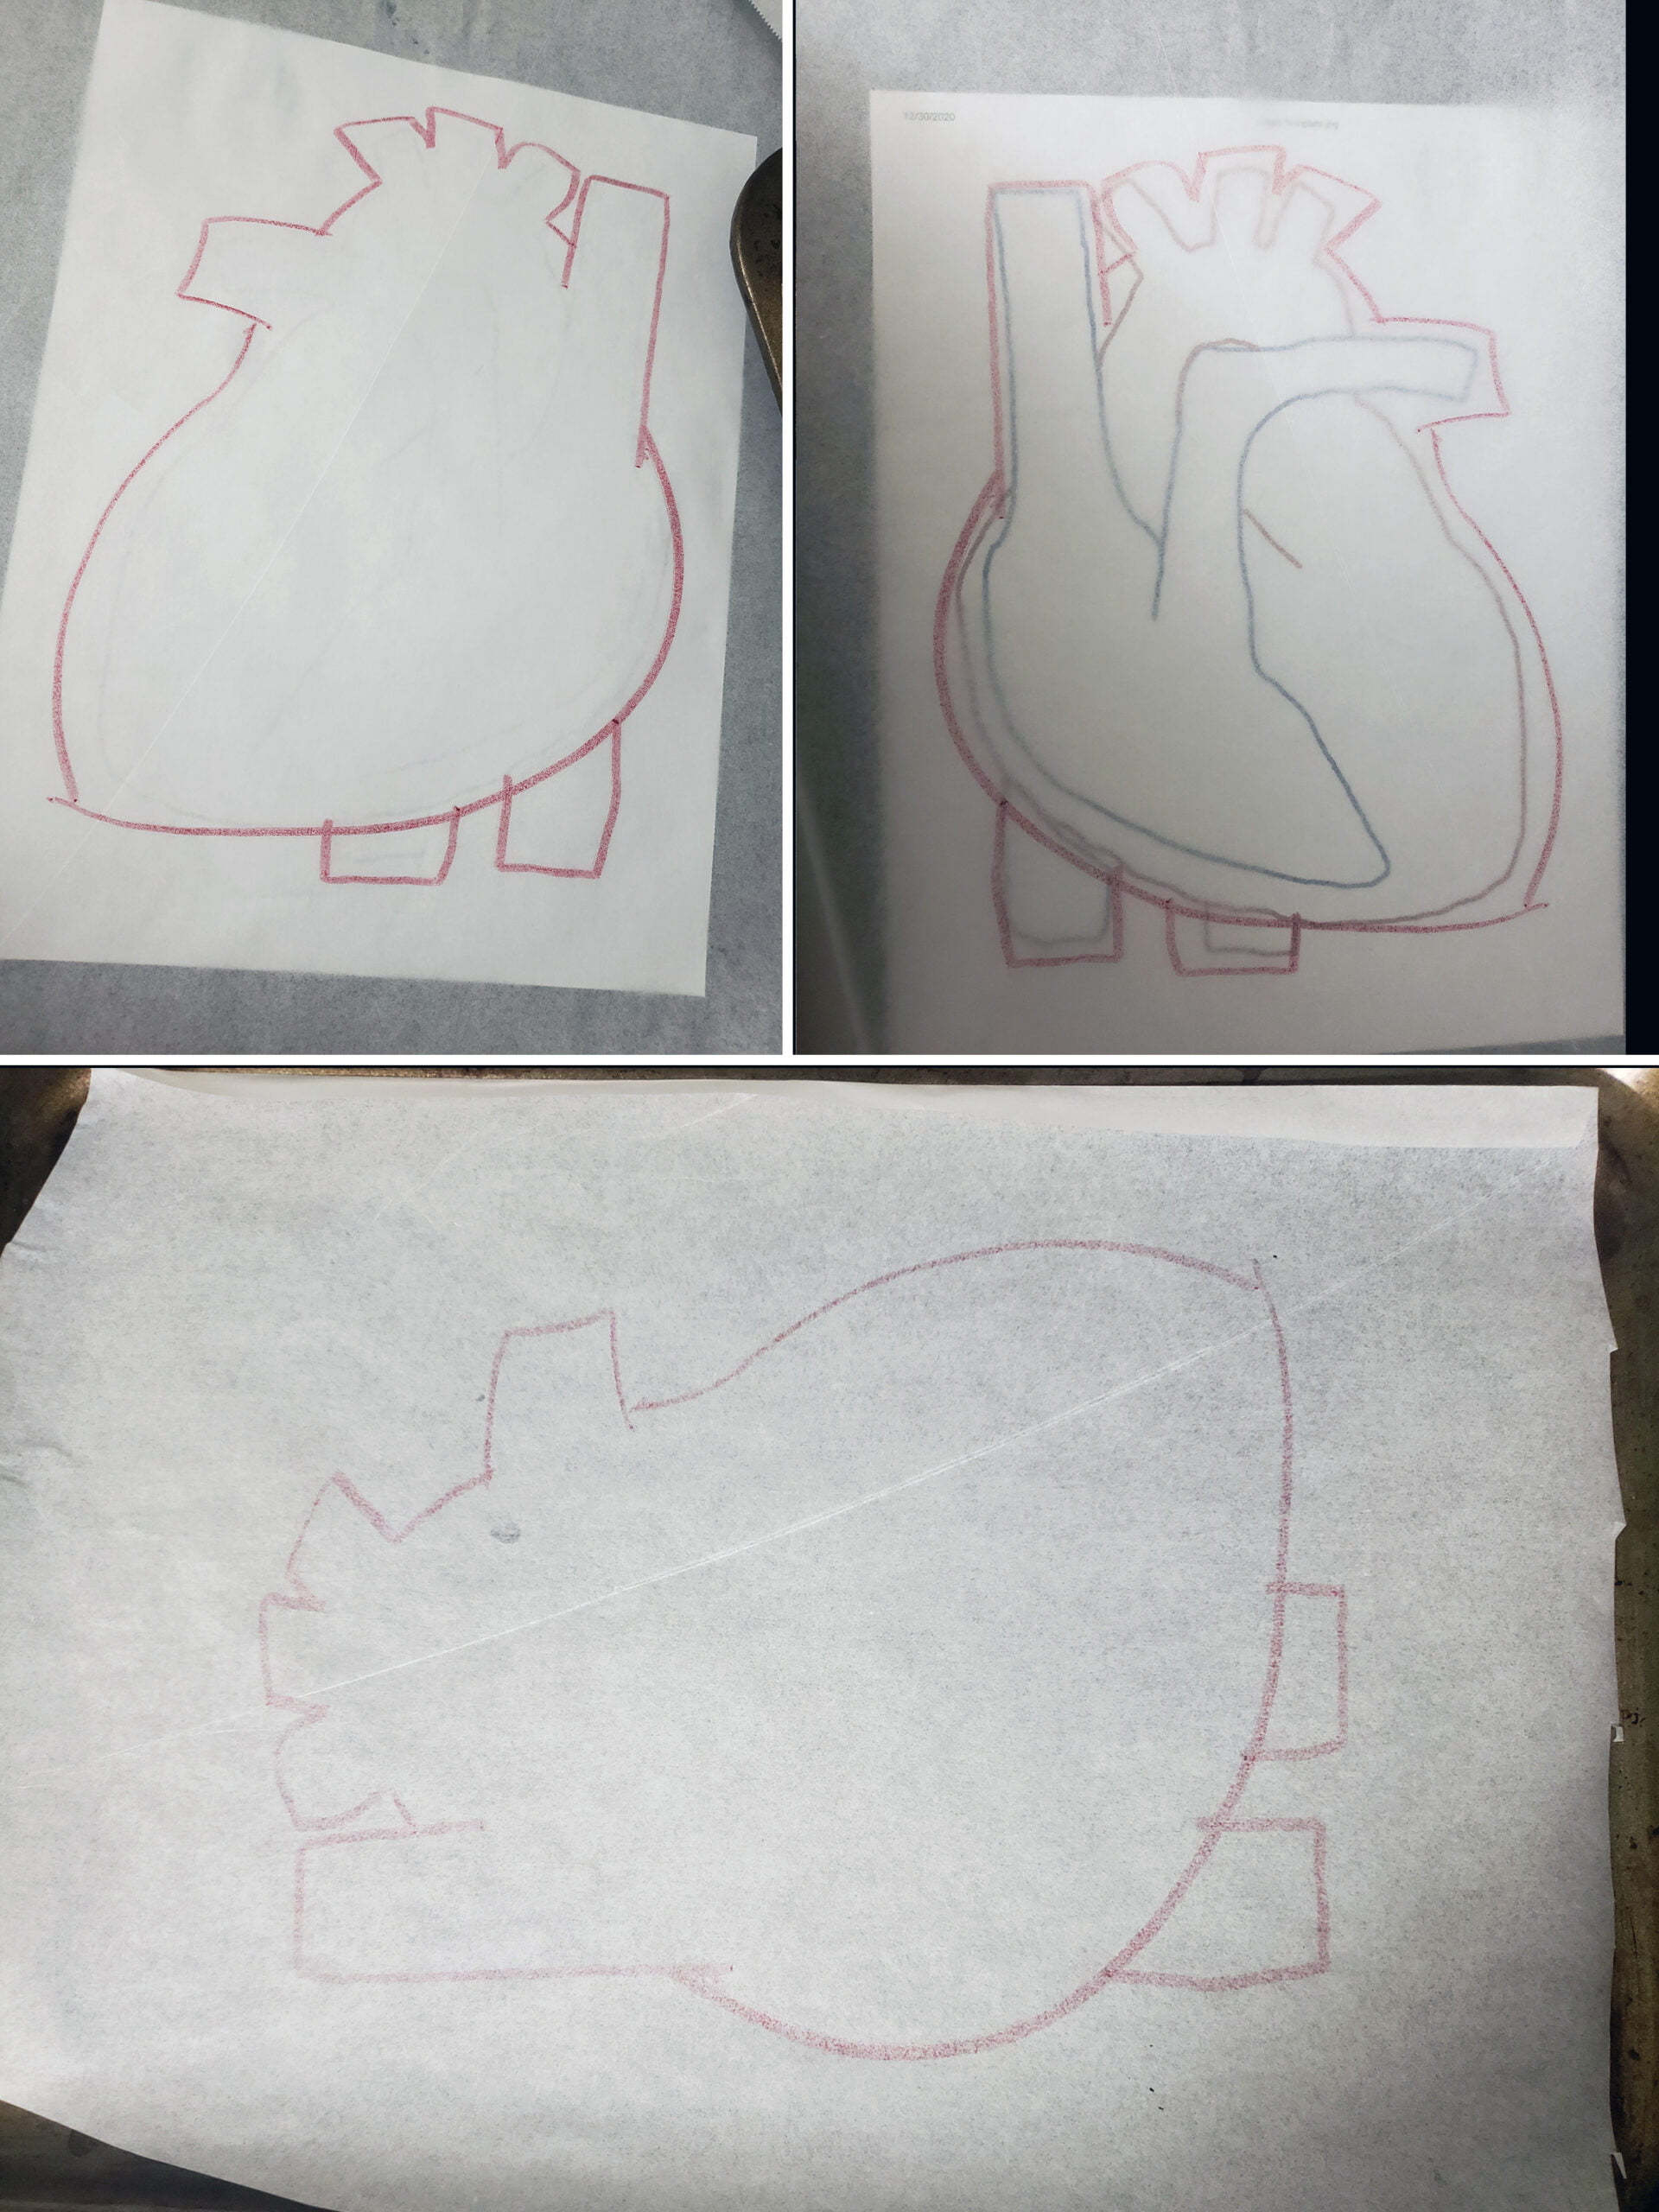
- If you do think ahead and print a template as a mirror image, place it design side UP on your work surface, and trace onto a sheet of parchment.
- Place parchment paper in your pans, marked side down. You should be able to see the markings through the paper.
Set aside.
- Remove eggs from fridge, separate out the whites, and allow to warm to room temp (about 5 minutes).
Make Your Meringue
- In your mixer bowl, beat egg whites together with salt until glossy peaks form.
- Slowly add in the sugar, and continue whipping until stiff peaks form. Turn off mixer, remove bowl.
- Sprinkle vinegar, cornstarch, red food colouring and raspberry flavouring* over meringue, gently fold in till combined.
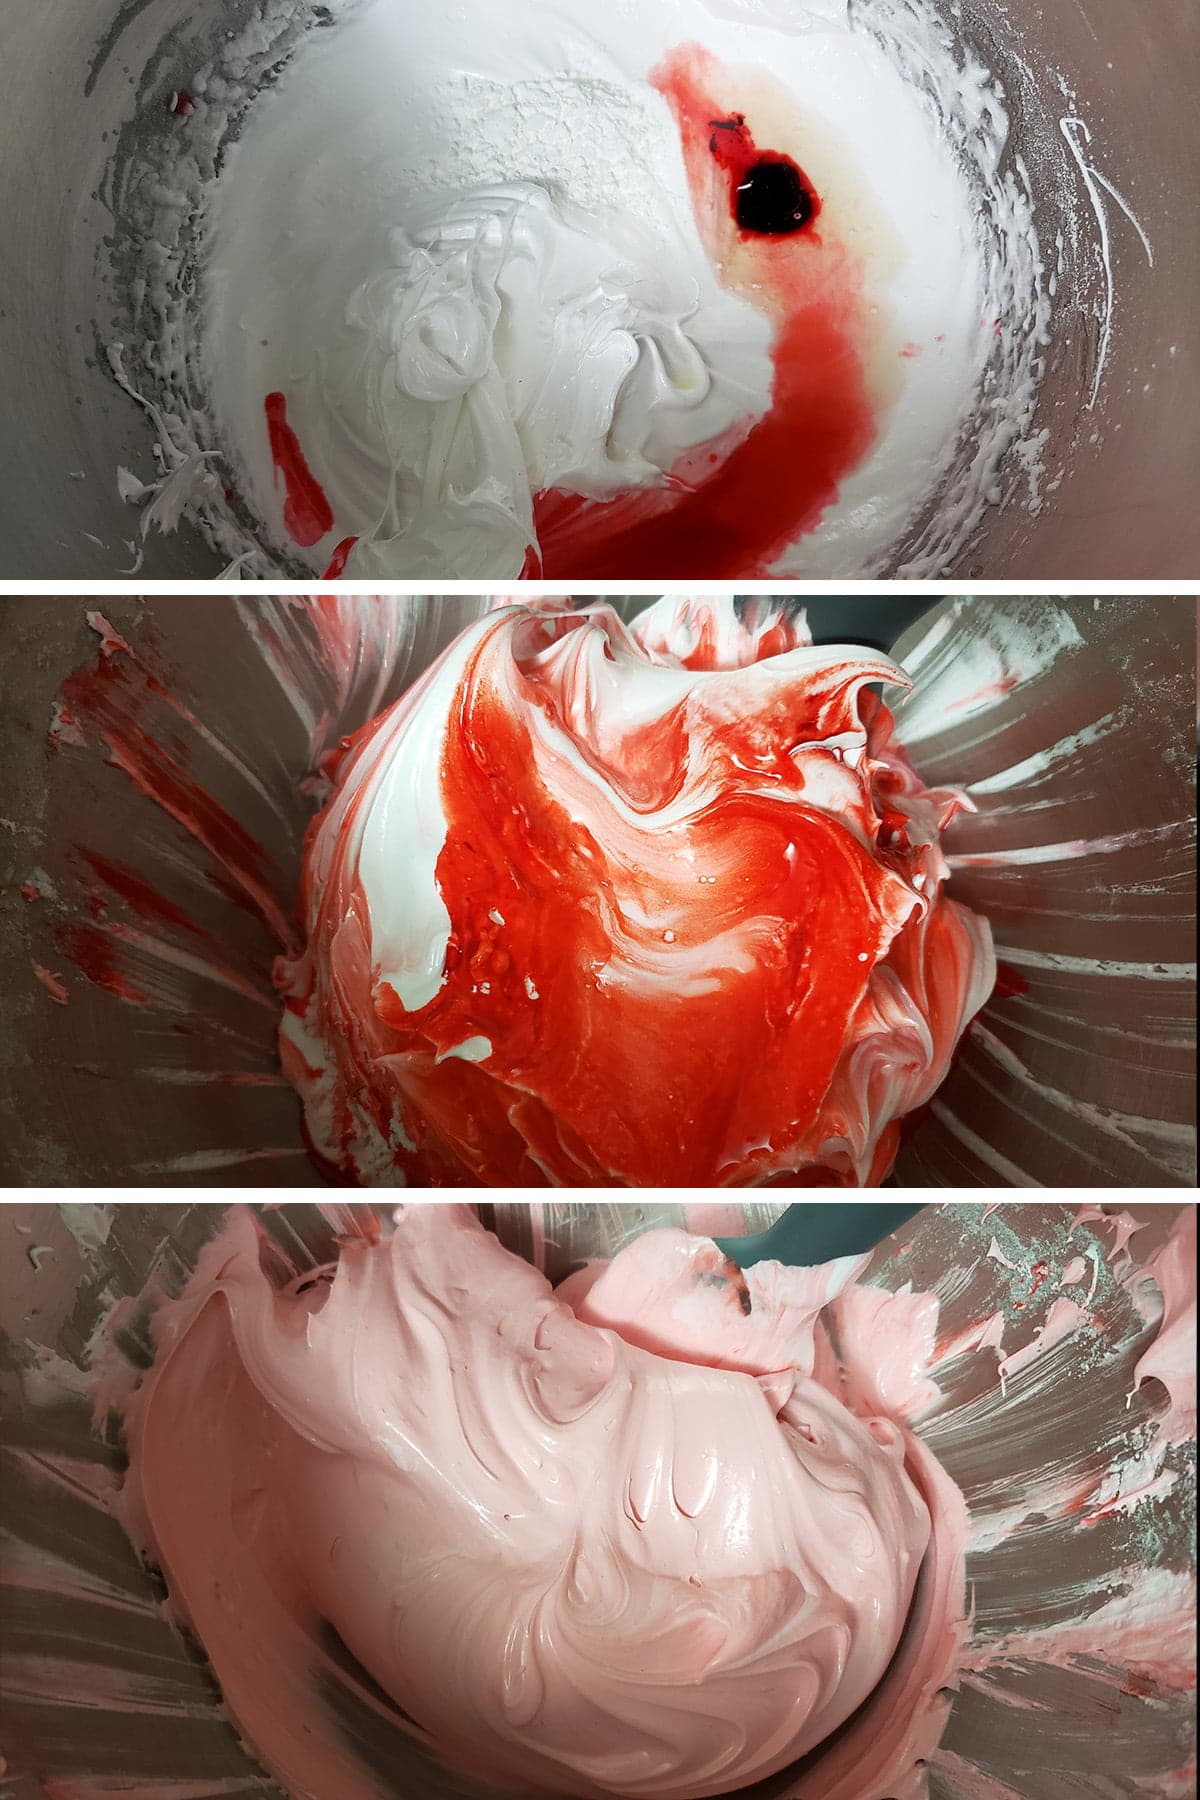
* I like to use Lorann Flavour Oil in Raspberry for this - despite the name, it is NOT oil based! - but you can use grocery store raspberry extract/flavouring if you’d like.
Using spoons or pastry bags, spoon or pipe the meringue onto your baking sheet, using your template as a guide.

The unbaked heart shaped pavlova
- Bake your Pavlova.
- Once your timer goes off, turn the oven off and let the meringue cool in the oven for several hours. The baking of the meringue can be done the day before, if needed!

The baked pavlova, after cooling. Yes, there's cracking - it really doesn't matter!
To Serve
- Just before serving, whip the heavy cream. I like my pavlovas a little sweeter, so I add about 2 tablespoon of sugar – add as much or as little as you want. Purists may not want to sweeten the cream at all!
- Once heavy cream is whipped to the desired thickness, add any desired flavourings, if applicable.
- Divide your whipped cream between two bowls, and colour with food colouring. For this particular template, ⅔ in one (red), and ⅓ in the other (blue) works perfectly!

- Spoon or pipe your whipped cream out onto the “heart”. I started with spooning the red out in the main areas, then spooned red and blue meringue into two bags to pipe the design on.
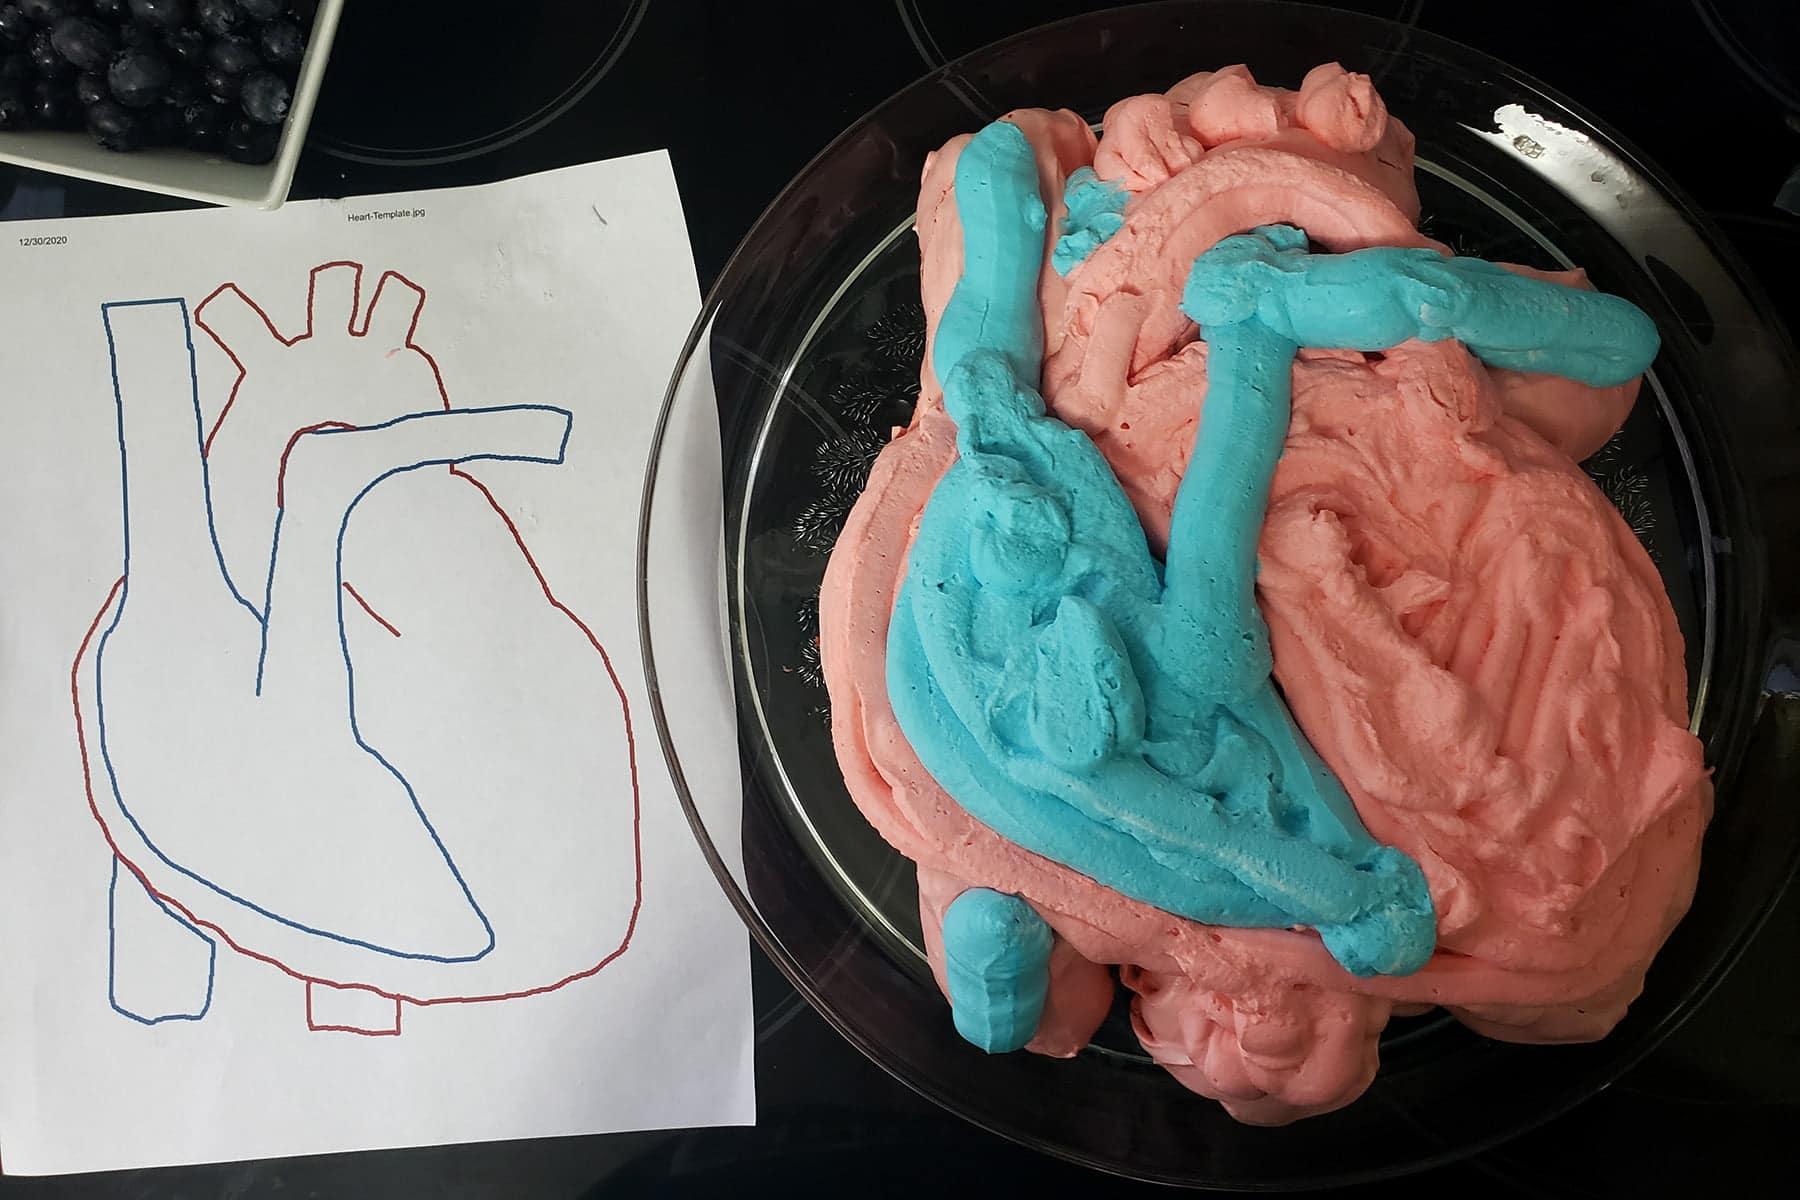
- Top with fresh raspberries and blueberries.
- Serve immediately!

Also, if you're interested in gluten-free cooking and baking, you should definitely check out my gluten-free cookbooks: Beyond Flour: A Fresh Approach to Gluten Free Cooking & Baking, and the sequel... Beyond Flour 2. You can order them through Amazon, or through any major bookseller.

More Valentine's Day Ideas
Looking to do something a bit different for Valentine's Day? Here are a few ideas!
6 Inch Cheesecake
Baklava Cheesecake
Balsamic Mushroom Baked Brie
Booze Bouquet Tutorial
Chocolate Leaves Cake Tutorial
Chocolate Raspberry Pavlova
Chocolate Ravioli
Dark Chocolate Truffles
Deviled Strawberries
Heart Shaped Beer Pretzels with Jalapeno Jack Dip
Mini Eclairs
Mushroom Goat Cheese Braid
Pepper Crusted Tuna with Wasabi Cream Sauce
Phyllo Crab Triangles
Pink Heart Shaped Bagels
Red Velvet Bagels
Red Velvet Brownies
Savory Tomato Shortcake
Traditional Raspberry Mousse
Valentine's Day Charcuterie Board
Valentine's Day Deviled Eggs
Special Diet Treats
Need it gluten free* or low carb? Check out these Valentine's Day recipes on my other blogs:
Gluten-Free Crab Cakes
Gluten Free Crepes
Gluten-Free Fried Brie
Heart Fruit Skewers with Raspberry Cheesecake Dip
Keto Creme Brulee
Low Carb Chocolate Mousse
Keto Crab Cakes
Low Carb Tiramisu
Keto Cheesecake
Seafood Cobb Salad
* Some of the recipes in the first link section are inherently gluten free, too!
Share the Love!
Before you chow down, be sure to take some pics of your handiwork! If you post it to Bluesky, be sure to tag us - @CelebrationGen. We're also on Pinterest, so you can save all your favourite recipes to a board!
Also, be sure to follow me on Pinterest, and subscribe to my free monthly email newsletter, so you never miss out on any of my nonsense.
Well, the published nonsense, anyway!
Anyway, on to that recipe!
Heart Shaped Valentine's Day Pavlova
Equipment
- Parchment Paper
- Baking Sheet
Ingredients
- 4 large egg whites
- 1 cup super fine / castor sugar *
- Pinch Salt
- 1 teaspoon Raspberry Extract**
- 2 teaspoon white vinegar
- 1 teaspoon Cornstarch
- 1 ¼ cup heavy cream
- ½-1 Raspberry Extract**
- 1-2 tablespoon Granulated Sugar optional
- Red and Blue Food Colouring
- Blueberries and Raspberries
Instructions
- Get ready: Preheat your oven to 350 degrees. Remove eggs from fridge and allow to warm to room temp (about 5 minutes). Line a baking (cookie) sheet with parchment paper (if drawing a guide on, follow the directions in the post!), and set aside. Fit your electric mixer with the whisk attachment.
- In your mixer bowl, beat egg whites together with salt until glossy peaks form. Slowly add in the sugar, and continue whipping until stiff peaks form. Turn off mixer, remove bowl.
- Sprinkle raspberry extract*, vinegar, and cornstarch over meringue, gently fold in till combined.
- Heap meringue onto the center of your baking sheet. Use a spatula to spread the meringue out into your desired heart shape.
- Put the baking sheet into your oven, and turn the temperature down to 250 degrees. Bake for 1 hour and 20 minutes. Once your timer goes off, turn the oven off and let the meringue cool in the oven for several hours. The baking of the meringue can be done the day before, if needed!
- Just before serving, whip the heavy cream. I like my pavlovas a little sweeter, so I add about 2 tablespoon of sugar – add as much or as little as you want. Purists may not want to sweeten the cream at all! I also like to add a little flavoring, again – optional
- Divide the whipped cream into two bowls,and tint with food colouring.. For this particular heart template, it was about ⅔ red, ⅓ blue.
- Spoon or pipe the whipped cream on your pavlova, and top with fresh fruits. Serve immediately!




Leave a Reply