

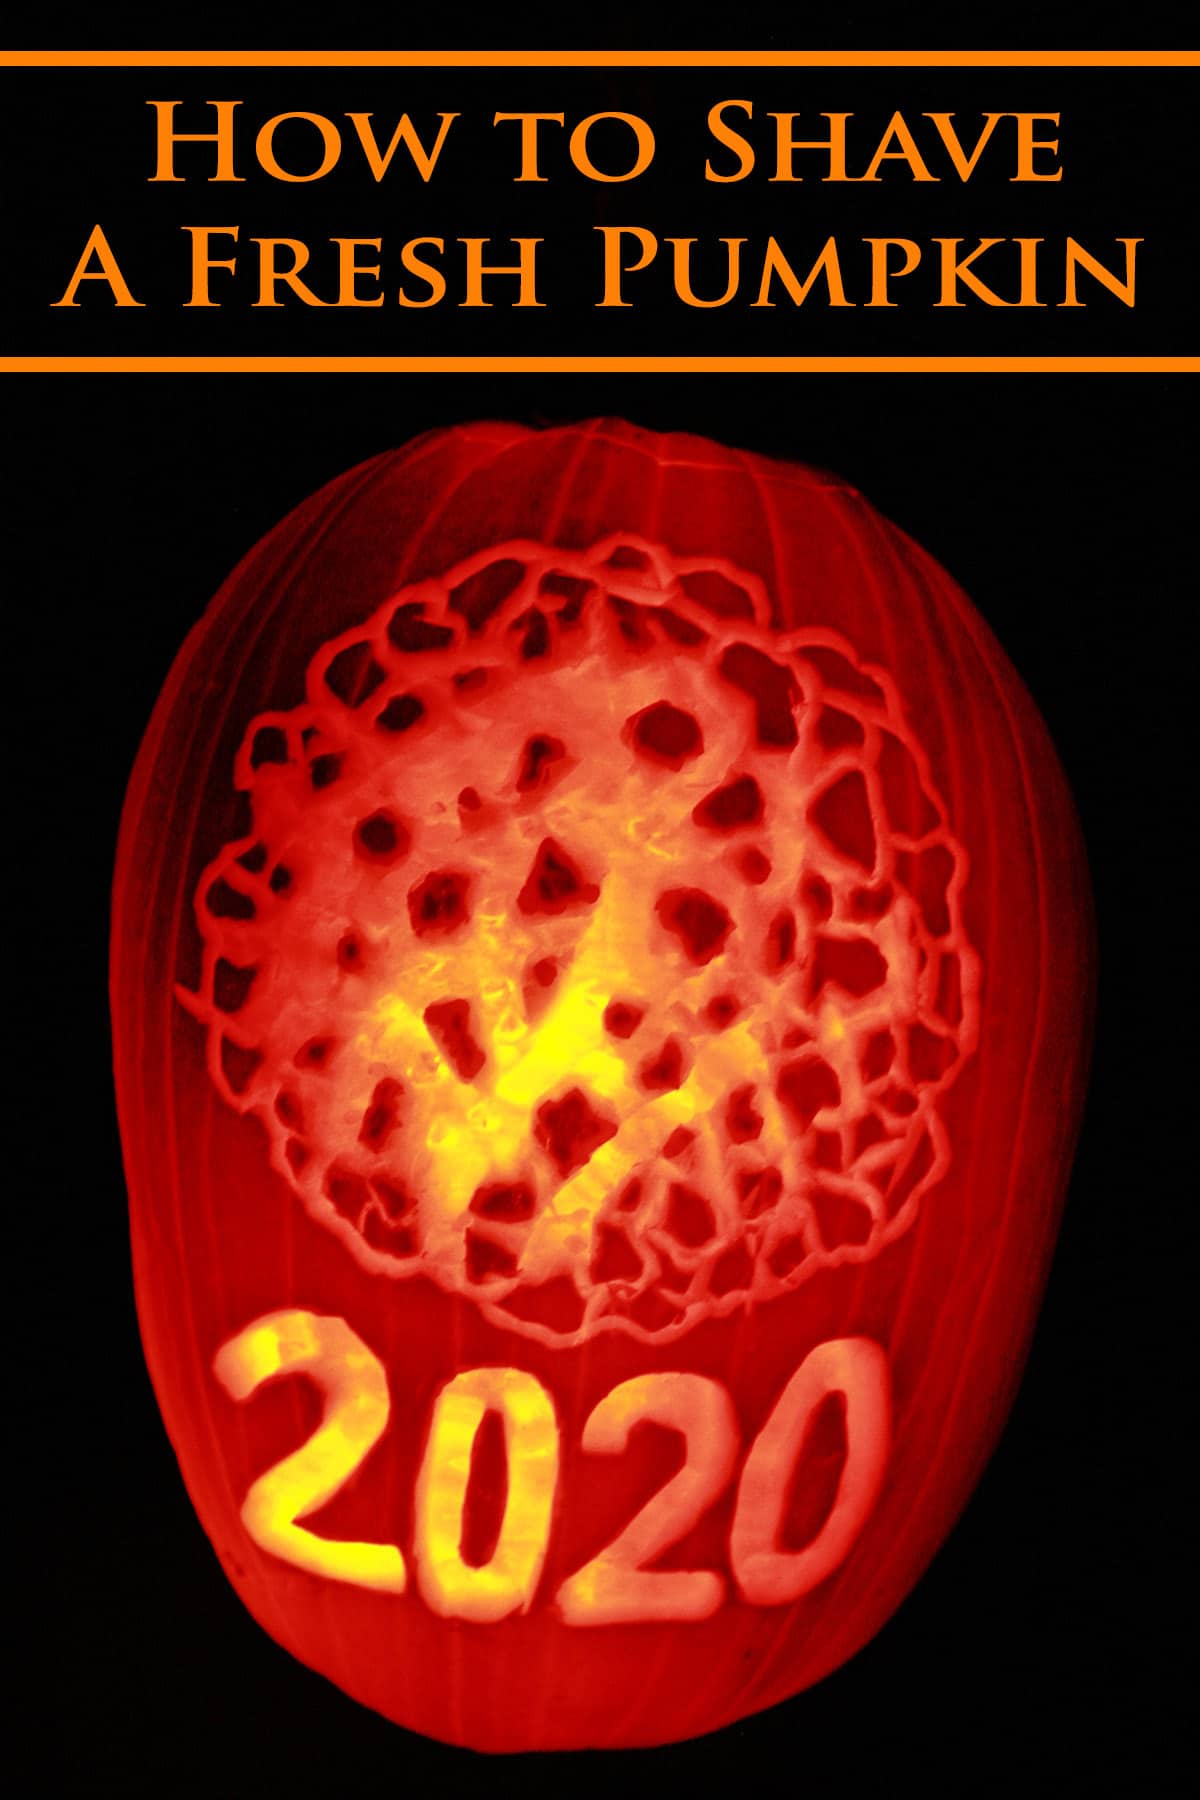
How to Carve a Pumpkin like a pro! Many tips for how to shave a pumpkin, and about carving or shaving a fake pumpkin, as well!

Note: This easy pumpkin carving post has grown in scope over the years - so keep scrolling for details on carving and shaving both fresh and foam pumpkins!
When I first posted this - 9 years ago! - I mentioned the fact that our big yearly Halloween tradition involved driving to Chicago for a weekend convention.
Being away for the weekend tended to preclude us from things like bothering to decorate our house and carving pumpkins.
Not a big deal on its own, I just mentioned it because it definitely hampered any potential I may (or may not!) have at pumpkin carving - or even just Halloween crafting in general!
So, I enlisted the help of Alex Wer, "The Pumpkin Geek", asking him to write a guest post with pumpkin carving tips for me.
That year alone, he’d been written up in international news, online newspapers, blogs, he appeared on “Good Morning America”, and “The Doctors”, and had shipped his work to 9 different countries!.
In the spirit of Halloween, check out some of his horror movie carves:

(I’ve since used Alex’s tips as some guidance to up my own Halloween pumpkin carving game. Keep reading on, after his tips, for a new tutorial, complete with photos!)
Anyway, without further Ado... here's Alex!
Alex Wer Guest Post
When Marie asked The Pumpkin Geek to write a blog, I thought, "The Pumpkin Geek can do that!" ...Then I thought, "Why the HELL am I referring to myself in the 3rd person!?" So...let's start again.
Ok, my name is Alex Wer & I am a geek - albeit, of the sexy nature! - but still, a geek!
Why do I think this? Because I can drone on endlessly about pumpkin carving. I can stare at my creations at any hour of the day & determine where I could've improved on my latest effort.
Some of you may understand this obsession, most will not! However, once you cross over to the Dark Side, there is no turning back!
While I would LOVE to teach each one of you how to carve as I do (OK, that’s a complete lie...then no one would have any need for me!), you'll have to settle for some basic tips on how it’s possible to carve something better than your friends! After all, that IS the goal!
Oh, and if you manage to get through this blog, you WILL have an idea that you can do to impress the neighbors!
Getting Started with Pumpkin Carving
First thing you should do is get one of those $5 carving kits. They work great, are completely safe, and a lot of them have cool stencils you can take a crack at and they come with pretty much all the tools you need.
Next, if you DO choose to use a stencil, make 3-4 inch slits extending inward from the outer areas of the paper, this will help "mold" it to the ‘kin. You can secure it by taping it onto the surface.
Now, depending on how complicated the carve is, there are a few ways to go next...OK, somehow this blog went from "pithy fun" to everyone reading so intently!
You need to "trace" the pattern onto the kin, either pressing firmly with a pen, poking holes with the "pokey thingy", or even an exacto knife (be CAREFUL!) to pre-cut the areas. Once you have your outline, you're ready to carve!
"But my friends have those stencils, too", you say!? What I suggest is going on-line & finding something you want to carve under "coloring pages". Here's an R2D2 as an example:
Shaving a Pumpkin
Want something REALLY different? Well, another option is trying your hand at shaving the pumpkin! I know, ladies, you shave enough, can you get at least ONE night off!? 🙂
What you need is about $5-$10 of sculpting clay tools:
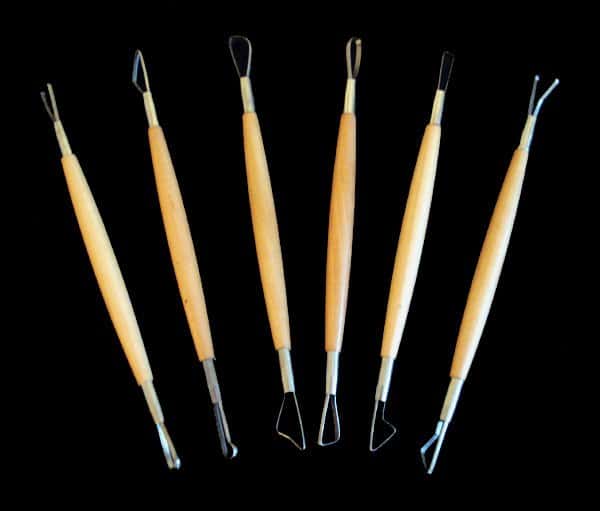
You can use these carving tools to "shave" the areas that are white in your image.
Same concept as before, but instead of cutting through the pumpkin, carve ½" - 1" deep & scoop away the pumpkin flesh as evenly as you can!
You can still gut the ‘kin & use a few candles to shine thru (you’ll need to shave/carve deep enough so the image is visible), or, don't gut the pumpkin at all, simply leaving it as is!
In that case, you only need to peel the orange skin off - your carve will last MUCH longer. No light, but you get to keep your creation for a month or so!
Soaking Your Carved Pumpkin
Last tip...when you're done carving, relax & take a bath!
No, not YOU, your carved PUMPKIN!!! Yes, believe it or not, it will last much longer if you soak it in the tub. Think of an apple...cut it open, leave it out, dries out quickly. Same concept with the pumpkin.
When I used to carve on real kins, I had a bathtub full of pumpkins floating around in cold water!
Come to think of it ... Mrs. Pumpkin Geek was in there a LONG time when I carved Aragorn!
So, I hope this little session has been helpful. It's my first blog entry, so please don't hate Marie for having me do this!
Alex Wer
The Pumpkin Geek
More Halloween Ideas
If you're still considering ideas for Halloween recipes and other ideas, be sure to check out my:
3D Halloween Bat Cupcakes
Bacon Wrapped Mummy Meatloaf
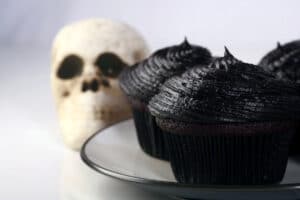
Black Velvet Cupcakes
Bloody Eyeball Cupcakes
Bloody Eyeball Halloween Punch
Breakfast Mummy Pastries
Candy Apples
Easy Halloween Bat Cupcakes
Easy Spider Web Cookies
Elegant Halloween Charcuterie Board
Fudgy Halloween Brownies
Glazed Halloween Popcorn
Gluten Free Mummy Dogs
Gluten-Free Mummy Jalapeno Poppers
Halloween Shooters
Halloween Spider Web Cupcakes
How to Carve a Pumpkin Like a Pro
Lychee "Bloody Eyeball" Pancakes
Lychee Bloody Eyeball Halloween Pavlova
Mummy Dogs
Mummy Jalapeno Poppers
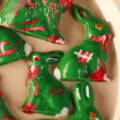
Nightmare Before Christmas Cookies
Spider Bread Bowl
... and check out our Holiday Recipes section for recipes to suit any holiday!
Share the Love!
When you finish carving , be sure to take some pics of your hard work! If you post it to Bluesky, be sure to tag us - @CelebrationGen. We're also on Pinterest, so you can save all your favourite recipes to a board!
Also, be sure to subscribe to my free monthly email newsletter, so you never miss out on any of my nonsense. Well, the published nonsense, anyway!
Finally, if you love this tutorial, please consider sharing it on social media, and leaving a star rating and/or a comment below!
Tools & Supplies
Before getting started with pumpkin carving, you’ll need the right tools - and a few supplies.
Carving Tools
Personally, I have to disagree with Alex on the $5 pumpkin carving kit - They’re usually pretty flimsy (in my experience), and can be frustrating to work with, as a result.
Much better to invest a few extra dollars in a more "permanent" pumpkin carving set.
I like this set of pumpkin carving tools, , which is the set I’ve been using for a few years now.
Any kitchen knife should work fine, as long as it’s a good, sturdy knife.
I’ll use a small serrated knife - or a small saw - for cutting the top off the pumpkin, and a sharp paring knife for carving the details.
You’ll also want something to scoop out the pumpkin guts. I’m definitely not a fab of the plastic spoons in those cheap kits!
Personally, I like to use a metal ladle or spoon to scrape the stringy pulp out, and I’ve heard that a metal ice cream scoop also works well!

Patterning Supplies
While I’m always down for carving an iconic jack-o with the same basic, freehanded shapes I’ve been doing since my very first pumpkin, you may want to go a bit more organized with your pumpkin designs.
A pumpkin carving stencil - or printed paper patterns - are the best way to go when you’re thinking about doing an elaborate design, with a lot of design lines.
Google is a great source for pumpkin ideas - I love Alex’s idea of looking for coloring page images.
Once you have your pattern, you’ll also want something to transfer those intricate designs to the actual pumpkin.
I like to use a large pin or the “pokey tool” from a pumpkin kit to trace along the drawn lines, poking tiny holes in the pumpkin skin.
Sometimes it’s a good idea to use a washable marker to trace over those punctured lines, if they’re hard to see. You can always wipe it clean later!
A Light Source
Plan ahead for how you’re going to light your pumpkin once it’s carved.
I used to use wax tea light candles or short pillar candles (have a long match if you’re using actual fire!), but I’m an a LED light convert.
Little battery operated tea light options have become way more common and affordable over the years. No sense taking a fire risk, these days!
Miscellaneous
In addition to the more obvious stuff, I like to have something to serve as a drop cloth for my work area, as well as a lot of paper towels on hand.
How to Choose a Fresh Pumpkin
Whether visiting a pumpkin patch to pick your own pumpkin or going to your local grocery store, you’re going to want to start off with the best pumpkin for your needs!
Before shopping, figure out your space. Where will the pumpkin go, and - more importantly - how much flat surface area do you have for it?
The perfect pumpkin isn’t so perfect if you have nowhere to put it, after all!
The right pumpkin starts with being the right size for your needs. If you’re hosing a Halloween party or haunted house in a large space, you’ll want a larger pumpkin.
A medium-sized pumpkin may be a better choice for a small patio, and a small pumpkin - or at least one with a small footprint - may be the best choice if it’s going to sit on your front steps.
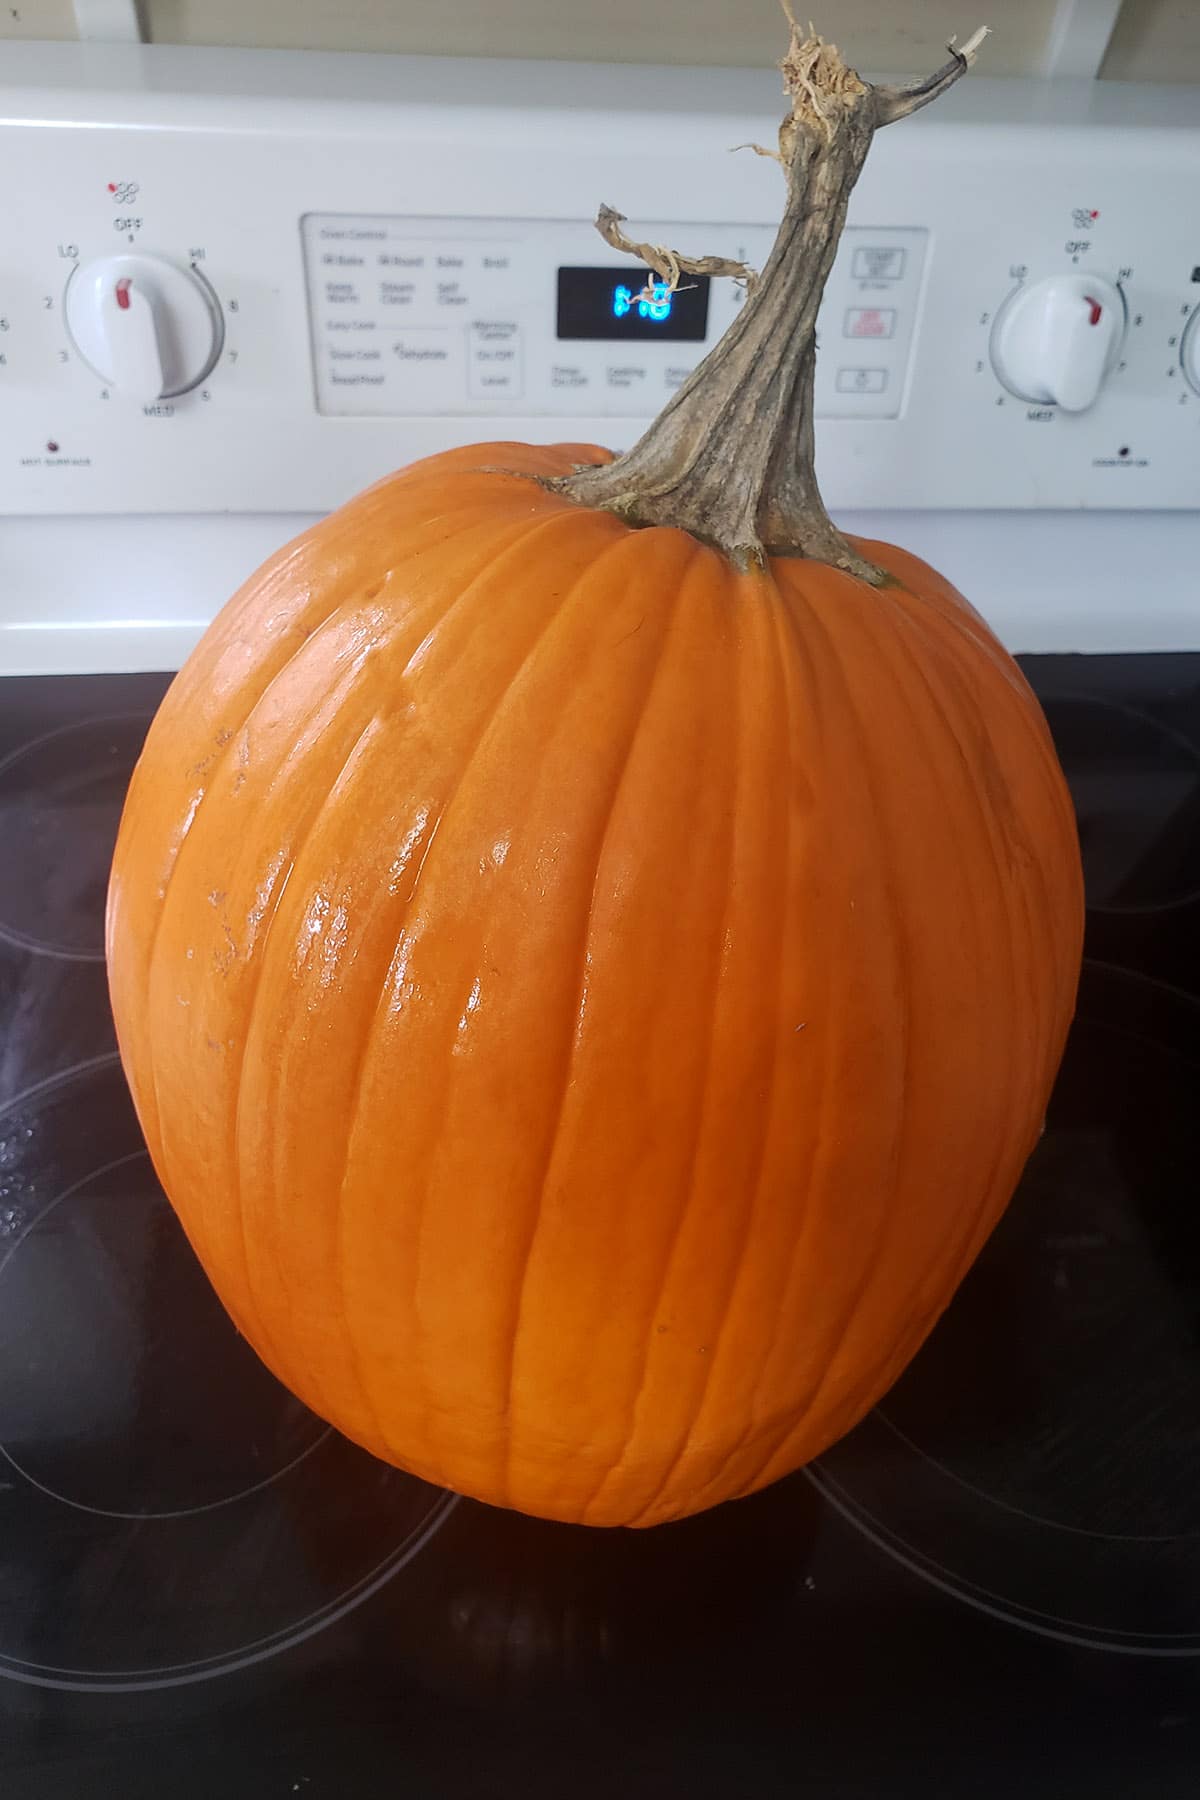
Take a moment to look over the outside of the pumpkin. You’ll want the surface of the pumpkin to be free of any soft spots - those can indicate rot.
When all of those other conditions are satisfied, I prefer to pick one that has a little bit of pumpkin stem left on.
I like it aesthetically, and I like it as a handle - makes it a lot easier to use it as a “lid”.
Additionally, the stem serves as a bit of an indicator for health. A fresh looking green stem is a good thing. If it’s browned and/or shrivelled at all, it’s likely to be an older pumpkin.
If you’re buying your pumpkin within a couple days of use, an older pumpkin isn’t necessarily a deal breaker.. But it won’t last as long as a fresher pumpkin.
How to Shave a Fresh Pumpkin
Getting Started
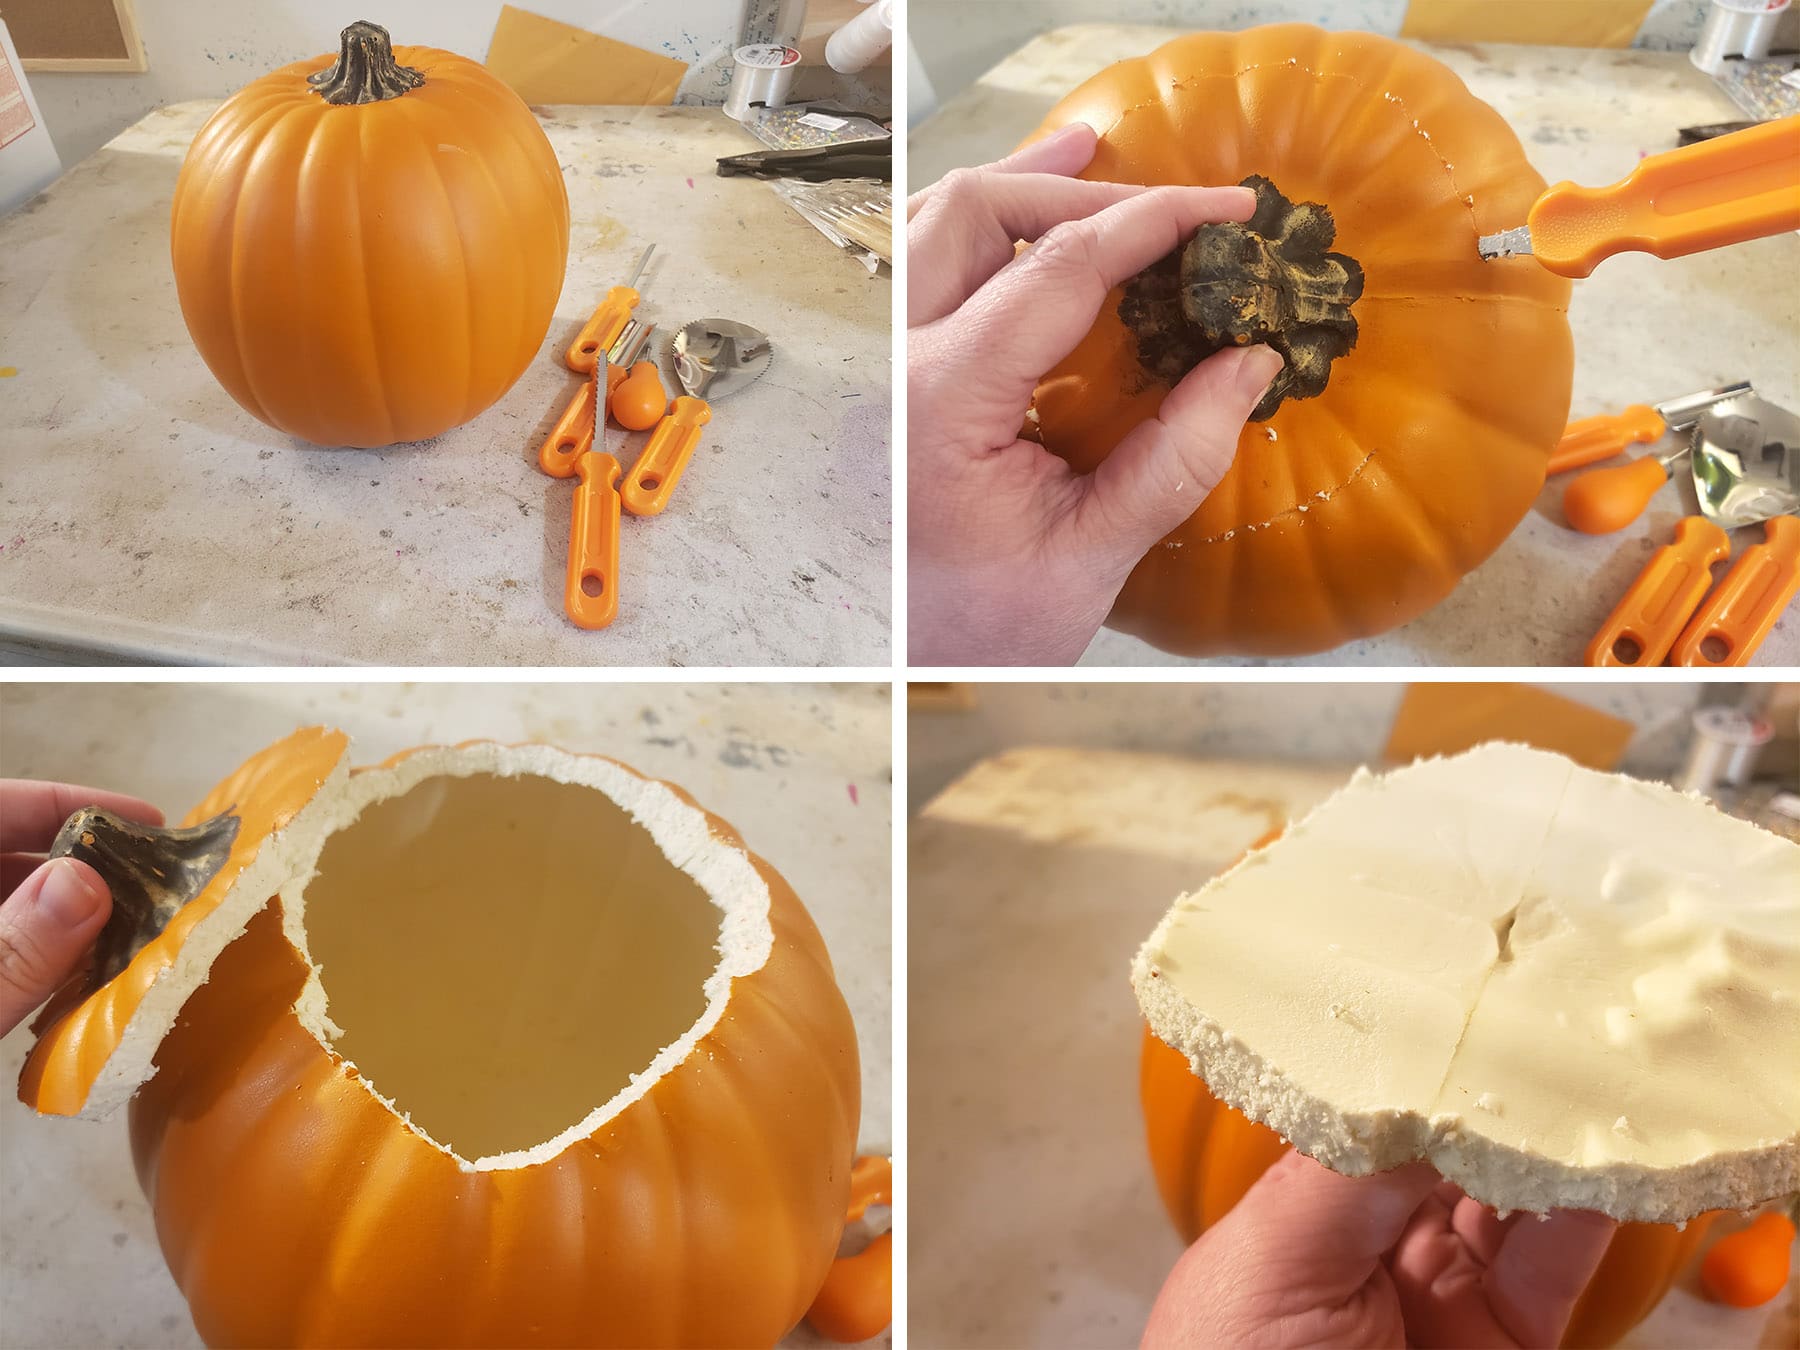
First thing to do: make sure the outside of your pumpkin is clean.
Scrub off any dirt - especially on the bottom of the pumpkin - trim any unwanted leaves/vine leftover, etc. I’ll usually do this right in my kitchen sink, when the pumpkin will fit.
Clear your workspace, gather your carving tools & supplies.
I like to do an asymmetrical opening - usually with a triangular notch - (to easily see which way it fits!), and to cut inwards at a slight angle, to prevent the lid from falling into the pumpkin later.

I never bother using the pumpkin carving set for this, I go right to my metal, long handed large spoon.
Try to get the inside of the pumpkin as dry as possible, scraping down the inner wall to remove the bulk of the seeds and as many of the stringy bits as possible.
I’ll pick the orange bits off, rinse well, and then let them air dry a bit before roasting them later.

Applying Your Pattern
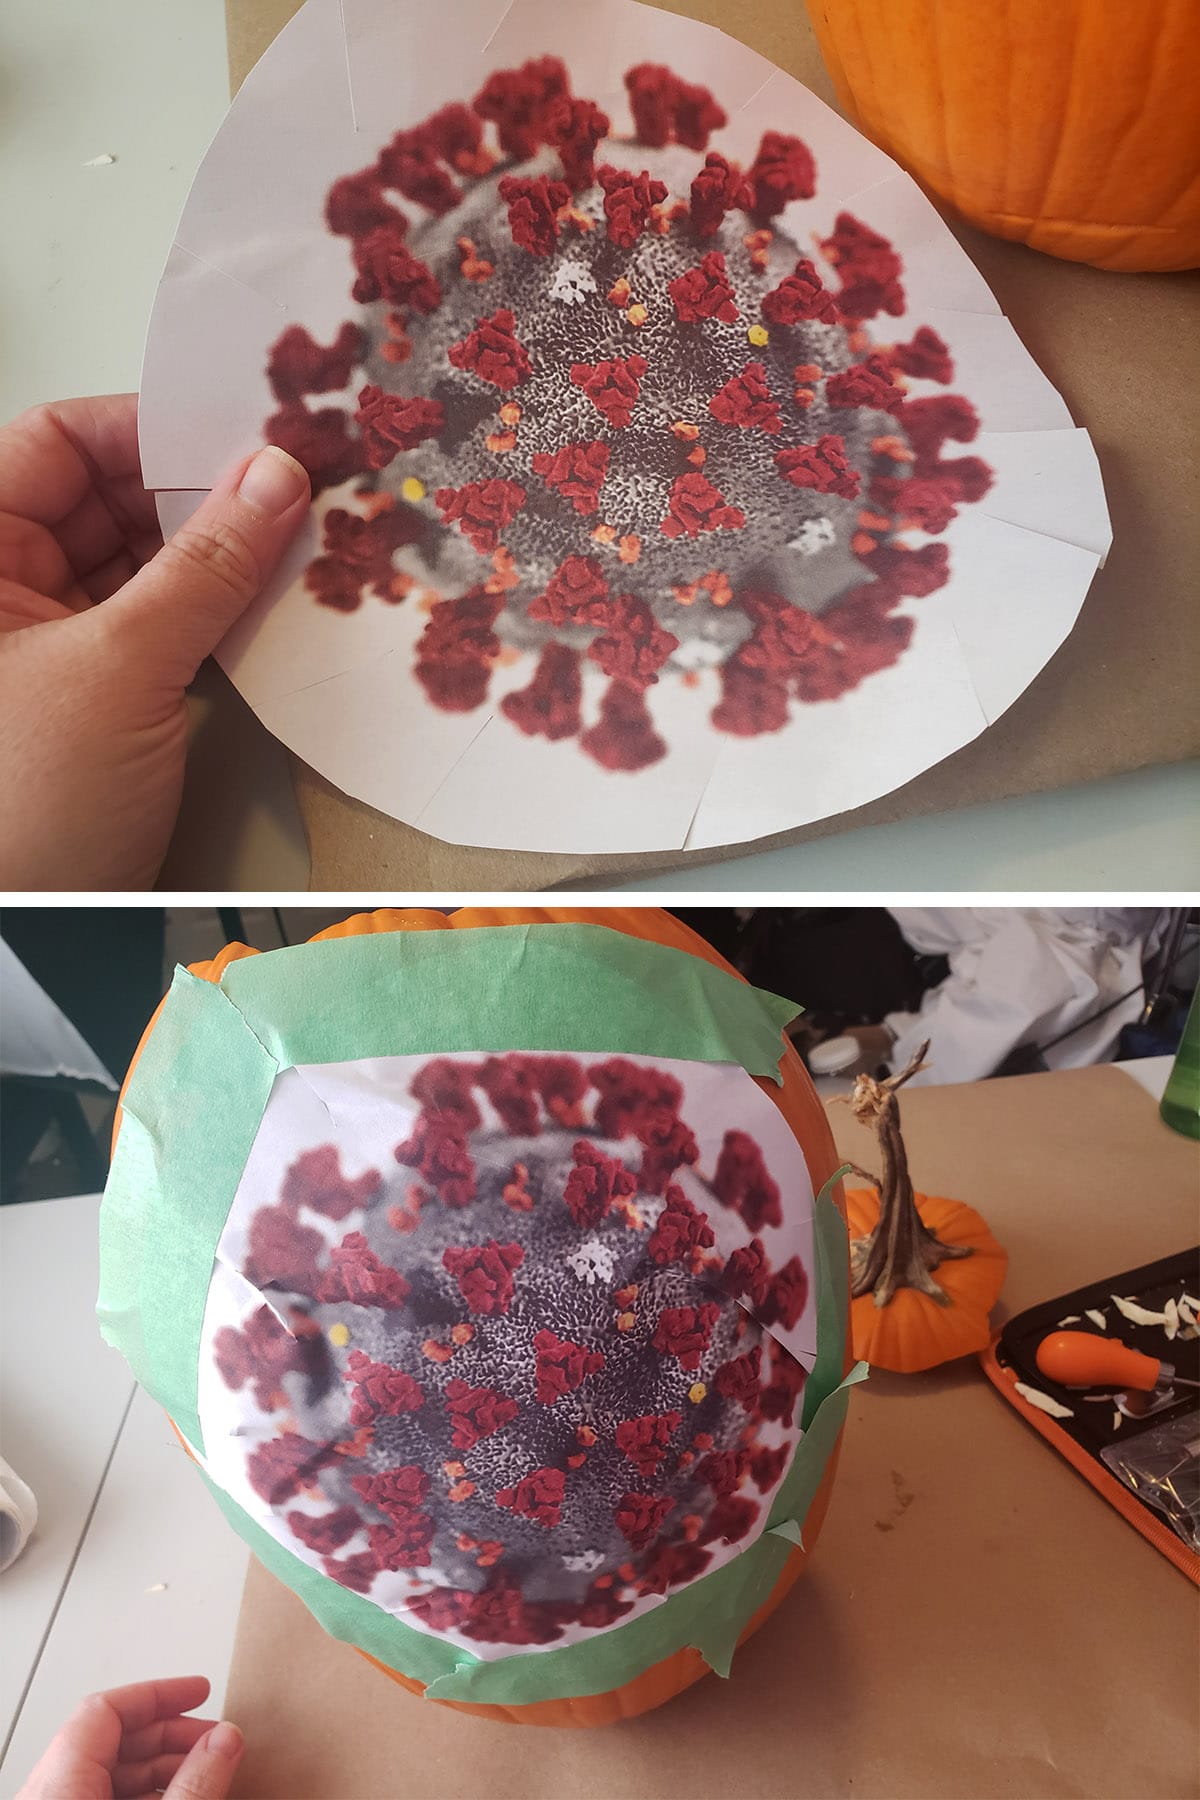
Print your design out on paper. Before getting started, hold the paper against the pumpkin to make sure your design fits well.
Trim excess paper from around the design as much as possible, while still leaving an inch or so border.
This will allow you to tape the design on, without taping over the design.
Position the paper on the pumpkin, folding and/or mashing the outer edge cut pieces down to form-fit. Tape around the outer edge of the pumpkin.
I like to use painter’s tape, as it won’t leave a residue when you remove it later.
Use a pin, pen, or the “pokey tool” from your pumpkin carving set to poke through the lines of the design, into your pumpkin.

I like to do this slightly outside the lines, in the direction of whatever is being cut / shaved off.

Establishing Your Borders
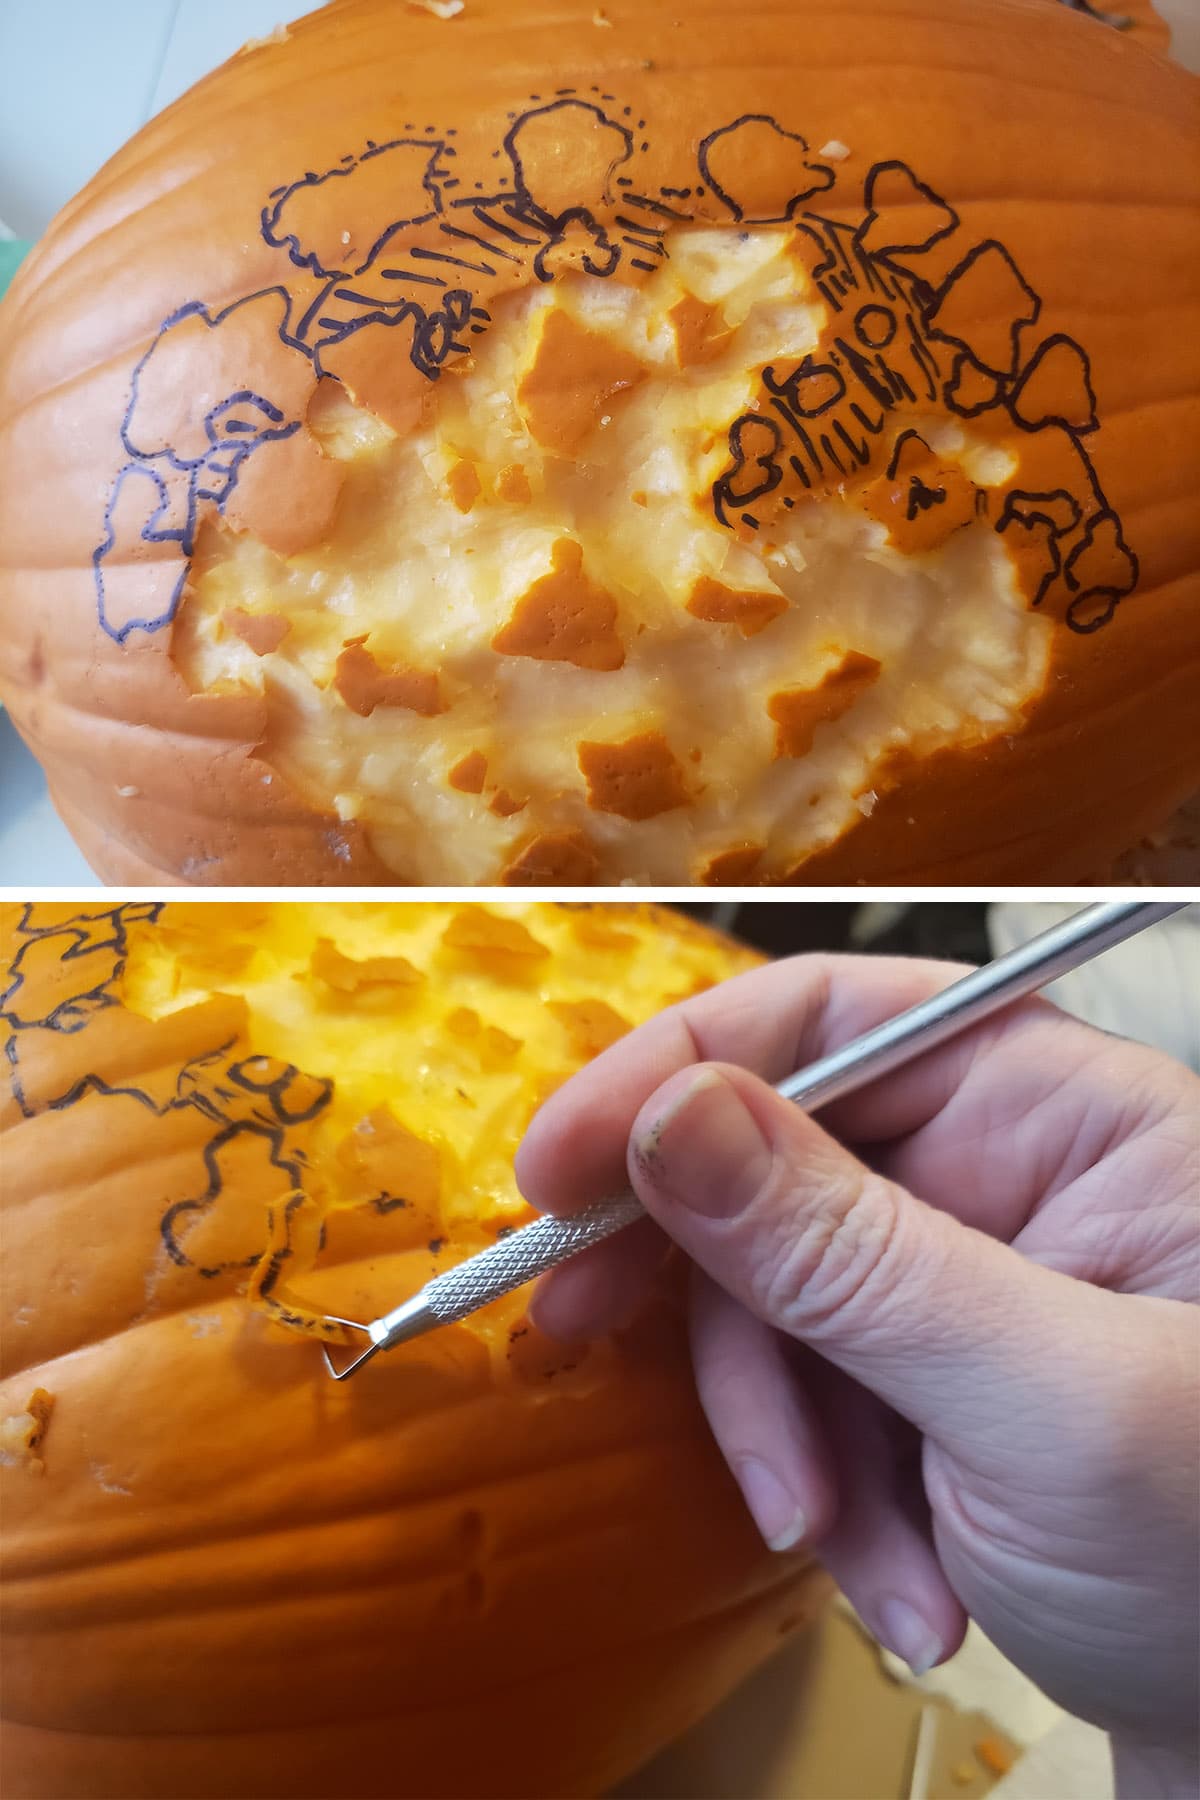
Remove your pattern. Check to make sure your whole design has been transferred to the pumpkin.
Using a SHARP craft knife, trace along your design marks. Be sure to get down a bit - you want to get through the orange rind, but not all the way through the pumpkin.

As you get a section done, start carefully carving the rind away from the areas to be exposed.
”Shaving” the Pumpkin
Once the areas to be “shaved” are clear of orange coating, you’re ready to shave it. Sort of.
... at that point, I put a light inside to see how it looks, and realized I needed to cut a lot deeper to make any kind of a difference!

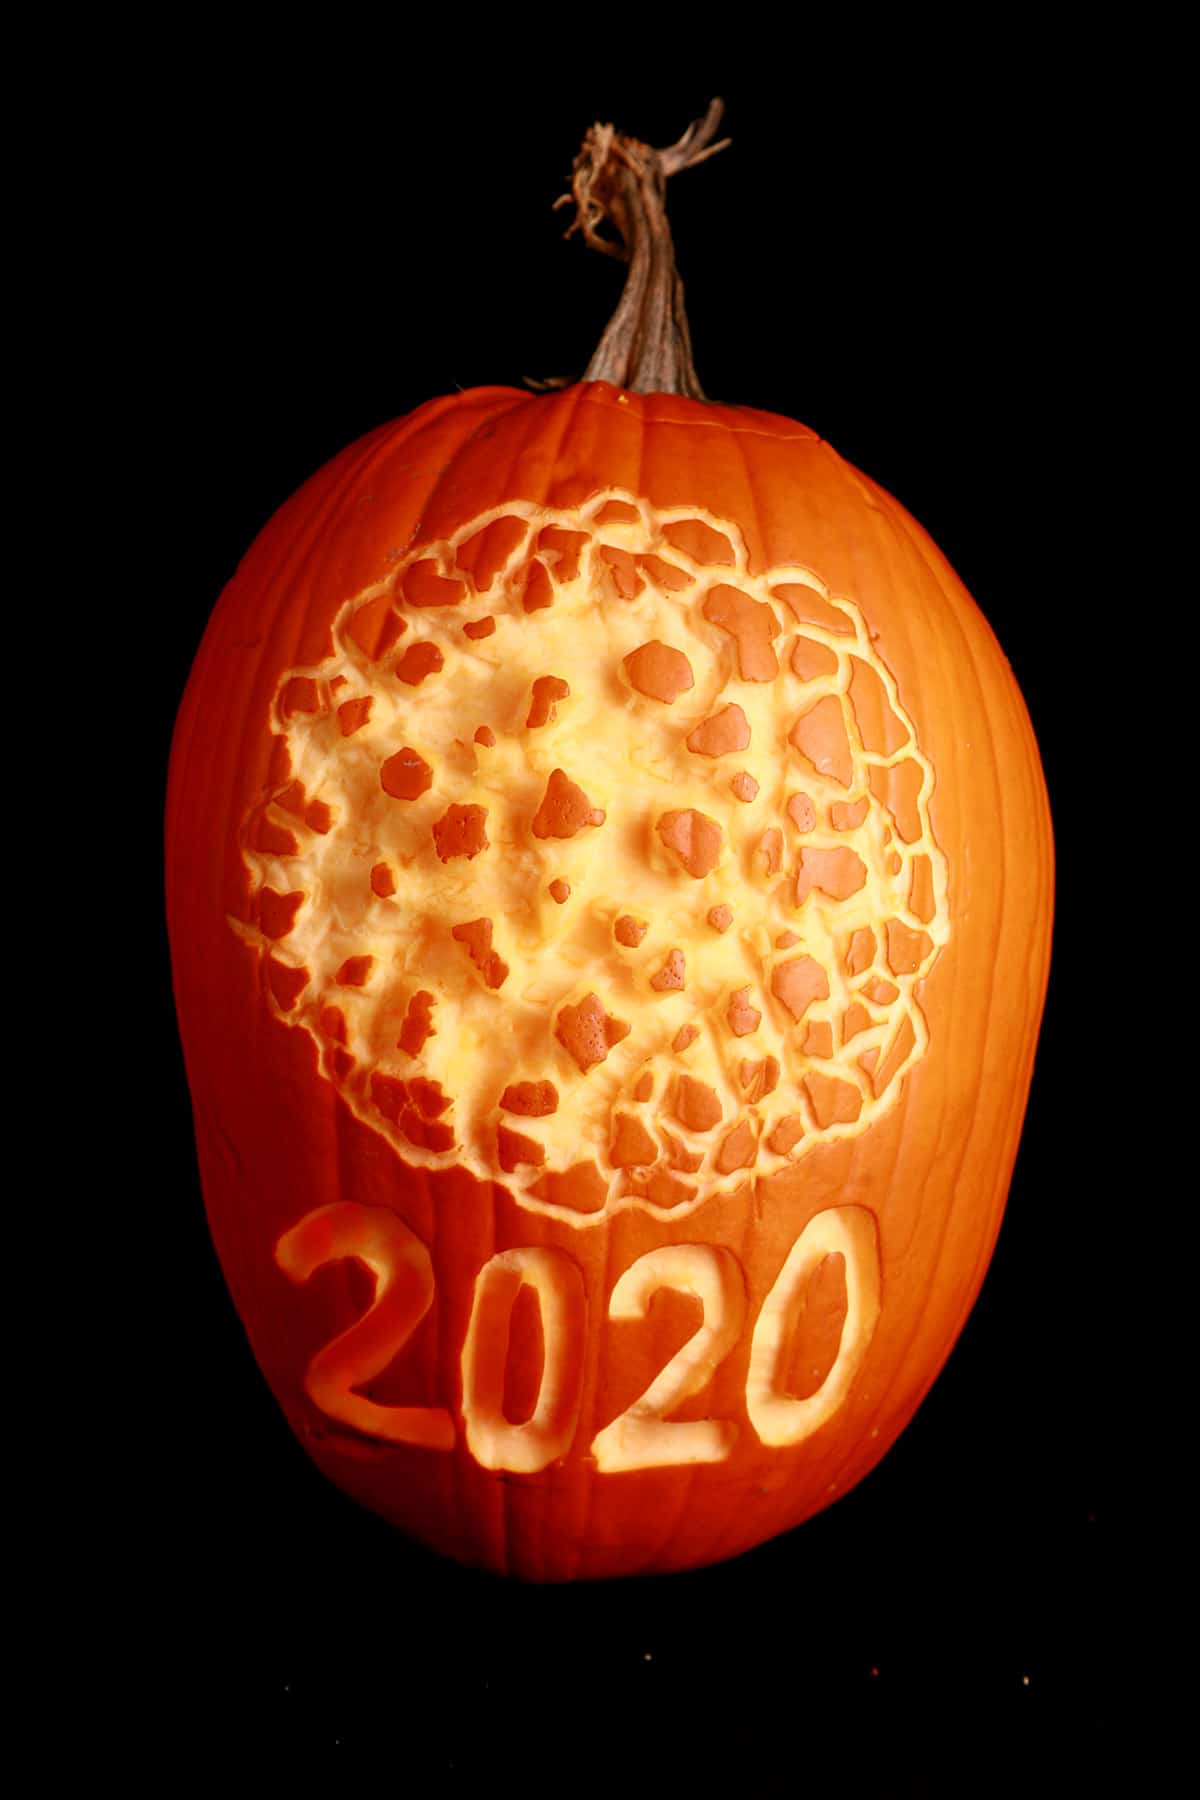
Use the tools to continue scraping out pumpkin flesh - varying the depths to which you carve - until you’re happy with the result.


Anyway. Behold, my 2020 pumpkin!

Shaving a Fake Pumpkin
I’ll be real with you, shaving a fake pumpkin isn’t easy or fun.
This was my first time doing it, so take this section of the post as less of a “like a pro” and more of a “learn from the mistakes of someone else who tried it for the first time.
Less a tutorial for shaving a fake pumpkin, and more a series of observations of what worked - and didn’t work - for me!
So, first of all: Do as I say, not as I do. ONLY use a really sharp - ideally new - blade. Old blades not only make for a lot more work, they’re also dangerous to use. The blade I used was neither new nor sharp.
Anyway...
Getting Started
Preparing the pumpkin works the same as it does for a real pumpkin, in a lot of ways.
First step: make sure the outside is clean. If you have any labels on there, carefully remove them, gently remove any residue. It is MUCH easier to do this when you have a whole pumpkin that hasn’t been cut into at all!
Clear your workspace, gather your tools.
Cut your “lid” and access hole. Much like with a real pumpkin, I like to do an asymmetrical opening (to easily see which way it fits!), and to cut inwards at an angle, to prevent the lid from falling into the pumpkin later.
Applying Your Pattern
Print your design out on paper. Before getting started, hold the paper against the pumpkin to make sure your design fits well.
Trim excess paper from around the design as much as possible, while still leaving an inch or so border. This will allow you to tape the design on, without taping over the design.
Cut a few snips inward from the outer edge, but not cutting into the design. This will help you mold the paper to the foam pumpkin.
Position the paper on the pumpkin, folding and/or mashing the outer edges down to form-fit. Tape around the outer edge of the pumpkin. I like to use painter’s tape, as it won’t leave a residue when you remove it later.
Use a pin, pen, or the “pokey tool” from your pumpkin carving set to poke through the lines of the design, into your pumpkin. I like to do this slightly outside the lines, in the direction of whatever is being cut / shaved off.

Establishing Your Borders
Remove your pattern. Check to make sure your whole design has been transferred to the pumpkin.
Using a SHARP craft knife, trace along your design marks. Be sure to get down a bit, but not all the way through the foam.
Once you’ve traced all of your design lines with the knife, use the very tip of the knife to draw another line just outside the original line - about ¼" or so away. This one only needs to go deep enough to cut though the papery orange coating on the pumpkin.
Continue lining and removing paper all the way around your design, so there’s a clear border around each are that will remain orange.
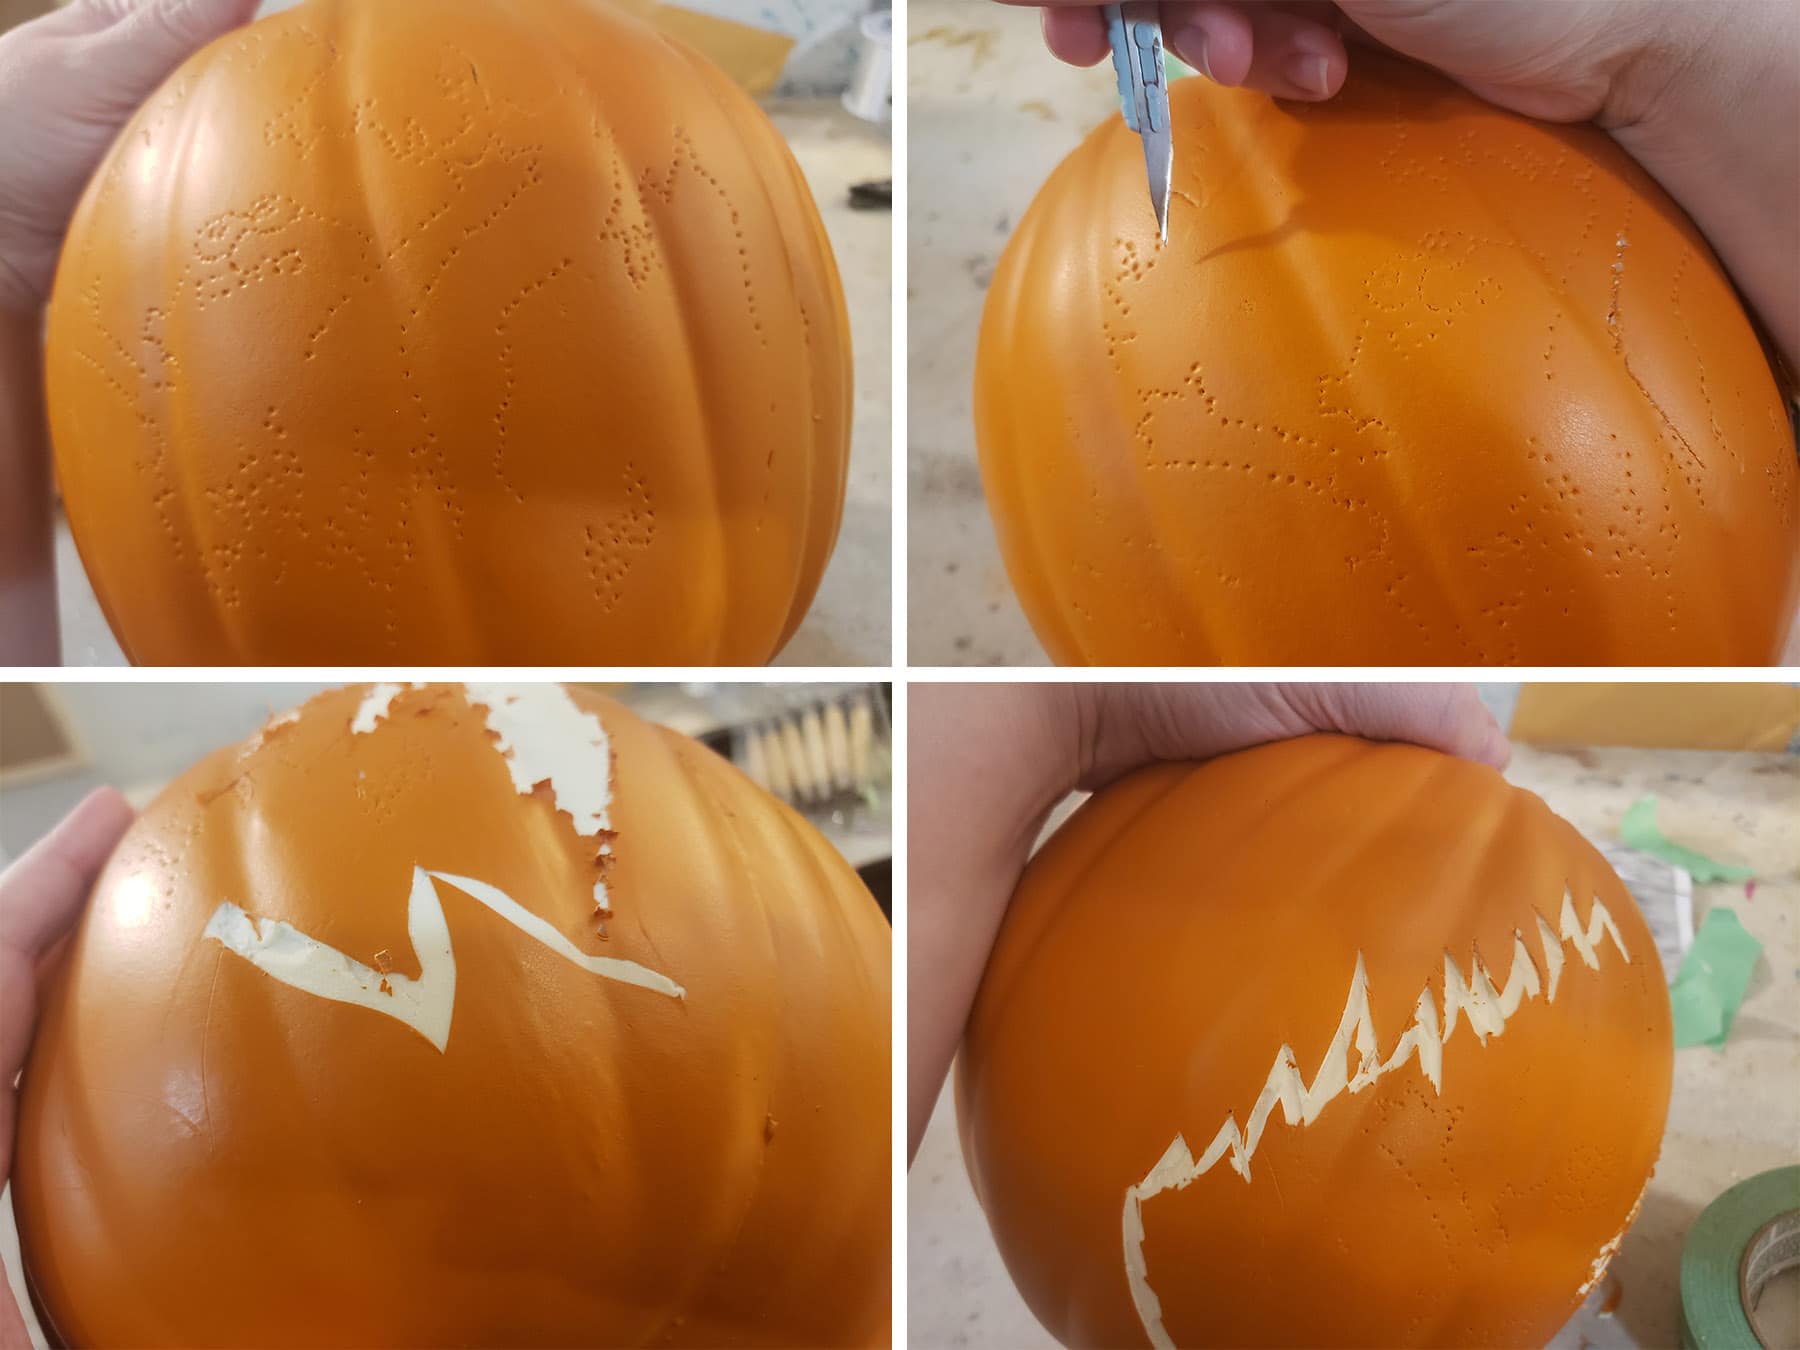
”Shaving” the Foam
- Once all the designs are isolated, you can use one of the shaving tools (pictured) to gently rub off / loosen the orange coating in the areas you want cleared of it. I just gently dragged it across the parts to remove - in a back and forth fashion - until it came loose.
- Once the areas to be “shaved” are clear of orange coating, you’re ready to shave it. Sort of.
As I quickly found out, The texture of the foam used means that using the same techniques as you would for the real pumpkin can easily result in chunks of foam getting pulled up / pulled out... and not necessarily in the way you’d be looking to.
I used the knife at an angle to cut away chunks of foam, creating a 3D effect.
... and then I put a light inside to see how it looks, and realized I needed to cut a lot deeper to make any kind of a difference, AND would need to do a lot of complete cutaways to get the look I wanted.

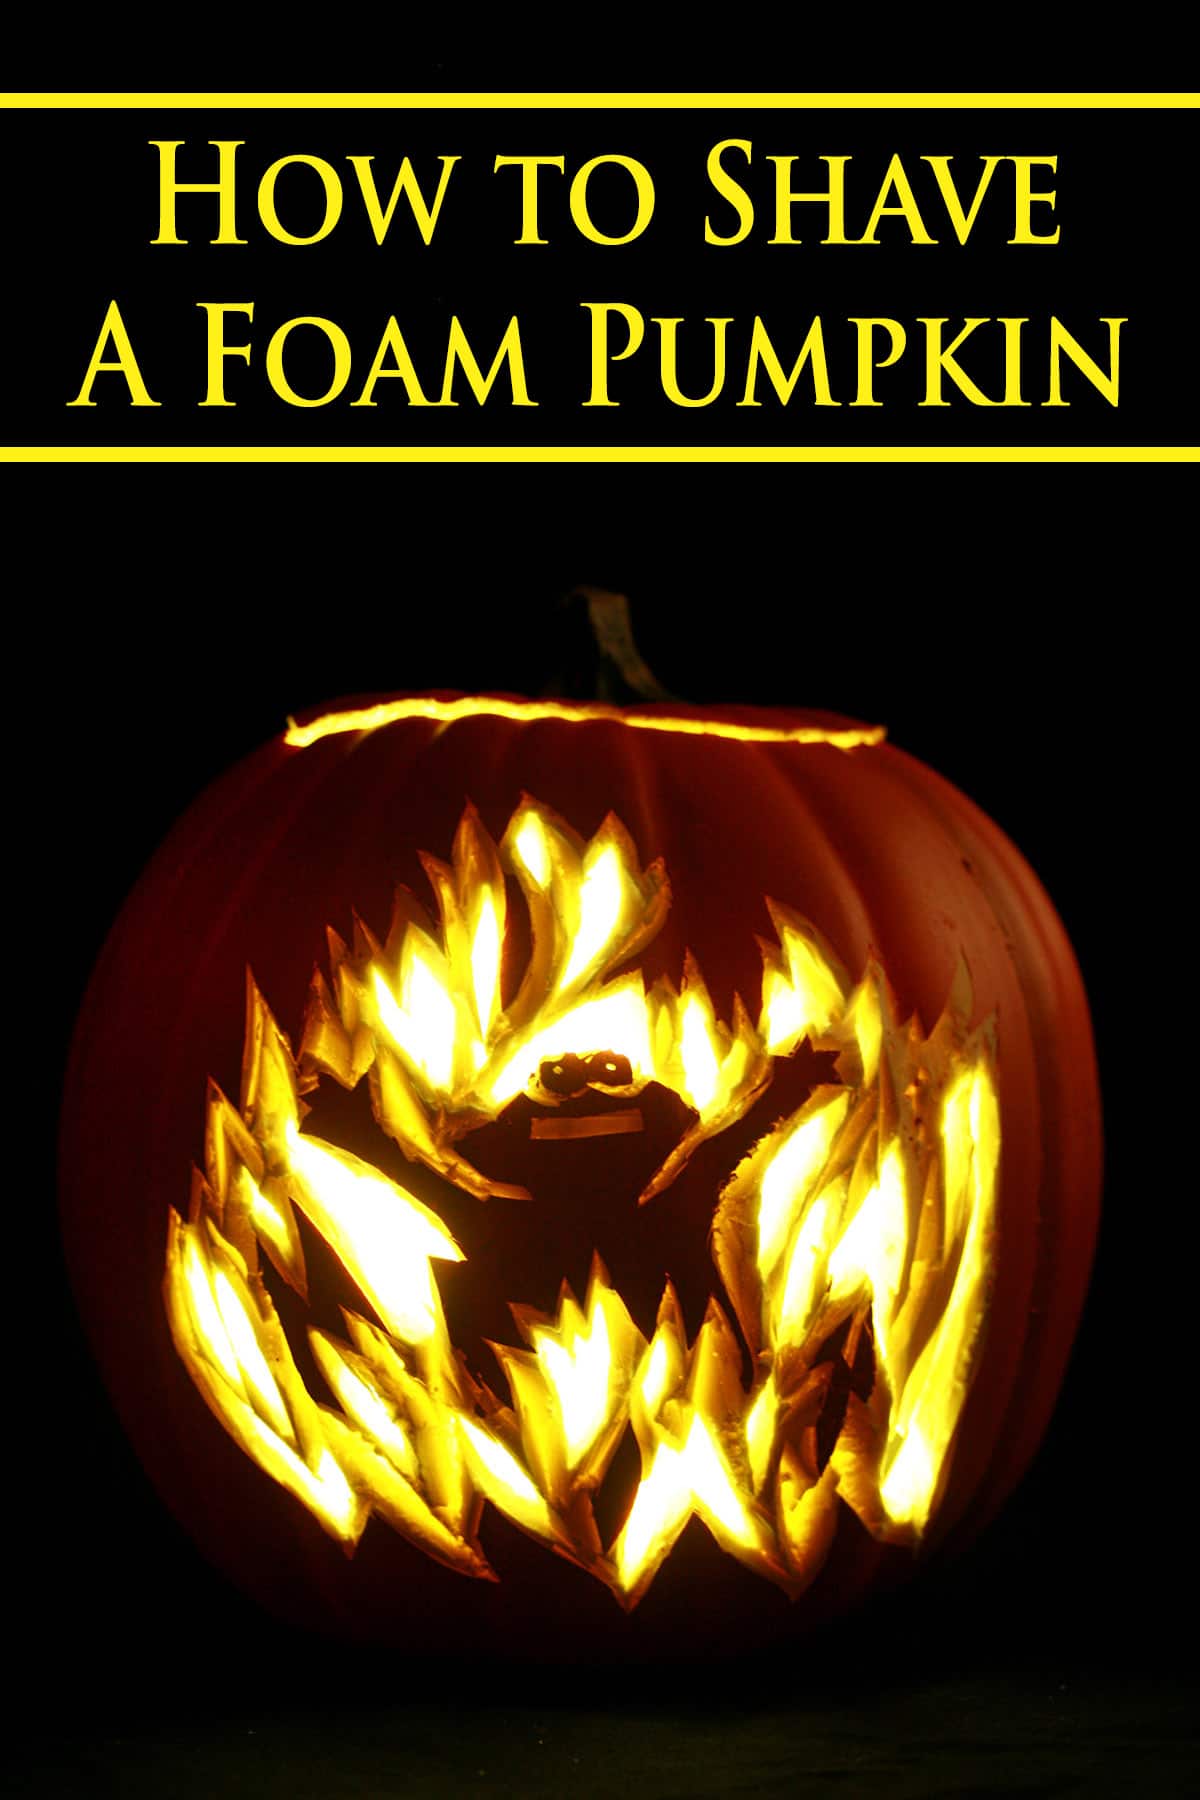
Anyway. Behold, my very first (sort of-) shaved fake pumpkin ever:

The carved foam pumpkin, as it looked when I decided I was done with it.
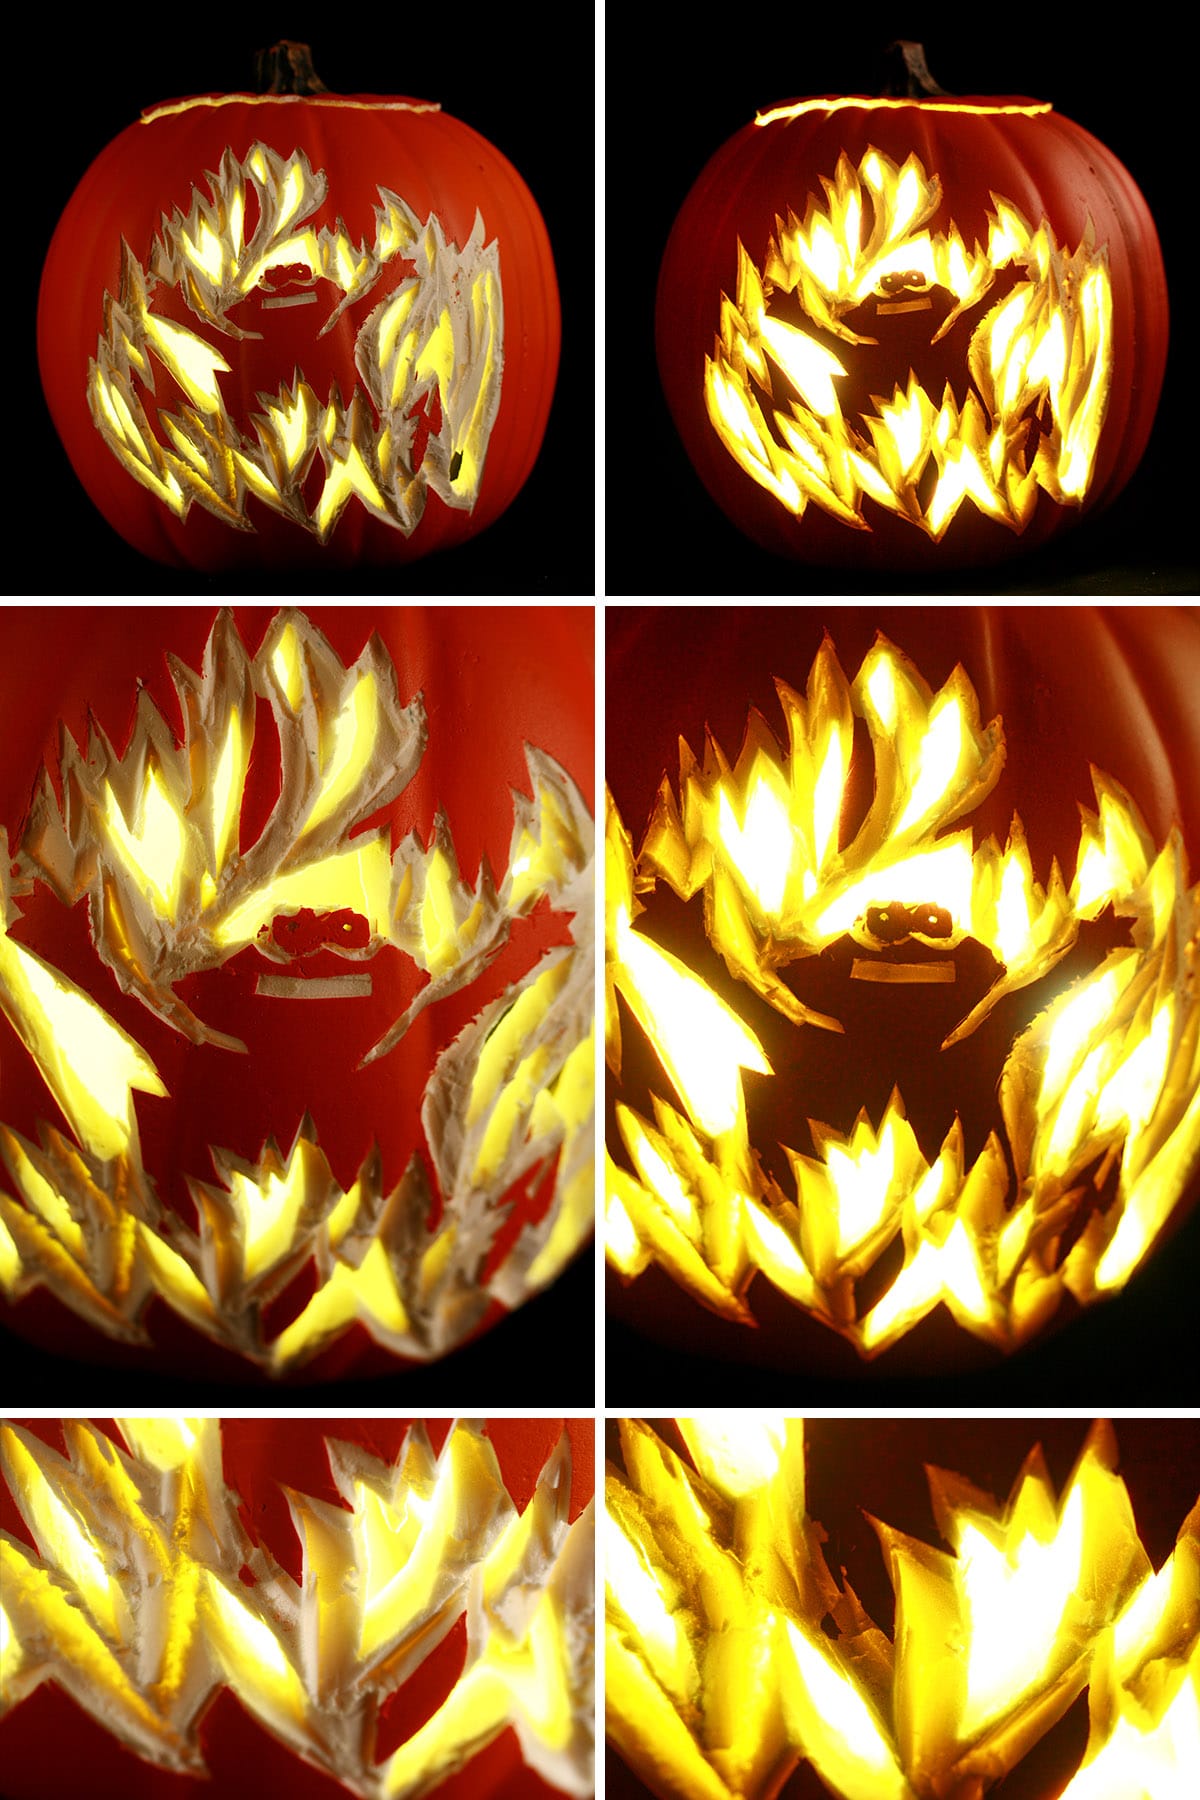

... Well, that’s terrifying... and not in a way I was aiming for, LOL!
How to Carve a Foam Pumpkin
Looking to carve a more old-school design, rather than hassle with shaving... but also want to keep it around for a while?
Carve a foam pumpkin!
Getting Started
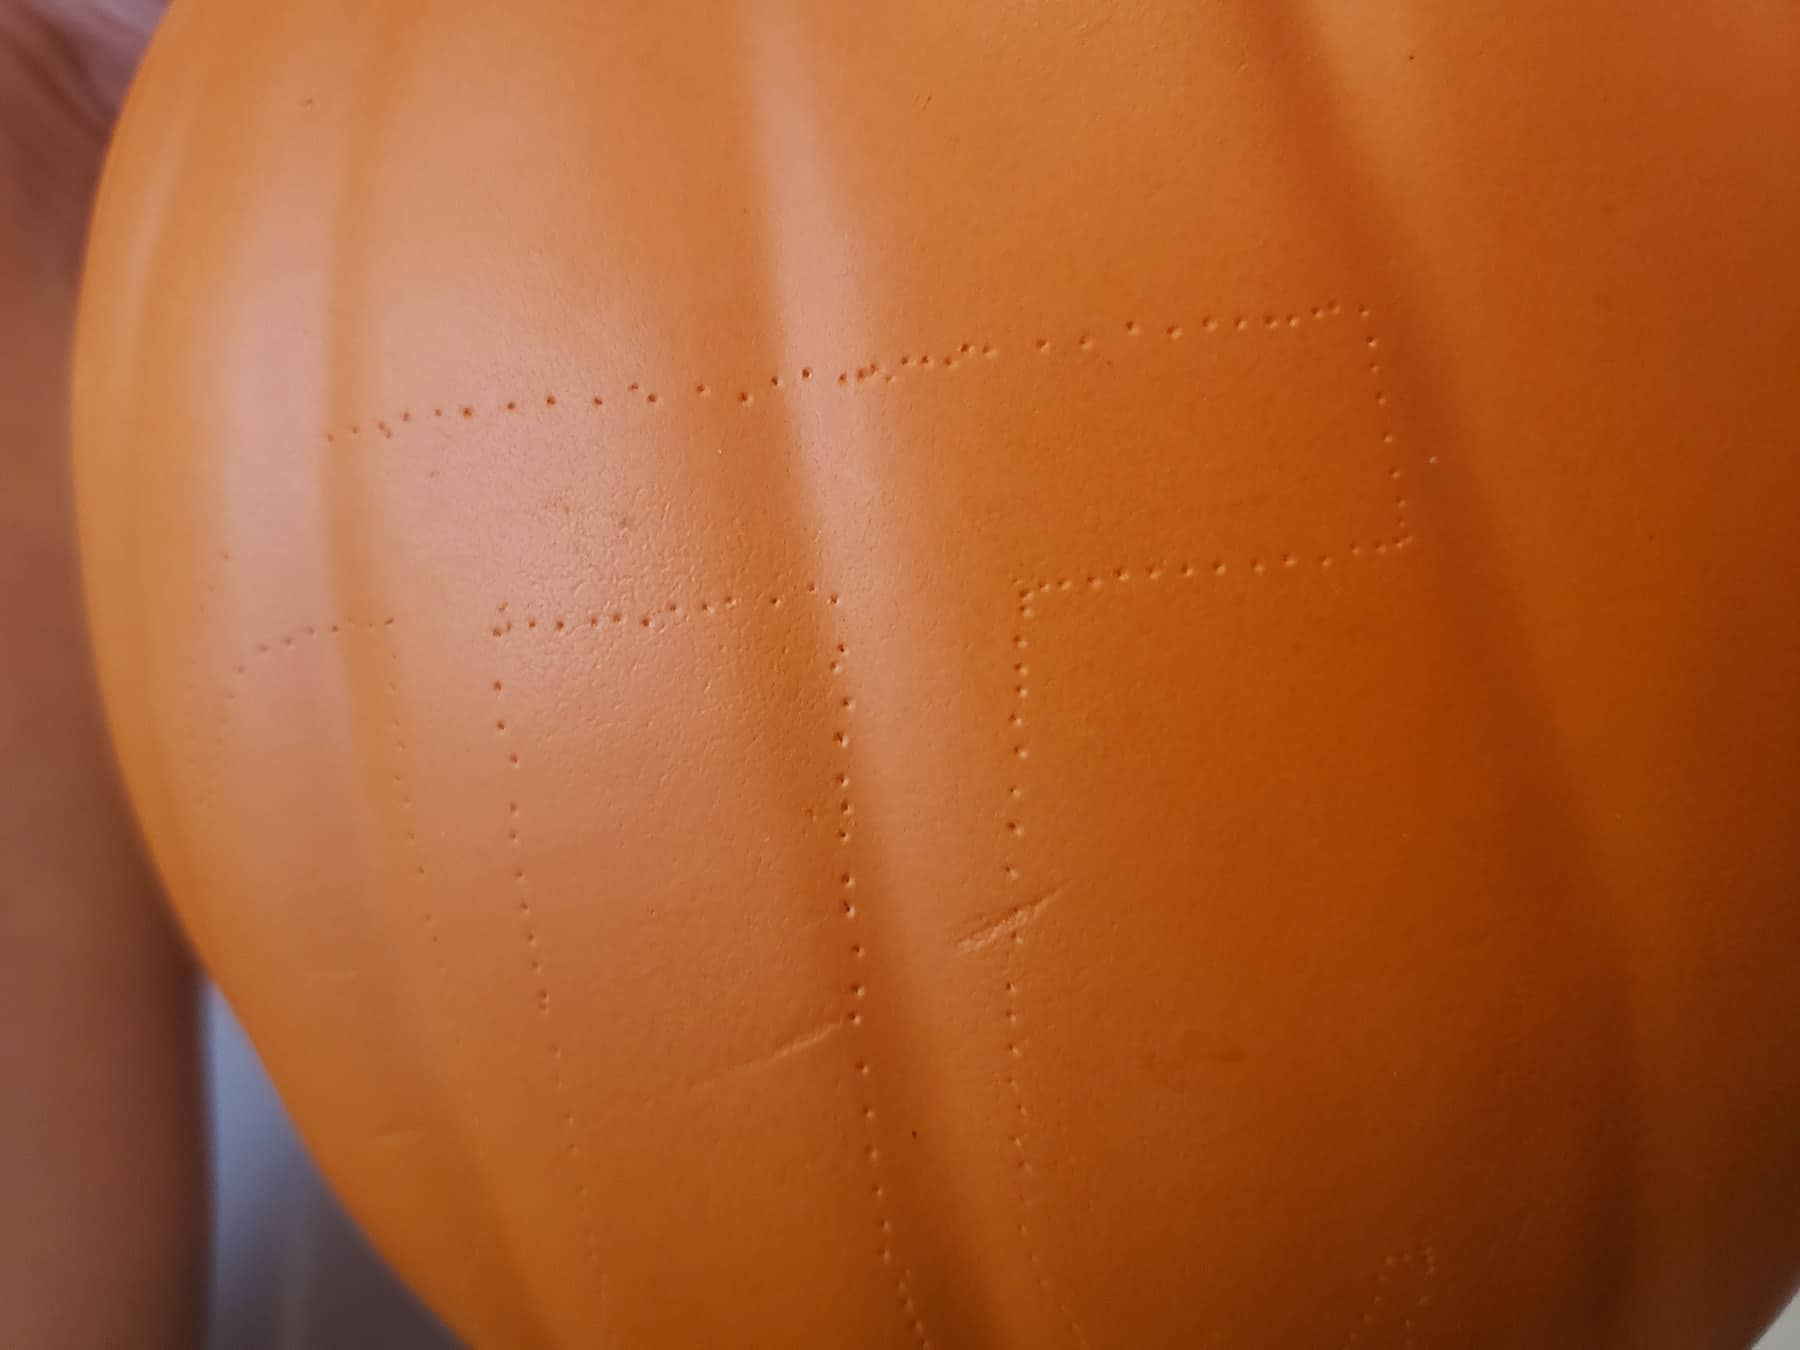
Much like with shaving a foam pumpkin, you’re going to want to get your design transferred to the pumpkin surface.
In this case, I decided to do a pi symbol - pumpkin pi, har har!
First, I printed off the image I wanted, at the size I wanted:
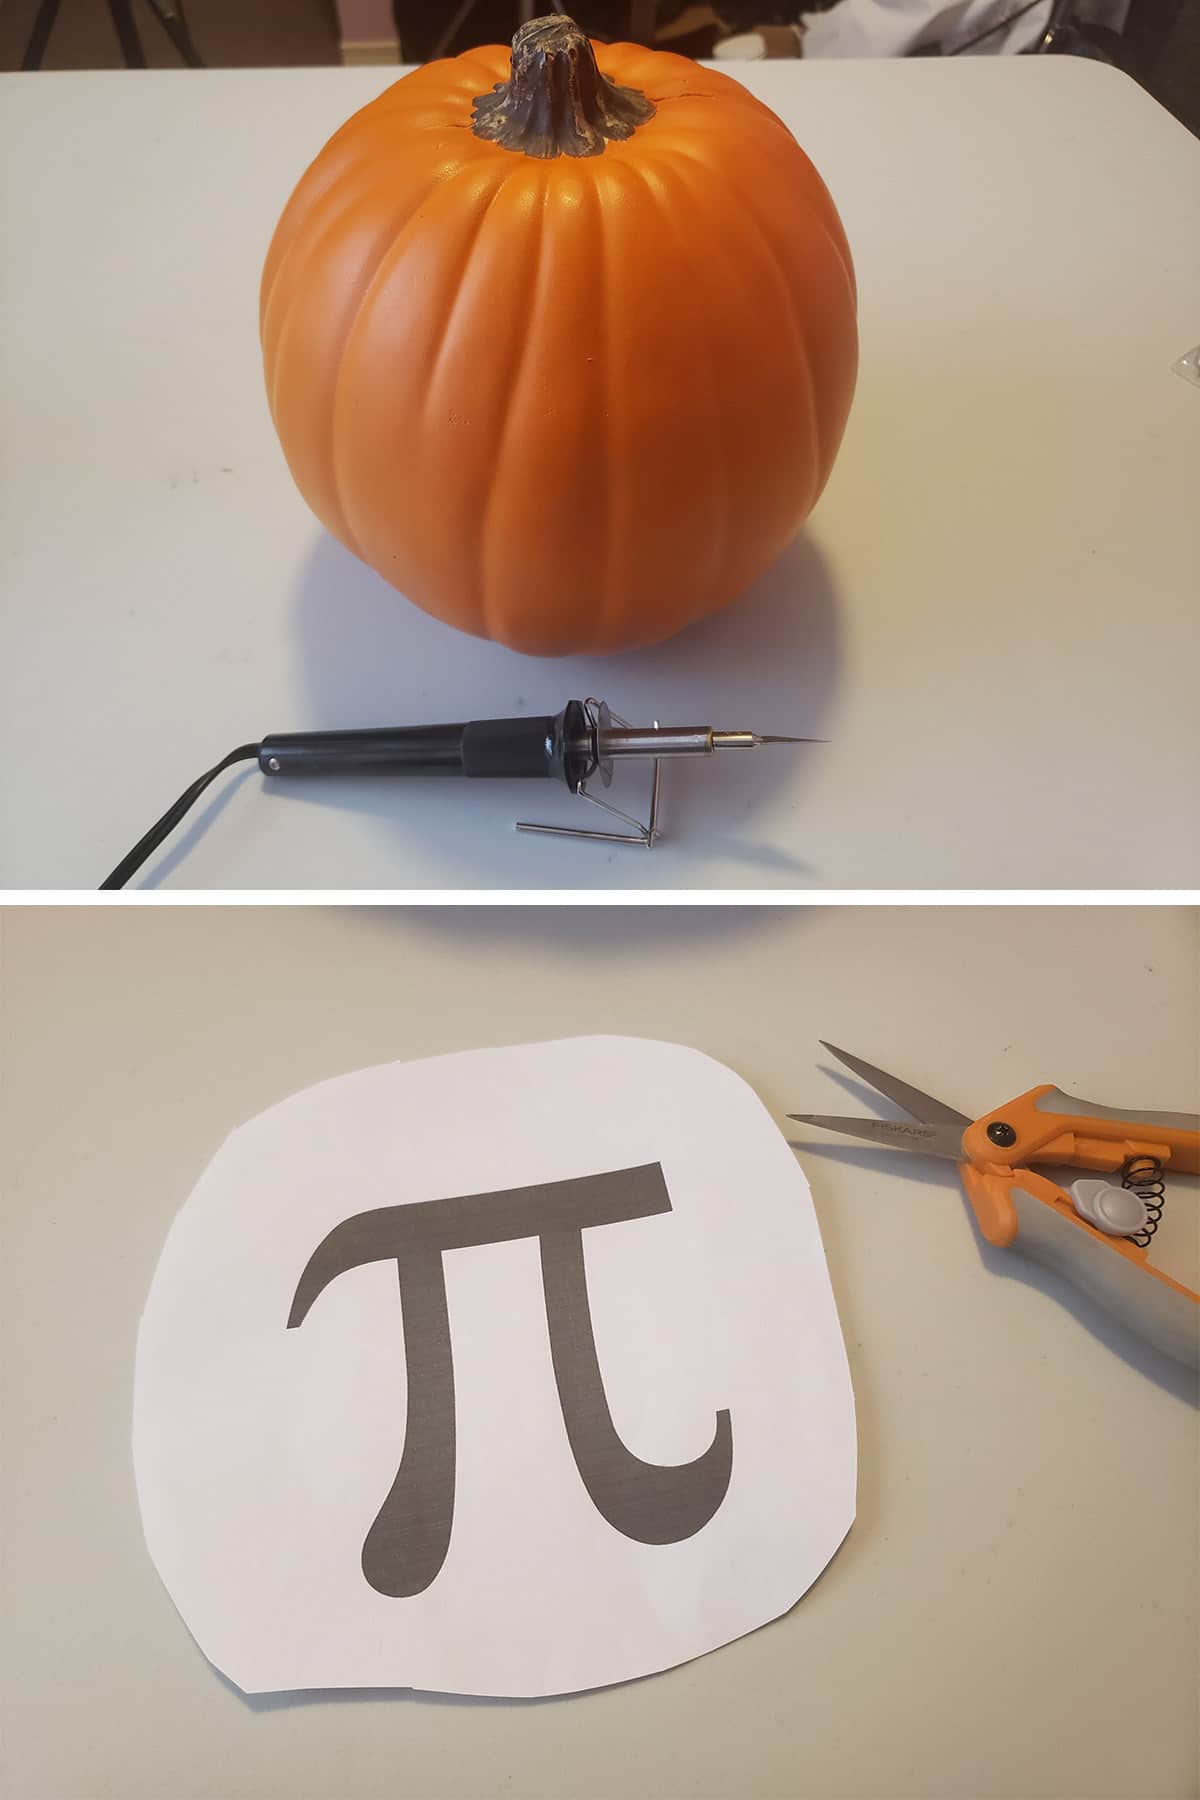
Then I trimmed the paper down close-ish to the design, cut slits in it, and taped it to the surface, using painters tape:

Then I used a sharp point to transfer the edge of the design through the paper, to the pumpkin surface:

Once I’d gone all the way around, I removed the paper to check that the whole design transferred.
Carving Your Design
Preheat your hot knife.
Use the hot knife to cut the top off the pumpkin. As with real pumpkins, I like to cut it in an asymmetrical way, angling the knife inward as I cut.

In sections, use the hot knife to cut away the parts of the pumpkin to be removed.

Getting around tight corners can be tricky, so I’ll approach it by cutting multiple angled sections out, until it leaves a fairly open section, and is more a matter of smoothing it out.

Once you’ve got all the sections cut out, give it a once over, and smooth out any sections you’re not happy with.

Pop a little battery operated light (DO NOT USE A REAL CANDLE WITH A FOAM PUMPKIN!) In it, and you’re good to go!


Terry Shull
I am the proud owner of three of Alex's carved pumpkins. They stay up in my office all year (they're not real pumpkins). Great advice on how to do this with the real thing - GREAT tip about soaking the pumpkins!
admin
Awesome! What are your carves of?
Sidney
I'm doing a demonstration speech on how to carve pumpkins, have any advice or tips on how I can make my speech outstanding? (:
Marie Porter
Hrm... I am SO the wrong person to ask about public speaking 🙁
Thaddeus Venture PhD
Should the tub be warm or room temperature water? Any other tips to help the pumpkin keep longer?
Emanual paul
It's incredible how Halloween traditions can evolve and become even more exciting over the years! 🎃✨ Enlisting "The Pumpkin Geek" Alex Wer for pumpkin carving tips is a fantastic idea, especially given his impressive list of fans and international recognition. His expertise must have added a whole new dimension to your Halloween celebrations. 🌟 It's wonderful to see how Halloween can bring people together, inspire creativity, and create lasting memories. Thanks for sharing this journey of Halloween tradition and improvement! 🍂👻