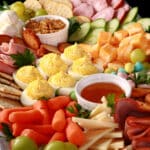
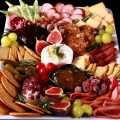
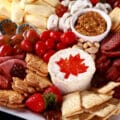
This Easter Charcuterie board is fun to make, cute, and full of great color, texture & flavor. The perfect appetizer for your Easter Brunch!

It’s now March, and the Easter holiday weekend is just a few weeks away. While you may or may not have already started shopping for Easter baskets, you still have time to plan your Easter dinner.
This beautiful Easter charcuterie board is a great addition to an Easter meal, whether you’re planning a larger Easter gathering with extended family and friends, or planning to spend the Easter weekend with just your household - as we are!
This festive appetizer is not only easy to scale it - like traditional charcuterie boards - is highly customizable.
I like to design my Easter themed charcuterie board around colors and themes associated with Easter, and the spring season in general.
For me, this means pastel colors, eggs - both real and chocolate eggs - carrots, ham, etc.
Maybe you’ll take inspiration from jelly beans, and come up with an Easter-themed charcuterie board that is bursting with bright colors.
Maybe you’ll lay your Easter board in a similar fashion to mine, maybe you’ll form your food items in the shape of a decorated Easter Egg, or a bunny face - always an adorable Easter charcuterie board idea!
There are so many different ways to building a charcuterie platter, and this post should give you all the inspiration you need to build a festive board for your next Easter party.
I promise, it’ll be a huge hit with the whole family, no matter which way you go with it!
Anyway, there are LOADS of Easter charcuterie board ideas and options to discuss, so let’s get to it!

Charcuturie Ingredients
Unlike the vast majority of my recipes, charcuterie doesn’t require a set list of ingredients
Think more “choose your own adventure”, or “pick 3 from column A, and a few more from column B”.
Here are the major categories of food you’ll want represented, and some ideas of the types of ingredients I’ll use from each, to fit in with the Easter theme. Pretty much everything should be easy to find in any local grocery store!
Meats
Traditionally, “charcuterie” refers to serving a selection of cured meats, so I like to start there.
While there’s a huge variety of meats to choose from when planning a charcuterie board, I wanted to keep mine more on the pale side, in terms of colour.
I was aiming for a pastel themed Easter Charcuterie board, so something like my Salami Roses were a bit dark for what I was envisioning.
Ham and turkey are popular dishes to serve with Easter brunch, so I decided to use both on my board. Thematically appropriate, AND perfect for the colour scheme!
I decided to use 2 types of deli ham, as well as a smoked deli turkey slices. I added some sliced Kielbasa, just for a bit of a more traditional offering.
If you’re also aiming for pastel, but like the idea of meat flowers, you can always roll strips of Prosciutto into loose rosebuds - a delicious way to bring a bit of floral aesthetic to a lighter coloured Easter charcuterie platter.
Cheeses
Generally speaking, I like to have a mix of firm and soft cheeses - cut to different shapes - when deciding on the cheese spread portion of my board.
As with the meats, I was also keeping colour in mind when choosing the cheeses.
After a LOT of consideration, I went with:
Bocconcini: It’s white, and the little spheres aren’t TOO far away from looking like a little pile of eggs.
Swiss cheese: My husband’s request, “Because it has holes in it”.
Cubes of marble cheese: Because every Easter brunch as a kid involved a cheese platter with cubes of marbled cheese and cheddar cheeses. Marbled just worked better for this board, aesthetically.
Provolone Roses
If you like the visual appeal of salami roses - but not necessarily the colour - consider trying cheese roses!
You’ll drape slices of provolone over the rim of a wine glass, in a similar fashion as what I do in my How to Make Salami Roses tutorial.
Just be sure to use really thin slices of cheese, and allow them to warm up to room temperature before draping them - otherwise, they’ll rip.
Lavender Cheese
Lavender gouda is a gorgeous purple cheese that you can sometimes find in specialty cheese shops - perfect for a pastel Easter theme.
It’s lavender in color AND flavor though, and that’s where it lost me. Though I like some floral cheeses, lavender just isn’t my thing!
Sage Derby Cheese
This is a green and white mottled cheese that would also look gorgeous in the colour scheme I picked - and it tastes great!
The only reason I didn’t use it was because I looked at the overall balance of colours I wanted, and where they’d be coming from.
It made more sense to get more of the whites from cheese, and greens from grapes and cucumbers
Starches
As with the meats and cheeses, I wanted to keep the crackers on the lighter end of things, color-wise.
I’d originally planned on using Rice Crackers, Melba Toast, and Sociables (again, a throwback to childhood Easter gatherings!).
Then my husband cackled about using Stoned Wheat Thins, “the perfect addition for the Easter theme”, and ... I had to.
I did, however, nix his followup request to include Communion Wafers (which are actually sold as a snack food in Quebec!) as one of the starches.
In the end, I went with Bacon Dippers - because they’re egg shaped! - Bread Sticks, baguette crackers, and the Stoned Wheat Thins.
Including some Mary's Gone Crackers and Schar Entertainment Crackers - separately - is a great way to be inclusive of those who are gluten-free, and my Crunchy Keto Crackers and Keto Tortilla Chips are great options for those who have to keep low carb.
Sweet Treats
While I like to keep my Easter brunch charcuterie board a *charcuterie* board - rather than veer too closely to becoming an Easter dessert board - cookies can be a fun way to bring some color to your board, and add to the theme.
Also, a great way to keep those with a sweet tooth happy!
You can usually find some sort of Easter egg or Easter bunny cookies in grocery stores, or grab some Easter Cookie Cutters and check out my Sugar Cookie Decorating tutorial, to make your own!
My various sugar cookie recipes - Cut Out Sugar Cookies, Gluten-Free Sugar Cookies, and Keto Sugar Cookies - are all great options!
Produce
I like to include some kind of fresh vegetables on most of my charcuterie boards, and adding some fresh fruit is an easy way to bring some bright colors and a bit of sweetness to any delicious grazing board.
I kept it really simple with this board - Baby carrots (both as a nod to “bunnies”, and for the colour), cucumber slices, and green grapes.
There weren’t a TON of options in the colour range I was aiming for, but these worked perfectly. Celery sticks would also have fit.
If you’re less concerned about keeping the colours pale, fresh berries, broccoli - or broccolini - are other good options.
If you have access to edible flowers - I did not, at the time of year I made this board - they’d be a super cute addition. Scattering a small flower here and there would definitely add to the “spring” theme!
Sauces, Spreads, and Dips
I like to include a tiny ramekin or two of sauces or spreads that accent the meats and cheeses offered on the board.
The various mustards from Kozlik’s Canadian Mustard are some of my favorite things to include.
They have a TON of flavors, most of which are a perfect way to accent charcuterie meats. I used a bit of their “Triple Crunch” on this board.
Going along with the hams, I added a bit of honey in another ramekin.
Fig Jam would have been another good idea, but really... If I had my time back, I probably would have gone with two different mustards and skipped the honey on this one.
The honey didn’t really get used, even if it *visually* fit in!
Munchies
I like to include 1-3 types of “munchies” on my boards. These usually end up being things like Dried Apricots, Pecan Halves, Cornichons, Pepitas, etc.
Sometimes I’ll use Pickled Red Onions, which could have been pretty with this board.
While the apricots or pecans would have worked, I had my sights set on ONE type of “munchy” item for this board:
It’s favorite Easter candy - really, the best part of the Easter season, IMHO! - and the pastel colors of these cute little Easter eggs work perfectly with the theme.
Anyway, while I like to keep the candy to a minimum on charcuterie boards in general - to keep them separate from being dessert charcuterie boards - a bit of candy just WORKS for an Easter spread.< Marshmallow Peeps, Mini Chocolate Bunnies, and Jelly Beans are all fun ideas to include, both as a munchy item AND garnish!
(Have you tried my Homemade Marshmallow Peeps recipe? SO good!)
Garnish and “Other”
I went really simple with the garnish on this board - just some fresh Italian parsley.
Another idea would be to use some Edible Grass - there are several kinds available, ranging from a flavourless starch grass, to bubblegum!
While not really a garnish, my deviled eggs didn’t really fit under any other category, so I’ll mention them here, as an “other”.
I went with a super basic deviled egg, which I threw together by taste, as I normally do.
If you want to get a bit extra with your deviled eggs, though, consider trying my Easter Deviled Eggs!
I just figure they would have been a bit too visually chaotic for my Easter charcuterie board vision.
The 3 3 3 3 Rule
You may have heard of the 3 3 3 rule, or the 3 3 3 3 rule.
This is a “rule” of charcuterie that says you have to have 3 meats, 3 cheeses, 3 starches - and, in the case of 3 3 3 3, 3 accompaniments - on a proper charcuterie board/
IMHO, there’s no wrong way to make a charcuterie board, though. I consider it more of a guideline, than a hard-and-fast rule.
You can make all kinds of delicious boards, without ever adhering to any rule beyond “make it taste good” and “be sure your guests have enough crackers for the amount of meat and cheese you have out.
You do you, it’ll be great!
Share the Love!Before you chow down, be sure to take some pics of your handiwork! If you post it to Bluesky, be sure to tag us - @CelebrationGen. We're also on Pinterest, so you can save all your favourite recipes to a board! Also, be sure to subscribe to my free email newsletter, so you never miss out on any of my nonsense. Well, the published nonsense, anyway! |

Charcuterie Supplies
Aside from the actual ingredients you’ll be serving to your guests, there are a few other supplies you’ll want for your Easter charcuterie board.
A Charcuterie Board
Charcuterie Trays can be almost anything, as long as it’s food safe.
The size and shape you get are pretty wide open, and will depend on how many people you’re serving, the amount of space you have to serve it on, etc.
A Large Cutting Board will work for smaller displays, and most party supply and dollar stores have plastic platters that work really well for mid range charcuterie displays.
If you’re looking to do a LARGE platter, you’re probably going to need to buy something specifically intended as a catering display. If you need a giant board, you may be able to rent one.
In terms of colour, I like using a very neutral coloured tray. Sure, going with a seasonal colour can be fun - but it can also distract from the food being served, and/or make it look weird.
Perhaps I’m boring, but 9 times out of 10, I’m serving my seasonal charcuterie boards on a plain white tray.
Small Bowls, Ramekins
If you’re serving a dip, you’ll want some sort of Small Dip Bowl.
Be sure to size your dip bowls on your board before actually using them - you’d be surprised how much real estate some bowls can take up!
For smaller servings of spreads - mustard, jelly, etc - or to contain smaller items like nuts, I recommend using small ramekins. 2 oz Ceramic Ramekins work perfectly!
Serving Utensils
Depending on what specific food items serving you’re , you may need certain utensils.
If you’re not pre-slicing your cheese, be sure to have some appropriate Cheese Knives on hand.
It’s good to have some small spoons on hand for things like sauces and dip - Espresso Spoons are perfectly sized.
If you’re serving a crowd - rather than, say, a small board for date night - I recommend having several Cocktail Picks, Cocktail Tongs, or even Bamboo Cocktail Forks on hand.
This will keep fingers out of food that others will be eating!
Cheese Markers are little signs you can stick in your cheeses, to let people know what they are.
I generally skip them - just as a matter of aesthetics.
Finally, having a good amount of small plates and napkins on hand is always a great idea!

More Charcuterie Boards!
Looking for more holiday charcuterie boards, and charcuterie ideas in general? I've got you covered!
Game Day Charcuterie Board
Valentine's Day Charcuterie Board
St Patrick's Day Charcuterie Board
Rainbow Charcuterie Board
S'Mores Charcuterie - Camping Dessert Board!
Canada Day Charcuterie Board
Thanksgiving Charcuterie Board
Halloween Charcuterie Board
Christmas Charcuterie Board
Charcuterie Wreath
Charcuterie Tree
Colourful Squares Cutting Board
Cutting Boards 101
Log Cabin Cutting Board
Pavlova Grazing Board
Salami Roses

How to Make an Easter Charcuterie Board
Much like with the ingredients, actually putting together an Easter charcuterie platter is more of a free form thing, rather than a set of directions that *has* to be followed, and done in the right order.
Here’s how I do it:
Place the Main Items
1. Figure out what your “solid” focal points are. This is generally things like sauce ramekins and dips, but could also be a cheese or meat - depending on the presentation
If you are including a wheel of brie, log of goat cheese, some kind of cheese ball, or a pate / terrine of some kind, that would count.
Place those focal points on your charcuterie board, leaving space between. I like to keep colour and texture in mind when placing, not placing things that are too similar next to each other.
Note: If any of your items is a bowl of dip, place the bowl - add the dip later!
3. Place your cheeses approximately where you’d like them, spacing them out relative to each other. I’ll usually leave some space between each meat and cheese.
Fill in the Secondary Items
4. Place your sections of starches. I like to keep the various types of crackers - and cookies, if using - separate from each other.

5. Fill in your sections of the more “snacky” produce, leaving more “garnish” produce for a later step. In this example, that means cucumber slices, mini carrots, and green grapes

6. Place sections of your “Munchies” items - the mini eggs, here - filling in any larger empty spaces.

Final Touches
7. If you haven’t arranged your meat slices and cheese slices the way you want to yet, do so now. I’ll usually use more meat / cheese / surrounding items to prop slices up, if needed.
8. Fill in any remaining white spice with more meat, cheese, produce, or munchies - whatever makes sense for that space on your specific board.
9. If you were holding off on adding dips to the bowls, do so just before serving. In this case, pipe your deviled eggs!
10. Place any of your more “garnish” produce, and any other items that may be acting as a quasi-garnish. In this case, that would be the Italian parsley, but could be things like chocolate bunnies being used as garnish.
11. Do any last minute fussing you may need to.
12. Serve and enjoy!

Tips for Charcuterie Success
Because of the different types of ingredients - and the different ways they need to be stored and handled - timing is really important when it comes to serving an Easter Charcuterie plate.
Here are some issues to keep in mind:
Food Safety
1. Make sure your charcuterie board itself is food safe. Some trays are meant for display - rather than food - using woods or finishes that aren’t food safe.
That’s not to say you CAN’T use them for charcuterie - just be sure to line them with parchment paper, so the food doesn’t directly touch the surface.
2. Practice good food handling hygiene: Wash hands frequently and/or wear gloves while preparing your charcuterie board. Change gloves and/or wash your hands after touching your face, using the washroom, touching your phone, etc.
Wash all produce as needed, and work with clean equipment.
This is cumulative time - it includes the amount of time you’re preparing the foods and working on your plate.
That being the case, you’ll want to minimize the amount of time your meats and cheeses are out of the fridge.
I recommend preparing each cheese or meat separately, when possible: Take one from the fridge, slice it up, cover and return it to the fridge.
Keep everything chilled until you start assembling your board. Assemble it as close to serving time as possible.
If you expect the board to be out for more than a few hours, make it smaller than needed, and keep refill items in baggies - in the fridge.
Keep an eye on time, and cycle the food out as its time expires - it’s the best tip for keeping your charcuterie spread fresh, tasty, and safe!.
Food Quality
1. Be sure to check expiration dates on things like packaged cheeses and meats, and use them well before the expiry date. When you buy a cut wedge of cheese, it should be used within 2 weeks of purchase - generally speaking.
2. Check all produce for blemishes or mold, and use only ripe produce.
3. Don’t let your cheeses be exposed to the air for too long before use - whether in the fridge or not. Wrap or bag everything when not in use.
4. Keep your cheeses separate when stored. Ideally you’ll be serving cheeses in a variety of flavours - when stored together, those flavours can mingle.
Not a great thing, in this case - keep each in a separate baggie, or wrapped in plastic wrap!
Presentation
1. Assemble your charcuterie board as close to the time you’ll serve it, as possible. This will prevent flavors from mingling, juicier produce from bleeding, moisture from spreading, etc.
Beyond the food safety issues mentioned earlier, it’ll also keep your foods the proper texture. If you make your board, wrap it, and chill it for a few hours ... you’re going to end up with soggy crackers.
2. I like to leave dips OUT of the bowls until the very last minute, whenever possible. It’s easy to accidentally bump the side of a hand into the dip, as you’re assembling your platter. Get it all assembled - with empty bowls - THEN spoon the dips in.
3. If you’re traveling with your board, it’s best to travel with the ingredients prepared and bagged, but not assembled. Not only will the flavors and textures stay right, you won’t risk an assembled board getting jostled while in transit.
4. Try to be inclusive when you’re serving a mixed crowd. If you know that some people are gluten free, leave the crackers off the board altogether, and provide some gluten free cracker options on the side. Be sure to minimize cross contamination wherever possible.

More Easter Content!
Looking for more fun / tasty ways to observe Easter? Here are a few of my favourite Easter recipes:
4 Layer Easter Creme Egg Brownies
Chocolate Zombie Easter Bunnies
Easter No-Bake Chocolate Pie with Mini Eggs.
Mini Egg Easter Pavlovas
Easter Pavlova
Easy Pysanky [Ukrainian Easter Eggs]
Gluten-Free Paska [Easter Bread]
Easter Deviled Eggs
Homemade Marshmallow Peeps
Hot Cross Bagels
Keto Paska
Paska - Ukrainian Easter Bread
Hot Cross Scones
Southern Comfort Glazed Ham
Paska Bagels

Cute & Festive Easter Charcuterie Board
Equipment
- Charcuterie Board
- Ramekins and Dip Bowls
- Cheese Knives, etc
Ingredients
- 3 oz Cured or smoked meats see post for suggestions
- 3 oz Cheese see post for suggestions
- Crackers see post for suggestions
- Produce Sauces, Snack Items, and Garnishes as desired - see post for suggestions.
Instructions
Place the Main Items
- Place your focal point items - wheels or chunks of cheese, sauce ramekins, dip bowls, etc - on the charcuterie tray. In this case, it was a couple ramekins of honey and Dijon mustard, and the boiled egg white halves.
- Place your meats roughly where you’d like them to go, then place your remaining cheeses. This was the smoked turkey deli meat, deli ham slices, and Kielbasa for the meats, and bocconcini, swiss cheese, and marble cheese for the cheeses.
Fill in the Secondary Items
- Arrange sections of your starches - crackers, cookies, bread. For this Easter charcuterie board, I used baguette crackers, bacon dippers, and bread sticks.
- Fill in your sections of the more “snacky” produce. In this case, that's cucumber slices, baby carrots, and green grapes.
- Place sections of your “Munchies” items, filling in any larger empty spaces. This is the mini eggs and dried apricots on the charcuterie board as pictured.
Final Touches
- Arrange your meat and cheese slices more artfully, if desired.
- Fill in any sparsely covered areas with more meat, cheese, produce, etc.
- Add dips to the bowls, if applicable, then garnish as desired. I piped the filling into the eggs, and garnished the board with fresh Italian parsley.
- Serve and enjoy!
Notes
Nutrition
Thanks for Reading!... and hey, if you love the recipe, please consider leaving a star rating and comment! |


Margaret
Thanks for all your instructive tips for food safety, food choices & displays. Much appreciated.