

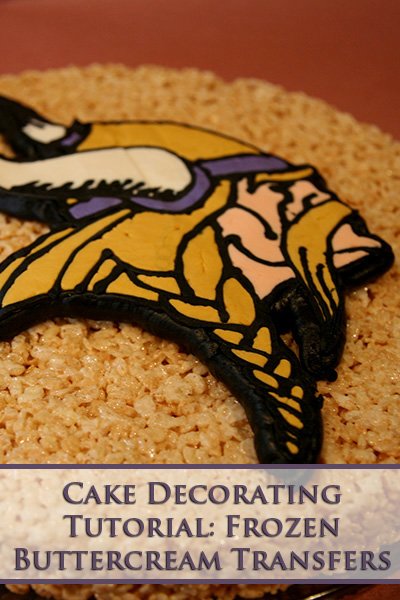
Frozen Buttercream Transfer Tutorial
Ever tried to pipe something specific onto a cake? A cartoon character, a company logo, or any other sort of recognizable design?
I know, it's a pain. You're stressed out about not screwing it up, hoping the final thing will be recognizable, and that it doesn't end up on the Cake Wrecks website.
Did you know that there's a much easier way to do it, than freehanding it? It's called "frozen buttercream transfer", and it takes all of the stress and freehand work out of piping set designs!
The nice thing about this technique is that it requires absolutely no artistic skill whatsoever! It's the kind of simple "Man, I wish *I* had thought of that!" brilliance that... well, I wish I'd thought of! Alas, this is one of those "learned it through other cakers" design "secrets".
Hope you enjoy my first cake decorating tutorial!
What you need
1 firm, flat portable work surface (Piece of plexiglass, cookie sheet, or cutting board)
Printout of desired image (Should be done as mirror image to what you actually want)
Parchment or wax paper
Tape
American Buttercream, tinted appropriate colors*
Piping bags, couplers, and tips (I usually use a 2, 4, 5, and 10)
1 cake, frosted
![]()
Step 1: Tape your image to your firm, portable work surface, making sure that it is as flat and smooth as possible.
![]()
Step 2:Tape a flat piece of wax paper or parchment paper over your design. You just want to tape around the edges, again aiming for a smooth surface - don't put tape over any part of your actual design.
![]()
Step 3: Use a size 4 or 5 round cake decorating tip and black frosting to pipe the outlines of your image. Keep your lines as smooth as you can, and make sure that all intersecting/touching lines are actually touching.
If there are any thinner, non-main parts that should also be piped black, change to a smaller tip (maybe a #2), and pipe them in. Once you have all of the black piped on, place your image - work surface and all - into the freezer for 10 minutes.
![]()
Step 4: Remove image from the freezer. Using a #4 or #5 tip, use the color that you'll be using the least of (in this case, purple) to fill in the appropriate areas.
Position your tip near one edge/corner of the inside of the area to color. Squeeze with gentle, constant pressure, and allow the frosting to fill the area smoothly. Make sure this frosting is touching the outline all the way around the area.
If your outline is still firm, pipe the next smallest amount of color (peach, in this case). If not, freezer image for another few minutes before proceeding.
![]()
Step 5: Continue freezing and piping areas of color, until you're all done.
![]()
I like to leave white for the very last color, to avoid any possible running of other colors. Accidents happen!
![]()
Step 6: Once all of your areas are filled in, fix a piping bag with a big round tip - I like #10 - and completely pipe over the whole area. Freeze image for about 1 hour, or until completely firm.
![]()
Step 7: Once your buttercream transfer is completely firm, remove the tape from the waxed paper. Very carefully flip your image into position on your frosted cake. If you're completely caked-out like I am, you can put it on a giant Rice Krispy Treat!
Put your work surface aside, and adjust the placement of your transfer if necessary - you should be able to see through the paper.
![]()
Step 8: Carefully remove your waxed paper, step back, and admire your work. LOOK WHAT YOU DID! Woo!
![]()
Using a fairly big tip - I used #10 round - Pipe a border around the outer edge of your transfer. I used a plain black border, but you can pipe shells, do whatever color you want, etc - this is basically just to hide the raw edges of your transfer.
![]()
Decorate the rest of the cake any way you want, then take lots of pictures!
Particularly happy with your newfound decorating skills? Be sure to post a photo on our Facebook page - we'd love to see it!
* Now, I'm not the biggest fan of American buttercream - definitely prefer Swiss Meringue buttercream - but for the purposes of this technique, I find that it just works better. Your frosting consistency should be thick enough to pipe solid lines that don't ooze, but soft enough to have good control over it, and that the lines aren't breaking.
I like to use Americolor brand food coloring. It comes in far more colors than grocery store food coloring, is super concentrated, and doesn't tend to make the colored frosting "bleed" like Wilton coloring
Minnesota Vikings "Norseman" logo used with permission.

More Cake Decorating Posts
Looking to up your cake decorating game? I've got you covered!
3D Monarch Butterfly Cupcakes
American Buttercream Recipe
Chocolate Leaves Cake Tutorial
How to Make Marshmallow Fondant
Spider Web Halloween Cupcakes
Swiss Meringue Buttercream Recipe

Interested in making wickedly delicious cakes? You'll LOVE my second cookbook, Evil Cake Overlord!
We've long been known for our “ridiculously delicious” moist cakes and tasty, unique flavors. Now, you can have recipes for all of the amazing flavors on our former custom cake menu, and many more!
Bake your moist work of gastronomic art, then fill and frost your cake with any number of tasty possibilities. Milk chocolate cardamom pear, mango mojito.. even our famous Chai cake – the flavor that got us into “Every Day with Rachel Ray” magazine!
Feeling creative? Use our easy to follow recipe to make our yummy fondant. Forget everything you’ve heard about fondant – ours is made from marshmallows and powdered sugar, and is essentially candy – you can even flavor it!
Order your copy directly through my site, through Amazon, or through any major bookseller!
Cake Photos
Interested in seeing - and reading - more details of some of my favourite cakes I’ve made over the years? Check out these links:
Bubble Bobble Wedding Cake
Clarice, Have the Lambs Stopped Screaming?
Dalek Cake for a Doctor
Lambeth Wedding Cake
Snowflakes Wedding Cake
SO.. I made a Cake for Amanda Palmer (NSFW)
Spumoni Cake & The Art of Trolling Cake Competitions
That Time I Made a Cake for a Pack of Klingons
The Story of Foopmallet
TARDIS for Wil Wheaton
Tremors Wedding Cake
Share the Love!
Before you chow down, be sure to take some pics of your handiwork! If you post it to Bluesky, be sure to tag us - @CelebrationGen. We're also on Pinterest, so you can save all your favourite recipes to a board!
Also, be sure to subscribe to my free monthly email newsletter, so you never miss out on any of my nonsense.
Well, the published nonsense, anyway!


Liz
This is crazy... I am making a graduation cake for this weekend, and on my first image search of frozen buttercream transfer I see this.. This is the EXACT one I have to do for the school logo. That is just too weird.
Bob Jackson
Can I leave the buttercream transfer in the freezer for more than 24 hours without any bad affects on the image? I would like to make the design a few days ahead of time.
Marie Porter
Should be fine!
Lena
I know you said that American Buttercream works better than Swiss Meringue Buttercream. I'm just wondering what differences you've noted. Why is it bettter? Thanks.
Chrys
Thank you so much! I had an order for 2 birthday cakes with the character Super Mario on top of 1 cake and Luigi on top of the other cake. All my customer gave me was a picture. I drew the characters on parchment paper and followed the instructions above. It worked wonderfully and the customer was sooooo pleased! The only comment I have is to watch how much frosting you cover the back with and keep the frosting within your margins. I covered the back with thick buttercream and went outside my margins (first time I tried this process). I had to trim excess buttercream from the back so the characters wouldn't stand too far off the top of the cakes and trimmed around the outline before placing the images on the cakes. The images stood up off the cake more than I planned, but after piping around the images after placement, they looked nicer than I thought they would. I will definitely use this process again and again!
Megan
Hi I was just wondering type of coloring you used for the skin color of the picture? Thanks!
Marie Porter
I use Americolor brand gel colours... they're available online, and at most cake decorating stores!
Trisha
Quick (maybe dumb) question about this technique - does the image soften as its on the cake or does it stay more firm?
Marie Porter
The frosting will soften up, but the image will stay clear.
Brenda
Do you think this would work if used on the side of a cake? I need to make the Navy and the Air Force seals and I want to put them on the side of each cake but I'm afraid they will slide down.
Marie Porter
Definitely! I wouldn't do the seals *super* large though, as they won't mold to the sides of the cake. (Well, if it's a round cake. If it's square, make them as big as will fit!)
Misty Dawn
I have found that you can do the entire top of the cake using a frozen transfer. Once you have your image done simply fill in around it to the size of you cake top with white or whatever your back color is, freeze, then top the whole thing off with a thin layer of white and transfer to the cake. This way you get a smooth, even surface with a consistent texture across the entire cake top.
Also, you can use a paper towel to smooth the design once it is done. Once its on the cake, let it sit at room temperature for about 5 minutes then lay a paper towel over the entire thing and smooth with your hand. Be careful not to move the paper towel around though or you could smudge the design.
Sarah McKenna
Hi! Quick question: would it be alright to ice the cake with Swiss Buttercream but do the transfer in American Buttercream?
Marie Porter
Definitely!
Brenda Livingstone
I need to make a US Navy going away cake. I want to do this method, but cannot find any templates that I can print out?? Any ideas as to a website that I can find something to print out? Thank you!
Marie Porter
I'd just Google for what you're looking for, and size it up/down as necessary before printing. I don't know of any sites with templates for that.