

This Easter Pavlova is proof that there really is a Pav for every season, holiday, and event. Easy to make, readily available ingredients!
Originally published January 26, 2021, updated on 2/28/2023.

I have fun with them, coming up with wild variations like Bananas Foster Pavlova, Cardamom Fig Pavlova, Matcha Green Tea Pavlova, and even a bright pink Tropical Dragonfruit Pavlova.
Then, there’s the matter of seasonal, holiday themed Pavlovas, like my Remember my Halloween Pavlova with Bloody Eyeballs, Christmas Tree Pavlova, and - more recently - the Heart Shaped Valentine Pavlova.
Well, it’s time to continue in my new mission of proving that there really is a Pavlova for every occasion.
This time of year? An Easter Egg Pavlova!
The Original Post
This Easter meringue originally started out as a bit of a departure from my normal pavlovas, in the choice of fruit.
As I said at the time:
With the exception of my Halloween Pavlova, I tend to exclusively use fresh fruit on all of my Pavlovas. I prefer fresh fruit to canned in general, in terms of appearance, texture, and taste.
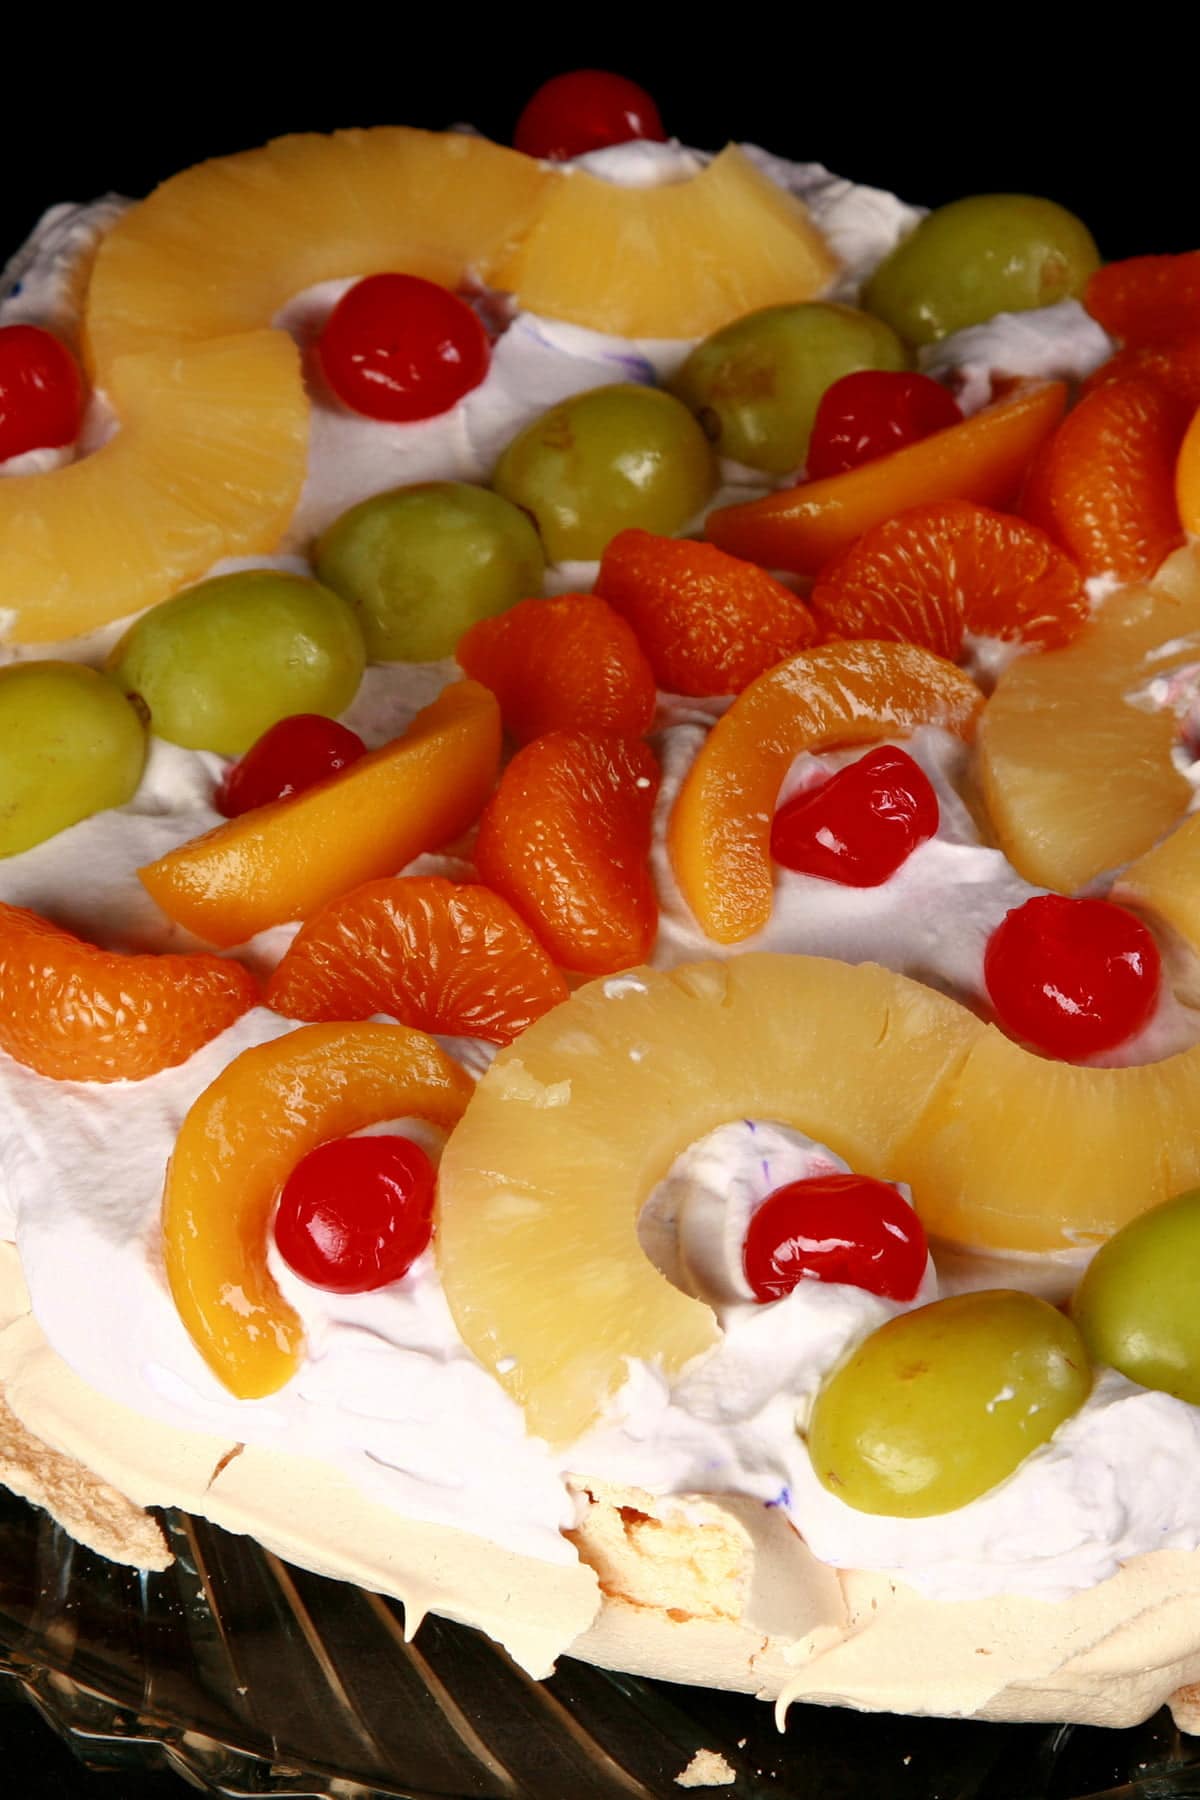
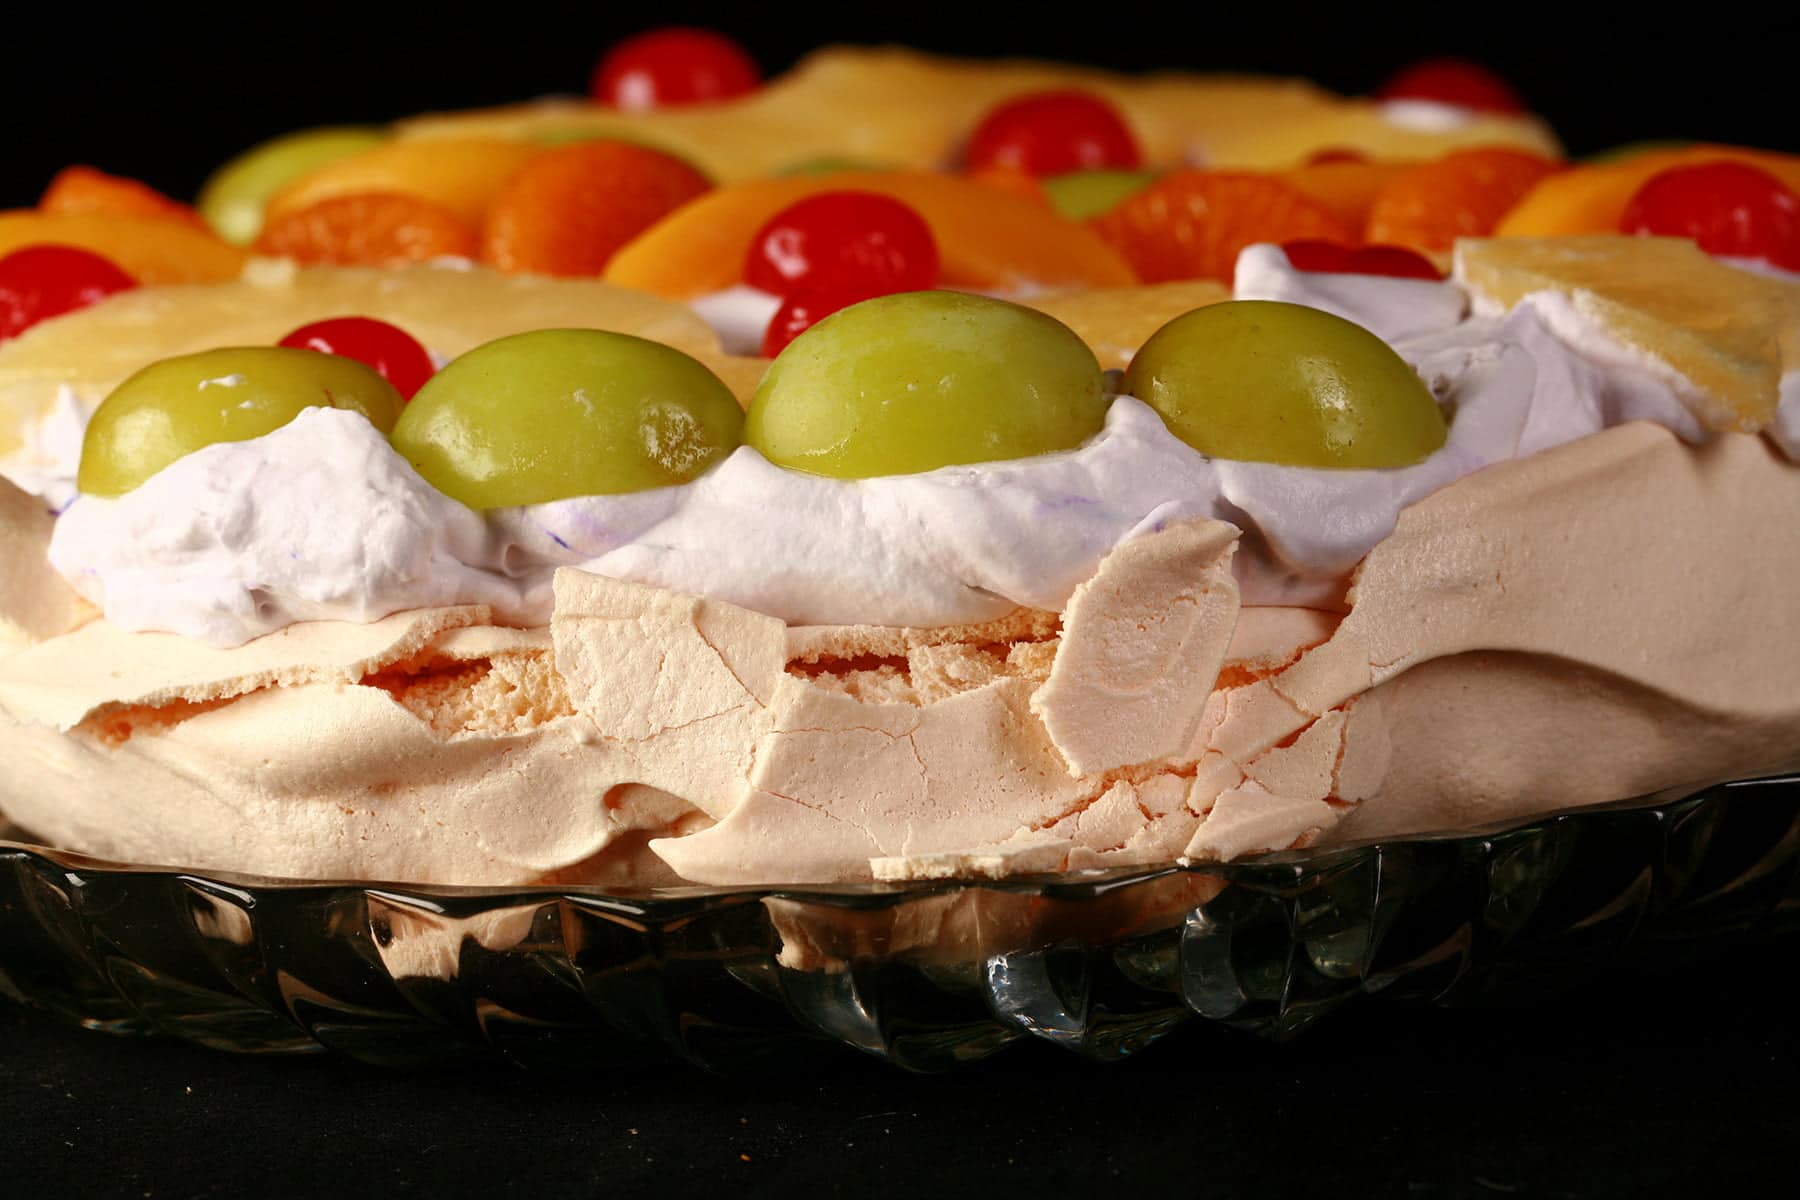
When it came to designing an Easter Pavlova, I started thinking about all the Watergate Salads, Cherry Fluff, and Ambrosia salads that tend to get served at Easter get togethers.
Also? I was just really in the mood to snarf some maraschino cherries - a guilty pleasure of mine.
... so, I decided to use canned fruit, as a result.
Canned fruit has a few benefits:
- Readily available; No worries about seasonality
- Cheap
- Easy. No need to peel anything, very little need to cut anything. (Kid friendly!)
- No time concerns. You can buy it ahead of time and use it when you’re ready to, instead of worrying that the raspberries are going to go bad before the kiwis are soft enough.
Will canned fruit make for a gorgeous, elegant Pavlova? Probably not.
However, it’ll be colourful, fun, easy, and something that kids can help decorate, should you feel so inclined to include them!
Well, I was right - it was definitely not a gorgeous Pavlova! (The original photos are at the end of this post, for posterity.)

Easter Pavlova 2.0
That Pavlova was definitely fun for the whole family, but the actual Pavlova ... didn’t look great in photos.
Last year, I decided I’d be redoing my fun Easter dessert, hopefully in a more aesthetically pleasing way!
Now, that original attempt was already different from what most people consider to be Easter Pavlovas - Usually mini Pavlovas with Easter chocolate, generally mini chocolate eggs.
While I’m a big fan of Cadbury mini eggs, I need FRUIT on my Pavlova - that’s a big part of why it’s my favourite dessert!
So I decided to take this Easter recipe in a different direction:
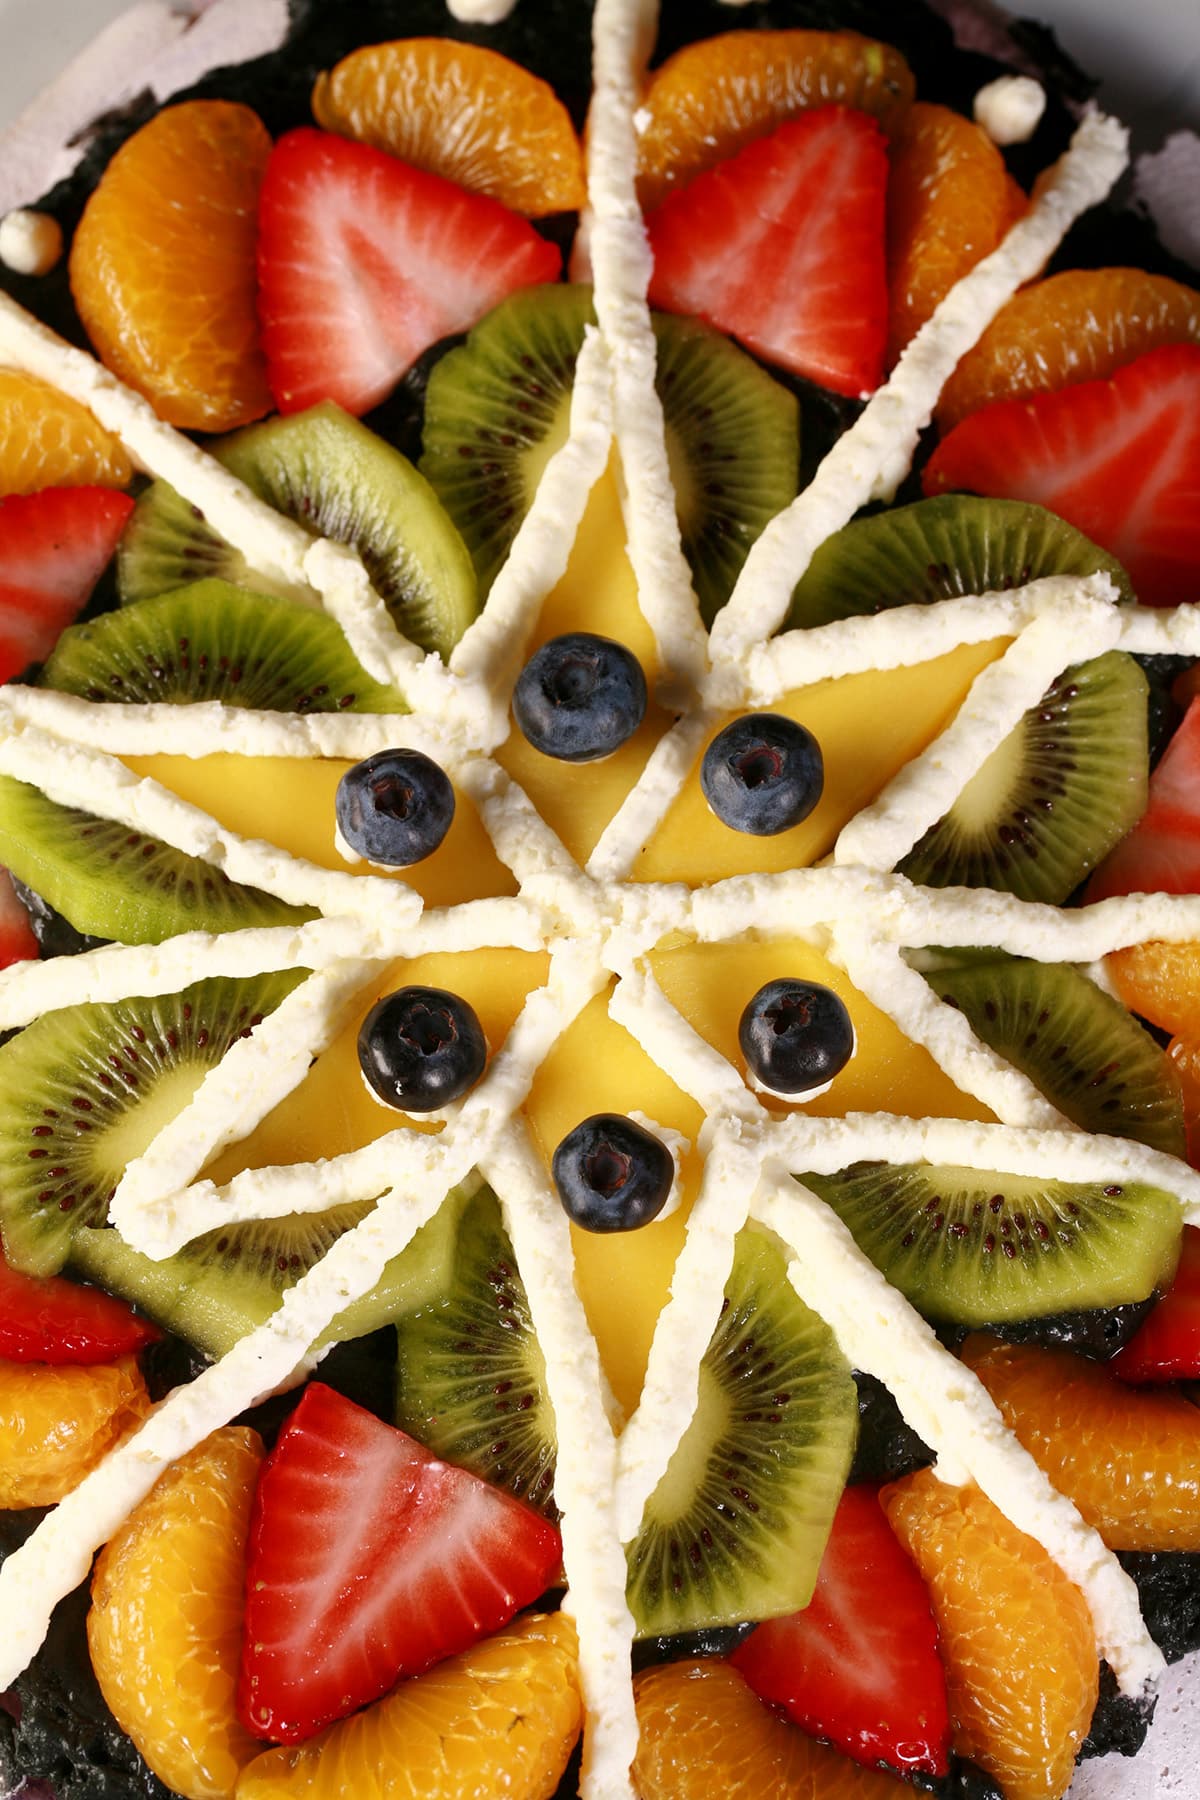
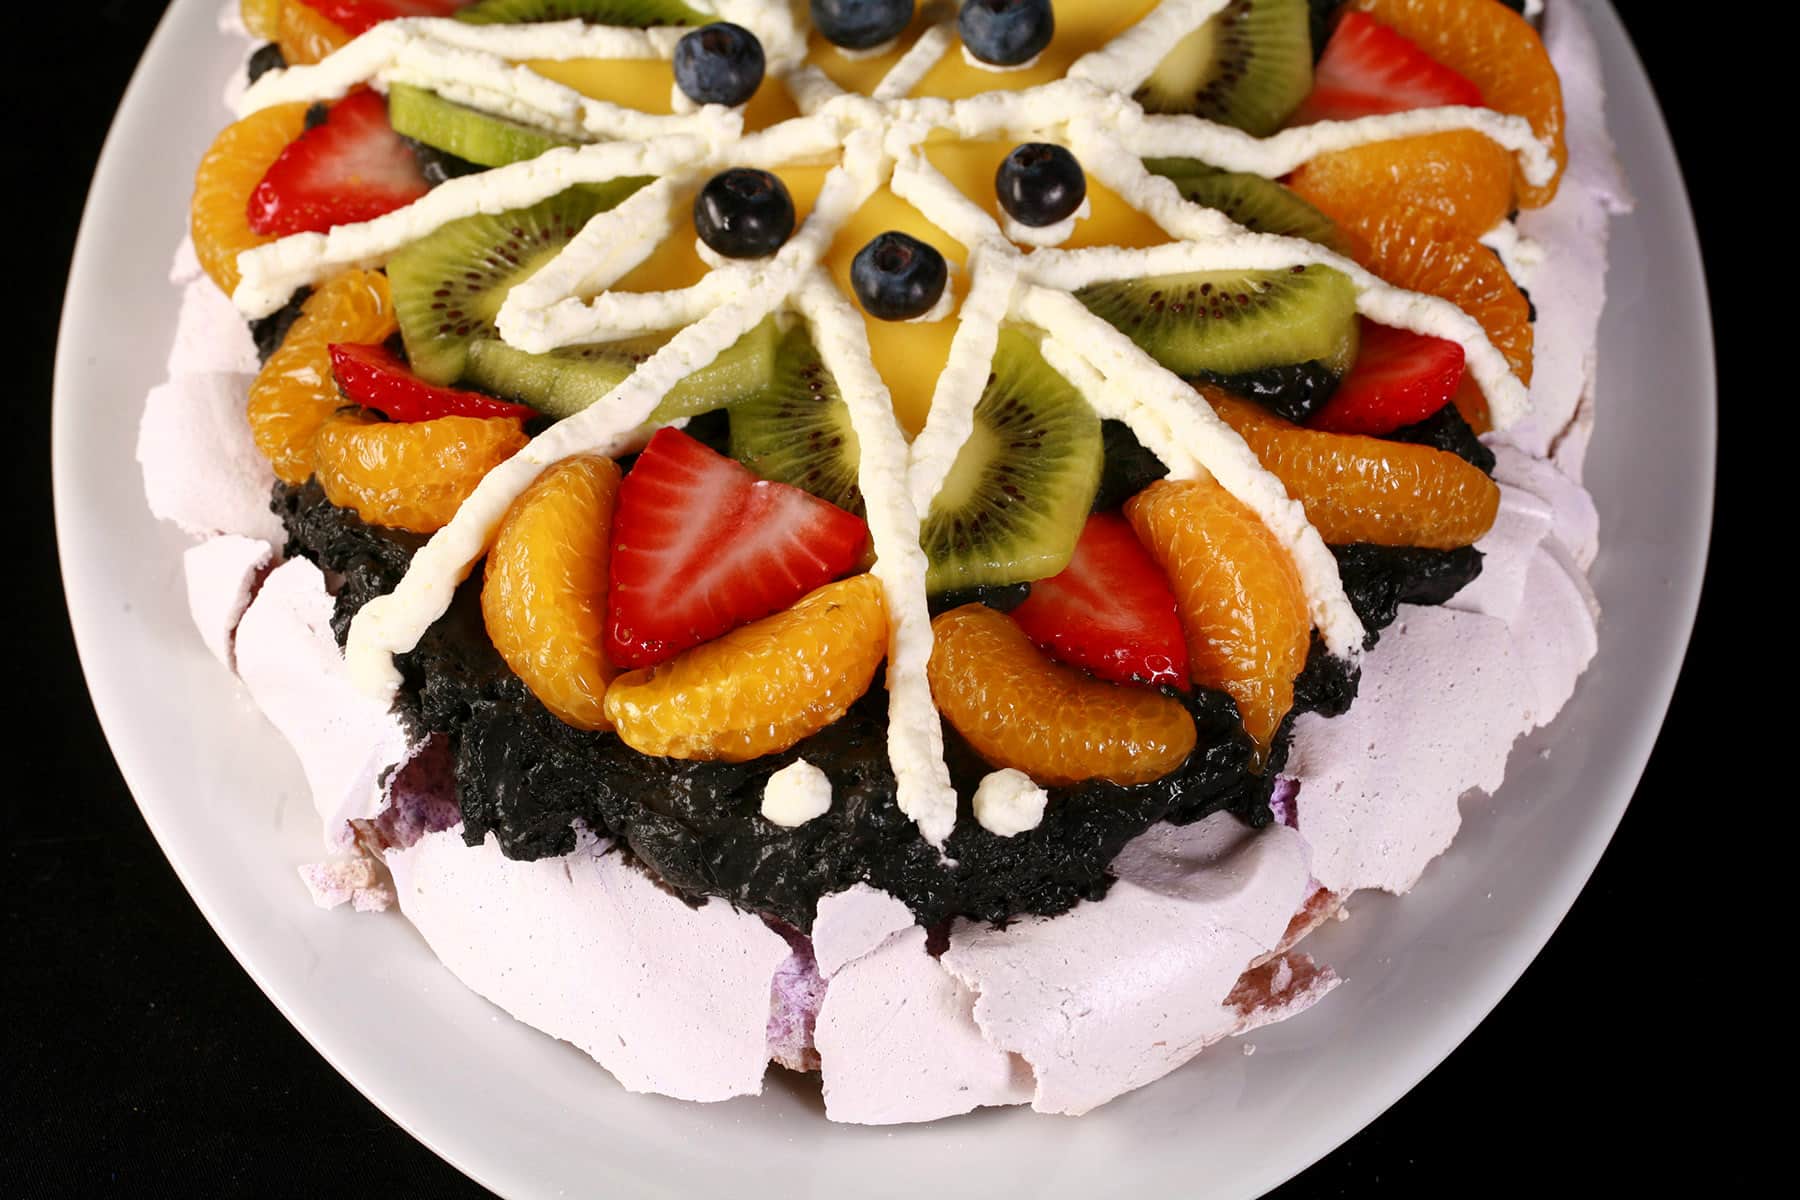
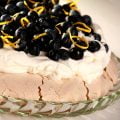
Keeping the Easter eggs theme, but using fresh fruit this time ... and basing the design Pysanky - those epic Ukrainian Easter eggs.
(See my tutorial Easy Pysanky [Epic Easter Eggs] for how to do them, albeit in a less traditional manner!)
I love the way this one turned out, and hope that you do, too!
This post is full of tips and info that definitely wouldn’t fit in the recipe card, so I recommend at least skimming it, before making your own Easter Pavlova!

Ingredients
This Easter egg Pavlova recipe uses really simple ingredients that are easily found at pretty much any local grocery store.
A few notes for you:
The Eggs
This recipe uses large eggs - the whites only.
I like to use the leftover egg yolks to make Fruit Curd (The link is a page with links to all of my fruit curd recipes!).
Fun fact: while I didn’t use it for this pavlova, fruit curd is a popular topping - so your eggs can do double duty, if you like.
Just top the meringue with whipped cream, then spoon the curd on top.
The Sugar
This recipe uses super fine sugar, also known as castor sugar / caster sugar.
Castor Sugar is NOT icing sugar / confectioners' sugar, it’s just a finer grind of granulated sugar.
It’s also more expensive than I like to pay for sugar, so I make my own - just measure some regular sugar into a food processor, and blitz it a bit.
The idea is that finger sugar will dissolve in the egg whites faster / better.
Pro tip: Make extra caster sugar, to sweeten your whipped cream. (Optional).
The Acid
I use plain white vinegar in most of my pavlovas, as a default. It’s cheap, I always have some on hand, clear, neutral flavour.
It’s not the only acid that you can use, though - feel free to use the same amount of lemon juice, apple cider vinegar, or white wine vinegar if you prefer.
Flavour Extract
As with all Pavs, I recommend considering your choice of fruit when it comes to picking the flavour you’ll use in the pavlova and/or whipped cream.
For some types of fruit, I like to use Almond Extract - usually when I’m doing a lot of berries.
If I’m doing a lot of tropical fruit, I like to use Rum Extract.
Lemon Extract is another great option.
For that matter, cherry extract could be fun with it, though - depending on brand - that could commit you to a pink egg.
Or, you know... Pure Vanilla Extract works.
The big thing to keep in mind: Whatever you flavour your meringue with CANNOT be oil based, or your Pav will fail.
Everything Else
Rounding out this recipe, you will need:
Heavy Cream / Heavy Whipping Cream / Whipping Cream / Double Cream
Fresh Fruit and/or Fresh Berries
Cornstarch
Salt
... I just don’t really have anything to add, when it comes to these ingredients.

Pavlova Tips
Pavlovas are super easy to make, if you keep a few basic things in mind. Here are a few tips to help you successfully make a Pavlova:
1. Eggs are easiest to separate when cold, and easiest to whip up when they’re room temperature.
For best results, crack them right away when you take them out of the fridge, then cover the bowl and let it sit for a bit to warm to room temp. 10-15 minutes should be enough time, you don’t want to leave them out all day, as salmonella is a THING.
Honestly, if you have a good stand mixer - I LOVE my Kitchenaid! - you should be good to go, right out of the fridge.
If you’re using a hand mixer... I’d let them warm up.
2. When cracking and separating your eggs, be VERY CAREFUL to not get any yolk in your whites.
Any yolk at all - even a speck - will prevent your whites from whipping up as they’re supposed to. This is probably the most important part of the recipe to get right.
If you do get yolk in the whites, and can’t get it out... start from scratch. Seriously.
You can make a nice omelette from those whites, but you won’t be able to get a Pavlova out of them.
3. Fat is the enemy of meringue
For the same reason yolks will mess you up, you also have to be careful to not let fat, oil, grease, etc touch your meringue.
Make sure your mixer and bowl are clean, and use a baking sheet lined with greaseproof paper- do NOT grease it!
Also, when flavouring the meringue, be sure you’re not using an oil based flavour.
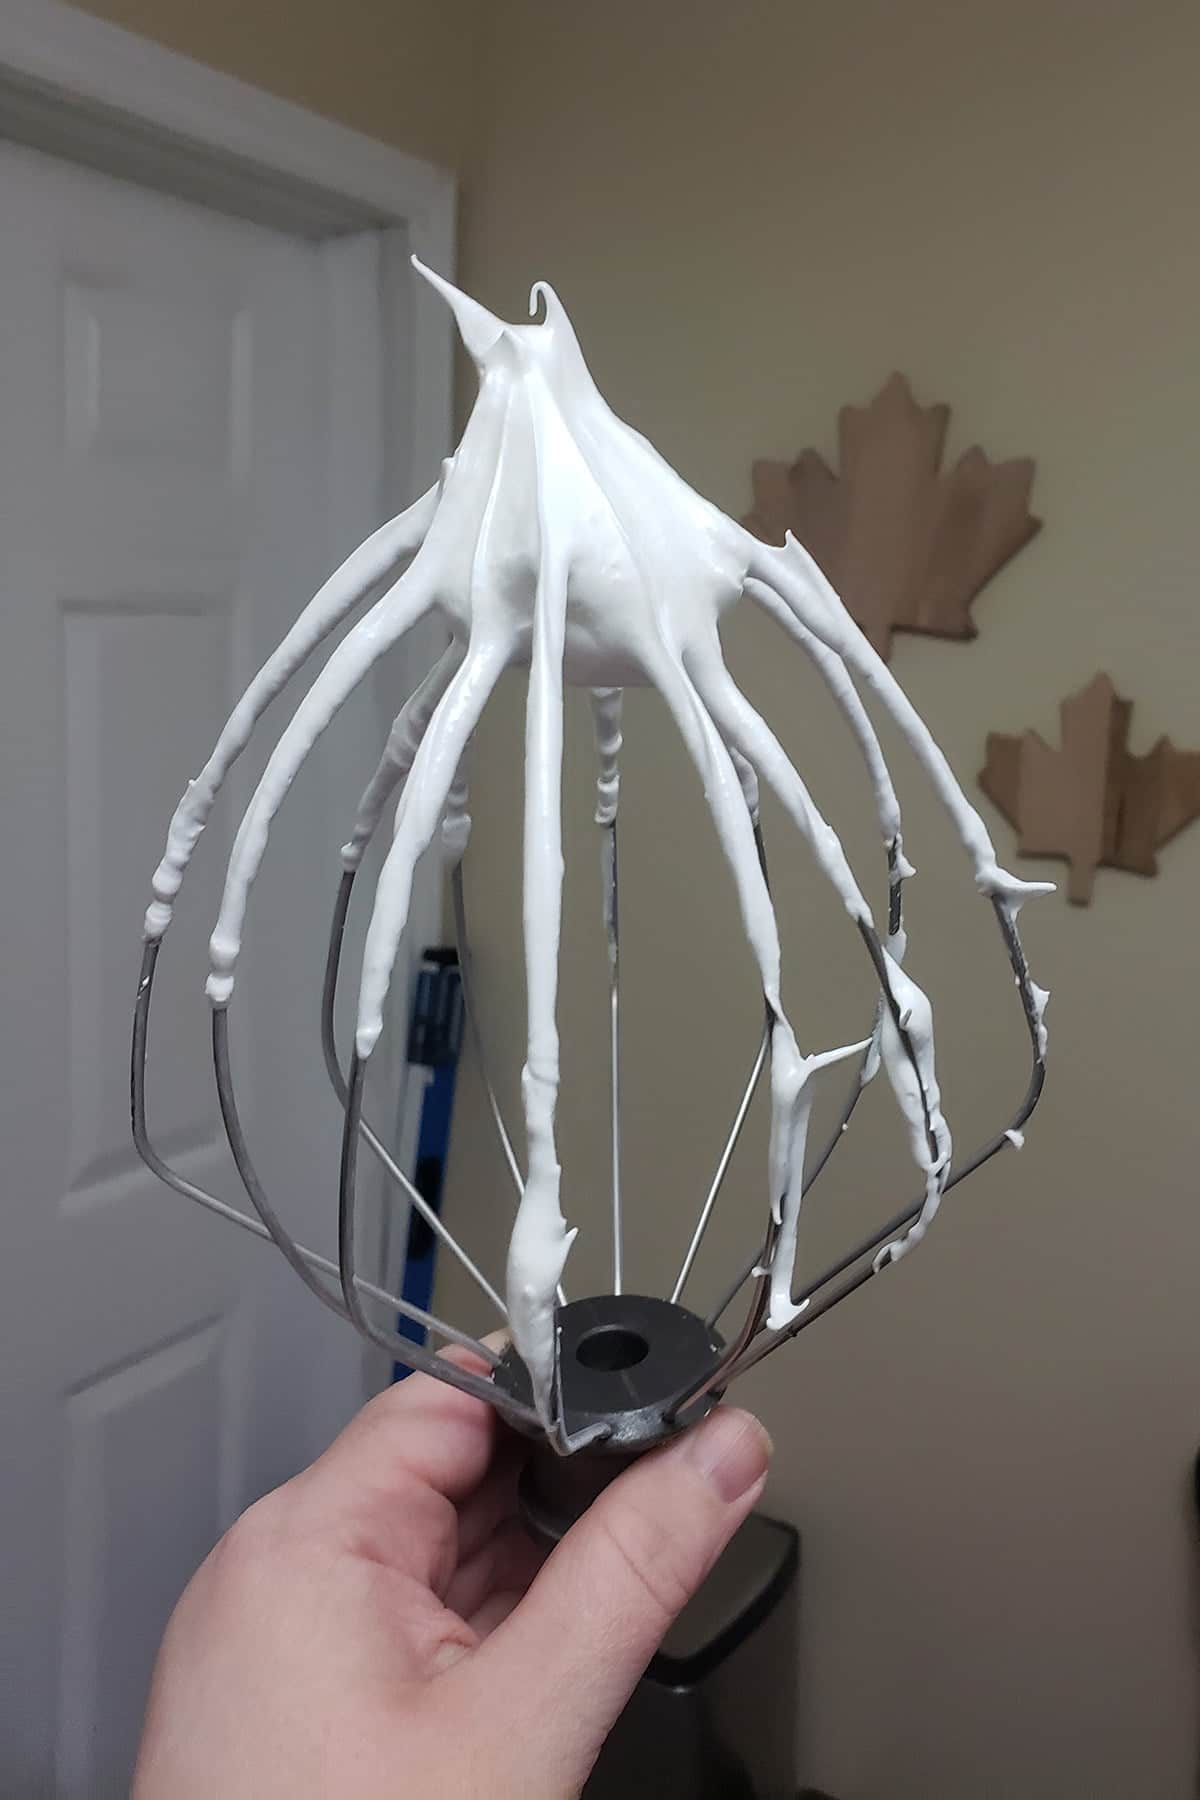
4. Don’t over-beat your egg whites
Over beating the egg whites can lead to a weeping meringue, and/or affect the texture. Get them to stiff peaks and that’s it!
5. Don’t open the oven door!
Once the pavlovas are in the oven, shut the door *and leave it shut* until you’re ready to use it. At the very least leave it in there for a few hours, for the sake of structural integrity.
I’ll usually leave it in there right up until I’m ready to assemble and serve it, as it’s nice and protected in there. Pavlovas are delicate and fragile and really, Murphy’s Law is a thing.
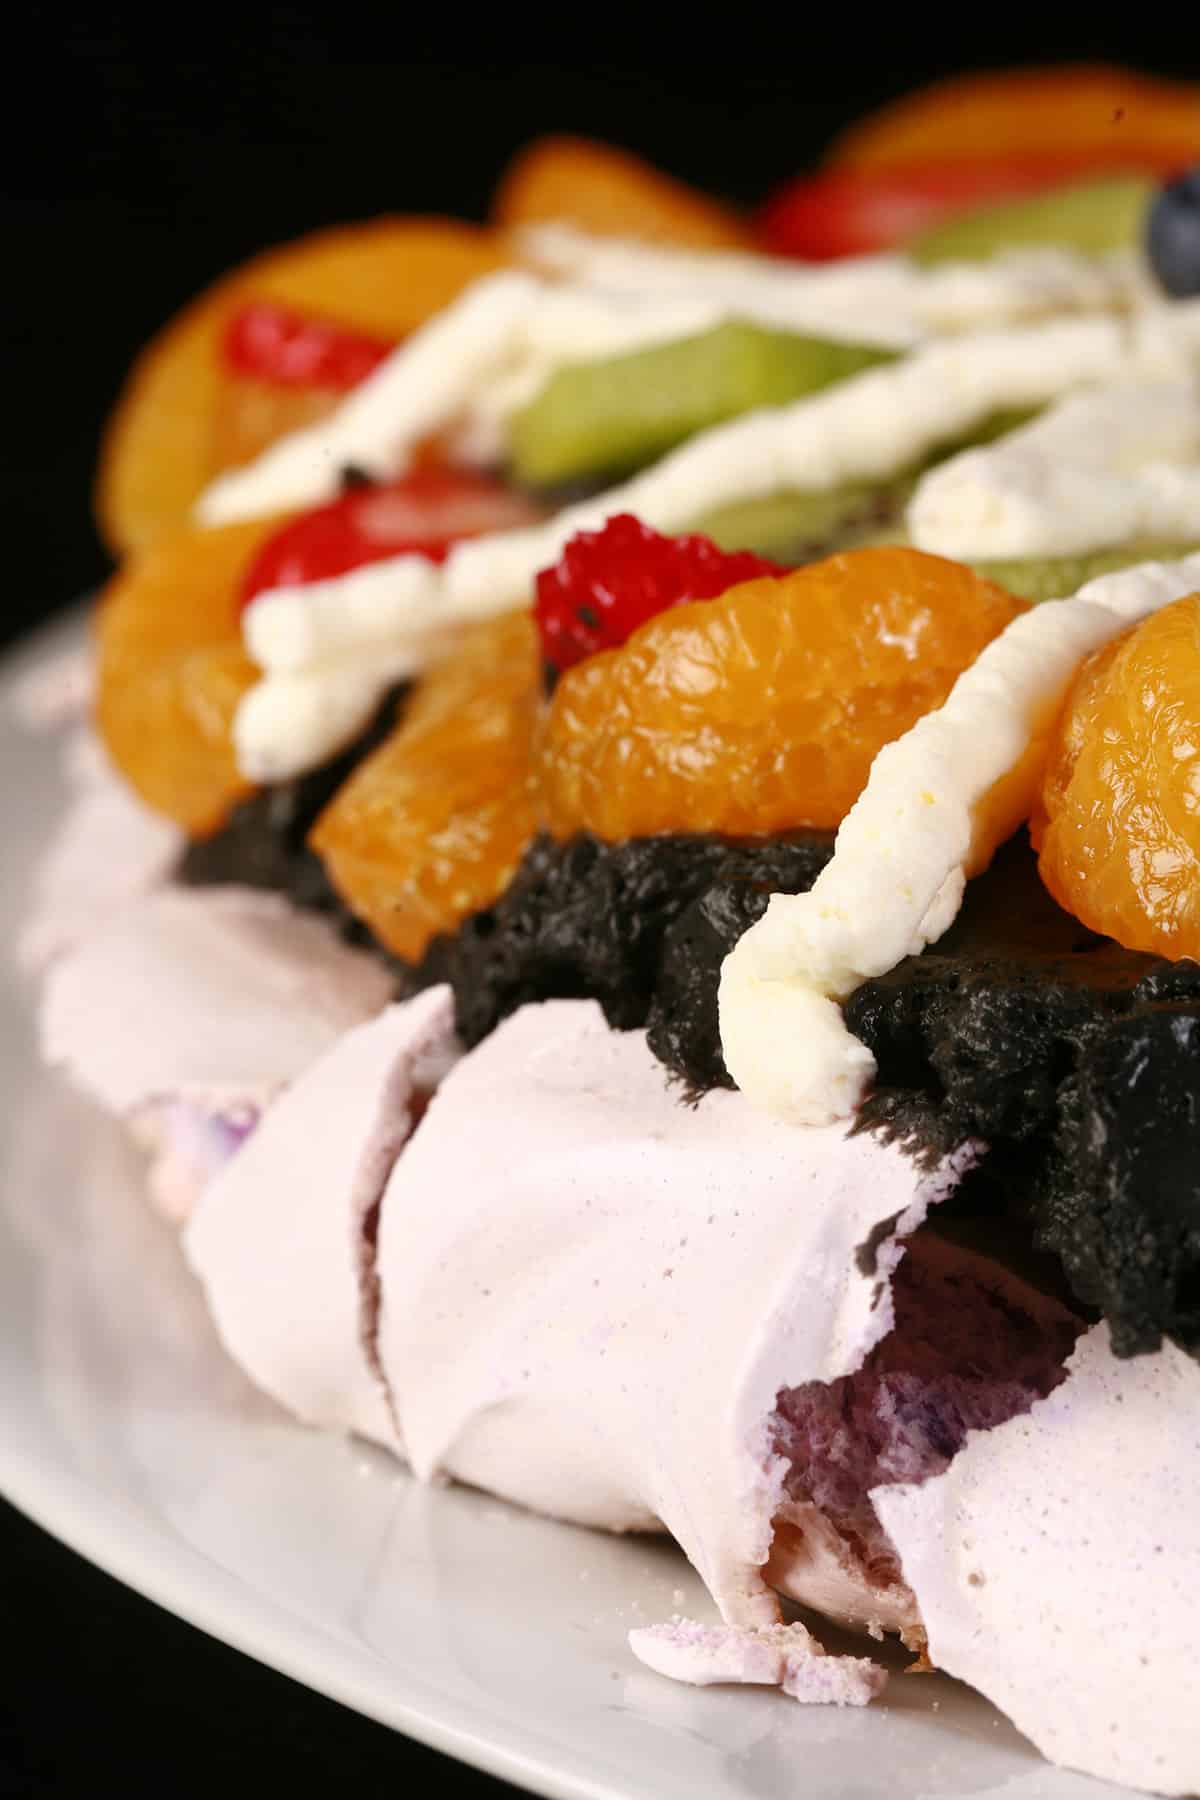
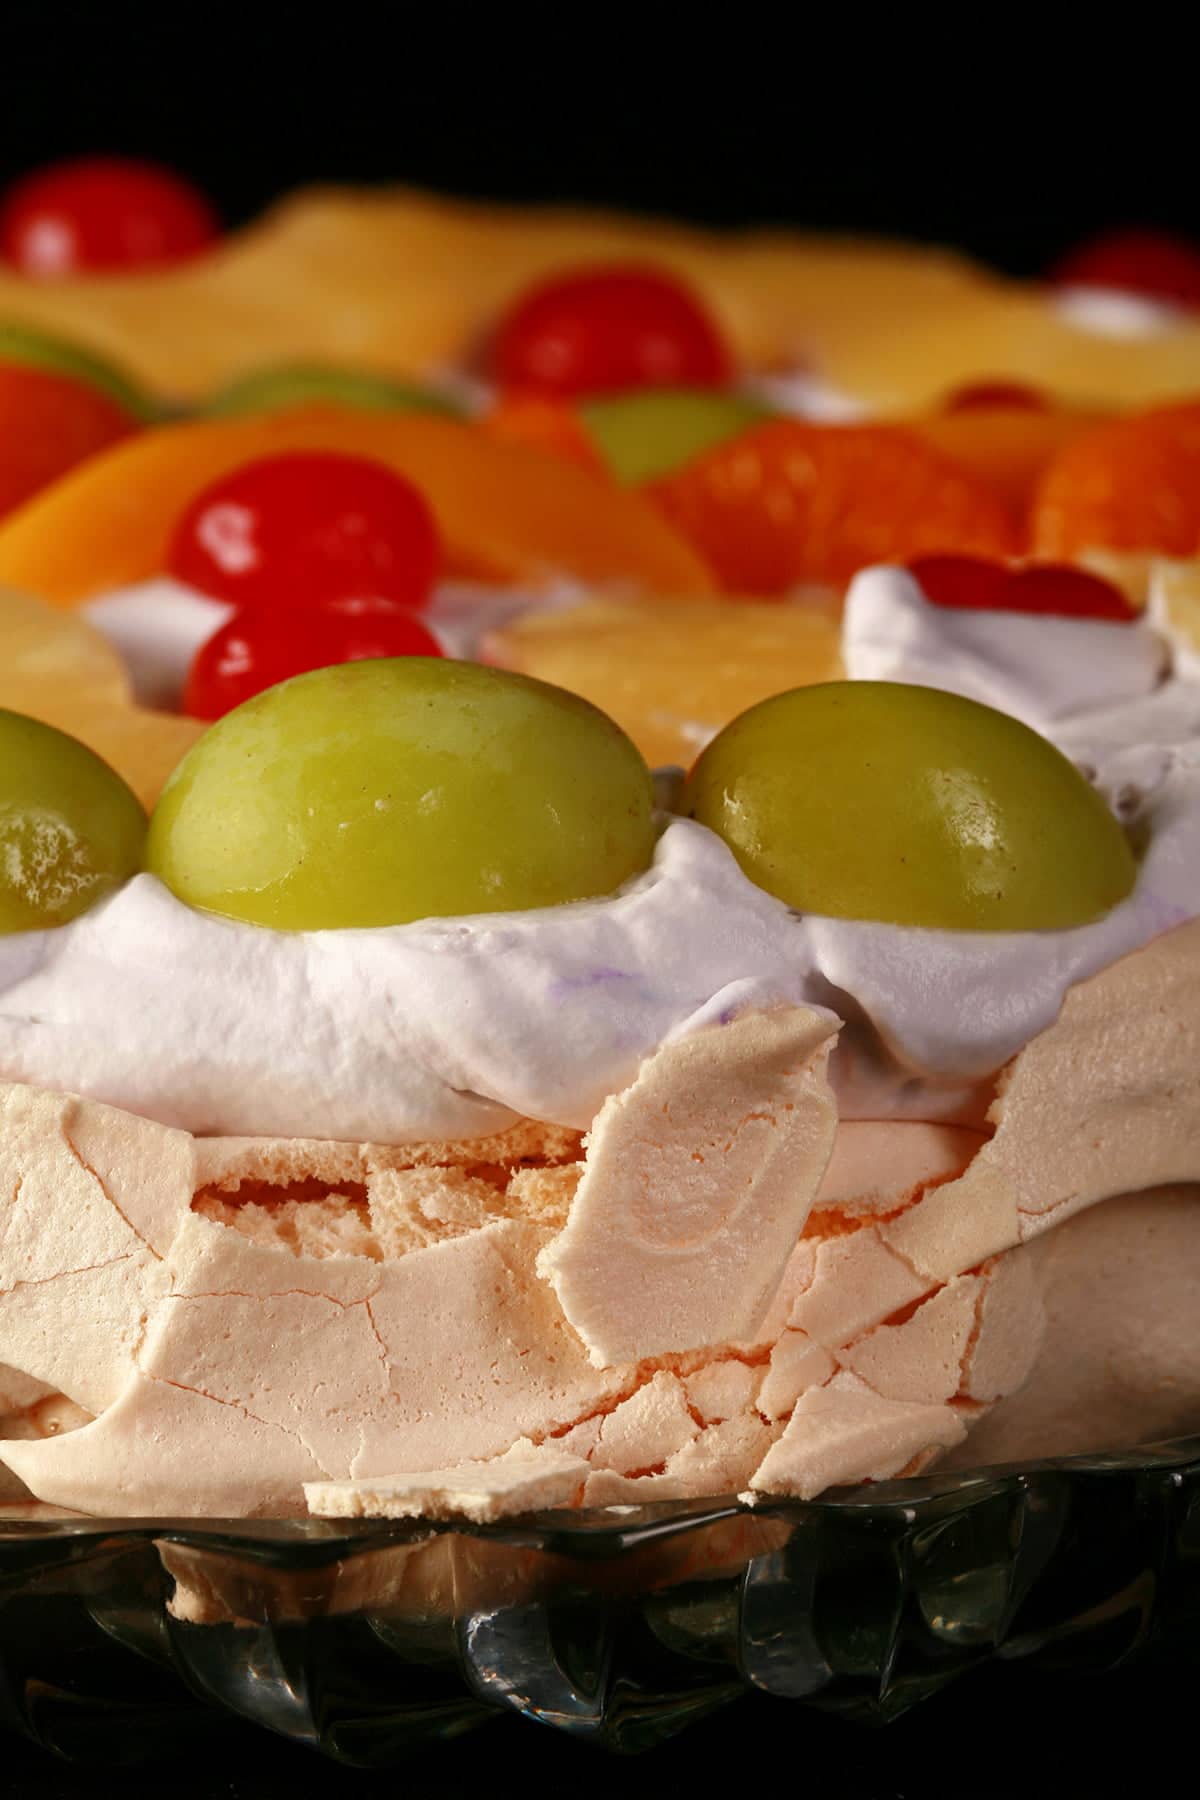
6. Understand that cracks are almost inevitable
Pavlovas crack - especially when you mound them up with whipped cream and fruit - and that’s just a fact of life. Embrace it.
Don’t mourn “perfection” lost, realize that it’s literally collapsing under the weight of its own awesomeness.
It’s all good!
7. Timing matters
Once you start whipping the cream for your Pavlova, the timer is started. Once you pile it on the pavlova, have your fruit good and ready to go, and be ready to serve it right away.
Whipped cream breaks down over time - unless you stabilize it with some gelatin. That’s neither here nor there, in this case, as Pavlovas need to be eaten pretty soon after assembling.
So, have everything ready to go when you make the whipped cream, serve it right away, and don’t leave anything behind - it really doesn’t hold up as leftovers.
8. Understand that “serving size” is a mere suggestion
Can this Pavlova serve 6 people (some say 8!)? Sure, when you’re listening to the same people who think that a serving size of dip is 2 Tbsp.
TWO TABLESPOONS!!!
Personally, I think this makes 4 good sized servings... 2 if you’re ambitious.
Let me be honest, my husband and I have split every Pavlova I’ve blogged, usually with no leftovers.

Making an Easter Egg Shaped Pavlova
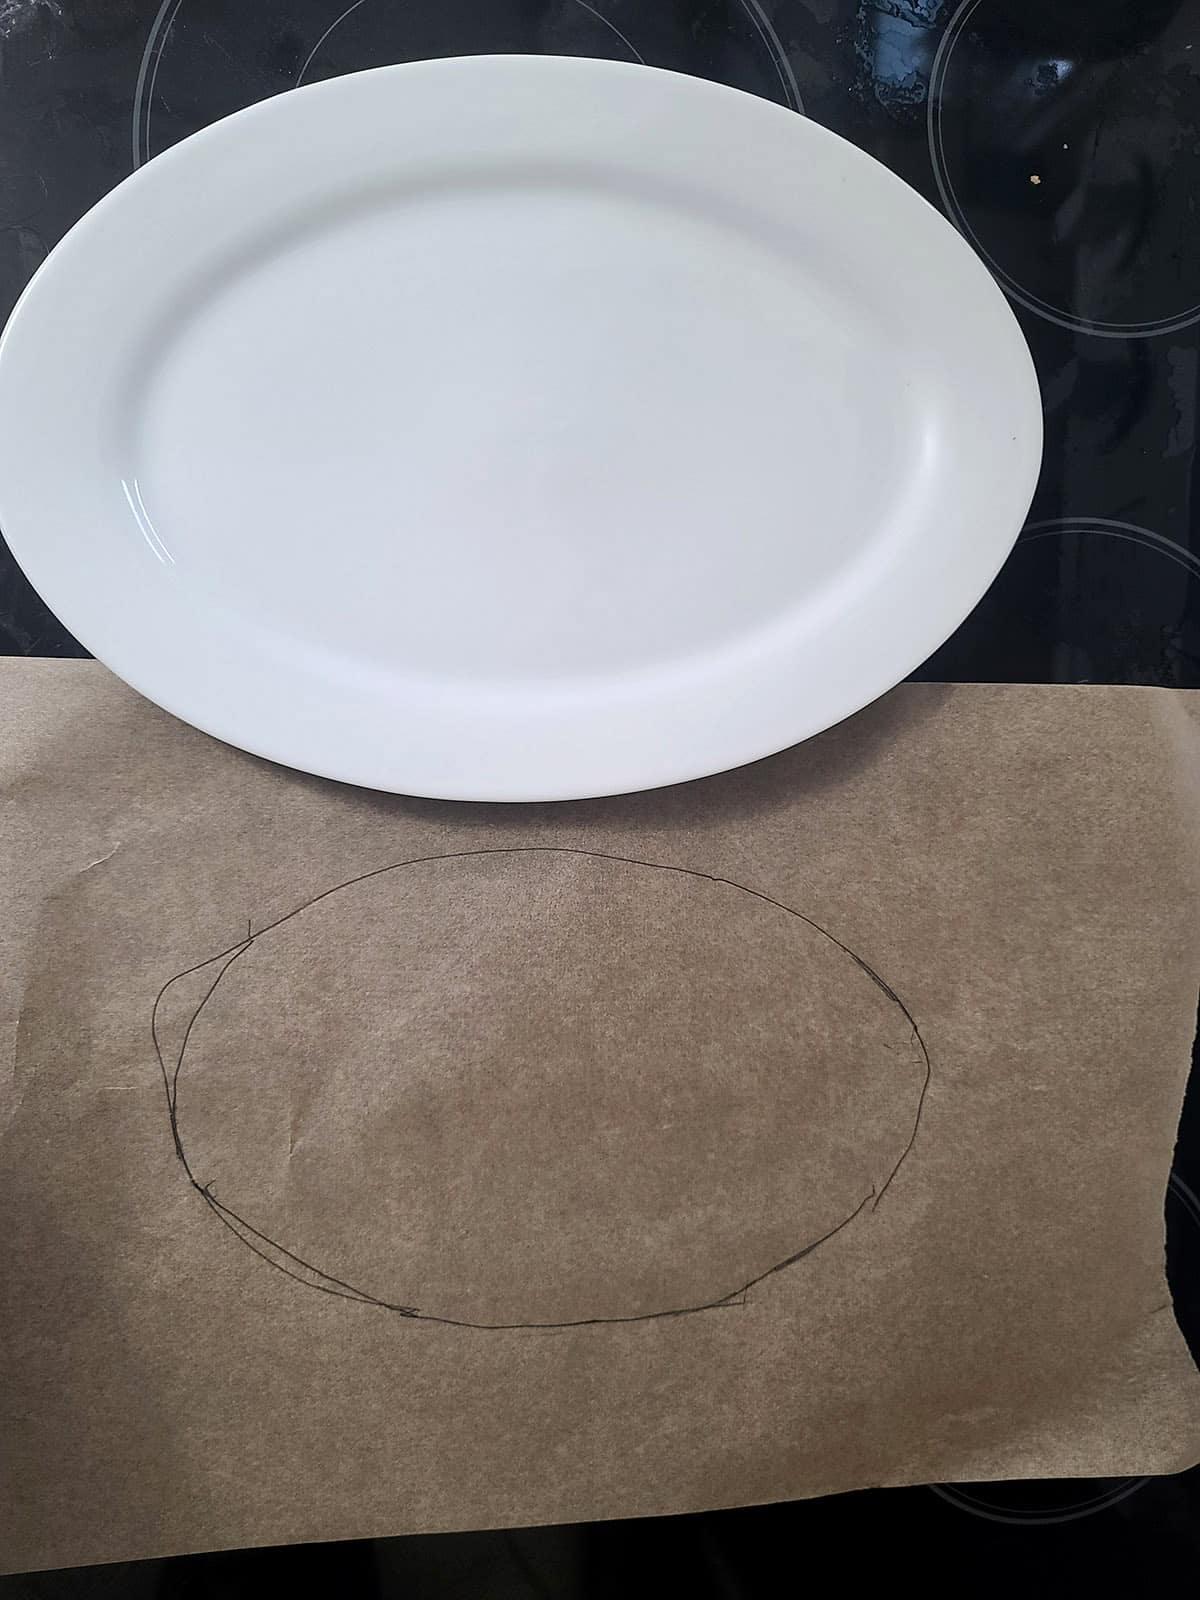
While you’re absolutely able to just freehand the egg shape, I like to draw a rough guideline, myself.
Partially because I have a habit of making my pavlovas too big for the plate they’ll be served on!
So, I recommend drawing even a rough egg shape onto your parchment paper. If not for shape, it helps for sizing!
I like to use a sharpie to draw the shape on, then flip it over so it’s marked side down on the baking sheet.
This keeps the marker out of your meringue, while still being able to see it through the parchment.

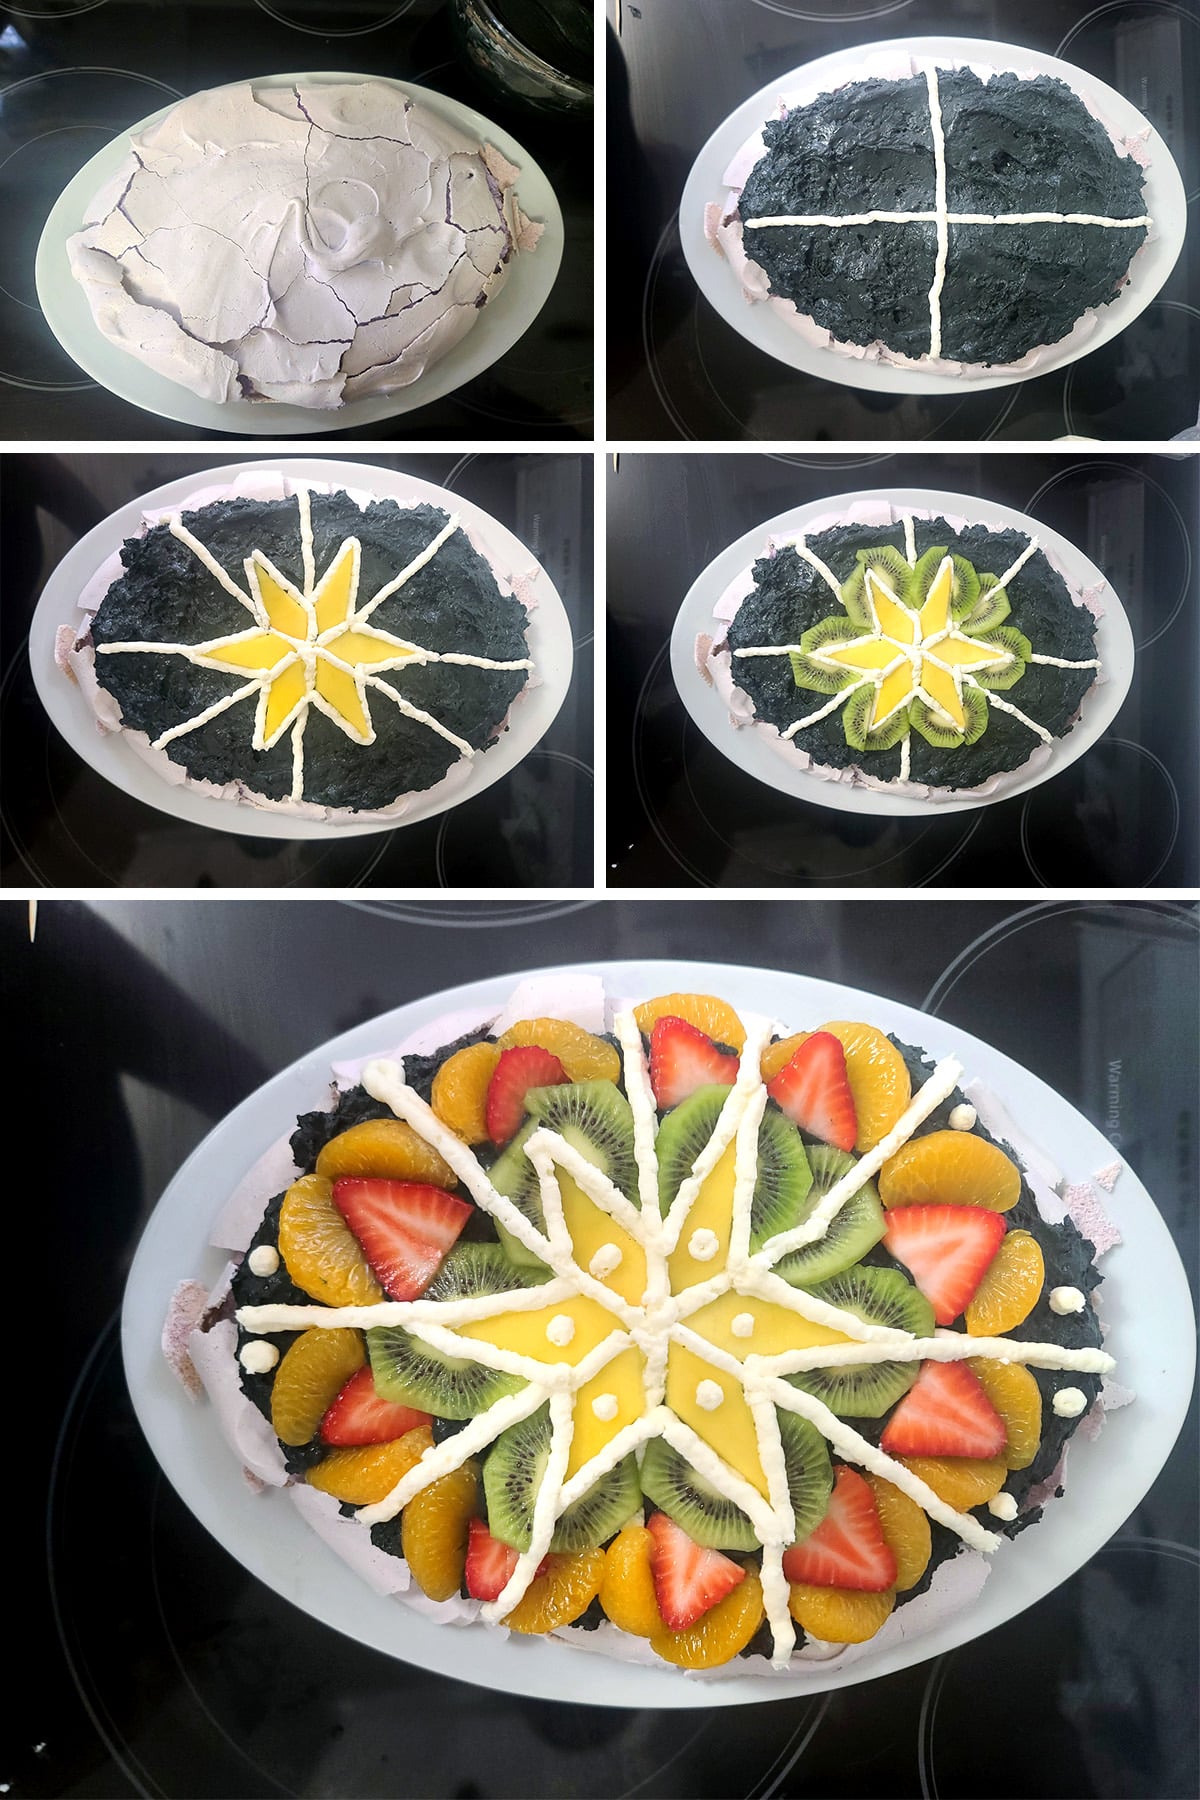
How to Make an Easter Pavlova
The full recipe is in the recipe card at the end of this post, here is a pictorial walk through.
Get Ready
Preheat your oven to 300 degrees F, set an oven rack to the middle of the oven.
Cut a piece of parchment paper to fit a large baking sheet.
Use a dark maker to draw an egg shape on the baking paper - I like to use the intended serving plate as a size / shape guide.
Note: Just keep in mind that your Pavlova will likely spread a bit during the baking process.
Place the baking parchment marker side down on your large baking tray, set aside.
Make The Meringue
Remove eggs from fridge, separate out the whites, and allow to warm to room temp (about 5 minutes).
Fit your stand mixer with the whisk attachment. Alternately, you can use a large bowl and an electric whisk / hand mixer.
In your mixer bowl, beat egg whites together with salt - on high speed - until glossy, soft peaks form.
Turn the mixer down to medium speed, and slowly add in the sugar a little bit at a time.
Once all of the sugar is added, turn the mixer back up to the fastest speed and continue whipping until stiff peaks form.
Turn off mixer, remove bowl from the stand, if you’re using a stand mixer.

If using paste food coloring, use a toothpick to add a bit to the meringue.
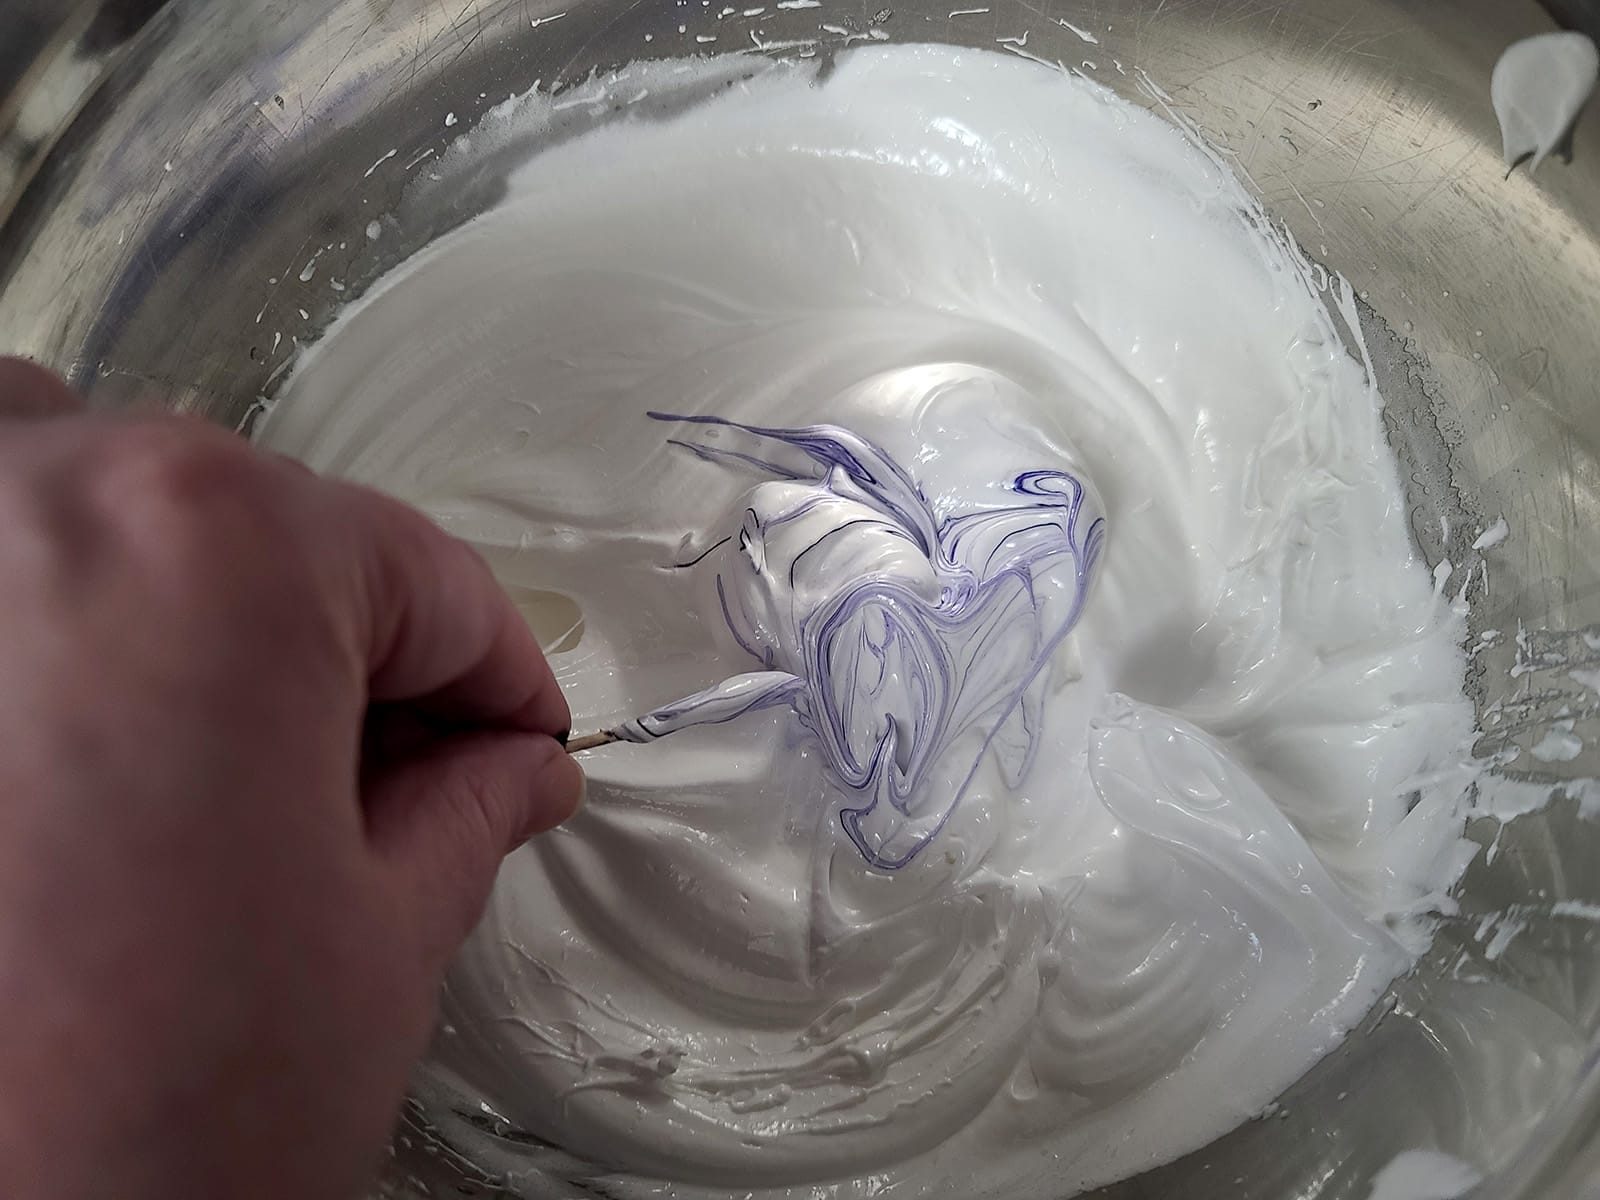
Sprinkle vinegar, cornstarch, extract, and food colouring (if using) over meringue, gently fold in till combined.

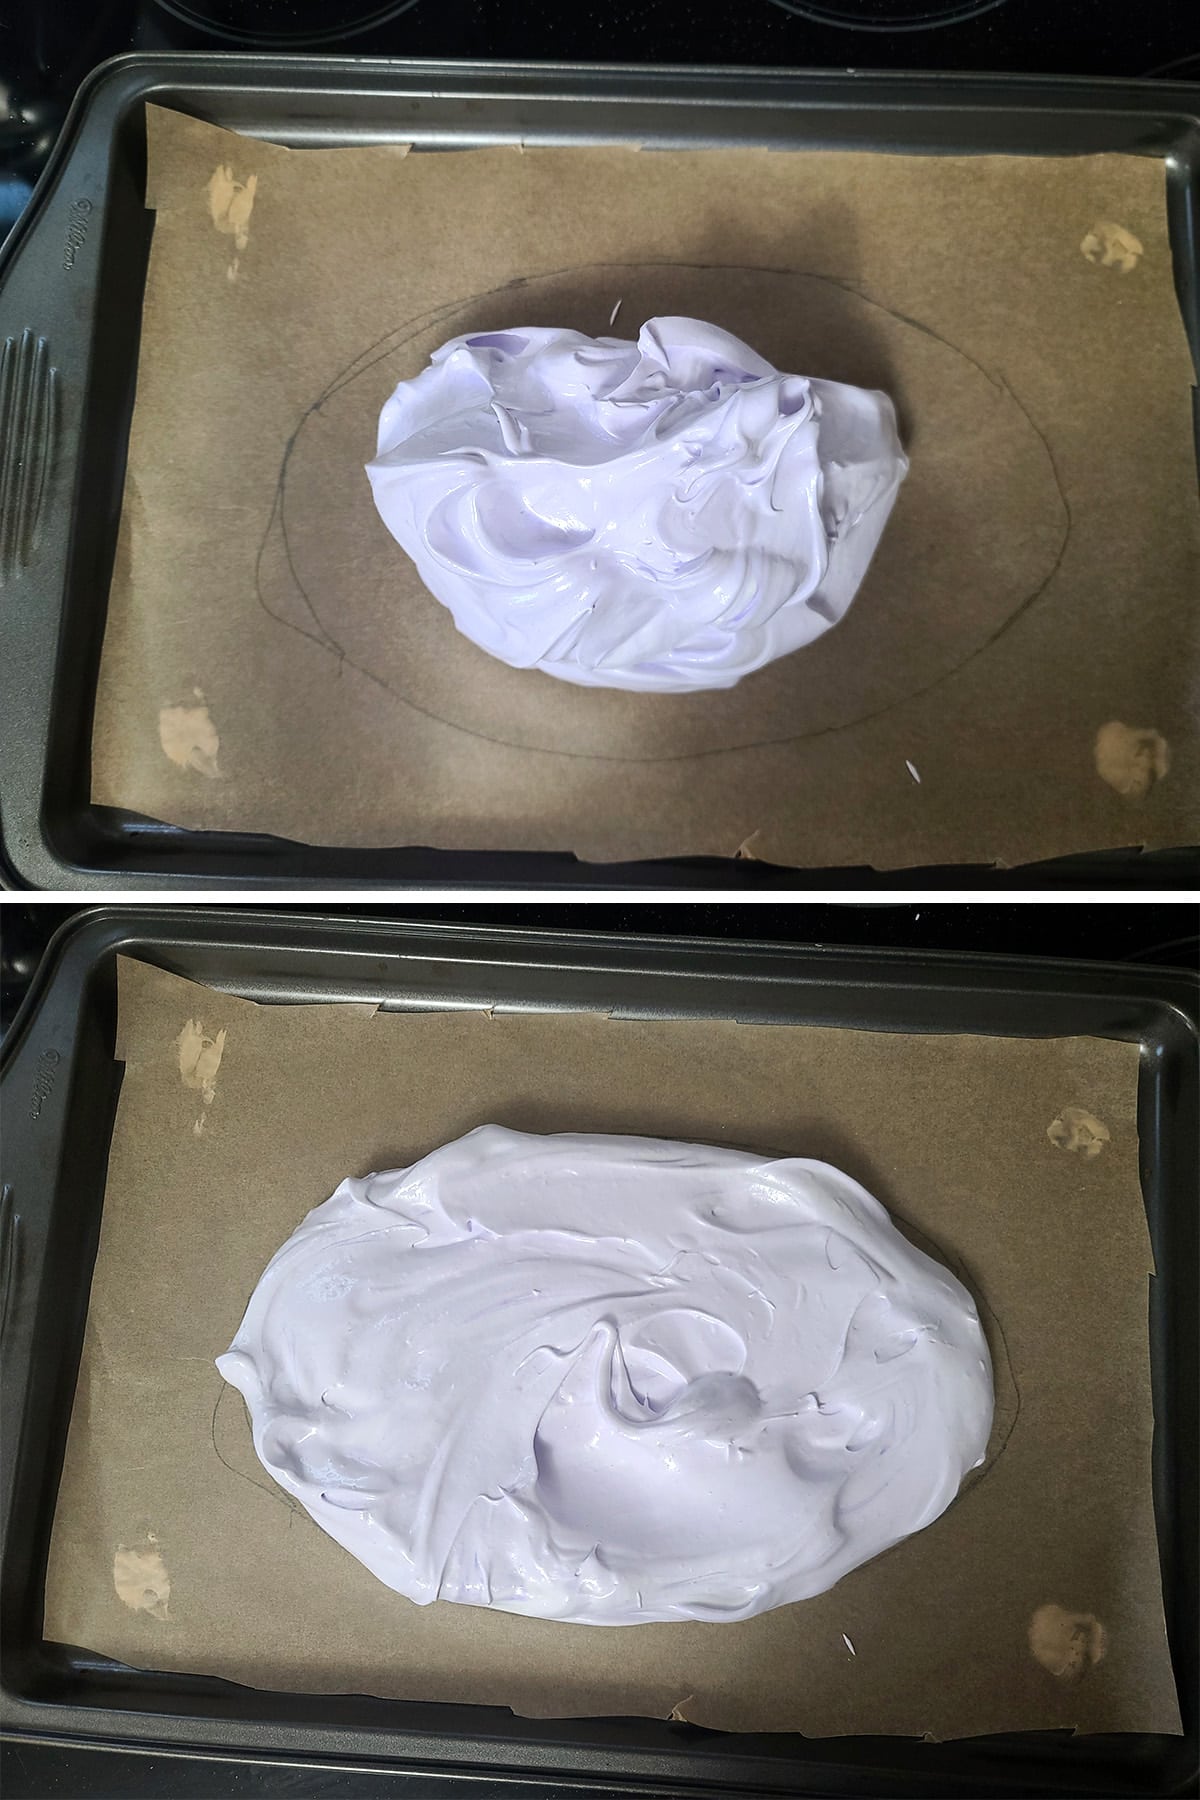
Use a spatula or the back of a spoon to spread the meringue out to an egg shape. I like to fashion a slight indent in the middle of the Pavlova.
Once your timer goes off, turn the oven off - without opening the oven door - and let the meringue cool in the oven for at least a couple of hours.
Note: The baking of the meringue can be done the day before, if needed!

Preparing the fruit, just before assembling the Pavlova.
Pavlova Assembly
Just before serving, prepare the heavy cream.
Measure the VERY cold heavy whipping cream into a metal or glass bowl and use an electric hand-whisk to beat it until thick and pillowy, scraping down the mixing bowl a few times, as you go.
I like my pavlovas a little sweeter, so I add about 2 tablespoon of sugar – add as much or as little as you want. Purists may not want to sweeten the cream at all!
I also like to add a little flavouring, again – optional. Once heavy cream is whipped to the desired thickness, add the flavour extract and food colouring if using, mix until well incorporated.

To do this, I added a little bit of cocoa powder (the darker the powder, the better) to my whipped cream, along with a judicious amount of black gel food coloring.
Ignore the weird texture - that’s not from the colouring, that’s because we ran into a timing issue and I made the whipped cream as Stabilized Whipped Cream to buy some extra time.
... unfortunately, we needed more time than I planned on, and it had set up too much before I used it, which means re-whipping to a weird texture.
Whatever, it still tasted great!

If you’re doing the pysanky thing, spoon the reserved white whipped cream into a piping bag.
Arrange drained fruit pieces on top, serve immediately!
Leftovers
Leftover Pavlova isn’t a thing. That’s quitter talk, and you’re not a quitter!
Seriously though, you want to get this thing GONE shortly after assembling. The moisture from the whipped cream and fruit will make the meringue soggy and unappealing, especially after storage in a fridge.
More Easter Content!
Looking for more fun / tasty ways to observe Easter? Here are a few suggestions for Easter baking and more:
Chocolate Zombie Easter Bunnies
Easter Creme Egg Brownies
Easter No-Bake Chocolate Pie
Easy Pysanky [Epic Easter Eggs]
Gluten-Free Paska [Easter Bread]>
Paska - Ukrainian Easter Bread
Paska Bagels
Pastel Easter Charcuterie Board
Southern Comfort Glazed Ham
Share the Love!
Before you chow down, be sure to take some pics of your handiwork! If you post it to Bluesky, be sure to tag us - @CelebrationGen. We're also on Pinterest, so you can save all your favourite recipes to a board!
Also, be sure to subscribe to my free monthly email newsletter, so you never miss out on any of my nonsense. Well, the published nonsense, anyway!
Finally, if you love this recipe, please consider leaving a star rating and/or a comment below, and maybe even sharing this post on social media!


Easter Pavlova [Easter Egg Pavlova]
Equipment
- Parchment Paper
- Baking Sheet
Ingredients
The Meringue
- 4 Large Egg Whites
- Pinch Salt
- 1 cup Super Fine / Castor Sugar *
- 2 teaspoon Vinegar
- 1 teaspoon Cornstarch
- 1 teaspoon Flavour Extract of choice NOT oil based!
- Food colouring Optional
The Whipped Cream
- 1 ¼ cup Heavy Cream
- 1-2 tablespoon Granulated Sugar optional
- 1 teaspoon Flavour extract of choice
- Food colouring optional
The Topping
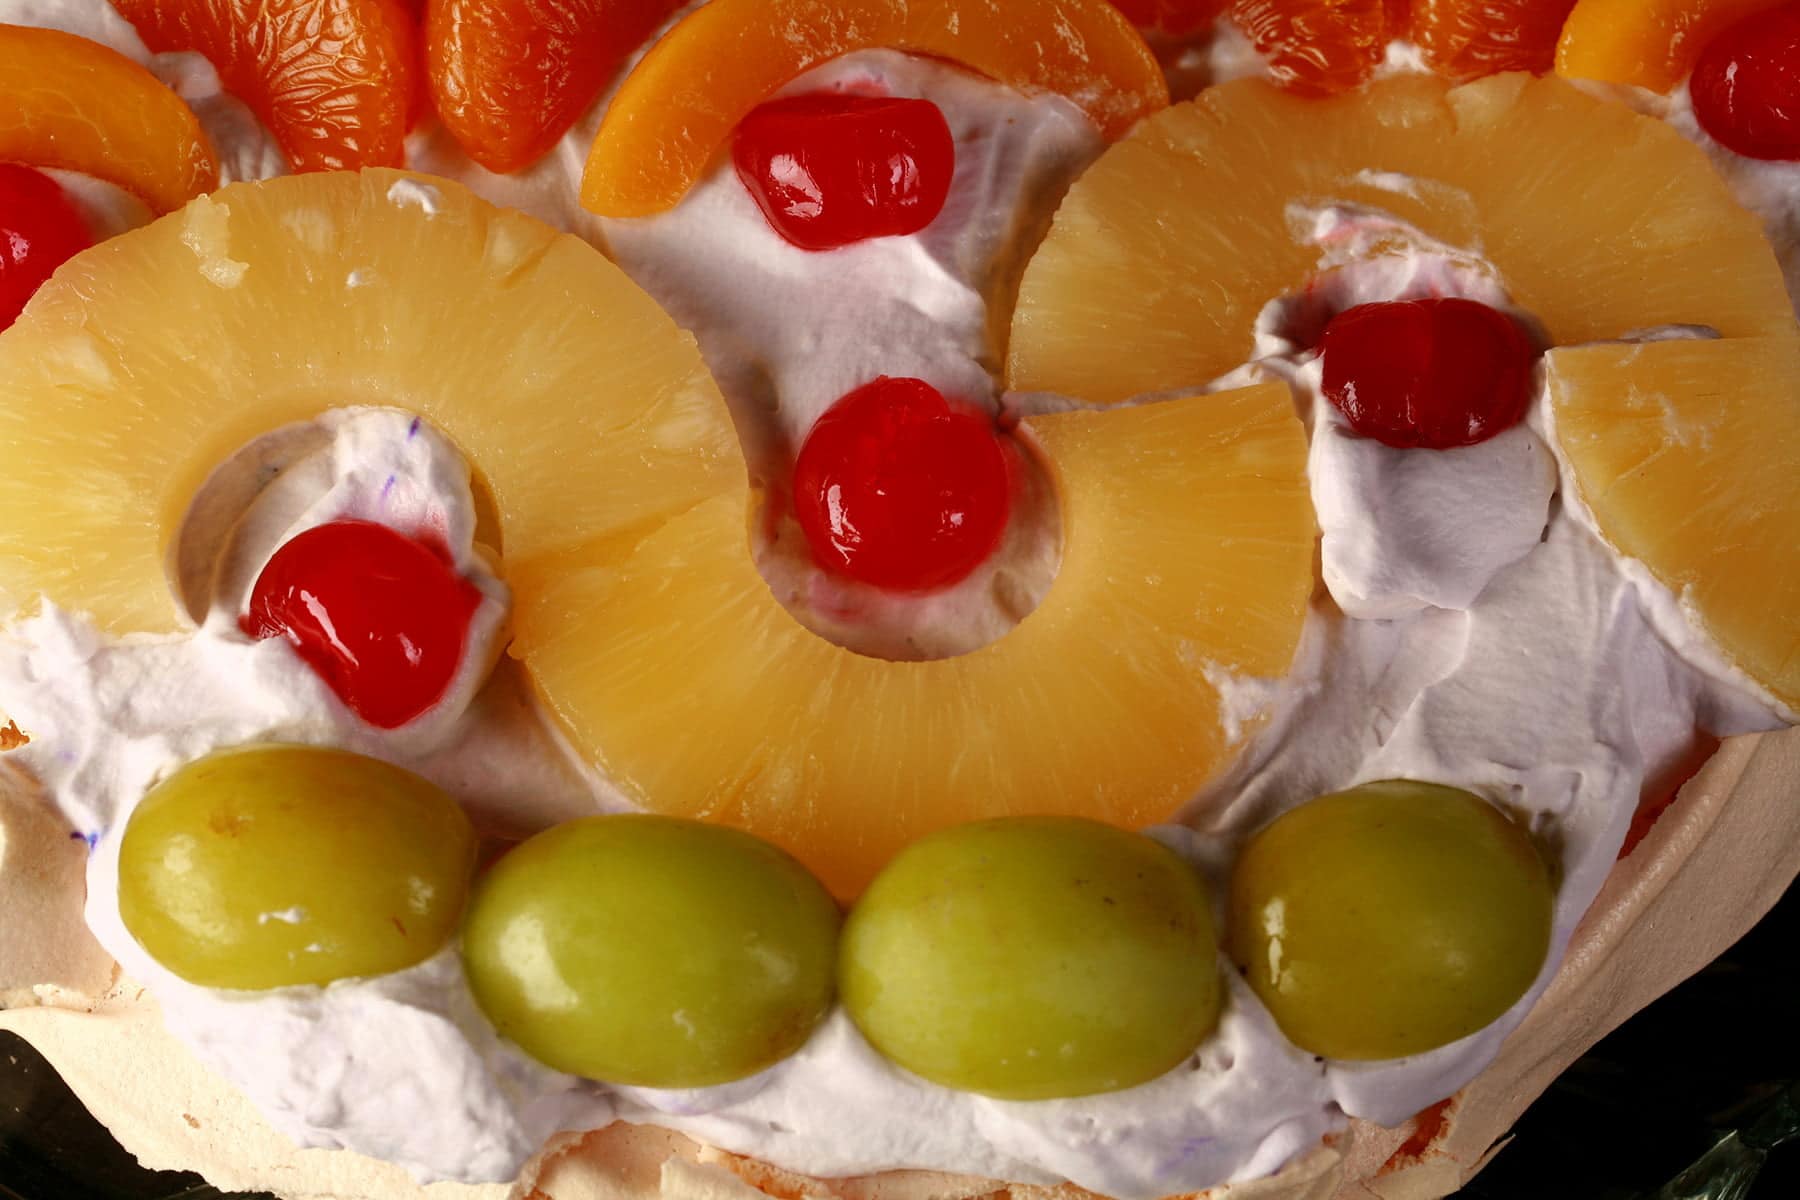
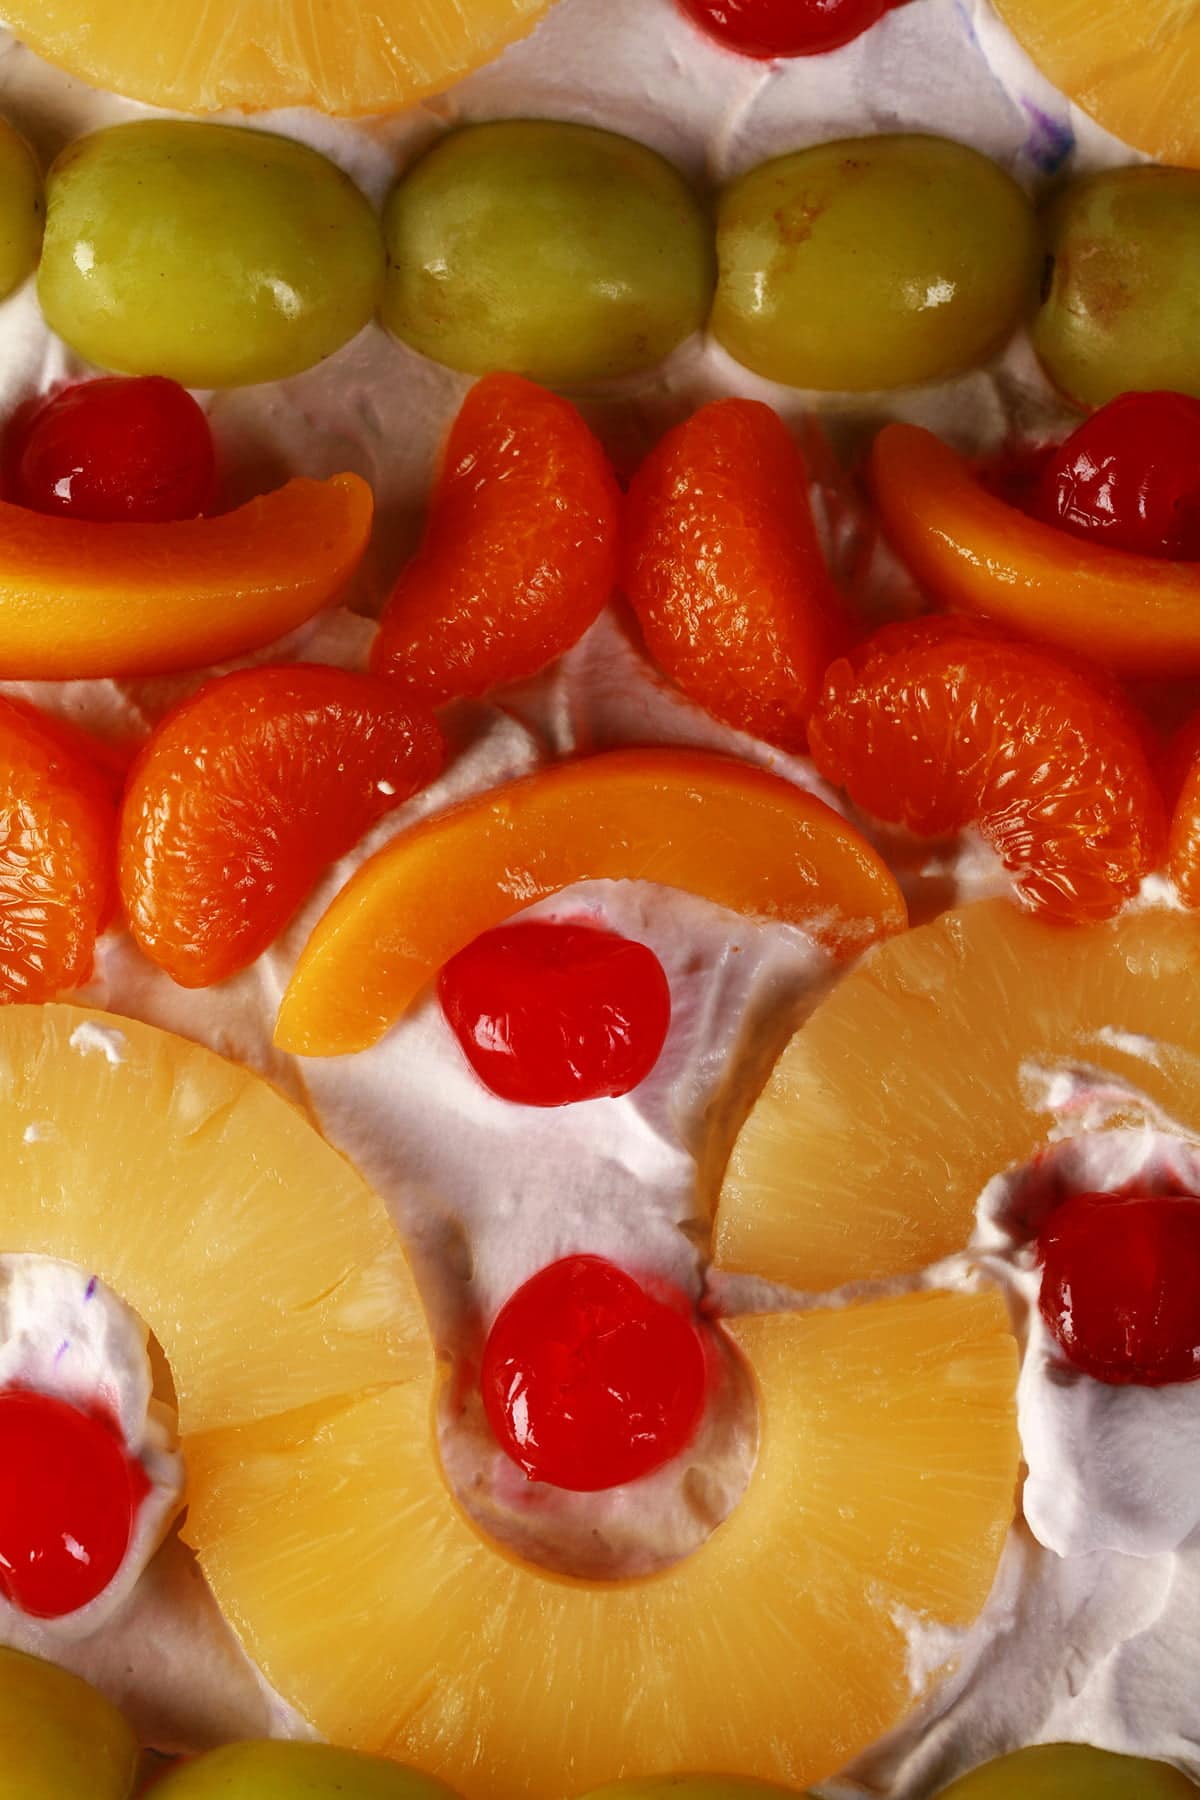
- Various types of canned fruit We used maraschino cherries, peaches, pineapple rings, and mandarin orange segments.
- Seedless grapes
- Other fresh fruit, as desired.
Instructions
The Meringue
- Get ready: Preheat your oven to 300 degrees. Line a baking (cookie) sheet with parchment paper, and set aside. Fit your electric mixer with the whisk attachment.
- Remove eggs from fridge, separate out the whites, and allow to warm to room temp (about 5 minutes).
- In your mixer bowl, beat egg whites together with salt until glossy peaks form.
- Slowly add in the sugar, and continue whipping until stiff peaks form. Turn off mixer, remove bowl.
- Sprinkle vinegar, cornstarch, extract, and food colouring (if using) over meringue, gently fold in till combined.
- Heap meringue onto the center of your baking sheet.
- Use a spatula to spread the meringue out to an egg shape.
- Put the baking sheet into your oven, and turn the temperature down to 250 degrees. Bake for 1 hour and 20 minutes.
- Once your timer goes off, turn the oven off and let the meringue cool in the oven for several hours. The baking of the meringue can be done the day before, if needed!
Assembly
- Just before serving, prepare the heavy cream.I like my pavlovas a little sweeter, so I add about 2 tablespoon of sugar – add as much or as little as you want. Purists may not want to sweeten the cream at all! I also like to add a little flavouring, again – optional
- Once heavy cream is whipped to the desired thickness, add the flavour extract and food colouring, mix until well incorporated.
- Mound the whipped cream on your pavlova, gently spreading it evenly over the top.
- Arrange drained fruit pieces on top, serve immediately!
Notes
Nutrition
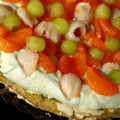
Older Photos
This post was recently updated with all new photos. Here are the originals, for posterity.


Leave a Reply