

DIY Recycled Wood Slice Pathway
Originally published July 29, 2013. Updated on 7/30/2021

If you have a fallen tree laying around, consider using it to make this Recycled DIY Wood Slice Garden Path Natural upcycling at its finest!
Adapting a "new" home (built in 1928, but new to us!) to suit your own style is usually a big ordeal... but that went doubly for us, when we were hit by the tornado right after moving in!
After the debris had settled, most of the cleanup was done, and we had a new roof over our heads, it was time to do some finer cleanup, repair, rebuild, and redo.
The side yard was a PROJECT - it was where most of the debris had landed, the small amount of planting we'd done pre-tornado was trampled by the roofers... just a huge mess.
Add to that the fact that neither of us had done any sort of landscaping design before? We were sort of floundering!
We started working on the side yard last summer, one year after the tornado.
Milling Black Walnut
It was around this time that we were also trying to figure out what we would do with the remnant logs from our downed black walnut.
We'd taken the biggest logs to a mill, and had some smaller (too small for the mill) logs milled in our yard.
After all of that, we still had some more logs that were either too small in diameter, too short, or too irregular for the portable wood mill.
It had been such a gorgeous tree, and the wood was WAY too beautiful to let any of it go to waste.

After the Tornado
With the bulk of the wood being processed and spoken for already - mostly for rebuilding the kitchen - these few leftover logs were something we could play around with a bit.
Redesigning the Side Yard
I had the idea of slicing them all up into disks and using them to redesign the side yard.
We'd already decided that we wanted it to be lush with edible fruits, but hadn't really come up with a solid design, or even really tossed around ideas yet.
I thought it would be a pretty, rustic-looking walkway to separate gardens on both sides of it... and the idea looked fabulous in my head!
Porter was a bit hesitant, and needed to be talked into it. He wasn't sure we'd have enough wood, and wasn't able to picture the outcome like I did.
So, I did the math - I measured out the ideal pathway, and figured out how many square inches we were talking.
Then, we figured out the average diameters of the logs we had left, and worked out how many square inches of coverage we would have, when slicing them into 3" disks.
There would be enough, so my husband agreed to go ahead with it.
While this looks like a huge project, it took about a day and a half of work, with the two of us doing it ourselves.
We love the results, and here's how we did it:
How to Make a Wood Slice Pathway
Clearing it Out
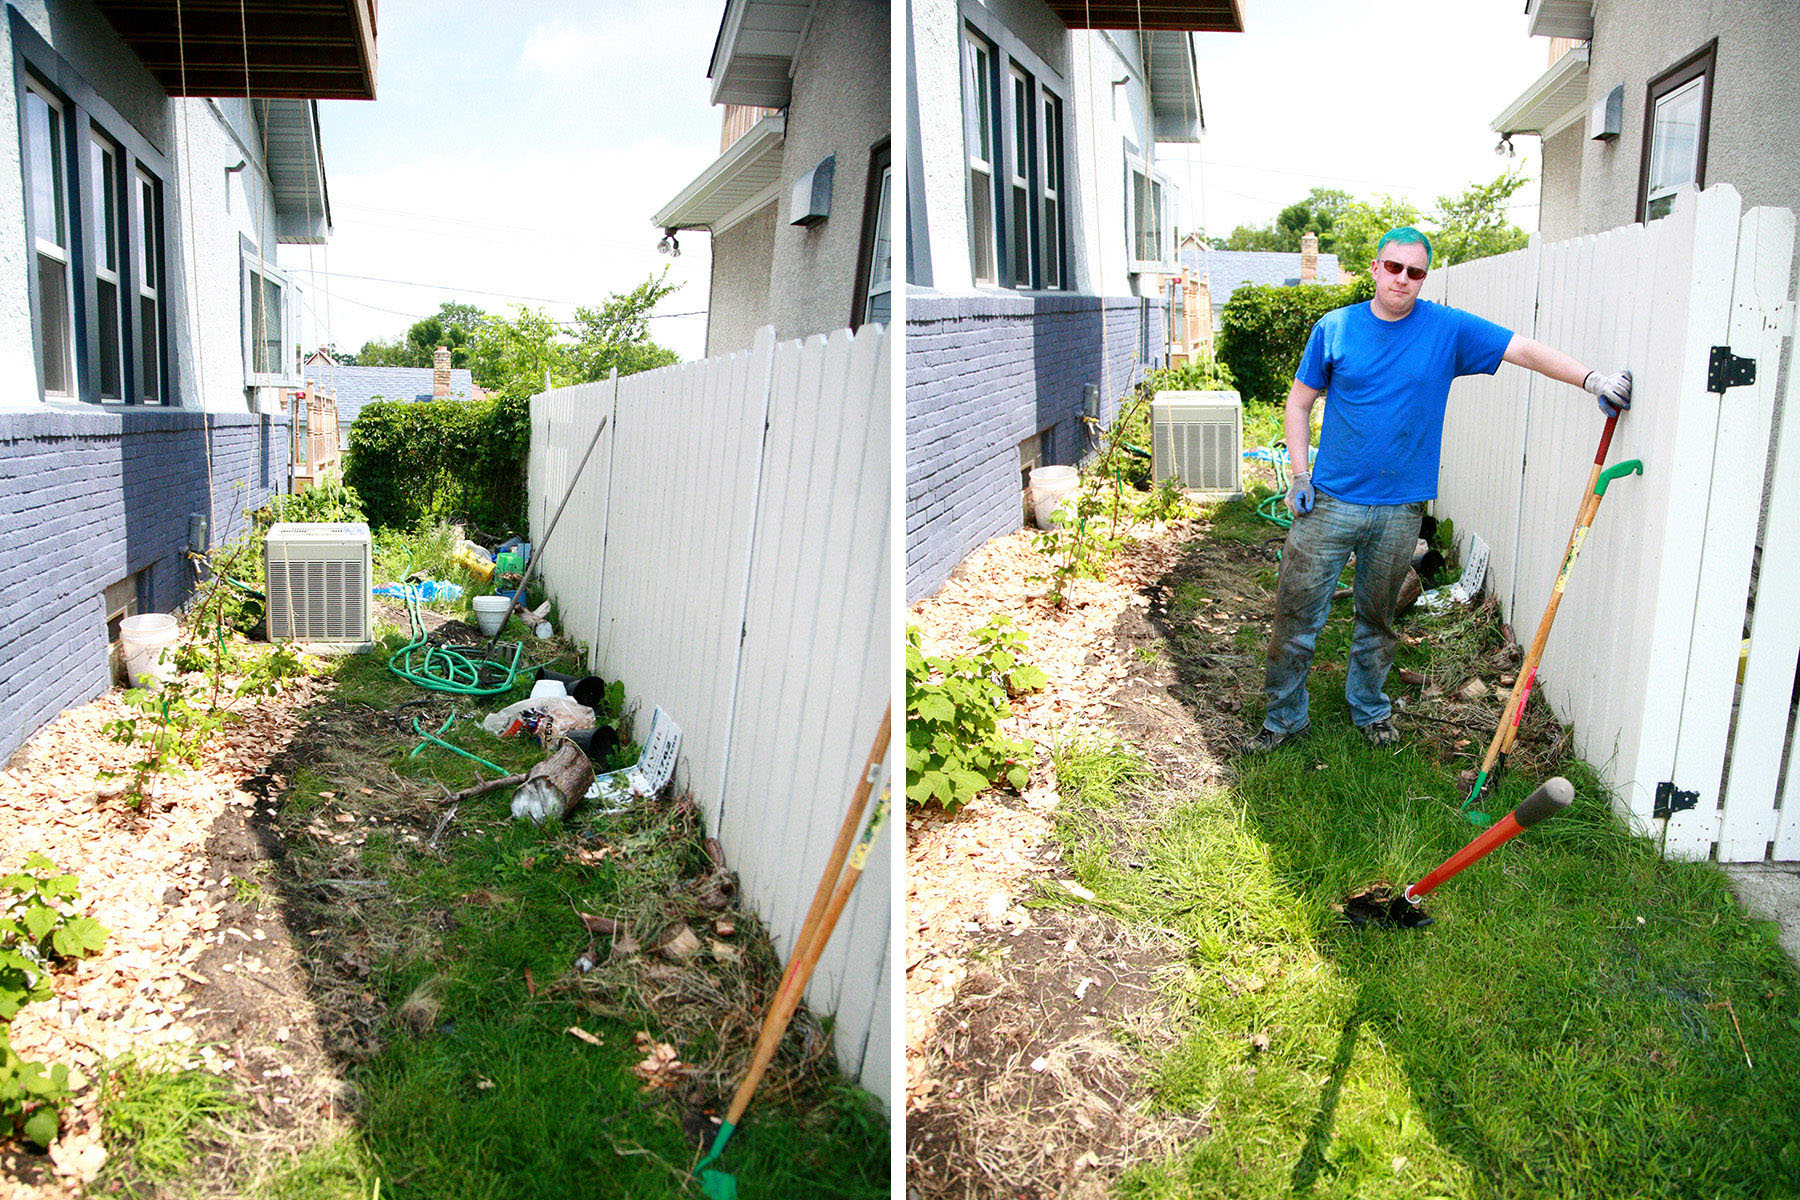
This is what we started with at the beginning of the weekend.
The bulk of the tornado debris had been cleared, but we still had some construction debris in there.
We had already planted 3 or 4 raspberry bushes along the side of the house, and had covered the soil in that area with cedar mulch.
As a first step, we completely cleared the area of any debris, garbage, and any large pieces of broken glass.
Clearing & Preparing the Land

Next, we pulled up the sod from the entire area, aside from the section with the raspberry bushes.
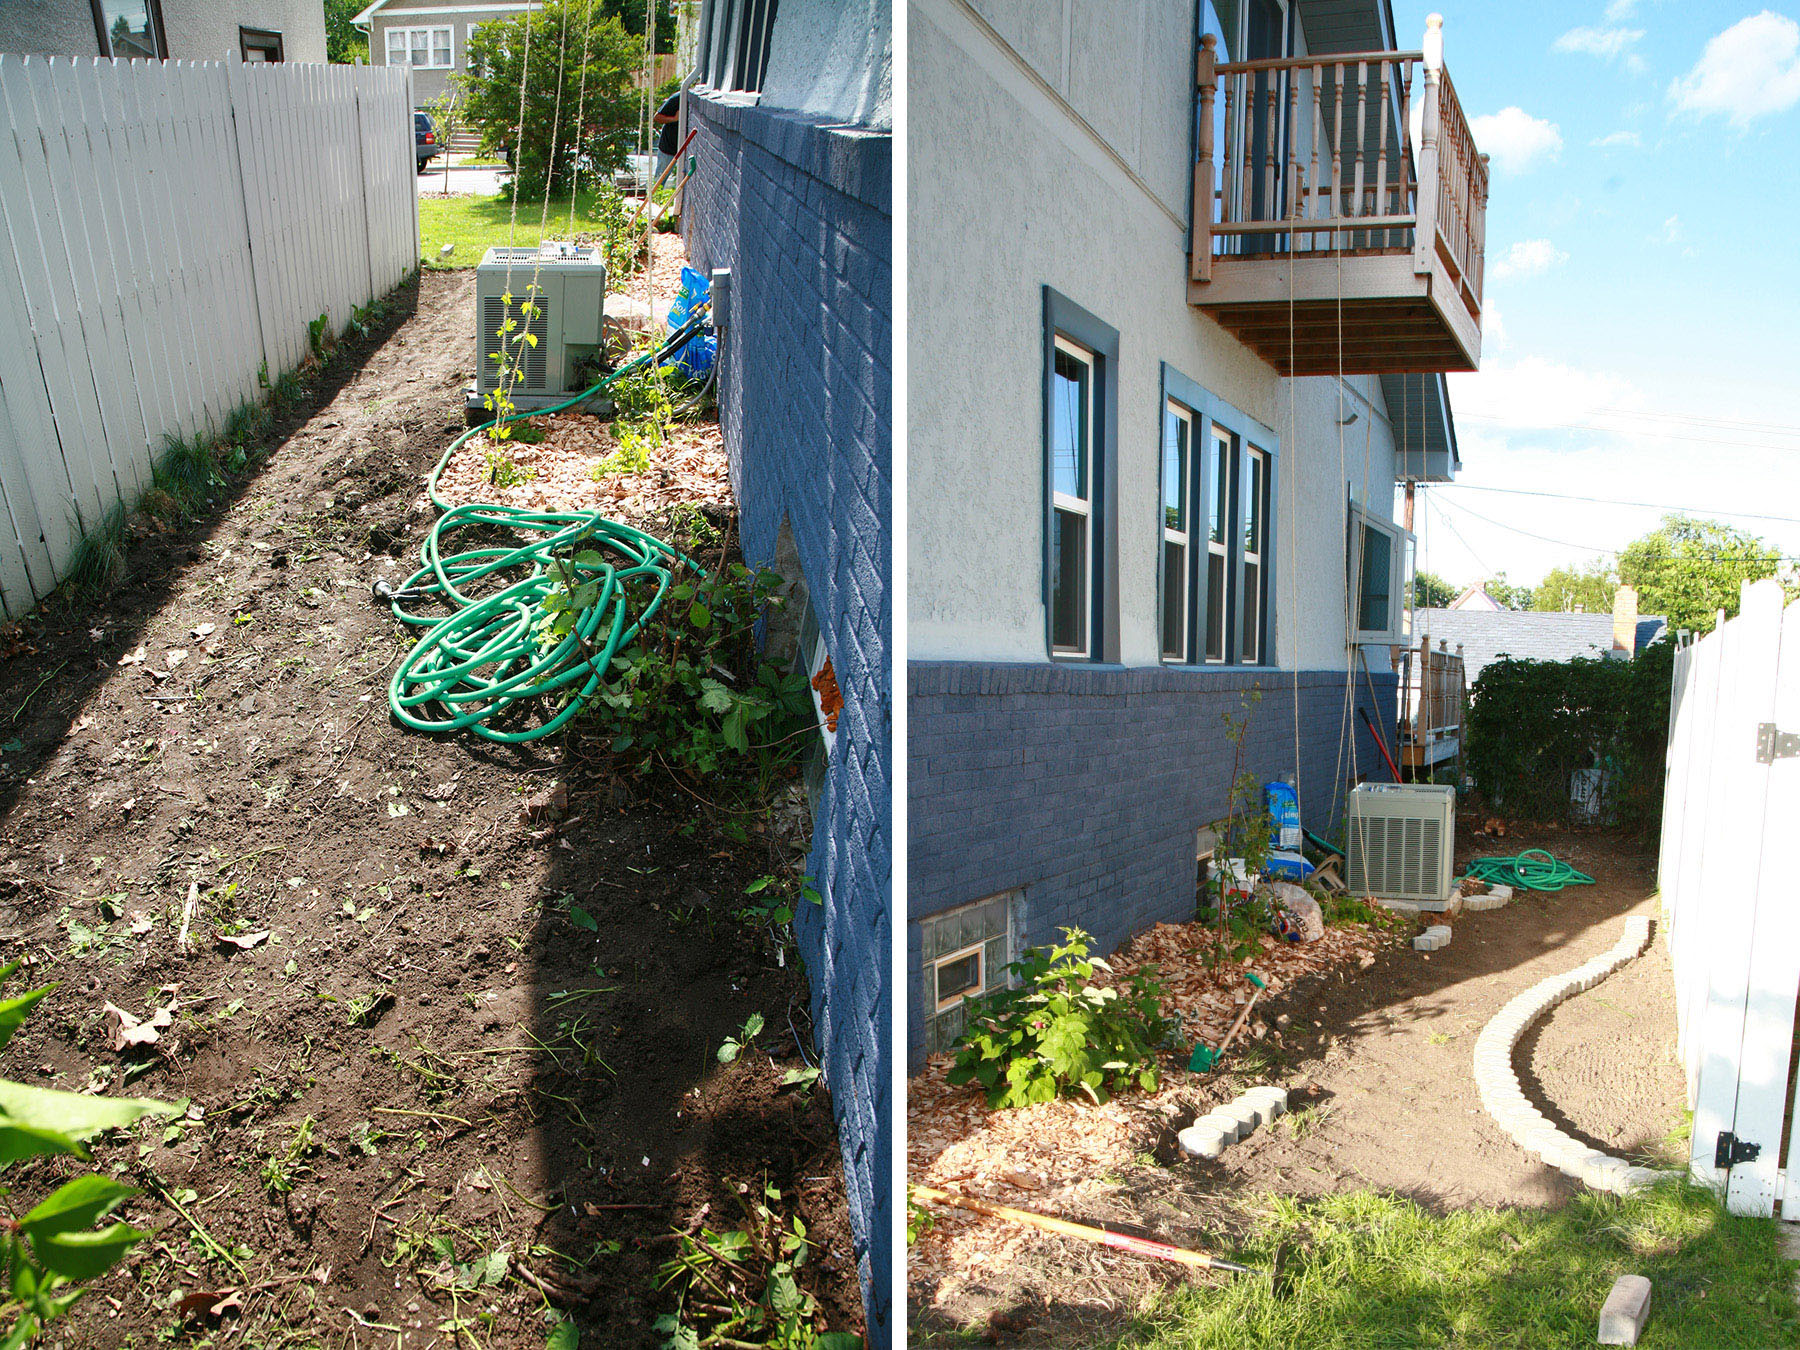
Once all of the sod was removed, we raked and trampled the ground to ensure a level base for what we were doing.
Laying the Borders, Building the Garden
With a flat work surface to start laying everything out on, I started laying out the various garden sections, creating a wavy path with cement edging pavers.
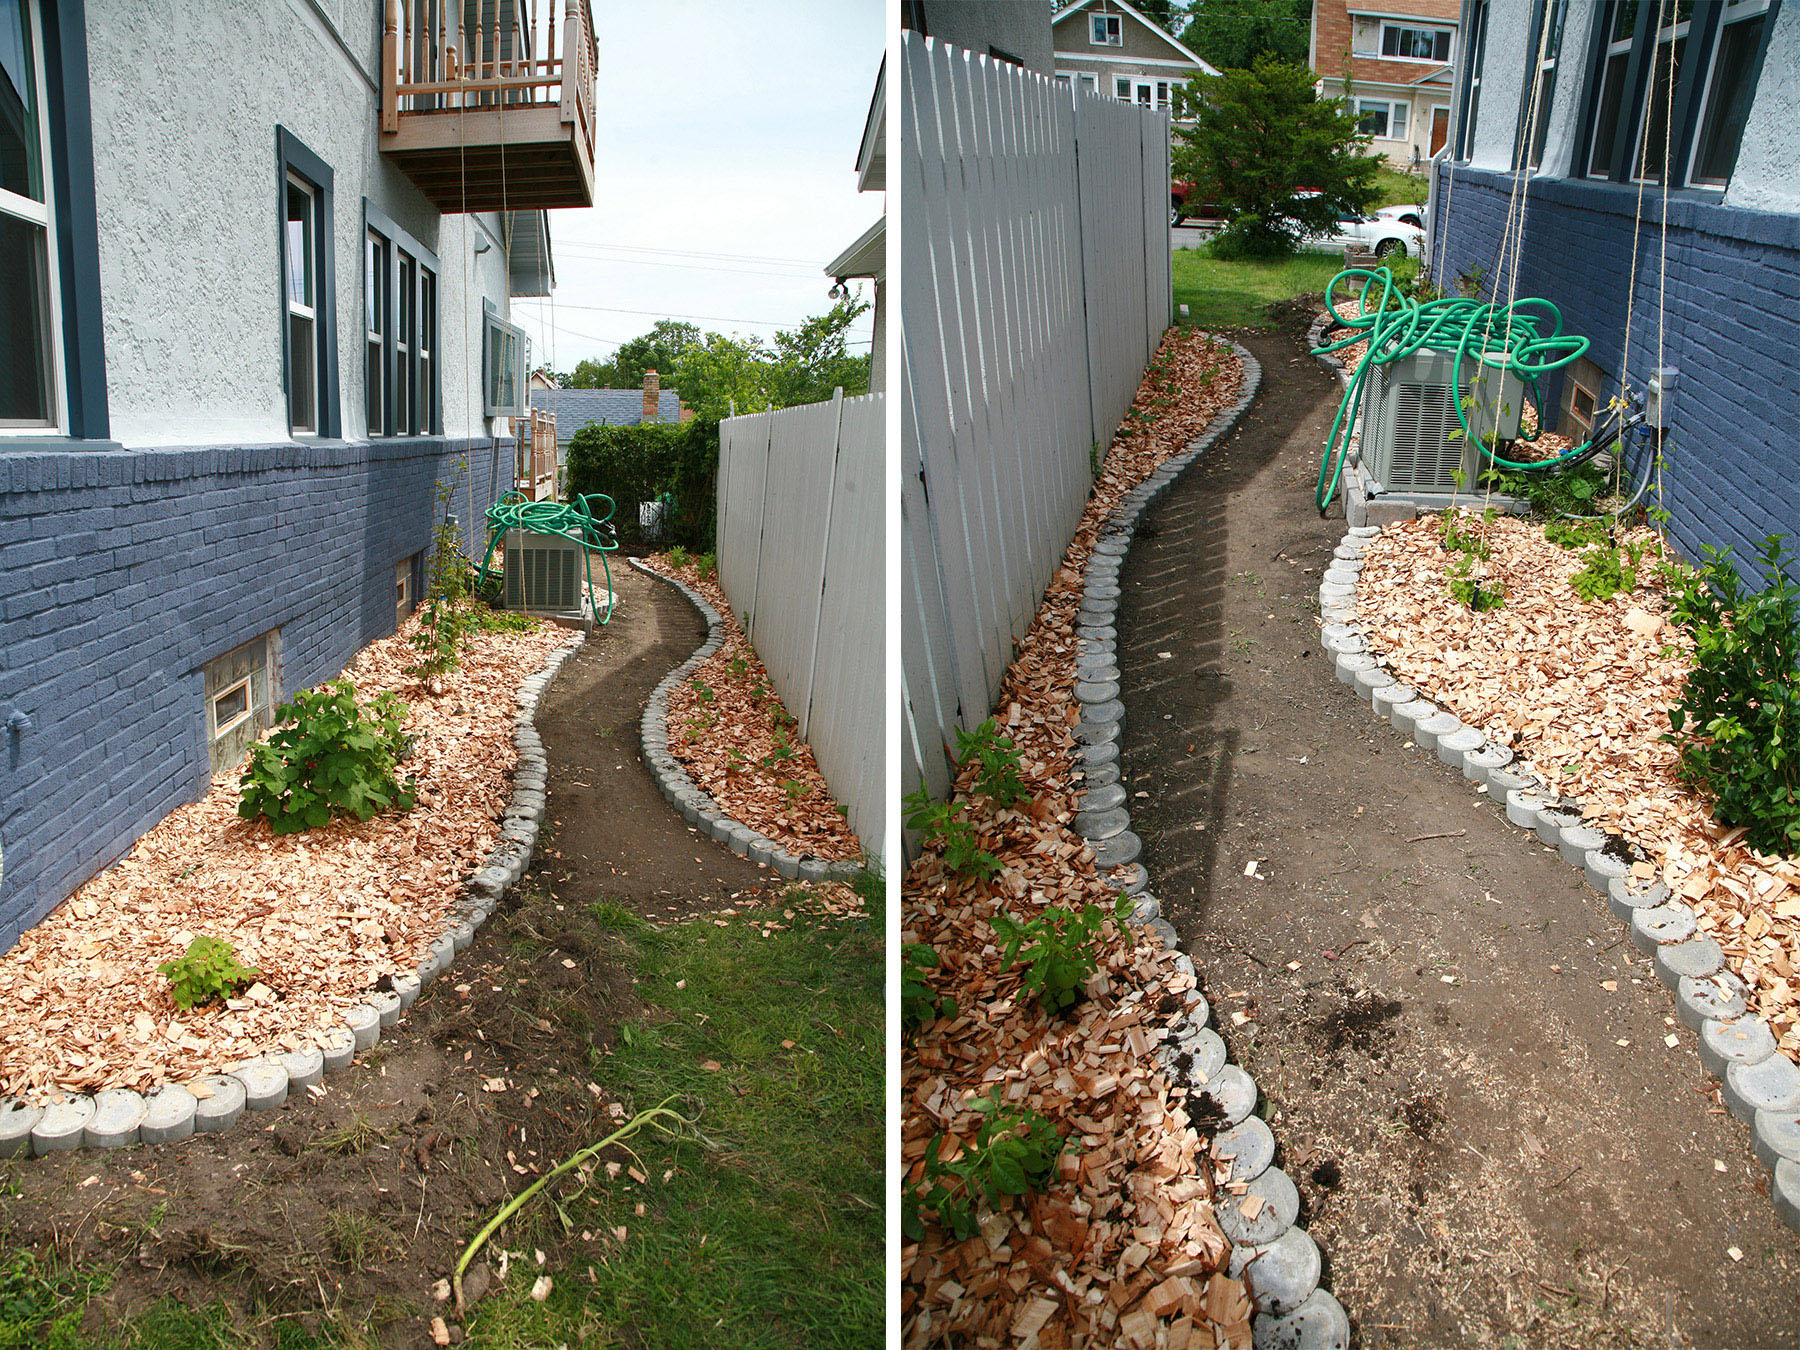
Once the main pathway was established, I filled in the outer sections with fresh top soil, and planted the gardens.
I planted strawberry plants across from the raspberries, and basil and mint just beyond that in the next "wave" on that side.
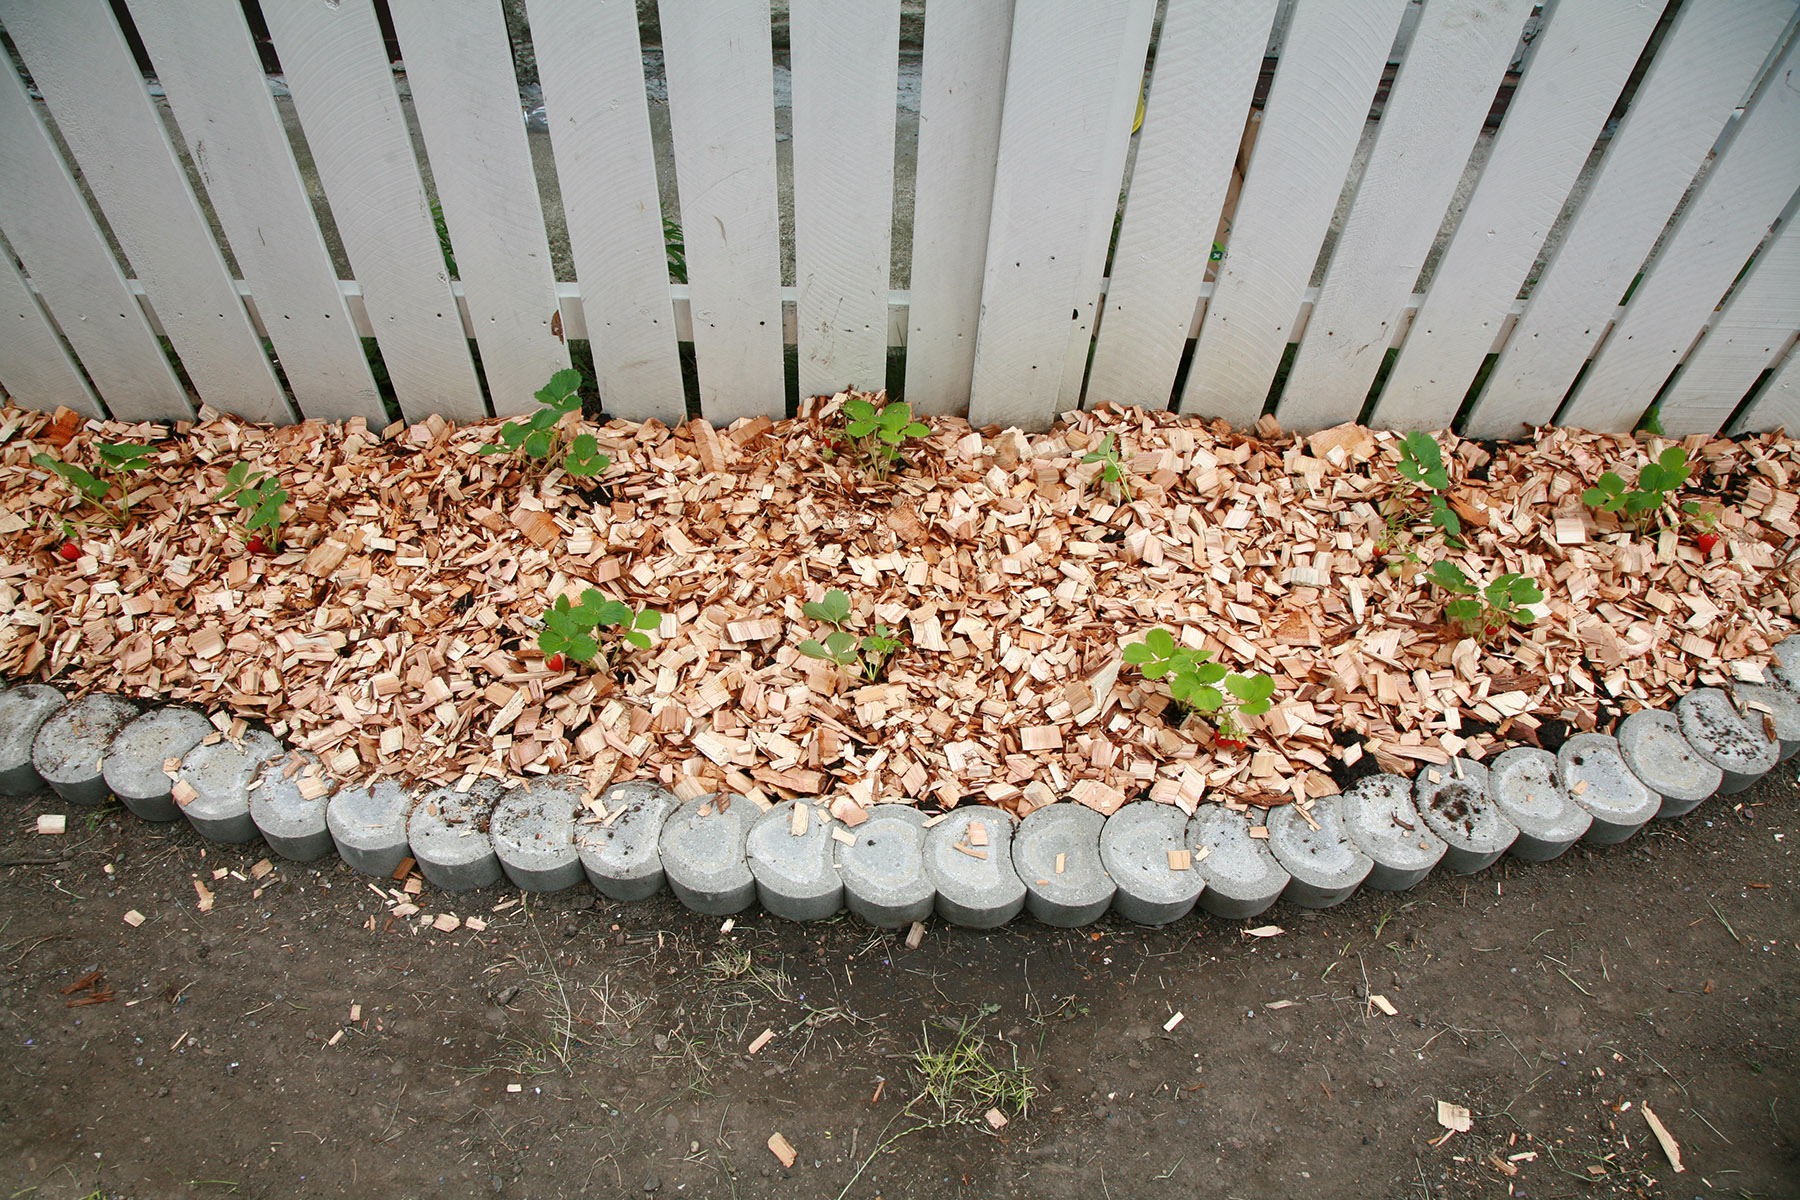
The Strawberry Section

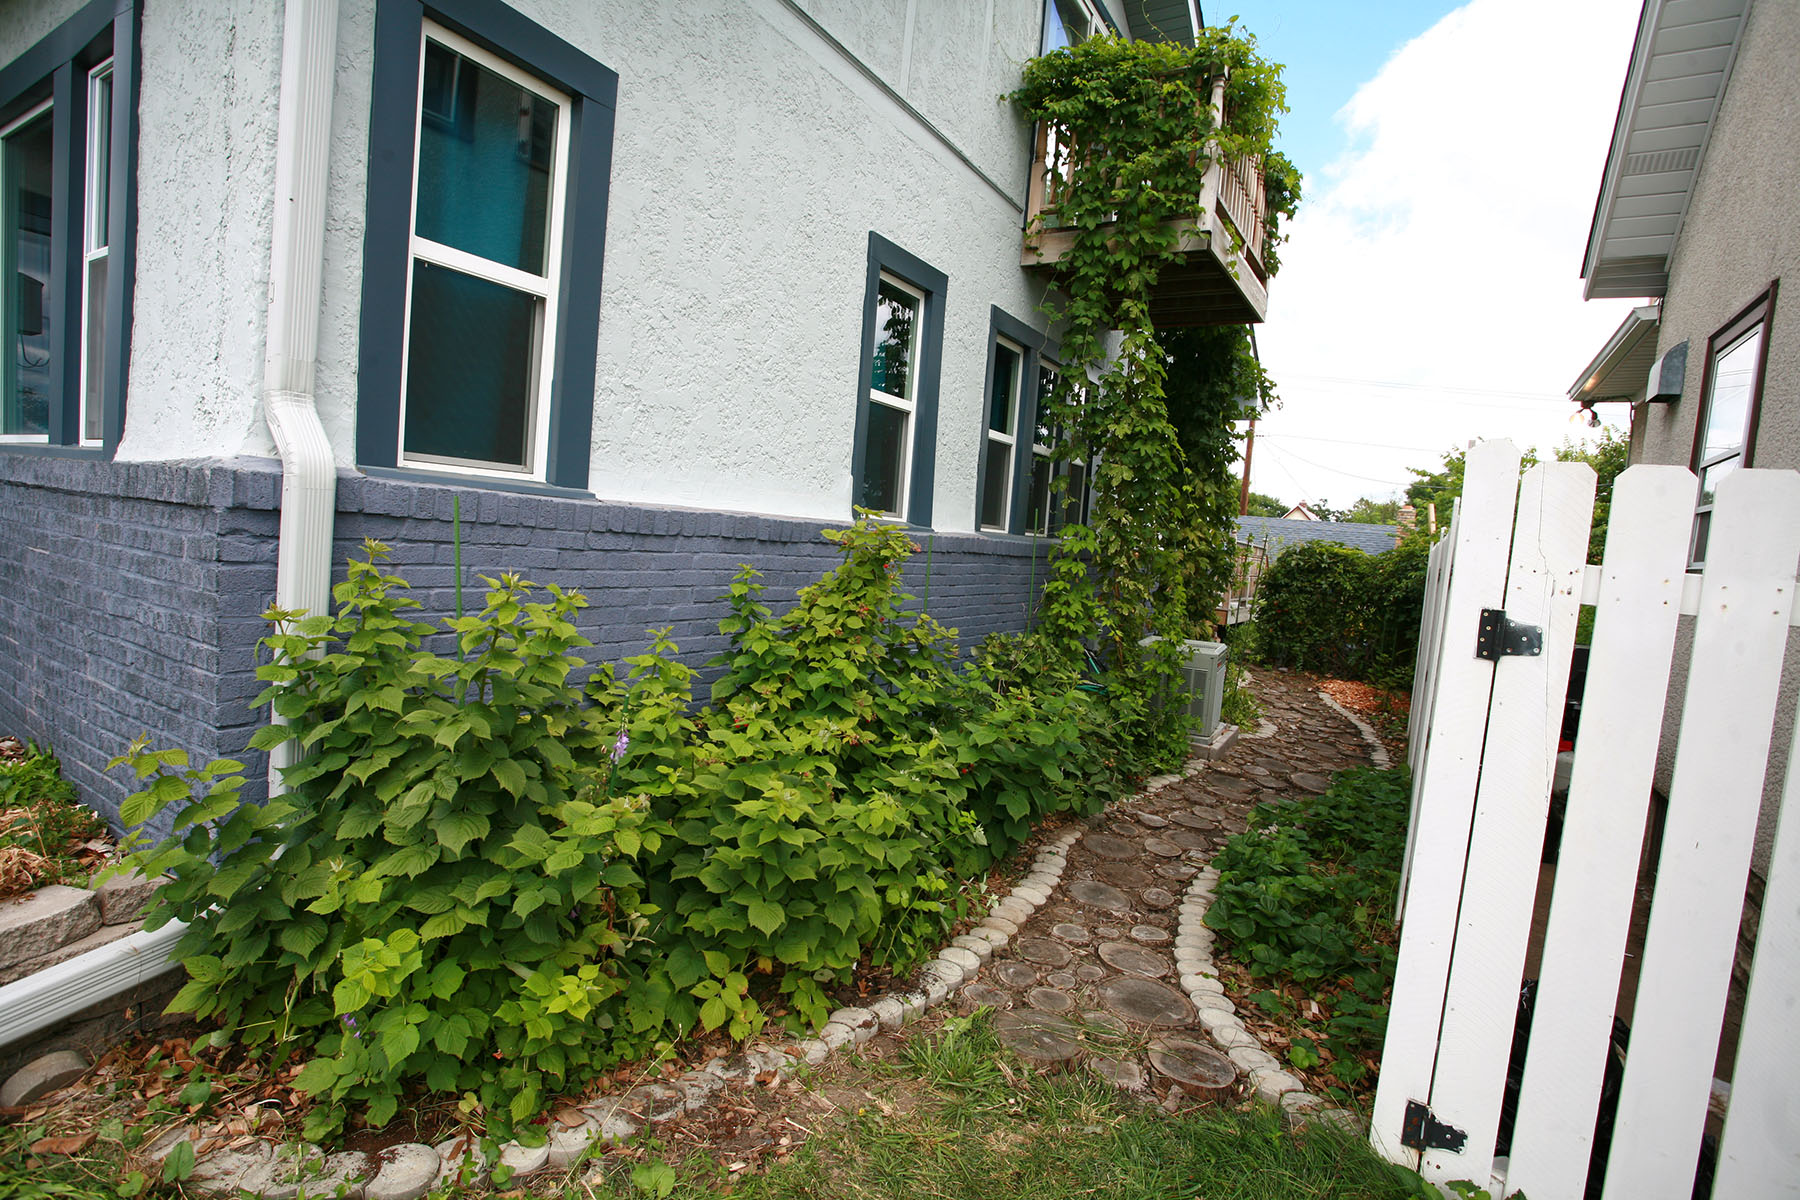
We planted two types of hops - 1 type each, on either side of our air conditioner - and ran twine up to our second level deck for them to grow up. Beyond the hops, we planted blueberry bushes (which ended up failing 🙁 )
Cutting the and Placing the Black Walnut

As I was building the pathway and gardens, Porter was busy in the backyard, cutting the logs into 3" disks (larger ones), and 2" disks (the smaller diameter ones, as filler). What a badass!
(As a note: He says it would have been nicer to use a large band saw for this, as some of the cuts - smaller logs - got kind of dangerous)

AS he finished batches of log slices, he would cart them out to me, and I would place them.
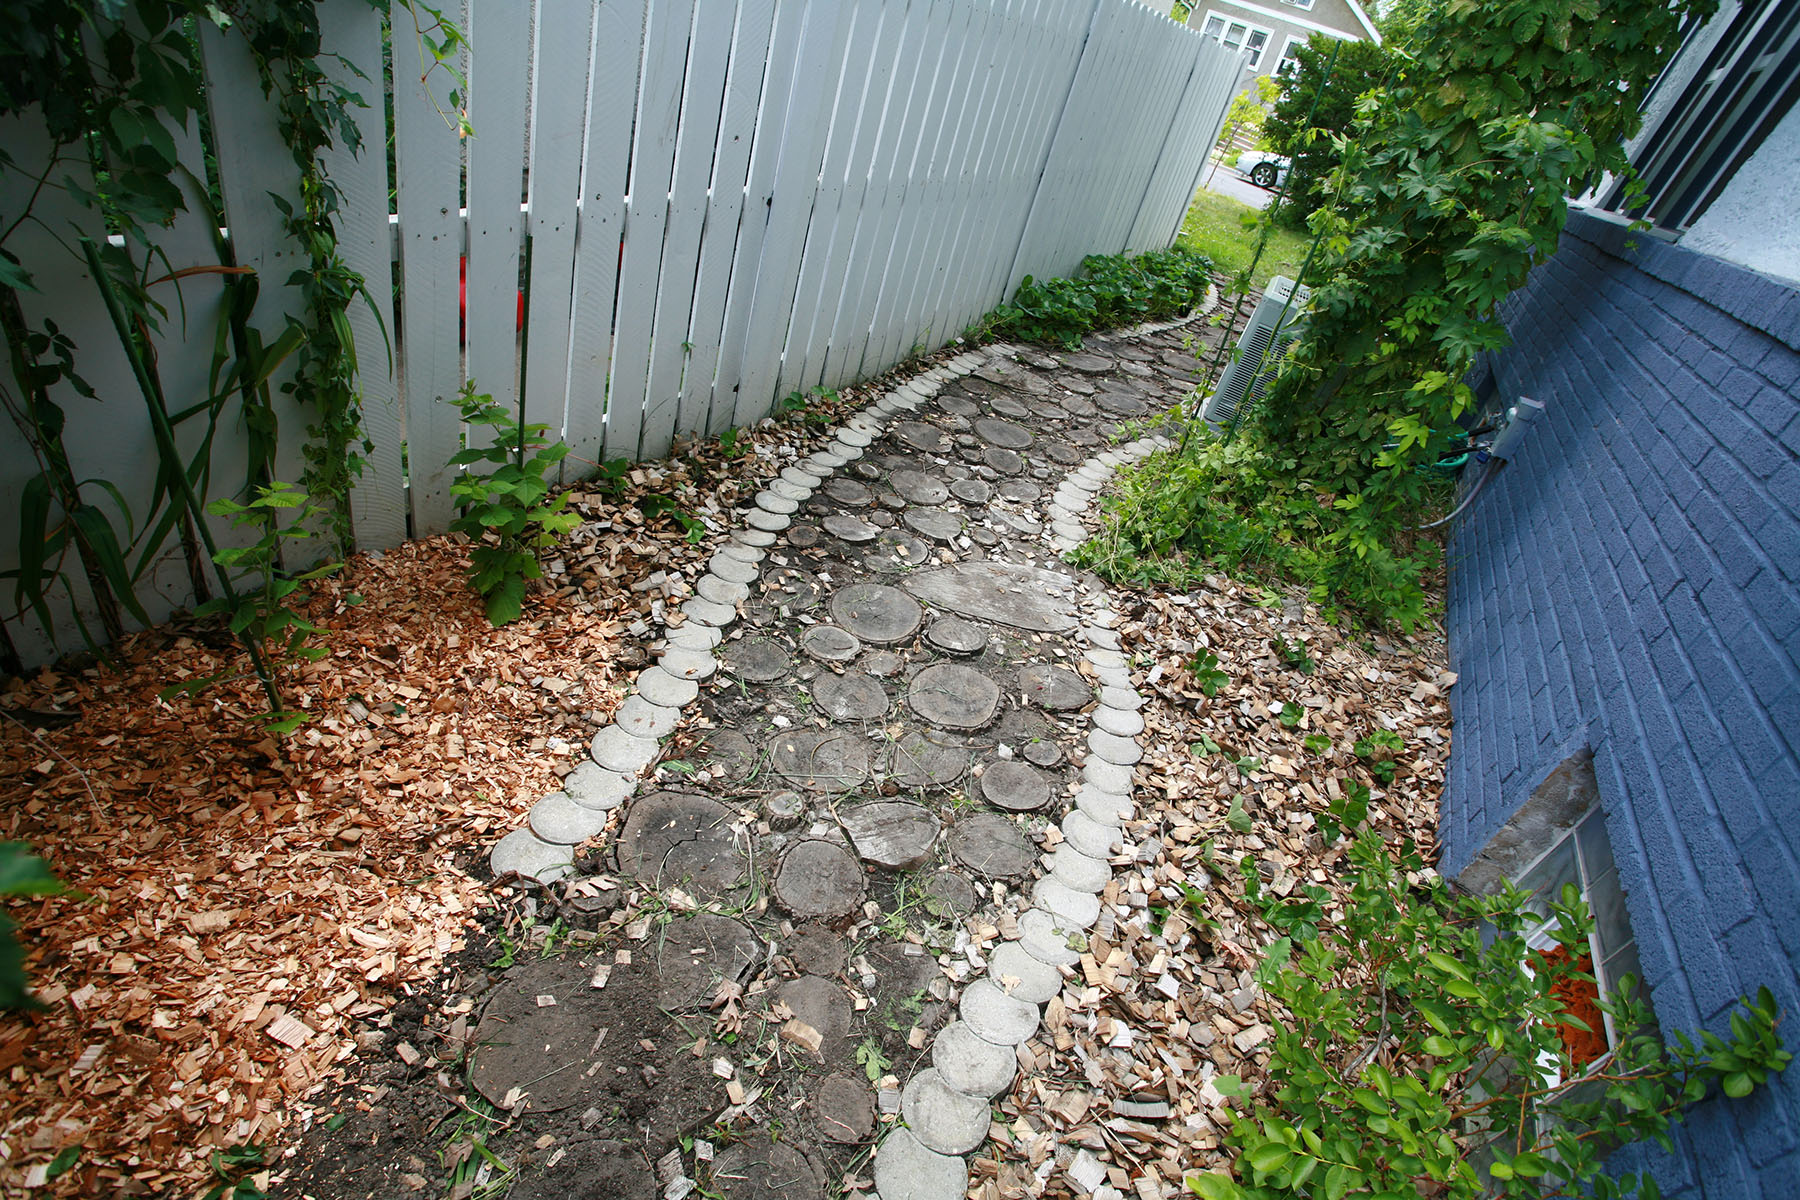
I started by placing the largest disks evenly throughout the space, to create the main stepping stones. I'd work my way down the sizes of logs, finally filling everything in with the smallest disks.
This is what it looked like when I'd finished placing all of the wood slices.

Another view.
Filling & Finishing the Path
Once all of the wood slices were placed, we had to carefully fill it all in with dirt. We shoveled on clean dirt, and swept it into all of the voids between the logs.


The filled-in pathway.
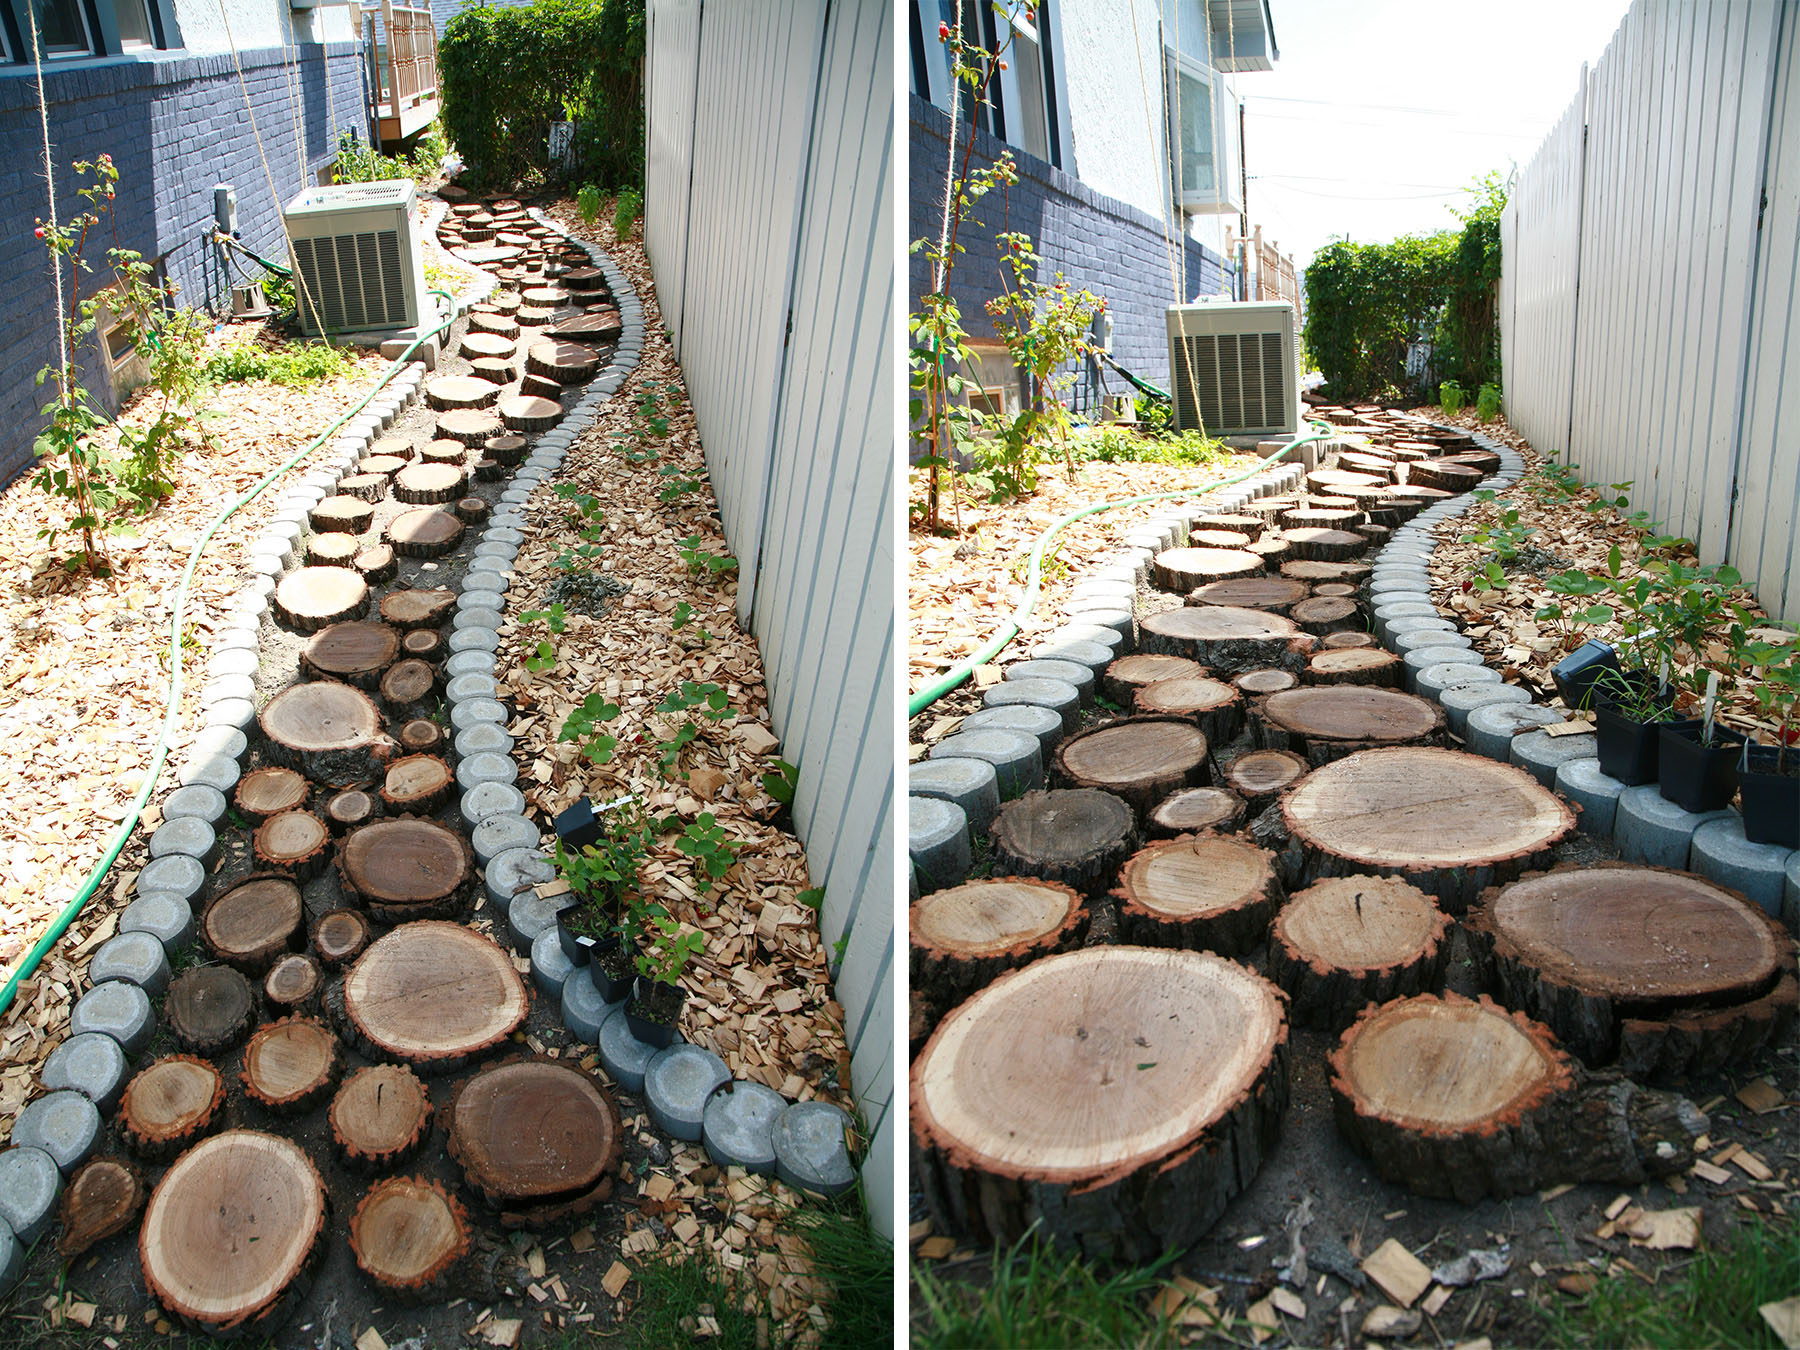
Wood Slice Pathway, 1 Year Later
A year later, this is what it looks like. Gorgeous!
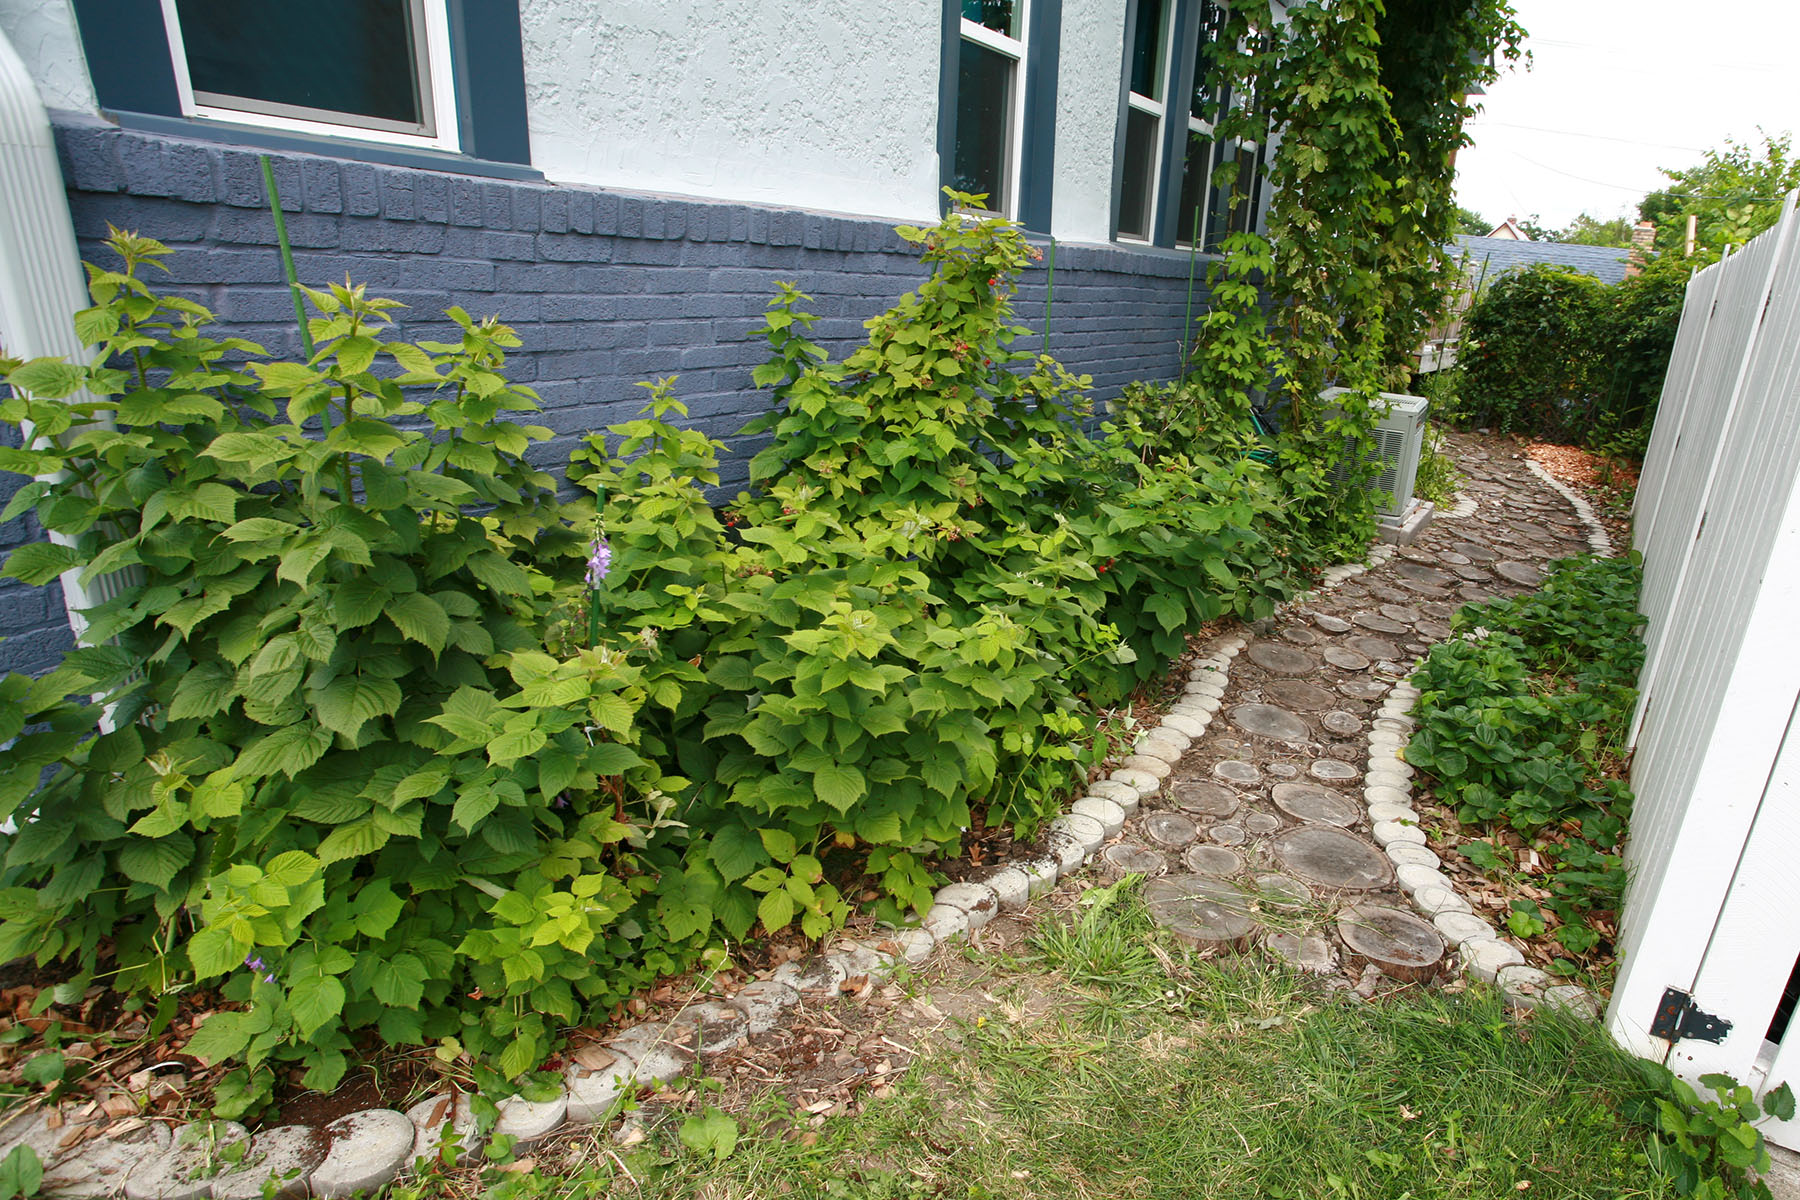
The wood has weathered a bit, and those 3-4 small raspberry bushes filled in like WOW, providing us with a ton of wildly delicious berries.
The strawberries have also filled in, and we've been transplanting the runners to the next garden wave (took out the basil and mint), for even more berries.
The hops have ALSO grown like crazy, and are threatening to take over our upper deck! Love it!

Not only do we love the look of the pathway, but it has the added benefit of making our whole side yard a NO MOWING area!
Because we used a high-quality hardwood, this path will look great for many years to come. Even as it degrades, it will only gain character!

So there you have it. Not a TON of work, with such great results!
More Tornado Posts
Going through a tornado - and the resulting rebuild - was a wild experience, with a LOT of learning involved. Here are some more posts about that whole ordeal!
North Minneapolis Tornado - Picking up the Pieces
Our "Tornado Smashed" Gingerbread House
So... You've Been Hit by a Tornado
Share the Love!
Before you chow down, be sure to take some pics of your handiwork! If you post it to Bluesky, be sure to tag us - @CelebrationGen. We're also on Pinterest, so you can save all your favourite recipes to a board!
Also, be sure to subscribe to my free monthly email newsletter, so you never miss out on any of my nonsense.
Well, the published nonsense, anyway!


Gerber Construction
Love this! It is super cute, and I always love seeing people find thrifty ways to utilize their resources. I love the berries! I might just have to put some of those in my own yard!
Damian
Hi, did you have to leave the tree slices to dry before using???
Thanks
Damian
Marie Porter
We didn't intentionally dry them out first, but they HAD been laying around as logs for at least a few months.
I don't think they'd need to dry. As they age, they're going to split a bit, decompose, etc.
Red
These look great. How do keep the wood from getting slippery?
Marie Porter
We didn't do anything to them, and they didn't get slippery. Maybe other wood types would? I don't know, though.
Hanle
I just came upon your blog and wondered how much the path has weathered by now. I am planning to do something similar and am trying to find out the best way of trying to preserve and seal the wood to make it last longer. The ideas I have come upon so far is to dip each log in a water/borax mixture to try and stop ants from eating it. Thereafter make a waterproof sealant for the bottom, place each one on black plastic and seal the top with something non-slippery. It seems like a lot of work which I am happy to do if it is going to help.. The alternative is to just place them and realize it is temporary.
I just love the look of yours.
Karen
Beautiful path! Just wondering...are there any problems with termites? or any way to prevent termites in areas where they are plentiful?
Marie Porter
We haven't had any, and I don't have any experience with termites at all... so I'm probably not the best person to ask :/