

Jalapeno Cheddar Beer Bagels! These are traditional bagels – chewy, dense, and wonderful.. and surprisingly easy to make at home.
Originally Posted February 21, 2013. Updated 1/8/2021

You know, for being married to someone who's allergic to gluten, my husband still manages to be utterly spoiled in the breads department.
The other day, I decided to treat him to a batch of my homemade bagels. It's been a while, I definitely haven't made them since the tornado, so it's probably been over two years. Wow!
From the smell of these, right from the raw dough making through to the finished product... they were very much worth the wait.
There are three of them left in the kitchen right now, and my husband is away at work... oh, willpower!
Anyway.
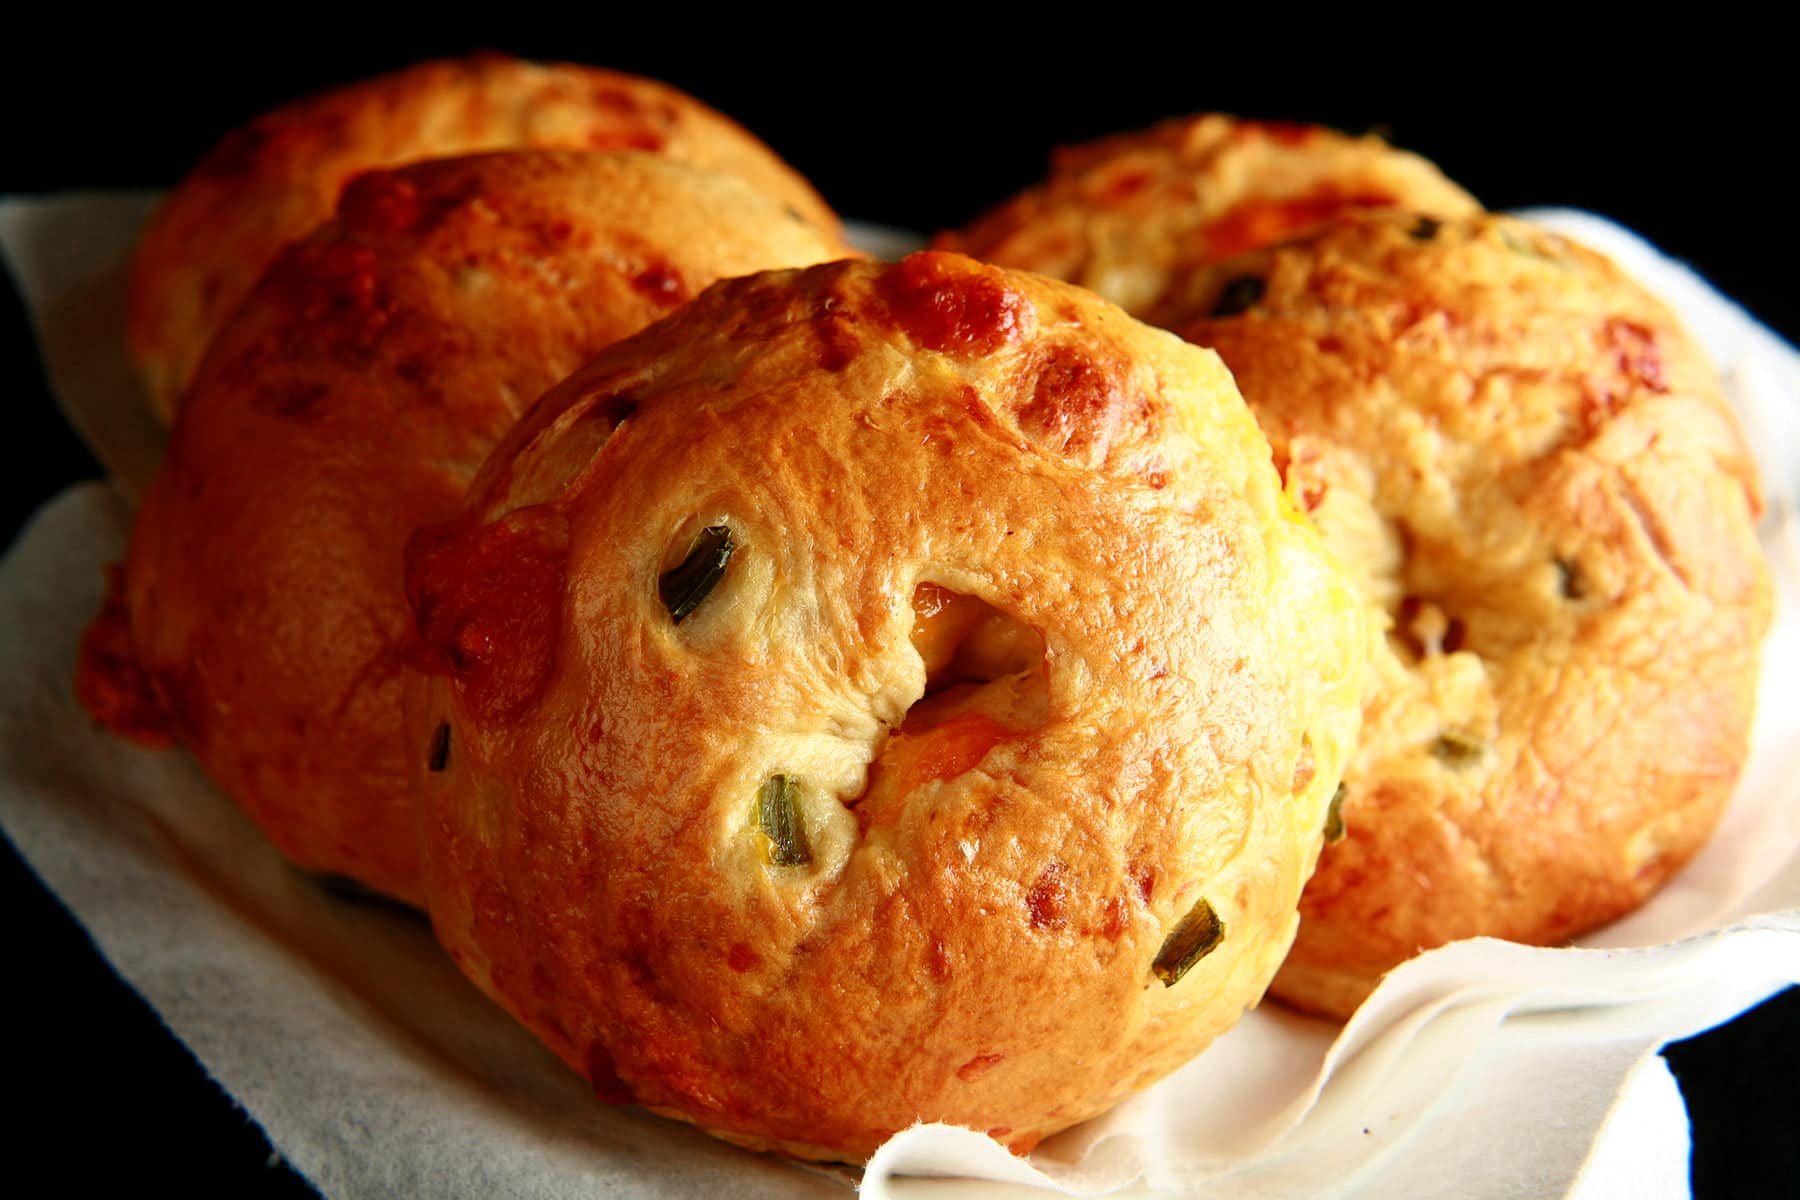
Cheddar Jalapeno Beer Bagels!
Bagel making is a little bit of effort, but *nothing* beats fresh, homemade bagels.
These are traditional bagels - chewy, dense, and wonderful.
As we're big fans of the cheddar / jalapeno / beer, I created this recipe to encompass those flavors. Sigh. I miss bagels...
Says my husband:
"These Jalapeno Cheddar Beer Bagels are SO good; no bagel from a store can compete with an oven fresh bagel bursting with flavor and that amazing texture."
Anyway, I'm gonna go ahead and post this recipe, so I can move on to something else... maybe distract myself from the thought of those golden rounds of heaven on the kitchen counter.

How to Make Jalapeno Cheddar Beer Bagels
I know that baking yeast/risen breads can be intimidating for those who haven’t done it before, but seriously ... don’t worry!
Start Your Yeast
The recipe starts out with sugar, yeast, and beer. This is one of the most important parts of the recipe, so make sure it’s all in place!
- The beer has to be warm, but not hot. You want to encourage the growth of the yeast, without killing it.
Cool beer won’t “wake up” the yeast the way warm does, and it won’t rise as much / quickly.
Hot beer will kill the yeast.
The sugar feeds the yeast.
Make sure to use yeast that has been properly stored and is fresh. Very old yeast doesn’t always work.
Anyway, you mix the three together and leave it for a few minutes, and this is what you should see:
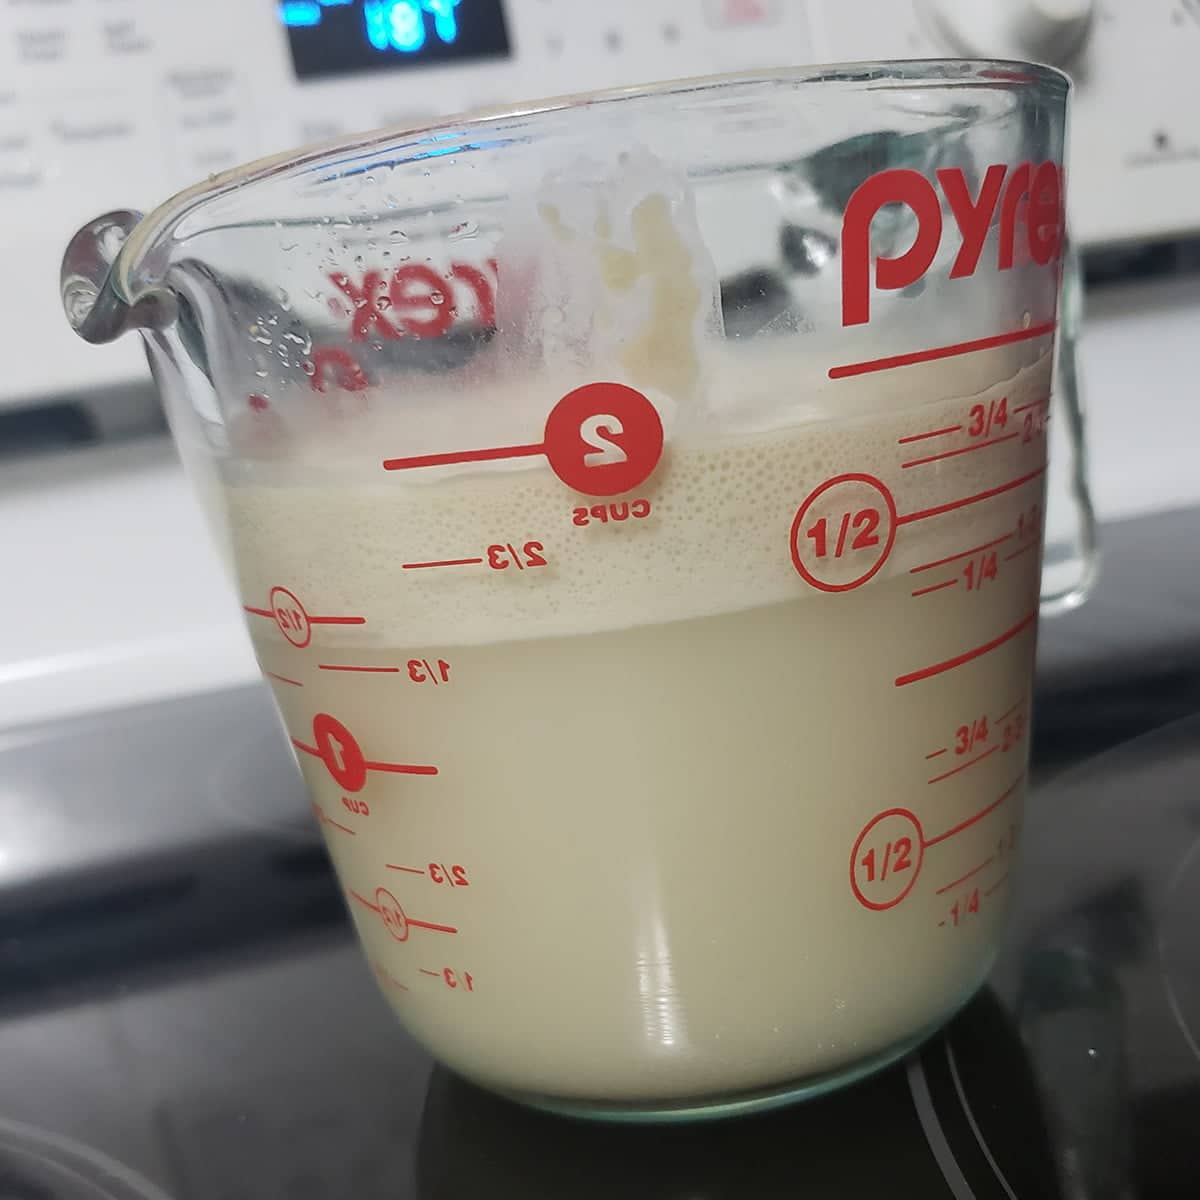
When it’s all foamy like this, you’re good to go!
If your yeast doesn’t foam up in 10 minutes, something went wrong - either the water was too hot /not warm enough, or the yeast was no good.
No foam means start over again.
Make Your Bagel Dough
You can do this by hand, or - like I do - in a stand mixer.
However you do it, just mix together your flour, salt, and foamy yeast beer, until it’s well incorporated and relatively smooth.
Once it’s all together, you’ll knead the dough. This develops the gluten in the dough, making the dough soft, stretchy, and perfect.
In a stand mixer:
Affix a dough hook and just let it go on medium speed for about 7 minutes or so, until it’s smooth and stretchy.
I start timing once the mixing is done, and all of the extra flour has been “cleaned” off the mixer bowl:

By hand:
Once the dough has come together - and you have all of the flour incorporated into it - dump it out on a clean work surface and knead it.
Basically, I’ll use the heels of my hands to push down and stretch the dough, fold it over, and repeat for about 15+ minutes.
It’s a great way to get out some anger, aggression, frustration, or ~feelings~ in general, but it is labourious... so I generally use the stand mixer!
Anyway, whichever way you go:
When it’s ready, it’ll be smooth and stretchy.
You can test readiness by pinching off a small bit of dough, flattening it a bit, and stretching it. If you can stretch it really thin without tearing, it’s done!
Once dough is fully kneaded, add in cheese and jalapenos, knead to distribute.

Proof your Dough
“Proofing” is just letting the dough rise.
You’ll want a warm - not hot - area to do this.
As I tend to keep my house nice and cool, I generally cheat at this: I’ll turn the oven on for a few minutes to warm it up a bit, then turn it off and use it as a proofing oven.
Let it rise - undisturbed - until it’s doubled in volume. Give it a good 45 minutes - 1 hour for this, but don’t leave it much longer than that without checking on it.
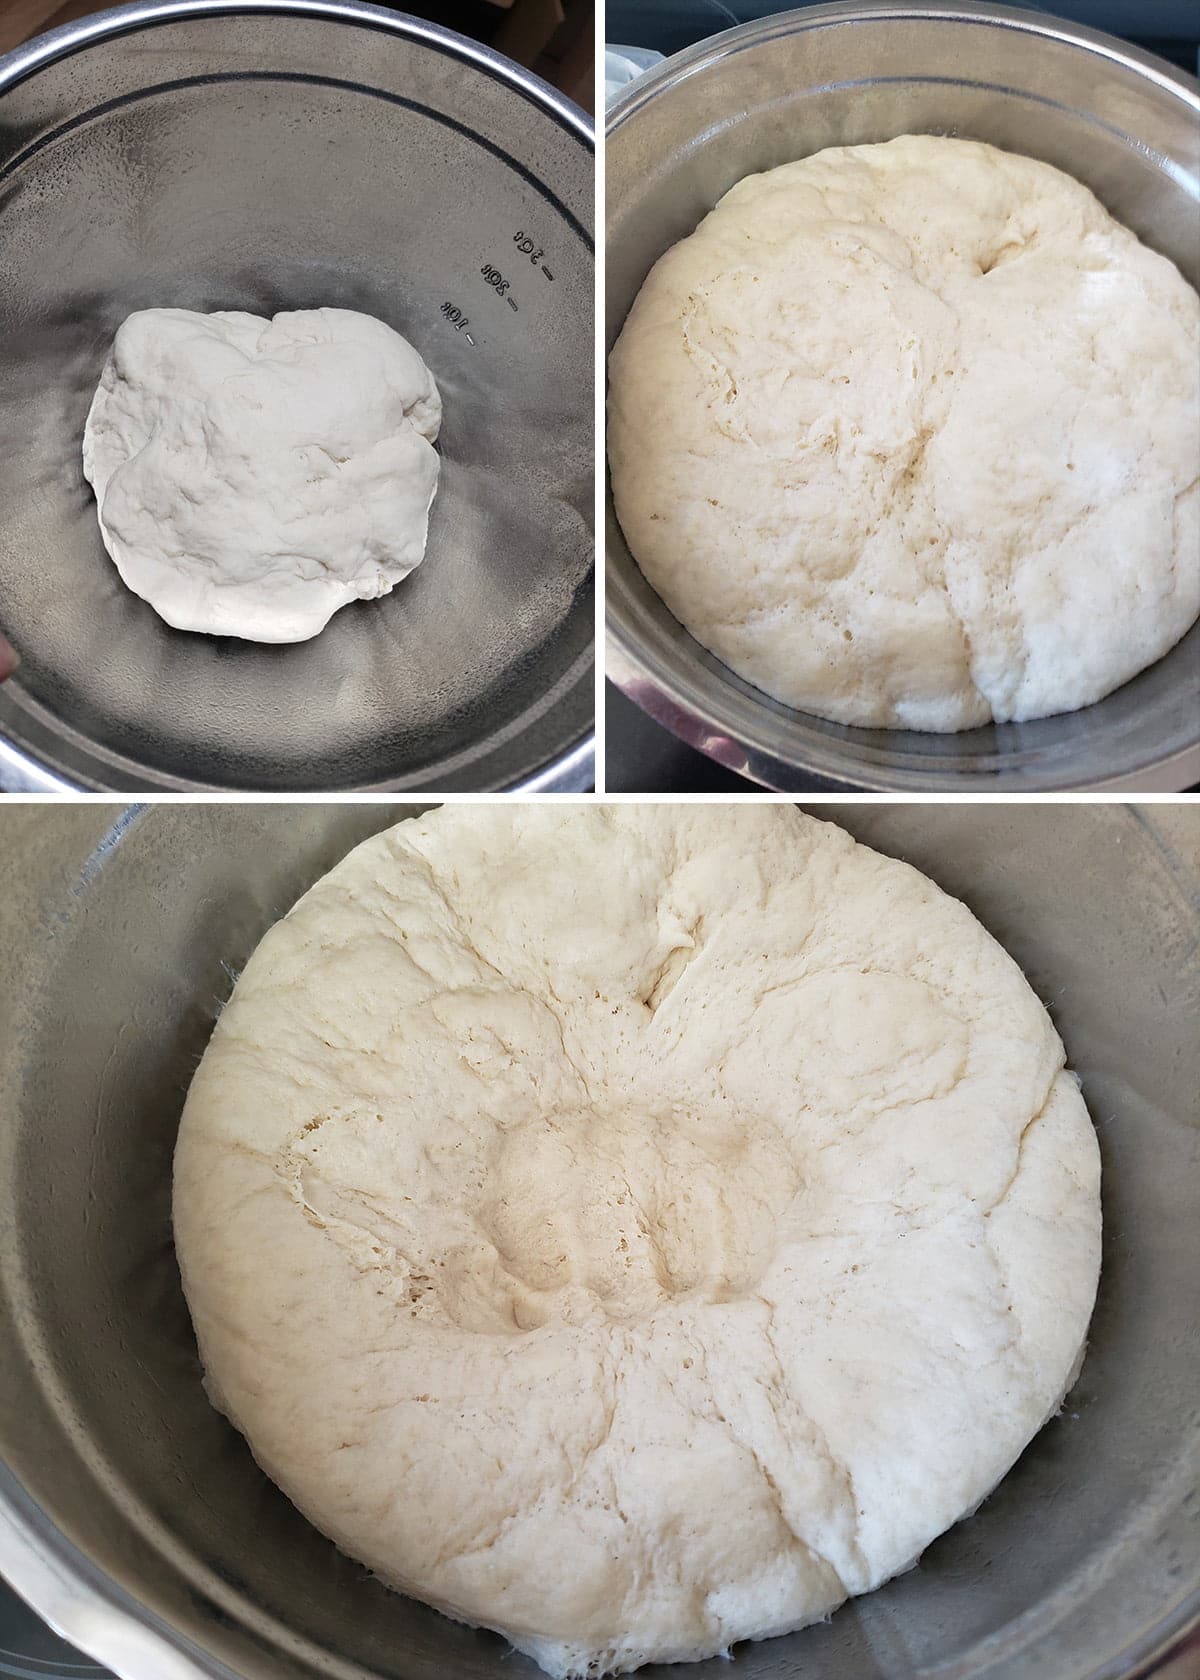
OVERproofing the dough - letting it rise too long / too far - will result in deflated dough, and hockey puck bagels.
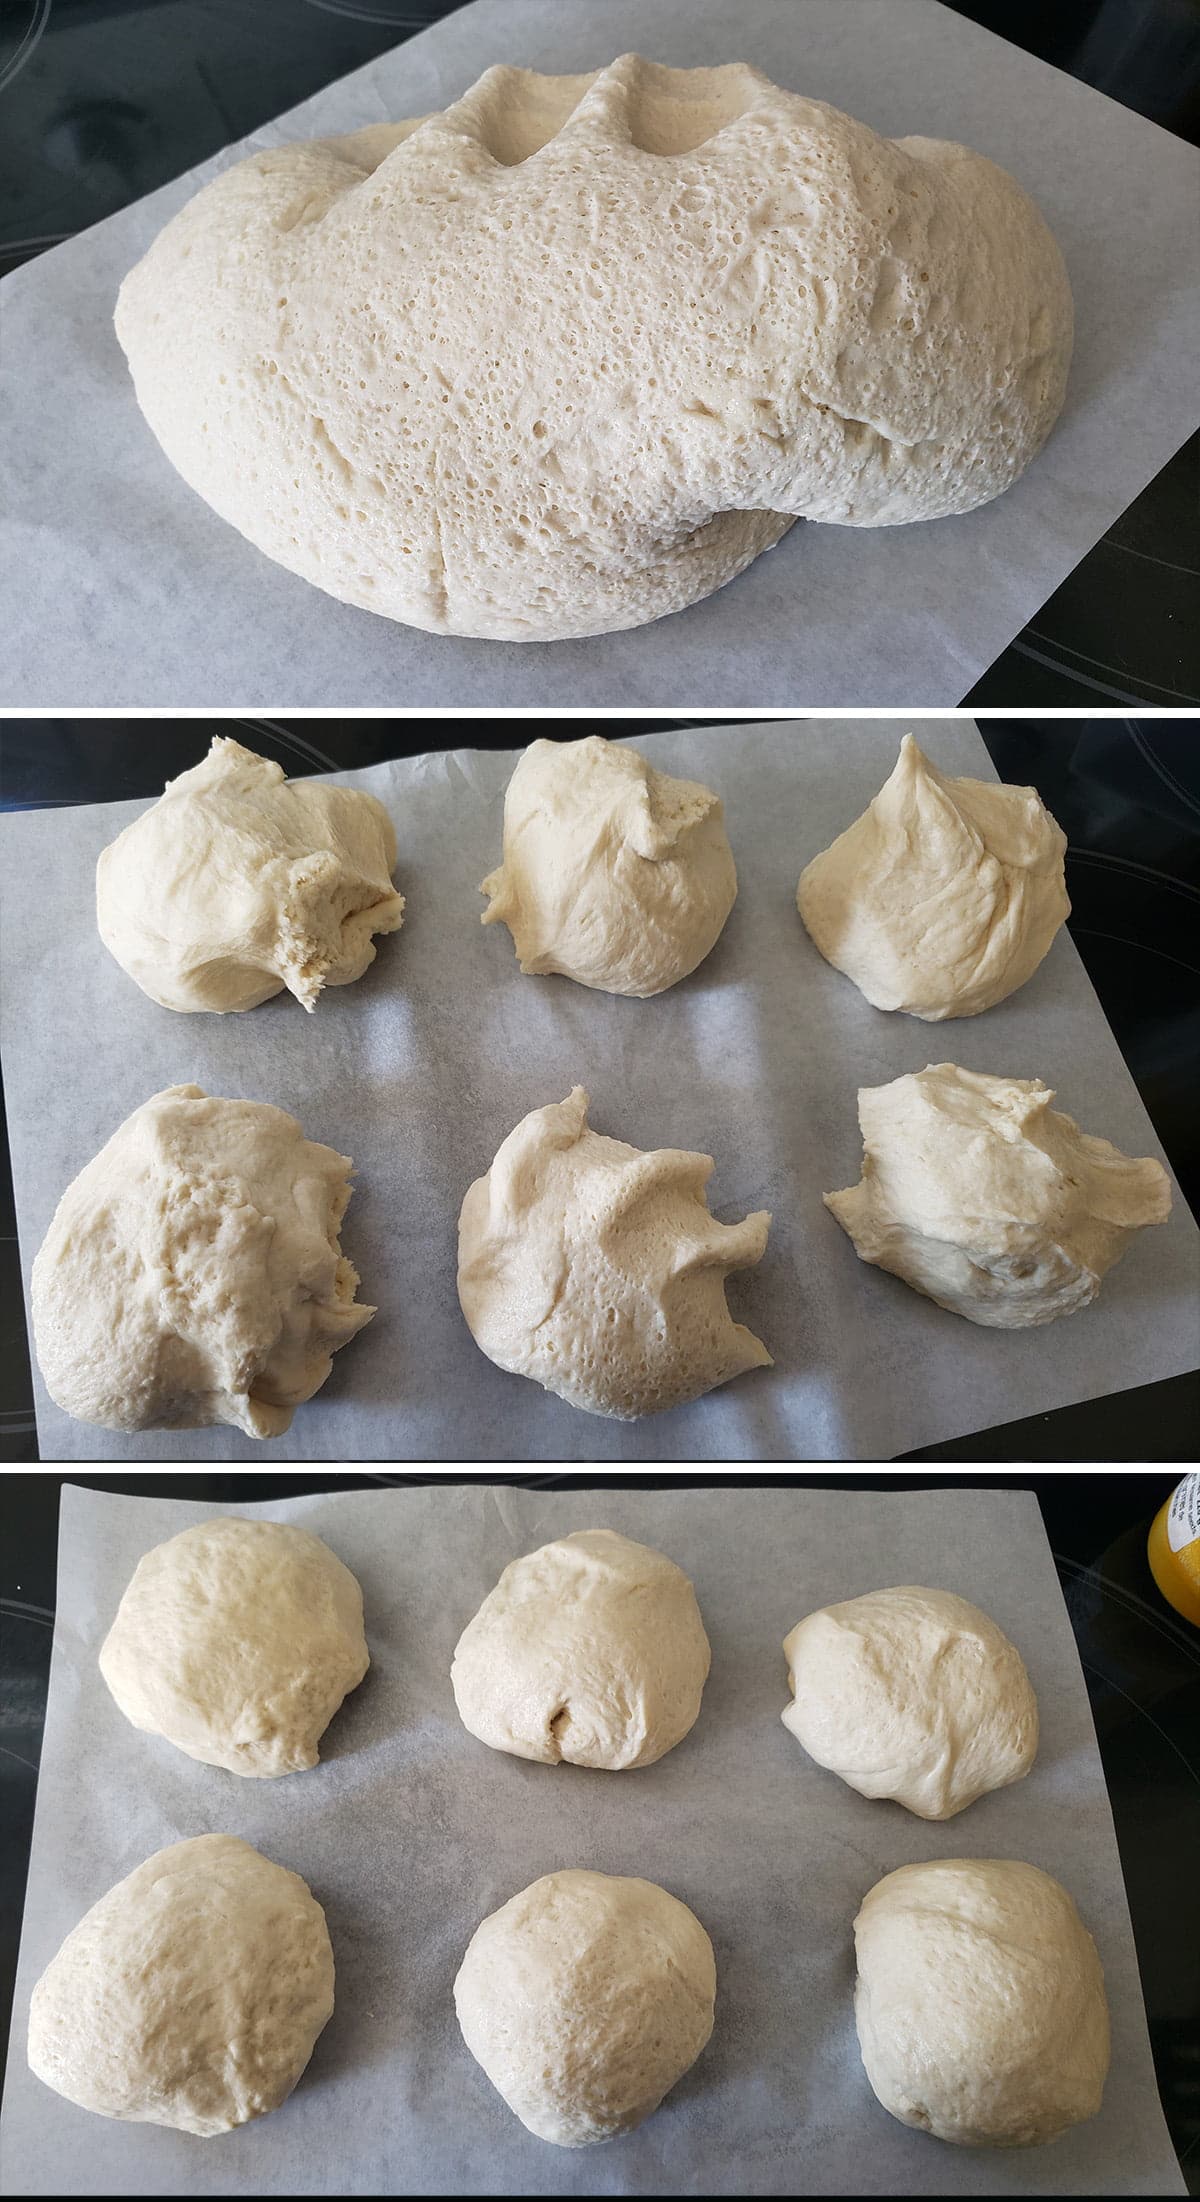
Once your initial proofing is done, punch it down and divide it out.
Forming Your Bagels
Punching the dough down removes some of the air, so it’s easier to work with.
From there, you’ll divide it out to relatively-equal portions.
I usually go with 6 for nice big bagels, but you can do 8 if you’d like them more grocery-store-sized.
Once they’re divided out, smooth them out into balls.
I’ll usually smooth it all out towards the edges, and tuck everything under.
When it comes to making them bagel shaped, there are two main methods:
1. Roll each lump of dough into a thick “snake” and secure the ends together
and
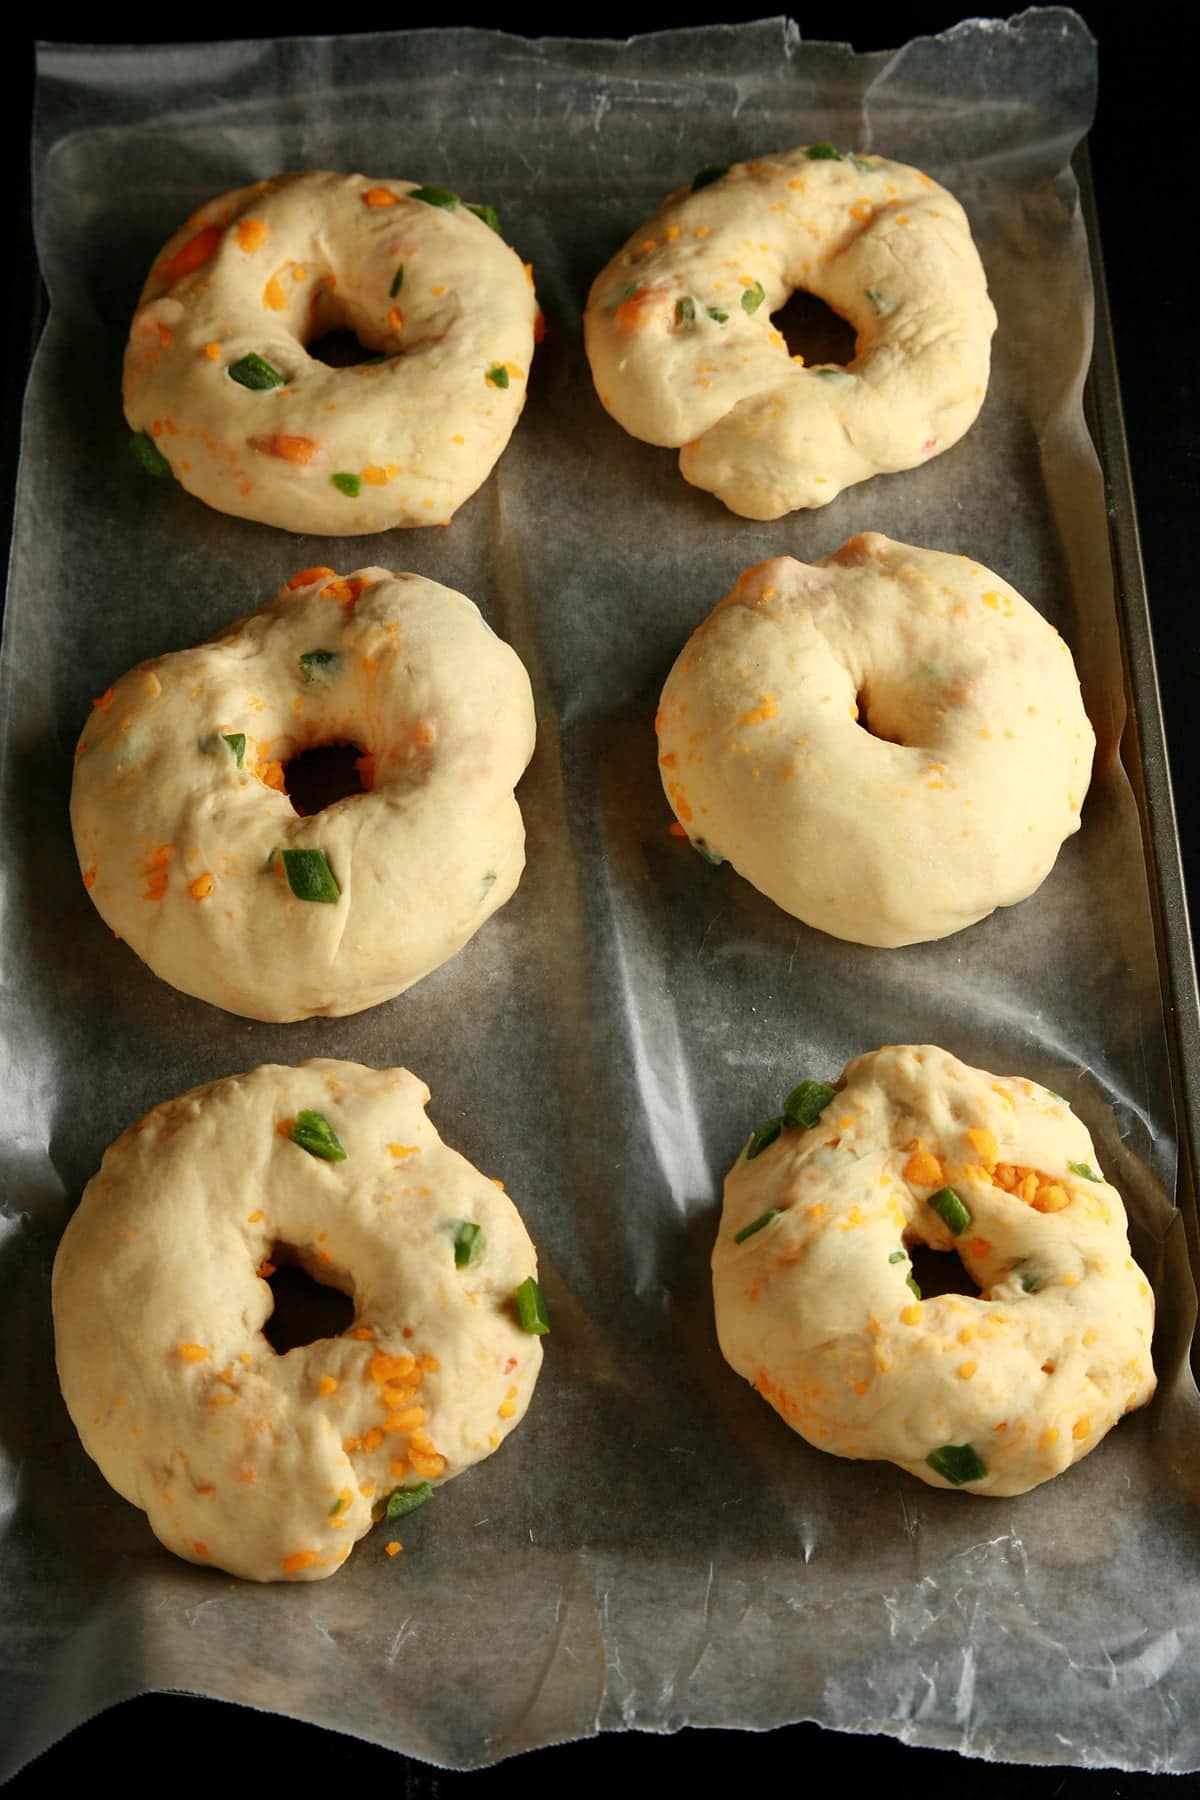
2. Roll each lump into a smooth ball before poking a finger though. Once you have a hole made, stretch the ring of dough out a bit to enlarge the hole.
Personally, I prefer the latter, so that’s what’s pictured.

The bagels before the final rise
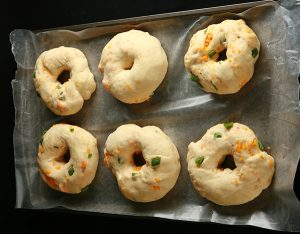
Let them rise for another 10 minutes, as you get things ready to proceed:
The bagels, after the final rise.
Prepare your Baking Sheet
Line a baking sheet with parchment paper.
If you like, you can scatter a layer of cornmeal on the parchment paper as well. This is totally optional, but gives a nice crunchy texture on the bottom of the bagel.

Set prepared pan aside.
This is also a good time to start preheating your oven.
Boil Your Bagels
As your bagels are rising for the second and final time, you’ll get ready to boil them.
Get a large pot of water boiling.
If you’re adding anything to the water (see variations, below), add it in and get that well incorporated before adding the bagels.
Once the water is boiling, turn the temp down enough to keep it at a gentle simmer.
You want to cook the outsides of the bagels gently, not brutalize them.
Once the water is simmering and 10 minutes are up, gently drop 2 or 3 bagels into your pot.
Allow them to cook for a minute, then gently flip them and allow them to cook for another minute.
Use a big slotted spoon to remove them from the water and allow them to drain well, before placing them on your prepared baking sheet.
Egg Wash Your Bagels
Whisk together your egg and water. This is an egg wash, and it gives a great texture and finish to the bagels - don’t skip it!
Brush the egg wash over as much of the bagels as are exposed. Tops and sides - you don’t need to flip them to get underneath, though.
Bake Your Bagels
Put your pan in the oven and bake until they’re golden brown.
Just don’t over bake them, or you’ll end up with hard bagels! As soon as they go golden, take them out!

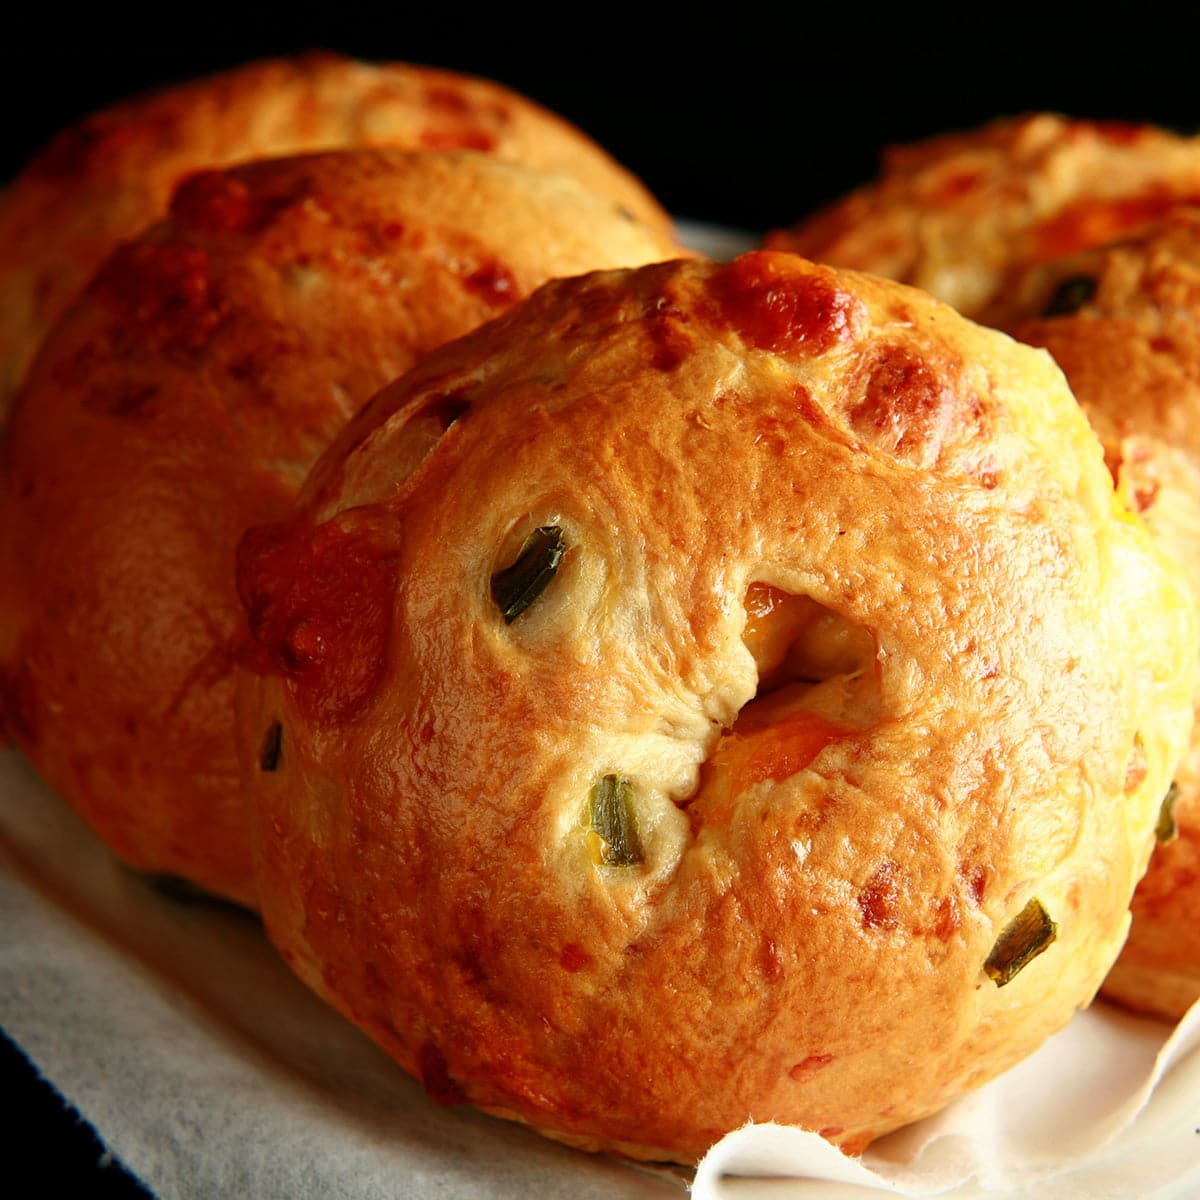
Enjoy!
Let them cool a LITTLE when you remove them... but otherwise, you can dig in while they’re still warm.
Enjoy fresh out of the oven, or let them cool and toast them later!

More Bagel Recipes
Looking for more fantastic bagels to make? Here are some great options!
Banana Nut Bagels
Blueberry Bagels
Chai Bagels
Everything Bagels
Garden Veggie Bagels
Gluten-Free Bagels
How to Make Bagels
Marble Rye Bagels
Mini Bagels
Montreal Bagels
Pumpernickel Everything Bagels
Rainbow Bagels
Red Velvet Bagels
Roasted Garlic Asiago Bagels
Roasted Red Pepper Bagels
Rye Bagels with Caraway Seeds
Seeded Whole Wheat Flax Bagels
Smoky Cheese Bagels
Whole Wheat Spinach Bagels
... and a few seasonal / holiday options, too:
Christmas Bagels
Gingerbread Bagels
Heart Shaped Bagels
Hot Cross Bagels
Maple Pumpkin Spice Bagels
Paska Bagels
Share the Love!
Before you chow down, be sure to take some pics of your handiwork! If you post it to Bluesky, be sure to tag us - @CelebrationGen. We're also on Pinterest, so you can save all your favourite recipes to a board!
Also, be sure to subscribe to my free monthly email newsletter, so you never miss out on any of my nonsense.
Well, the published nonsense, anyway!

Cheddar Jalapeno Beer Bagels

Jalapeno Cheddar Beer Bagels
Ingredients
- 12 oz Bottle of beer We used a light tasting home brewed corn beer
- 4 teaspoon Active Dry Yeast
- 3 tablespoon Granulated Sugar
- 3 ½ cups All Purpose Flour
- 2 teaspoon Salt
- 6 oz Sharp Cheddar Cheese Cut into small cubes
- 2-3 Jalapenos Seeded and chopped into small pieces.
- 1 Large Eggs
Instructions
- Pour beer into a microwave safe bowl, heat til warm (not hot). Stir in yeast and sugar, allow to stand for 10 minutes – it should get very bubbly.
- In a large mixing bowl, combine flour and salt. Pour in yeast mixture, stir well to combine.
- Dump dough out onto a floured surface, knead until soft and elastic, 5-10 minutes. Once dough is fully kneaded, add in cheese and jalapenos, knead to distribute. Place dough in a greased bowl, cover with plastic wrap, and allow to rise for one hour, or until doubled in size.

- Once dough has doubled, punch it down, and divide it out. We divided the mixture into 6 equally sized balls, for LARGE bagels – but you can make them smaller by dividing into 8 or 12 equal sized pieces.
- Preheat oven to 350F, and bring a large pot of water to a boil, while you form the bagels.
- There are two main ways of forming bagels – with roll each lump of dough into a thick “snake” and secure the ends together, or roll each lump into a smooth ball before poking a finger though. Once you have a hole made, stretch the ring of dough out a bit to enlarge the hole. Personally, I prefer the latter.

- Once you have all of your bagels formed, set them on a baking sheet to rise for another 10 minutes.
- Turn heat down a little, allowing water to simmer rather than boil. 2 or 3 at a time, drop your bagels into the simmering water, allow to cook for 1 minute, then flip each and allow to cook for another minute. Drain well, place on a greased cookie sheet.
- Whisk egg together with 1 tablespoon of water, brush over the tops and sides of each bagel. Bake for 35-37 minutes (small) or 40-45 mins (large), until golden brown.
- Yum.


PolaM
Never made bagels but really feel like trying now!
JimmySinn
Tried these out for the first time today. The recipe is fantastically easy to follow, and the dough seems to be turning out WAY better than the bagels I spent 4 hours trying to make yesterday. They're in the oven right now, and smell absolutely wonderful. I used whole wheat flour for mine. I'll let you know how they turned out! Thanks for the recipe!
Marie Porter
Awesome, always good to hear!
JimmySinn
They turned out BEAUTIFULLY! Color, consistency, everything is absolutely perfect! Thank you, again, for the awesome recipe!
Meghan
I'm so excited to try these. If possible I'd like to do part of the process tonight and just bake in the morning. Have you ever done that? If so, do you know what step is best to cut off at?
Thanks!
Shelley
Followed the recipe exactly except I used bread flour instead of all purpose. Turned out so good! I will definitely make these again.
Tracy Hall
Thank you for posting your how to make bagels. My husband eats bagel breakfast sandwiches every morning and I had decided we were spending to much money buying them. Your post gave the best step by step how to make bagels and different types. Now I make him bagels every week, a few different kinds. He loves the pretzel bagels. Thank you