

Ever since making my husband's Ronan the Accuser costume, I've had a ton of questions about how I did the makeup... so, Ronan The Accuser Makeup Tutorial time!

When we first saw Guardians of the Galaxy, I KNEW I'd be making that costume for Porter. A day or two later, we did a quick makeup test - using my "Beast" blue makeup, and a tube of really cheap black Halloween makeup to look goopy. It looked good enough to convince me to go ahead with the costume, but was a far cry from what his final makeup would be.
After a couple tweaks to my process since that point, I've finally hit on the products and procedures needed for Ronan makeup that stays PUT - not peeling up, etc. There are probably a million different ways to do this makeup - I am NOT a makeup artist, and this is just what works for us.
Big thanks to Josh from ChaManLeon Fx, who filled in a couple missing puzzle pieces for me. I'd originally planned to use crushed up rolled oats, but he told me that "Ash Powder" exists.
Apologies for the crappy cell phone photography - I didn't want to get makeup all over the good camera while shooting for this tutorial!

Getting something to eat after a long day in costume... with none of the latex peeling off!
First things first... here's my husband in his Ronan The Accuser costume:

If you're interested in seeing how the costume came together, I have an album up on my costuming Facebook page, here. That album is the closest thing you'll get to a tutorial, from me - that costume cost me some sanity 🙂
Now, on to the makeup tutorial!

Ronan The Accuser Makeup Tutorial
What you need:
Purple Contacts
Glue stick
Scar wax
Blue nail polish
Makeup sponges
Prosaid
Disposable plates / bowls
Ash Powder
Liquid Latex
Castor Sealer
Paper Towels or cotton balls
2 shades of blue cream makeup (I used Paradise brand)
Super White face powder (optional)
Stipple sponge
Sealing powder
Red lip liner
black cream makeup
Makeup brushes
Black eyeliner, mascara (optional)
Black food colouring
Southern Comfort or other nicely flavoured spirit.
I like to lay everything out in the order I'll use it - which is how I wrote them, above. All that experience writing recipes, right? 🙂
First things first: Have your Ronan wash his/her hands and face VERY well, making sure to get rid of any oils that may be present. Dry everything well.
1. Have them put in the contacts - you don't want them fussing with that after getting the makeup on!
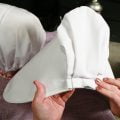
2. Apply a few coats of glue stick to the eyebrows. I like to gently use a back and forth motion the first time, to get the hair completely coated. Allow that to dry, then run another coat on top, going in the same direction as the eyebrow hair.
Once that is dry, block the eyebrows with eyebrow / scar wax. Make sure the hair is completely covered, with as thin a layer as possible. I like to smooth it over with a wet finger to ensure there are no loose edges that can pull up

3. Paint the nails blue. Aim for a blue that's as close to the finished skin makeup colour as possible.

4. Using a cosmetic sponge, apply a thin layer of Prosaide to anywhere that the black makeup will be - including the line down the front of the neck. Also. carefully brush a thin coat of it over the (dried!) nailpolish. Allow to dry completely.

5. In a disposable plate, bowl, or cup (At conventions, I'll usually use hotel room paper coffee cups!), mix together some Ash Powder with liquid latex. I usually just eyeball it - a Tablespoon or two of powder, and as much latex as it takes to makee it goopy - almost like oatmeal.

Using a makeup sponge, dab globs of the latex goop all over the area that will be black - across the eyebrows, under the eyes, the streaks down the cheeks, below the mouth, and the streak down the middle of the neck. Take care to not get it in the eyelashes! Allow to dry COMPLETELY.

|
6. While I'm waiting for that to dry, I like to get started on the blue makeup, because that takes forever. I'll start with the ears, neck, sides of face... leaving a fair amount of space around the clumpy stuff. I use water based "Paradise" makeup, a lightish blue. It's actually not light ENOUGH, but it's what I could find locally / what I use for my Beast makeup, so we make do and just use white powder later, to dull it down. Ideally, you want something very light, like a periwinkle blue. 7. Once the goop has dried, carefully sponge castor sealer all over the goopy parts, making sure to get it in the little crevices and everything. Use a paper towel or cotton balls to blot excess castor sealer. 8. Continue painting the entire face, ears, hands, and neck area with the lighter blue colour. Check under different lighting to make sure there are no blotchy/ lighter spots. |
 |
Optional: If the light blue is too dark/vibrant, use the Super White powder to powder over the whole thing now. (Image on right, below.)

9. Wet the stiple sponge, shake it off, and get just a small amount of the darker blue cream makeup on it, lightly sponge over the entire face and neck area. You're going for a very subtle texturing effect here. If you get too much makeup on the sponge, or it's runny... reapply the light blue and start over.

10. Once you're happy with how it looks, use a big kabuki type brush to apply sealing powder all over everything.
11. Use the red lip liner to draw thin, jagged "veins" in a few places.

12. Carefully apply black makeup to all of the areas that it needs to go, carefully working it into any bumps and crevices in the "goop" application. I keep a printout of Lee Pace's makeup on hand, and consult it fairly frequently to make sure I keep it looking right.

(At this point, I stopped taking progress photos of the black makeup, whoops!
13. Once you're happy with the black makeup, apply eye liner and mascara, if desired.
14. For a shinier appearance on the black areas, gently brush on some more castor sealer. Don't use too much!
15. For the black mouth, I mix together some cake decorator grade black food colouring, with Southern Comfort. (Wilton pictured, because I have it on hand... but Americolor is stronger!).
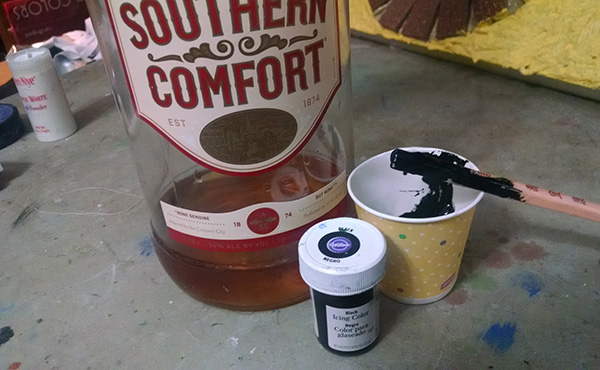
This kind of food colouring mixes into alcohol better than water (it's why all my cakes that were hand painted or airbrushed were done so with vodka!). I chose Southern Comfort because it's sweet and tastes good, and that combats the nasty taste of the food colouring.
Have your Ronan swish this mixture in the mouth for a minute or two, and spit. I like to have extra on hand in a water bottle, for refreshing the colour during the day.
... and that's it! Now your Ronan is free to cleanse the universe of Zandarians...

... or fist-bump adorable little fans on Free Comic Book Day...

..or just go twerk on stage!
.. with makeup that stays on and looks great all day. Even when ending that long day with a bowl of pho!

Wanna Nerd out With Us Some More?
There's a LOT of nerdery - and geekery - going down on this blog. Here are some favourites...
Bubble Bobble Wedding Cake
Dalek Cake for a Doctor
Dalek Sugar Cookie Decorating
"Convention" Brownies
Convention Sloppy Joes
Gluten-Free Lembas
How to Make a Weeping Angel Costume
How to Design & Install a Nerdy Backsplash
Miruvor Recipe
My Convention Survival Guide
Partridgeberry Pie & Cosplay Geekery
Pi Day Pinata Tutorial
Roasted Convention Chili Recipe
That Time I made a TARDIS Cake for Geek Royalty..
The Epic Klingon Cake
The One Cheese Ring
The Silence of the Lambs Cake
The Story of Foopmallet
Tremors Wedding Cake
Share the Love!
Before you chow down, be sure to take some pics of your handiwork! If you post it to Bluesky, be sure to tag us - @CelebrationGen. We're also on Pinterest, so you can save all your favourite recipes to a board!
Also, be sure to follow me on Pinterest, and subscribe to my free monthly email newsletter, so you never miss out on any of my nonsense.
Well, the published nonsense, anyway!


Dave DuJour
This post did some odd formatting into Feedly. It shows the initial pictures, the ingredients list, and goes right into step 1. Then after step 5 it gives the introduction. So that was very confusing. It might be the frames and tables that things are organized into.
Also, this is in Chrome. And it's not the first post I've read in Feedly that got reordered via the RSS feed.
Really just an FYI. There may not be enough readers through RSS for it to be worth the time to figure out. If you want help (screenshots, etc.) I can offer some. Let me know.